
Во время апдейта до Windows 10 через Media Creation Tool некоторые пользователи могут сталкиваться с ошибкой 0x8007001f – 0x20006. В сообщении ошибки может содержаться следующая информация:
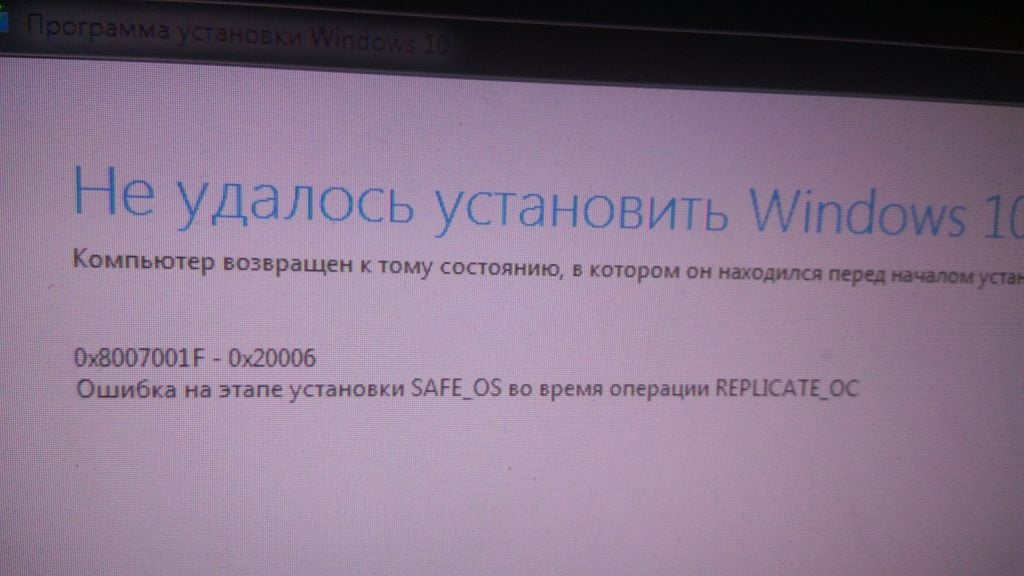
Не удалось установить Windows 10
Компьютер возвращен к тому состоянию, в котором он находился перед началом установки Windows 10.0x8007001f – 0x20006
Ошибка на этапе установки SAFE_OS во время операции REPLICATE_OC
Во время этапа SAFE_OS запускается установка всех необходимых для операционной системы обновлений, тем не менее в какой-то момент что-то идет не так и Media Creation Tool показывает пользователю ошибку 0x8007001f – 0x20006. Этим «что-то» может являться прерванная загрузка файлов апдейта, проблемы с интернет-подключением и многое другое.
Как избавиться от ошибки 0x8007001f – 0x20006?
Решение №1 Запуск средства устранения неполадок
Первым делом вы должны попробовать запустить средство устранения неполадок с Центром обновления и посмотреть, получится ли у него устранить вашу проблему. Перейдите по следующей ссылке для загрузки файла WindowsUpdate.diagcab. Запустите скачанный файл, после чего перед вами должно появиться следующее окошко:
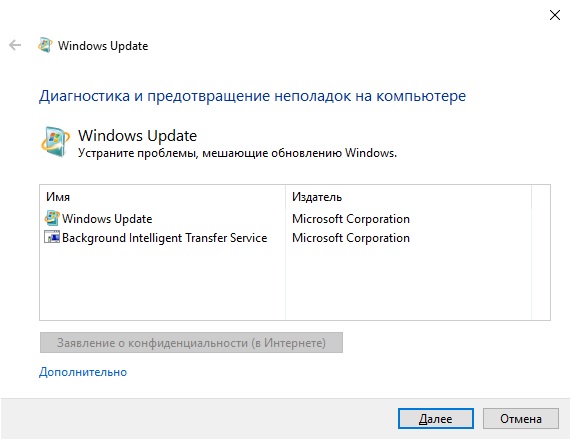
Нажмите на пункт «Дополнительно» в нижнем левом углу окна и поставьте галочку возле опции «Автоматически применять исправления». Далее нажмите на кнопку «Далее» и следуйте последующим инструкциям на экране.
Решение №2 Сброс компонентов Центра обновления
В некоторых случаях для решения ошибки 0x8007001f – 0x20006 может потребоваться сброс всех компонентов Центра обновления Windows. Благо, уже давно существуют способы автоматизации данного процесса — вам не придется с полчаса сидеть за Командной строкой, вручную прописывая каждую команду.
Предлагаем вам воспользоваться скриптом смышленного пользователя-энтузиаста, способного полностью сбросить все компоненты вашего Центра обновления. Нажмите Win+R, после чего выполните значение notepad.exe. Далее вставьте в окно Блокнота следующий скрипт:
:: Run the reset Windows Update components.
:: void components();
:: /*************************************************************************************/
:components
:: —— Stopping the Windows Update services ——
call :print Stopping the Windows Update services.
net stop bitscall :print Stopping the Windows Update services.
net stop wuauservcall :print Stopping the Windows Update services.
net stop appidsvccall :print Stopping the Windows Update services.
net stop cryptsvccall :print Canceling the Windows Update process.
taskkill /im wuauclt.exe /f
:: —— Checking the services status ——
call :print Checking the services status.sc query bits | findstr /I /C:»STOPPED»
if %errorlevel% NEQ 0 (
echo. Failed to stop the BITS service.
echo.
echo.Press any key to continue . . .
pause>nul
goto :eof
)call :print Checking the services status.sc query wuauserv | findstr /I /C:»STOPPED»
if %errorlevel% NEQ 0 (
echo. Failed to stop the Windows Update service.
echo.
echo.Press any key to continue . . .
pause>nul
goto :eof
)call :print Checking the services status.
sc query appidsvc | findstr /I /C:»STOPPED»
if %errorlevel% NEQ 0 (
sc query appidsvc | findstr /I /C:»OpenService FAILED 1060″
if %errorlevel% NEQ 0 (
echo. Failed to stop the Application Identity service.
echo.
echo.Press any key to continue . . .
pause>nul
if %family% NEQ 6 goto :eof
)
)call :print Checking the services status.
sc query cryptsvc | findstr /I /C:»STOPPED»
if %errorlevel% NEQ 0 (
echo. Failed to stop the Cryptographic Services service.
echo.
echo.Press any key to continue . . .
pause>nul
goto :eof
):: —— Delete the qmgr*.dat files ——
call :print Deleting the qmgr*.dat files.del /s /q /f «%ALLUSERSPROFILE%\Application Data\Microsoft\Network\Downloader\qmgr*.dat»
del /s /q /f «%ALLUSERSPROFILE%\Microsoft\Network\Downloader\qmgr*.dat»:: —— Renaming the softare distribution folders backup copies ——
call :print Deleting the old software distribution backup copies.cd /d %SYSTEMROOT%
if exist «%SYSTEMROOT%\winsxs\pending.xml.bak» (
del /s /q /f «%SYSTEMROOT%\winsxs\pending.xml.bak»
)
if exist «%SYSTEMROOT%\SoftwareDistribution.bak» (
rmdir /s /q «%SYSTEMROOT%\SoftwareDistribution.bak»
)
if exist «%SYSTEMROOT%\system32\Catroot2.bak» (
rmdir /s /q «%SYSTEMROOT%\system32\Catroot2.bak»
)
if exist «%SYSTEMROOT%\WindowsUpdate.log.bak» (
del /s /q /f «%SYSTEMROOT%\WindowsUpdate.log.bak»
)call :print Renaming the software distribution folders.
if exist «%SYSTEMROOT%\winsxs\pending.xml» (
takeown /f «%SYSTEMROOT%\winsxs\pending.xml»
attrib -r -s -h /s /d «%SYSTEMROOT%\winsxs\pending.xml»
ren «%SYSTEMROOT%\winsxs\pending.xml» pending.xml.bak
)
if exist «%SYSTEMROOT%\SoftwareDistribution» (
attrib -r -s -h /s /d «%SYSTEMROOT%\SoftwareDistribution»
ren «%SYSTEMROOT%\SoftwareDistribution» SoftwareDistribution.bak
if exist «%SYSTEMROOT%\SoftwareDistribution» (
echo.
echo. Failed to rename the SoftwareDistribution folder.
echo.
echo.Press any key to continue . . .
pause>nul
goto :eof
)
)
if exist «%SYSTEMROOT%\system32\Catroot2» (
attrib -r -s -h /s /d «%SYSTEMROOT%\system32\Catroot2»
ren «%SYSTEMROOT%\system32\Catroot2» Catroot2.bak
)
if exist «%SYSTEMROOT%\WindowsUpdate.log» (
attrib -r -s -h /s /d «%SYSTEMROOT%\WindowsUpdate.log»
ren «%SYSTEMROOT%\WindowsUpdate.log» WindowsUpdate.log.bak
):: —— Reset the BITS service and the Windows Update service to the default security descriptor ——
call :print Reset the BITS service and the Windows Update service to the default security descriptor.sc.exe sdset wuauserv D:(A;;CCLCSWLOCRRC;;;AU)(A;;CCDCLCSWRPWPDTLOCRSDRCWDWO;;;BA)(A;;CCDCLCSWRPWPDTLCRSDRCWDWO;;;SO)(A;;CCLCSWRPWPDTLOCRRC;;;SY)S:(AU;FA;CCDCLCSWRPWPDTLOCRSDRCWDWO;;WD)
sc.exe sdset bits D:(A;;CCLCSWLOCRRC;;;AU)(A;;CCDCLCSWRPWPDTLOCRSDRCWDWO;;;BA)(A;;CCDCLCSWRPWPDTLCRSDRCWDWO;;;SO)(A;;CCLCSWRPWPDTLOCRRC;;;SY)S:(AU;FA;CCDCLCSWRPWPDTLOCRSDRCWDWO;;WD)
sc.exe sdset cryptsvc D:(A;;CCLCSWLOCRRC;;;AU)(A;;CCDCLCSWRPWPDTLOCRSDRCWDWO;;;BA)(A;;CCDCLCSWRPWPDTLCRSDRCWDWO;;;SO)(A;;CCLCSWRPWPDTLOCRRC;;;SY)S:(AU;FA;CCDCLCSWRPWPDTLOCRSDRCWDWO;;WD)
sc.exe sdset trustedinstaller D:(A;;CCLCSWLOCRRC;;;AU)(A;;CCDCLCSWRPWPDTLOCRSDRCWDWO;;;BA)(A;;CCDCLCSWRPWPDTLCRSDRCWDWO;;;SO)(A;;CCLCSWRPWPDTLOCRRC;;;SY)S:(AU;FA;CCDCLCSWRPWPDTLOCRSDRCWDWO;;WD):: —— Reregister the BITS files and the Windows Update files ——
call :print Reregister the BITS files and the Windows Update files.cd /d %SYSTEMROOT%\system32
regsvr32.exe /s atl.dll
regsvr32.exe /s urlmon.dll
regsvr32.exe /s mshtml.dll
regsvr32.exe /s shdocvw.dll
regsvr32.exe /s browseui.dll
regsvr32.exe /s jscript.dll
regsvr32.exe /s vbscript.dll
regsvr32.exe /s scrrun.dll
regsvr32.exe /s msxml.dll
regsvr32.exe /s msxml3.dll
regsvr32.exe /s msxml6.dll
regsvr32.exe /s actxprxy.dll
regsvr32.exe /s softpub.dll
regsvr32.exe /s wintrust.dll
regsvr32.exe /s dssenh.dll
regsvr32.exe /s rsaenh.dll
regsvr32.exe /s gpkcsp.dll
regsvr32.exe /s sccbase.dll
regsvr32.exe /s slbcsp.dll
regsvr32.exe /s cryptdlg.dll
regsvr32.exe /s oleaut32.dll
regsvr32.exe /s ole32.dll
regsvr32.exe /s shell32.dll
regsvr32.exe /s initpki.dll
regsvr32.exe /s wuapi.dll
regsvr32.exe /s wuaueng.dll
regsvr32.exe /s wuaueng1.dll
regsvr32.exe /s wucltui.dll
regsvr32.exe /s wups.dll
regsvr32.exe /s wups2.dll
regsvr32.exe /s wuweb.dll
regsvr32.exe /s qmgr.dll
regsvr32.exe /s qmgrprxy.dll
regsvr32.exe /s wucltux.dll
regsvr32.exe /s muweb.dll
regsvr32.exe /s wuwebv.dll:: —— Resetting Winsock ——
call :print Resetting Winsock.
netsh winsock reset:: —— Resetting WinHTTP Proxy ——
call :print Resetting WinHTTP Proxy.if %family% EQU 5 (
proxycfg.exe -d
) else (
netsh winhttp reset proxy
):: —— Set the startup type as automatic ——
call :print Resetting the services as automatics.
sc.exe config wuauserv start= auto
sc.exe config bits start= delayed-auto
sc.exe config cryptsvc start= auto
sc.exe config TrustedInstaller start= demand
sc.exe config DcomLaunch start= auto:: —— Starting the Windows Update services ——
call :print Starting the Windows Update services.
net start bitscall :print Starting the Windows Update services.
net start wuauservcall :print Starting the Windows Update services.
net start appidsvccall :print Starting the Windows Update services.
net start cryptsvccall :print Starting the Windows Update services.
net start DcomLaunch:: —— End process ——
call :print The operation completed successfully.echo.Press any key to continue . . .
pause>nul
goto :eof
:: /*************************************************************************************/
Нажмите на пункт «Файл» в строке меню окна и выберите «Сохранить как…». Задайте файлу имя WUReset.cmd (обязательно выставьте расширение cmd!) и сохраните его в удобное для вас место на ПК, например, на рабочем столе. Создав файл, дважды кликните на него ЛКМ и наблюдайте за сбросом Центра обновления. Как только все закончится, перезагрузите компьютер и проверьте наличие ошибки 0x8007001f – 0x20006.
Решение №3 Отключение брандмауэра и антивируса
Бывают случаи, когда процессу установки Windows 10 могут мешать активный фаервол или антивирус. Чтобы отключить брандмауэр Windows, вам нужно сделать следующее:
- нажмите Win+R;
- напишите control и нажмите Enter;
- перейдите в раздел «Брандмауэр Защитника Windows»;
- кликните на ссылку «Включение и отключение брандмауэра Защитника Windows»;
- поставьте галочки возле отключения брандмауэра для каждого типа сети;
- сохраните изменения.
Для деактивации Защитника Windows, необходимо сделать следующее:
- нажмите Win+S;
- напишите запрос «Параметры Защитника Windows» и выберите найденный результат;
- далее кликните на пункты «Защита от вирусов и угроз→Управление настройками»;
- выставьте переключатель «Защита в режиме реального времени» в положение «Откл.»;
- сохраните изменения и перезагрузите компьютер.
Запустите обновление до «десятки» еще раз и посмотрите, покажется ли ошибка 0x8007001f – 0x20006.
Решение №4 Чистая загрузка системы
Возможно, какое-то программное обеспечение на вашем компьютере мешает установке Windows 10. Это легко проверить, начисто загрузив свою ОС. Делается это следующим образом:
- нажмите Win+R;
- пропишите msconfig и нажмите Enter;
- перейдите во вкладку «Службы»;
- поставьте галочку возле опции «Не отображать службы Майкрософт» и нажмите кнопку «Отключить все»;
- перейдите во вкладку «Автозагрузка»;
- кликните на ссылку «Открыть диспетчер задач»;
- деактивируйте всё ПО, которое будет находиться перед вами в списке;
- перезагрузите компьютер и запустите обновление до Windows 10 еще раз.
Надеемся, что данный материал был полезен для вас в решении ошибки 0x8007001f – 0x20006.
В этой статье я перечислю шаги, которые могут помочь справиться с нежеланием Windows 7 обновляться до ОС старшей версии и раскажу, что помогло именно мне.
Операционная система Windows может выдать такое сообщение, например, после неудачной попытки установки обновлений в Windows 10. Когда я попробовал обновить ОС Windows 7 до Windows 10 система сообщила, что она откатывается назад… После перезагрузки компьютера и входа в учётную запись, выскочило окно, в котором отображался злосчастный код и дополнительная информация:
0x8007001F 0x20006 Failed in the Safe_OS Phase with an error during Replicate_OC operation
Причина может заключаться в нестабильной работе сетевого адаптера/сбоях при подключении к сети (часто), в тяжёлом и надоедливом антивирусе, некотором ПО (например КриптоПро)… К сожалению, в списке часто встречающихся ошибок при обновлении Windows на сайте Microsoft нет информации о 0x8007001F 0x20006. Так что же нужно делать?
Если вы точно не знаете в чём причина или просто лень разбираться, то можно выполнить следующее:
1. Установите последние обновления для Windows 7. Это можно сделать через Центр обновлений Windows или с помощью PowerShell, используя модуль PSWindowsUpdate. Выбирайте на свой вкус. Если имеются какие-либо иные ошибки в центре Центр обновлений, то рекомендуется с ними разобраться. Например, можно использовать встроенный в Windows Troubleshooter обновлений.
2. Убедитесь, что в системе нет неопознанных устройств или повреждённых драйверов. Откройте диспетчер устройств: WIN+R —> devmgmt.msc —> Enter. Если есть проблемы, то диспетчер сообщит вам об этом: на значке устройства будет отображаться жёлтый восклицательный знак. В таком случае удалите драйвер и установите новый, скачав его с сайта производителя. Также на момент обновления системы лучше отключить всю периферию.
2.1. Обновите драйверы для всех устройств.
3. Отключите антивирус и Firewall.
4. Старые системные файлы (обновления), которые во время не очищаются самой ОС могут быть причиной. Поэтому для начала можно очистить кэш Центра обновлений. Удалите скрытые папки $ Windows. ~ BT & $ Windows. ~ WS. Далее остановите службу Windows Update командой net stop wuauserv , а затем перейдите в C:\Windows\SoftwareDistribution\Download и удалите все файлы в этой папке. Безболезненно этим можно заняться и в DataStore\Logs.
5. Проверьте целостность системных файлов. Запустите CMD от имени администратора и введите команду sfc /scannow. Если система обнаружила повреждённые файлы и не смогла их восстановить, то возможно инструкция от Microsoft сможет помочь вам.
6. Проверьте диск командой chkdsk C: /f /r. Параметр /f попытается исправить, если будут найдёны ошибки.
7. Выполните чистую загрузку ОС Windows 7. Для этого выполните следующее:
— запустите msconfig с правами администратора
- установите настройки во вкладе «Общие» как на картинке ниже:
— перейдите на вкладку «Службы» и выставите следующие настройки; нажмите кнопку «Отключить все».
Таким образом будут работать самые необходимые для системы службы, а не обязательные программы, процессы, службы не запустятся. Для усиления «эффекта» можно отключить ещё драйверы устройств, оставив нетронутыми только драйверы для сетевой карты. Перезагрузите компьютер, система запустится в чистом режиме. Выполняйте обновление.
8. Ремонтная установка Windows 7 (Repair Install). Она позволяет переустановить систему, оставив программы и директорию пользователя на своих местах. Если вы не пользуетесь OEM лицензией, то можете попробовать выполнить ремонтную установку. Скорее всего впоследствии вам удастся обновить систему до Windows 10.
9* Что помогло мне… Recovery Factory… В моём случае сложность заключалась ещё в том, что использовалась OEM лицензия. Выполнять ремонтную установку было очень опасно, всегда может что-то пойти не так, тем более нет чёткой информации как это правильно сделать. Сбросить систему до заводских настроек очень просто. Достаточно скачать средство (утилиту) с сайта изготовителя вашего ноутбука, и выполнить рекомендации мастера создания загрузочного носителя с образом операционной системы.
Update errors aren’t a novelty in the Windows OS history. Some of them are easy to resolve, while others are quite challenging.
Today we’ll try to address an error that goes by the code 0x8007001F. This error is closely related to audio drivers and prevents users from updating Windows 10.
There are a few possible workarounds applicable to this problem, so follow these steps, and hopefully, we can work it out.
What causes Windows Update error 0x8007001f?
Glitches cause upgrade error 0xc1900208 and similar ones with Windows Update, and usually, a built-in troubleshooter can fix those.
For example, upgrade error 0x80070714 can occur if your firewall or antivirus is blocking the update process, so we encourage you to check your security settings.
An error such as this can also cause Windows installation failed in safe OS phase message to appear, so make sure that your installation media isn’t corrupted.
Update error 0x8007001F can prevent you from installing the latest updates, which can be a big problem. Speaking of update issues, here are some problems that users reported:
- Windows failed to install the following update with error 0x8007001f – We couldn’t install this update but you can try again (0x8007001f)
- Windows 10 update assistant error 0x8007001f
- 0x8007001f Windows 11, Windows 10, Windows 7
- Windows 11 install error 0x8007001f
- Windows update error 0x8007001f
- 0x8007001f – 0x20006, 0x3000d, 0x2000d
- Game Pass error 0x8007001f
Without further ado, let’s just jump right in!
How do I fix error 0x8007001F 0x20006?
1. Use the Windows update troubleshooter
- Click the Start button and select Settings.

- Now choose Update & Security.

- Click on Troubleshoot from the left pane, then select Additional troubleshooters from the right.

- Click on Windows Update to expand it, then hit the Run the troubleshooter button.

- The system will find any possible issue with the update and attempt to fix it. Just follow the additional steps to proceed.


2. Disable the antivirus
- Hit the Start icon and click on Settings.
- Select Update & Security.
- From the menu on the left, select Windows Security and click on Open Windows Security in the right pane.

- Select Virus & threat protection.

- If you don’t have a third-party antivirus installed, choose Virus & threat protection settings and disable Windows Defender protection. If you do, click on the Open app, which will bring you to the menu of your antivirus.
- Usually, the button to disable the antivirus is within its Security settings, but that may be different for every antivirus.


Although your antivirus will offer protection from malware, sometimes it can interfere with your system and cause a 0x8007001F error to appear.
We recommend changing your antivirus settings and disabling certain features to fix the problem. In the worst-case scenario, you might even have to remove your antivirus from your PC altogether.
Many users reported that both Norton and McAfee could cause this error to appear, so if you’re using one of these tools, be sure to remove them.
3. Uninstall the audio drivers
- Click the Start button, type device manager, and select the results.
- Navigate to the Sound, video, and game controllers section, right-click your audio device and select Uninstall device.

- If available, check the Remove driver software for this device. Now click the Uninstall button to remove the driver.


According to users, sometimes, error 0x8007001F can appear on your PC due to your audio drivers. For example, you might encounter this issue if your audio drivers are outdated or corrupted.
After that, you should try to download the latest drivers for your audio device. Then, simply visit your motherboard or sound card manufacturer’s website and download the latest drivers.
Up next, check if the problem is resolved. To avoid permanent damage to your PC by downloading and installing the wrong driver versions, we strongly recommend using Outbyte Driver Updater.
This tool will automatically download all the outdated drivers on your PC and help you fix this issue with only a few clicks.
Outbyte Driver Updater
Keep your drivers up to date to avoid such errors with this amazing tool.
4. Restart the Windows Update Service
- Press Windows key + R and enter services.msc, then press Enter or click OK.
- In the Services list, search for Windows Update, right-click on it, and open Properties.

- Now choose Disabled as Startup Type.
- Save the changes and restart your PC; check if the service is still disabled after the reboot.
- Press the Windows key + E to start File Explorer, navigate the path below and find the SoftwareDistribution folder.
C:\Windows
- Rename the folder to SoftwareDistribution.OLD (you can delete it, as well, but why take unnecessary risks).
- Once again, start the Services app as shown in steps 1 and 2 and, in Properties, change the Startup Type from Disabled to Manual.
- Go to Start and open Settings on the left side.
- Open Update & Security and Check for updates.


Update service can be a culprit for various update issues. Additionally, it’s known for inflicting heavy CPU usage occasionally for no apparent reason.
Nevertheless, we will show you a possible workaround that can be used with most of the update errors. And the one we are currently addressing is not an exception.
Remember that you’ll need administrative access to change/delete system folders. This procedure proved as a good solution for multiple update errors. However, if the problem is persistent, move on to the next solution.
5. Perform SFC and DISM checks
5.1 Run a quick SFC scan
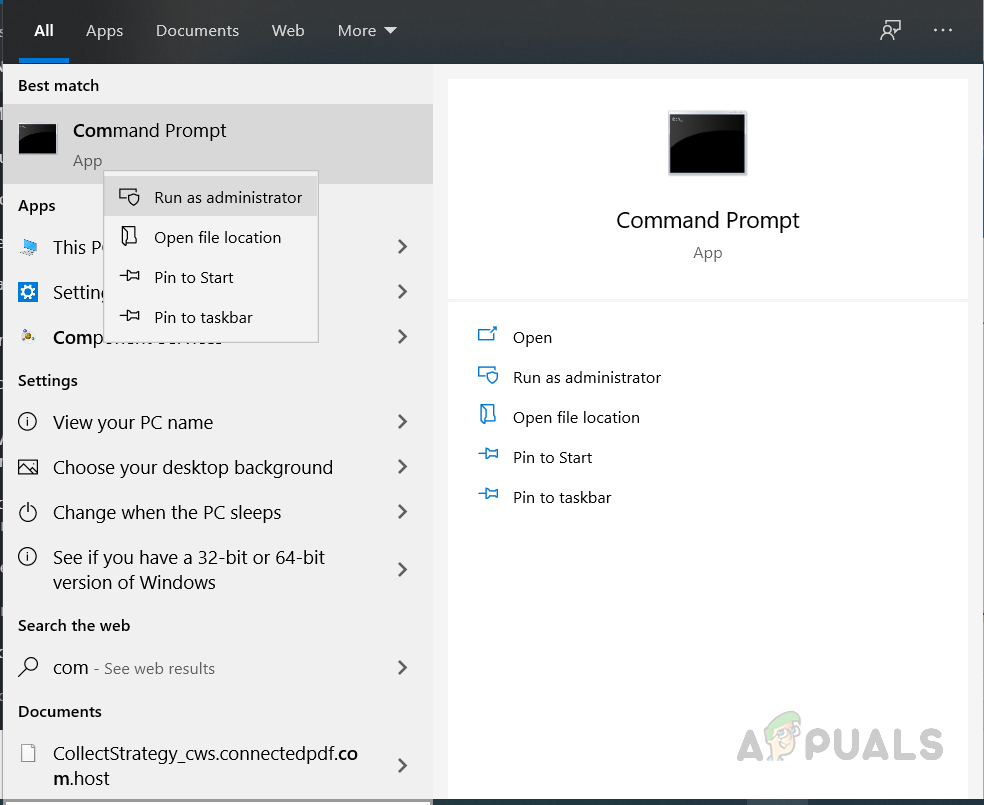
- Click the Start button, type cmd, and select Run as administrator to start Command Prompt with full privileges.
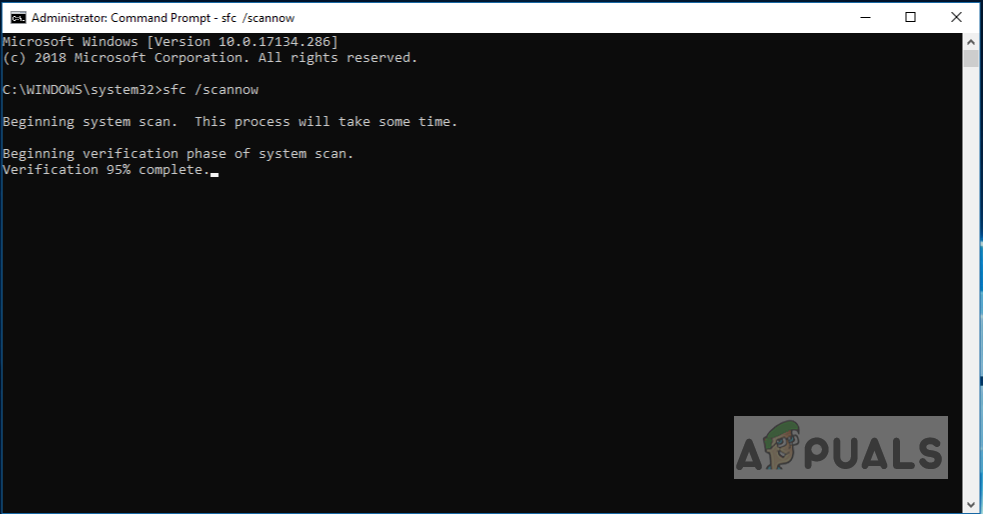
- When Command Prompt opens, type the following command and press Enter to run it:
sfc /scannow
- SFC scan will now start. This scan can take up to 15 minutes, so don’t interfere with it.


Sometimes error 0x8007001F can appear due to corrupted system files. If that’s the case, we recommend performing an SFC scan and repairing your files.
Once the SFC scan is finished, check if the problem is resolved.
The system update malfunctions are closely related to file corruption. In addition, some system files can get corrupted or quarantined due to malware infections.
For that reason, DISM (Deployment Image Servicing and Management) can be used to scan and resolve this issue by repairing broken files, so follow the steps below.
5.2 Run a DISM scan
- Hit the Windows button, type cmd, then select Run as administrator from the results.
- Type the following command and press Enter to run it:
DISM.exe /Online /Cleanup-image /Restorehealth
- The scanning will take a couple of minutes, so don’t interfere with the process.


6. Perform a clean boot
- Press Windows key + R and enter msconfig, then press Enter or click OK.
- Go to the Services tab, check Hide all Microsoft services, and click on the Disable all button.
- Go to the Startup tab and click Open Task Manager.
- Now, check if you have any programs you don’t want to run in the startup, right-click on them one by one and select Disable.

- Go back to the System Configuration window and click Apply and OK to save the changes.
- Restart your PC.


According to users, third-party applications sometimes interfere with your system, leading to this error. However, you might be able to fix the problem simply by performing a clean boot.
Once your PC restarts, all startup applications, and services will be disabled, ensuring that third-party applications don’t interfere with the upgrade process.
- FIX: Windows 10 update error code 0xc1900107
- Windows 10/11 update error 0x8007042B [FIX]
- Fix: Error 0x8007042B in Windows Update [Windows 10 & 11]
7. Create a new user account
- Click the Start button and select Settings.
- When the Settings app opens, navigate to the Accounts section.

- In the left pane, select Family & other people and then click on Add someone else to this PC.
- Now select I don’t have this person’s sign-in information.
- Select Add a user without a Microsoft account.
- Now enter the desired user name and click Next.


The issue might be a corrupted user account if you have problems updating due to error 0x8007001F. However, you might be able to circumvent this issue simply by creating a new user account.
After creating a new account, switch to it and check if the problem is resolved.
8. Perform an in-place upgrade
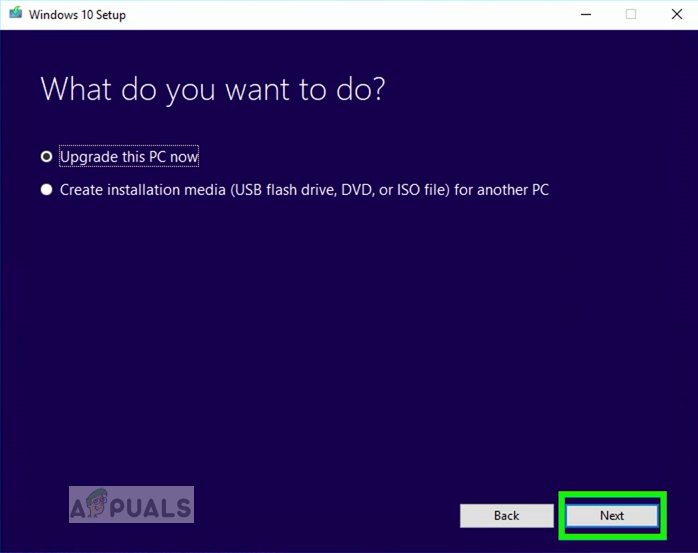
- Download the Microsoft Update Assistant and run it on your PC.

- If the tools detect a new update, select Upgrade this PC now. If not, you will see the message Thank you for updating to the latest version of Windows 10.
- Follow the instructions on the screen to complete the setup, and select the option to keep your files if you’re asked.


If you can’t install Windows updates due to error 0x8007001F, you might want to try performing an in-place upgrade. By doing that, you’ll force Windows 10 to update to the latest version.
Once the process is finished, you’ll have the latest version of Windows installed, and all your files and apps will be preserved.
How can I fix the update error 0x8007001F on Windows 11?
1. Windows Update Cache
- Press hotkeys Windows + X, then select Terminal (Admin).
- Type the script below and hit Enter.
net stop wuauserv
- Type C: and hit Enter.
- Now type the script below and hit Enter.
cd %Windir%\SoftwareDistribution - Finally, type the delete code below and hit Enter.
del /f /s /q Download

Although Windows 11 has an updated interface and new features, it still inherits many problems from Windows 10, including the Windows Update error code 0x8007001F.
However, all the solutions presented in this guide can also be applied to the new OS without any problems.
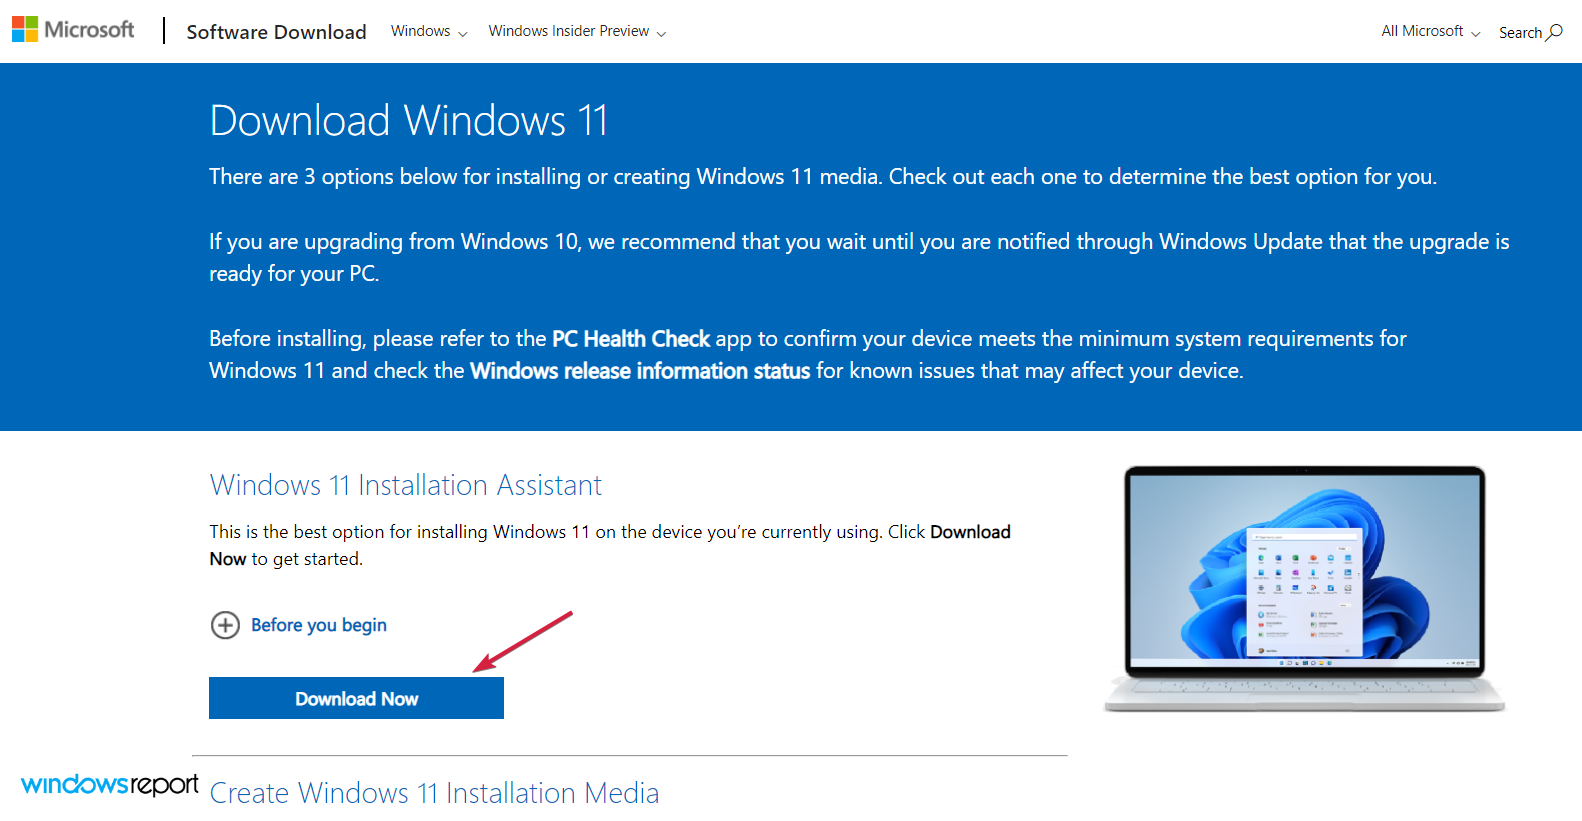
The only slight difference is for step 7, where you need to download the Windows 11 Installation Assistant instead.
Of course, the process will also be slightly different because it’s not an updater tool, but it will help you install a fresh copy of Windows 11.
However, if you keep your files within the procedure, your data will be OK. But as an added security measure, it’s better to back up your files first.
That should wrap it up. Your error should have been resolved if you had followed these instructions closely. In case you have some questions or additional workarounds, please be sure to inform us in the comments section.
Also, for any suggestions or additional problems, feel free to use our comments section below, and we will come back with an answer as soon as possible.
This error is encountered when users try to update their Windows Operating System. This is a system error that is caused due to a corrupt system file. This can lead to other problems such as Windows not being able to update or other System applications that might not update. It can also cause third-party Software Applications installed on your system to stop working.
It is important to keep the Windows updated because if you miss the security updates then you leave your system vulnerable to cyber attacks, viruses, and malware. Even if the update does not remove the security vulnerability, it still enhances the overall stability of the computer system and it also installs the latest features offered by the Windows Operating System and also patches the already installed software.
Method 1: Manually Update the Windows
In this method, we will try to update the Windows Operating System through the Command Prompt also known as the Power Shell. Windows Power Shell offers more control over the operating system and allows the user to perform tasks that are otherwise not possible to perform in the native Graphical Environment.
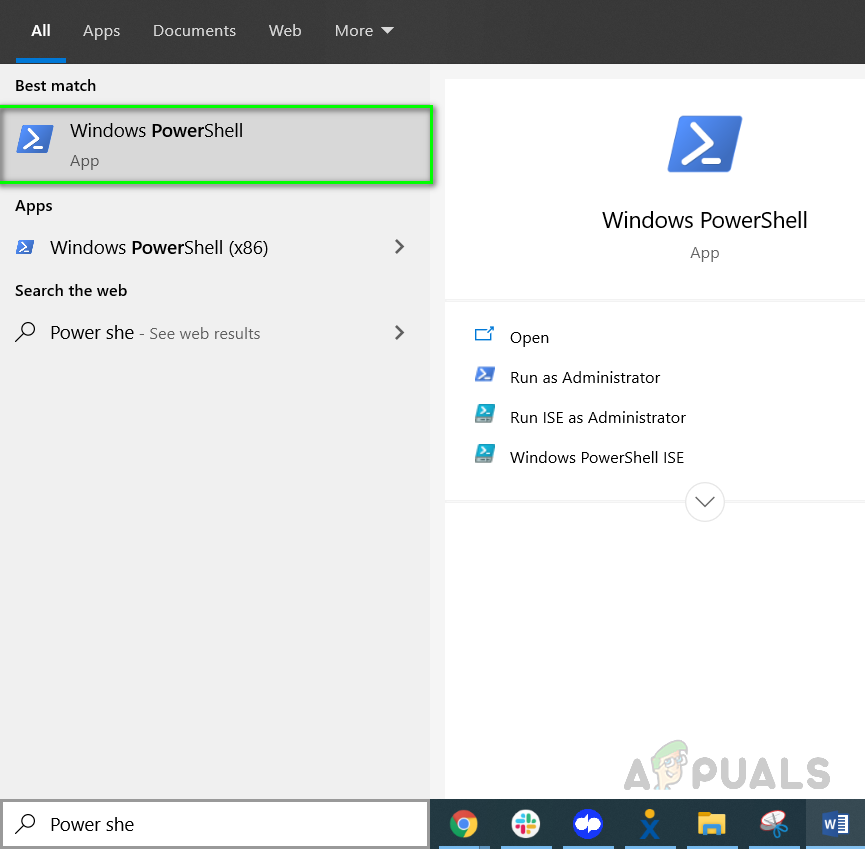
- Open Windows Power Shell by going to Windows Start > Windows Powershell, run this program as administrator.

Open Window s Power Shell as administrator - In the PowerShell type in the following commands in the sequence.
net stop wuauserv
net stop cryptSvc
net stop bits
net stop msiserver
Ren C:\Windows\SoftwareDistribution SoftwareDistribution.old
Ren C:\Windows\System32\catroot2 Catroot2.old
net start wuauserv
net start cryptSvc
net start bits
net start msiserver
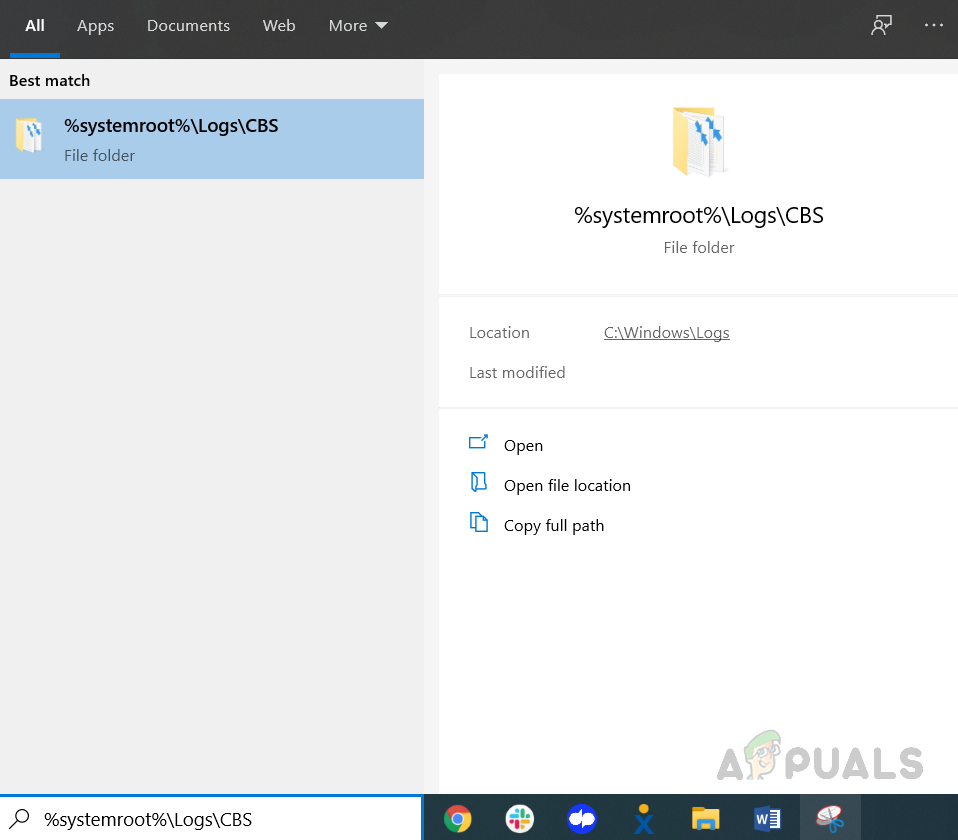
- Now to go to Windows Search Box and type the following command and press Enter.
%systemroot%\Logs\CBS

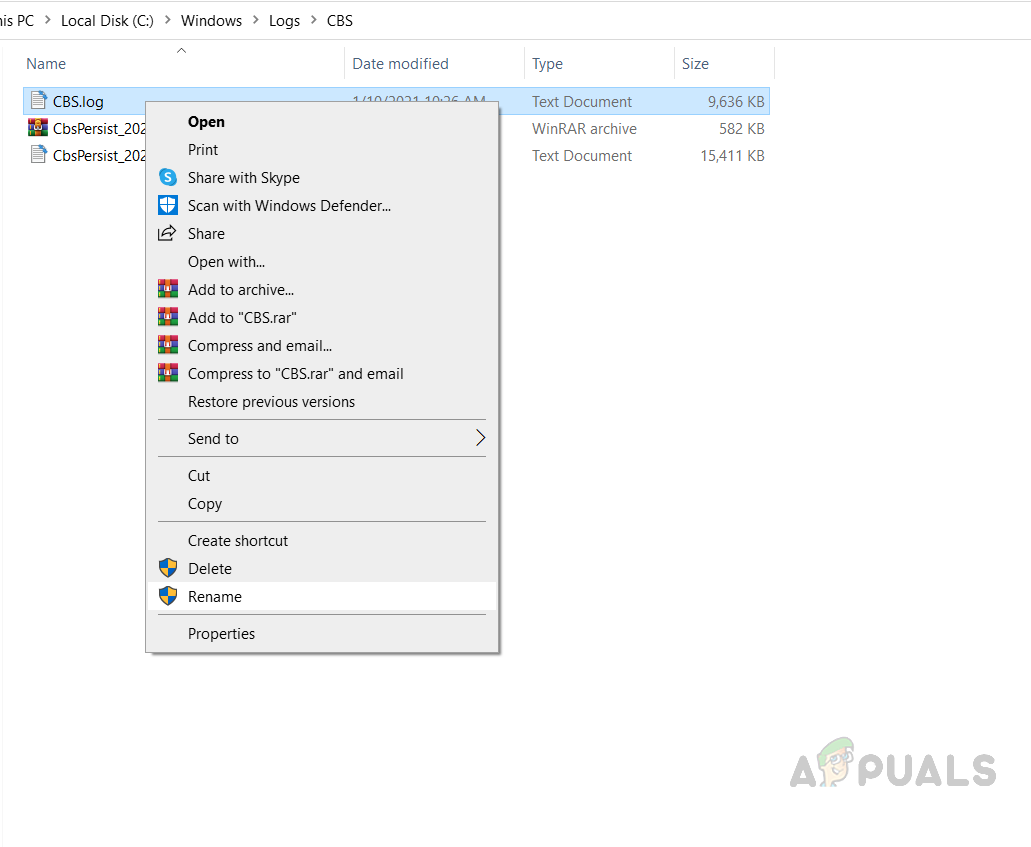
Open CBS.log file folder - You will see the file with the name CBS.Log, rename it to something else.

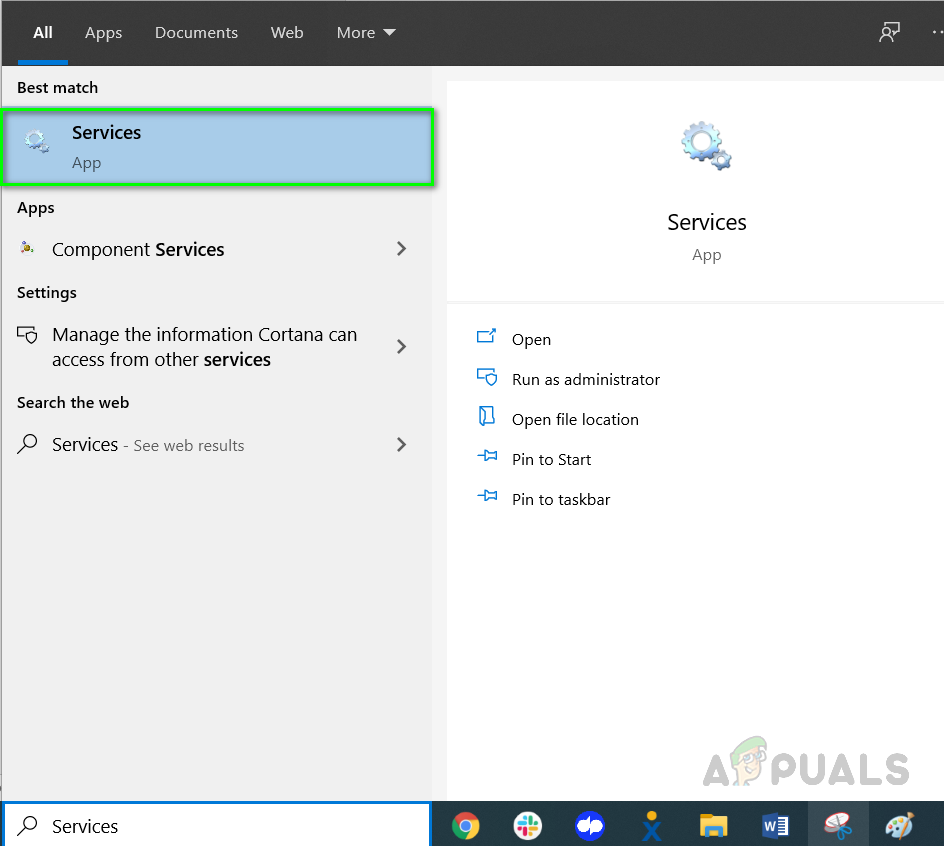
Rename CBS Log file to something else - If you are unable to rename the file then again go to the Search box and type in Services.

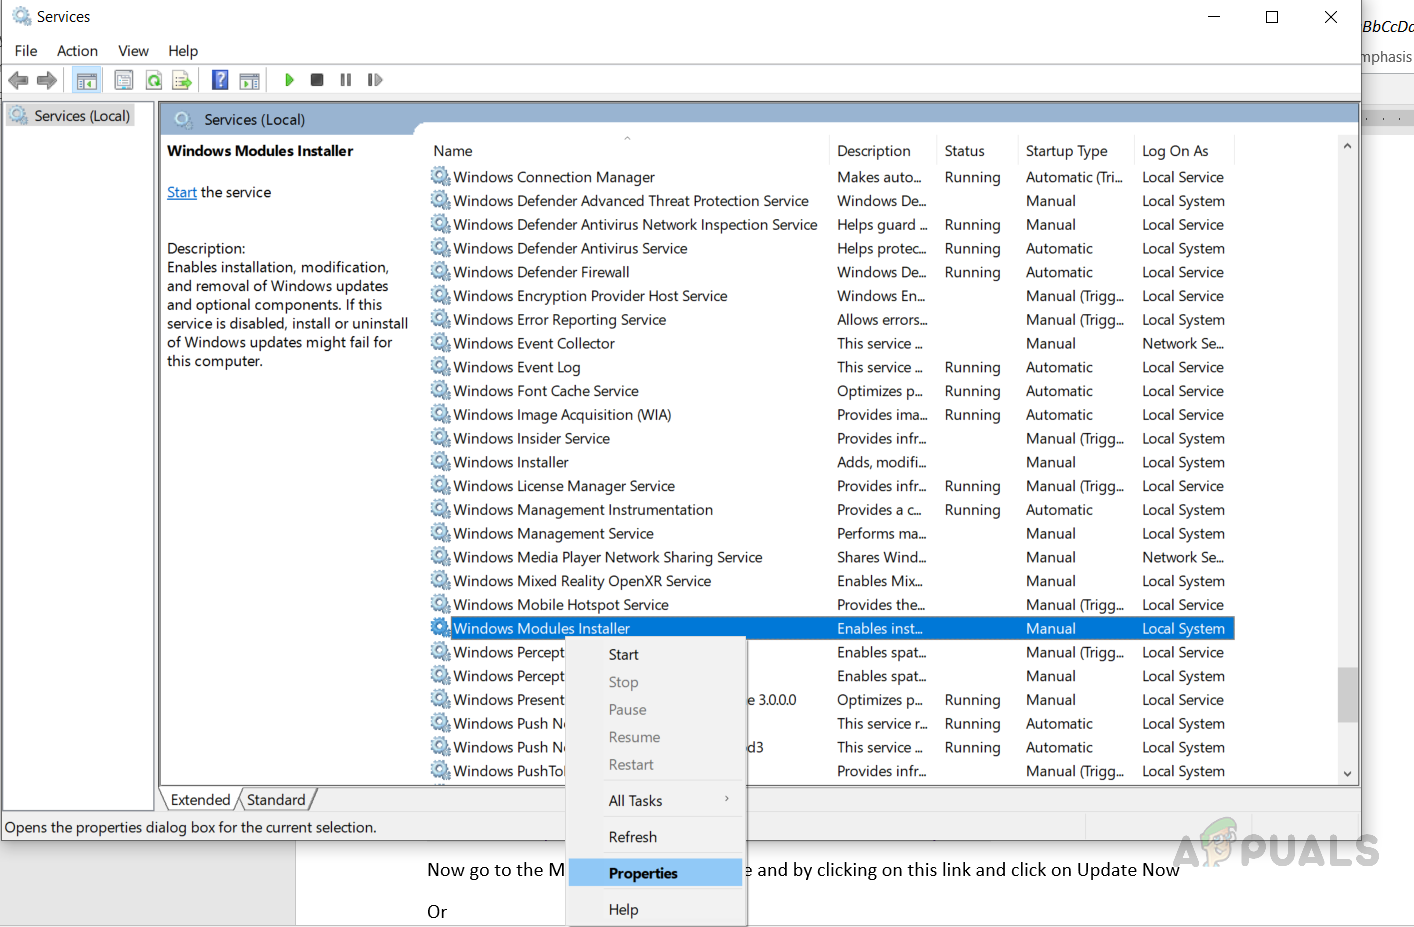
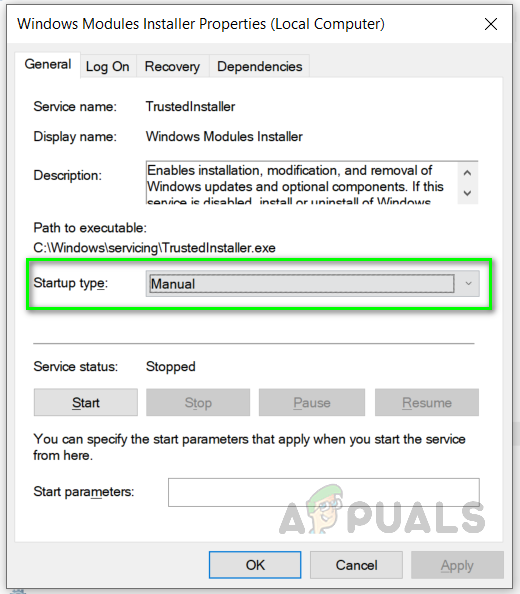
Open Windows Services - Find the Windows Module installer Service and double click on it to open the properties

Open Windows Module Installer Properties - Change the startup type to Manual and then restart the computer.

Change the Startup type to manual - Now try to Rename the CBS.log file as instructed in step and then again restart the computer.
- Once restarted change the Windows Module Installer Startup Type to Automatic.
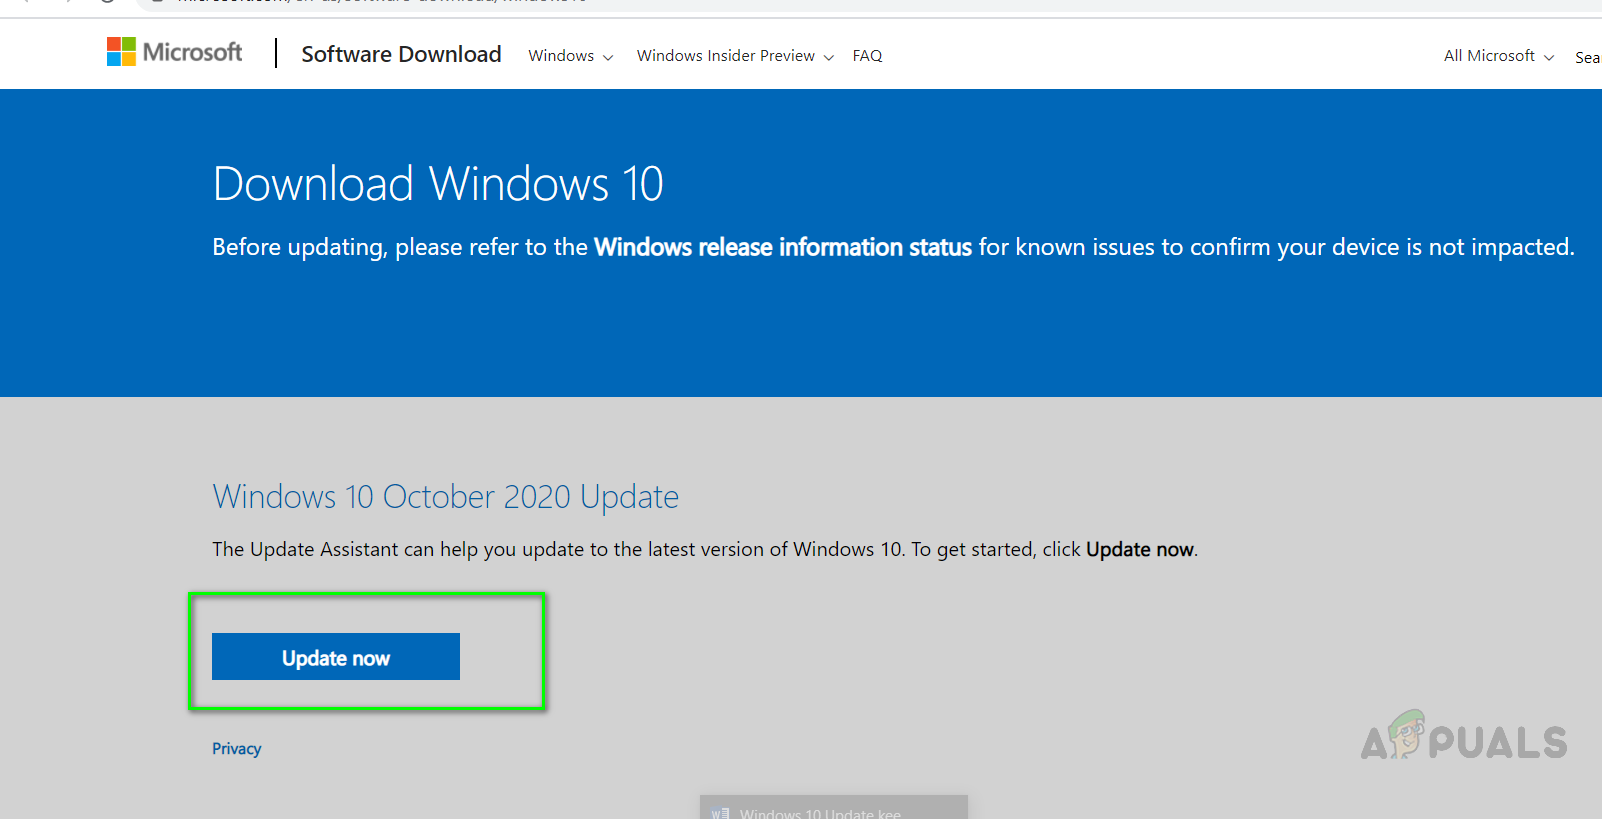
- Now go to the Microsoft Oficial website and by clicking on this link and click on the Update Now button.

Click Update now
Method 2: Perform a Repair Install of Windows 10
In this method, we will perform a repair install of Windows 10. This method allows an in-place upgrade without losing anything other than all installed Windows Updates. You will keep all the previously installed applications and programs since an in-place upgrade works the same as a normal upgrade. You do not need to go into boot or Safe Mode to perform this upgrade, it can be done directly from the Windows Environment. You will need to make sure that you have the following available:
- At least 9GB of free space on the drive where Windows is installed
- An installation media (CD or Bootable USB) which has the same .ISO image file that is already installed on your computer including the exact same edition and build
- The installation media should be in the same language as the system default language of your currently installed Windows.
- The .ISO image should be the same as your current Windows architecture, i.e. if you have 32-bit Windows installed the .ISO should be 32-bit as well and if you have the 64-bit version installed then .ISO image should also be the 64-bit version.
- You should be logged in as an Administrator account to perform this upgrade
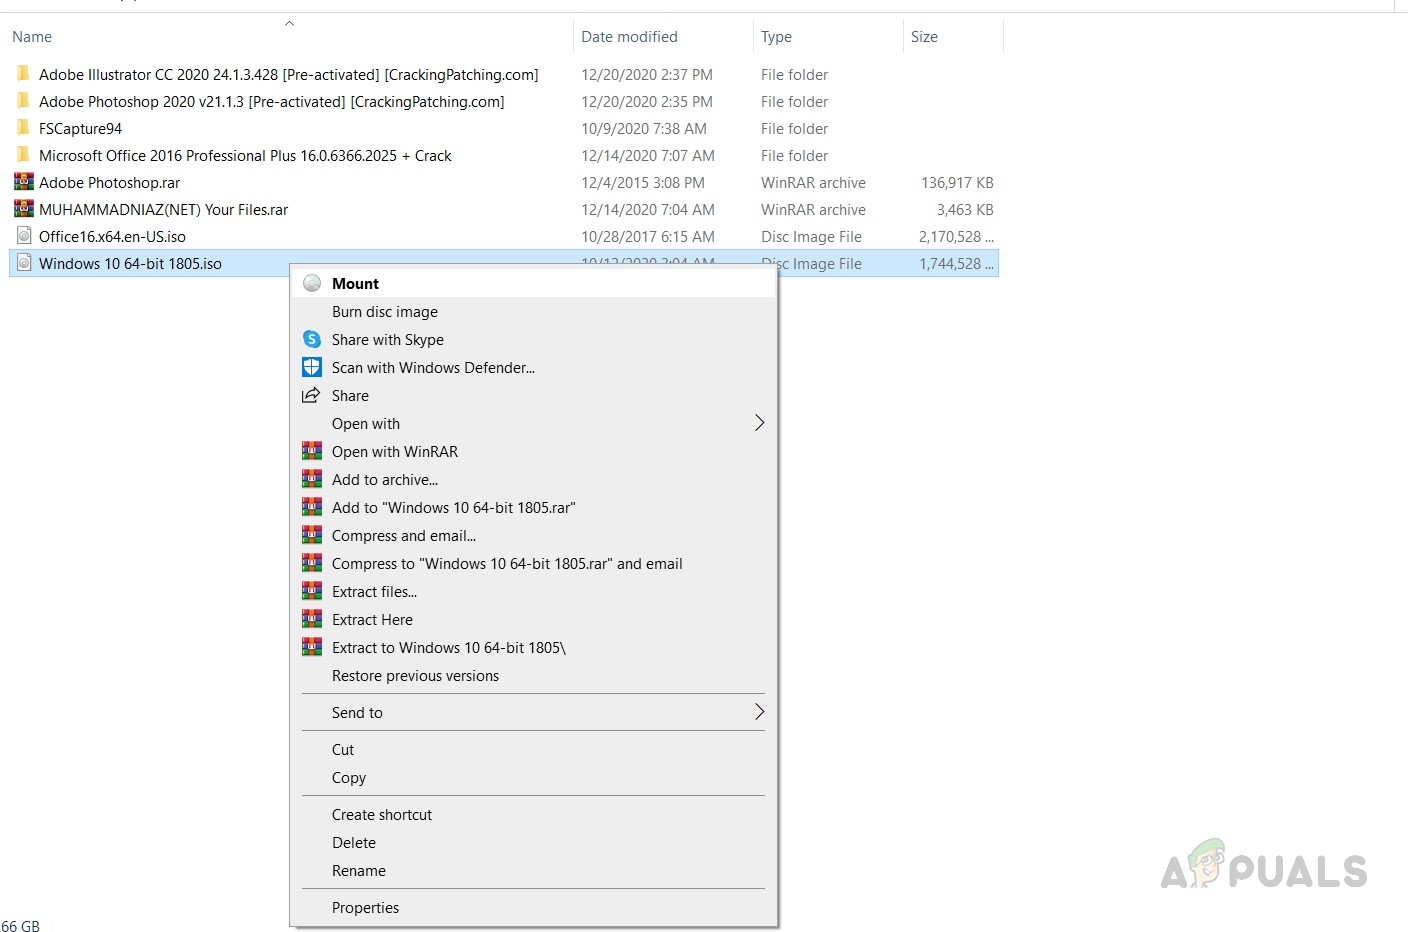
- Download the Windows .ISO file and mount it by

Right-click the ISO image file and then click Mount - If you do not see the Mount option then click the Open with option and select Windows Explorer. This will mount the .ISO file.
- Once the Image File has been mounted you will be able to see it in the My Computer

Windows 10 mounted image - Open the Drive which has the mounted .ISO file and run setup.exe to start Windows Setup.
- If a dialog box appears that prompts you to allow the program to make changes click Yes.
- You will see a message box that says Windows is preparing the setup.
- Once the preparation is done click on Change how Windows Setup downloads updates.
- Select the option not right now and click Next.
- You will see the setup Getting things ready.

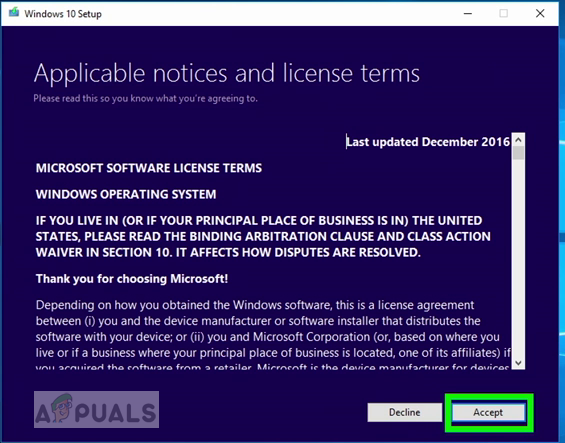
Windows In-Place upgrade getting ready to install - Accept the License Agreement and then the Windows Setup will begin to search for and install any updates

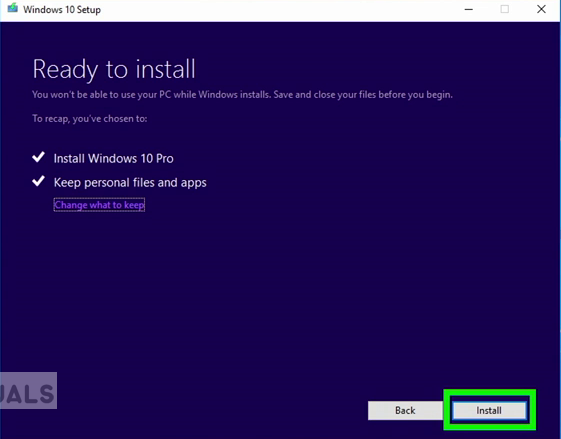
Accept Microsoft License Agreement - When updates are ready, click on the Install button but keep in mind once you click the install button you will not be able to cancel the process until updates have been installed.

Choose Upgrade this PC now - You will be prompted to choose whether you want to keep your files and apps or not, choose the appropriate option and click Next.
- Windows Setup will start the process of in place upgrade to repair the Windows.
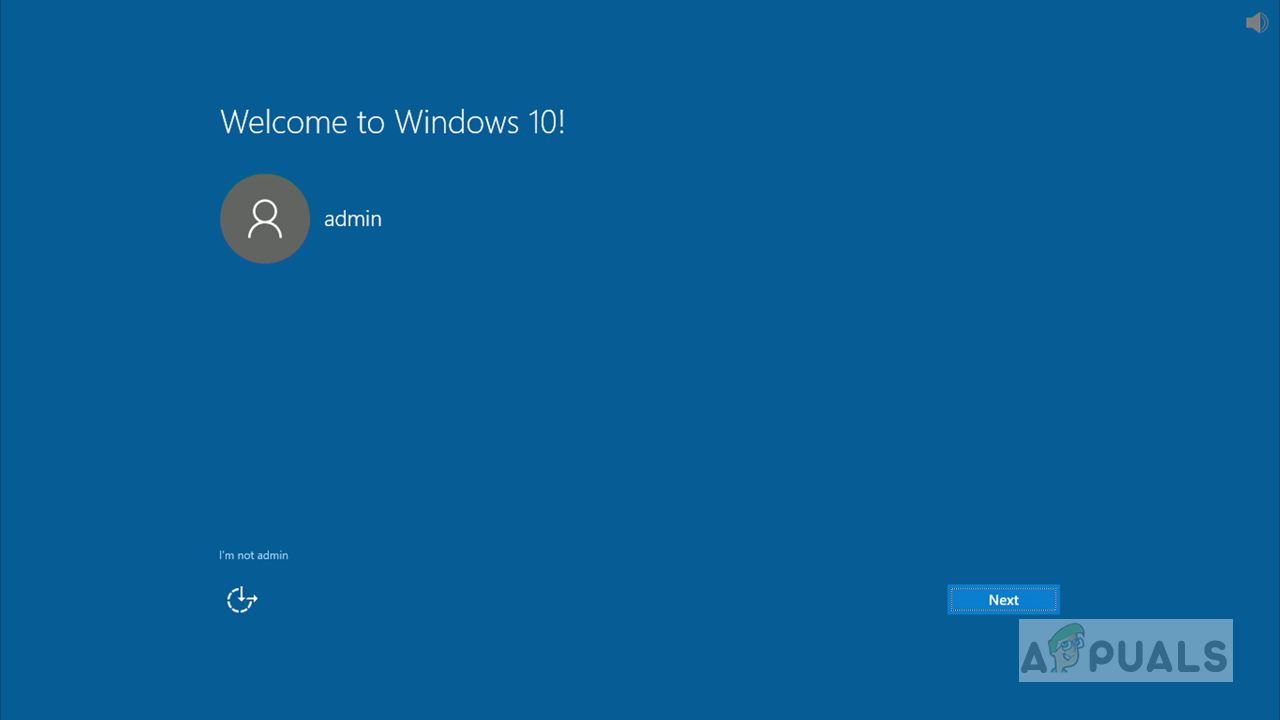
- Once the process is finished you will then be taken to the Sign-in screen.

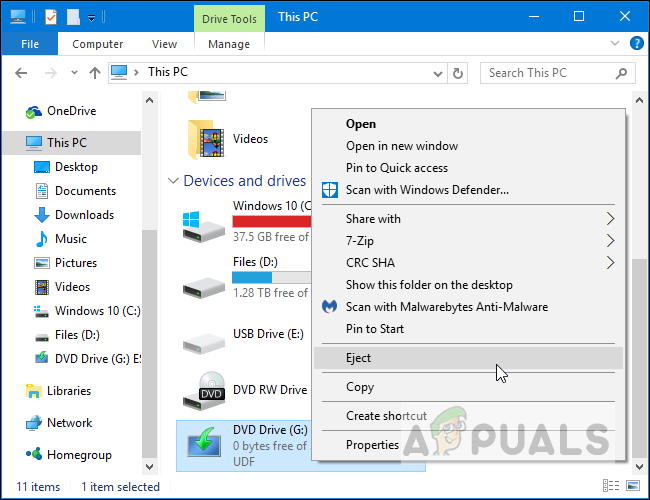
Windows Sign-In Screen - Make sure you unmount the Image file and set up the Time and Date according to your Time zone.
- Now go to Command Prompt and Run as Administrator.

Open Command Prompt as Administrator - Enter the command sfc /scannow to repair the missing or corrupted files

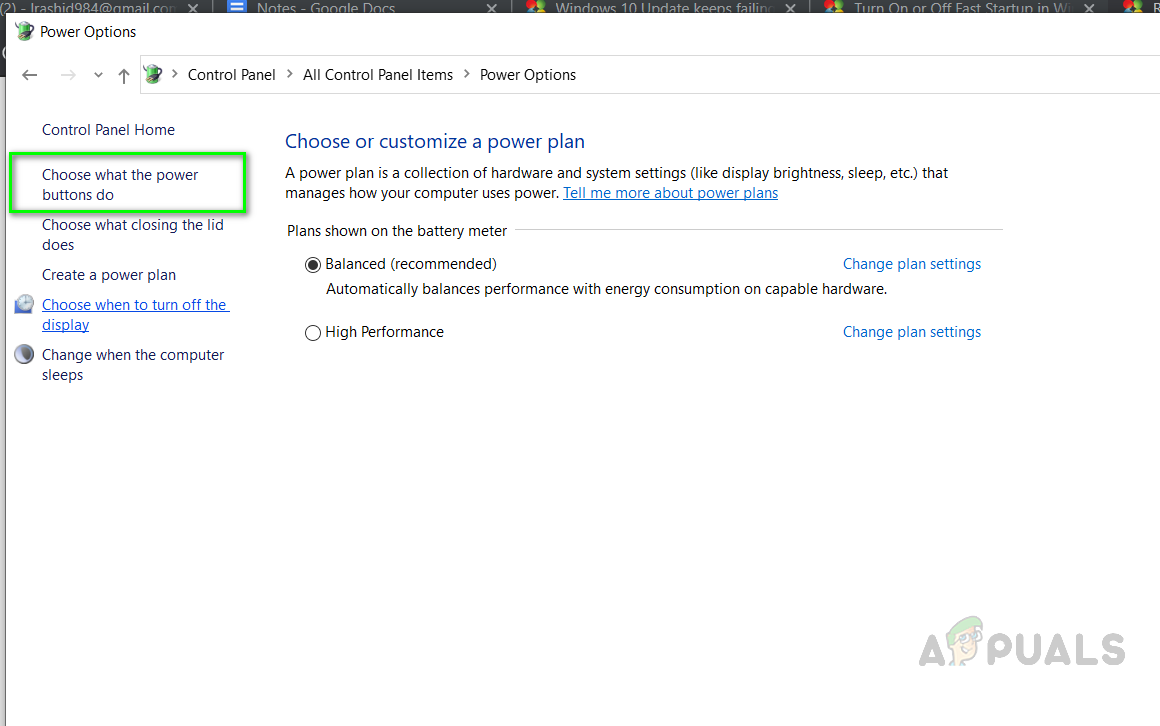
Run sfc scannow - Now Turn off the Fast Startup Option if you have it enabled, open the Control Panel in Icons view and click on Power Options

Control Panel icons view - Click the option Choose what the power buttons do.

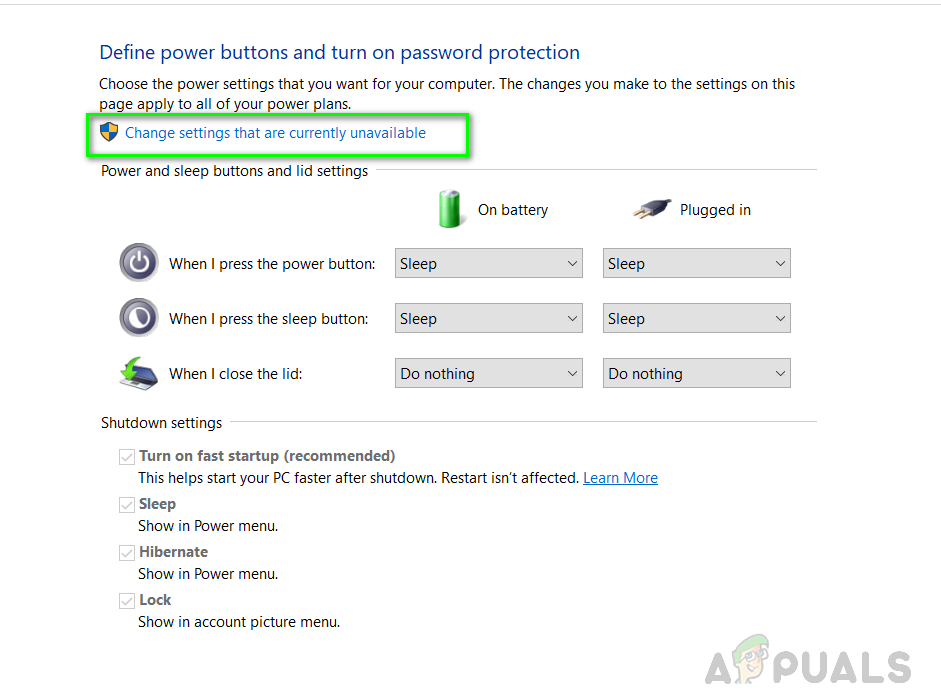
Click Choose what the power buttons do - Click on the link that says change settings that are currently unavailable

Change settings that are currently unavailable - Under the Shutdown settings, uncheck the Turn on Fast Startup box and then click the Save Changes button to apply changes

Uncheck Turn on fast start up

Kevin Arrows
Kevin Arrows is a highly experienced and knowledgeable technology specialist with over a decade of industry experience. He holds a Microsoft Certified Technology Specialist (MCTS) certification and has a deep passion for staying up-to-date on the latest tech developments. Kevin has written extensively on a wide range of tech-related topics, showcasing his expertise and knowledge in areas such as software development, cybersecurity, and cloud computing. His contributions to the tech field have been widely recognized and respected by his peers, and he is highly regarded for his ability to explain complex technical concepts in a clear and concise manner.
How Can We Help?
Created On
Last Updated On
You are here:
SAFE_OS Error
If you have upgraded to Windows 10 and have the following error:
We couldn’t install Windows 10
We’ve set your PC back to the way it was right before you started installing Windows 10.
0x8007001F – 0x20006
The installation failed in the SAFE_OS phase with an error during REPLICATE_OC operation

How to Fix the issue Windows Upgrade Error
- Download Windows 10 version 1607 and install that first.
(You won’t get the error installing this older version of Windows 10) - Once 1607 has installed, you can then upgrade to 2004 (or latest version at the time)
If this guide has helped you, please let us know! Please take a look at our other guides and tips.