
Readers help support Windows Report. We may get a commission if you buy through our links.
Read our disclosure page to find out how can you help Windows Report sustain the editorial team. Read more
All Intel-powered computers have an integrated graphics processor to perform basic graphic tasks.
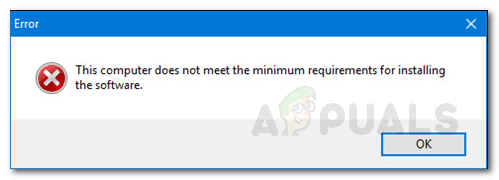
However, while installing a newer version of the Intel Graphics driver, you may encounter This computer does not meet the minimum requirements for installing the software error.
This error can occur for multiple reasons, including motherboard disabling the integrated graphics chipset, incompatible driver or the OS, lack of integrated Intel Graphics, etc.
Now that Windows 11 is out, many out there are testing the new PC Health Check app to see whether they can make the jump to the latest OS as well.
What does this computer does not meet the minimum requirements message mean?
This computer does not meet the minimum requirements for installing the software error message shows up when most users try to install graphics drivers.
It occurs due to incompatible drivers and outdated operating systems. Also, the error can be down to a disabled graphics chipset. Irrespective of the cause, we have prepared a suitable fix for you in this guide.
Can I run a game if my PC doesn’t meet the minimum requirements?
It is possible to run a game from below the minimum needs at roughly 20-30 frames per second, arguably playable.
Occasionally, the game would refuse to allow you to play it and display a notice stating that your computer does not meet the minimum requirements for playing this game. However, you may be able to get away with running it at low enough settings on occasion.
Usually, when the lowest resolution and the lowest settings are used, your machine can only run the game at its lowest settings and resolution while maintaining an average frame rate of 30 frames per second.
You will be able to participate in the game, but the quality of the experience will be significantly reduced, making you want to uninstall it immediately.
If you are also troubled by this issue, here are a couple of troubleshooting tips to help you resolve it in no time.
How do I fix the PC doesn’t meet the requirements error?
1. Update drivers using an automated tool
When speaking about keeping your system up to date, our recommendation is to use a specialized driver updating tool.
These complete solutions scan your PC for any missing, broken, or outdated drivers and then download and install them.
2. Check for Windows updates
- Click the Start icon and select Settings.

- Select the Updates & Security option.

- Now, click on the Check for updates button.
- Go through the available updates and click the Install now button to install them.


Once all the available updates are installed, check if the OS or computer doesn’t meet the minimum requirements for this installer error code 21 message occurs again. If the issue persists, try other fixes below.
3. Update graphic card from Device Manager
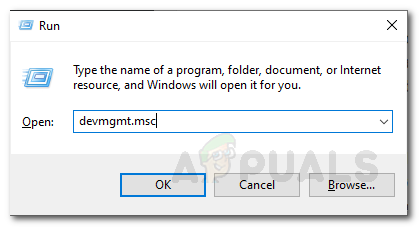
- Press the Windows key + R to open Run.
- Type devmgmt.msc, and click OK.
- Double-click on the Display adapters option to expand it.

- Right-click on Intel HD Graphics and select Update driver.
- Click on the Search automatically for drivers option.
- Windows will look for a newer version of the driver and install it.


If you are getting a system or graphics device does not meet the applications minimum specifications, it might be down to outdated drivers. Updating it manually will help you search for a suitable driver to install.
- Fix: Hardware device is not connected (Code 45) error
- Fix: Camera not showing in Device Manager
- Fix: Biometric devices not showing in Device Manager in Windows 11
4. Manually install the Intel Graphics driver
- Go to your driver manufacturer’s website to download the latest version.

- Press the Windows key + X and select Device Manager.
- Expand the Display adapters option.
- Right-click on your driver and select Update driver.
- Choose Browse my computer for drivers.
- Now, select the Let me pick from a list of available drivers on my computer option.
- From here, click the Have Disk… button and navigate to the folder where the driver you downloaded is saved.
- Now, navigate to the Graphics directory and choose the .inf file.
- If there is no Graphics directory, just select the .inf file and click Open.
- Now, click the Next button.
- Finally, click the Yes button when prompted and wait for the driver to be installed.


What happens when a device doesn’t meet the minimum requirements specified by a manufacturer
Manufacturers set minimum requirements for a reason. If your computer does not meet the minimum requirements for installing software or application, the program you are trying to install will not run.
However, if your computer meets the minimum requirements but not the suggested specifications, the program will install but will be slow. Also, it can sometimes encounter problems.
How do I fix this computer does not meet the minimum requirements on Windows 11?
The cause of this error on Windows 11 is the same as on Windows 10. You can effectively fix the problem by updating your graphics driver with a dedicated tool.
Also, you can update your PC to the latest version. Lastly, you can handle this issue effectively with any of the solutions in this guide.
This computer does not meet the minimum requirements for installing the software error occurs if the Intel Graphics processor installed on your system is not compatible with the driver package you are trying to install.
By following the steps in this article, you can install the Intel Graphics processor’s correct version and eliminate the error.
However, your laptop might be outdated or broken if you can’t solve the issue with any of the above solutions.
We hope our solutions helped you fix the PC that doesn’t meet the requirements error. For more suggestions or other questions, please access the comments section below.
Tashreef Shareef
Tashreef Shareef is a software developer turned tech writer. He discovered his interest in technology after reading a tech magazine accidentally. Now he writes about everything tech from Windows to iOS and streaming services to IoT at WindowsReport.

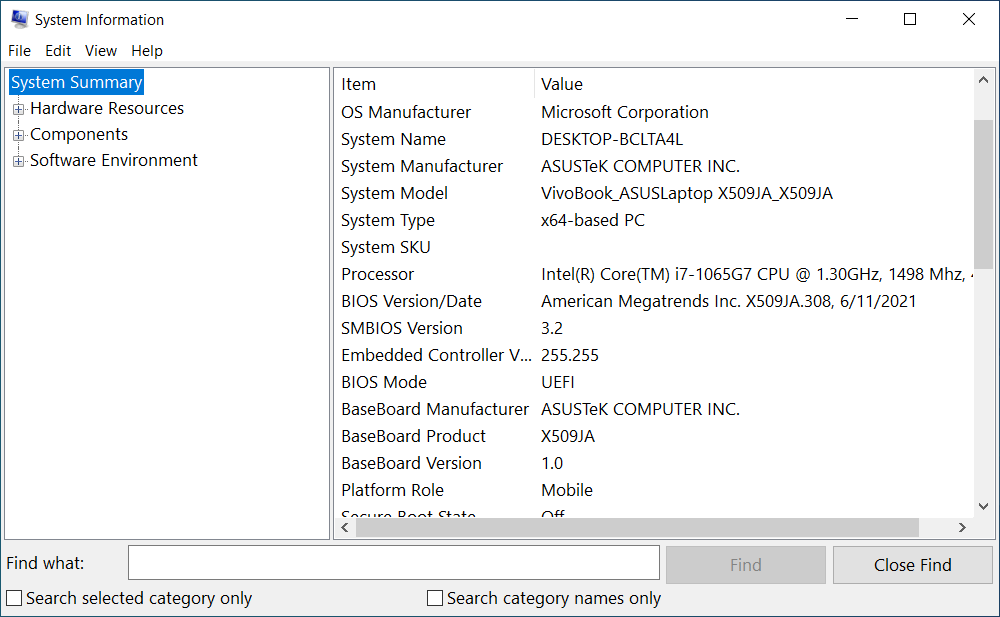
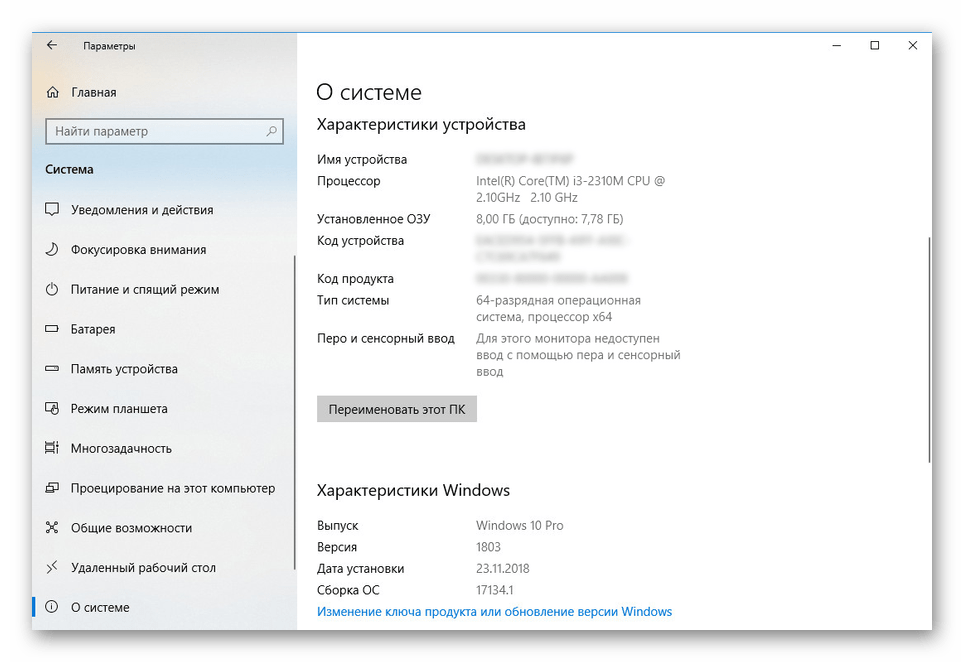
The Minimum Error Code System Requirements Fails The Creator I am trying to install windows 11 from the full retail version thumb drive. after answering the keyboard & language questions, the installer displays a dialog saying the system doesn’t meet requirements. i really wish i knew the exact problem the installer is having. is there a log file or other resource that identifies the issue?. What is your operating system? we can see its windows, but is it windows 10 or 11, and does it have its updates. if you press the windows key and type system, a window will open like this below.

Os Does Not Meet The Minimum System Requirements For This Installer Here are a few steps to try: pc health check tool: run this to see the exact compatibility issue. double check tpm and secure boot: ensure both are properly enabled in bios and verify tpm in windows security > device security. check cpu compatibility: verify your processor is on the official windows 11 supported list. Drivers and firmware: outdated or missing device drivers can lead to hardware not being recognized correctly by the operating system, resulting in an inability to meet minimum requirements. solutions to fix the error step 1: identify software requirements. Some windows 10 users reported the error this computer does not meet the minimum requirements after installing a newer version of the intel graphics driver. one of the first solutions is to make sure you update your drivers with an automated tool. Learn how to resolve «this computer does not meet minimum requirements for installing the software» error message while installing intel graphics driver.
Fillable Online The System Does Not Meet The Minimum Requirements Fax Some windows 10 users reported the error this computer does not meet the minimum requirements after installing a newer version of the intel graphics driver. one of the first solutions is to make sure you update your drivers with an automated tool. Learn how to resolve «this computer does not meet minimum requirements for installing the software» error message while installing intel graphics driver. How to fix «this pc doesn’t meet windows 11 system requirements» error. unable to install windows 11 due to ‘secureboot’ and or ‘tpm 2.0’ errors? here’s how you enable both, and a quick workaround that nullifies the need for it altogether. Most likely, this error will occur when you are not meeting cpu, tpm 2.0 or secure boot requirements. ensure that these requirements along with the requirements mentioned in the following section of this post are met before you continue with the installation process. Microsoft provides a free tool, the pc health check tool, which can quickly analyze your device and tell you whether it meets the requirements for windows 11. the tool scans key hardware components such as tpm 2.0, system boot method, and processor compatibility, and gives clear results. Fortunately, there are ways to fix this issue and upgrade your pc to windows 11 even if it doesn’t meet the minimum system requirements. if your computer does not meet the minimum requirements for windows 11, it may be related to hardware components like the cpu, tpm 2.0, or secure boot.
Os Does Not Meet The Minimum System Requirements For This Installer How to fix «this pc doesn’t meet windows 11 system requirements» error. unable to install windows 11 due to ‘secureboot’ and or ‘tpm 2.0’ errors? here’s how you enable both, and a quick workaround that nullifies the need for it altogether. Most likely, this error will occur when you are not meeting cpu, tpm 2.0 or secure boot requirements. ensure that these requirements along with the requirements mentioned in the following section of this post are met before you continue with the installation process. Microsoft provides a free tool, the pc health check tool, which can quickly analyze your device and tell you whether it meets the requirements for windows 11. the tool scans key hardware components such as tpm 2.0, system boot method, and processor compatibility, and gives clear results. Fortunately, there are ways to fix this issue and upgrade your pc to windows 11 even if it doesn’t meet the minimum system requirements. if your computer does not meet the minimum requirements for windows 11, it may be related to hardware components like the cpu, tpm 2.0, or secure boot.
System Doesn T Meet The Requirements For This Update Full Fix Microsoft provides a free tool, the pc health check tool, which can quickly analyze your device and tell you whether it meets the requirements for windows 11. the tool scans key hardware components such as tpm 2.0, system boot method, and processor compatibility, and gives clear results. Fortunately, there are ways to fix this issue and upgrade your pc to windows 11 even if it doesn’t meet the minimum system requirements. if your computer does not meet the minimum requirements for windows 11, it may be related to hardware components like the cpu, tpm 2.0, or secure boot.
Все способы:
- Причина 1: Несоответствие минимальным системным требованиям
- Причина 2: Функция защита в BIOS (UEFI)
- Причина 3: Разгон процессора
- Причина 4: Зарезервированный системой раздел
- Вопросы и ответы: 0
Причина 1: Несоответствие минимальным системным требованиям
Бывает, что при попытке перейти на Windows 10 с более ранней операционной системы возникает сообщение о том, что запуск «десятки» на этом компьютере невозможен. Конечно, технически большинство современных компьютеров способны «потянуть» операционку, но, если у вас довольно старое оборудование, то при установке или использовании не исключено множество проблем. Поскольку данное решение подойдет далеко не всем, то сразу переходите к следующему способу, но если у вас действительно старый ПК/ноутбук, не лишним будет проверить его характеристики и сравнить с требованиями для Windows 10.
Подробнее: Системные требования для установки Windows 10
Причина 2: Функция защита в BIOS (UEFI)
Другая распространенная причина появления сообщения о том, что запуск Windows 10 на этом компьютере невозможен, — это активная защитная функция в BIOS (UEFI). Она предназначена для предотвращения исполнения программ в области, которая используется для хранения данных. Функция позволяет избежать ошибок в ситуациях, когда некоторые вредоносные утилиты могут использовать буфер. Но иногда технология блокирует и установку программного обеспечения, не связанного с вирусами.
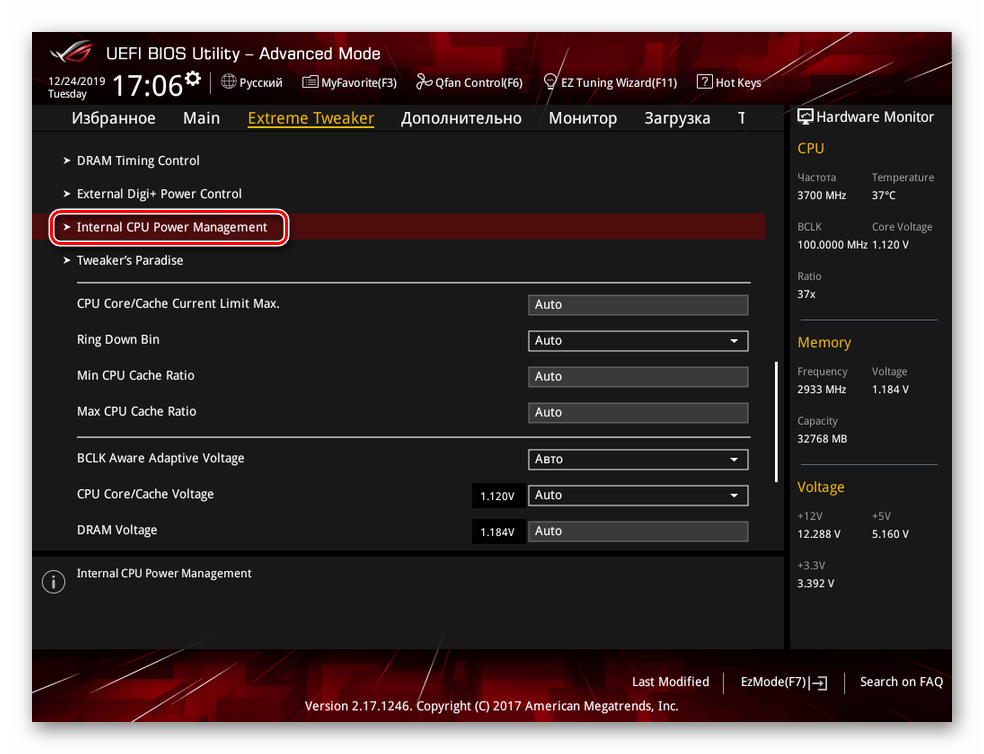
Защитная функция, как правило, встраивается в большинство современных процессоров, и называется она у компонентов от Intel «XD-bit», а у AMD — «NX-bit». Активная технология может блокировать использование Windows 10 на компьютере, поэтому ее следует отключить через базовую систему ввода-вывода:
- Перейдите в BIOS/UEFI на компьютере при помощи горячей клавиши. То, какая клавиша (или комбинация) актуальна для вас, зависит от модели ноутбука или материнской платы. Более подробно о том, как зайти в BIOS на ПК и лэптопе, мы писали в отдельных материалах.
Подробнее: Как попасть в BIOS на компьютере / на ноутбуке
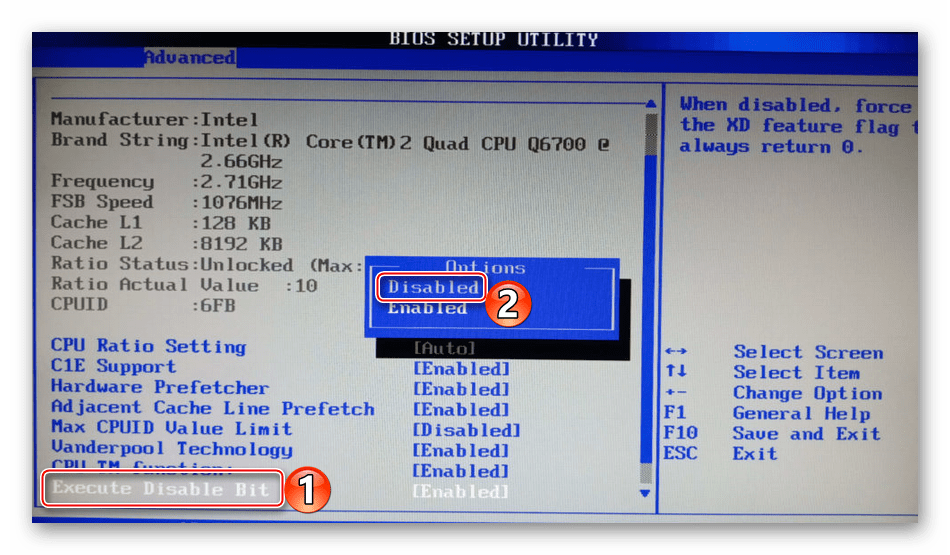
- Далее нужно найти вышеупомянутую защитную функцию. Называться она может по-разному, что тоже зависит от процессора и материнской платы. Часто она отмечена в BIOS/UEFI следующим образом: «Execute Disable Bit», «No-Execute Memory Protect», «Execute Bit Support» и другие. Точное название иногда указывается в характеристиках материнской платы или ноутбука (в паспорте устройства или на официальном сайте производителя). Переведите значение параметра в «Disabled».
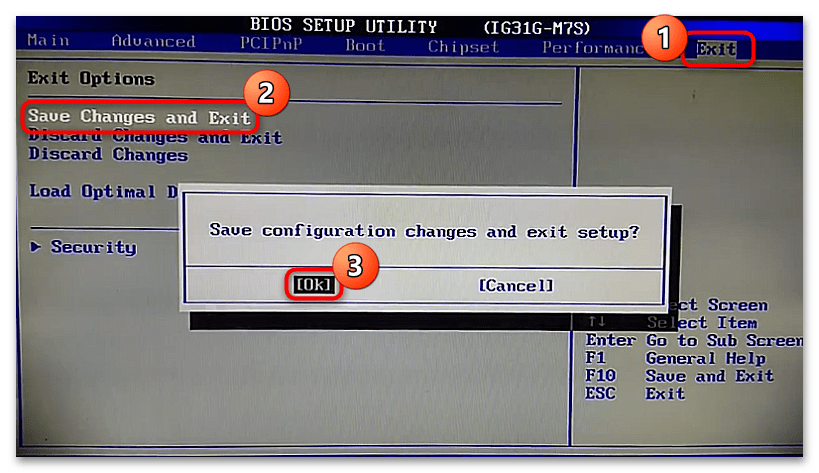
- Выйдите из BIOS, сохранив настройки. Нужно переместиться на вкладку «Exit» и выбрать пункт «Save Changes and Exit» или просто нажать «F10».
Если вы не нашли защитную функцию, тогда может потребоваться обновление BIOS. О том, как это правильно сделать, читайте в наших отдельных руководствах по ссылкам ниже.
Подробнее:
Инструкция по обновлению BIOS c флешки
Обновление BIOS на компьютере

Причина 3: Разгон процессора
Иногда проблемы с запуском Windows 10 появляются из-за ранее разогнанного центрального процессора. Такую процедуру проводят для увеличения производительности устройства путем повышения тактовой частоты компонента. Часто это позволяет выполнять более затратные задачи на компьютере, поскольку производитель ЦП, как правило, предусматривает дополнительные ресурсы, не задействованные в обычном режиме. Чтобы исправить ситуацию с запуском «десятки», отключите разгон процессора, используя настройки BIOS или самой операционки. Более детально об этом наш автор писал в статье по следующей ссылке.
Подробнее: Как понизить тактовую частоту процессора
Причина 4: Зарезервированный системой раздел
Если при попытке обновиться до «десятки» появляется системное окно с ошибкой, говорящей о том, что запуск Windows 10 невозможен, поскольку не удалось обновить раздел, зарезервированный системой, для этого также есть решение. Этот раздел не отображается в списке устройств и дисков «Моего компьютера», но его можно увидеть с помощью специальных средств по работе с томами и накопителями.
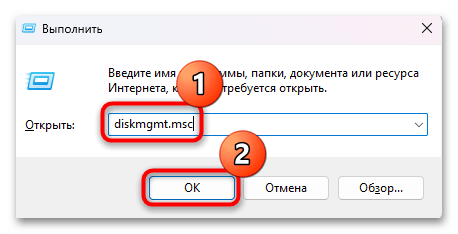
- Одновременно нажмите на клавиши «Win + R», чтобы вызвать окно «Выполнить». В текстовом поле введите запрос
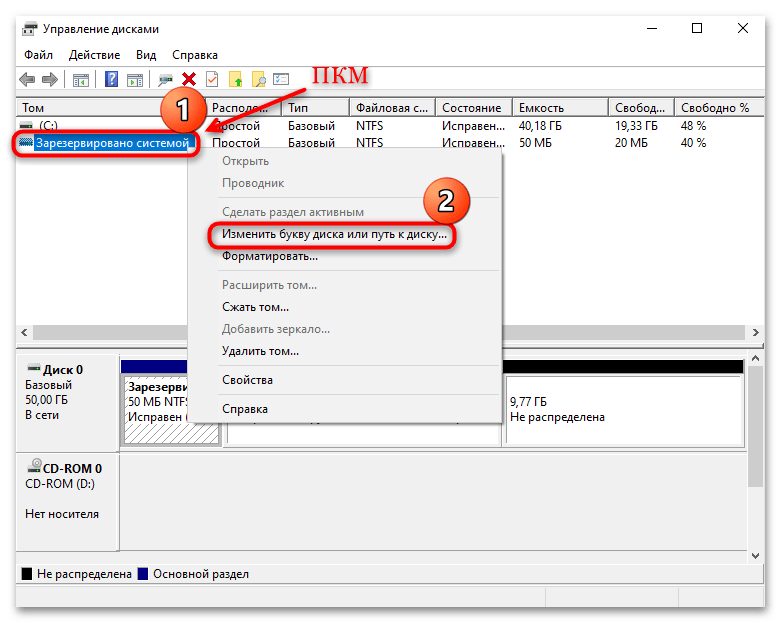
diskmgmt.mscи нажмите на кнопку «ОК». - В оснастке «Управление дисками» среди дисков найдите раздел, зарезервированный системой, кликните по нему правой кнопкой мыши и выберите пункт «Изменить букву диска или путь к диску».
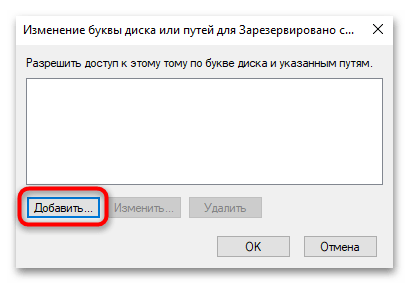
- Нажмите на кнопку «Добавить».
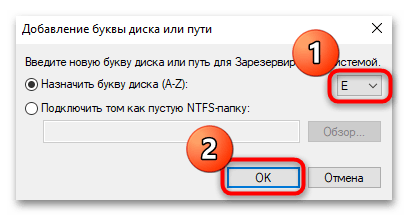
- Из выпадающего меню выберите любую свободную букву и подтвердите настройку, нажав на кнопку «ОК». Можете закрывать утилиту «Управление дисками».
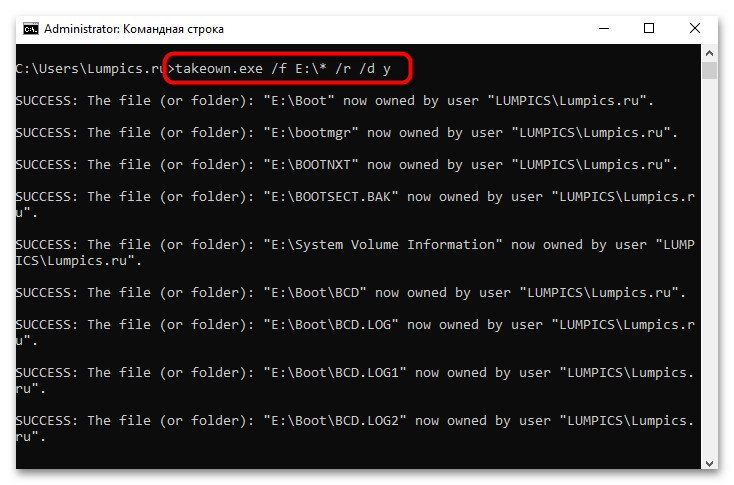
- Далее потребуется изменить атрибуты файлов и каталогов. Запустите консоль «Командная строка» от имени администратора, затем введите
takeown.exe /f E:\* /r /d y, где под «E» подразумевается только что назначенная буква, и нажмите на клавишу «Enter». Эта команда открывает доступ к файлам, причем процедура может занять длительное время, поэтому дождитесь окончания. - Выполните команду
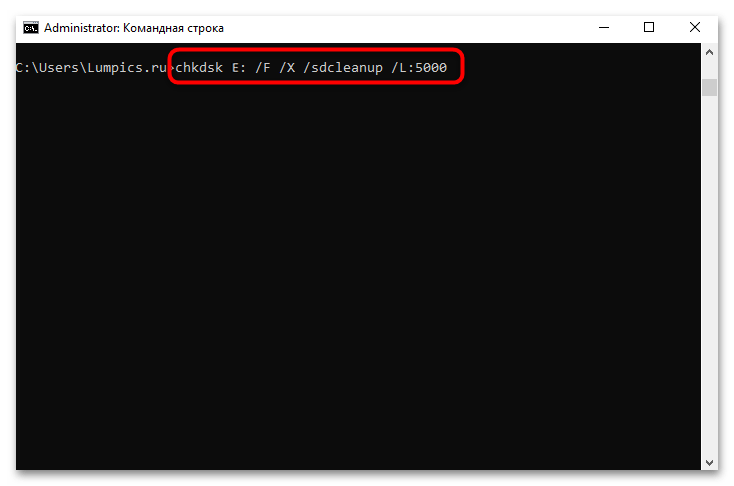
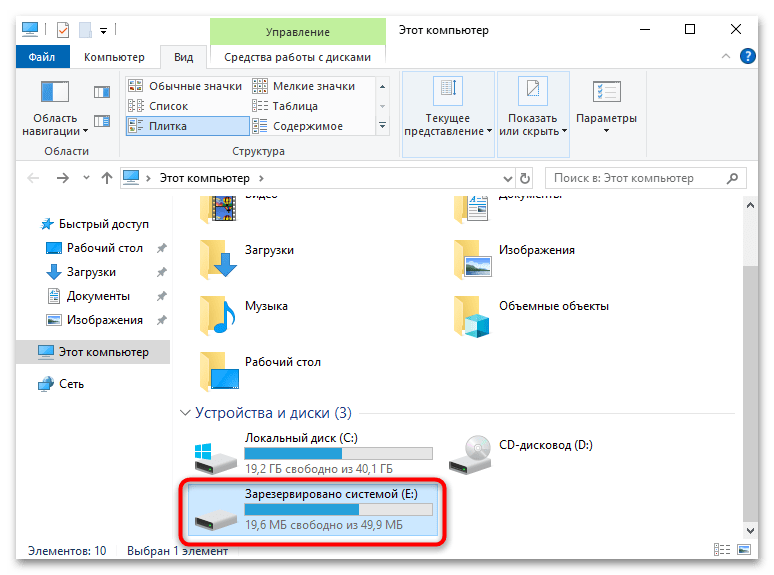
icacls . /grant administrators:F /t, чтобы отобразить списки управления доступом. Для изменения атрибутов и файлов используйте командуattrib -h -s -r bootmgr. Далее нужно выполнитьchkdsk E: /F /X /sdcleanup /L:5000, заменив «E» на назначенную букву, и нажать на клавишу ввода. - После выполнения операции можно закрывать окно консоли. Откройте «Проводник» и перейдите в раздел, зарезервированный системой, но для этого предварительно потребуется включить отображение скрытых файлов и папок.
Подробнее: Как показать скрытые файлы и папки в Windows 7
- Останется найти папку «Boot» на этом разделе, затем удалить папки с языковыми параметрами, например «en-US» или «en-GB». Стереть следует все, кроме каталогов «en-US» и «ru-RU».
После выполненных действий попробуйте вновь обновиться до десятой версии операционной системы. Если сделать это удалось, не забудьте удалить букву раздела, зарезервированного системой, с помощью средств оснастки «Управление дисками».
Наша группа в TelegramПолезные советы и помощь
The error message ‘This computer does not meet the minimum requirements for installing the software’ is often due to the presence of an external graphics card which, as a result, disables the integrated GPU. Other than that, a wrong driver or incorrect OS version can also result in the said error message. The error pops up when you are trying to either update or install a driver for your Intel GPU which comes integrated with the chipset.
In some cases, the users are not even able to see the card under the Display Adapters entry in the Device Manager. This usually refers to a restriction imposed by the BIOS configuration. Various motherboards often disable the integrated graphics card in the chipset when an external video card is attached to the system. However, that’s not supposed to occur all the time. We will be looking into the causes of the error message in more detail down below. Therefore, without further ado, let us get into it.
What causes the “This Computer does not meet the Minimum Requirements for Installing the Software” Error Message?
We went through several user reports to have a better grasp over the said error message and prepared a list of various causes which are mentioned below.
- Graphics Card Disabled in the BIOS Configuration: The error message pops up if you have an external video card attached to the system in which case some motherboards automatically disable the integrated graphics card in the chipset. However, the presence of an external video card is just a probability and not a defined scenario.
- Wrong Driver: Another cause of the said error message can be the implementation of an entirely wrong driver. What this means is that the driver that you are trying to install on your system varies from the one supposed for your graphics card.
- Incorrect OS Version: If you do not already know, every version of the Windows operating system has a different driver available which is specifically developed for that version of the Windows OS. For example, if you are running Windows 10 and the driver that you have downloaded is supposed to be for Windows 7 or 8, then, in such a scenario, you are very likely to see such an error pop up. Another thing to note is the architecture of your operating system, for example, you won’t be able to install a 32-bit version of the driver on a 64-bit operating system.
How to Fix the ‘This Computer does not meet the Minimum Requirements for Installing the Software’ Error Message?
Now that you are aware of the causes of the error message, let us get into the solutions that you implement to resolve the issue.
1. Use Intel Driver and Support Assistant
The first thing you should do if you face the said error message is to download the Intel Driver and Support Assistant utility that will scan your system configuration and install the required drivers for you automatically. This can be helpful when you are not sure of your integrated graphics card model or anything of the sort. To download the tool, just head to this link and click the Download Now button. This will start downloading the Intel Driver and Support Assistant tool.
Alternately, you can check the model of your graphics card. Once you have your graphics card model, you can head to this link and download the right driver manually.
2. Install the Driver Manually
The error message pops up when you are trying to install the driver by running the setup file of the driver. You can work around the error message by installing it manually via the Device Manager. Installing a driver manually is not always recommended, however, in this scenario, you can safely do so.
Before you get on with installing the driver manually, make sure you have the right driver downloaded on your system. Afterward, follow the instructions given below:
- Press the Windows Key + R to open up the Run dialog box.
- Once it opens up, type in devmgmt.msc and then press the Enter key.

Opening Device Manager - This will open up the Device Manager window.
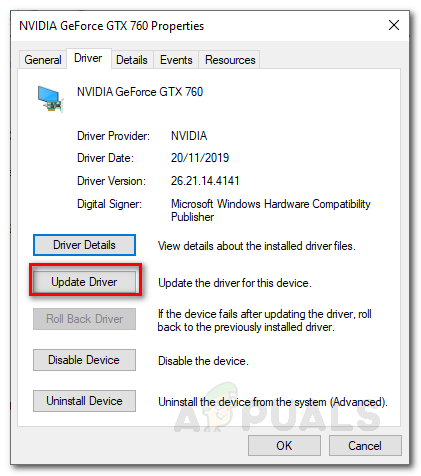
- Now, expand the Display Adapters entry, right-click on your graphics card and then select Properties from the drop-down menu.
- Then, switch to the Driver tab and click the Update Driver button.

Display Adapter Properties - Click the ‘Browse my computer for driver software’ option.
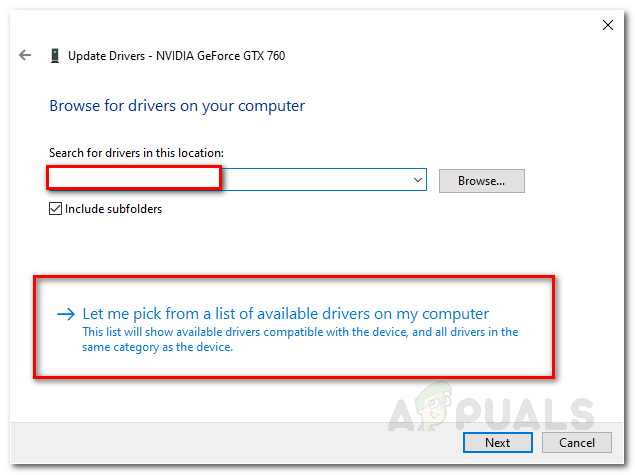
- Afterward, click on the ‘Let me pick from a list of available drivers on my computer’ option.

Updating Graphics Driver Manually - Click the Have Disk button and then browse to the folder you have your driver. Go to the Graphics directory and select the .inf file. If you do not have a Graphics directory, no worries, just select the .inf (this will be the one meant for your display adapter) file and click Open.
- After that, click Next and if you are popped up with a message, just hit Yes.
- Wait for the driver to be installed.
If you do not have an Intel Graphics entry under Display Adapters, then follow the next solution.
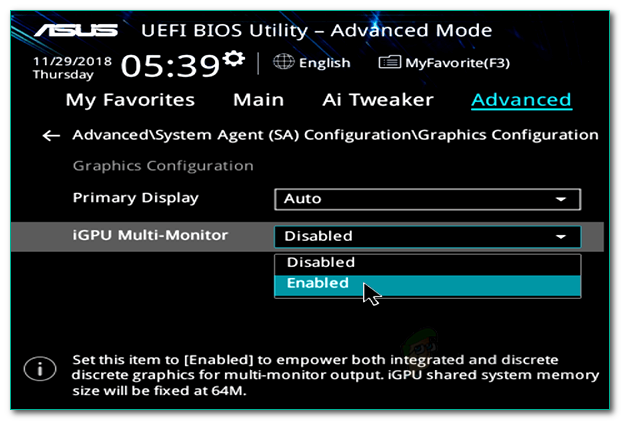
3. Enable Integrated Graphics
As it happens, some motherboards are programmed to automatically disable the integrated graphics card when you have an external video card attached. However, in some scenarios, that may not be the case and your integrated card might still be disabled. In such a scenario, you will have to enable the integrated graphics card from the BIOS.
Enabling your integrated graphics might vary from manufacturer to manufacturer due to which we can’t provide a defined set of instructions. However, to give a rough idea, it usually is found in the Advanced tab of your BIOS settings usually called IGD Multi-Monitor, iGPU Multi-Monitor or Intel Integrated GPU. Different manufacturers have different defined keys for booting into BIOS, so you will have to look it up on Google.
Kevin Arrows
Kevin Arrows is a highly experienced and knowledgeable technology specialist with over a decade of industry experience. He holds a Microsoft Certified Technology Specialist (MCTS) certification and has a deep passion for staying up-to-date on the latest tech developments. Kevin has written extensively on a wide range of tech-related topics, showcasing his expertise and knowledge in areas such as software development, cybersecurity, and cloud computing. His contributions to the tech field have been widely recognized and respected by his peers, and he is highly regarded for his ability to explain complex technical concepts in a clear and concise manner.
While using Windows 10, you may have across different kinds of common errors and technical hindrances. Have you ever seen the “This computer does not meet the minimum requirement” error message on Windows 10? This error can strike your device due to incompatible system drivers, outdated or corrupt drivers, disabled integrated Intel graphics chipset, presence of viruses or malware on your device.

Wondering how to get past this issue? Don’t worry! In this post, we have covered several solutions that will allow you to resolve the “This computer does not meet minimum requirement” issue on Windows 10.
How to Fix This Computer Does Not Meet Minimum Requirement
Let’s explore a few troubleshooting hacks to remove this error message from your device.
Also read: Ways To Fix Error Code 0xc0000225 In Windows 10
Solution #1: Update Windows OS
If you’re operating on an outdated Windows version, make sure you install the latest Windows update right away. Installing your device with the latest Windows update will offer performance improvements, enhance security, and an improved overall experience. To check for updates, here’s what you need to do.
Tap the Windows icon, select the gear-shaped icon to open Windows settings.

In the Windows Settings, tap on “Update and Security”. Switch to the “Windows update” section from the left menu pane.

On the right side of the window, tap on the “Check for Updates” option to check if any latest updates are available for your device. If any update is available, install your device to the latest Windows version.
After upgrading your device, you will be able to resolve the “Your PC does not meet the minimum requirement” issue quite easily.
Also read: How to Fix Windows 10 Update Error Code: 80072ee2
Solution #2: Update Intel Graphic Drivers
Another most common reason why you may get stuck with this issue is when the motherboard disables the Intel graphics chipset on your device. To resolve this, you can try updating the Intel graphics drivers on your PC. Follow these quick steps to update Intel graphic chipset drivers installed on your device:
Press the Windows + R key combination to open the Run dialog box.

Type “Devmgmt.msc” in the textbox, hit Enter.

In the Device Manager window, look for “Intel graphics driver”. Right-click on it, select the “Update Driver” option.
Follow the on-screen instructions to install the latest driver version of the Intel graphic chipset from the web.
Solution #3: Add Legacy Hardware
If the above-mentioned steps didn’t offer you any luck, then let’s try another workaround to resolve the “This computer does not meet minimum requirement” issue on Windows 10. Here’s what you need to do.
Press the Windows + R key combination to open the Run dialog box. Type “Devmgmt.msc” in the textbox to open Windows Device Manager.

Tap on the “Action” button placed on the top menu bar. Select the “Add Legacy Hardware” option.
To manually update the hardware drivers, Windows will offer you a list of options on the next screen. Select the “Display Adapter” option as we have to update the graphic drivers.

Select “Intel Corporation” under the manufacturer section and then tap the “Next” button to proceed.
You can also pick the respective model from the list if you are aware of the details. Although, if you’re not sure about the exact graphic model, tap the “Have Disk” option placed underneath the “Model” section.
In the browse window, navigate to the location where the Intel graphic drivers are stored.

Tap on the “autorun.inf” file and install the graphic drivers manually.
Follow the on-screen instructions to manually update the Intel graphic chipset drivers on your Windows 10 PC. After installing the latest updates, reboot your machine to check if you’re still experiencing the error.
Solution #4: Download Systweak Antivirus for Windows
Last but not least, we need to make sure that your device is 100% virus and malware-free. And for this, we recommend you to download a comprehensive antivirus suite.
Looking for suggestions? Systweak Antivirus for Windows is an all-round security tool that offers real-time protection against viruses, malware, and ransomware attacks. This nifty antivirus software can add an extra layer of security to keep zero-day threats and vulnerabilities at bay. Its advanced algorithms are smart enough to detect malicious threats right away and prevent any virus or malware from penetrating your device.

Systweak Antivirus also improves the overall performance of your Windows device by removing malicious or unwanted startup items. It also comes packed with a bunch of additional security features that include USB device protection, public WiFi security, startup manager, software updater, safe web browsing, performance optimization, and a world-class 24×7 customer support to guide you at any step you feel stuck.

Install Systweak Antivirus on your Windows device and scan your entire PC for viruses or malware. After running a thorough check to scan for malicious threats, your PC will be 100% virus-free.
Also read: 15+ Best Antivirus Software of 2021
Wrap Up
You can use any of the above-mentioned solutions to fix the “This computer does not meet minimum requirement” issue on Windows 10 devices. So, before you start retrospecting your system’s technical specifications, try these troubleshooting hacks to get past this issue.
Good luck!