
- Skip to content
- Accessibility Policy
Looking for other Java downloads?
Java 24, Java 21, and earlier versions available now
JDK 24 is the latest release of the Java SE Platform.
JDK 21 is the latest Long-Term Support (LTS) release of the Java SE Platform.
Earlier JDK versions are available below.
- JDK 24
- JDK 21
- GraalVM for JDK 24
- GraalVM for JDK 21
Java SE Development Kit 24.0.1 downloads
JDK 24 binaries are free to use in production and free to redistribute, at no cost, under the Oracle No-Fee Terms and Conditions (NFTC).
JDK 24 will receive updates under these terms, until September 2025, when it will be superseded by JDK 25.
- Linux
- macOS
- Windows
Release information
- Online Documentation
-
Installation
Instructions - Release Notes
- Documentation License
-
JDK 24 Licensing Information User Manual (includes
third-party licenses) - Certified System Configurations
- Readme
- Java Value Engineering
Java SE Development Kit 21.0.7 downloads
JDK 21 binaries are free to use in production and free to redistribute, at no cost, under the Oracle No-Fee Terms and Conditions (NFTC).
JDK 21 will receive updates under the NFTC, until September 2026, a year after the release of the next LTS. Subsequent JDK 21 updates will be licensed under the Java SE OTN License (OTN) and production use beyond the limited free grants of the OTN license will require a fee.
- Linux
- macOS
- Windows
Release information
- Online Documentation
-
Installation
Instructions - Release Notes
- Documentation License
-
JDK 21 Licensing Information User Manual (includes
third-party licenses) - Certified System Configurations
- Readme
- Java Value Engineering
GraalVM for JDK 24.0.1 downloads
GraalVM for JDK 24 binaries are free to use in production and free to redistribute, at no cost, under the
GraalVM Free Terms and
Conditions (GFTC).
GraalVM for JDK 24 will receive updates under these terms, until September 2025, when it will be superseded by GraalVM for JDK 25.
Oracle GraalVM uses the Graal just-in-time compiler and includes the Native Image feature as optional early adopter technology.
Native Image is extensively tested and supported for use in production, but is not a conformant implementation of the Java Platform. GraalVM for JDK 24 without the Native Image feature included is available for customers at My Oracle Support.
- Linux
- macOS
- Windows
Release information
- Online Documentation
- Installation Instructions
- Release Notes
- Licensing Information User Manual (includes third-party licenses)
- Certified System Configurations
- Java Value Engineering
GraalVM for JDK 21.0.7 downloads
GraalVM for JDK 21 binaries are free to use in production and free to redistribute, at no cost, under the
GraalVM Free Terms and
Conditions (GFTC).
GraalVM for JDK 21 will receive updates under the GFTC, until September 2026, a year after the release of the next LTS. Subsequent updates of GraalVM for JDK 21 will be licensed under the GraalVM OTN License Including License for Early Adopter Versions (GOTN) and production use beyond the limited free grants of the GraalVM OTN license will require a fee.
Oracle GraalVM uses the Graal just-in-time compiler and includes the Native Image feature as optional early adopter technology.
Native Image is extensively tested and supported for use in production, but is not a conformant implementation of the Java Platform. GraalVM for JDK 21 without the Native Image feature included is available for customers at My Oracle Support.
- Linux
- macOS
- Windows
Release information
- Online Documentation
- Installation Instructions
- Release Notes
-
Licensing Information User Manual (includes
third-party licenses) - Certified System Configurations
- Java Value Engineering
Protect your investment—and more
Java SE subscribers get support for JDK 17, receive updates until at least October 2029, are entitled to GraalVM, Java Management Service, and bundled patch releases (BPRs) with fixes not yet available to
nonsubscribers, and more.
Java SE subscribers have more choices
Also available for development, personal use, and to run other licensed Oracle products.
- Java 17
- GraalVM for JDK 17
- Java 11
- Java 8
- Java 8 Enterprise Performance Pack
Java SE Development Kit 17.0.15 downloads
The Oracle JDK 17 license changed in October 2024
The Oracle Technology Network License Agreement for Oracle Java SE used for JDK 17 updates 17.0.13 and greater is substantially different from prior Oracle JDK 17 licenses. This license permits certain uses, such as personal use and development use, at no cost — but other uses authorized under prior Oracle JDK licenses may no longer be available. Please review the terms carefully before downloading and using this product. FAQs are available here.
Commercial license and support are available for a low cost with Java SE Universal Subscription.
JDK 17.0.15 checksums and OL 8 GPG Keys for RPMs
- Linux
- macOS
- Windows
Release information
- Online Documentation
-
Installation
Instructions - Release Notes
- Documentation License
-
JDK 17 Licensing Information User Manual (includes
third-party licenses) - Certified System Configurations
- Readme
- Java Value Engineering
GraalVM for JDK 17.0.15 downloads
The Oracle GraaalVM for JDK 17 license changed in October 2024
GraalVM OTN License Including License for Early Adopter Versions (GOTN) used for JDK 17 updates 17.0.13 and greater is substantially different from prior Oracle GraaalVM for JDK 17 licenses. This license permits certain uses, such as personal use and development use, at no cost — but other uses authorized under prior Oracle GraaalVM for JDK licenses may no longer be available. Please review the terms carefully before downloading and using this product. FAQs are available here.
Commercial license and support are available for a low cost with Java SE Universal Subscription.
Oracle GraalVM uses the Graal just-in-time compiler and includes the Native Image feature as optional early adopter technology.
Native Image is extensively tested and supported for use in production, but is not a conformant implementation of the Java Platform. GraalVM for JDK 17 without the Native Image feature included is available for customers at My Oracle Support.
GraaalVM for JDK 17.0.15 checksums and OL 8 GPG Keys for RPMs
- Linux
- macOS
- Windows
Release information
- Online Documentation
-
Installation
Instructions - Release Notes
-
Licensing Information User Manual (includes
third-party licenses) - Certified System Configurations
- Java Value Engineering
Java SE Development Kit 11.0.27
Java SE subscribers will receive JDK 11 updates until at least
January 2032.
These downloads can be used for development, personal use, or to run Oracle licensed products. Use for other
purposes, including production or commercial use, requires a Java SE Universal Subscription or another Oracle license.
Commercial license and support are available for a low cost with
Java SE Universal Subscription.
JDK 11 software is licensed under the
Oracle Technology Network
License Agreement for Oracle Java SE.
JDK 11.0.27 checksums and OL 8 GPG Keys for RPMs
- Linux
- macOS
- Solaris
- Windows
Release information
- Online Documentation
- Installation instructions
- Release Notes
- Documentation license
-
Java SE 11 Licensing Information User Manual
(includes 3rd party licenses) -
Certified System
Configurations - Readme
- Java Value Engineering
- Linux
- macOS
- Solaris
- Windows
-
JRE 8
- Linux
- macOS
- Solaris
- Windows
-
Server JRE 8
- Linux
- Solaris
- Windows
Which Java 8 package do I need?
-
Software developers: Java SE Development Kit (JDK)
For Java developers. Includes a complete JRE plus tools for developing, debugging, and monitoring Java applications.
-
Running headless Linux workloads at or near your systems’ CPU or memory limits
Enterprise Performance Pack brings significant memory and performance improvements including modern garbage collection algorithms, reduced memory usage and many other optimizations.
Learn more
-
Administrators running applications on a server
Server Java Runtime Environment (Server JRE). For deploying Java applications on servers. Includes tools for JVM monitoring and tools commonly required for server applications, but does not include browser integration (Java plug-in), auto-update, or an installer.
Learn more
-
End user running Java on a desktop: Java Runtime Environment (JRE)
Covers most end-users needs. Contains everything required to run Java applications on your system.
Release information
- Online Documentation
- Installation Instructions
- Release Notes
-
Java SE Licensing Information User Manual (includes
third-party licenses) -
Certified System
Configurations - JDK ReadMe
- JRE ReadMe
- Demos and Samples Archive
- Java Value Engineering
- Linux
- Skip to content
- Accessibility Policy
Java SE 21 Archive Downloads
Go to the Oracle Java Archive page.
The JDK is a development environment for building applications using the Java programming language.
The JDK includes tools useful for developing and testing programs written in the Java programming language and running on the JavaTM platform.
WARNING: Older versions of the JDK are provided to help developers debug issues in older systems. They are not updated with the latest security patches and are not recommended for use in production.
For production use Oracle recommends downloading the latest JDK version.
Only developers and enterprise administrators should download these releases.
For current Java releases, please visit Oracle Java SE Downloads.
- Details
- Written by
- Last Updated on 21 October 2024 | Print Email
JDK 23 is a regular update of the Java SE platform, released on September 17th 2024. Follow the steps below to set up the Java Development Kit (JDK) on your Windows operating system with Oracle JDK 23, a commercial distribution provided by Oracle corporation.
After completing this guide, you will have the Java runtime environment, as well as core Java development tools, installed — essentials to start your Java programming journey.
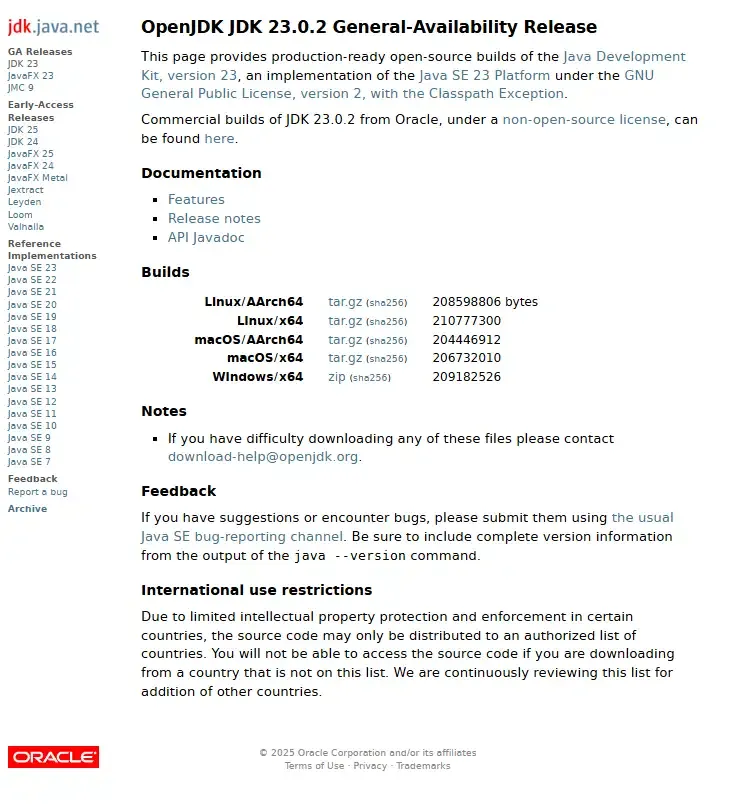
1. Download Oracle JDK 23 Installer for Windows
It’s strongly recommended to use an official installer or JDK 23. Visit the official Java downloads page, where you’ll find Oracle JDK 23 available as Zip file (x64 Compressed Archive), x64 Installer (EXE) and x64 MSI Installer:
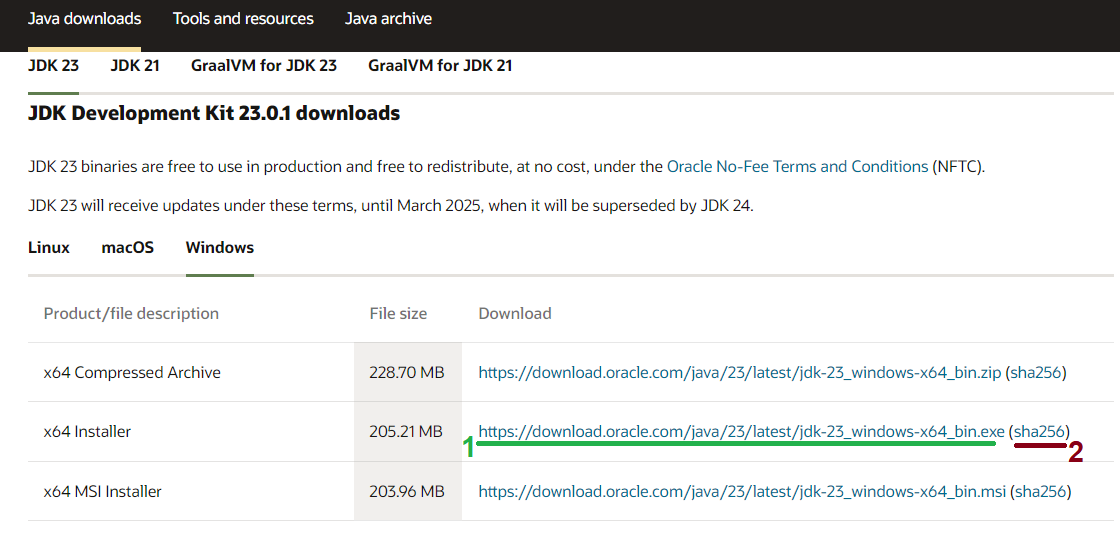
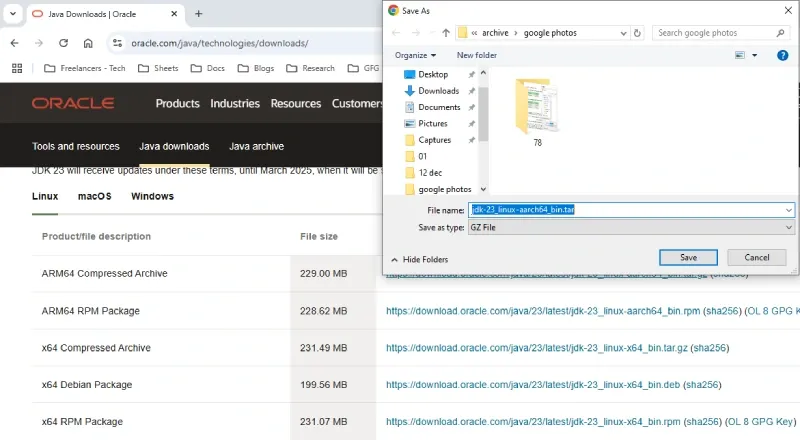
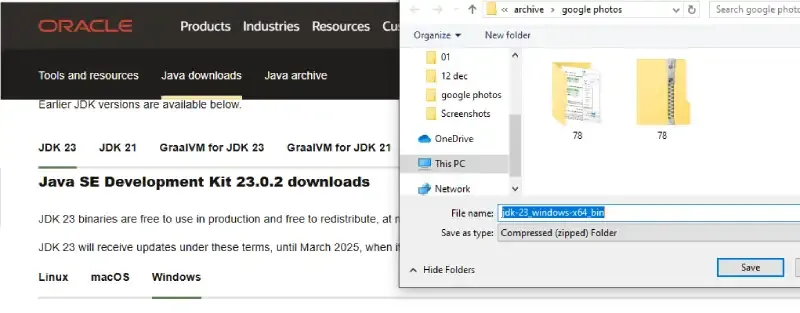
For convenience (ease of setup), you can choose to download either the EXE or MSI installer. In this guide, I will choose the EXE installer, so click on the download link (1) next to x64 Installer. Save the file (jdk-23_windows-x64_bin.exe) to the Downloads folder in your user home directory.
2. Verify the Installer File
This step is option but recommended to ensure that the downloaded file is original and has not been tampered with. Open a new Command Prompt window and change the current directory to the Downloads folder using the following command:
cd Downloads
Then type the following command:
certutil -hashfile jdk-23_windows-x64_bin.exe sha256
This prints the SHA256 checksum value of the file. Go back to the Java downloads page and click on the sha256 link (2) next to the download link to view the SHA256 checksum of the original file. If both values match, it means the downloaded file is intact, and you can safely run it.
Double-click the .exe file to run the Windows installer for Oracle JDK 23. If you see the warning “the app you’re trying to install isn’t a Microsoft-verified app”, click Install anyway. This will launch the Setup program for Java(TM) SE Development Kit 23.0.1 (64-bit) as shown below:
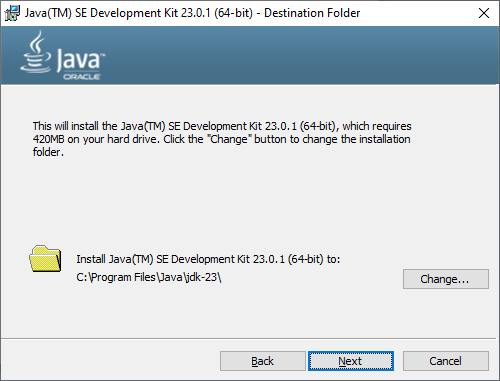
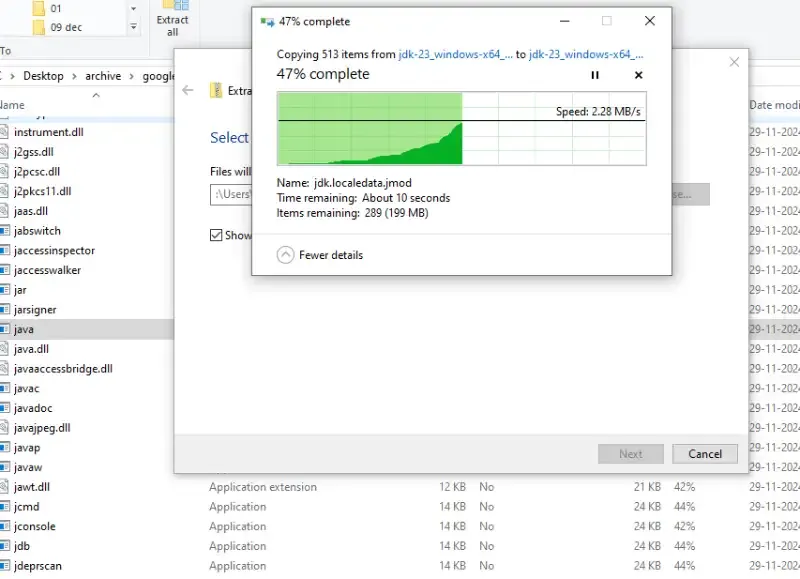
If you want proceed the installation with default settings, click the Next button twice. The installation will be completed in just a few seconds, and JDK 23 will be installed in the C:\Program Files\Java\jdk-23 directory by default. There is no need to configure system environment variables.
4. Verify the Oracle JDK 23 Installation on Windows
Exit the Setup program. Then, open a new Command Prompt window, type in java -version to check version of the Java Virtual Machine (JVM). If you see a result similar to the following screenshot, it means JDK 23 has been installed successfully on your Windows computer:
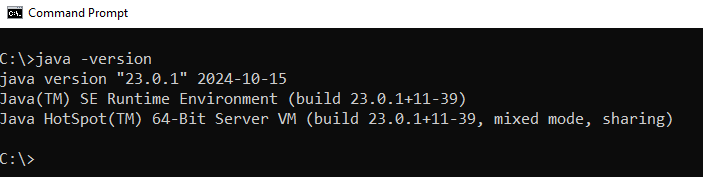
You can also type javac -version to check version of the Java compiler, and it will display “javac 23.0.1”.
Congratulations! You’ve done the first and foremost step to begin creating, developing, building and running Java applications on the Windows operating system using the Oracle JDK distribution for Java 23.
To see the setup of Oracle JDK 23 in action, watch the following video:
Related Articles:
- How to set JAVA_HOME in macOS and Linux permanently
- How to set JAVA_HOME environment variable on Windows 10
- What are JVM, JRE and JDK
- How to write, compile and run a hello world Java program for beginners
- Java Core Language Tutorials
About the Author:
Nam Ha Minh is certified Java programmer (SCJP and SCWCD). He began programming with Java back in the days of Java 1.4 and has been passionate about it ever since. You can connect with him on Facebook and watch his Java videos on YouTube.
Add comment
Java Development Kit (JDK) is one of the most important tools for developers who use it to build, compile, and run Java applications. It does not matter if you are a beginner or an experienced programmer; installing JDK is the first step towards working with Java development. We can download JDK to create and run Java applications on our system. Also, the JDK is used to create Android application source files as well, using the Java or Kotlin programming language. There are multiple benefits of installing a JDK.
Key Features of JDK:
- Compiler (javac): Converts Java code into bytecode for JVM execution.
- JRE + JVM: Includes runtime environment to execute Java programs.
- Rich Libraries: Pre-built classes for I/O, networking, databases, and more.
- Debugging Tools: JDK provides JDB (Java Debugger) for troubleshooting code.
- Multi-Platform Support: JDK supports write-once, run anywhere (Windows, Linux, macOS).
The system will execute the code using a set of Libraries and Compilers. JDK, JRE, and JVM should not be confused with one another.
Refer to this article to learn more: Differences between JDK, JRE, and JVM.
Why Install JDK?
- To develop and run Java applications
- Compile Java source code (javac)
- Includes JRE (Java Runtime Environment) and JVM (Java Virtual Machine)
- Required for Android app development (Java/Kotlin)
This article describes the step-by-step process for installing and configuring the JDK on Windows, Mac, and Linux.
Java JDK Download
The JDK can be installed on the following Platforms:
- Microsoft Windows
- Linux
- macOS
Download JDK (Java Development Kit)
We need to download the JDK first, find the steps below to get started:
Step 1: Visit the Official Website
Go to the Official JDK website to download the file.
Oracle Official Website
Since JDK is an open-source, so you can get it from OpenJDK in a few clicks.
OpenJDK
Step 2: Select the Appropriate Version
As of 2025, the latest stable versions are JDK 23 (SE) and JDK 21 (LTS). Select the compatible version as per your operating system (Windows, Mac or Linux)
JDK Latest Version – Download
Step 3: License and Agreement
Go through all the License and Agreement before downloading (from Oracle website), it will not ask if you’ll download it from OpenJDK website.
Install JDK on Windows
Follow the below steps to install JDK on Windows environment i.e.Windows 7, Windows 8, Windows 8.1, Windows 10, and Windows 11.
Step 1: Run the Java Development Kit (JDK) Installer
Locate the downloaded .exe file (e.g. jdk-23-windows-x64_bin.exe) and make the double click to begin the Installation process. Follow the installation wizard prompts to complete the installation process.
JDK Installer for Windows
Step 2: Setup the Environment Variables
Once the installation gets completed, you need to configure environment variables to notify the system about the directory in which the JDK files are located.
Proceed to C:\Program Files\Java\jdk-{YOUR_JDK_VERSION}\bin (replace {-} with your JDK version)
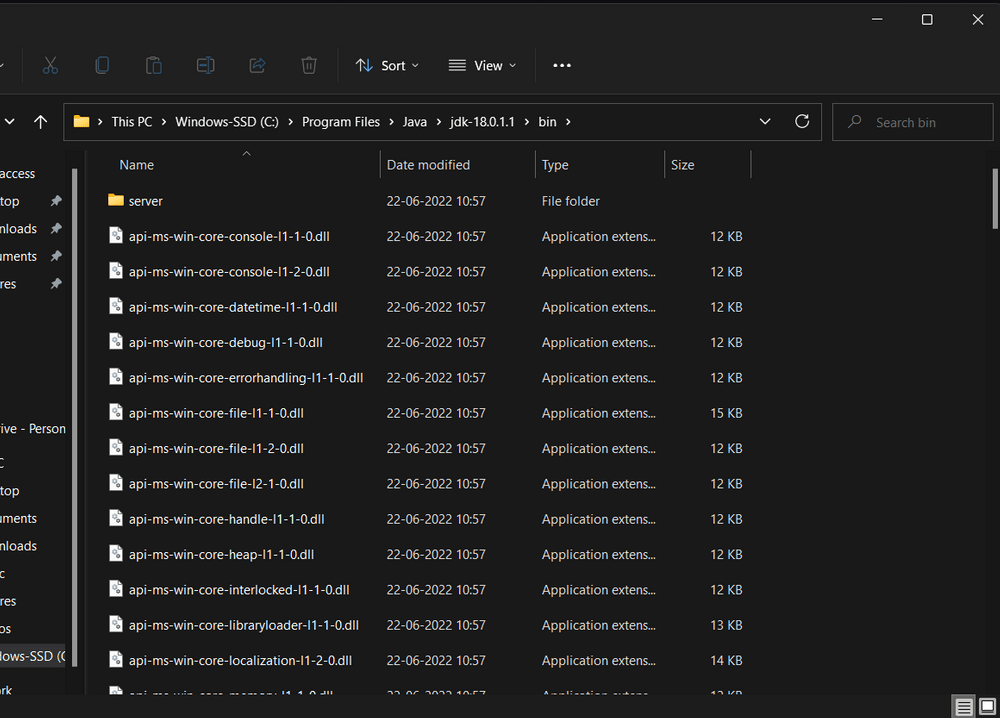
Program Files
Step 2.1: To set the Environment Variables, you need to search Environment Variables in the Task Bar and click on “Edit the system environment variables”.

System Properties
Step 2.2: Under the Advanced section, Click on “Environment Variables”.
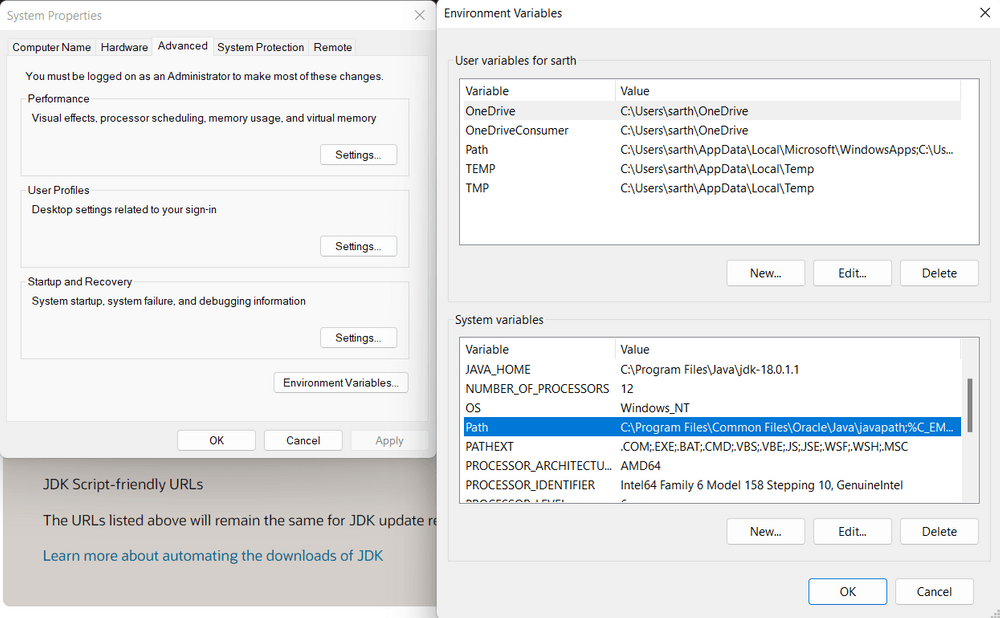
Environment Variables
Step 2.3: Under System variables, select the “Path” variable and click on “Edit”. Click on “New” then paste the Path Address i.e. C:\Program Files\Java\jdk-{YOUR_JDK_VERSION}\bin. Click on “OK”.
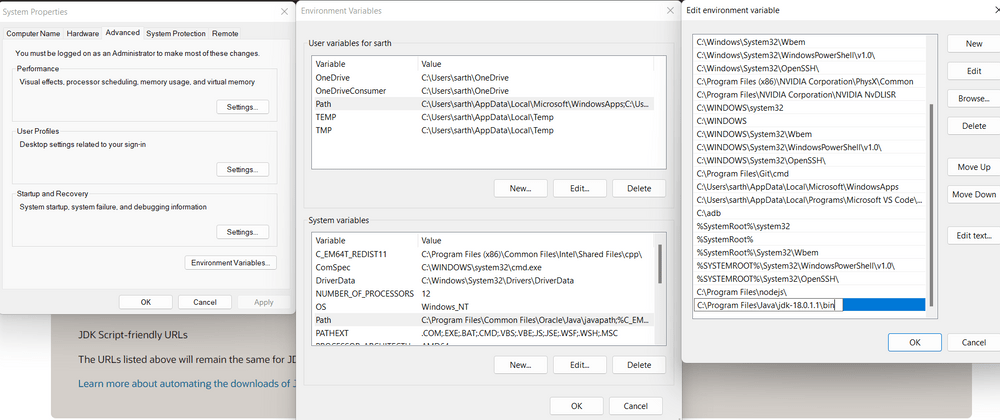
Path
Step 2.4: Now, in the Environment Variables dialogue, under System variables, click on “New” and then under Variable name: JAVA_HOME and Variable value: paste address i.e.
C:\Program Files\Java\jdk-{YOUR_JDK_VERSION}. Click on OK => OK => OK.
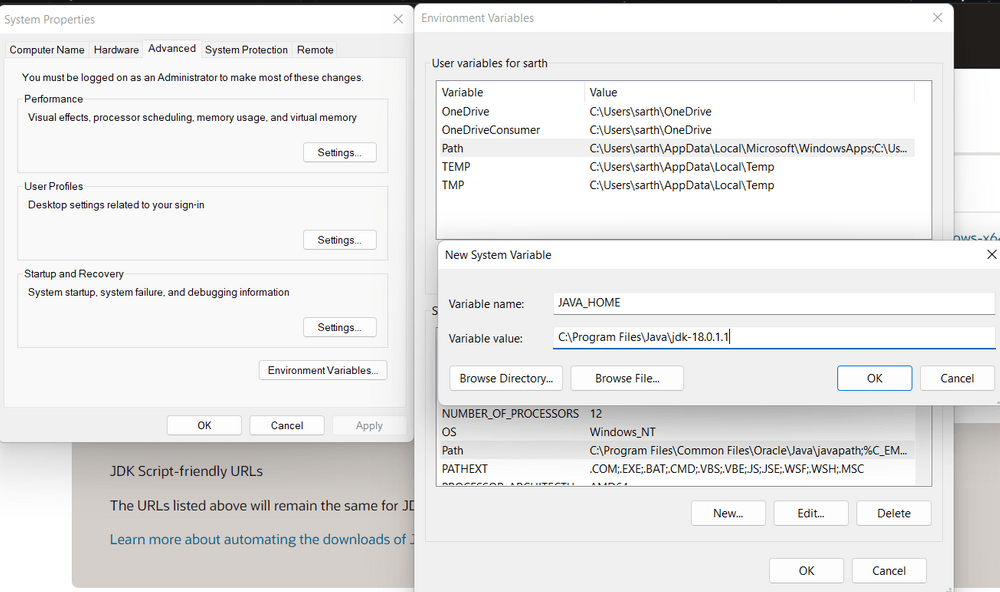
System Properties
Step 3: Check the Java Version
Open Command Prompt and enter the following commands:
java -version
javac -version
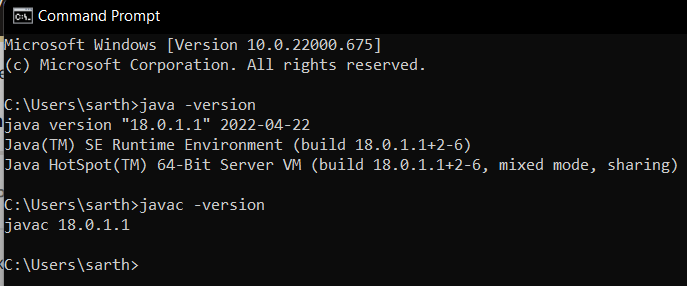
Command Prompt
Install JDK on Linux
Follow the steps below to install the Java software Development Kit on a Linux environment. These instructions are applicable to various Linux distributions such as Ubuntu, Fedora, and CentOS.
Note: We have used Kali Linux distributions here.
Step 1: Install Oracle Java Development Kit (JDK)
To install the downloaded JDK File using terminal, Open terminal and change your directory to downloads by using the command:
$ cd downloads
To list files and packages present in the directory, Type
$ ls
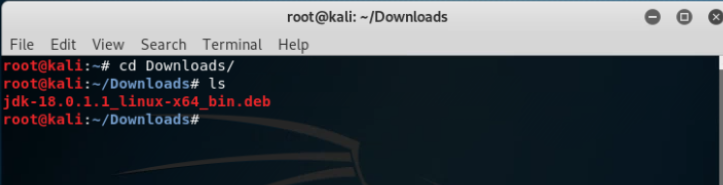
Root Kali
Step 1.1: Now we use Debian Package Manager to configure our downloaded file for installation by typing
$ sudo dpkg -i jdk-{YOUR_JDK_VERSION} (replace {-} with your version)
Enter your password as we have run an elevated prompt, i.e. the sudo or superuser do command, which is a quick way to grant specific users permission to perform specific system commands at the system’s root (most powerful) level.
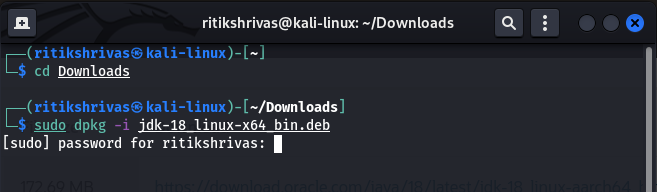
Kali Linux
Step 1.2: Now, Type the following commands to proceed with the installation
$ sudo update-alternatives –install /usr/bin/java java /usr/lib/jvm/jdk-{YOUR_JDK_VERSION}/bin/java 1
$ sudo update-alternatives –install /usr/bin/javac javac /usr/lib/jvm/jdk-{YOUR_JDK_VERSION}/bin/javac 1
Step 2: Check the Java Version
Open the terminal and enter the following commands
$ java –version
$ javac –version
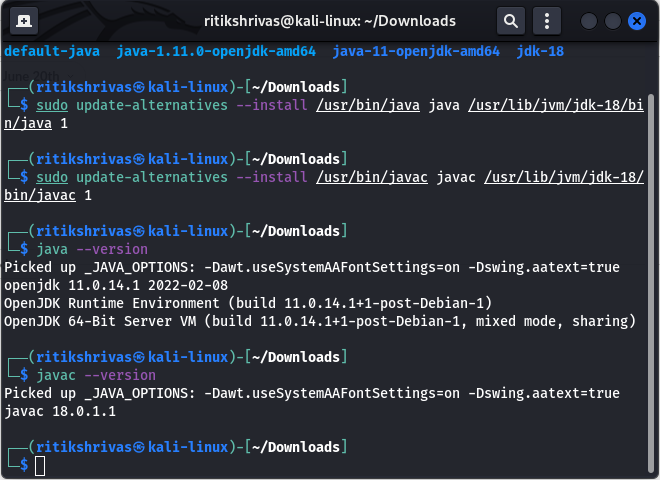
sudo
Step 3: Configure JAVA_HOME Environment Variable
After the installation is complete, we have to configure environment variables to notify the system about the directory in which jdk files are located. To find the Location of the JDK Files, run this command and copy the File Location.
$ sudo update-alternatives –config java
In order to set the environment variable, you need to edit the environment file using the following command:
$ sudo gedit /etc/environment
Step 3.1: Proceed to add JAVA_HOME=” /usr/lib/jvm/jdk-{YOUR_JDK_VERSION}”
Proceed to save and close the file.
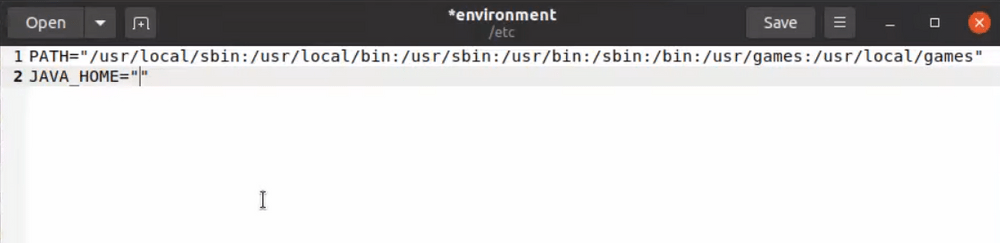
environment
Step 3.2: Now we have to refresh the environment file by using this command:
$ SOURCE /etc/environment
And echo the JAVA_HOME Path
$ echo $JAVA_HOME
Install JDK on macOS
Follow the steps below to install the Java Development Kit (JDK) on macOS. These instructions are compatible with various versions of macOS, including Mojave, Catalina, Big Sur, Monterey, Ventura, Sonoma the latest macOS Sequoia.
Step 1: Install Oracle Java Development Kit (JDK)
Proceed to Install the JDK kit by following the bootstrapped steps:
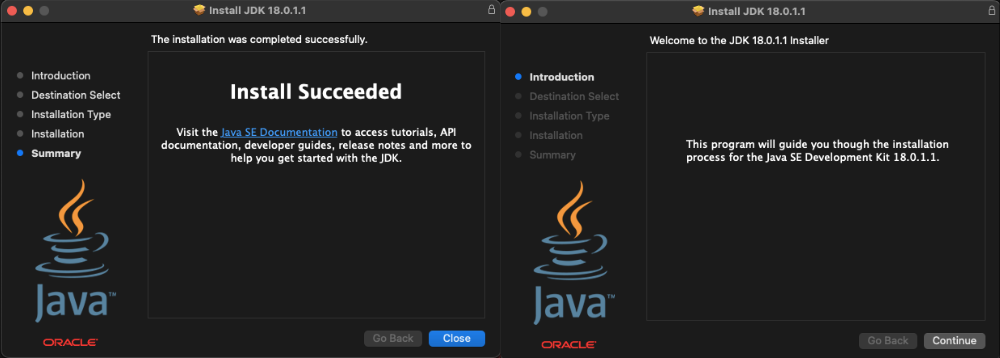
Installation
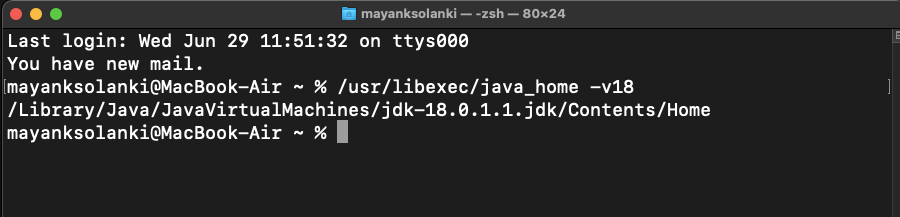
Step 2: Configure Environment Variables
Open the terminal and pass the following commands. To find the Location of the JAVA_HOME, run this command:
$ /usr/libexec/java_home -v{YOUR_VERSION}
Configure
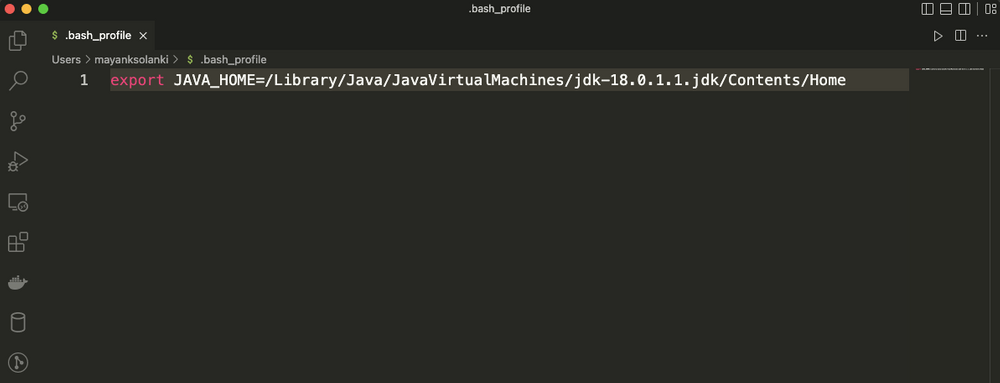
Step 2.1: We have to set this output as our JAVA_HOME Environment Variable. You can use any command or code editor to edit the file, here we are using VS Code
$ code ~/. bash_profile

Terminal
Step 2.2: At the very bottom, we have to export the path we obtained earlier i.e.
$ export JAVA_HOME=/Library/Java/JavaVirtualMachines/jdk-{YOUR_VERSION}.jdk/Contents/Home
bash
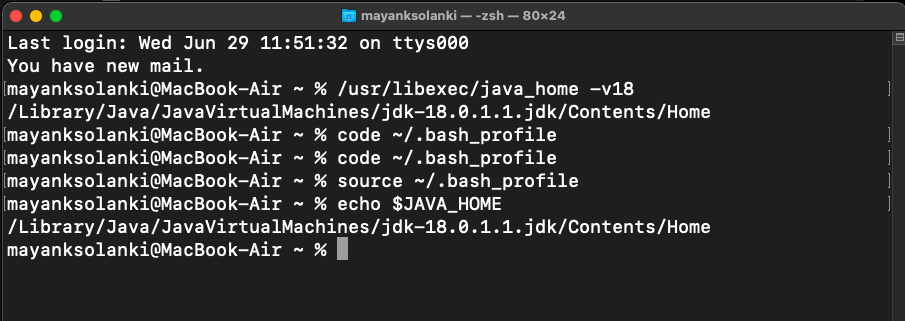
Step 2.3: Now we have to refresh the environment file by using this command:
$ source ~/.bash_profile
And echo the JAVA_HOME variable
$ echo $JAVA_HOME
Java HOME
Step 3: Verify the Java Version
In the terminal, enter the following commands
$ java -version
$ javac -version
javac
Advanatages of JDK
The Advanatages of JDK are listed below:
- Complete Development Kit: It Includes compiler (javac), JRE, JVM, and debugging tools.
- Platform Independence: It write once, run anywhere (WORA) using JVM.
- Rich Libraries & APIs: JDK has built-in support for networking, I/O, databases, and more.
- Performance Optimization: Just-In-Time (JIT) compiler boosts execution speed.
- Backward Compatibility: Older Java apps still run on newer JDK versions.
Disadvantages of JDK
The disadvantages of JDK are listed below:
- Large Memory Usage: JDK consumes more RAM compared to some lightweight languages.
- Complex Setup: Requires manual environment variable configuration.
- Slower Startup Time: JVM initialization can delay execution.
- License Restrictions: Oracle JDK requires a commercial license for business use.
Conclusion
Installing the latest JDK version is a simple process, whether you’re on Windows, macOS or Linux. By following this guide, you can setup JDK and start developing Java applications in just a few steps. You can easily download the latest jdk 23 in your system and start with Java development today.
#База знаний
-
0
Начинаем разрабатывать на Java: где взять, как установить и настроить всё, что нужно.
vlada_maestro / shutterstock
Пишет на Java. Верит в Agile. Пьёт много кофе и не любит грязный код.
Чтобы начать программировать на Java, нужно установить комплект разработчика приложений (SDK). Он позволит запускать, отлаживать и исполнять наши первые программы. Также нам понадобится среда разработки (IDE), где мы и будем писать код.
Пройдём через это вместе. Установим JDK в Windows, Ubuntu и macOS, и IntelliJ IDEA тоже в Windows, Ubuntu и macOS. Поехали!
Java Development Kit (JDK) — это комплект ПО для разработчиков приложений на Java. Стандартная установка включает в себя интерпретатор, облегчённый интерпретатор JRE, компилятор, библиотеку Java-классов, отладчик, средства архивации и сжатия jar и другое.
Чтобы установить JDK в Windows, нужно:
- загрузить актуальную версию пакета,
- установить его,
- настроить переменные окружения.
Нам нужна бесплатная версия — AdoptOpenJDK (она есть под Windows, macOS, Ubuntu и другие платформы).
Идём сюда и выбираем версию JDK (актуальны версии 8+), виртуальную Java-машину (JVM) и свою платформу.
Я выбрал OpenJDK 11 (LTS), HotSpot и Windows x64 jdk соответственно:
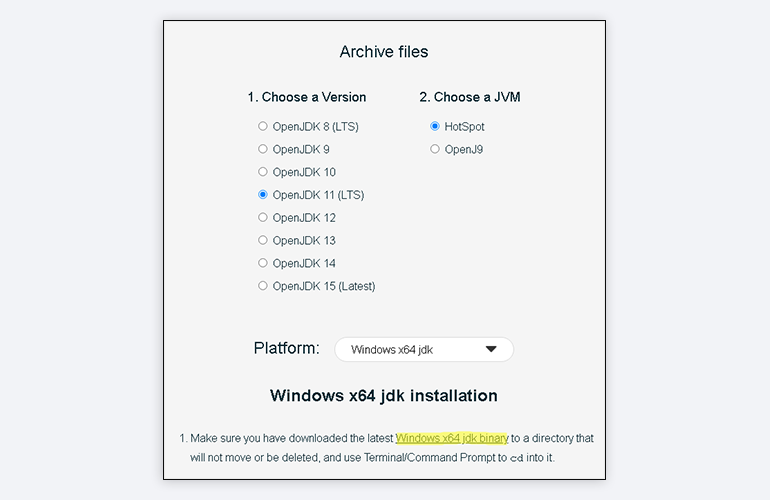
Скачиваем файл по появившейся ссылке (я выделил её жёлтым на скрине выше).
Извлекаем скачанный архив в папку C:\Program Files\Java\
При этом будет создана подпапка jdk-*номер версии*, а внутри неё появится папка bin.
В результате полный путь до папки bin у меня выглядит так:
C:\Program Files\Java\jdk-11.0.2\bin
Нам нужно создать системную переменную JAVA_HOME, которая будет хранить путь до нашей версии JDK. Это понадобится программам для работы с проектами Java.
Заходим в Панель управления → Система → Дополнительные параметры системы → Дополнительно
А можно и прямо в Панели управления вбить в поиск слово «переменных» (без кавычек). ОС предложит варианты, из которых выбирайте «Изменение системных переменных среды».
У вас откроется окно:
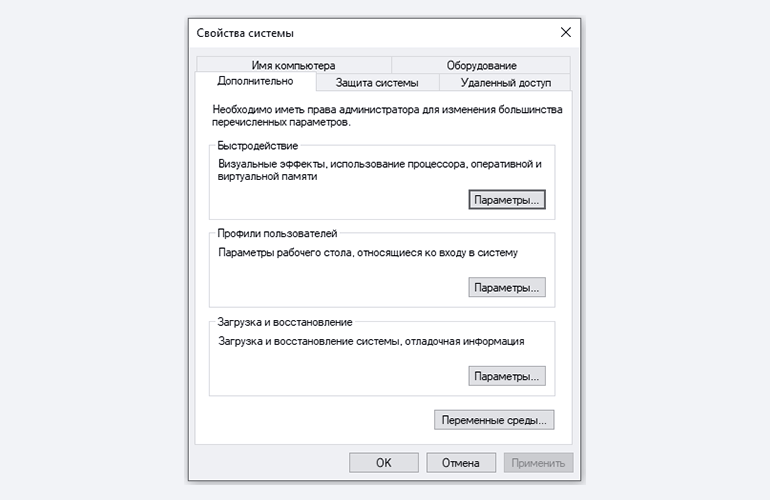
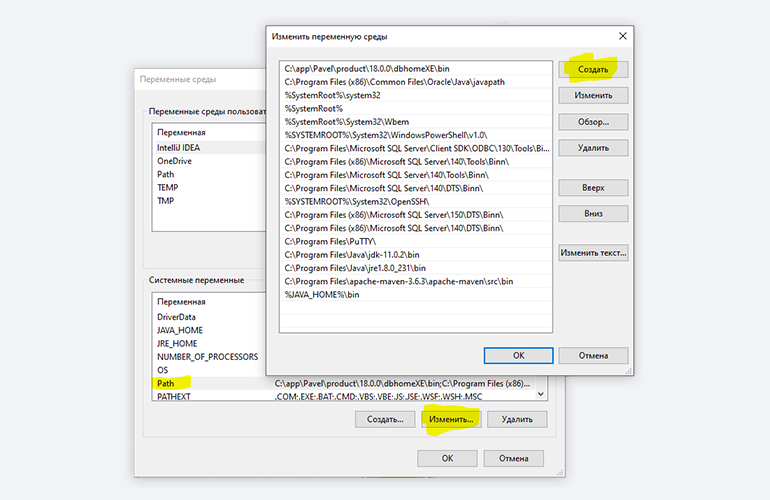
Здесь жмём на кнопку «Переменные среды».
В новом окне для раздела «Системные переменные» кликаем «Создать». В «Имя переменной» вводим JAVA_HOME (именно так, латиницей в верхнем регистре), а в поле «Значение переменной» подставляем наш путь C:\Program Files\Java\jdk-*номер версии*:
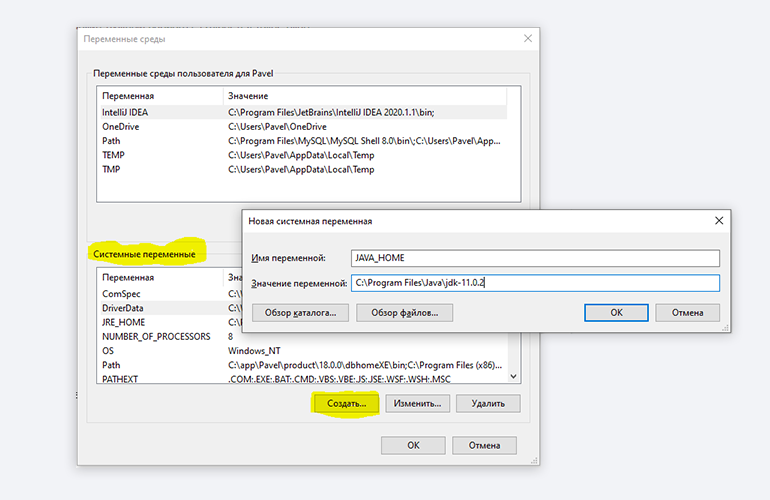
Далее в разделе «Переменные среды…» редактируем системную переменную Path. Нужно добавить в неё путь к папке с исполняемыми файлами Java, а именно: %JAVA_HOME%\bin (соблюдайте регистр символов):
Перезагружаем Windows.
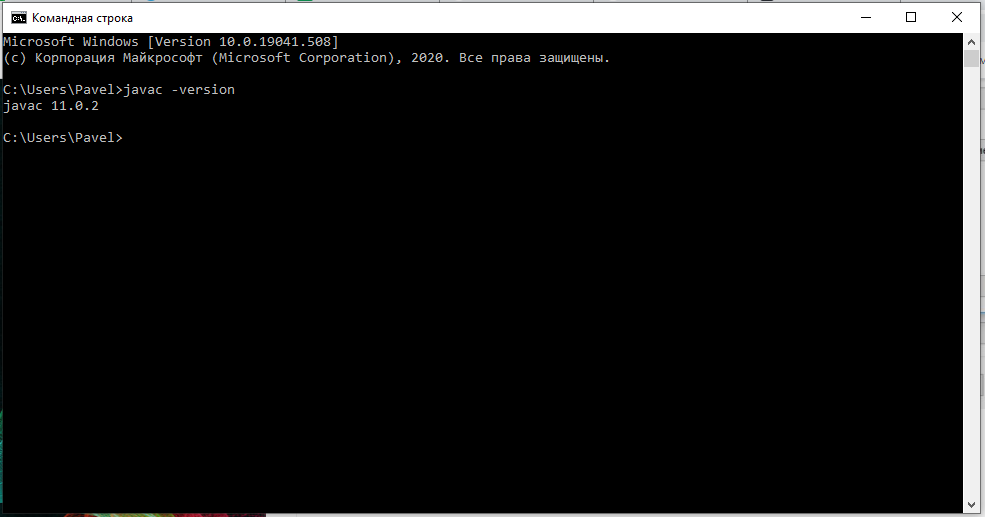
Запускаем Командную строку Windows. Для этого нажимаем Win + R, а в появившемся окне вводим cmd.exe и жмём на Enter.
В открывшейся консоли набираем javac -version и жмём ввод.
Если установка прошла успешно, то ответ покажет версию вашего компилятора:
Рассмотрим установку JDK на одном из самых популярных дистрибутивов Linux — Ubuntu 20.04 (LTS).
Проще всего установить версию, которая входит в пакет Ubuntu. По умолчанию в Ubuntu 20.04 входит версия Open JDK 11.
Открываем терминал сочетанием клавиш Ctrl + Alt + T и обновляем базу данных пакетов с помощью APT:
Проверяем ранее установленные версии командой:
Если установка уже выполнялась, то мы увидим что-то такое:

Для запуска любых приложений Java нужна JRE (Java Runtime Environment — среда выполнения для языка Java). Но для компиляции и разработки программ требуется JDK (Java Development Kit).
Чтобы установить JRE, вводим в консоль:
$ sudo apt install default-jre
Для установки JDK — команду:
$ sudo apt install default-jdk
Вводим команду:
Ответ должен выглядеть примерно так:
Этот способ установки использует HomeBrew (менеджер недостающих пакетов для macOS).
Прежде всего нужно добавить репозиторий в HomeBrew. Для этого открываем терминал (Cmd + N) и вводим:
$ brew tap AdoptOpenJDK/openjdk
Устанавливаем OpenJDK 11 командой:
$ brew cask install adoptopenjdk11
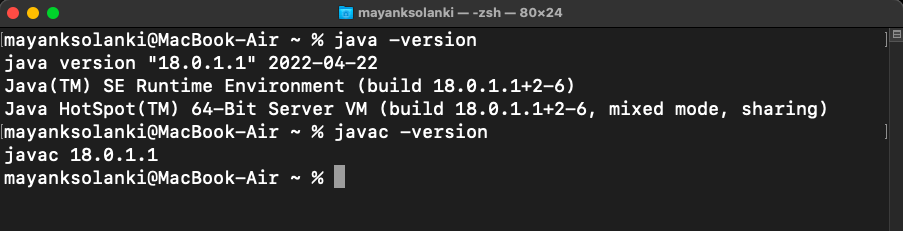
Вводим:
Ответ должен выглядеть примерно так:
openjdk version "11.0.2" 2019-01-15
OpenJDK Runtime Environment AdoptOpenJDK (build 11.0.2+9)
OpenJDK 64-Bit Server VM AdoptOpenJDK (build 11.0.2+9, mixed mode)
IntelliJ IDEA — это интегрированная среда разработки (IDE), то есть система программных средств для создания проектов на разных языках программирования.
Сегодня это самая популярная IDE для языка Java. А ещё есть Eclipse, NetBeans и немало других, но мы рекомендуем именно IDEA, потому что даже её бесплатная версия обладает широкой функциональностью, подходит для профессиональной разработки и вообще делает Java проще в использовании.
В IDE обязательно входят:
- текстовый редактор для написания кода (он знает синтаксис нужных языков);
- компилятор;
- отладчик.
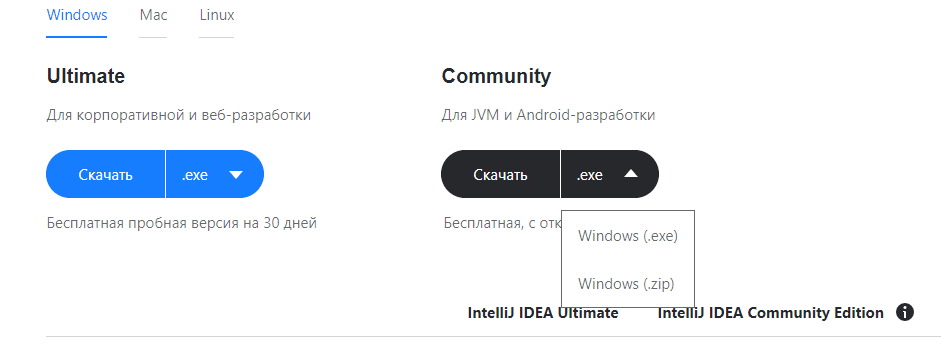
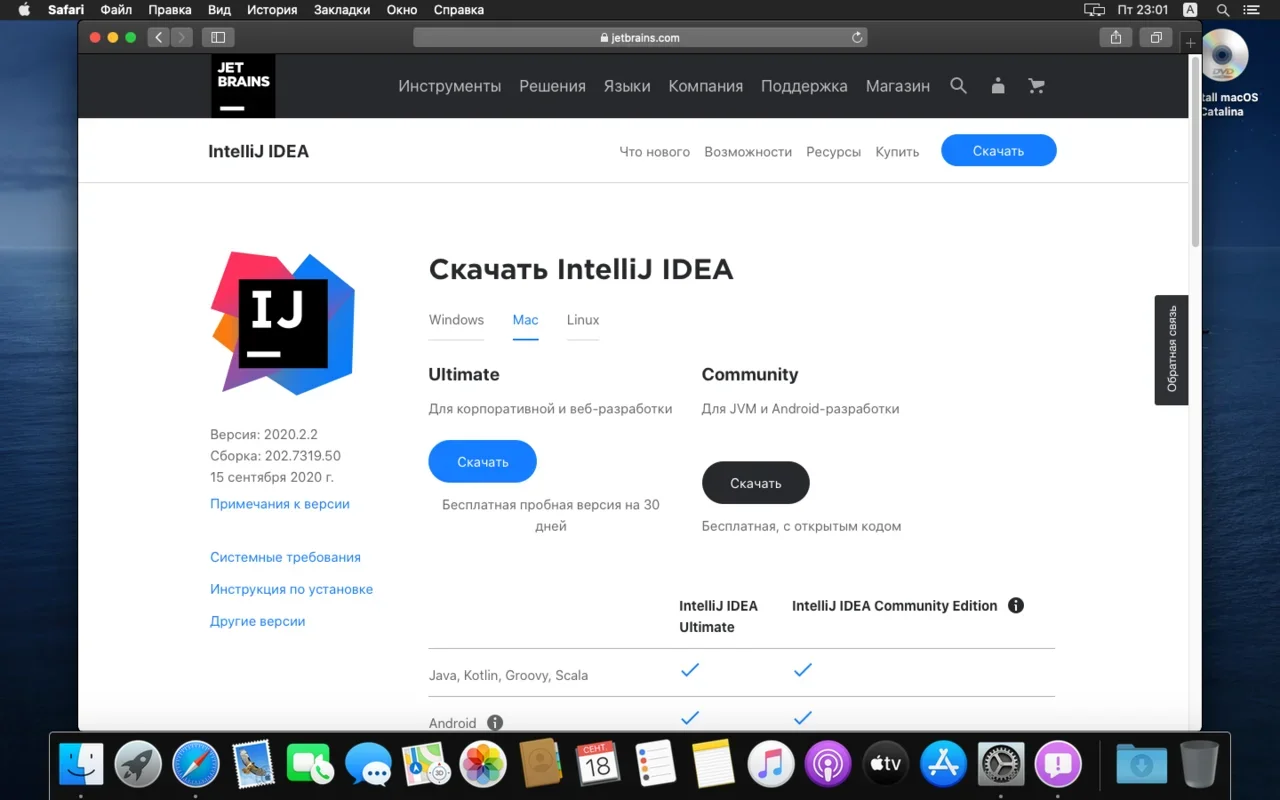
IntelliJ IDEA доступна в бесплатной (Community) и платной (Ultimate) версиях. Чем они различаются, видно на скрине ниже:

Пока что нам хватит возможностей бесплатной версии.
На заметку: IntelliJ предлагает студентам и преподавателям свободный доступ к своим продуктам.
Заходим сюда и качаем версию для Windows.
Запускаем скачанный файл .exe:
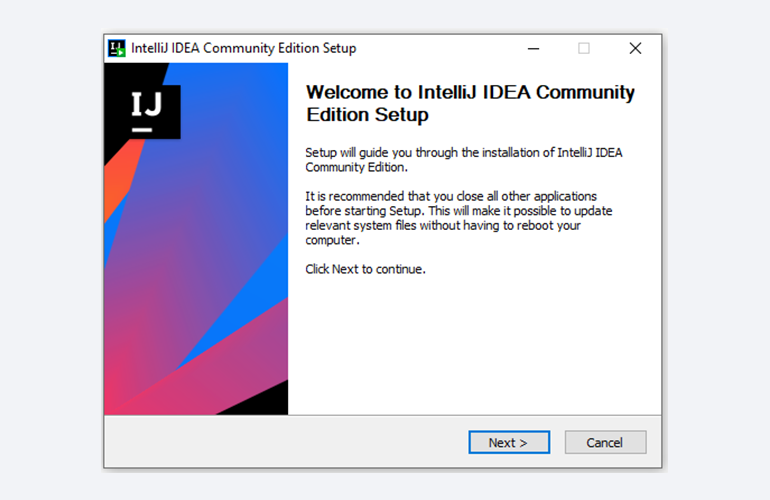
Жмём Next (Далее) и выбираем путь для установки:
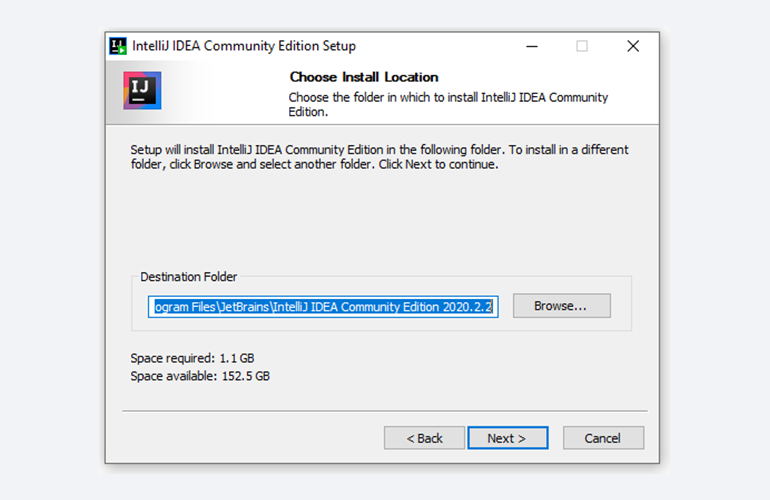
Снова Next, и настраиваем параметры установки:
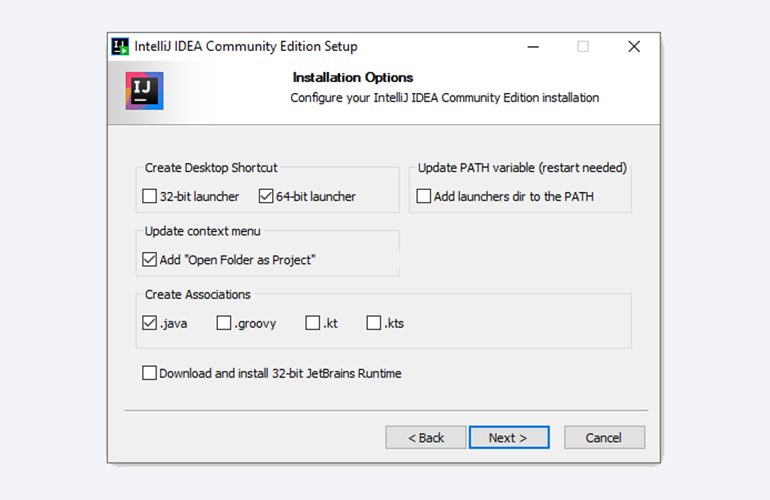
В общем случае это:
- 64-bit launcher — для запуска 64-разрядной версии приложения (будет создан ярлык на рабочем столе);
- Add ”Open Folder as Project“» — позволяет открывать папки с исходниками как проекты прямо через контекстное меню;
- .java — файлы такого типа (с таким расширением) будет открывать IDEA (по умолчанию и через контекстное меню).
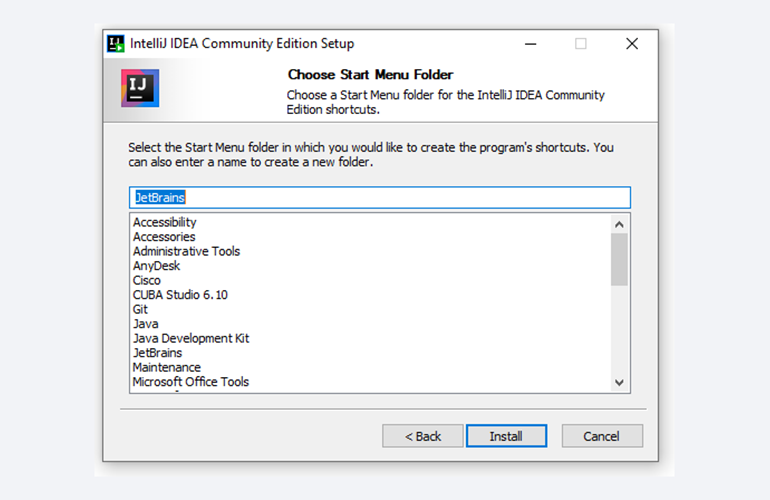
Кликаем Next (Далее) и выбираем папку для ярлыков IDEA (оставляем по умолчанию):
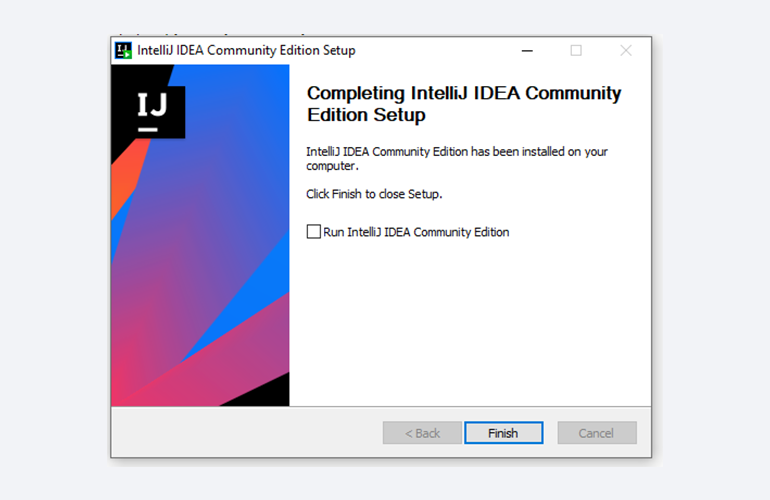
Нажимаем Install (Установить), после чего стартует установка:

Дожидаемся её окончания и жмём Finish (Завершить):
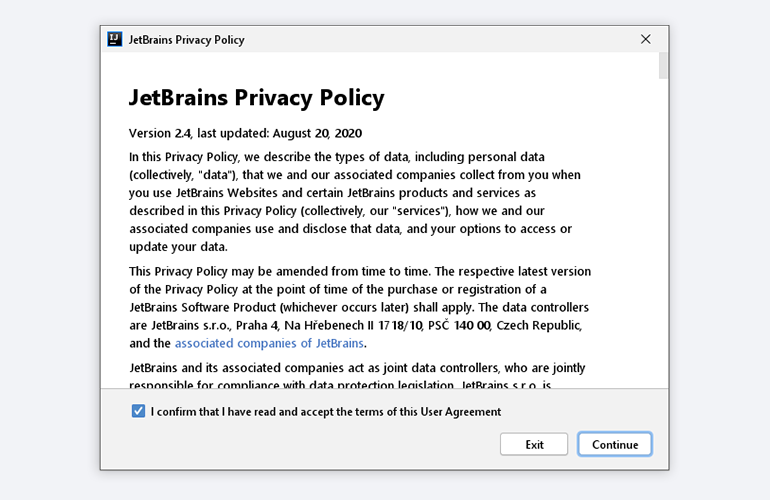
При первом запуске принимаем пользовательское соглашение и нажимаем Continue (Продолжить):
Далее выбираем тему оформления (доступны тёмная и светлая):
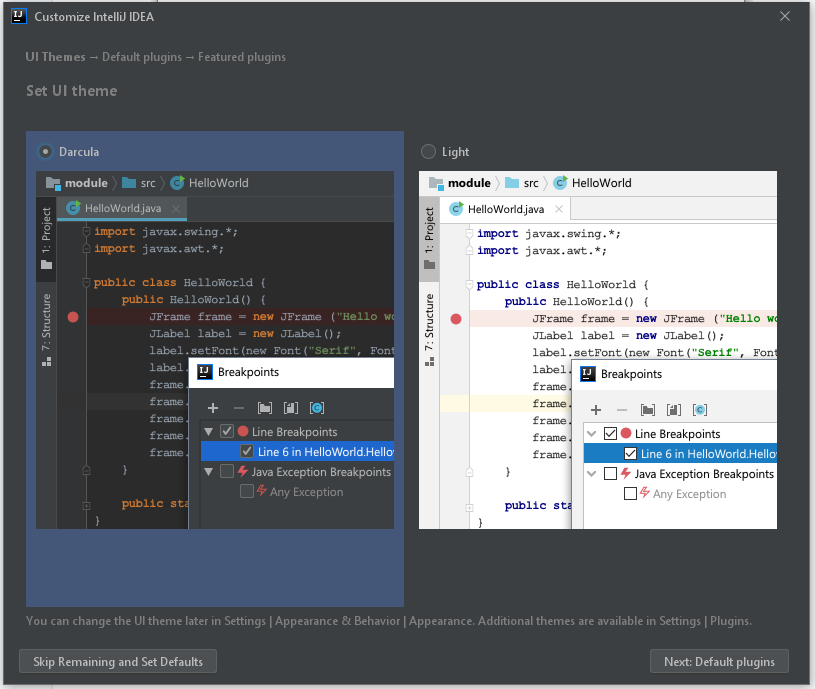
Жмём Next: Default plugins и переходим к выбору устанавливаемых плагинов:
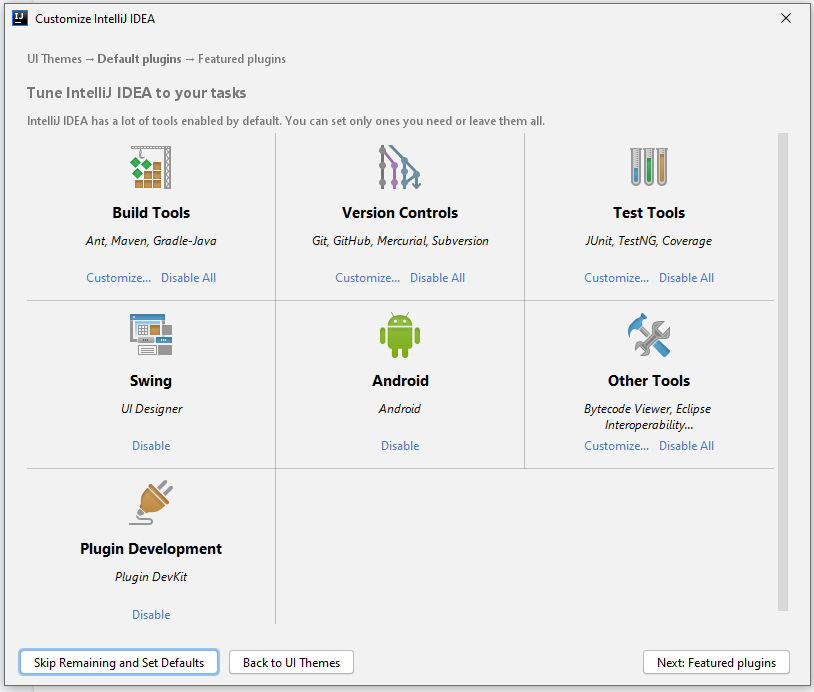
Если не знаете, что вам точно пригодится, — оставляйте всё как есть. А если, например, с Андроидом вам не работать — выключите соответствующий пункт.
Не волнуйтесь, если надобавляете лишнего или о чём-то забудете. Всё можно будет переиграть — в настройках среды.
После чего нажмите на кнопку Next: featured plugins и выберите другие нужные плагины (или оставляйте всё по умолчанию):
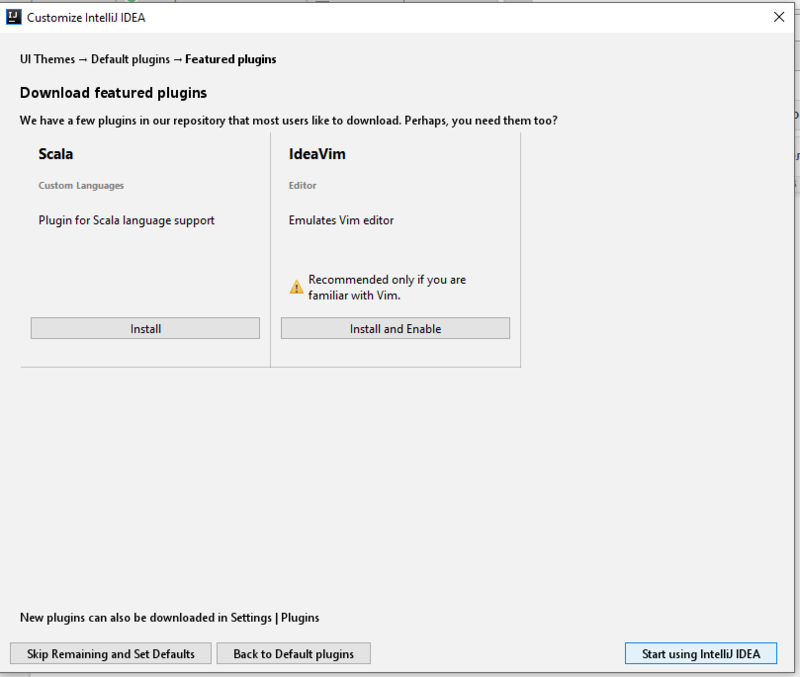
И наконец, нажимаем Start using IntelliJ IDEA.
Вас встретит начальный экран среды разработки (Welcome screen). Здесь можно создать новый проект, открыть или импортировать существующий, а также скачать проект из системы контроля версий:
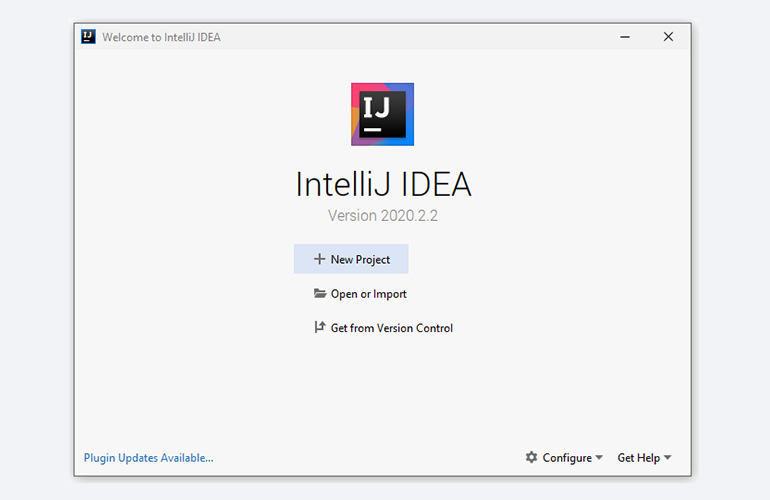
Если вы видите такой же экран — поздравляю, установка и настройка прошли успешно! Приятного обучения!
Здесь всё даже легче, чем в Windows. Для начала качаем версию для macOS отсюда (о различии между редакциями Community и Ultimate читайте выше — в пункте про установку на Windows):
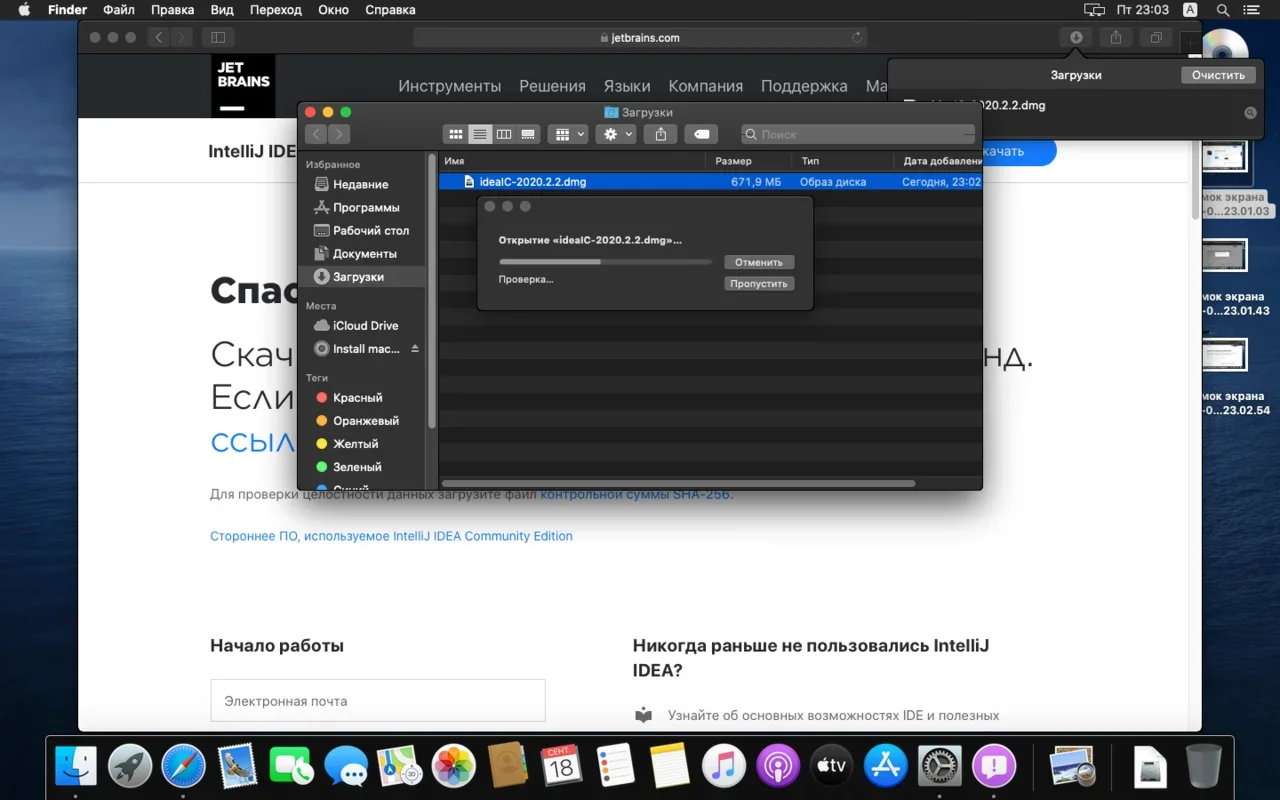
Открываем скачанный файл .dmg:
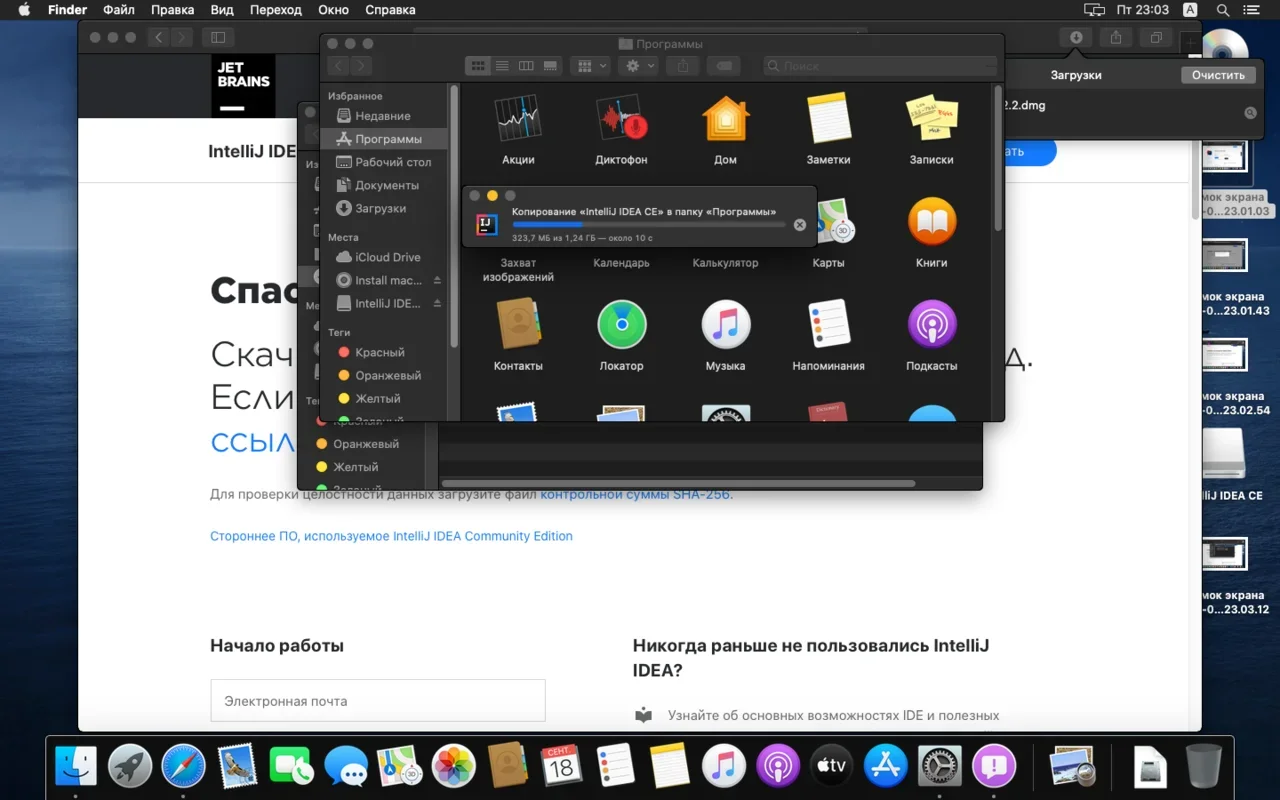
Копируем файл в «Программы»:
Читаем предупреждение ОС и жмём «Открыть»:
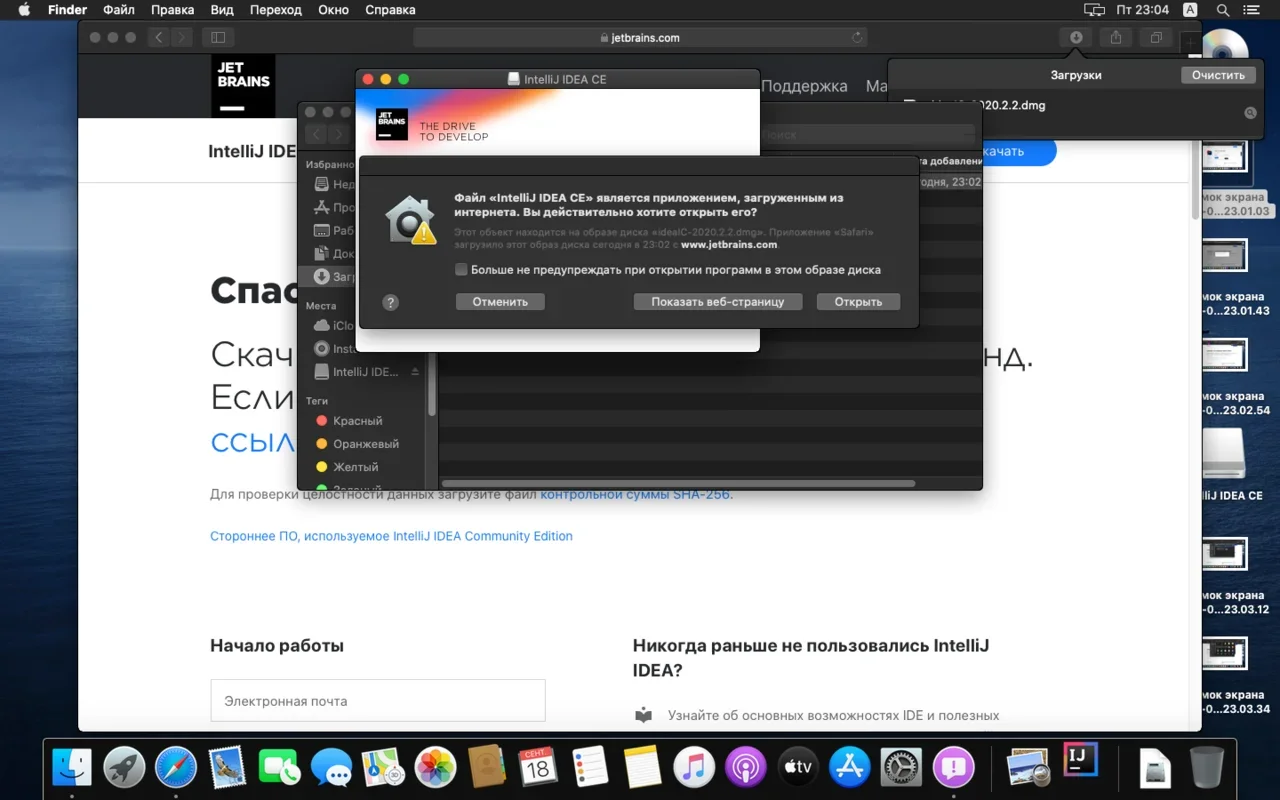
Принимаем пользовательское соглашение и жмём кнопку Continue (Продолжить):

Теперь приложением можно пользоваться. Приятного обучения!
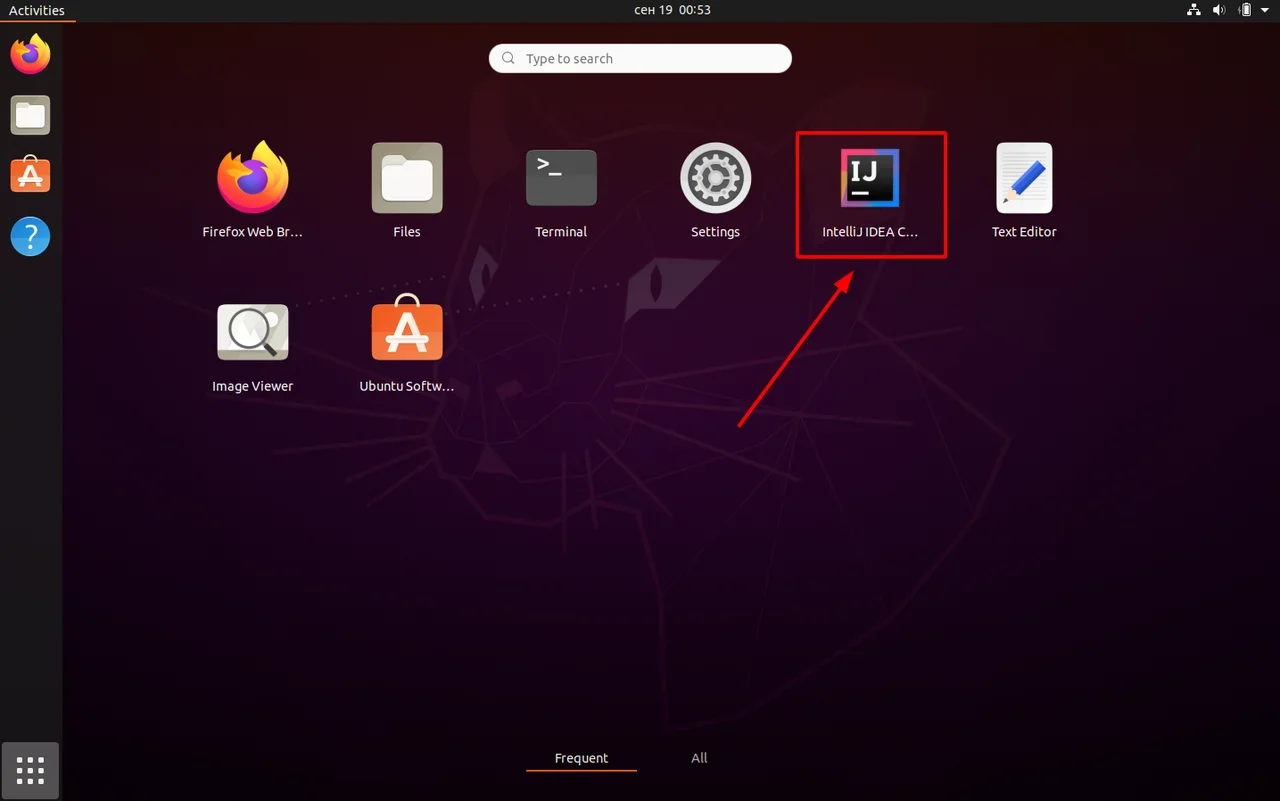
Для установки IntelliJ IDEA открываем Центр приложений Ubuntu:
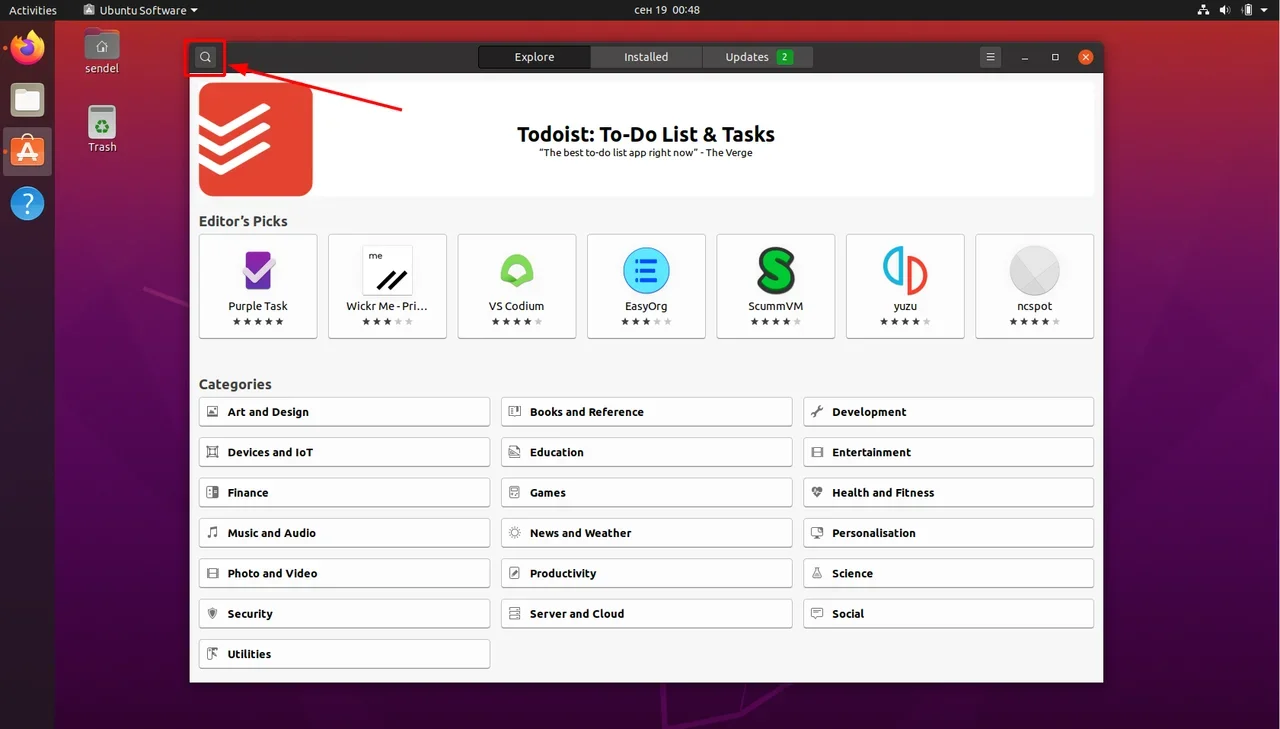
Вводим в поиск слово «Intellij» (без кавычек). Нам нужна IDEA Community (о различии между редакциями Community и Ultimate читайте выше — в пункте про установку на Windows):
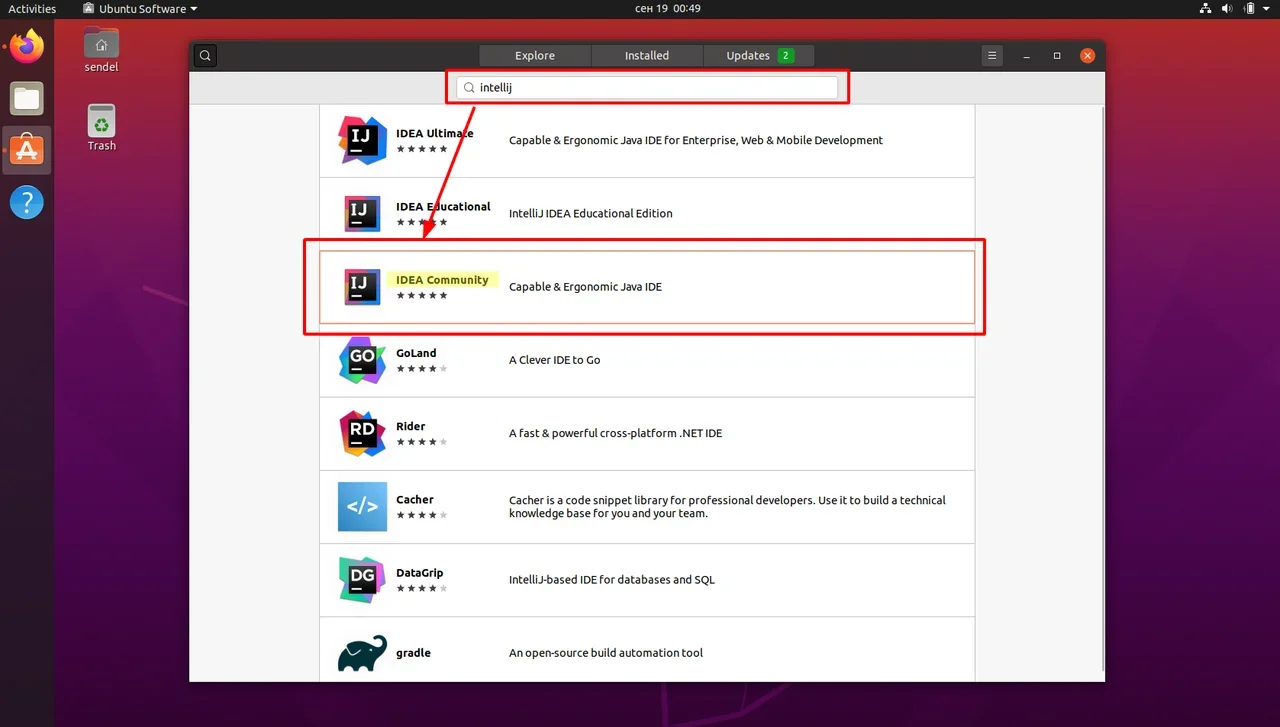
Выбираем версию и нажимаем кнопку Install (Установить):
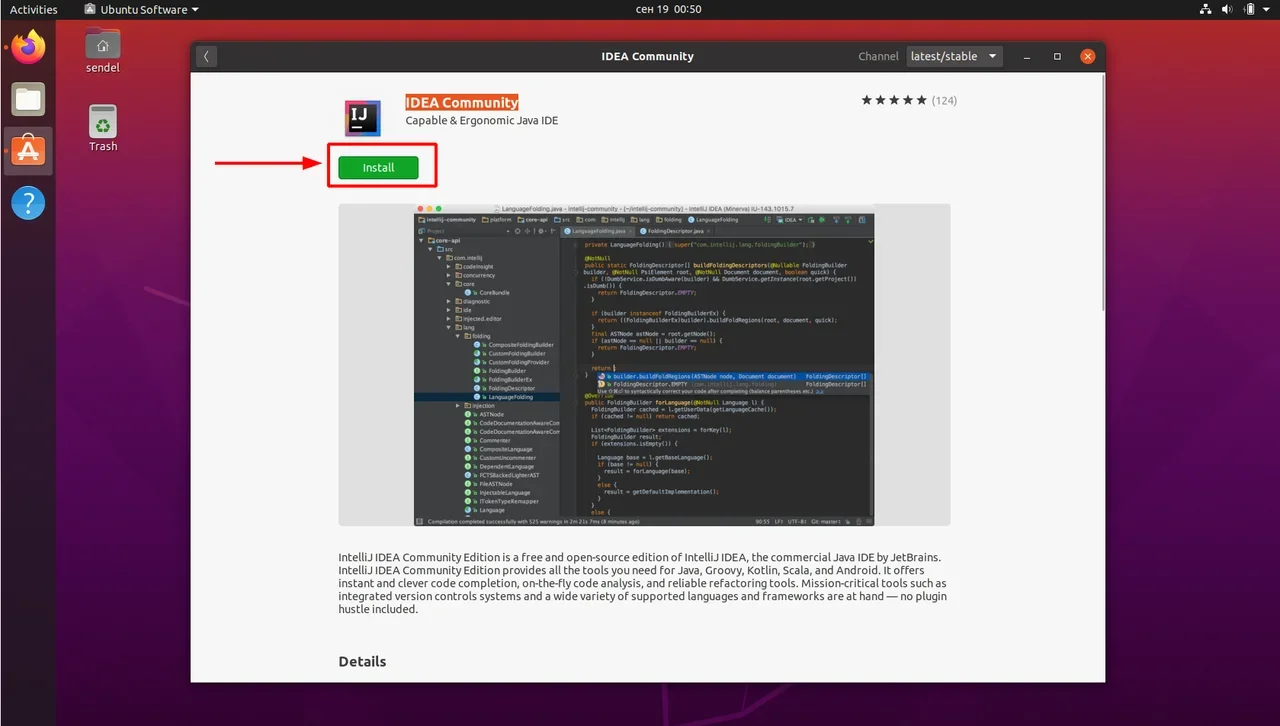
После установки видим IDEA в меню программ:
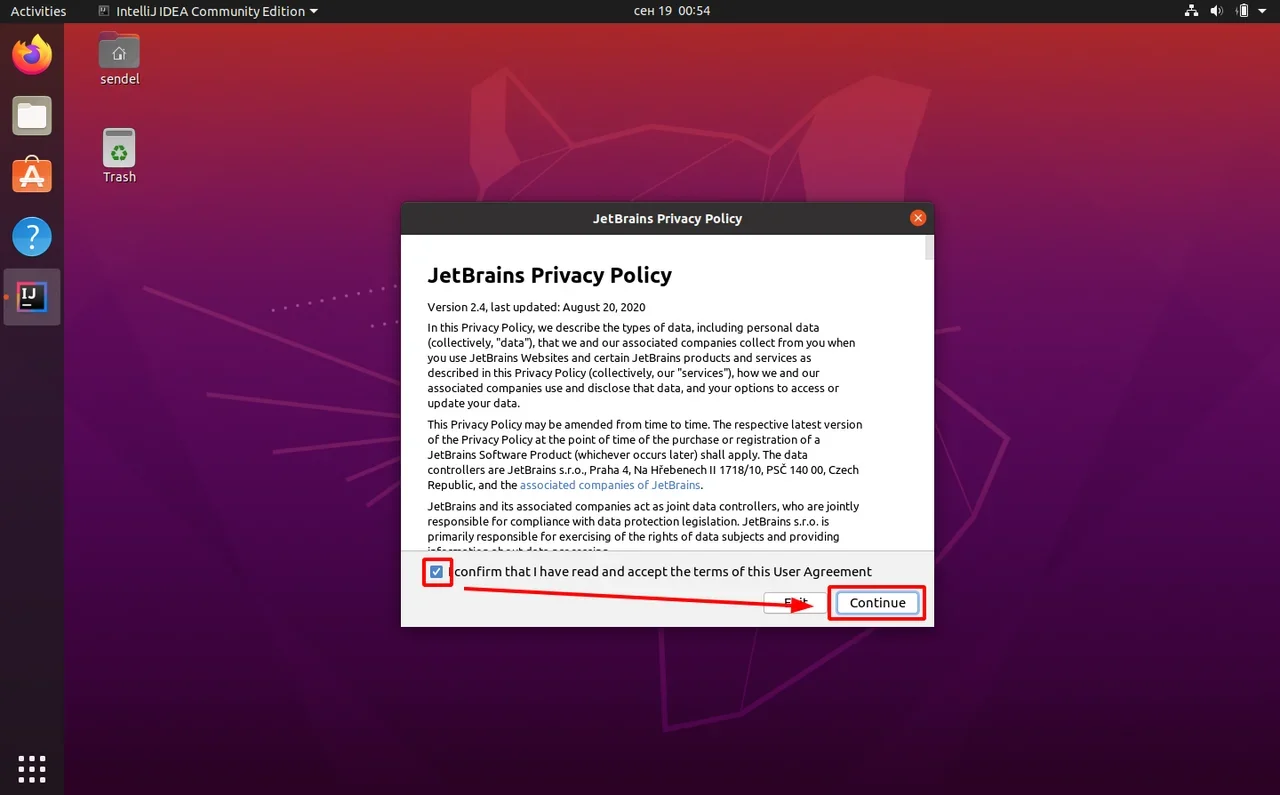
Запускаем, принимаем пользовательское соглашение и нажимаем кнопку Continue (Продолжить):
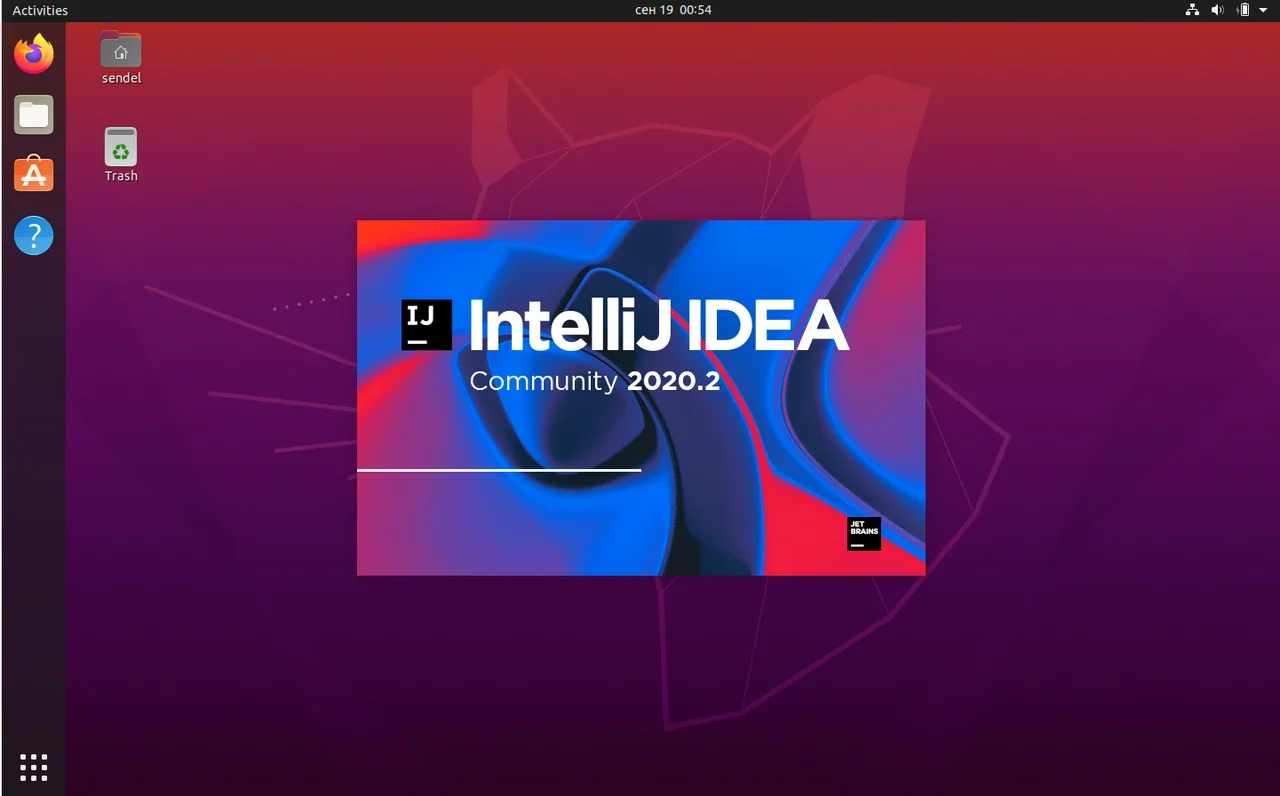
Вы увидите экран загрузки:
Далее вас встретит начальный экран (Welcome screen). Здесь можно создать новый проект, открыть или импортировать существующий, а также скачать проект из системы контроля версий.
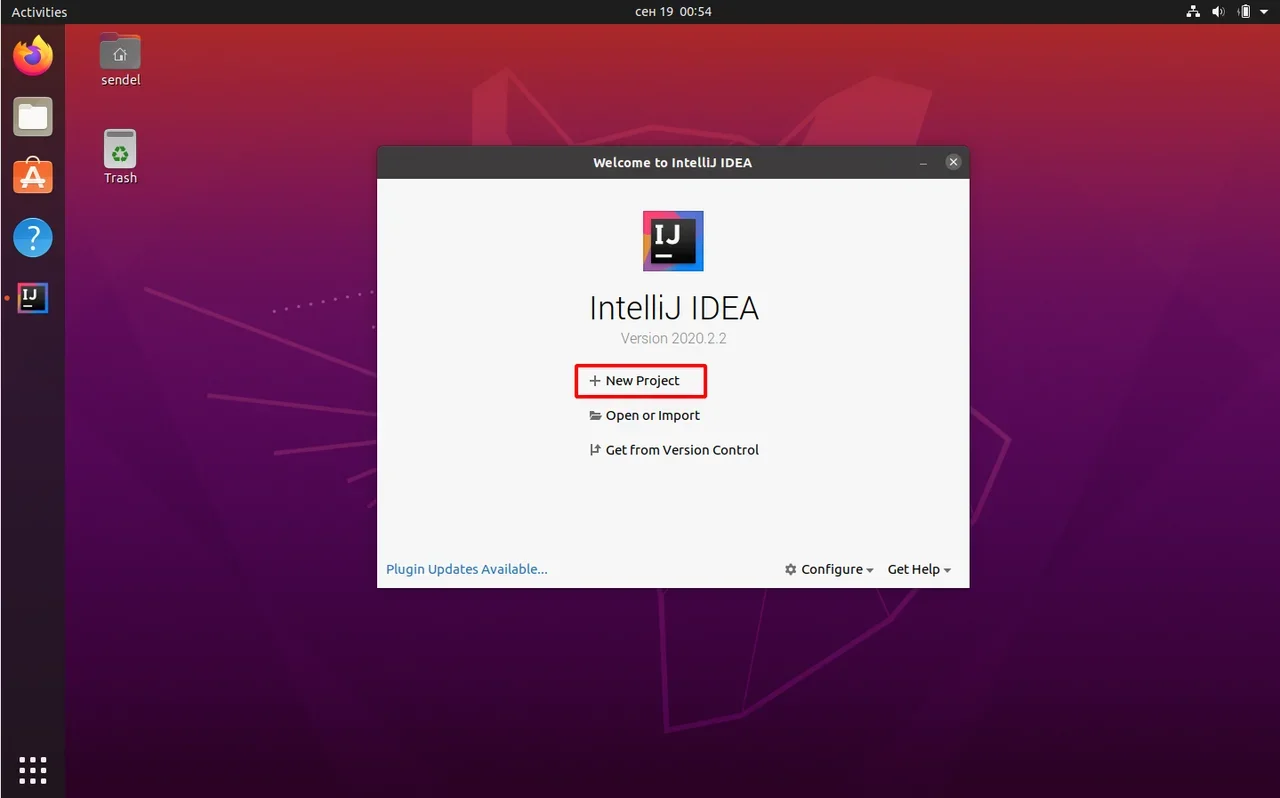
Если вы видите такой же экран — поздравляю, установка и настройка прошли успешно! Приятного обучения!

Курс с трудоустройством: «Профессия Java-разработчик»
Узнать о курсе