
- Home
- Blog
-
Step-By-Step Procedure to Install OpenSSL on a Windows Machine
/
/

OpenSSL is an open-source cryptographic library that provides a robust toolkit for securing communications and creating, managing, and verifying digital certificates. It is widely used for implementing Secure Sockets Layer (SSL) and Transport Layer Security (TLS) protocols to encrypt connections between clients and servers.
Some of the common uses of OpenSSL include setting up private certificate authorities, generating public/private key pairs, creating certificate signing requests, exporting private key from certificates, converting between certificate formats like PEM and PFX, validating SSL connections, and more.
In this comprehensive guide, we will cover how to download, install, and configure OpenSSL on Windows machines. While Linux distributions come with OpenSSL pre-installed, Windows users need to manually install OpenSSL by getting the binaries from trusted third-party sources.
We will go over the prerequisites, walk through the installation steps, explain how to set up environment variables, and verify the installation to ensure OpenSSL is ready to use on your Windows PC or server. Whether you are a developer, IT admin, or security professional, this step-by-step procedure will help you get OpenSSL running smoothly on your Windows systems.
What is OpenSSL and Why Should We Install OpenSSL on a Windows PC?
OpenSSL is an open-source cryptographic library that provides a robust toolkit for securing communications and applications. Though primarily used on Linux, installing OpenSSL on Windows unlocks powerful capabilities. OpenSSL is mostly for system administrators, developers, and Windows users who wants to implement SSL/TLS connections in their apps and scripts. It enables generating X.509 certificates and certificate signing requests (CSRs) for securing websites and internal infrastructure. Developers can call OpenSSL crypto functions to encrypt data and implement PKI authentication in their apps.
System administrators can manage certificates, test secure connections, and integrate OpenSSL into automation scripts. OpenSSL also helps troubleshoot connection issues by analyzing network traffic and certificates.
There are a lot of things you can do using OpenSSL. Only a few of them are listed here:
-
You can create your own Certificate Authority and issue certificates on your network.
-
Convert digital certificates from one to another format.
-
Export or Import private keys from the certificates.
-
Validate the HTTPS connections to the destination website.
-
Verify the certificate of the destination website.
-
Run benchmark tests of your server and remote website.
-
Extract information like issuer, subject, issued and expiring dates, and fingerprint from certificates.
-
Create CSR.
-
Decode CSR and Certificates to verify contents.
You can enjoy the features of OpenSSL if you have installed it on your Windows machine. Before we begin the procedure to install OpenSSL on the Windows platform, let’s see the prerequisites.
Download OpenSSL Installer for Windows
Before we jump into the installation of OpenSSL on a Windows PC, let’s cover a few things about the Linux package. As we said in the introduction, OpenSSL will come as part of default installation packages in all the popular Linux distributions, even if you need a specific version of OpenSSL for your Linux machine, you can download the source code of OpenSSL on from its official website alternatively from here and compel it on Linux.
Well, If you are looking to download the OpenSSL package for your Windows machine from its official website, you can’t. It’s because OpenSSL doesn’t release official OpenSSL installers for Windows. You should depend on a few third-party distributors who distribute OpenSSL installer files for Windows platforms. OpenSSL has published the list of all trusted third-party distributors on its Wiki page. Please download and install only from these listed third-party sites.
Disclaimer Message from OpenSSL: The listing of these third-party products does not imply any endorsement by the OpenSSL project, and these organizations are not affiliated in any way with OpenSSL other than by reference to their independent websites here. In particular, any donations or payments to any of these organizations will not be known to, seen by, or in any way benefit the OpenSSL project.
– OpenSSL
Note: OpenSSL says none of these vendors are partnered with OpenSSL, so issues with these installers should be directly communicated with the distributors. OpenSSL doesn’t hold any responsibilities for these installers. Use these OpenSSL-derived products at your own risk; these products have not been evaluated or tested by the OpenSSL project.
List of Third-Party OpenSSL Distributions:
| Product | Description | URL |
|---|---|---|
| OpenSSL for Web (using WebAssembly) | OpenSSL 3.0 ported to WebAssembly (in October 2021). Uses Emscripten and xterm.js to emulate a terminal in your browser. WASI binaries are supported too. The Wasm execution happens using WebWorkers if the browser supports them. Originally developed for the cryptology playground “CrypTool-Online”. Code is open-source on GitHub. | OpenSSL-React app: https://github.com/cryptool-org/openssl-webtermBasic Wasm terminal: https://github.com/cryptool-org/wasm-webtermRunning sample: https://www.cryptool.org/en/cto/openssl |
| OpenSSL for Windows | Works with MSVC++, Builder 3/4/5, and MinGW. Comes in form of self-install executables. | https://slproweb.com/products/Win32OpenSSL.html |
| OpenSSL for Windows | Pre-compiled Win32/64 libraries without external dependencies to the Microsoft Visual Studio Runtime DLLs, except for the system provided msvcrt.dll. | https://indy.fulgan.com/SSL/ |
| OpenSSL for Windows | Reproducible builds with latest MinGW-w64, 64/32-bit, static/dynamic libs and executable. | https://github.com/curl/curl-for-win |
| OpenSSL for Solaris | Versions for Solaris 2.5 – 11 SPARC and X86 | http://www.unixpackages.com/ |
| OpensSSL for Windows, Linux, OSX, Android | Pre-compiled packages at conan.io package manager:Windows x86/x86_64 (Visual Studio 10, 12, 14, 15)Linux x86/x86_64 (gcc 4.6, 4.8, 4.9, 5, 6, 7)OSx (Apple clang).Cross-building ready recipe: Linux ARM, Android. | https://www.conan.io https://conan.io/center/openssl |
| OpenSSL for Windows | Pre-compiled Win32/64 1.0.2, 1.1.0, 1.1.1 and 3.0 libraries without external dependencies, primarily built for François Piette’s Internet Component Suite (ICS) for Embarcadero (Borland) Delphi and C++ development tools, but may be used for any Windows applications. The OpenSSL DLLs and EXE files are digitally code signed ‘Open Source Developer, François PIETTE’, so applications can self verify them for corruption. | http://wiki.overbyte.eu/wiki/index.php/ICS_Download |
| OpenSSL for Windows | OpenSSL 3.1, 3.0, and 1.1.1 pre-compiled for Microsoft Windows with no external dependencies. The binary distributions can be used standalone or integrated into any Windows application. Installer, EXEs and DLLs are digitally signed with ‘FireDaemon Technologies Limited’ Extended Validation (EV) code signing certificate. | https://www.firedaemon.com/get-openssl |
| OpenSSL for NonStop | Pre-compiled NonStop ia64/x86 1.0.2, 1.1.1 executables and libraries for the HPE NonStop Operating Systems. Threaded versions are included. The SPT version depends on FLOSS, otherwise there are no other dependencies. 32-bit versions are available. The builds are done by the ITUGLIB Technical Committee as part of Connect. | https://ituglib.connect-community.org/apps/Ituglib/SrchOpenSrcLib.xhtml |
How To Install OpenSSL On The Windows Platform?
The installation procedure is very simple and straightforward. Since OpenSSL does not provide official Windows installers, you need to download OpenSSL from trusted third-party sources listed on the OpenSSL Wiki.
We used Windows 11 64-bit and OpenSSL v 3.1.3 in this tutorial post.
Step 1. Download OpenSSL Installer
Visit any of the above sites and download the appropriate OpenSSL installer for your Windows version (32-bit or 64-bit). Make sure to pick the correct installer package for your machine.
Step 2. Run the OpenSSL Installer
Once downloaded, run the OpenSSL installer (.exe file) by double-clicking on it.
Accept the license agreement and choose the installation directory. The default is C:\Program Files\OpenSSL-Win64 but you can customize it.
The installer will copy all the required DLLs, and libraries, including files and executables. The installation typically finishes within a minute.
Step 3. Installation in progress…….
Step 4. Finish OpenSSL Installation
Once the installation completes, the setup wizard will prompt you to finish the installation. Click Finish to complete the OpenSSL installation process.
Step 5. Set Environment Variable
If you just want to set the environment varibles only for a login session, then run these commands.

>set OPENSSL_CONF=C:\Program Files\OpenSSL-Win64\bin\openssl.cfg
>set Path= C:\Program Files\OpenSSL-Win64\bin
If you want to set the env variable for permanently, then add OPENSSL_CONF and Path environment variable on System Properties.
Open Run using ‘Windows’ + ‘r’ then type ‘sysdm.cpl‘. Go to Advanced > Environment Variable.
Set OPENSSL_CONF and Path variables.
Step 6. Verify the Installation
To verify that OpenSSL is installed correctly and added to PATH, open a new command prompt and run:
openssl versionThis will print the installed OpenSSL version and confirm the installation was successful.
You can also check all available commands by running:
openssl helpThis completes the installation of OpenSSL on Windows. You will see openssl.ext file in C:\Program Files\OpenSSL-Win64\bin directory.
Troubleshooting OpenSSL Issues
The real problem is not in installing OpenSSL on your Windows computer. The real problem encountered after the installation is when you start using OpenSSL. Many people reported that they were unable to run OpenSSL commands on their computers. This could be due to one of these reasons:
-
Incorrect environment variables – OpenSSL requires certain env vars like OPENSSL_CONF to be set properly. Not configuring these variables correctly can prevent things from working.
-
OpenSSL path not added – The OpenSSL install location needs to be added to the PATH env variable. Failing to do so will make the openssl command unrecognized.
-
Configuration issues – OpenSSL depends on its config file openssl.cnf. If this file is missing or corrupted, strange errors can occur.
-
Old OpenSSL version – OpenSSL releases new versions periodically with security fixes and improvements. Using an outdated OpenSSL can expose vulnerabilities. Upgrade to a newer version when possible.
-
Wrong architecture – Getting 32-bit and 64-bit versions mixed up can lead to errors. Make sure to install the version that matches your Windows architecture.
-
Missing DLL files – OpenSSL relies on certain DLL files like libeay32.dll and ssleay32.dll. If these files are missing or not in the system path, OpenSSL commands will fail.
The first thing you should do is to download the correct installer file and reinstall the OpenSSL. This solves problems like missing DLL and wrong architecture. Generally, version-related issues were seen least oftentimes. You can try fixing version-related issues by reinstalling a different version.
If your problem still persists, then the reason could either be with environment variables or OpenSSL configuration files. Let’s try to troubleshoot.
You should start troubleshooting by running openssl version command. If you get any error, ensure you configured OPENSSL_CONF and Path environment variable as per step 5. We should tell you about the two prominent configuration files openssl.cfg and openssl.cnf. People often get confused with these files. Just pay attention to the extensions .cfg and .cnf. You should set the environment variable OPENSSL_CONF to openssl.cfg file.
Let’s understand openssl.cfg and openssl.cnf configuration files in OpenSSL.
-
openssl.cfg – This is the default configuration file that comes with OpenSSL. It contains default settings for OpenSSL when no other config file is specified. The openssl.cfg file is located in the apps subfolder of the OpenSSL install directory.
-
openssl.cnf – This is the recommended main configuration file for OpenSSL. It contains sections for settings like certificate authority locations, certificate policies, default algorithms and protocols etc. The openssl.cnf file allows extensive customization of OpenSSL behavior.
It may sound similar. Let’s see the difference between to know more about these two files.
The main differences between openssl.cfg and openssl.cnf are:
-
openssl.cfg contains minimal default settings just to get OpenSSL working out of the box. openssl.cnf has extensive options to control OpenSSL behavior.
-
openssl.cfg is automatically loaded if no other config is specified. openssl.cnf must be explicitly specified using the -config option.
-
openssl.cfg is limited and intended for initial testing. openssl.cnf is meant for production use and customization.
-
openssl.cfg sets insecure default settings like using MD5 hashes. openssl.cnf has more conservative secure defaults.
-
Anything set in openssl.cnf will override the defaults in openssl.cfg. openssl.cnf is treated as the main config.
In Windows, openssl.cfg file is located at C:\Program Files\OpenSSL-Win64\bin directory. The openssl.cnf file is located at two locations: C:\Program Files\Common Files\SSL and C:\Program Files\OpenSSL-Win64\bin\cnf.
If you get an error messages “Can’t open /usr/lib/ssl/openssl.cnf for reading, No such file or directory” and “cannot access ‘/etc/ssl/openssl.cnf’: No such file or directory“. Make sure you have both files in their path and that environment variables are set.
If in case your openssl.cnf file is missing or unable to see, you can download openssl.cnf file from MIT (Massachusetts Institute of Technology). MIT provides a generic configuration file that you can use. You can download the file to these directories to fix the errors.
-
C:\Program Files\Common Files\SSL\
-
C:\Program Files\OpenSSL-Win64\bin\cnf\
If you set all these things, you are not going to see any issues in OpenSSL.
Bottom Line
Installing OpenSSL on Windows provides access to a robust cryptographic toolkit for secure communication and certificate management. This step-by-step guide covered downloading OpenSSL installers from the trusted third-party distributors, installing it on a Windows machine, setting up environment variables, and verifying the installation.
With OpenSSL added to your Windows desktop or server, you can now generate public/private key pairs, create and manage X.509 certificates, test SSL/TLS connections, implement encryption in your apps, and much more.
We hope this step-by-step procedure helps understand everything about the instillation of OpenSSL on a Windows machine. Thanks for reading this post. Please share this post and help secure the digital world. Visit our website, thesecmaster.com, and our social media page on Facebook, LinkedIn, Twitter, Telegram, Tumblr, Medium, and Instagram and subscribe to receive updates like this.
You may also like these articles:
Arun KL
Arun KL is a cybersecurity professional with 15+ years of experience in IT infrastructure, cloud security, vulnerability management, Penetration Testing, security operations, and incident response. He is adept at designing and implementing robust security solutions to safeguard systems and data. Arun holds multiple industry certifications including CCNA, CCNA Security, RHCE, CEH, and AWS Security.
Historically, utilizing OpenSSL necessitated either operating within a Linux environment or engaging in the manual compilation of its source code for both Mac and Windows users. However, with the advent of Win32/Win64 OpenSSL, this powerful open-source cryptography library has been made accessible to users of both 32-bit and 64-bit Windows operating systems, allowing for seamless integration into Windows environments through a straightforward installation process.OpenSSL is renowned for its pivotal role in securing data across a myriad of applications and network connections. It is instrumental in encrypting data for SSL/TLS protocols, thereby ensuring secure HTTPS connections, and is also utilized in the encryption processes for SSH, OpenVPN, and DNSSEC, among others.Thanks to the efforts of Shining Light Productions, the deployment of OpenSSL on Windows has been significantly simplified. The Win32/Win64 OpenSSL Installation Project, available at slproweb.com, offers an installer that streamlines the process, bypassing the complexity of manual compilation by providing ready-to-use binaries. This development not only facilitates easier access to OpenSSL’s robust security features but also enhances the security infrastructure of Windows-based systems with minimal effort.
Comprehensive Guide to Setting Up OpenSSL on Windows
Deploying OpenSSL on Windows 10 and Windows 11 has become more accessible, and this guide outlines two straightforward methods for installation. Begin with the most direct approach by leveraging the Windows Package Manager. To initiate this process, press the Windows-logo+R keys simultaneously to open the ‘Run’ dialogue box, type ‘cmd’, and select OK. Alternatively, you can press the Windows key, search for ‘cmd’, and then select the command prompt icon from the search results.Once you open the command prompt window, enter the following command to install OpenSSL. If your user account doesn’t have administrative privileges, right-click on the command prompt and choose “Run as administrator” for elevated access.<“C:\> winget install openssl”>The command line tool ‘winget’ serves as a versatile package manager for Windows, simplifying the installation of software applications and packages directly from the command line interface. When you run 'winget‘ for the first time, it may ask you to accept the terms of the source agreement. You can do this by pressing the ‘Y’ key when prompted.
This method showcases the simplicity and efficiency of using 'winget' for software installations on Windows platforms, streamlining the process of getting OpenSSL up and running on your system without the need for intricate steps or manual downloads.The OpenSSL package is now installed. The second method is to download and install the package.
Step-by-Step Guide to Downloading and Installing Win64 OpenSSL
Locate the Installer: Visit the official Shining Light Productions website at https://slproweb.com/products/Win32OpenSSL.html to find the installer. It’s advisable to opt for the most recent version to ensure you have the latest security and functionality enhancements. As of the last update to this guide, the Win64 OpenSSL v3.0.7 EXE Light version is recommended for its balance of features and lightweight installation.Initiate the Installation Process: Search for the “Win64 OpenSSL v3.0.7 EXE Light” option, which should be prominently displayed at the top of the list. Download this file and, once the download is complete, navigate to your download directory and double-click the Win64OpenSSL_Light-3_0_7.exe file to start the setup process.Navigate the Setup Wizard: Upon launching the installer, you may encounter a User Account Control (UAC) prompt. Click 'Yes' to affirm your decision to proceed with the installation. This action will activate the setup wizard, which will guide you through the necessary steps to successfully install OpenSSL on your Windows system. The wizard automates the process of unpacking and transferring the necessary OpenSSL files to their designated locations on your computer.
Integrating OpenSSL into the Windows Environment
Access System Properties: Begin by opening the Run dialog box using the Windows + R shortcut, then type SYSTEM PROPERTIES ADVANCED and click OK to proceed.Navigate to Environment Variables: In the System Properties window that appears,locate and click on the ‘Environment Variables’ button situated at the lower section of the window.Modify the System Path: Within the Environment Variables window, scroll to find the ‘Path’ variable under the ‘System Variables’ section. Select it and then click the ‘Edit’ button. This action opens the ‘Edit Environment Variable’ window, where you will add the path to the OpenSSL installation.
Specifically, you’re aiming to include the path to the OpenSSL-Win64\bin directory, which is typically located within the Program Files directory. This path houses the openssl.exe executable. Utilize the Browse button or directly paste the path if you have it ready. Confirm by clicking OK.Add OPENSSL_CONF Variable: For OpenSSL to function correctly, it needs to know where to find its configuration file. Achieve this by adding a new system variable. Click ‘New’ within the System Variables section and enter OPENSSL_CONF as the variable name. In the variable value field, input the path to your openssl.cnf file, which is usually located at C:\Program Files\OpenSSL-Win64\bin\cnf\openssl.cnf. Confirm all actions by clicking OK.
Verifying the Installation
To confirm that OpenSSL has been correctly set up and is operational, open a command prompt window and execute the following commands:To check the version and build information of your OpenSSL installation, enter:“C:\> openssl version -a”This command will display details such as the version number and build date.To ascertain the directory where OpenSSL searches for its configuration files, use:“C:\> openssl version -d”This returns the OPENSSLDIR path, indicating where the OpenSSL configuration files reside.Utilizing OpenSSL on WindowsWhile Windows does not support the ‘man’ pages common on Linux for detailed command documentation, OpenSSL on Windows provides a helpful alternative. The openssl help command offers context-sensitive guidance for using its various functions. For example, you can use openssl help s_client, openssl help x509, or openssl help req to get specific information on these commands. Additionally, extensive documentation and manual pages are available online, offering a wealth of information to both new and experienced users.
Mastering OpenSSL: Key Commands and Operations
OpenSSL is an incredibly robust toolkit that offers an array of functionalities for managing and manipulating SSL/TLS certificates, keys, and other cryptographic tasks. Below, we explore several essential OpenSSL commands that are widely used for security and certificate management. This list is not exhaustive but highlights some practical examples of how OpenSSL can be utilized effectively.
Essential OpenSSL Commands for Security Experts
– Inspecting Certificate Details: To examine the details of a certificate file named `ca-cert.pem` without altering its content, use the following command:openssl x509 -noout -text -in ca-cert.pemThis command outputs the certificate’s details in a readable format, making it easier to review its contents.– Verifying Certificate Signing Requests (CSRs): For scrutinizing and confirming the data within a CSR file named `x509-check.csr`, execute:openssl req -text -noout -verify -in x509-check.csrThis ensures the integrity and correctness of the CSR’s information.– Checking Key File Integrity: To verify the structural integrity of a key file, such as `rootCA.key`, use:openssl rsa -check -in rootCA.keyThis command helps ensure that the key file is valid and has not been corrupted.– Computing Certificate Checksum: To calculate the MD5 checksum of a certificate file `ca-cert.pem`, facilitating the verification of its integrity, perform:openssl x509 -noout -modulus -in ca-cert.pem | openssl md5– Converting Certificate Formats: To transform a PEM format certificate `servercert.pem` into a PKCS#7 format and save it as `servercert.p7b` in a temporary directory, execute:openssl crl2pkcs7 -nocrl -certfile servercert.pem -out c:\temp\servercert.p7b– Exporting to PKCS#12 Format: To convert a certificate `rootCA.pem` and its key `rootCA.key` into a PKCS#12 format file named `rootCA.p12`, use:openssl pkcs12 -export -in rootCA.pem -inkey rootCA.key -out c:\temp\rootCA.p12 -name "PKCS12 certificate"– Generating SSL Certificates: For creating a new SSL certificate and key with RSA 2048 encryption and SHA256 hashing, valid for one year, the command is:openssl req -new -newkey rsa:2048 -sha256 -days 365 -nodes -x509 -keyout server.key -out server.crt– Testing Server Connections: To check the connection to an IMAP service on `imap.gmail.com` at port 993, use:openssl s_client -connect imap.gmail.com:993For SMTP with STARTTLS on `smtp.gmail.com` at port 587, the command is:openssl s_client -crlf -connect smtp.gmail.com:587 -starttls smtpAnd to verify the connection details of `www.ietf.org` at port 443 quietly and briefly:openssl s_client -verify_quiet -brief www.ietf.org:443– Generating Random Passwords: To create a secure random password in base64 format, which could be used to safeguard private keys, execute:openssl rand -base64 20These commands represent just a fraction of what OpenSSL can accomplish. Its versatility extends far beyond these examples, serving as a critical tool for anyone working with encryption, certificates, and secure communications.
Уровень сложностиПростой
Время на прочтение14 мин
Количество просмотров3.6K
Скорее всего, если вы нашли эту статью не через поиск — вам она вряд ли понравится. Тут рассматривается туториал для решения конкретной задачи и конкретных нужд.
Привет, Хабр и читатели! В своей прошлой статье я рассказывал про написание скрипта на PowerShell для отслеживания сроков действия сертификатов. В этом же туториале я хочу рассказать (и поделиться) о скрипте, который позволит создавать сертификаты субъекта, подписанные вышестоящим сертификатам типа root (это позволит не устанавливать каждый раз выпускаемые сертификаты субъекта в хранилище доверенных издателей). Статья будет в виде подробного туториала, чтобы охватить как можно больше аудитории (а она разная) и в основном для тех, кто будет это делать впервые, ну или почти впервые.
Что мы конкретно будем делать? В этом туториале мы будем делать следующее:
-
Установим OpenSSL на ОС Windows (потому что будем в итоге писать небольшой скрипт для PowerShell);
-
Выпустим ключи уровня CA, на которых будут выпускаться остальные ключи (уровня субъекта) для наших сервисов;
-
Напишем, собственно, скрипт на PowerShell, который будет:
3.1. Создавать файл конфигурации для генерации файла запроса;
3.2. Создавать ключи с нужными для нас полями, нужными признаками и, самое важное, с полем SAN и единым вышестоящим root сертификатом;
3.3. Конвертировать ключи в форматы .crt, .key, .pem, .pfx (самые частые форматы ключей, которые требуют сервисы);
-
Протестируем скрипт и подведём итоги.
Если после прочитанного вы вообще не поняли, о чём речь, зачем это нужно и что получится – переходите к тестированию и итогам – там будут все результаты и демонстрационная гифка. А мы начнём с начала…
1) Установка OpenSSL
Тут совсем коротко, потому что скачивать и устанавливать пакеты в Windows, я думаю, на Хабре все давно умеют, тем более этих гайдов по установке OpenSSL в инторнетах ну целая куча. Основной замес туториала не в этом. И всё же… первым делом нам нужно установить OpenSSL для Windows (мы ведь собираемся через PowerShell с ним работать потом).
Перейдём на https://slproweb.com/products/Win32OpenSSL.html
Пролистаем немного вниз страницы и скачаем актуальный установочный файл – у меня это Win64 OpenSSL v3.4.0

Скачиваем установочный файл и запускаем его. Установка проходит в режиме «Далее, далее, готово» за исключением вот этой галки, тут советую сложить все библиотеки в /bin директорию:

Теперь проверяем, что сам OpenSSL корректно установился и работает:
Пуск --→ OpenSSL --→ Win64 OpenSSL Command Prompt
Всё должно запуститься без ошибок, в командной строке должна отобразиться версия, номер сборки и прочая информация о пакете.
Теперь засунем это всё дело в переменные среды, чтобы у нас была возможность обращаться к исполняемым файлам напрямую из PowerShell и сделаем это парой команд через него же. Запускаем с наивысшими правами PowerShell и вводим туда следующее:
$currentPath = [System.Environment]::GetEnvironmentVariable('Path', 'User')
[System.Environment]::SetEnvironmentVariable('Path', "$currentPath;C:\Program Files\OpenSSL-Win64\bin\", 'User')
Коротко, что делает скрипт – записывает в переменную $currentPath текущее значение Path пользователя. Это критически важно, потому что если мы сразу передадим туда новое значение (новый путь), то мы просто затрём все пути, которые там созданы на данный момент системой.
Так вот, после того, как мы получили значение, добавим туда C:\Program Files\OpenSSL-Win64\bin\ и уже после этого передаём новое значение. Всё это можно сделать вручную через графику в настройках переменных сред, если вы не доверяете командам в PowerShell.
Вот тут это делается ручками через графику:

Чтобы командная строка начала воспринимать новые пути после изменения, нужно закрыть все текущие её сессии и открыть заново (чтобы она перечитала переменную пути). Закрываем/открываем, пишем «openssl version», чтобы проверить, что скрипт отработал штатно – если всё хорошо (а я надеюсь, что у вас всё хорошо), то результатом вы получите версию установленной OpenSSL. Отлично, перейдём к более интересному.
2) Выпускаем ключи и корневой сертификат уровня CA
Поехали выпускать ключики. Тут по классике, всё в PowerShell (от администратора) – создаём директорию для ключей в нужном месте. У меня это так:
mkdir E:\Certs\CAСоздадим и поместим в неё закрытый ключ:
openssl genrsa -out E:\Certs\CA\ca.keyТеперь создадим для него сертификат, но…здесь немного поподробнее: есть такая опция «-days» и туда мы должны передать значение, которое будет определять, сколько дней этот сертификат будет валиден — напомню, речь идёт о корневом сертификате уровня CA. Тут смотрите, какие у вас цели и потребности. Если вы собираетесь основательно и продолжительно выпускать на этом сертификате другие сертификаты, а также не будете публиковать его в открытых источниках, советую выпустить его лет на 10, то есть 3650 дней. Учитывайте, что после истечения этого срока, все нижестоящие сертификаты, которые были выпущены на руте – тоже протухнут, а вместе с ними, возможно, остановятся и сервисы.
Что ещё важно: раз этот сертификат у нас будет уровня CA, то в него обязательно нужно включить нужные признаки, а не просто подписать им другой сертификат. Эти признаки должны содержаться в конфигурационном файле по пути: "C:\Program Files\OpenSSL-Win64\bin\openssl.cfg" чем мы и воспользуемся. Итак, в итоге команда будет следующей:
openssl req -x509 -new -key E:\Certs\CA\ca.key -days 3650 -out E:\Certs\CA\root.crt -extensions v3_ca -config "C:\Program Files\OpenSSL-Win64\bin\openssl.cfg" -subj "/CN=Root Certification authority”Внимательно следите за путями в командах (не забывайте подставлять свои). На этом этапе, если вы всё ввели без ошибок, то в вашей директории (у меня это "E:\Certs\CA\") должен был создаться root сертификат. Надеюсь, что это так и тогда это отлично! Предлагаю открыть и посмотреть на него. При первом открытии он выглядит так:

Сейчас мы видим, что наша система не доверяет этому сертификату – всё правильно.
Предлагаю сразу проверить поля, которые для нас важны, а потом установить сертификат в хранилище системы. Перейдём на вкладку «Состав». Какие поля нас интересуют? Всего 3 поля: CN, Validity (NotAfter) и Base Constrains. Поле CN должно содержать «Root Certification authority», поле «Validity» должно указывать на срок окончания действия сертификата, у меня это через 10 лет (я смело могу выпускать на нём подчинённые сертификаты и не опасаться того, что корневой в скором времени истечёт, а за ним и подчинённые сертификаты) и поле «Base Constrains» должно содержать признак того, что сертификат уровня CA (Тип субъекта=ЦС), а также на этом поле должен быть восклицательный знак, который говорит о том, что это расширение критическое (то есть обязано учитываться информационной системой, которая будет работать с сертификатом). Это всё присутствует. Если нет, то удаляем сертификат и перепроверяем команду для создания сертификата – значит вы где-то допустили ошибку. У меня всё без ошибок, сертификат меня устраивает, а значит, самое время установить его в систему.
Нажимаем на кнопку «Установить сертификат…» → Далее → Поместить все сертификаты в следующее хранилище → Обзор → Доверенные корневые центры сертификации → ОК → далее → Готово. Если система уведомит вас о том, что готовится установка сертификата с таким-то отпечатком – соглашаемся, после этого сертификат должен быть установлен. Закрываем сертификат и открываем снова – теперь система доверяет сертификату и мы должны увидеть следующее:

Ну а теперь, переходим к заключительной и самой сложной части этой статьи – будем выпускать подчинённые сертификаты уровня субъекта (для всевозможных веб-интерфейсов, агентов, etc.)
3) Создание скрипта на PowerShell для генерации закрытых ключей и выпуска подчинённых сертификатов, которые будут подписаны вышестоящим root сертификатом, создание скрипта для упаковки ключей в формат .pfx, сшивания цепочки сертификатов в файле .pem
Для написания скриптов на PowerShell я использую PowerShell ISE с повышенными правами, но можно писать всё и в обычный текстовик, а в конце поменять у него расширение на .ps1 — всё это на ваш вкус.
Перейдём в директорию с нашими ключиками:
Set-Location -Path 'E:\Certs\CA'Скрытый текст
Тут я указывал путь через одинарные кавычки, как того требует документация к PowerShell, но синтаксис самого OpenSSL одинарные кавычки не поддерживает и уведёт вас в ошибку, поэтому там я уже буду использовать двойные
Далее, нам понадобится файл конфигурации, на основе которого будут генерироваться все наши дальнейшие сертификаты. Мы создадим его сами и включим в него несколько «шаблонов», которые не обязательно нужны прямо сейчас, но могут понадобиться в будущем. Раньше я хранил его отдельным файлом в директории, но потом решил, что лучше передам его содержимое в переменную, чтобы этот файлик не валялся, пусть скрипт сам создаёт файлик, передаёт в него содержимое переменной, а затем, в конце своей работы – удаляет файлик. Я не буду утверждать, что это супер метод, но я остановился именно на этом варианте. В случае переноса скрипта на другую машину мне придётся переносить на 1 файлик меньше, код будет более самодостаточен, хоть и менее опрятен.
$content = @"
[req_distinguished_name]
# Может быть пустым, так как мы сами передадим значения полей
# Расширения для пользовательского сертификата по умолчанию
[usr_cert]
basicConstraints = CA:false
subjectKeyIdentifier = hash
authorityKeyIdentifier = keyid,issuer
subjectAltName = email:move
# Расширения для пользовательского сертификата по умолчанию, но в запросе указаны SAN
[usr_cert_has_san]
basicConstraints = CA:false
subjectKeyIdentifier = hash
authorityKeyIdentifier = keyid,issuer
# Расширение для выпуска сертификата уровня центра сертификации
[v3_ca]
subjectKeyIdentifier = hash
authorityKeyIdentifier = keyid:always,issuer:always
basicConstraints = CA:true
subjectAltName=email:move
# Расширение для выпуска сертификата уровня центра сертификации, но в запросе указаны SAN
[v3_ca_has_san]
subjectKeyIdentifier = hash
authorityKeyIdentifier = keyid:always,issuer:always
basicConstraints = CA:true
# Передаём длину ключа и запрос расширений
[req]
prompt             = no
default_bits       = 4096
distinguished_name = req_distinguished_name
req_extensions = req_ext
# Это наш основной шаблон выпуска сертификатов уровня субъекта
[req_ext]
keyUsage = critical, digitalSignature, keyEncipherment
extendedKeyUsage = serverAuth, clientAuth
basicConstraints = CA:false
subjectKeyIdentifier = hash
subjectAltName = @san
# Сюда будем передавать адреса дополнительных имён субъекта
[san]
"@
Для создания файлика используем следующую команду:
Set-Content -Path 'E:\Certs\CA\template.cfg' -Value $content В основном, для выпуска сертификата будет использоваться шаблон [ req_ext ]. О чём он нам говорит? Ни о чём, потому что он не умеет разговаривать. Он говорит нам о том, что в сертификате субъекта будут обязательно присутствовать такие поля, как «Использование ключа», который согласно RFC должен быть критическим, и который будет содержать два параметра – Цифровая подпись и Шифрование ключей.
Далее идёт поле «Расширенное использование ключа», которое будет содержать такие параметры, как: аутентификация сервера, аутентификация клиента.
Поле «Основные ограничения» будет говорить о том, что этот сертификат не может подписывать другие сертификаты – это конечный сертификат субъекта, а не сертификат уровня CA.
Самое важное поле всей нашей затеи – SAN – Дополнительное имя субъекта. В этом поле будут перечислены доменные адреса или IP-адреса информационных систем, для которых предназначается сертификат. То есть, если вы разворачиваете сервер, адреса которого будут звучать как 192.168.100.100 и/или domaincontroller.mgmt.it то эти адреса как раз пойдут в это поле, и именно эти адреса мы сможем использовать для подключения к веб-интерфейсу в браузере через https.
Ладно, с этим разобрались, идём дальше.
Предполагается, что поле SAN у нас всегда будет разное, потому как для каждой новой системы мы будем создавать свои ключи и у каждой системы будет свой адрес (внезапно), поэтому это поле мы будем запрашивать у пользователя через интерактивный ввод. Как мы это сделаем? Вот так:
$name = Read-Host 'Введите необходимое доменное имя или IP-адрес сайта' add-content -Path 'E:\Certs\CA\template.cfg' -Value ($name)
$name2 = Read-Host 'Введите необходимое доменное имя или IP-адрес сайта' add-content -Path 'E:\Certs\CA\template.cfg' -Value ($name2)
Почему два раза? Лично я чаще всего использую два адреса, это IP-адрес, который обычно не меняется и по нему можно будет подключиться используя https в случае, если что-то случилось с DNS и он не резолвит доменное имя… ну и само доменное имя, которое создано для лёгкости запоминания человеком. Поэтому я передам именно две переменные. Если вам нужно больше, добавляйте больше, их не обязательно заполнять все – если третий адрес вам окажется не нужен, просто передайте пустое значение в переменную (при запросе ничего не вводите и нажмите Enter) – сертификат выпустится корректно. Но для себя я пришёл к выводу, что двух адресов мне, обычно, хватает, хотя бывают и исключения. Теперь самое важное – в каком формате вводить данные в эти переменные? Данные должны выглядеть следующим образом:
|
Для доменных имён пишем так: |
Для IP-адресов пишем так: |
|
DNS.1 = my.domain.ru |
IP.1 = 192.168.0.1 |
|
DNS.2 = your.domain.io |
IP.2 = 10.114.162.9 |
|
… |
… |
|
DNS.n = ours.domain.it |
IP.n = 172.11.16.5 |
Я обычно заполняю вот так:
DNS.1 = usboverip.mgmt.organization.local
IP.1 = 172.16.100.100
Но для некоторых систем нужно и 5 адресов (привет, UserGate NGFW), так что добавляйте нужное именно вам количество.
С этим всё выяснили. Далее создадим папку для ключей, которые будут создаваться:
New-Item -Path . -Name "Keys" -ItemType "directory"Переходим к генерации непосредственно нового закрытого ключа уже для нашей системы, в которую будут устанавливаться эти ключики (уровня субъекта). Буду генерировать 2048 битный ключ – не слишком большой (для старых систем), не слишком маленький (для новых). Вы можете указать другую длину ключа.
openssl genrsa -out Keys/private.key 2048Теперь генерируем файл запроса на сертификат с явным указанием объектных идентификаторов поля «субъект».
openssl req -new -key Keys/private.key -out Keys/req.csr -config template.cfg -subj "/CN=Subject Certificate/C=RU/ST=Siberia/L=Best City/O=My organization/OU=IT/"Тут снова небольшой нюанс. Согласно RFC в случае, если в сертификате используется поле SAN (а оно у нас используется, чёрт подери), то в поле CN не должен передаваться адрес, НО не все информационные системы этому следуют, встречаются такие, которые ждут адрес и в этом поле тоже, и без него не «съедят» сертификат, поэтому имейте ввиду, что для конкретно ваших целей, возможно, это поле нужно будет поменять и вписать туда доменное имя, но по умолчанию мы его туда стараемся не писать. Остальные поля, такие как: Country, State, Locality, Organization, Organizational-Unit – технически не обязательны, но я заполняю их для придания некого порядка и солидности сертификатам. Это опять же, на ваш выбор.
Теперь выпускаем сертификат субъекта, подписанный сертификатом CA на нужное нам количество дней, используя файлик конфигурации, который мы создавали выше.
openssl x509 -req -in Keys/req.csr -CA root.crt -CAkey ca.key -extensions req_ext -extfile template.cfg -out Keys/certWITHca.crt -days 3330 В параметре –days передаём количество дней валидности сертификата конечного субъекта. Тут, думаю, без лишних комментариев – пишите столько дней, сколько требуется вашим сертификатам, но не больше срока действия сертификата уровня CA, которым он будет подписан.
На этом этапе у нас уже есть файл запроса, закрытый ключ и файл сертификата, но некоторые системы также требуют загрузки файла цепочки сертификатов. Соберём цепочку:
Get-Content 'Keys\certWITHca.crt', 'root.crt' | Set-Content 'Keys\fullchain.pem' Мы создадим цепочку без закрытого ключа. В случае, если вам нужна полная цепочка с закрытым ключом (но это редкость), тогда воспользуйтесь командой:
Get-Content ‘Keys\private.key’, ‘Keys\certWITHca.crt’, ‘root.crt’ | Set-Content ‘Keys\fullchain.pem’Тут сначала идёт закрытый ключ, потом сертификат субъекта, а в самом конце – коревой. Но будьте внимательны при передаче файла полной цепочки, так как в нём содержатся все ключи (в том числе и закрытый) и он не защищён паролем, как, например, файл .pfx, о котором, кстати, сейчас тоже поговорим.
Давайте сформируем .pfx файл из ключевой пары. Этот файл должен быть защищён паролем, поэтому выведем строку, запрашивающую интерактивный ввод пароля от пользователя:
Write-Host "Введите пароль для pfx файла" -ForegroundColor Cyan
openssl pkcs12 -export -out Keys/ReadyKeys.pfx -inkey Keys/private.key -in Keys/certWITHca.crt
Далее я хочу переименовать папку с ключами (тут опционально, лично моя хотелка):
Rename-Item -Path ‘E:\Certs\CA\Keys’ -NewName ‘Новые Ключи’И в конце, проверяем существование созданных файликов и выводим текст об их успешном создании:
$directoryPath = 'E:\Certs\CA\Новые Ключи'
$extensions = @(".pfx", ".crt", ".pem", ".key")
$filesFound = Get-ChildItem -Path $directoryPath -File | Where-Object { $extensions -contains $_.Extension }
$missingExtensions = $extensions | Where-Object {
    -not ($filesFound.Extension -contains $_)
}
if ($missingExtensions.Count -eq 0) {
    Write-Host "Все файлы (.pfx, .crt, .pem, .key) были успешно созданы!" -ForegroundColor Green
} else {
    Write-Host "Следующие типы файлов отсутствуют в директории:" -ForegroundColor Yellow
    $missingExtensions | ForEach-Object { Write-Host "- $_" }
}
Добавим в конце запрос нажатия Enter, чтобы была возможность прочитать информационные сообщения или сообщения об ошибках:
Read-Host -Prompt "Нажмите Enter для выхода и откиньтесь на спинку кресла"Вот и всё. Осталось только удалить файл конфигурации, который создавался скриптом:
Remove-Item 'E:\Certs\CA\template.cfg'Ну что, пришло время собрать все команды воедино:
Set-Location -Path 'E:\Certs\CA'
$content = @"
[req_distinguished_name]
# Этот раздел может быть пустым, так как мы сами передадим значения полей командой

# Расширения для пользовательского сертификата по умолчанию
[usr_cert]
basicConstraints = CA:false
subjectKeyIdentifier = hash
authorityKeyIdentifier = keyid,issuer
subjectAltName = email:move
# Расширения для пользовательского сертификата по умолчанию, но в запросе указаны SAN
[usr_cert_has_san]
basicConstraints = CA:false
subjectKeyIdentifier = hash
authorityKeyIdentifier = keyid,issuer
# Расширение для выпуска сертификата уровня центра сертификации
[v3_ca]
subjectKeyIdentifier = hash
authorityKeyIdentifier = keyid:always,issuer:always
basicConstraints = CA:true
subjectAltName=email:move
# Расширение для выпуска сертификата уровня центра сертификации, но в запросе указаны SAN
[v3_ca_has_san]
subjectKeyIdentifier = hash
authorityKeyIdentifier = keyid:always,issuer:always
basicConstraints = CA:true
# Передаём длину ключа и запрос расширений
[req]
prompt             = no
default_bits       = 4096
distinguished_name = req_distinguished_name
req_extensions = req_ext
# Это наш основной шаблон выпуска сертификатов уровня субъекта
[req_ext]
keyUsage = critical, digitalSignature, keyEncipherment
extendedKeyUsage = serverAuth, clientAuth
basicConstraints = CA:false
subjectKeyIdentifier = hash
subjectAltName = @san
# Сюда будем передавать адреса дополнительных имён субъекта
[san]
"@
Set-Content -Path 'E:\Certs\CA\template.cfg' -Value $content
$name = Read-Host 'Введите необходимое доменное имя или IP-адрес сайта'
add-content -Path 'E:\Certs\CA\template.cfg' -Value ($name)
$name2 = Read-Host 'Введите необходимое доменное имя или IP-адрес сайта'
add-content -Path 'E:\Certs\CA\template.cfg' -Value ($name2)
New-Item -Path . -Name 'Keys' -ItemType 'directory'
openssl genrsa -out Keys/private.key 2048
openssl req -new -key Keys/private.key -out Keys/req.csr -config template.cfg -subj "/CN=Subject Certificate/C=RU/ST=Siberia/L=Best City/O=My organization/OU=IT/"
openssl x509 -req -in Keys/req.csr -CA root.crt -CAkey ca.key -extensions req_ext -extfile template.cfg -out Keys/certWITHca.crt -days 3330
Get-Content 'Keys\certWITHca.crt', 'root.crt' | Set-Content 'Keys\fullchain.pem'
Write-Host "Введите пароль для pfx файла" -ForegroundColor Cyan
openssl pkcs12 -export -out Keys/ReadyKeys.pfx -inkey Keys/private.key -in Keys/certWITHca.crt
Rename-Item -Path 'E:\Certs\CA\Keys' -NewName 'Новые Ключи'

$directoryPath = 'E:\Certs\CA\Новые Ключи'
$extensions = @(".pfx", ".crt", ".pem", ".key")
$filesFound = Get-ChildItem -Path $directoryPath -File | Where-Object { $extensions -contains $_.Extension }
$missingExtensions = $extensions | Where-Object {
    -not ($filesFound.Extension -contains $_)
}
if ($missingExtensions.Count -eq 0) {
    Write-Host "Все файлы (.pfx, .crt, .pem, .key) были успешно созданы!" -ForegroundColor Green
} else {
    Write-Host "Следующие типы файлов отсутствуют в директории:" -ForegroundColor Yellow
    $missingExtensions | ForEach-Object { Write-Host "- $_" }
}
Read-Host -Prompt "Нажмите Enter для выхода и откиньтесь на спинку кресла"
Remove-Item 'E:\Certs\CA\template.cfg'
4) Тестируем скрипт и подводим итоги
Сохраняем файл как скрипт с расширением .ps1, клацаем на нём правой кнопкой мыши, выбираем «Запустить с помощью PowerShell» — должно запуститься выполнение скрипта и всё должно быть без ошибок. Скрипт запросит у вас на ввод две переменные – это адреса альтернативного имени субъекта. Вводим их, затем вводим (с подтверждением) пароль для .pfx файла. В идеальном варианте это всё – ключи готовы, файлики созданы, песенка спета, птичка в клетке.

Теперь у нас есть небольшой, примитивный, но от этого не менее полезный скрипт, который по нажатию выпускает для нас сертификат уровня субъекта, который будет подписан корневым сертификатом, иметь нужный для нас срок действия, нужные поля, адреса в SAN, а также скрипт производит создание цепочки .pem и упаковку ключевой пары в .pfx. Пользуйтесь!
При наличии большого желания и такого же количества свободного времени и небольшой любви к извращениям, можно попытаться оформить для этого скрипта графическую оболочку.
На эту тему у меня всё, буду рад, если кому-то пригодилось\помогло.
Если у вас есть предложения по улучшению скрипта — пишите. Я далеко не программист и мне самому не нравится как выглядит то, что у меня получилось — но оно работает и помогает мне. А, возможно, поможет и вам.
Provide feedback
Saved searches
Use saved searches to filter your results more quickly
Sign up
Appearance settings
Generating SSL certificates can be a daunting task, one filled with frustration and sorrow. But it doesn’t have to be that way! If you have Windows 10 and OpenSSL along with a little help from this tutorial, you will be well on your way.
Not a reader? Watch this related video tutorial!
Not seeing the video? Make sure your ad blocker is disabled.
In this article, you’re going to learn how to install OpenSSL on Windows 10. Once installed, you’ll then generate SSL certificates, troubleshoot and debug certificates, and convert between formats.
Let’s begin mastering OpenSSL on Windows 10 with PowerShell!
Related: Managing Certs with Windows Certificate Manager and PowerShell
Prerequisites
In this article, you are going to learn using a hands-on approach. While OpenSSL historically is a Linux OS utility, you can use it with Windows OS as well.
- A Windows system with Local Administrator rights – The tutorial will be using Windows 10
- Windows PowerShell 5.1 (comes with Windows) or PowerShell 7
- Chocolatey – A package manager for Windows installed.
- PowerShell ISE, Visual Studio Code or any text editor of your choice
All screenshots in this guide were taken from Windows 10 build 1909 and PowerShell 7.
Installing OpenSSL on Windows 10 with PowerShell and Chocolatey
Assuming you have installed Chocolatey using the installation instructions, your first task is to install OpenSSL on Windows 10. To do this, open up your PowerShell console and run choco install OpenSSL.Lightas shown below.

That’s it! You’ve now installed OpenSSL with PowerShell.
Set up a Working Directory
This tutorial will be creating a few certificates to learn from. To ensure all of the work you do here is confined to a single folder you can clean up later, go ahead and create one.
This tutorial will store all certificates and related files in the C:\certs folder. You can create a folder with PowerShell by running the below command.
New-Item -ItemType Directory -Path C:\certsNow it’s time to configure OpenSSL.
Configuring OpenSSL
By default, OpenSSL on Windows 10 does not come with a configuration file. This is intentional because there are a lot of configuration options that you can customize. For the purposes of this guide, you are going to use a sample configuration that you can customize later to best suit your security requirements.
Open up PowerShell and run the below command. This command downloads a sample configuration file from MIT and saves it as openssl.cnf in the current working directory.
You can now open up the openssl.cnf file and you should see something that looks like below.
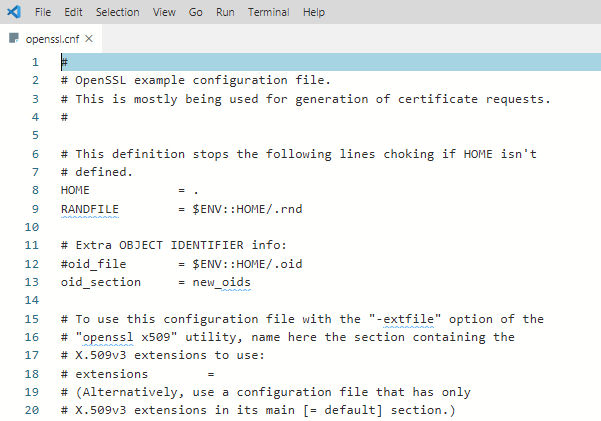
The downloaded configuration will work as-is for now. Do not use the defaults in a production environment!
Update PowerShell Profile Environment Variables
To make things go smoothly, you should modify your PowerShell profile on Windows 10. Setting up some environment variables allows you to easily switch between different versions of OpenSSL that you may have installed.
I suggest adding two environment variables to your PowerShell profile called path and OPENSSL_CONF. You will update the PATH environment variable to ensure you can run the openssl binary in any location while on the command line.
Below you’ll see a way to create a PowerShell profile if you don’t already have one. This command appends the OpenSSL binary path to your PATH and assign the configuration file path to OPENSSL_CONF.
# Add environment variables to PowerShell profile
# Test for a profile, if not found create one!
if (-not (Test-Path $profile) ) {
    New-Item -Path $profile -ItemType File -Force
}

# Edit profile to add these lines
'$env:path = "$env:path;C:\Program Files\OpenSSL\bin"' | Out-File $profile -Append
'$env:OPENSSL_CONF = "C:\certs\openssl.cnf"' | Out-File $profile -Append
To use the environment variables, reload your profile typing . $profile or just close and reopen PowerShell.
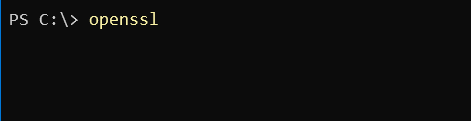
Now you can easily invoke the openssl binary wherever you are in PowerShell as shown below.
Using OpenSSL on Windows 10 to Generate a CSR & Private Key
Before you can create an SSL certificate, you must generate a certifiate-signing request (CSR). A CSR is an encoded file that provides you with a way to share your public key with a certificate authority (CA). This file contains identifying information, a signature algorithm, and a digital signature. Let’s create your first CSR and private key.
Related: Understanding X509 Certificates: A Clear and Concise Guide (For Mortals)
To create a CSR, run the below command. OpenSSL will then prompt you to enter some identifying information as you can see in the following demonstration.
openssl req -new -out MyFirst.csr
Once complete, you will have a valid CSR and private key which can be used to issue an SSL certificate to you.
The configuration file defaults can be edited further to streamline this process should you not want to enter data every time you generate a CSR.
You can read more about the available CSR options and view sample configurations in the man pages. OpenSSL also has an active GitHub repository with examples too.
Generating RSA Key Pairs
You can also create RSA key pairs (public/private) with OpenSSL. To do so, first, create a private key using the genrsa sub-command as shown below.
When you run the command below, OpenSSL on Windows 10 will generate a RSA private key with a key length of 2048 bits. This key is generated almost immediately on modern hardware. The resulting key is output in the working directory
# generate a private key using maximum key size of 2048
# key sizes can be 512, 758, 1024, 1536 or 2048.
openssl genrsa -out rsa.private 2048
Next, generate a public key using the private key that you just created using the rsa sub-command. The syntax below will create a public key called rsa.public in the working directory from the rsa.private private key.
# generate a public key using the private key
openssl rsa -in rsa.private -out rsa.public -pubout -outform PEM
Generating a Self-Signed Certificate
On occasion you may need to generate a self-signed certificate. Self-signed certificates are fine to use for lab use but not a secure practice to use in a production environment.
Let’s create a self-signed certificate before moving onto the next task. To do so, enter the command below to create an X509 SSL certificate. This certificate will use SHA256 cryptography that will be valid for 365 days using an RSA key length of 2048 bits. The certificate will be saved to the working directory.
openssl req -x509 -sha256 -nodes -days 365 -newkey rsa:2048 -keyout privateKey.key -out certificate.crtYou are now ready to import the certificate into a browser or server.
Validating CSRs, Certificates, and Keys with OpenSSL
Checking the information in a CSR, private key, certificate, or PKCS#12 can save you time troubleshooting SSL errors. Sometimes a wrong key may have been used to create a certificate, for example. You may have the wrong identifying information in the certificate.
Let’s start by checking a CSR using the req command and some parameters:
openssl req -text -noout -verify -in .\MyFirst.csr
Details such as country name, organizational name, and the email address you entered when creating the CSR at the beginning of this guide, should match precisely.
You can also check a certificate using the x509 sub-command with a couple of parameters:
openssl x509 -in .\certificate.crt -text -noout | more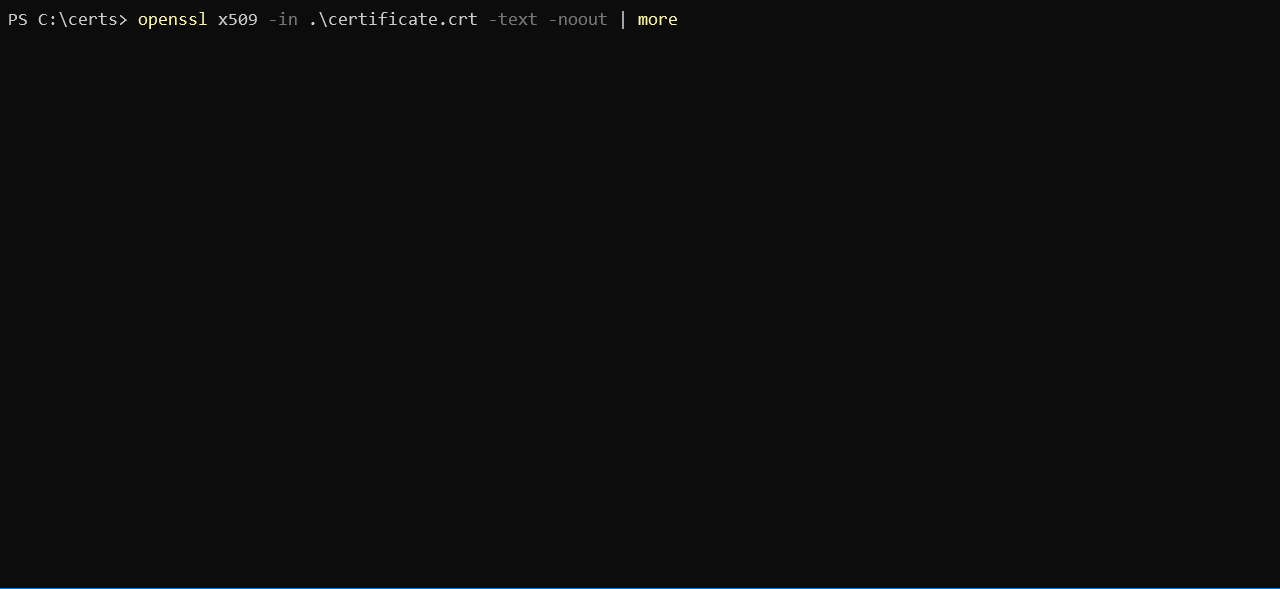
Converting Certificates with OpenSSL
There are occasions where an application does not use a particular certificate format. You can run into this issue with an application called HAproxy, for example that requires a PEM certificate when you may have a DER-formatted certificate (.crt .cer .der).
To demonstrate converting a certificate, let’s convert the self-signed certificate created earlier in a DER format (certificate.crt) to PEM. Use the code in the following code snippet to do so.
This command below uses the x509 sub-command with the parameter of -inform which should match the format of the -in file followed by the -out format.
openssl x509 -inform der -in .\certificate.crt -out .\certificate.pemYou can also reverse the order if you’d like to the DER format from PEM too as shown below.
openssl x509 -outform der -in .\certificate.pem -out .\certificate.derAnd last but not least, you can convert PKCS#12 to PEM and PEM to PKCS#12. This is a file type that contain private keys and certificates. To convert to PEM format, use the pkcs12 sub-command.
openssl pkcs12 -in .\SomeKeyStore.pfx -out .\SomeKeyStore.pem -nodesYou can convert a PEM certificate and private key to PKCS#12 format as well using -export with a few additional options. Below you are exporting a PKCS#12 formatted certificate using your private key by using SomeCertificate.crt as the input source. Using the -certfile option value MyCACert.crt allows you to validate SomeCertificate.crt.
openssl pkcs12 -export -out SomeCertificate.pfx -inkey SomePrivateKey.key -in SomeCertificate.crt -certfile MyCACert.crtTroubleshooting & Debugging
Now that you can create & convert CSR’s, certificates, and key pairs, it’s time to learn how to troubleshoot and debug them. OpenSSL comes with commands that make it a breeze to troubleshoot problems.
OpenSSL also allows you to check certificates for file integrity and test for possible data corruption. Using an MD5 checksum, you can use the following code examples to test certificates, keys and CSR’s:
# Certificates
openssl x509 -noout -modulus -in .\certificate.crt | openssl md5

# Public / Private Keys
openssl rsa -noout -modulus -in .\privateKey.key | openssl md5

# Certificate Server Request
openssl req -noout -modulus -in .\MyFirst.csr | openssl md5

# Check an external SSL connection
openssl s_client -connect www.google.com:443
Once you have the original hash, you can then compare that original hash with a current hash to verify the certificate hasn’t been modified or corrupted.
Here’s a sample of what that code looks like when run in PowerShell:

Summary
In this article, you have learned how to install and configure OpenSSL on Windows 10, create a CSR, key pair, and SSL certificate. You have also learned how to convert between different certificate formats and do some basic troubleshooting using built-in sub-commands.
Additional Resources
- OpenSSL config man page
- OpenSSL commands
- Online SSL Checker
- Automating IIS SSL Certificate Installation with PowerShell
- How to Create Self-Signed Certificates with PowerShell