
Время на прочтение7 мин
Количество просмотров41K
Введение
В данной статье речь пойдет о сборке и установке OpenCV 4 для C/C++, Python 2 и Python 3 из исходных файлов с дополнительными модулями CUDA 10 на ОС Windows.
Я постарался включить сюда все тонкости и нюансы, с которыми можно столкнуться в ходе установки, и про которые не написано в официальном мануале.

Сборка тестировалась для:
- Windows 8.1 + Visual Studio 2017 + Python 2/3 + CUDA 10.0 + GeForce 840m
- Windows 10 + Visual Studio 2019 + Python 2/3 + CUDA 10.0 + GeForce GTX 1060
Внимание! Сборка не подойдет для версии OpenCV 4.0.1 и/или CUDA ниже 10-й версии. CUDA 9 и ниже поддерживается OpenCV 3.
Что потребуется для установки
В моей сборке использовались следующие инструменты:
- CMake 3.15
- MS Visual Studio 2019 64-бит + средства CMake С++ для Windows
- Python 3.7.3 64-бит + NumPy 64-бит
- Python 2.7.16 64-бит + NumPy 64-бит
- CUDA 10.0
- CuDNN 7.6.2
- OpenCV 4.1.1 и OpenCV-contrib-4.1.1
Установка
Так как установка производится через консольные команды, то следует внимательно и аккуратно выполнять все шаги. Также, при необходимости, меняйте установочные пути на свои.
Для начала необходимо установить требуемое ПО, причем Visual Studio должна быть установлена до CUDA:
- CMake (версия >= 3.9.1)
- MS Visual Studio
- Python 3.7 (дистрибутив Anaconda3)
- CUDA 10.0
- CuDNN 7.6.2
После установки всех компонент убедитесь, что пути для CMake, Visual Studio, Python, CUDA, CuDNN прописаны в переменных PATH, PYTHONPATH, CUDA_PATH и cudnn соответственно.
Далее загружаем архивы исходников opencv-4.1.1 и opencv-contrib-4.1.1 в желаемое место (в моем случае это C:\OpenCV\).
git clone https://github.com/opencv/opencv.git -b "4.1.1"
git clone https://github.com/opencv/opencv_contrib.git -b "4.1.1"
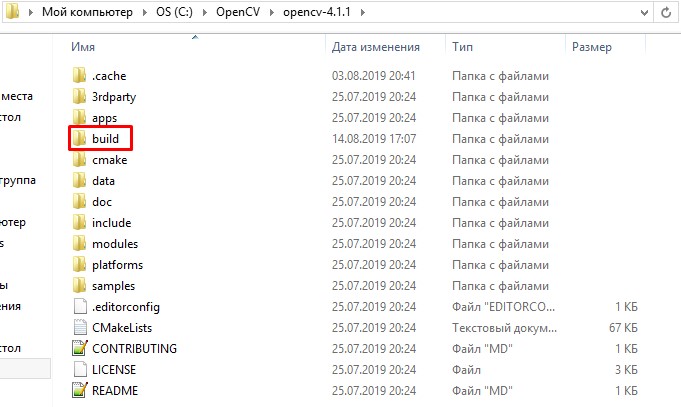
Создаем папку build/ внутри opencv-4.1.1.

Далее сгенерируем файлы сборки с помощью cmake. Мы будем использовать консольный вариант cmake, так как cmake-gui путает типы некоторых переменных (например, OPENCV_PYTHON3_VERSION) и, как следствие, неправильно генерирует файлы.
Открываем консоль по пути C:\OpenCV\ и прописываем переменные.
set "opencvSource=opencv-4.1.1"
set "opencvExtraModules=opencv_contrib-4.1.1/modules"
set "opencvBuild=%opencvSource%\build"
set "compiler=Visual Studio 16 2019"
set "buildType=Release"Примечание. Для Visual Studio 2017 генератор пишется как «Visual Studio 15 2017 Win64» и без флага -A.
Также можно явно указать питоновские библиотеки для python 2 и python 3 на случай, если сборщик не сможет найти их автоматически.
set "python2_executable=C:/Python27/python.exe"
set "python2_include_dir=C:/Python27/include"
set "python2_library=C:/Python27/libs/python27.lib"
set "python2_numpy_include_dirs=C:/Python27/Lib/site-packages/numpy/core/include"
set "python2_packages_path=C:/Python27/Lib/site-packages"

set "python3_executable=C:/Users/root/Anaconda3/python.exe"
set "python3_include_dir=C:/Users/root/Anaconda3/include"
set "python3_library=C:/Users/root/Anaconda3/libs/python37.lib"
set "python3_numpy_include_dirs=C:/Users/root/Anaconda3/lib/site-packages/numpy/core/include"
set "python3_packages_path=C:/Users/root/Anaconda3/Lib/site-packages"Примечание. Обратите внимание на то, что библиотека NumPy должна быть той же разрядности, что и OpenCV. Проверить это легко:
import numpy.distutils.system_info as sysinfo
print(sysinfo.platform_bits)
Выполняем генерацию файлов сборки с помощью длинной команды ниже. При неудачной генерации или наличии ошибок после выполнения команды, повторную генерацию следует производить вычистив все файлы в build/ и .cache/.
cmake ^
-B"%opencvBuild%/" ^
-H"%opencvSource%/" ^
-G"%compiler%" ^
-Ax64 ^
-DCMAKE_BUILD_TYPE=%buildType% ^
-DBUILD_opencv_world=ON ^
-DINSTALL_TESTS=OFF ^
-DINSTALL_C_EXAMPLES=OFF ^
-DBUILD_EXAMPLES=OFF ^
-DOPENCV_EXTRA_MODULES_PATH="%opencvExtraModules%/" ^
-DBUILD_PROTOBUF=ON ^
-DBUILD_opencv_python_bindings_generator=ON ^
-DWITH_CUDA=ON ^
-DCUDA_FAST_MATH=ON ^
-DWITH_CUBLAS=ON ^
-DCUDA_ARCH_PTX=7.5 ^
-DBUILD_opencv_python2=ON ^
-DPYTHON2_EXECUTABLE="%python2_executable%" ^
-DOPENCV_PYTHON2_VERSION=2.7.16 ^
-DPYTHON2_INCLUDE_DIR="%python2_include_dir%" ^
-DPYTHON2_LIBRARY="%python2_library%" ^
-DPYTHON2_NUMPY_INCLUDE_DIRS="%python2_numpy_include_dirs%" ^
-DPYTHON2_PACKAGES_PATH="%python2_packages_path%" ^
-DBUILD_opencv_python3=ON ^
-DPYTHON3_EXECUTABLE="%python3_executable%" ^
-DOPENCV_PYTHON3_VERSION=3.7.3 ^
-DPYTHON3_INCLUDE_DIR="%python3_include_dir%" ^
-DPYTHON3_LIBRARY="%python3_library%" ^
-DPYTHON3_NUMPY_INCLUDE_DIRS="%python3_numpy_include_dirs%" ^
-DPYTHON3_PACKAGES_PATH="%python3_packages_path%"
Значение некоторых флагов
- BUILD_opencv_world – необязательный модуль, содержащий копии всех выбранных в ходе установки библиотек. Удобен при разработке на C++, так как вместо подключения кучи зависимостей opencv можно подключить одну зависимость opencv_world411.lib в проект
- INSTALL_EXAMPLES/INSTALL_TESTS – установка примеров/тестов кода opencv
- CUDA_FAST_MATH, WITH_CUBLAS – дополнительные модули для CUDA, призванные ускорить вычисления
- CUDA_ARCH_PTX – версия PTX инструкций для улучшения производительности вычислений
- OPENCV_EXTRA_MODULES_PATH – путь до дополнительных модулей из opencv-contrib (обязательно для CUDA)
- BUILD_PROTOBUF – для работы некоторых модулей opencv необходим Protobuf (сборщик opencv в любом случае поставит BUILD_PROTOBUF=ON)
Спустя примерно 10 минут в консоле должна появиться информация о сборке и завершающие строки «Configuring done» и «Generating done». Проверяем всю информацию, особенно разделы NVIDIA CUDA, Python 2, Python 3.

Далее собираем решение. На сборку может уйти несколько часов в зависимости от вашего процессора и версии Visual Studio.
cmake --build %opencvBuild% --target ALL_BUILD --config ReleaseУстанавливаем решение.
cmake --build %opencvBuild% --target INSTALL --config ReleaseПосле успешной установки создаем системную переменную OPENCV_DIR со значением C:\OpenCV\opencv-4.1.1\build\install\x64\vc15\bin и также добавляем ее в PATH.
Тест
Проверим работоспособность OpenCV с модулем CUDA на простом примере умножения матриц.
Подключение OpenCV в проект Visual Studio
- Установить тип сборки Release/x64 (для Debug следует собрать OpenCV с флагом Debug)
- Project Properties → C/C++ → General → Добавить строку «C:\OpenCV\opencv-4.1.1\build\install\include» в Additional Include Directories
- Project Properties → Linker → General → Добавить строку « C:\OpenCV\opencv-4.1.1\build\install\x64\vc16\lib» в Additional Library Directories
- Project Properties → Linker → General → Добавить «;opencv_world411.lib» («;opencv_world411d.lib» для Debug) в конец Additional Dependencies
Пример на Python 3
import numpy as np
import cv2 as cv
import time

rand = np.random.random((1024, 1024)).astype(np.float32)
h_array1 = np.stack([rand, rand],axis=2)
h_array2 = h_array1
d_array1 = cv.cuda_GpuMat()
d_array2 = cv.cuda_GpuMat()
d_array1.upload(h_array1)
d_array2.upload(h_array2)

start = time.time()
cv.cuda.gemm(d_array1, d_array2, 1, None, 0, None, 1)
end = time.time()
print("Time elapsed:", end - start, "sec")
Вывод в консоли
Time elapsed: 0.3130002021789551Пример на C++
#include <iostream>
#include <opencv2/opencv.hpp>
#include <opencv2/cudaarithm.hpp>

using namespace std;
using namespace cv;
using namespace cv::cuda;

int main() {

	Mat h_array1 = Mat::ones(1024, 1024, CV_32FC2);
	Mat h_array2 = Mat::ones(1024, 1024, CV_32FC2);
	Mat h_array3 = Mat::zeros(1024, 1024, CV_32FC2);
	Mat h_result;
	GpuMat d_array1, d_array2, d_array3, d_result;

	d_array1.upload(h_array1);
	d_array2.upload(h_array2);

	const clock_t begin_time = clock();
	cuda::gemm(d_array1, d_array2, 1.0, d_array3, 0.0, d_result);
	cout << "Time elapsed: " << (float(clock() - begin_time) / CLOCKS_PER_SEC) << " sec" << endl;

	d_result.download(h_result);

	return 0;
}
Вывод в консоли
Time elapsed: 0.354Удаление
Чтобы удалить OpenCV, нужно выполнить команду.
cmake --build %opencvBuild% --target uninstall --config Releaseи удалить системную переменную OPENCV_DIR и убрать путь до OpenCV из PATH.
Заключение
В статье мы рассмотрели установку OpenCV 4 для ОС Windows 10. Данный алгоритм тестировался на Windows 8.1 и Windows 10, но, в теории, может собираться и на Windows 7. За дополнительной информацией можно обратиться к списку источников ниже.
P.S. Напоследок сведем все установочные команды в один .bat файл для тех, кто хочет автоматизировать установку.
install_opencv411.bat
cd C:\OpenCV

git clone https://github.com/opencv/opencv_contrib.git -b "4.1.1"
git clone https://github.com/opencv/opencv.git -b "4.1.1"

ren opencv opencv-4.1.1
ren opencv_contrib-4.1.1

set "opencvSource=opencv-4.1.1"
set "opencvExtraModules=opencv_contrib-4.1.1/modules"
set "opencvBuild=%opencvSource%\build"
set "compiler=Visual Studio 16 2019"
set "buildType=Release"

set "python2_executable=C:/Python27/python.exe"
set "python2_include_dir=C:/Python27/include"
set "python2_library=C:/Python27/libs/python27.lib"
set "python2_numpy_include_dirs=C:/Python27/Lib/site-packages/numpy/core/include"
set "python2_packages_path=C:/Python27/Lib/site-packages"

set "python3_executable=C:/Users/root/Anaconda3/python.exe"
set "python3_include_dir=C:/Users/root/Anaconda3/include"
set "python3_library=C:/Users/root/Anaconda3/libs/python37.lib"
set "python3_numpy_include_dirs=C:/Users/root/Anaconda3/lib/site-packages/numpy/core/include"
set "python3_packages_path=C:/Users/root/Anaconda3/Lib/site-packages"

cmake ^
-B"%opencvBuild%/" ^
-H"%opencvSource%/" ^
-G"%compiler%" ^
-Ax64 ^
-DCMAKE_BUILD_TYPE=%buildType% ^
-DBUILD_opencv_world=ON ^
-DINSTALL_TESTS=OFF ^
-DINSTALL_C_EXAMPLES=OFF ^
-DBUILD_EXAMPLES=OFF ^
-DOPENCV_EXTRA_MODULES_PATH="%opencvExtraModules%/" ^
-DBUILD_PROTOBUF=ON ^
-DBUILD_opencv_python_bindings_generator=ON ^
-DWITH_CUDA=ON ^
-DCUDA_FAST_MATH=ON ^
-DWITH_CUBLAS=ON ^
-DCUDA_ARCH_PTX=7.5 ^
-DBUILD_opencv_python2=ON ^
-DPYTHON2_EXECUTABLE="%python2_executable%" ^
-DOPENCV_PYTHON2_VERSION=2.7.16 ^
-DPYTHON2_INCLUDE_DIR="%python2_include_dir%" ^
-DPYTHON2_LIBRARY="%python2_library%" ^
-DPYTHON2_NUMPY_INCLUDE_DIRS="%python2_numpy_include_dirs%" ^
-DPYTHON2_PACKAGES_PATH="%python2_packages_path%" ^
-DBUILD_opencv_python3=ON ^
-DPYTHON3_EXECUTABLE="%python3_executable%" ^
-DOPENCV_PYTHON3_VERSION=3.7.3 ^
-DPYTHON3_INCLUDE_DIR="%python3_include_dir%" ^
-DPYTHON3_LIBRARY="%python3_library%" ^
-DPYTHON3_NUMPY_INCLUDE_DIRS="%python3_numpy_include_dirs%" ^
-DPYTHON3_PACKAGES_PATH="%python3_packages_path%"

cmake --build %opencvBuild% --target ALL_BUILD --config Release
cmake --build %opencvBuild% --target INSTALL --config Release
Список источников
- docs.opencv.org/4.1.1/d3/d52/tutorial_windows_install.html
- www.learnopencv.com/install-opencv-4-on-windows
- jamesbowley.co.uk/build-opencv-4-0-0-with-cuda-10-0-and-intel-mkl-tbb-in-windows
- lightbuzz.com/opencv-cuda
- Глава «Building libraries from Source» книги Hands-on GPU-Accelerated Computer Vision with OpenCV and CUDA
OpenCV CUDA installation
A save of the process needed to build manually OpenCV for Python 3 with CUDA bindings on Windows 10 and 11.
Alternatively this is also a guide for building a standard OpenCV module for Python 3 if you omit all the CUDA related paragraphs.
Sources and troubleshooting references
The process is based on this tutorial by Anindya for the step-by-step process with CMake GUI and this tutorial by James Bowley for the process with command line CMake and some troubleshooting.
ImportError: DLL load failed while importing cv2: The specified module could not be found.
Both of these tutorials should be enough for most people. But in some cases, even if the module was successfully installed in your Python installation, you may end up with this message when importing OpenCV with import cv2:
ImportError: DLL load failed while importing cv2: The specified module could not be found.
This case is detailed in the troubleshooting section and is almost entirely based on this quite extensive github issue. Basically your whole installation is likely completely successful, it may just be Python failing to read your environment variables.
Hardware and software configuration used
Tested on a Windows 10 20H2 machine with i7-10700 CPU @ 2.90GHz and GeForce RTX 2080 Ti.
Python 3.8.10, OpenCV 4.5.5, NumPy 1.21.6, CUDA toolkit v11.6, cuDNN v8.3.3, Visual Studio Community 2019 v16.11.13, CMake 3.19.1, all of this in April 2022.
Repeated in September 2022 with no problems on the same machine updated to Windows 11 and on another i5 laptop with an older Quadro GPU. I will not need to repeat an installation (with CUDA) for the foreseeable future, if something goes wrong please do keep me posted!
Repeated in late 2023 without problems (without CUDA) on a Windows 11 laptop (i7-8th gen, Intel UHD Graphics 620) with Python 3.10, OpenCV 4.9.
Step-by-step installation process
Prerequisites
- Visual Studio with C++ build tools
- CUDA according to your GPU
- cuDNN corresponding to CUDA (free account creation needed to download)
- Python 3 install
- NumPy
- OpenCV from source and the matching version of OpenCV contrib modules from source
- CMake
Check that your GPU is compatible with CUDA: wikipedia.org/wiki/CUDA.
Python, NumPy and pip
Install a recent Python 3.x however you prefer (Python website, Anaconda, Windows store, create a virtual env…), but if you are here that’s probably already done. This «tutorial» is done with a standard Python install, from the Python website with no virtual environment. For the particularities of an Anaconda installation look at James Bowley’s tutorial.
Make sure you have NumPy installed or install it with pip install numpy. Uninstall any OpenCV python module pip uninstall opencv-python or pip uninstall opencv-contrib-python. Delete the YOUR_PYTHON_PATH/Lib/site-packages/cv2 folder for cleaning purposes.
Visual Studio
Download Visual Studio (2019 version here) and install the build tools for C++ from the Visual Studio Installer.

CUDA and cuDNN
Download and install the latest CUDA toolkit compatible with your GPU (see here for compatibility as well) or check you already have it installed in C:\Program Files\NVIDIA GPU Computing Toolkit.
Idem for cuDNN with an intermediary step to create a NVIDIA developer account, fill up their survey etc.
Check in your environment variables that CUDA_PATH and CUDA_PATH_Vxx_x are here and pointing to your install path.
Copy the files in the cuDNN folders (under C:\Program Files\NVIDIA\CUDNN\vX.X) bin, include and lib/x64 to the corresponding folders in your CUDA folder.
OpenCV
Download and extract matching versions of OpenCV and OpenCV-contrib from the links above.
CMake configuration
Preparation
Prepare a «build» folder with your OpenCV extracted folders.

Edit the end of the OpenCVDetectPython.cmake file in opencv-x.x.x/cmake. Move the second elseif above the first to get this:

This will prioritize the use of your Python 3 installation for the build.
CMake GUI build configuration
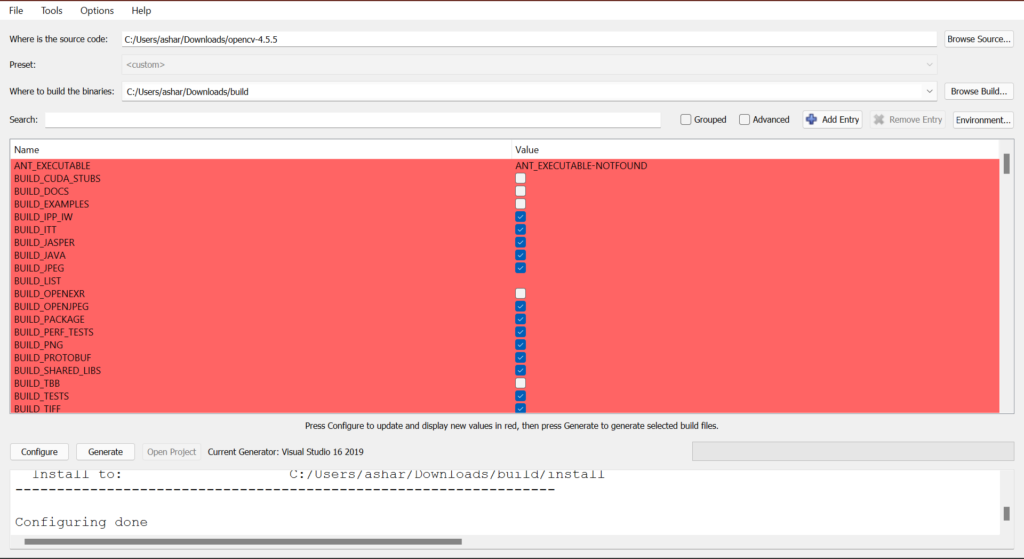
Provide the paths to the OpenCV and target build folders:

Hit Configure and select x64 as the Optional platform for generator, then hit finish to start the first round of configuration.
Once this is done edit the following parameters:
| Name | Value |
|---|---|
| ENABLE_FAST_MATH | ✅ |
| OPENCV_DNN_CUDA | ✅ |
| OPENCV_EXTRA_MODULES_PATH | path of modules directory in extracted opencv_contrib-x.x.x |
| OPENCV_PYTHON3_VERSION | ✅ |
| WITH_CUDA | ✅ |
Check the PYTHON3_… parameters so that the paths correspond to what you expect.
Note that the path separator in OPENCV_EXTRA_MODULES_PATH (or any other parameter value) has to be «/» and not «\».
Hit Configure again.
Edit two more parameters:
| Name | Value |
|---|---|
| CUDA_FAST_MATH | ✅ |
| CUDA_ARCH_BIN | x.x |
The CUDA_ARCH_BIN corresponding to your GPU is the value found in the left column of the GPU support table. For instance «7.5» for the RTX 2080 Ti.

Hit Configure for the final configuration round.
Once the configuration is done you should not have any parameter left in red.
Now hit Generate. When generation is finished we are done with CMake.
Build the project with Visual Studio
Open the OpenCV.sln just created in the build folder.
Go in «Tools>Options…», then in «Projects and Solutions > Web Projects» uncheck the last parameter. Continue if it was already unchecked, otherwise close Visual Studio and reopen OpenCV.sln.
N.B. If you are not using Visual Studio in english, this setting may be elsewhere or (from personal experience) somehow simply unfindable. If this is the case change the language to english. While I have no precise idea of why this setting is needed, it actually has an impact.

Change the «Debug» mode to «Release».

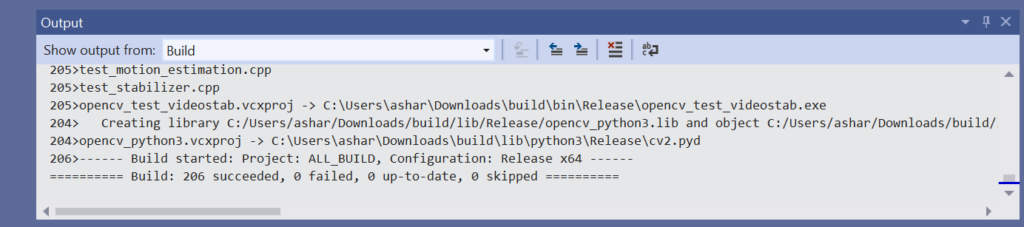
In the solution explorer expand CMakeTargets, right-click ALL_BUILD and select Build. This should take about half an hour.
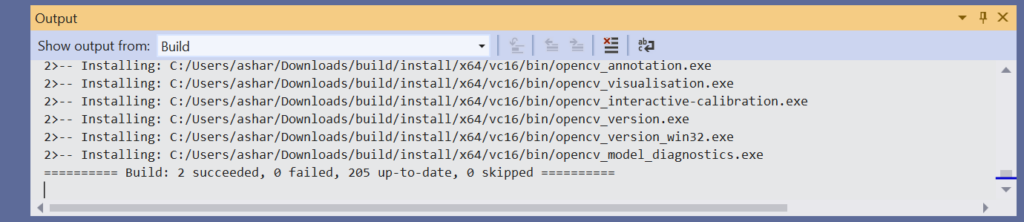
Then repeat the step for INSTALL (right below ALL_BUILD).
Check for errors in the two building steps, if everything is fine you are done.
Check install and troubleshooting
First thing to do open your preferred way of executing some Python code and try this:
import cv2
print(cv2.__version__)
print(cv2.cuda.getCudaEnabledDeviceCount())
If it works, congratulations you are good to go!
If not let’s tackle the problem. The problem being ImportError: DLL load failed while importing cv2: The specified module could not be found..
For other bugs and problems I refer you to the troubleshooting section of James Bowley’s tutorial.
Is everything in place ?
You should have a «cv2» folder in your python installation (under your_python_path/Lib/site-packages). If not check if you have a «binding» folder in the Visual Studio solution.
Otherwise I suggest trying to change two parameters in the CMake configuration: BUILD_SHARED_LIBS 🔳 and OPENCV_FORCE_PYTHON_LIBS ✅. Then re-generate and re-build everything.
Is CV2 detected ?
In an IDE with code suggestion (VS Code for instance) try to type import cv2, then write cv2. and see if suggestions appear. If they do your Python installation can successfully access OpenCV.
OpenCV libraries
Check that the libraries installed by your build are not causing the import error. To do this you can add manually the DLL files path to a script:
import os
os.add_dll_directory('C:/path_to_opencv_build_folder/install/x64/vc16/bin')
import cv2
This import should be done by default in the config.py file in the cv2 folder and should probably not solve the issue by itself.
External libraries
The problem is most likely linked to other libraries not loaded by Python even if they are in your PATH environment variables. You can troubleshoot this by adding all the PATH variables to the script with os.add_dll_directory() until it works or use the Dependency walker to find which DLLs you are missing.
Using the Dependency walker
Opening the cv2.cp38-win_amd64.pyd (or the .pyd file corresponding to the python version you’re using) with the dependency walker can get you a list of DLLs it is missing. However it will also list a ton of Microsoft DLLs (starting with API-MS-… or EXT-MS-…) that actually do not impact the import error. Then you can try to add manually the missing libraries and see if it solves the issue.
Using Anaconda binaries
A solution highlighted in the github issue mentioned in the intro of this README was that using an Anaconda Python install made it work, so having a Python 3.8 Anaconda install I added the C:/Users/username/Anaconda3/Library/bin path to my script and voilà, it worked.
It turns out my only missing libraries were hdf5.dll and zlib.dll out of the >200 DLL files located there. So they are here in this repository if you do not want to needlessly install Anaconda.
Once you have located the folders containing your missing DLLs you have a few options to permanently solve the import error:
- copy the files to your
path_to_opencv_build_folder/install/x64/vc16/binfolder (easy but not clean) - add the
import osandos.add_dll_directory('...')to any script using OpenCV (ok but not convenient) - add all the needed
os.add_dll_directory()in the__init__.pyfile ofcv2right after the__all__ = []line (cleanest but make it clear!)
If some part of this solved your ImportError: DLL load failed while importing cv2: The specified module could not be found. then great! Otherwise I suggest going thoroughly through the github issue for more ideas. Feel free to make any remarks, I will update this page if need be.
This article will focus on the assembly and installation of OpenCV 4 for C / C ++, Python 2 and Python 3 from source files with additional CUDA 10 modules on Windows.
We tried to include here all the subtleties and nuances that you may encounter during the installation, and about which it is not written in the official manual.
The assembly was tested for:
Windows 8.1 + Visual Studio 2017 + Python 2/3 + CUDA 10.0 + GeForce 840m
Windows 10 + Visual Studio 2019 + Python 2/3 + CUDA 10.0 + GeForce GTX 1060
Attention! The build will not work for version OpenCV 4.0.1 and / or CUDA below version 10. CUDA 9 and below is supported by OpenCV 3.
What you need to install
The following tools were used in my assembly:
- CMake 3.15
- MS Visual Studio 2019 64-bit + CMake C ++ tools for Windows
- Python 3.7.3 64-bit + NumPy 64-bit
- Python 2.7.16 64-bit + NumPy 64-bit
- CUDA 10.0
- CuDNN 7.6.2
- OpenCV 4.1.1 and OpenCV-contrib-4.1.1
Installation
Since the installation is done through console commands, you should carefully and accurately carry out all the steps. Also, if necessary, change the installation paths to your own.
First you need to install the required software, and Visual Studio must be installed before CUDA:
- CMake (version> = 3.9.1)
- MS Visual Studio
- Python 3.7 (Anaconda3 distribution)
- CUDA 10.0
- CuDNN 7.6.2
After installing all the components, make sure that the paths for CMake, Visual Studio, Python, CUDA, CuDNN are written in the variables PATH, PYTHONPATH, CUDA_PATH and cudnn, respectively.
Next, download the opencv-4.1.1 and opencv-contrib-4.1.1 source archives to the desired location (in my case, this is C: \ OpenCV ).
git clone https://github.com/opencv/opencv.git -b "4.1.1"
git clone https://github.com/opencv/opencv_contrib.git -b "4.1.1"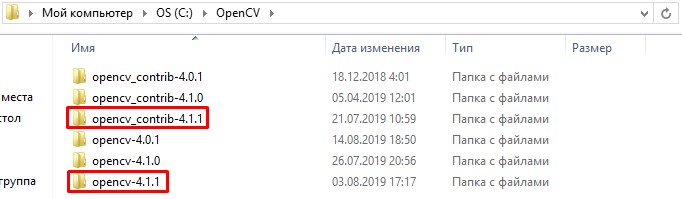
Create the build / folder inside opencv-4.1.1.
Next, we generate assembly files using cmake. We will use the console version of cmake, since cmake-gui confuses the types of some variables (for example, OPENCV_PYTHON3_VERSION) and, as a result, generates files incorrectly.
We open the console along the path C: \ OpenCV \ and register the variables.
set "opencvSource=opencv-4.1.1"
set "opencvExtraModules=opencv_contrib-4.1.1/modules"
set "opencvBuild=%opencvSource%\build"
set "compiler=Visual Studio 16 2019"
set "buildType=Release"Note. For Visual Studio 2017, the generator is written as “Visual Studio 15 2017 Win64” and without the -A flag.
You can also explicitly specify the Python libraries for python 2 and python 3 in case the collector cannot find them automatically.
set "python2_executable=C:/Python27/python.exe"
set "python2_include_dir=C:/Python27/include"
set "python2_library=C:/Python27/libs/python27.lib"
set "python2_numpy_include_dirs=C:/Python27/Lib/site-packages/numpy/core/include"
set "python2_packages_path=C:/Python27/Lib/site-packages"

set "python3_executable=C:/Users/root/Anaconda3/python.exe"
set "python3_include_dir=C:/Users/root/Anaconda3/include"
set "python3_library=C:/Users/root/Anaconda3/libs/python37.lib"
set "python3_numpy_include_dirs=C:/Users/root/Anaconda3/lib/site-packages/numpy/core/include"
set "python3_packages_path=C:/Users/root/Anaconda3/Lib/site-packages"Note. Please note that the NumPy library must be the same bit depth as OpenCV. Checking this out is easy:
import numpy.distutils.system_info as sysinfo
print(sysinfo.platform_bits)
Generate assembly files using the long command below. In case of unsuccessful generation or errors after executing the command, repeated generation should be performed by cleaning all the files in build / and .cache /.
cmake ^
-B"%opencvBuild%/" ^
-H"%opencvSource%/" ^
-G"%compiler%" ^
-Ax64 ^
-DCMAKE_BUILD_TYPE=%buildType% ^
-DBUILD_opencv_world=ON ^
-DINSTALL_TESTS=OFF ^
-DINSTALL_C_EXAMPLES=OFF ^
-DBUILD_EXAMPLES=OFF ^
-DOPENCV_EXTRA_MODULES_PATH="%opencvExtraModules%/" ^
-DBUILD_PROTOBUF=ON ^
-DBUILD_opencv_python_bindings_generator=ON ^
-DWITH_CUDA=ON ^
-DCUDA_FAST_MATH=ON ^
-DWITH_CUBLAS=ON ^
-DCUDA_ARCH_PTX=7.5 ^
-DBUILD_opencv_python2=ON ^
-DPYTHON2_EXECUTABLE="%python2_executable%" ^
-DOPENCV_PYTHON2_VERSION=2.7.16 ^
-DPYTHON2_INCLUDE_DIR="%python2_include_dir%" ^
-DPYTHON2_LIBRARY="%python2_library%" ^
-DPYTHON2_NUMPY_INCLUDE_DIRS="%python2_numpy_include_dirs%" ^
-DPYTHON2_PACKAGES_PATH="%python2_packages_path%" ^
-DBUILD_opencv_python3=ON ^
-DPYTHON3_EXECUTABLE="%python3_executable%" ^
-DOPENCV_PYTHON3_VERSION=3.7.3 ^
-DPYTHON3_INCLUDE_DIR="%python3_include_dir%" ^
-DPYTHON3_LIBRARY="%python3_library%" ^
-DPYTHON3_NUMPY_INCLUDE_DIRS="%python3_numpy_include_dirs%" ^
-DPYTHON3_PACKAGES_PATH="%python3_packages_path%"
After about 10 minutes, the assembly information and the final lines “Configuring done” and “Generating done” should appear in the console. We check all the information, especially the sections of NVIDIA CUDA, Python 2, Python 3.

Next, we build the solution. It may take several hours to build, depending on your processor and version of Visual Studio.
cmake --build %opencvBuild% --target ALL_BUILD --config ReleaseInstall the solution.
cmake --build %opencvBuild% --target INSTALL --config ReleaseAfter successful installation, create the OPENCV_DIR system variable with the value C: \ OpenCV \ opencv-4.1.1 \ build \ install \ x64 \ vc15 \ bin and also add it to PATH.
Test
We will test the functionality of OpenCV with the CUDA module using a simple example of matrix multiplication.
An example of Python 3
import numpy as np
import cv2 as cv
import time

rand = np.random.random((1024, 1024)).astype(np.float32)
h_array1 = np.stack([rand, rand],axis=2)
h_array2 = h_array1
d_array1 = cv.cuda_GpuMat()
d_array2 = cv.cuda_GpuMat()
d_array1.upload(h_array1)
d_array2.upload(h_array2)

start = time.time()
cv.cuda.gemm(d_array1, d_array2, 1, None, 0, None, 1)
end = time.time()
print("Time elapsed:", end - start, "sec")
Console output
Time elapsed: 0.3130002021789551Remove
To remove OpenCV, you need to run the command.
cmake --build %opencvBuild% --target uninstall --config Releaseand remove the OPENCV_DIR system variable and remove the path to OpenCV from PATH.
Conclusion
In this article, we examined the installation of OpenCV 4 for Windows 10. This algorithm was tested on Windows 8.1 and Windows 10, but, in theory, it can be built on Windows 7. For more information, refer to the list of sources below.
P.S. Finally, we will bring all the installation commands into a single .bat file for those who want to automate the installation.
cd C:\OpenCV

git clone https://github.com/opencv/opencv_contrib.git -b "4.1.1"
git clone https://github.com/opencv/opencv.git -b "4.1.1"

ren opencv opencv-4.1.1
ren opencv_contrib-4.1.1

set "opencvSource=opencv-4.1.1"
set "opencvExtraModules=opencv_contrib-4.1.1/modules"
set "opencvBuild=%opencvSource%\build"
set "compiler=Visual Studio 16 2019"
set "buildType=Release"

set "python2_executable=C:/Python27/python.exe"
set "python2_include_dir=C:/Python27/include"
set "python2_library=C:/Python27/libs/python27.lib"
set "python2_numpy_include_dirs=C:/Python27/Lib/site-packages/numpy/core/include"
set "python2_packages_path=C:/Python27/Lib/site-packages"

set "python3_executable=C:/Users/root/Anaconda3/python.exe"
set "python3_include_dir=C:/Users/root/Anaconda3/include"
set "python3_library=C:/Users/root/Anaconda3/libs/python37.lib"
set "python3_numpy_include_dirs=C:/Users/root/Anaconda3/lib/site-packages/numpy/core/include"
set "python3_packages_path=C:/Users/root/Anaconda3/Lib/site-packages"

cmake ^
-B"%opencvBuild%/" ^
-H"%opencvSource%/" ^
-G"%compiler%" ^
-Ax64 ^
-DCMAKE_BUILD_TYPE=%buildType% ^
-DBUILD_opencv_world=ON ^
-DINSTALL_TESTS=OFF ^
-DINSTALL_C_EXAMPLES=OFF ^
-DBUILD_EXAMPLES=OFF ^
-DOPENCV_EXTRA_MODULES_PATH="%opencvExtraModules%/" ^
-DBUILD_PROTOBUF=ON ^
-DBUILD_opencv_python_bindings_generator=ON ^
-DWITH_CUDA=ON ^
-DCUDA_FAST_MATH=ON ^
-DWITH_CUBLAS=ON ^
-DCUDA_ARCH_PTX=7.5 ^
-DBUILD_opencv_python2=ON ^
-DPYTHON2_EXECUTABLE="%python2_executable%" ^
-DOPENCV_PYTHON2_VERSION=2.7.16 ^
-DPYTHON2_INCLUDE_DIR="%python2_include_dir%" ^
-DPYTHON2_LIBRARY="%python2_library%" ^
-DPYTHON2_NUMPY_INCLUDE_DIRS="%python2_numpy_include_dirs%" ^
-DPYTHON2_PACKAGES_PATH="%python2_packages_path%" ^
-DBUILD_opencv_python3=ON ^
-DPYTHON3_EXECUTABLE="%python3_executable%" ^
-DOPENCV_PYTHON3_VERSION=3.7.3 ^
-DPYTHON3_INCLUDE_DIR="%python3_include_dir%" ^
-DPYTHON3_LIBRARY="%python3_library%" ^
-DPYTHON3_NUMPY_INCLUDE_DIRS="%python3_numpy_include_dirs%" ^
-DPYTHON3_PACKAGES_PATH="%python3_packages_path%"

cmake --build %opencvBuild% --target ALL_BUILD --config Release
cmake --build %opencvBuild% --target INSTALL --config Release

Why manually build OpenCV?
The pre-built Windows libraries available for OpenCV do not include the CUDA modules, support for the Nvidia Video Codec SDK or cuDNN.
If you just need the Windows libraries or a Python wheel take a look at OpenCV C++ CUDA builds and/or OpenCV Python CUDA wheels to see if there is a pre-built version suitable for your setup.
To see if building the OpenCV CUDA modules is suitable for your application you can get an indication of the performance boost of most functions in OpenCV CUDA Performance Comparison (Nvidia vs Intel).
Before you begin quickly check which parts of the guide are relevant to you
-
This guide assumes you are building the latest stable release of OpenCV against the most recent CUDA dependencies. Whilst the instructions can also work on older versions, this is not guaranteed so please update to the latest stable releases before raising any issues.
-
If you just need the OpenCV binaries or a Python wheel which includes the CUDA modules, check OpenCV C++ CUDA builds and/or OpenCV Python CUDA wheels first to see if they are available for your desired combination of OpenCV and CUDA.
-
If you have previously built and/or are trying to manually install the Python bindings and are facing errors check out the troubleshooting Python bindings installation issues and manually installing OpenCV Python bindings sections first.
-
If you already have the OpenCV source and the required dependencies and are just looking for the CMake flags they can be found here.
Prerequisites
There are a couple of components you need to download and/or install before you can get started, you first need to:
-
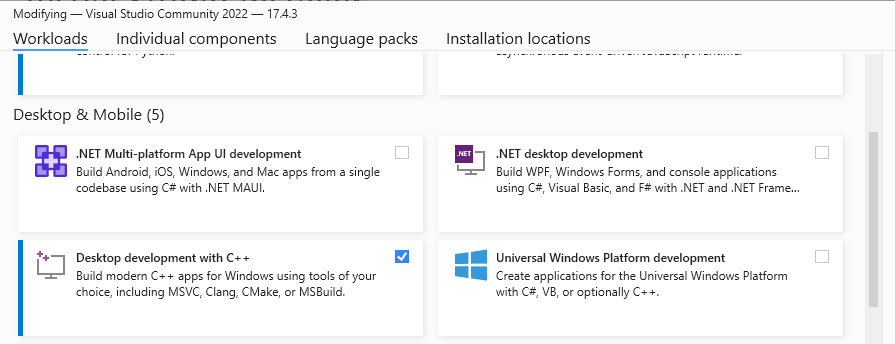
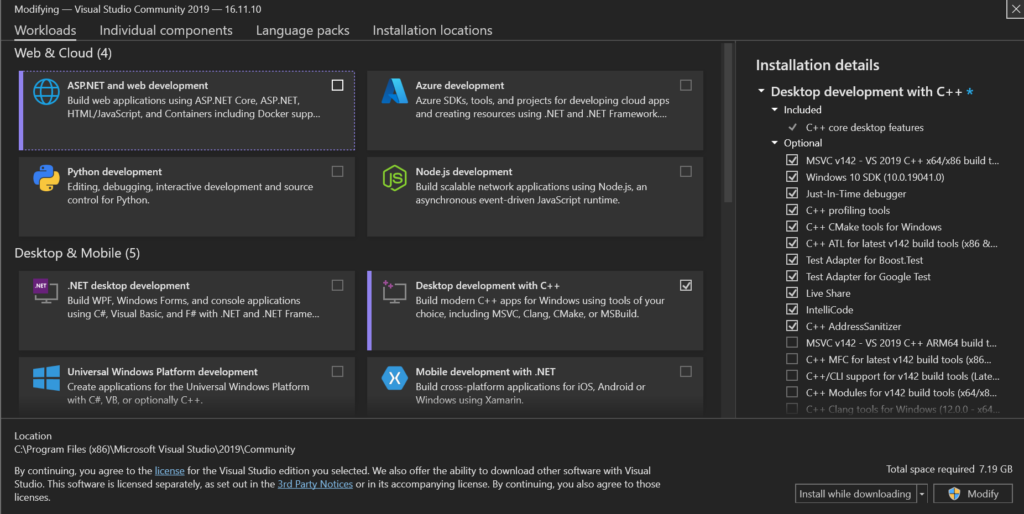
Install the latest version of Visual Studio, selecting the Desktop development with C++ workload shown in the image below. If you already have an installation ensure that the correct workload is installed and that you have updated to the latest version.

Visual Studio Select C++ Workload -
Download the source files1 for OpenCV from GitHub by either cloning the repositories (opencv and opencv_contrib) or or downloading the archives containing the source files (opencv.zip and opencv_contirib.zip)
-
Install the latest stable (not release candidate -rc) version of CMake.
-
Install the latest version of the CUDA Toolkit.
If your system path is too long, CUDA will not add the path to its shared libraries C:\Program Files\NVIDIA GPU Computing Toolkit\CUDA\vxx.x\bin during installation. If you receive a warning about this at the end of the installation process do not forget to manually add the this to your system or user path.
- Optional2 — To decode video on the GPU with the Nvidia Video Codec SDK:
- Register and download the latest version of the Complete Video Codec SDK xx.x Package.
- Extract and copy the contents of Interface and Lib to the include and lib directories inside your CUDA installation.
- Optional — To use the DNN CUDA backend:
- Register and download the latest version of cuDNN for the version of CUDA you have installed by selecting the Tarball.
- Extract and copy the bin, include and lib directories to your CUDA installation.
The installation directory for CUDA xx.x is C:\Program Files\NVIDIA GPU Computing Toolkit\CUDA\vxx.x.
- Optional3 – To call OpenCV CUDA routines from python, install the latest x64 bit version of miniforge with numpy (execute mamba install numpy from the miniforge prompt once miniforge is installed.)
Building OpenCV with CMake
Before you can build OpenCV you have to generate the build files with CMake. This can be done via the command line or with the CMake GUI. Most new users will find the GUI more accessible however by far the quickest, easiest and least error prone way to proceed is to call CMake from the command line and as a result I have not included any instructions for using the CMake GUI4.
In addition there are several ways to build OpenCV using Visual Studio. For simplicity only two methods are discussed:
- Building OpenCV with Visual Studio solution files.
- Building OpenCV with the ninja build system to reduce the build time.
Building OpenCV with CUDA using Visual Studio solution files from the command prompt (cmd)
The following steps will build opencv_worldxxx.dll which is suitable for use on the installed GPU and any other GPUs with the “same” compute capability. This is the best way to get started as it has the smallest build time, but it will limit your options if you want to build software which runs on a range of different GPUs. To fully understand the implications of this please read choosing a suitable CUDA compute capability.
Use Ninja for faster build times
Visual Studio is painfully slow when compiling OpenCV with CUDA, to reduce the build time I recommended always using the Ninja build system instead, see the Ninja tab below for the command line arguments and building OpenCV with the ninja build system to reduce the build time for more information.
- Open windows command prompt, type cmd in the Windows search bar.
-
Paste the below5 into to the command prompt and press Enter.
- All CUDA modules
- cuDNN only
- Without Python bindings
- Without CUDA
- Ninja
set CMAKE_BUILD_PARALLEL_LEVEL=<N_THREADS>
"C:\Program Files\CMake\bin\cmake.exe" -H"<PATH_TO_OPENCV_SOURCE>" -DOPENCV_EXTRA_MODULES_PATH="<PATH_TO_OPENCV_CONTRIB_MODULES>" -B"<PATH_TO_BUILD_DIR>" -G"Visual Studio 17 2022" -DINSTALL_TESTS=ON -DINSTALL_C_EXAMPLES=ON -DBUILD_EXAMPLES=ON -DBUILD_opencv_world=ON -DENABLE_CUDA_FIRST_CLASS_LANGUAGE=ON -DWITH_CUDA=ON -DCUDA_GENERATION=Auto -DBUILD_opencv_python3=ON -DPYTHON3_INCLUDE_DIR=<PATH_TO_PYTHON_DIST>/include -DPYTHON3_LIBRARY=<PATH_TO_PYTHON_DIST>/libs/<PYTHON_Lib> -DPYTHON3_EXECUTABLE=<PATH_TO_PYTHON_DIST>/python.exe -DPYTHON3_NUMPY_INCLUDE_DIRS=<PATH_TO_PYTHON_DIST>/lib/site-packages/numpy/core/include -DPYTHON3_PACKAGES_PATH=<PATH_TO_PYTHON_DIST>/Lib/site-packages/
If you just want to CUDA accelerate the DNN module and are not interested in building the rest of the CUDA modules this will significantly reduce compilation time and size of opencv_worldxxx.dll.
set CMAKE_BUILD_PARALLEL_LEVEL=<N_THREADS>
"C:\Program Files\CMake\bin\cmake.exe" -H"<PATH_TO_OPENCV_SOURCE>" -DOPENCV_EXTRA_MODULES_PATH="<PATH_TO_OPENCV_CONTRIB_MODULES>" -B"<PATH_TO_BUILD_DIR>" -G"Visual Studio 17 2022" -DINSTALL_TESTS=ON -DINSTALL_C_EXAMPLES=ON -DBUILD_EXAMPLES=ON -DBUILD_opencv_world=ON -DENABLE_CUDA_FIRST_CLASS_LANGUAGE=ON -DWITH_CUDA=ON -DCUDA_GENERATION=Auto -DBUILD_opencv_cudaarithm=OFF -DBUILD_opencv_cudabgsegm=OFF -DBUILD_opencv_cudafeatures2d=OFF -DBUILD_opencv_cudafilters=OFF -DBUILD_opencv_cudaimgproc=OFF -DBUILD_opencv_cudalegacy=OFF -DBUILD_opencv_cudaobjdetect=OFF -DBUILD_opencv_cudaoptflow=OFF -DBUILD_opencv_cudastereo=OFF -DBUILD_opencv_cudawarping=OFF -DBUILD_opencv_cudacodec=OFF -DBUILD_opencv_python3=ON -DPYTHON3_INCLUDE_DIR=<PATH_TO_PYTHON_DIST>/include -DPYTHON3_LIBRARY=<PATH_TO_PYTHON_DIST>/libs/<PYTHON_Lib> -DPYTHON3_EXECUTABLE=<PATH_TO_PYTHON_DIST>/python.exe -DPYTHON3_NUMPY_INCLUDE_DIRS=<PATH_TO_PYTHON_DIST>/lib/site-packages/numpy/core/include -DPYTHON3_PACKAGES_PATH=<PATH_TO_PYTHON_DIST>/Lib/site-packages/
set CMAKE_BUILD_PARALLEL_LEVEL=<N_THREADS> "C:\Program Files\CMake\bin\cmake.exe" -H"<PATH_TO_OPENCV_SOURCE>" -DOPENCV_EXTRA_MODULES_PATH="<PATH_TO_OPENCV_CONTRIB_MODULES>" -B"<PATH_TO_BUILD_DIR>" -G"Visual Studio 17 2022" -DINSTALL_TESTS=ON -DINSTALL_C_EXAMPLES=ON -DBUILD_EXAMPLES=ON -DBUILD_opencv_world=ON -DENABLE_CUDA_FIRST_CLASS_LANGUAGE=ON -DWITH_CUDA=ON -DCUDA_GENERATION=Autoset CMAKE_BUILD_PARALLEL_LEVEL=<N_THREADS> "C:\Program Files\CMake\bin\cmake.exe" -H"<PATH_TO_OPENCV_SOURCE>" -DOPENCV_EXTRA_MODULES_PATH="<PATH_TO_OPENCV_CONTRIB_MODULES>" -B"<PATH_TO_BUILD_DIR>" -G"Visual Studio 17 2022" -DINSTALL_TESTS=ON -DINSTALL_C_EXAMPLES=ON -DBUILD_EXAMPLES=ON -DBUILD_opencv_world=ON -DBUILD_opencv_python3=ON -DPYTHON3_INCLUDE_DIR=<PATH_TO_PYTHON_DIST>/include -DPYTHON3_LIBRARY=<PATH_TO_PYTHON_DIST>/libs/<PYTHON_Lib> -DPYTHON3_EXECUTABLE=<PATH_TO_PYTHON_DIST>/python.exe -DPYTHON3_NUMPY_INCLUDE_DIRS=<PATH_TO_PYTHON_DIST>/lib/site-packages/numpy/core/include -DPYTHON3_PACKAGES_PATH=<PATH_TO_PYTHON_DIST>/Lib/site-packages/For details see decreasing the build time with Ninja
"C:\Program Files\Microsoft Visual Studio\2022\Community\VC\Auxiliary\Build\vcvars64.bat"
"C:\Program Files\CMake\bin\cmake.exe" -H"<PATH_TO_OPENCV_SOURCE>" -DOPENCV_EXTRA_MODULES_PATH="<PATH_TO_OPENCV_CONTRIB_MODULES>" -B"<PATH_TO_BUILD_DIR>" -G"Ninja Multi-Config"" -DCMAKE_BUILD_TYPE=Release -DINSTALL_TESTS=ON -DINSTALL_C_EXAMPLES=ON -DBUILD_EXAMPLES=ON -DBUILD_opencv_world=ON -DENABLE_CUDA_FIRST_CLASS_LANGUAGE=ON -DWITH_CUDA=ON -DCUDA_GENERATION=Auto -DBUILD_opencv_python3=ON -DPYTHON3_INCLUDE_DIR=<PATH_TO_PYTHON_DIST>/include -DPYTHON3_LIBRARY=<PATH_TO_PYTHON_DIST>/libs/<PYTHON_Lib> -DPYTHON3_EXECUTABLE=<PATH_TO_PYTHON_DIST>/python.exe -DPYTHON3_NUMPY_INCLUDE_DIRS=<PATH_TO_PYTHON_DIST>/lib/site-packages/numpy/core/include -DPYTHON3_PACKAGES_PATH=<PATH_TO_PYTHON_DIST>/Lib/site-packages/
Following the configuration step the build is started with
"C:\Program Files\CMake\bin\cmake.exe" --build PATH_TO_BUILD_DIR --target install --config Releasewhere
- <N_THREADS> should be set to the number of cores/logical processors on your CPU,
- <PATH_TO_OPENCV_SOURCE> is the root of the OpenCV files you downloaded or cloned (the directory containing 3rdparty, apps, build, etc.),
- <PATH_TO_OPENCV_CONTRIB_MODULES>6 is the path to the modules directory inside the opencv-contrib repository (the directory containing cudaarithm, cudabgsegm, etc.),
- <PATH_TO_BUILD_DIR> is the path to the directory where the build files should go,
- <PATH_TO_PYTHON_DIST>7 is the directory where miniforge was installed and,
- <PYTHON_LIB> is the concatination of “python” with the major and minor version of your python install and “.lib”, e.g. for Python 3.10.6 <PYTHON_LIB>==python310.lib. You can confirm this by looking in your <PATH_TO_PYTHON_DIST>/libs directory.
When passing paths to CMake on the command line make sure not to terminate them using \ as this is a special character and will cause the following arguments to be ignored. e.g. PATH_TO_OPENCV_SOURCE can be D:\opencv or D:\opencv/ but not D:\opencv\.
This will generate the build files for OpenCV with python bindings with CUDA acceleration including all the corresponding tests and examples for verifcation. Additionally if the Nvidia Video Codec SDK or cuDNN are installed the corresponding modules will automatically be included.
Expand the tips below for an example of the CMake output if the configuration step is successful and how to check that output to make sure the Python bindings will be being built.
Example of CMake Configuration Output
--
-- General configuration for OpenCV 4.10.0-dev =====================================
--   Version control:               4.9.0-571-g2629688d11
--
--   Extra modules:
--     Location (extra):            D:/repos/opencv/contrib/modules
--     Version control (extra):     4.9.0-84-gb236c71c
--
--   Platform:
--     Timestamp:                   2024-06-11T08:50:41Z
--     Host:                        Windows 10.0.22631 AMD64
--     CMake:                       3.29.5
--     CMake generator:             Ninja Multi-Config
--     CMake build tool:            D:/bin/ninja/ninja.exe
--     MSVC:                        1940
--     Configuration:               Debug Release
--
--   CPU/HW features:
--     Baseline:                    SSE SSE2 SSE3
--       requested:                 SSE3
--     Dispatched code generation:  SSE4_1 SSE4_2 FP16 AVX AVX2 AVX512_SKX
--       requested:                 SSE4_1 SSE4_2 AVX FP16 AVX2 AVX512_SKX
--       SSE4_1 (18 files):         + SSSE3 SSE4_1
--       SSE4_2 (2 files):          + SSSE3 SSE4_1 POPCNT SSE4_2
--       FP16 (1 files):            + SSSE3 SSE4_1 POPCNT SSE4_2 FP16 AVX
--       AVX (9 files):             + SSSE3 SSE4_1 POPCNT SSE4_2 AVX
--       AVX2 (38 files):           + SSSE3 SSE4_1 POPCNT SSE4_2 FP16 FMA3 AVX AVX2
--       AVX512_SKX (8 files):      + SSSE3 SSE4_1 POPCNT SSE4_2 FP16 FMA3 AVX AVX2 AVX_512F AVX512_COMMON AVX512_SKX
--
--   C/C++:
--     Built as dynamic libs?:      YES
--     C++ standard:                11
--     C++ Compiler:                C:/Program Files/Microsoft Visual Studio/2022/Community/VC/Tools/MSVC/14.40.33807/bin/Hostx64/x64/cl.exe  (ver 19.40.33811.0)
--     C++ flags (Release):         /DWIN32 /D_WINDOWS /W4 /GR  /D _CRT_SECURE_NO_DEPRECATE /D _CRT_NONSTDC_NO_DEPRECATE /D _SCL_SECURE_NO_WARNINGS /Gy /bigobj /Oi  /fp:precise /FS     /EHa /wd4127 /wd4251 /wd4324 /wd4275 /wd4512 /wd4589 /wd4819  /O2 /Ob2 /DNDEBUG  /Zi
--     C++ flags (Debug):           /DWIN32 /D_WINDOWS /W4 /GR  /D _CRT_SECURE_NO_DEPRECATE /D _CRT_NONSTDC_NO_DEPRECATE /D _SCL_SECURE_NO_WARNINGS /Gy /bigobj /Oi  /fp:precise /FS     /EHa /wd4127 /wd4251 /wd4324 /wd4275 /wd4512 /wd4589 /wd4819  /Zi /Ob0 /Od /RTC1
--     C Compiler:                  C:/Program Files/Microsoft Visual Studio/2022/Community/VC/Tools/MSVC/14.40.33807/bin/Hostx64/x64/cl.exe
--     C flags (Release):           /DWIN32 /D_WINDOWS /W3  /D _CRT_SECURE_NO_DEPRECATE /D _CRT_NONSTDC_NO_DEPRECATE /D _SCL_SECURE_NO_WARNINGS /Gy /bigobj /Oi  /fp:precise /FS       /O2 /Ob2 /DNDEBUG  /Zi
--     C flags (Debug):             /DWIN32 /D_WINDOWS /W3  /D _CRT_SECURE_NO_DEPRECATE /D _CRT_NONSTDC_NO_DEPRECATE /D _SCL_SECURE_NO_WARNINGS /Gy /bigobj /Oi  /fp:precise /FS     /Zi /Ob0 /Od /RTC1
--     Linker flags (Release):      /machine:x64  /INCREMENTAL:NO  /debug
--     Linker flags (Debug):        /machine:x64  /debug /INCREMENTAL
--     ccache:                      NO
--     Precompiled headers:         NO
--     Extra dependencies:          C:/Program Files/NVIDIA GPU Computing Toolkit/CUDA/v12.5/lib/x64/cudart_static.lib C:/Program Files/NVIDIA GPU Computing Toolkit/CUDA/v12.5/lib/x64/nppial.lib C:/Program Files/NVIDIA GPU Computing Toolkit/CUDA/v12.5/lib/x64/nppc.lib C:/Program Files/NVIDIA GPU Computing Toolkit/CUDA/v12.5/lib/x64/nppitc.lib C:/Program Files/NVIDIA GPU Computing Toolkit/CUDA/v12.5/lib/x64/nppig.lib C:/Program Files/NVIDIA GPU Computing Toolkit/CUDA/v12.5/lib/x64/nppist.lib C:/Program Files/NVIDIA GPU Computing Toolkit/CUDA/v12.5/lib/x64/nppidei.lib C:/Program Files/NVIDIA GPU Computing Toolkit/CUDA/v12.5/lib/x64/cublas.lib C:/Program Files/NVIDIA GPU Computing Toolkit/CUDA/v12.5/lib/x64/cublasLt.lib C:/Program Files/NVIDIA GPU Computing Toolkit/CUDA/v12.5/lib/x64/cufft.lib C:/Program Files/NVIDIA GPU Computing Toolkit/CUDA/v12.5/lib/x64/nppif.lib C:/Program Files/NVIDIA GPU Computing Toolkit/CUDA/v12.5/lib/x64/nppim.lib C:/Program Files/NVIDIA GPU Computing Toolkit/CUDA/v12.5/lib/x64/nppicc.lib
--     3rdparty dependencies:
--
--   OpenCV modules:
--     To be built:                 aruco bgsegm bioinspired calib3d ccalib core cudaarithm cudabgsegm cudacodec cudafeatures2d cudafilters cudaimgproc cudalegacy cudaobjdetect cudaoptflow cudastereo cudawarping cudev datasets dnn dnn_objdetect dnn_superres dpm face features2d flann fuzzy gapi hfs highgui img_hash imgcodecs imgproc intensity_transform line_descriptor mcc ml objdetect optflow phase_unwrapping photo plot python3 quality rapid reg rgbd saliency shape signal stereo stitching structured_light superres surface_matching text tracking ts video videoio videostab wechat_qrcode world xfeatures2d ximgproc xobjdetect xphoto
--     Disabled:                    -
--     Disabled by dependency:      -
--     Unavailable:                 alphamat cannops cvv freetype hdf java julia matlab ovis python2 python2 sfm viz
--     Applications:                tests perf_tests examples apps
--     Documentation:               doxygen
--     Non-free algorithms:         NO
--
--   Windows RT support:            NO
--
--   GUI:
--     Win32 UI:                    YES
--     VTK support:                 NO
--
--   Media I/O:
--     ZLib:                        build (ver 1.3.1)
--     JPEG:                        build-libjpeg-turbo (ver 3.0.3-70)
--       SIMD Support Request:      YES
--       SIMD Support:              NO
--     WEBP:                        build (ver encoder: 0x020f)
--     PNG:                         build (ver 1.6.43)
--       SIMD Support Request:      YES
--       SIMD Support:              YES (Intel SSE)
--     TIFF:                        build (ver 42 - 4.6.0)
--     JPEG 2000:                   build (ver 2.5.0)
--     OpenEXR:                     build (ver 2.3.0)
--     HDR:                         YES
--     SUNRASTER:                   YES
--     PXM:                         YES
--     PFM:                         YES
--
--   Video I/O:
--     DC1394:                      NO
--     FFMPEG:                      YES (prebuilt binaries)
--       avcodec:                   YES (58.134.100)
--       avformat:                  YES (58.76.100)
--       avutil:                    YES (56.70.100)
--       swscale:                   YES (5.9.100)
--       avresample:                YES (4.0.0)
--     GStreamer:                   NO
--     DirectShow:                  YES
--     Media Foundation:            YES
--       DXVA:                      YES
--
--   Parallel framework:            Concurrency
--
--   Trace:                         YES (with Intel ITT)
--
--   Other third-party libraries:
--     Intel IPP:                   2021.11.0 [2021.11.0]
--            at:                   D:/build/opencv/4_10/3rdparty/ippicv/ippicv_win/icv
--     Intel IPP IW:                sources (2021.11.0)
--               at:                D:/build/opencv/4_10/3rdparty/ippicv/ippicv_win/iw
--     Lapack:                      NO
--     Eigen:                       NO
--     Custom HAL:                  NO
--     Protobuf:                    build (3.19.1)
--     Flatbuffers:                 builtin/3rdparty (23.5.9)
--
--   NVIDIA CUDA:                   YES (ver 12.5.40, CUFFT CUBLAS NVCUVID NVCUVENC)
--     NVIDIA GPU arch:             50 52 60 61 70 75 80 86 89 90
--     NVIDIA PTX archs:            90
--
--   cuDNN:                         YES (ver 9.2.0)
--
--   OpenCL:                        YES (NVD3D11)
--     Include path:                D:/repos/opencv/opencv/3rdparty/include/opencl/1.2
--     Link libraries:              Dynamic load
--
--   Python 3:
--     Interpreter:                 C:/Users/b/miniforge3/envs/py37_mini/python.exe (ver 3.7.12)
--     Libraries:                   C:/Users/b/miniforge3/envs/py37_mini/libs/python37.lib (ver 3.7.12)
--     Limited API:                 NO
--     numpy:                       C:/Users/b/miniforge3/envs/py37_mini/Lib/site-packages/numpy/core/include (ver 1.21.6)
--     install path:                C:/Users/b/miniforge3/envs/py37_mini/Lib/site-packages/cv2/python-3.7
--
--   Python (for build):            C:/Users/b/miniforge3/envs/py37_mini/python.exe
--
--   Java:
--     ant:                         NO
--     Java:                        NO
--     JNI:                         NO
--     Java wrappers:               NO
--     Java tests:                  NO
--
--   Install to:                    D:/build/opencv/4_10/install
-- -----------------------------------------------------------------
--
-- Configuring done (63.3s)
-- Generating done (21.4s)
-- Build files have been written to: D:/build/opencv/4_10
Verify configuration includes Python bindings before building
If you are building the python bindings look for python3 in the To be built: section of your CMake configuration output and if its not present look for any python related errors in the output preceeding it. e.g.
-- OpenCV modules: -- To be built: aruco bgsegm bioinspired calib3d ccalib core cudaarithm cudabgsegm cudacodec cudafeatures2d cudafilters cudaimgproc cudalegacy cudaobjdetect cudaoptflow cudastereo cudawarping cudev datasets dnn dnn_objdetect dpm face features2d flann fuzzy hfs highgui img_hash imgcodecs imgproc line_descriptor ml objdetect optflow phase_unwrapping photo plot python2 python3 quality reg rgbd saliency shape stereo stitching structured_light superres surface_matching text tracking ts video videoio videostab world xfeatures2d ximgproc xobjdetect xphoto -
The OpenCV.sln solution file should now be in your PATH_TO_BUILD_DIR directory. To build OpenCV you have two options depending on you preference you can:
-
Build directly from the command line by simply entering the following (swaping Release for Debug to build a release version)
"C:\Program Files\CMake\bin\cmake.exe" --build PATH_TO_BUILD_DIR --target install --config Debug -
Build through Visual Studio GUI by opening up the OpenCV.sln in Visual Studio, selecting your Configuration, clicking on Solution Explorer, expanding CMakeTargets, right clicking on INSTALL and clicking Build.
Visual Studio Build Solution
Either approach will both build the library, install the Python bindings and copy the necessary redistributable parts to the install directory (PATH_TO_BUILD_DIR/build/install). All that is required now to run any programs compiled against these libs is to add the directory containing opencv_worldxxx.dll to you user path environmental variable.
-
By default you have to build Release when generating python bindings, for instructions on how to build Debug see generate python bindings for a debug build
If everything was successful, congratulations, you now have OpenCV built with CUDA. To quickly verify that the CUDA modules are working and check if there is any performance benefit on your specific hardware see verifying OpenCV is CUDA accelerated.
Decreasing the build time with Ninja
The build time for OpenCV can be reduced by more than 2x (from 2 hours to 30 mins to under an hour on an i7-8700) by utilizing the Ninja build system instead of directly generating Visual Studio solution files.
Ninja is installed by default if the Desktop development with C++ workload is selected when installing Visual Studio, therefore building with Ninja only requires two extra configuration steps:
-
Configuring Visual Studio Development tools by entering the following into the command prompt before entering the CMake command (changing Community to either Professional or Enterprise if necessary)
"C:\Program Files\Microsoft Visual Studio\2022\Community\VC\Auxiliary\Build\vcvars64.bat" -
Telling CMake to use Ninja instead of Visual Studio, i.e. replacing -G»Visual Studio 17 2022″ with -G»Ninja Multi-Config».
Once the build files have been generated the build can be kicked off in the same way as before. i.e.
"C:\Program Files\CMake\bin\cmake.exe" --build PATH_TO_BUILD_DIR --target install --config Releasefor an example fo the full command line for building a Release version of OpenCV with the Ninja build system go to the Ninja tab.
Verifying OpenCV is CUDA accelerated
The easiest way to quickly verify that everything is working is to check that one of the inbuilt CUDA tests passes. This is demonstrated here using the GEMM8 acccuracy test which can be run by entering the following into the existing command prompt.
"PATH_TO_BUILD_DIR\bin\opencv_test_cudaarithm.exe" --gtest_filter=CUDA_Arithm/GEMM.Accuracy/0To verify that everything is working look for the [ PASSED ] 1 test text, at the bottom of the test output, i.e.
[==========] Running 1 test from 1 test case.
[----------] Global test environment set-up.
[----------] 1 test from CUDA_Arithm/GEMM
[ RUN      ] CUDA_Arithm/GEMM.Accuracy/0, where GetParam() = (NVIDIA GeForce RTX 3070 Ti Laptop GPU, 128x128, 32FC1, 0, whole matrix)
[       OK ] CUDA_Arithm/GEMM.Accuracy/0 (1038 ms)
[----------] 1 test from CUDA_Arithm/GEMM (1039 ms total)

[----------] Global test environment tear-down
[==========] 1 test from 1 test case ran. (1041 ms total)
[  PASSED  ] 1 test.
If the test has passed then we can confirm that the OpenCV build inside PATH_TO_BUILD_DIR includes the CUDA modules.
The instructions above will enable you to build a Release version of OpenCV with bindings for Python and automatically install them into your PATH_TO_PYTHON_DIST/site-packages directory. You can then import the OpenCV python module (cv2) as
and you should see output similar to the below when interrogating the build information
>>> print(cv2.getBuildInformation())

General configuration for OpenCV 4.10.0-dev =====================================
  Version control:               4.9.0-571-g2629688d11

  Extra modules:
    Location (extra):            D:/repos/opencv/contrib/modules
    Version control (extra):     4.9.0-84-gb236c71c

  Platform:
    Timestamp:                   2024-06-11T08:50:41Z
    Host:                        Windows 10.0.22631 AMD64
    CMake:                       3.29.5
    CMake generator:             Ninja Multi-Config
    CMake build tool:            D:/bin/ninja/ninja.exe
    MSVC:                        1940
    Configuration:               Debug Release
    ...
That said you may:
- Want to build bindings for a Debug as well or instead of a Release build.
- Encounter errors when trying to import the cv2 module in Python.
- Manually install the Python bindings.
Generate Python bindings for a Debug Build
Python bindings cannot by default be generated for a Debug configuration, that is unless you have specificaly built or downloaded a debug version of Python. That said you can make a Debug build if you first modify the contents of PATH_TO_PYTHON_DIST/include/pyconfig.h, changing
pragma comment(lib,"pythonxx_d.lib")to
pragma comment(lib,"pythonxx.lib")and
to
Then simply follow the instructions above for building with CMake.
Troubleshooting Python Bindings Installation issues
If you are unable to import cv2 without errors then check below to see if there is a solution to the error you recieve.
-
ModuleNotFoundError: No module named 'cv2'The installation of the Python bindings has failed, check
- the build was successful,
- -DPYTHON3_PACKAGES_PATH=PATH_TO_PYTHON_DIST/Lib/site-packages/ was set correctly, and
- if you are still seeing the above error try manually installing opencv Python bindings.
-
ImportError: ERROR: recursion is detected during loading of "cv2" binary extensions. Check OpenCV installation.The main two reasons for this are:
-
You have another installation of OpenCV, either manually installed or through the package manager (pip/mamba etc.). This can easily be fixed by first uninstalling any opencv-python, opencv-contrib-python distributions from your package manager and then deleting the cv2 directory (PATH_TO_PYTHON_DIST/Lib/site-packages/cv2/) or bindings file (PATH_TO_PYTHON_DIST/Lib/site-packages/cv2.cpxx-win_amd64.pyd) if they exist.
-
You have built a Debug configuration. Currently (https://github.com/opencv/opencv/issues/23568) when building this configuration the cv2.cpxx-win_amd64.pyd shared library is not copied into site-packages-x.x
directory on installation. This can easily be resolved by creating the python-x.x directory and copying the shared library accross so you have PATH_TO_PYTHON_DIST/Lib/site-packages/cv2/python-x.x/cv2.cpxx-win_amd64.pyd, where xx is the PYTHON_VERSION.
-
-
ImportError: DLL load failed: The specified module could not be found.The directory of one or more of the required DLL’s has not been added with os.add_dll_directory(). Whilst the automatic installation of the bindings should have added all the directories containing the dependant DLL’s to config.py it’s possible that one has been missed or you are using a less common configuration. In these cases you will have to
- first track down which DLL’s are missing (see this guide for assistance) and then
- permanantly add the directory containing them to your installation by modifying the contents of PATH_TO_PYTHON_DIST/Lib/site-packages/cv2/config.py.
e.g. If you built OpenCV against CUDA 12.1 and your own version of the FFMpeg libraries (-DOPENCV_FFMPEG_USE_FIND_PACKAGE=ON) instead of using the provided opencv_videoio_ffmpegxxx_64.dll plugin, the contents of config.py should look like
import os BINARIES_PATHS = [ os.path.join('D:/build/opencv/install', 'x64/vc17/bin'), os.path.join(os.getenv('CUDA_PATH', 'C:/Program Files/NVIDIA GPU Computing Toolkit/CUDA/v12.5'), 'bin') os.path.join(`D:/ffmpeg/bin`) ] + BINARIES_PATHS -
ImportError: DLL load failed while importing cv2: A dynamic link library (DLL) initialization routine failed.The most common cause of this is out of date Visual C++ Redistributable libraries. These can be loaded from your windows system or your python installation depending on your configuration. The easiest thing to do is update both by
- downloading and installing the latest version of the Visual C++ Redistributable from Microsoft, and
- checking your python package manager (pip/mamba/conda/… list) for the vc or vc14_runtime packages and updating them to the latest version (e.g.
pip install vc --upgradeormamba/conda upgrade vc) and try importing OpenCV again.
Manually installing OpenCV Python bindings
If you have downloaded the pre-built binaries or are having issues with the automatic installation then you can manually install the python bindings following the steps below:
-
Remove any pre-existing OpenCV installations.
-
Copy PATH_TO_BUILD_DIR/lib/python3/cv2.cpxx-win_amd64.pyd to PATH_TO_PYTHON_DIST/Lib/site-packages/cv2.cpxx-win_amd64.pyd
-
Determine the paths to the directories containing any dependant shared libraries (see here for assistance).
-
Adding the locations from (3) by calling os.add_dll_directory() for each one before importing the OpenCV python module. e.g. If you have followed the guide exactly this will be the directories containing the OpenCV and Nvidia shared libaries, which you would add as
import os
os.add_dll_directory('C:\\Program Files\\NVIDIA GPU Computing Toolkit\\CUDA\\vxx.x\\bin')
os.add_dll_directory('PATH_TO_BUILD_DIR/bin')
before calling
Choosing a suitable CUDA compute capability
The default command line options given above will build a version of OpenCV which runs on the GPUs which are installed at configuration time. As mentioned above depending on your circumstances this might be the best solution. e.g. If you don’t have a GPU installed on the build system. Before discussing the various options which can be used to add support for GPUs with different compute capabilities to those installed on your system it is important to understand the following concepts:
- Compute capability – every GPU has a fixed compute capability which determines its general specifications and features. In general the more recent the GPU the higher the compute-capability and the more features it will support. This is important because:
- Each version of CUDA supports different compute capabilities. Usually a new version of CUDA comes out to suppoort a new GPU architecture, in the case of CUDA 11.0, support was added for the Ampere (compute 8.0, with compute 8.6 added in CUDA 11.1) architecture. On the flip side support for compute 3.0 and 3.2 was dropped. Therefore by if we chose to build OpenCV with CUDA 11.0 we limit ourselves to GPU’s of compute capability >=3.5. Notice we have not limited ourselves to compute capability GPU’s <=8.6, the reason for this is discussed in the next section.
- You can build OpenCV to support one or many different compute capabilities, depending on your specific requirements.
- Supporting a compute capability — to support a specific compute capability you can do either of the following, or a combination of the two:
- Generate architecture-specific cubin files, which are only forward-compatible (excluding Tegra) with GPU architectures with the same major version number. This can be controlled by passing the CUDA_ARCH_BIN flag to CMake. For example passing -DCUDA_ARCH_BIN=3.0 to CMake, will result in binary code which can only run on compute capability 3.0, 3.5 and 3.7 devices. Futhermore it will not support any specific features of compute capability 3.5 (e.g. dynamic parallelism) or 3.7 (e.g. 128 K 32 bit registers). You can detrmine which functions this will affect by searching OpenCV on github for the CUDA_ARCH flag. Because of the default CMake rules when CUDA_ARCH_BIN is not explicitly set it will also contain architecture-specific cubin files for all GPU architectures supported by your CUDA version.
- Generate forward-compatible PTX assembly for a virtual architecture, which is forward-compatable with all GPU architectures of greater than or equal compute-capability. This can be controlled by passing CUDA_ARCH_PTX to CMake. e.g. Setting the -DCUDA_ARCH_PTX=9.0 flag, builds OpenCV containing PTX code for compute capability 9.0 which can be Just In Time (JIT) compiled to architecture-specific binary code by the CUDA driver, on any future GPU architectures.
- PTX considerations – given that PTX code is forward-compatible and cubin binaries are not it would be tempting to only include the former. To understand why this might not be such a great idea, a things to be aware of when generating PTX code:
-
As mentioned previously the CUDA driver JIT compiles PTX code at run time and cache’s the resulting cubin files so that the compile operation should in theory be a one-time delay, at least until the driver is updated. However if the cache is not large enough JIT compilation will happen every time, causing delay every time your program executes.To get an idea of this delay I passed -DCUDA_ARCH_BIN=3.5 and -DCUDA_ARCH_PTX=3.5 to CMake before building OpenCV. I then emptied the cache (default location %appdata%\NVIDIA\ComputeCache\) and ran the performance example on a GTX 1060 (compute-capability 6.1), to force JIT compilation. I measured an initial delay of over 3 minutes as the PTX code was JIT compiled before the program started to execute. Following that, the delay of subsequent executions was around a minute, because the default cache size (256 MB) was not large enough to store all the compiled PTX code. Given my compile options the only solution to remove this delay is to increase the size of the cache by setting the CUDA_CACHE_MAXSIZE environmental variable to a number of bytes greater than required. Unfortunately because,
Older binary codes are evicted from the cache to make room for newer binary codes if needed
this is more of a band aid than a solution. This is because the maximum cache size is 4 GB, therefore your PTX compiled code can be evicted at any point in time if other programs on your machine are also JIT compiling from PTX, bringing back the “one-time” only delay.
-
For maximum device coverage you should include PTX for the lowest possible GPU architecture you want to support.
-
For maximum performance NVIDIA recommends including PTX for the highest possible architecture you can.
-
CMake command line options to control cubin/PTX content of the OpenCV shared library
Given (1)-(3) above, the command line options that you want to pass to CMake when building OpenCV will depend on your specific requirements. I have given some examples below for various scenarios given a main GPU with compute capability 6.1 and CUDA toolkit 12:
- Firstly stick with the defaults (-DCUDA_GENERATION=Auto) if your programs will always be run on your main GPU. It should take around an hour to build, depending on your CPU and the resulting shared library should not be larger than 200 MB.
- If you want maximum coverage then use Nvidia’s recommended settings for future compatibility. That is compile for all supported major and minor real architectures, and the highest major virtual architecture by passing -DCUDA_ARCH_BIN=50,52,60,61,70,75,80,86,89,90 and -DCUDA_ARCH_PTX=90 to CMake.
- If you are going to deploy your application, but only to newer GPU’s pass -DCUDA_ARCH_BIN=61,70,80,86,89,90 and -DCUDA_ARCH_PTX=90 to CMake for maximum performance and future compatibility. This is advisable because you may not have any control over the size of the JIT cache on the target machine, therefore including cubin’s for all compute-capabilities you want to support, is the only way be sure to prevent JIT compilation delay on every invocation of your application.
- If size is really an issue but you don’t know which GPU’s you want to run your application on then to ensure that your program will run on all current and future supported GPU’s pass -DCUDA_ARCH_BIN=61 and -DCUDA_ARCH_PTX=30 to CMake for maximum coverage.
Back to top
Footnotes
-
I have seen lots of guides including instructions to download and use git to get the source files, however this is a completely unnecessary step. If you are a developer and you don’t already have git installed and configured then I would assume there is a good reason for this and I would not advise installing it just to build OpenCV.↩︎
-
Before building you may want to ensure that your GPU has decoding support by referring to Nvidia Video Decoder Support Matrix↩︎
-
All python distributions should work however I recommend building and testing against a new install of this compact distribution to avoid any problems caused by existing configurations.↩︎
-
If you have any build issues with OpenCV then you will need to provide the arguments passed to CMake as well as the output from the generation step when asking for assistance which is another good reason to avoid the CMake GUI if you can.↩︎
-
An additionally option you may want to include is -DCUDA_FAST_MATH=ON which compiles the CUDA kernels with the -use_fast_math option. This will however cause some of the accuracy and performance tests to fail as the floating point results will be slightly less accurate.↩︎
-
If you get the following error “CUDA : OpenCV requires enabled ‘cudev’ module from ‘opencv_contrib’” when configuring the build with CMake you have not set OPENCV_EXTRA_MODULES_PATH correctly, most likely you have set it to the root of the opencv_contrib repo and not the modules directory inside the repo.↩︎
-
The default installation directory for miniforge is %userprofile%\miniforge3.↩︎
-
The GEMM test is used in this example but any of the accuracy (opencv_test_cuda*.exe) or performance (opencv_perf_cuda*.exe) tests could have been chosen.↩︎
Hey guys, in this blog we will see how we can build OpenCV with Cuda and cuDNN support in Windows. The process of building OpenCV with Cuda can be very tricky and tedious if doing it for the very first time. So without any further due, let’s do it.
- These are the versions we will be installing.
- Opencv 4.5.5
- Opencv-contrib 4.5.5
- Visual Studio 2019
Step 0 – Uninstall Python and Anaconda.
- Although this is not an important step, it’s recommended for smooth installation.
- You need to uninstall previous installations of Python and Anaconda.
- Reinstall Anaconda from here.
- Install NumPy from the terminal using pip install numpy.
Step 1 – Download Cmake to build OpenCV with cuda
https://cmake.org/download/
Step 2 – Download Visual Studio
- We will download Visual Studio 2019.
- Install “Desktop development with C++“.
RESTART YOUR COMPUTER…
Step 3 – Download OpenCV
- Download OpenCV – https://opencv.org/releases/
- Download Sources.
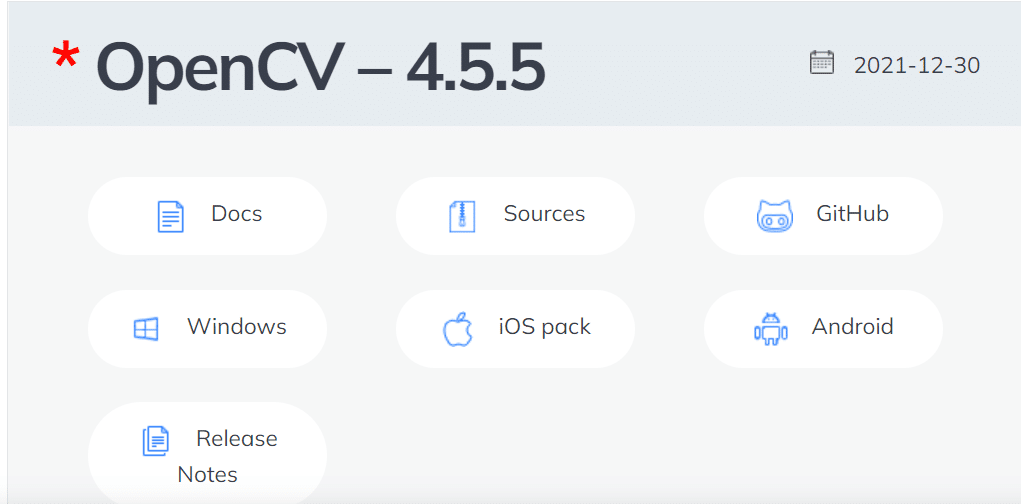
Step 4 – Download opencv-contrib
- Download opencv-contrib – https://github.com/opencv/opencv_contrib/tags
- Click on zip.

Step 5 – Extract files.
- Extract the OpenCV zip and OpenCV-contrib zip.
- Create an empty folder named build.

Step 6 – Run Cmake GUI.
- In Where is the source code, Select the main opencv extracted folder.
- In Where to build the binaries, Select the empty build folder we created above.

- Click on the Configure button.
- I have Visual Studio 2019 installed, so I selected Visual Studio 16 2019.
- In the Optional platform for the generator, select x64.
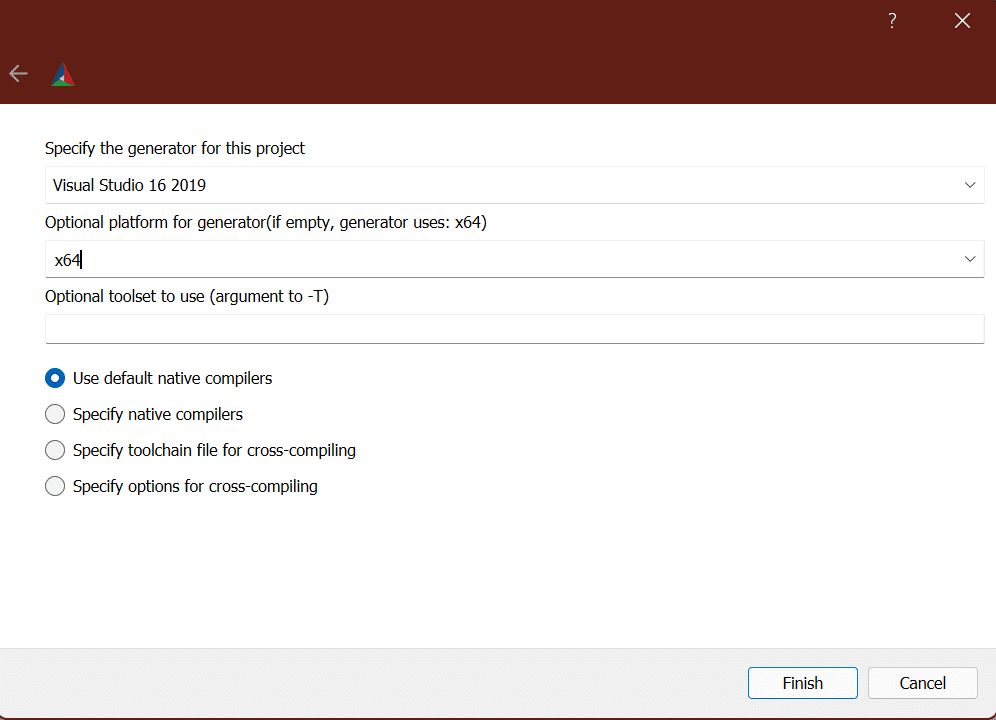
- Click on Finish and it will start configuring.
- Once done you will see a screen like this.
Now search the following…
- WITH_CUDA and tick/check it.
- OPENCV_DNN_CUDA and tick/check it.
- ENABLE_FAST_MATH and tick/check it.
- OPENCV_EXTRA_MODULES_PATH and browse to the module folder in opencv-contrib we extracted in step 5.
- And now again hit on the Configure button.
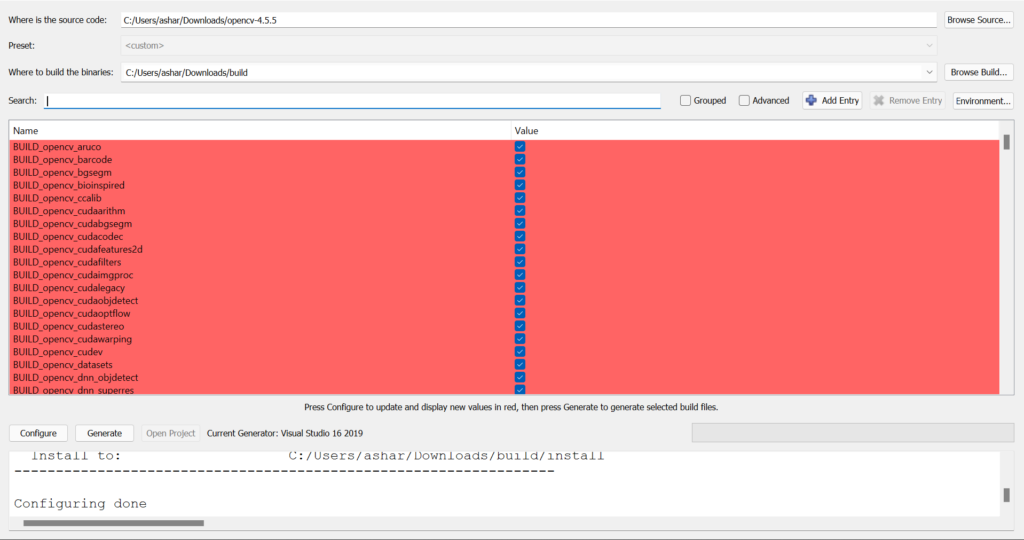
- Once you see, Configuring done, check CUDA_FAST_MATH also.
- Now go to this link and check your compute capability against your graphic card.
- Mine is Nvidia GTX 1050Ti, so my arch is 6.1.

- In the CMake window, search for CUDA_ARCH_BIN.
- You will see something like this.
- Delete all values except your Compute Capability.
- Again hit on the Configure button for the final time.
- Once done, finally hit the Generate button.

- Now you will see a lot of files in your build folder.
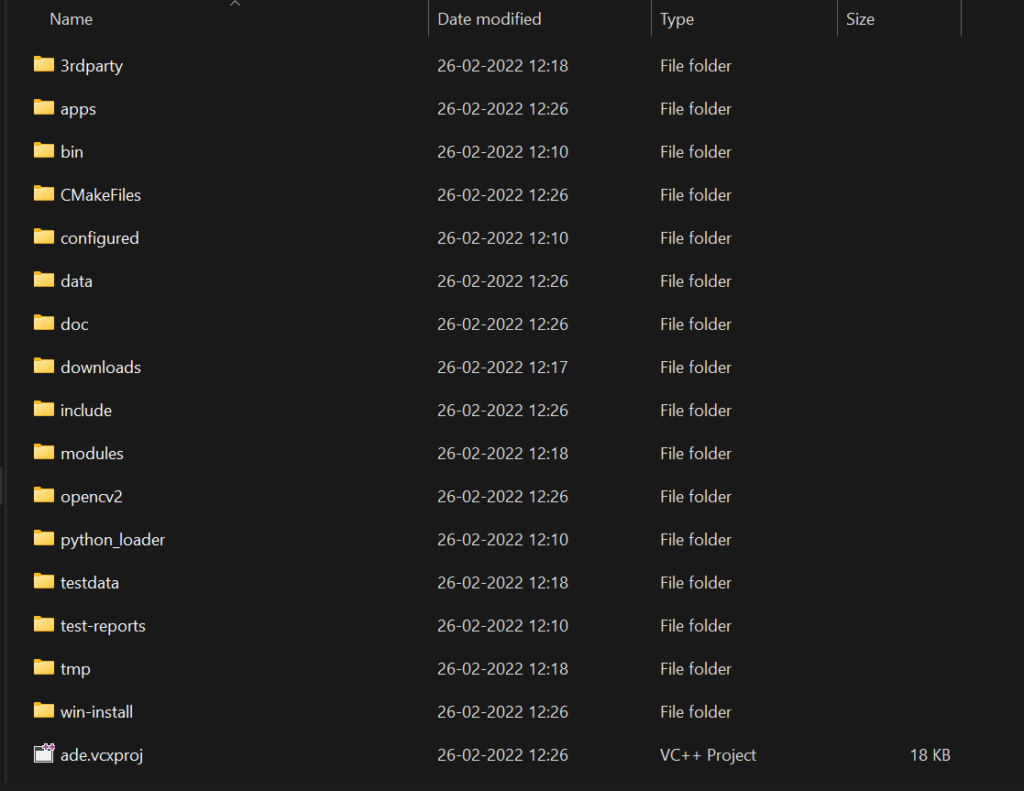
- We will have a file like this OpenCV.sln.
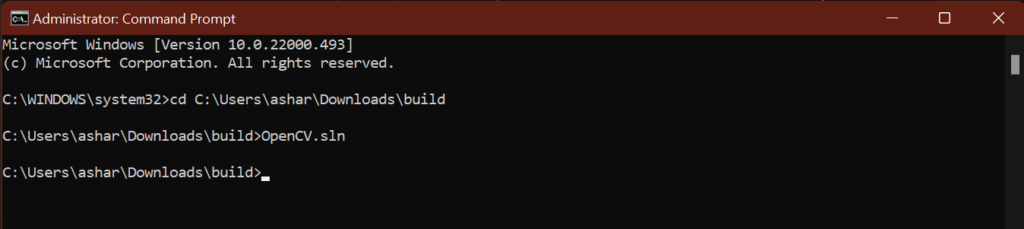
- Now open the CMD Terminal in Administrator mode from the start menu.
- Change the directory to your build folder using cd command and run OpenCV.sln.
- It will open up Visual Studio.
- Once Visual Studio is opened, change Debug to Release.


- Now in the right sidebar, open the CMake Targets dropdown and you will see ALL_BUILD.
- Right click on it and select build and it will start building our binaries.
- This process will take some time.
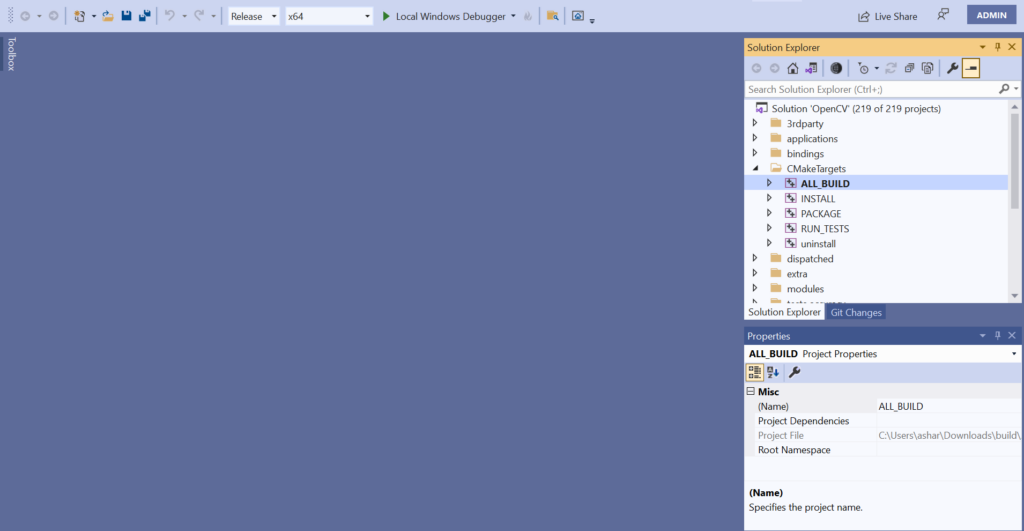
- Once done it will prompt this.
- Now right click on INSTALL and build.
Step 8 – Check OpenCV Installation.
- Congratulations, you have successfully installed OpenCV with Cuda support.
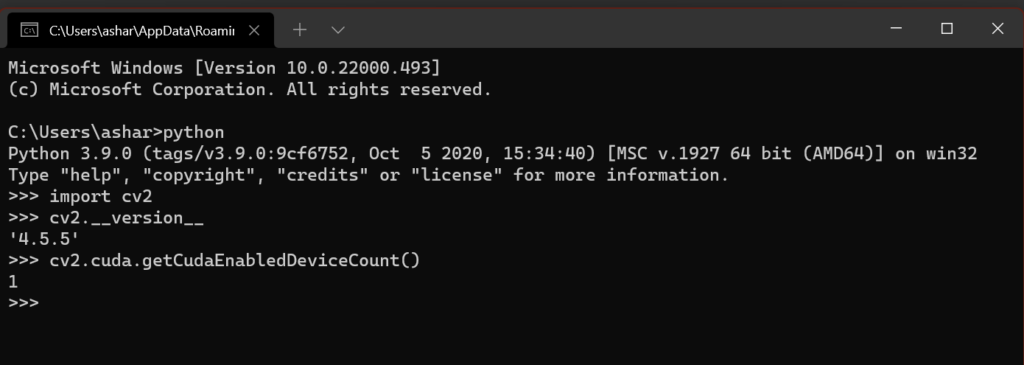
- Now let’s check if python is detecting cv2 or not.
- Open cmd and paste the following commands.
python
import cv2
cv2.__version__
cv2.cuda.getCudaEnabledDeviceCount()
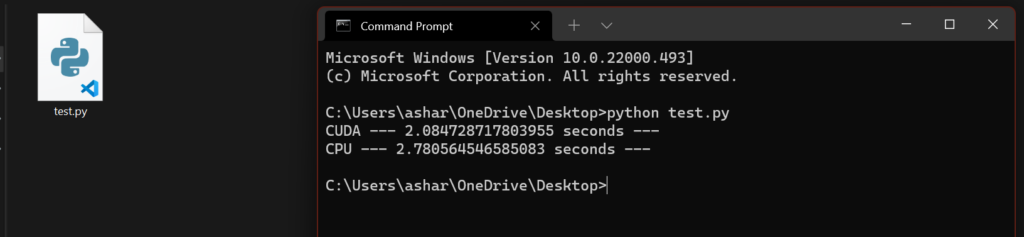
- Now let’s check if cv2 is detecting CUDA or not.
- Create a test.py file and paste the following code in it and run it.
import numpy as np
import cv2 as cv
import time


npTmp = np.random.random((1024, 1024)).astype(np.float32)

npMat1 = np.stack([npTmp,npTmp],axis=2)
npMat2 = npMat1

cuMat1 = cv.cuda_GpuMat()
cuMat2 = cv.cuda_GpuMat()
cuMat1.upload(npMat1)
cuMat2.upload(npMat2)
start_time = time.time()
cv.cuda.gemm(cuMat1, cuMat2,1,None,0,None,1)
print("CUDA --- %s seconds ---" % (time.time() - start_time))
start_time = time.time()

cv.gemm(npMat1,npMat2,1,None,0,None,1)
print("CPU --- %s seconds ---" % (time.time() - start_time))
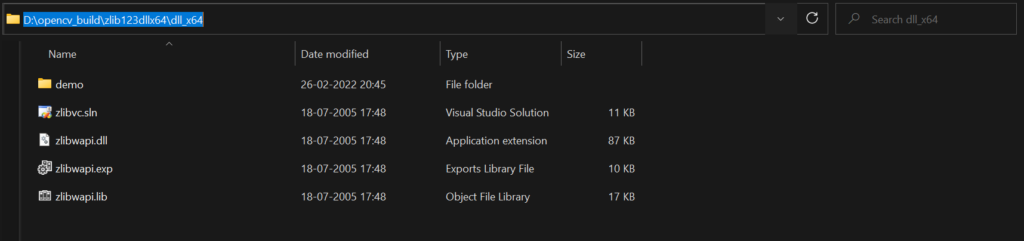
NOTE – If you are facing the below error while running cv2, follow these steps.

- Download zlib123dllx64.zip, extract it in a folder, and copy the path to the folder where zlibwapi.dll file is located.
- I extracted it in the opencv_build folder, you can extract it anywhere else also.
- Now open the start menu and search env, then open “Edit the system Environment Variable”, click on Environment Variables…, then double click on the Path under the System variables Section.
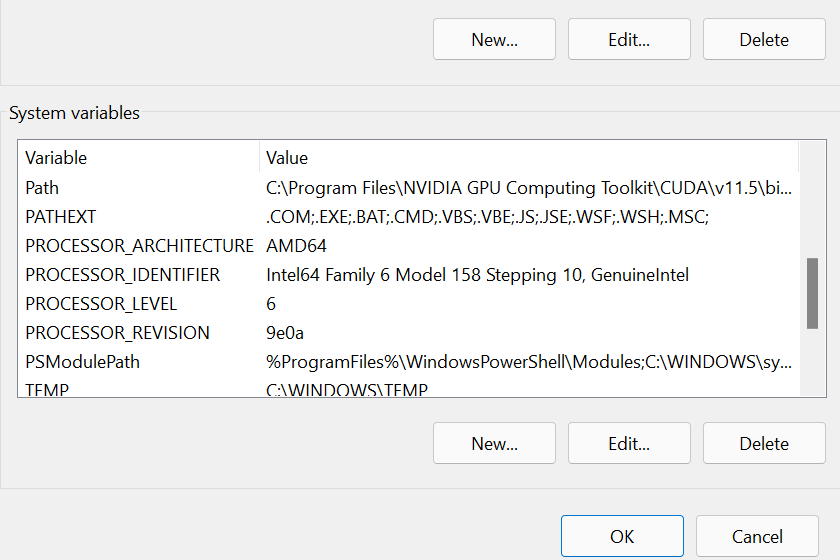
- Click on New and paste the path you copied above.
- And then simply click OK, OK and OK.
And now everything should work like a charm!!!
Conclusion
In conclusion, building OpenCV with CUDA and cuDNN support on Windows opens up a world of possibilities for accelerating image processing and deep learning tasks. By harnessing the power of NVIDIA GPUs, developers can leverage CUDA-accelerated functions and cuDNN optimizations to achieve significant performance improvements.
So this is how you can build OpenCV with CUDA and cuDNN support in Windows, thanks for reading it and I hope you are taking something with you after reading this and till the next time…
FAQs
Can I use any version of the CUDA Toolkit and cuDNN with OpenCV?
OpenCV versions may have specific requirements for CUDA Toolkit and cuDNN versions. It’s recommended to check the compatibility matrix provided by OpenCV documentation to ensure compatibility between versions.
What if I encounter errors during the configuration or build process?
If you encounter errors during the configuration or build process, carefully review the error messages to identify the issue. Common issues include missing dependencies, incorrect paths to CUDA Toolkit or cuDNN, or incompatible Visual Studio versions.
Do I need a compatible NVIDIA GPU to use CUDA-accelerated functions in OpenCV?
Yes, CUDA-accelerated functions in OpenCV require a compatible NVIDIA GPU. Make sure your GPU meets the requirements specified by the CUDA Toolkit and OpenCV documentation.
Can I build OpenCV with CUDA and cuDNN support on a Windows virtual machine?
Building OpenCV with CUDA and cuDNN support on a Windows virtual machine may encounter limitations due to virtualization technologies. It’s recommended to use a physical Windows machine with a compatible NVIDIA GPU for optimal performance.
Is there a pre-built package of OpenCV with CUDA and cuDNN support available for Windows?
Some third-party distributions of OpenCV may provide pre-built packages with CUDA and cuDNN support for Windows. However, it’s essential to verify the compatibility and reliability of such packages before using them in production environments.
Check out my other machine learning projects, deep learning projects, computer vision projects, NLP projects, Flask projects at machinelearningprojects.net