
Время на прочтение4 мин
Количество просмотров23K
Привет, Хабр! Меня зовут Холодаев Алексей, я младший системный администратор в Cloud4Y. Сегодня хочу поделиться способом подключения стандартного RDP-клиента Windows к MacOS. Если интересно, ныряйте под кат.
Вы наверняка знаете, что в MacOS есть встроенный VNC сервер, к которому можно подключаться через VNC клиента. Однажды я задумался: а почему бы не использовать стандартный RDP client Windows для подключения к яблочной операционной системе? Немного погуглив, я обнаружил, что существует бесплатный RDP сервер на MacOS — xRDP. Данный сервер легко устанавливается на ОС Linux/Unix. Об установке и настройке этого сервера расскажу далее.
Установку я производил на свой макбук с MacOS Big Sur.
Для начала необходимо установить инструменты командной строки Xcode. Для этого выполняем команду в ПО терминала.
xcode-select --installДалее установим менеджер сторонних пакетов Homebrew командой
$ /usr/bin/ruby -e "$(curl -fsSL https://raw.githubusercontent.com/Homebrew/install/master/install)"Установим библиотеку OpenSSL командой
brew install opensslПосле установки OpenSSL присвоим переменной CPPFLAGS путь к библиотеке, чтобы компилятор смог данную библиотеку найти. Выполним команду
export CPPFLAGS="-I/usr/local/opt/openssl/include"Установим необходимые пакеты командами
brew install automakebrew install libtoolbrew install pkgconfigbrew install nasmУстановим XQuartz – программное средство системы X Window System. Скачать программу можно с официального сайта. После установки необходимо перезайти в систему.
Для удобства работы создадим отдельную папку: mkdir /Users/admin/Documents/xrdp/
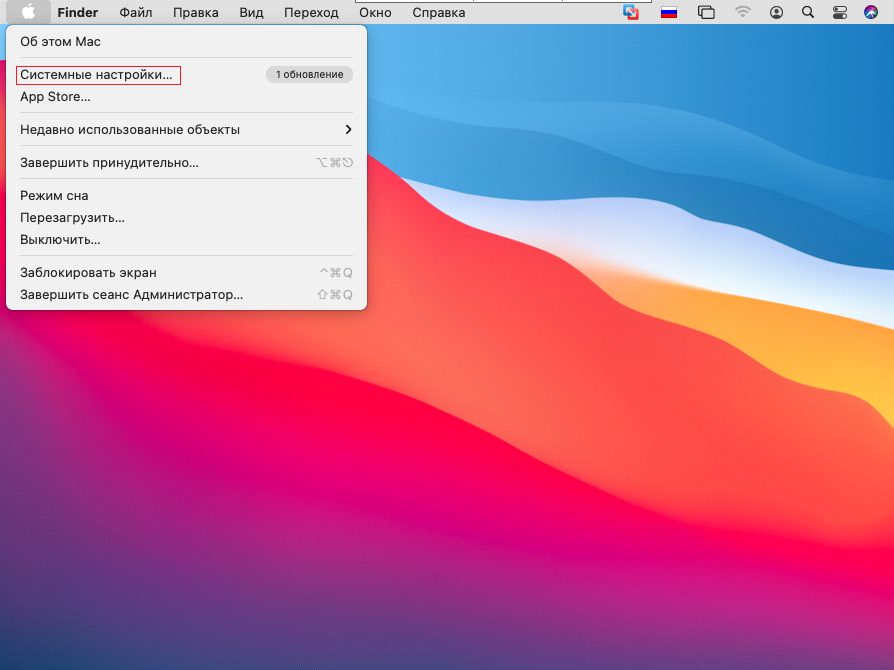
Теперь включим встроенный VNC сервер. Для этого перейдём в «Системные настройки»
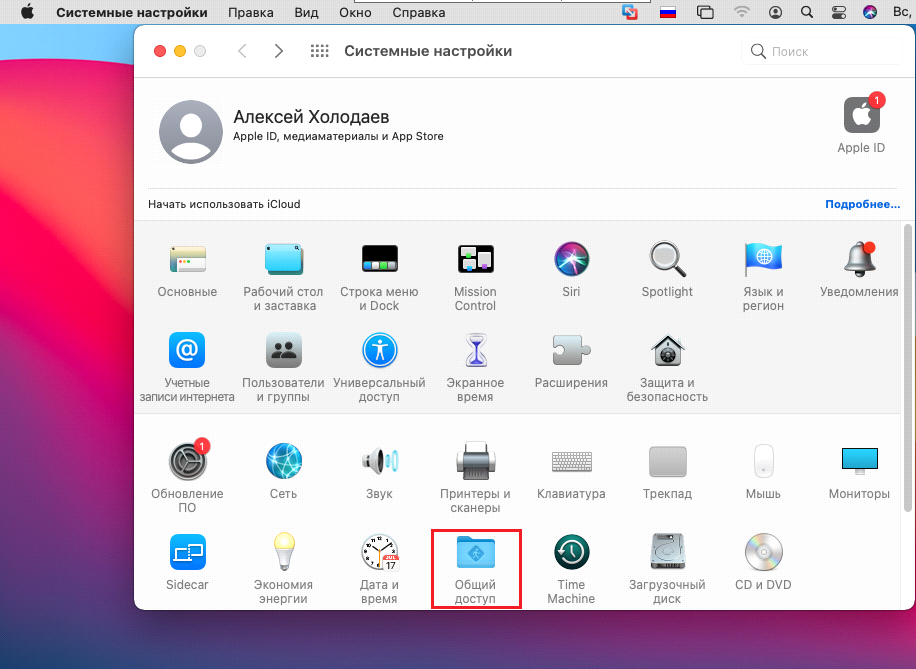
Далее выбираем общий доступ:
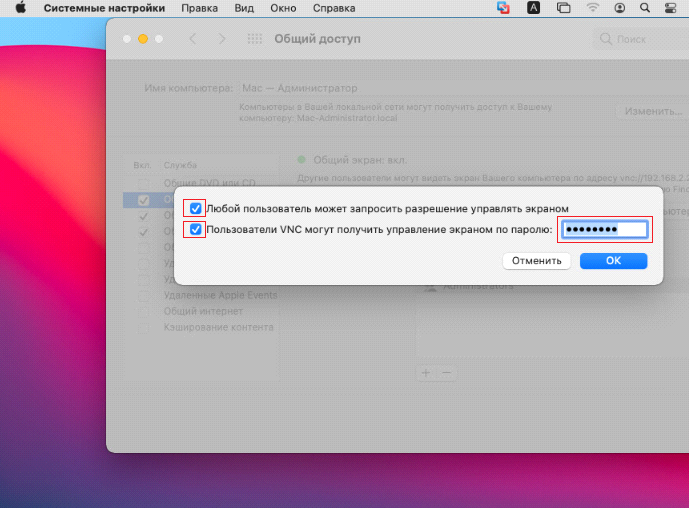
Включаем функцию «Общий экран» и переходим в настройки компьютера

Включаем опцию “любой пользователь может запросить разрешение управлять экраном” и задаём пароль в пункте “Пользователи VNC могут получить управление экраном по паролю”
Теперь загрузим необходимые пакеты.
Нам требуются xRDP и xOrgRDP в формате исходного кода.
Загрузить их можно отсюда (tar.gz архивы). После загрузки переместим данные архивы в папку, которую мы ранее создали, и извлечём их.
cp /Users/admin/Downloads/xrdp-0.9.11.tar /Users/admin/Documents/xrdp/
tar -xvf xrdp-0.9.11.tar
rm xrdp-0.9.11.tar

cp /Users/admin/Downloads/xorgxrdp-0.2.11.tar /Users/admin/Documents/xrdp/
tar -xvf xorgxrdp-0.2.11.tar
rm xorgxrdp-0.2.11.tar
Сборка xRDP
Запустим Bootstrapper и сконфигурируем сборку с помощью OpenSSL. Затем запустим make установщик.
Если вы получаете ошибку на этом шаге, то скорей всего это связано с неправильным экспортом OpenSSL CPPFLAGS.
Сборка xOrgRDP
Запустим Bootstrapper и сконфигурируем сборку так, чтоб она происходила при помощи OpenSSL. Затем запустим make установщик.
cd ../xorgxrdp-0.2.11/
./bootstrap
./configure PKG_CONFIG_PATH=/opt/X11/lib/pkgconfig
make
sudo make install
Если вы столкнулись с ошибкой, убедитесь, что вы перезапустили сессию после установки сервера xQuartz X11. Если вы получаете ошибку /opt/X11/include/xorg/dixfontstr.h:30:10:fatal error ‘X11/fonts/libxfont2.h’ file not found, необходимо поправить файл dixfontstr.h, прописав #include “/opt/X11/fonts/libxfont2.h” вместо #include “/X11/fonts/libxfont2.h”.
xRDP сервер почти готов. Теперь необходимо настроить его. Давайте откроем файл xrdp.ini.
sudo vi /etc/xrdp/xrdp.iniНайдём секцию в файле со всеми типами сессий.
[Xorg]
name=Xorg
lib=libxup.so
username=ask
password=ask
ip=127.0.0.1
port=-1
code=20

[Xvnc]
name=Xvnc
lib=libvnc.so
username=ask
password=ask
ip=127.0.0.1
port=-1
#xserverbpp=24
#delay_ms=2000

[vnc-any]
name=vnc-any
lib=libvnc.so
ip=ask
port=ask5900
username=na
password=ask
#pamusername=asksame
#pampassword=asksame
#pamsessionmng=127.0.0.1
#delay_ms=2000

[neutrinordp-any]
name=neutrinordp-any
lib=libxrdpneutrinordp.so
ip=ask
port=ask3389
username=ask
password=ask
Я буду подключаться через модуль Xvnc. Используем библиотеку libvnc.dylib вместо libvnc.so. Я закомментирую все модули, которые не буду использовать. Вот так будет выглядеть изменённая секция с типами сессий в файле xrdp.ini.
#[Xorg]
#name=Xorg
#lib=libxup.so
#username=ask
#password=ask
#ip=127.0.0.1
#port=-1
#code=20

[Xvnc]
name=Xvnc
lib=libvnc.dylib
username=ask
password=ask
ip=127.0.0.1
port=5900
xserverbpp=24
#delay_ms=2000

#[vnc-any]
#name=RDP to VNC Connector
#lib=libvnc.so
#ip=127.0.0.1
#port=5900
#username=ask
#password=ask
#xserverbpp=24
#pamusername=asksame
#pampassword=asksame
#pamsessionmng=127.0.0.1
#delay_ms=2000

#[neutrinordp-any]
#name=neutrinordp-any
#lib=libxrdpneutrinordp.so
#ip=ask
#port=ask3389
#username=ask
#password=askПримечание: В редакторе vi нажмите клавишу «i», чтобы войти в режим редактирования. Чтобы сохранить и выйти, нажмите «ESC» и введите :wq!
Теперь запустим демоны xRDP и xRDP-sesman. Они находятся по пути /usr/local/sbin/.
Выполним следующие команды:
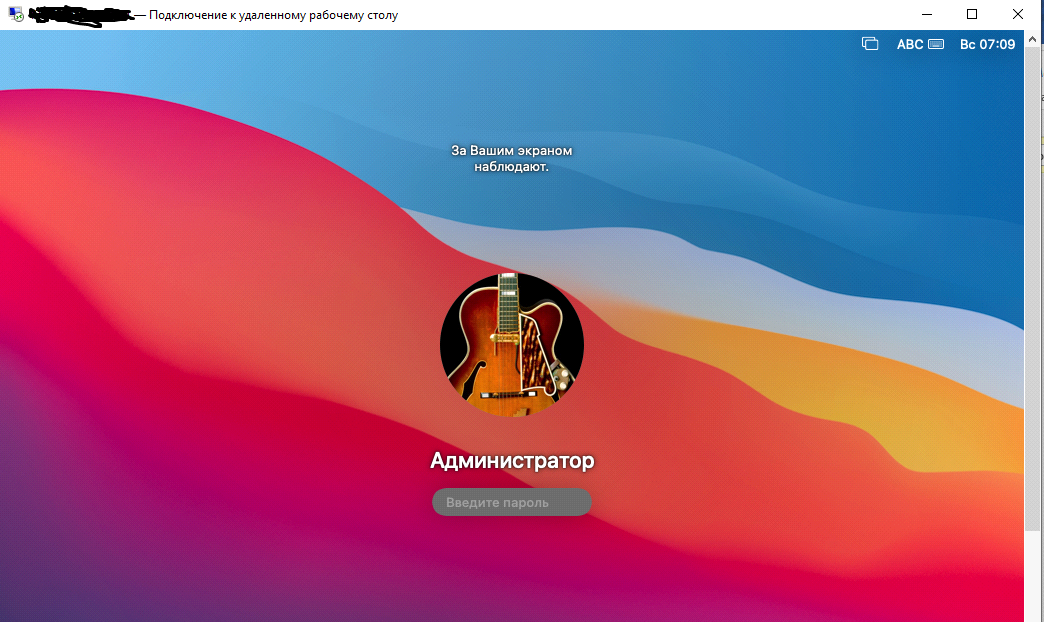
sudo /usr/local/sbin/xrdpsudo /usr/local/sbin/xrdp-sesmanПробуем подключиться по RDP. Вводим логин и пароль, нажимаем ENTER.
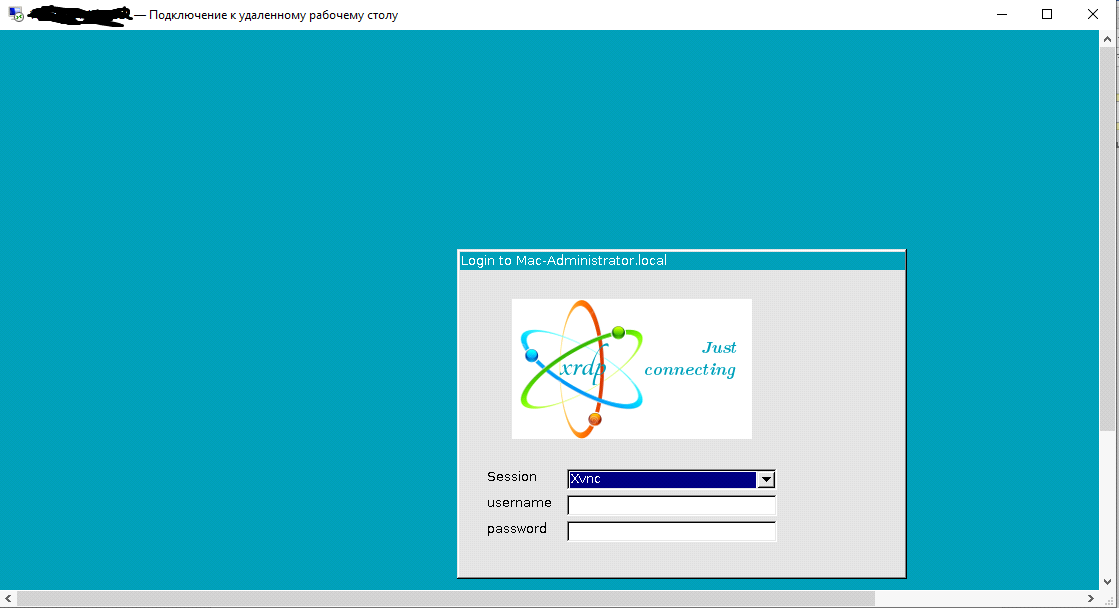
Если у вас появилось окно авторизации MacOS, значит, всё работает правильно.
Если у вас возникают какие-либо ошибки, смотрите логи. Они находятся по пути:
/var/logs/xrdp.log

/var/logs/xrdp-sesman.log
Вот таким способом можно предоставить доступ на MAC OS по протоколу RDP. Спасибо за внимание!
Что ещё интересного есть в блоге Cloud4Y
→ История Game Genie — чит-устройства, которое всколыхнуло мир
→ Как я случайно заблокировал 10 000 телефонов в Южной Америке
→ Странные продукты Apple
→ WD-40: средство, которое может почти всё
→ Как ИИ учится рисовать аниме
Подписывайтесь на наш Telegram-канал, чтобы не пропустить очередную статью. Пишем не чаще двух раз в неделю и только по делу.
Quick Links
-
Connecting to Your Other Computers Using RustDesk
-
Settings You Might Want to Know About
Summary
- RustDesk allows effortless screen sharing between Mac and Windows, just install it on both machines and you’re good to go.
- Use the user-friendly interface for simple remote administration, and set a permanent password to make connecting quick and easy.
- Use RustDesk’s various permissions controls to stay in control of a remote machine if you’re using the remote access tool for troubleshooting purposes.
Sharing your screen remotely is a seamless way to access another computer as if you were physically present. With minimal setup and free software, you can effortlessly share your Mac’s screen on a Windows machine, and vice versa.
Connecting to Your Other Computers Using RustDesk
RustDesk is an easy, free, and open-source solution for initiating simple screen sharing between Mac and Windows machines. While there are other remote desktop solutions you can try out, I found that RustDesk’s free tier works great for remote tasks and administration. Best of all, it requires practically no configuration, so you can start using it in a matter of minutes.
To begin, you’ll want to install the RustDesk software on each of your client machines. From there, it’s a fairly straight path to screen sharing. One of the great things about RustDesk is that the software is pretty much identical for both platforms, so once you know how to use it on one system, you don’t have to learn how to use it on the other.
When you connect from one machine, you’ll need the remote machine’s ID and the one-time password. Simply enter the ID in the «Enter Remote ID» field and select «Connect» then enter the one-time password.
Alternatively, if you are sitting at the remote machine, you can also select «Accept» when prompted.
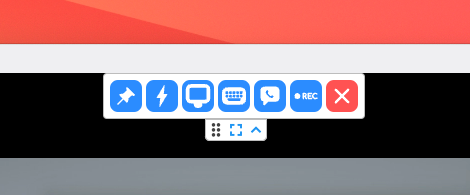
Once connected, you can use the remote machine as needed. Along the top of the RustDesk control window there are some dropdown options. You can enter full-screen mode and pin the toolbar so it doesn’t automatically hide itself.
If needed, you can initiate certain actions on the remote machine, such as Ctrl+Alt+Delete and, beyond that, select certain display preferences, initiate a chat, and record your session. Once your remote session is complete, select the red «X» to disconnect it.
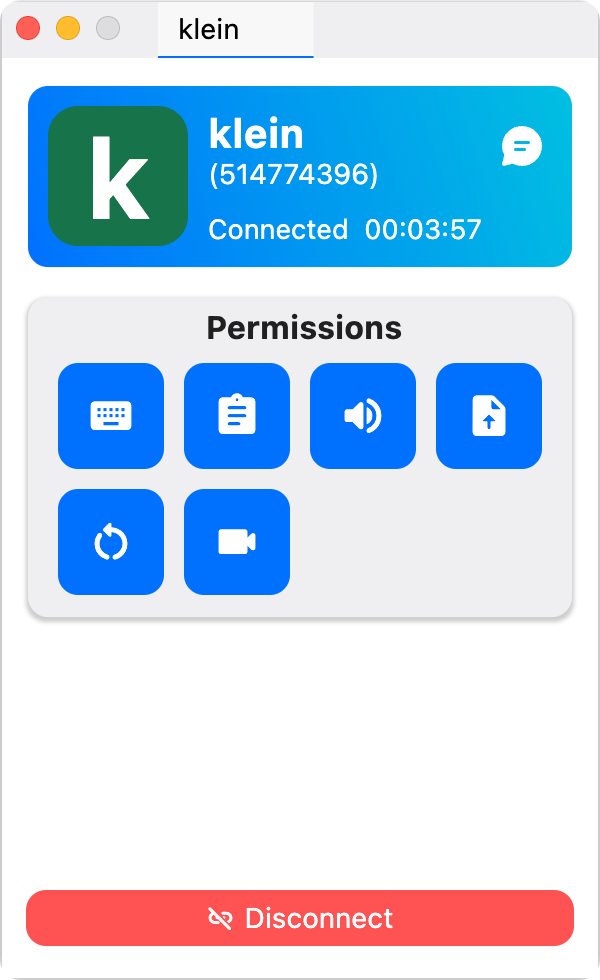
The remote user also has significant control over permissions, ensuring both functionality and security. For example, you can prevent someone’s ability to use mouse or keyboard input on your machine. This is useful if all you want to do is show the other person what you’re talking about.
You can also restrict clipboard sharing, copy and paste, audio streaming, and disable screen recording. Finally, you can prevent someone from remotely restarting your machine, and if you need to sever the connection, just select «Disconnect».
Settings You Might Want to Know About
RustDesk has various settings for changing things, like the theme, language, security, display, and account. Feel free to dig through these at your convenience. For now, I want to bring your attention to a couple that I found immediately useful.
Assigning Permanent Passwords
RustDesk typically uses a one-time password for connections, which changes with each session. This is ideal for occasional use, such as assisting a friend or family member. However, for frequent access to devices on your private network, you may want to set a permanent password.
Open Rust-Desk’s settings and select Security (you might need to authenticate). Under Passwords, select «Set Permanent Password» to assign a permanent password to that computer. Repeat this process for every device running RustDesk if you want to connect to them more easily.
Setting Your Default View Style
One other option that I feel is important is «Default View Style» under Display settings. I like to select «Adaptive» to constrain the remote computer to a resizable window. I find this is much easier to use, such as when connecting from a lower-resolution display like 1080p to a higher resolution like 4K.
Connecting to Computers with Multiple Displays
If the remote computer has multiple displays, RustDesk lets you choose which display to view or show all of them as separate windows. This feature ensures a cleaner and more focused experience.
As you can see, RustDesk is a versatile and user-friendly solution for remote screen sharing, offering robust features without the cost of Windows Professional or the complexity of setting up VNC. Whether you’re assisting someone or accessing your own devices, it provides a seamless experience with flexible settings to suit your needs.
Tools like RustDesk unlock simple, secure, and cost-effective remote access across devices, making collaboration and troubleshooting easier than ever. Whether you’re managing your own machines or lending a helping hand to someone else, you’ve gained the skills to stay productive and connected, no matter where you are.
В последнее время многие пользователи столкнулись с проблемами при попытке удаленного подключения к другому компьютеру. Некоторые специализированные утилиты недоступны для российских пользователей или сервера блокируют установку соединения.
Не все знают, что в macOS есть набор встроенных средств для установки связи с другими компьютерами. Всего пара нужных настроек потребуется для установки быстрого и стабильного подключения.
1. Подключение через Общий экран
Самый простой способ подключиться к другому компьютеру Mac – это встроенное в macOS приложение Общий экран. Утилита очень давно входит в стандартный набор поставки macOS, но спрятана в иерархии папок. Знают о ней не все пользователи компьютеров Apple.
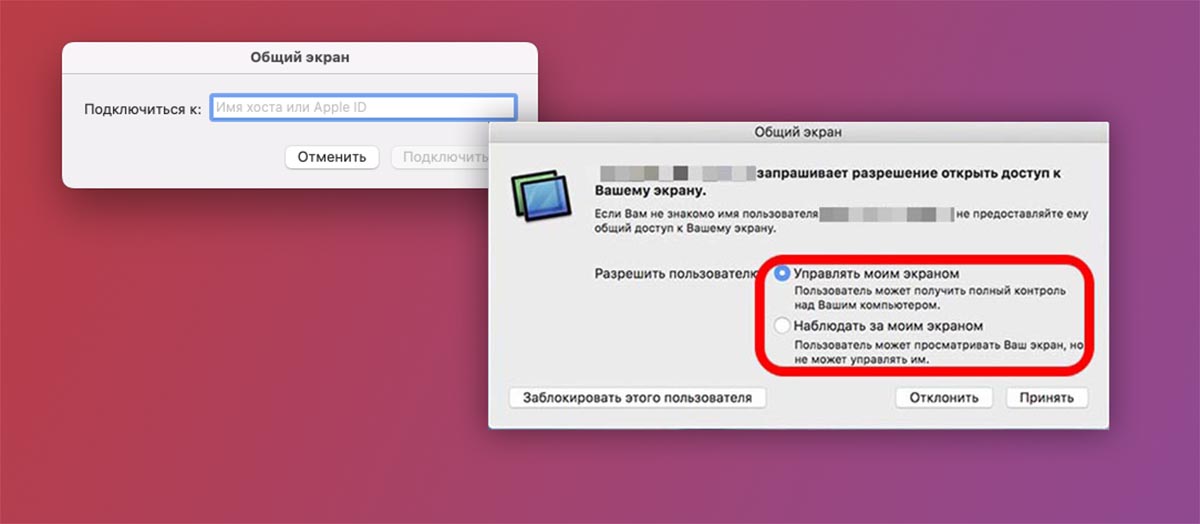
▶ Запустите утилиту Общий экран. Её можно найти через поиск Spotlight, в Launchpad или в папке Программы.
▶ Введите Apple ID пользователя, к которому хотите подключиться.
▶ После того как пользователь подтвердит подключение, вы сможете увидеть экран его Mac.
В зависимости от выданных разрешений вы сможете полностью управлять другим компьютером удаленно либо просто наблюдать за демонстрацией экрана.
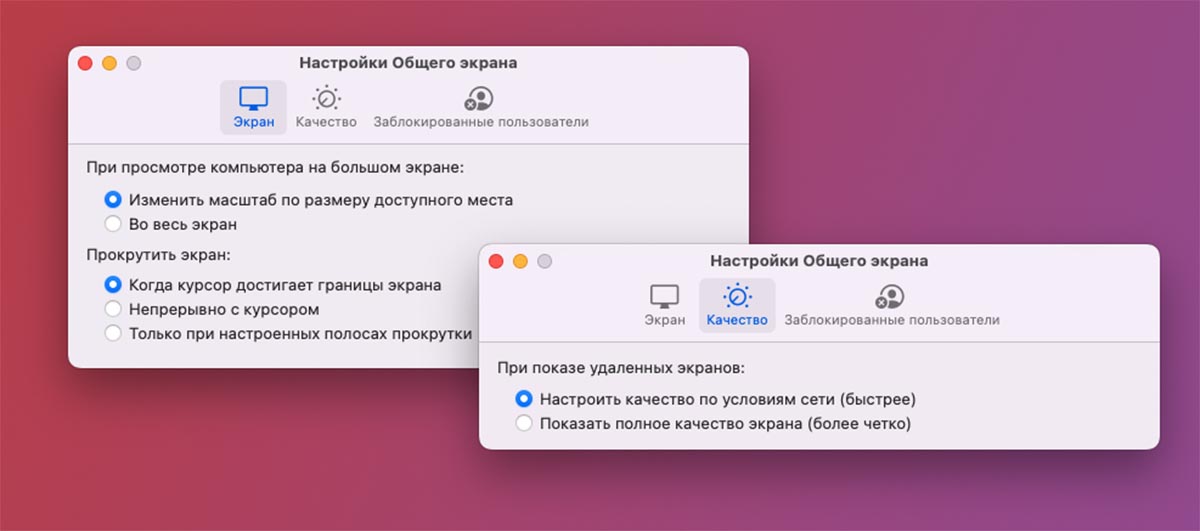
Приложение Общий экран имеет минимум параметров, в настройках можно задать опции масштабирования, прокрутки экрана и качество передаваемой картинки. При больших задержках во время подключения рекомендуется понизить последний параметр.
2. Установка связи через iMessage

Аналогичное подключение можно установить через стандартный мессенджер экосистемы Apple. Разумеется, для этого вы должны добавить пользователя в контакты и указать его идентификатор Apple ID.
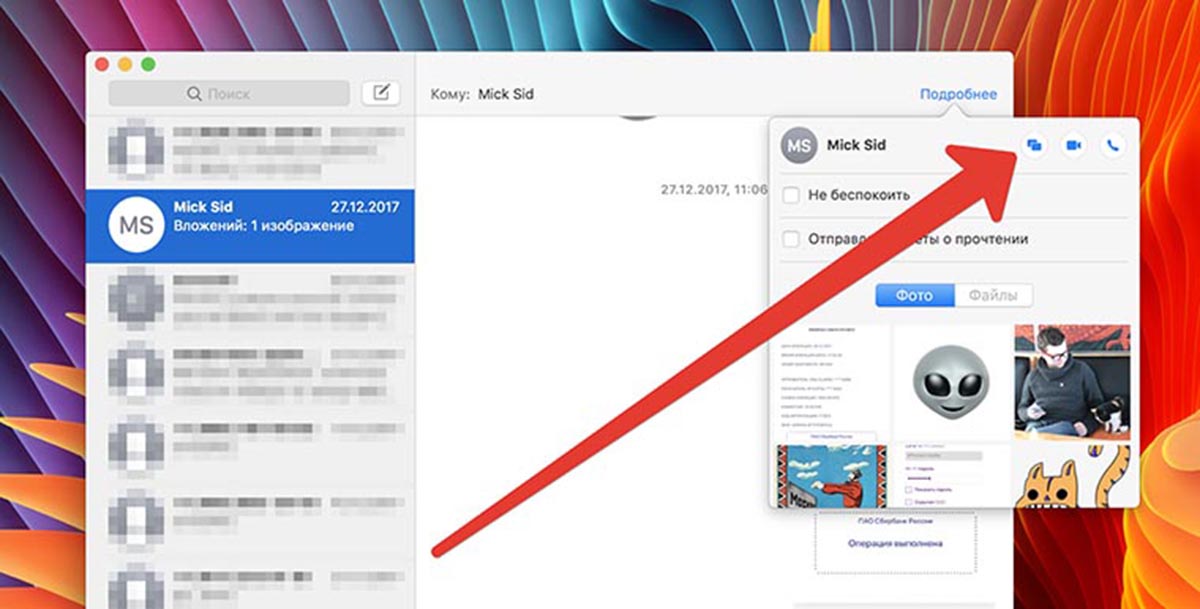
◈ Откройте чат в iMessage с нужным пользователем.
◈ В правом верхнем углу нажмите кнопку “i” и выберите пункт Поделиться. В более старых версиях macOS пункт скрыт в меню Подробнее.
◈ Дождитесь подтверждения от другого пользователя и сможете управлять его компьютером или смотреть демонстрацию экрана (в зависимости от выданного разрешения).
Связь происходит по тому же протоколу, что и в предыдущем случае. Только здесь можно быстрее найти нужного пользователя и инициировать подключение.
3. Управление по протоколу VNC
Такой способ связи пригодится, если захотите управлять компьютером Mac при помощи смартфона или компьютера с другой операционной системой. Способ подходит, если гаджеты находятся в рамках одной локальной сети.
На Маке, к которому будет осуществляться подключение, следует произвести такие настройки:
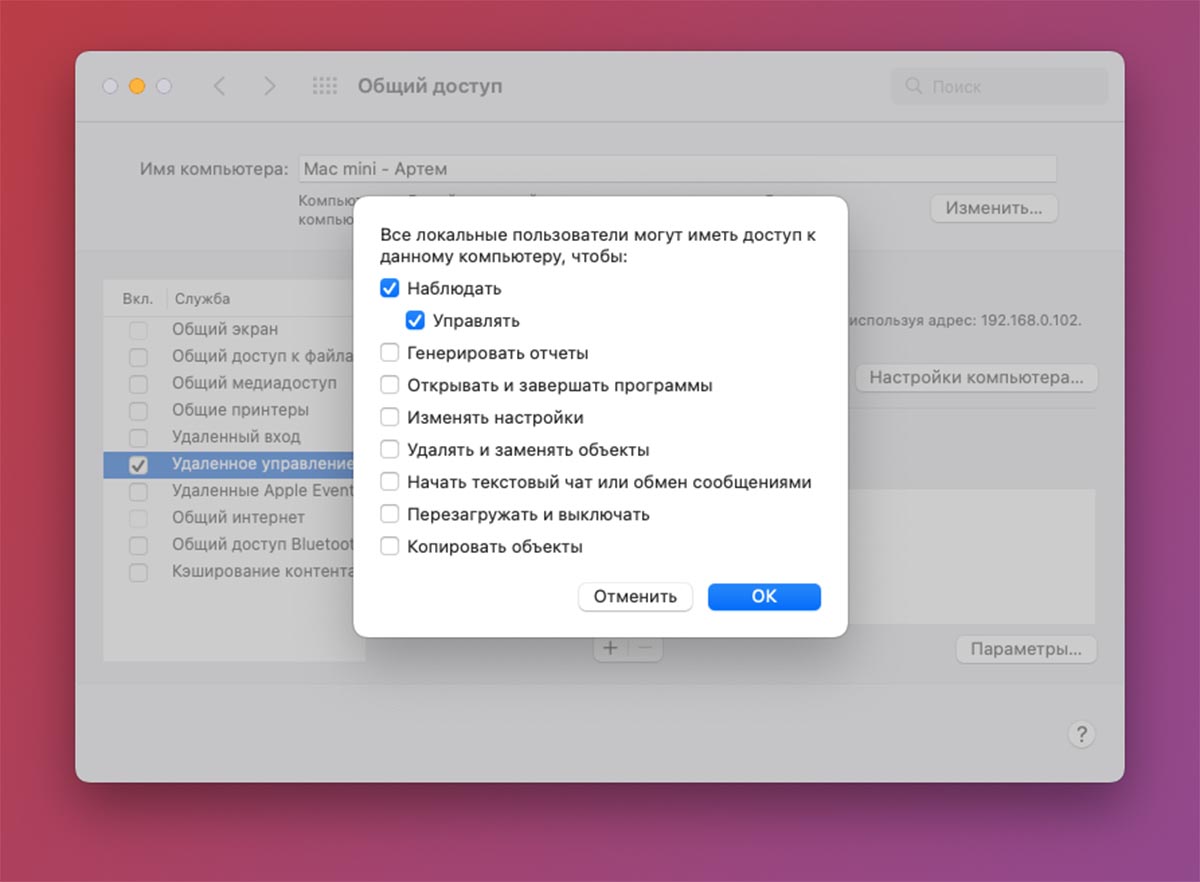
◉ Перейдите в Системные настройки – Общий доступ и выберите в боковом меню раздел Удаленное управление.
◉ Активируйте опцию и выдайте нужные разрешения на работу некоторых фишек.
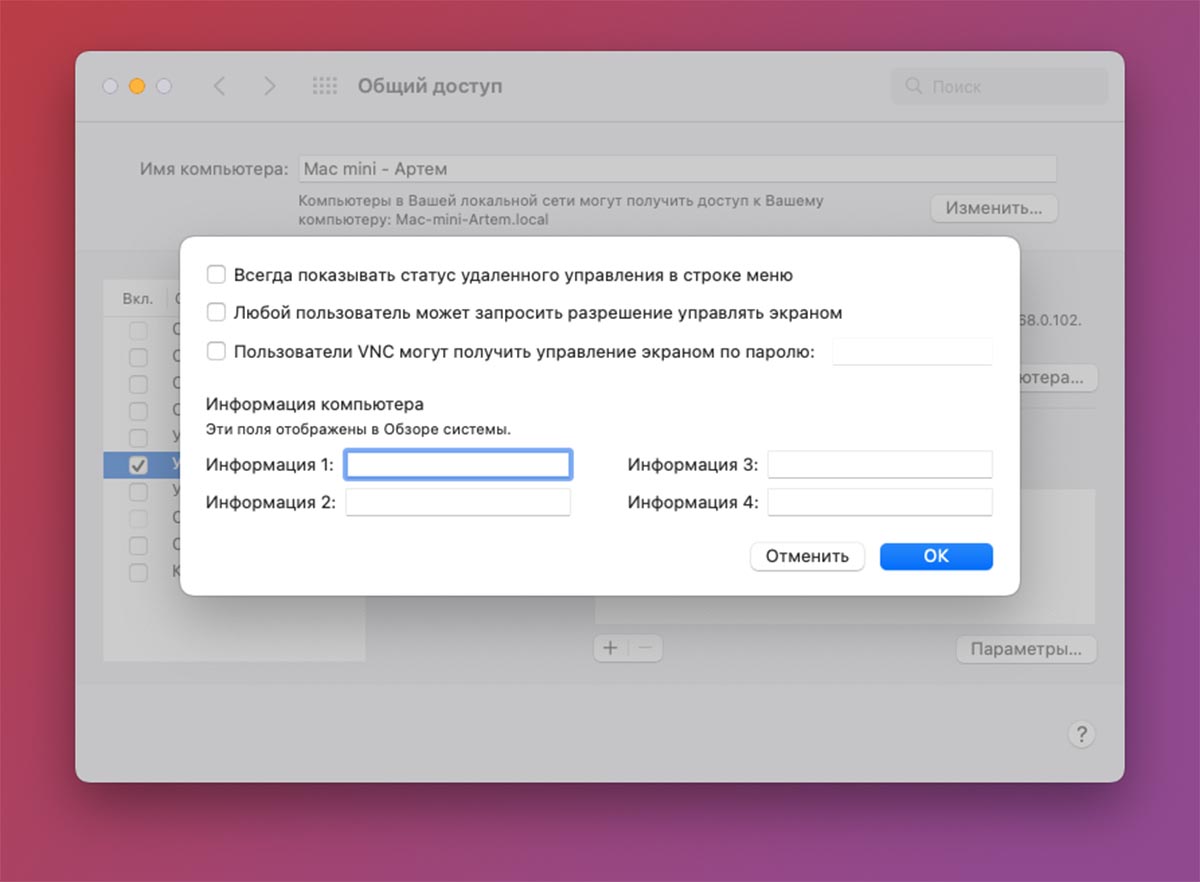
◉ В разделе Настройки компьютера можно задать пароль для осуществления подключения.
По указанному в параметрах IP-адресу можно подключиться к данному Mac с другого компьютера или смартфона. Для этого потребуется приложение VNC Viewer для iPhone, VNC Viewer для Android или дополнения Viewer for Google Chrome для одноименного браузера.
Просто вводим уже известный IP-адрес и пароль, если он был задан в настройках подключения.
Вот так можно подключаться для помощи с компьютером к друзьям, смотреть демонстрацию экрана коллег по работе или администрировать семейные компьютеры Apple.
(21 голосов, общий рейтинг: 4.67 из 5)
iPhones.ru
Минимум настроек и быстрое соединение
Артём Суровцев
@artyomsurovtsev
Люблю технологии и все, что с ними связано. Верю, что величайшие открытия человечества еще впереди!
If you’re a Windows desktop user and need to access your Mac desktop remotely, there are a few ways to do it.
We’ll show you how to connect to your Mac from a Windows PC using a Remote Desktop client as well as some third-party apps.
Do you ever find yourself needing to access a file or application on your desktop computer but you’re not at home? Or maybe you’re traveling and don’t want to lug your laptop with you.
That’s where Parallels Access comes in.
It’s the fastest, simplest, and most reliable way to remotely access your computer from anywhere.
You’ll be able to access all your files, applications, and computers in one place. Plus, it’s secure so you can rest assured that your data is safe.
We’ll also cover some tips on how to control your Mac remotely.
So, whether you’re at home or away, you can easily access and use your Mac desktop from anywhere.
What Is Remote Desktop Connection for Mac?
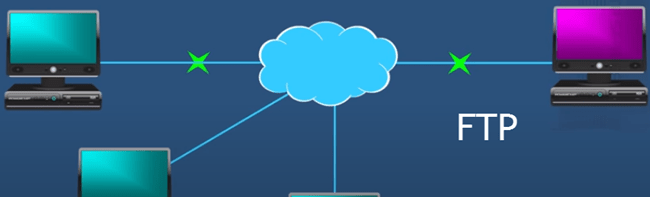
Remote connection means many things. You can access certain files in an Apple Mac remotely using shared file systems, via FTP.
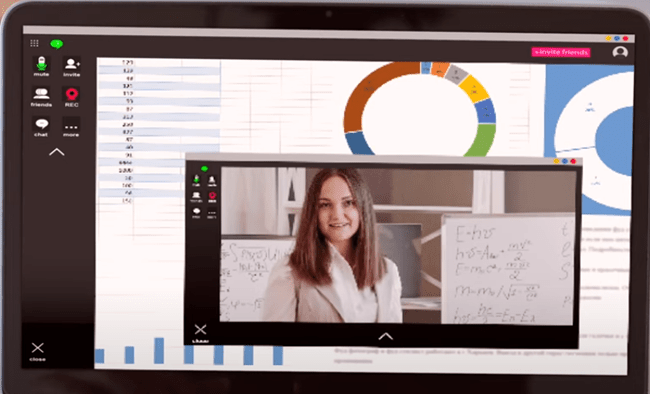
Screen sharing can also be considered a remote connection since you can see the screen of the computer by sharing the screen remotely via Zoom. But there’s no way to regulate it.
We’ll be examining remote connections for a MacBook with no physical presence.
Can You Connect to a Mac with Remote Desktop Access?
You can use Remote Desktop to connect to a Mac from another computer.
To do this, your administrator and client computers must meet certain requirements.
Mac computers must be running OS X 10.10.5 or later, and the Remote Desktop client software must be version 3.6 or later for Macs. This will allow you to exercise complete control over the remote machine.
You can use Remote Desktop to access files and applications on the remote computer, as well as to share your Mac’s screen with others or provide remote support.
While it is possible to remote control a Mac from Windows, it requires a few extra steps.
First, you need to enable remote login on your Mac.

This can be done by going to System Preferences > Sharing.
Next, select Remote Login and choose which users you want to have access.
Once this is done, you will be able to connect remotely to your Mac from another computer using a Secure Shell (SSH).
This will allow you to use a Secure File Transfer Protocol (SFTP) to remotely access files on your Mac.
How Do I Access a Mac from Windows?
Macs and Windows PCs have always been different beasts when it comes to operating systems, but in recent years, it’s become easier to use a Mac from a Windows PC.
If you need to access files or applications on a Mac from a Windows computer, there are a few different ways you can go about it.
One of the easiest methods is to simply use the built-in file-sharing features of both operating systems.
On the Windows computer, open File Explorer, click Network, and locate the Mac you want to connect to.
Double-click the Mac, then enter the account name and password for the user account. It may take a moment for the Windows computer to show that the Mac is on the network.
Once connected, you can browse the Mac’s file system and even launch applications remotely.
Another option is to use a third-party application like VMware Fusion or Parallels Desktop.
These utilities create a virtual environment on your PC that allows you to run macOS alongside Windows. This can be useful if you need to use specific Mac-only software, but it does require more processing power and memory than simply using file sharing.
Whichever method you choose, connecting to a Mac from a PC is relatively straightforward and can be done without any headaches.
How to Access Your Mac from Another Location
File Transfer Protocol (FTP)
The best technique, but also the easiest method, in sharing files from a Macbook is FTP. You can do either using FTP Client or Terminal with much more convenience. FTP is available as an easy-to-use client.
The robust file manager ForkLift provides all FTP functionality but takes this to an entirely new level and can be an excellent replacement for the Search tool, with the ability to search quickly, preview instantly, and file compare.
DCommander combines speed with the reliability to manage thousands, if not millions, of documents, schedule backups, and even automate transfer processes.
Allow Remote Login to Your Mac from Another Computer
For devices using similar Mac OSes, remote Mac access is possible via Secure Shell (SSH). This allows access from a computer to the computer via SFTP.
You can access your computer remotely using a different computer by entering your username and password. Write these down and keep it secure, as the ability to use Macs makes it more difficult to access.
Do You Need a VPN?
Security should be the priority for every Mac user if they’re using an Internet connection.
In general, it’s advisable to always use a VPN connection with public Wi-Fi networks.
The ability to access any Mac computer is restricted to the ‘View Only’ version — if you don’t want the passwords in your computer.
Having password information hidden on the internet may pose huge security risks to your identity and personal information.
How to Use Your iOS Device As a Remote Mouse?
You can use an iPhone or iPad to control a Mac remotely, just as a mouse could use a desktop or laptop.
Remote Mouse allows you to change an iPhone or iPad to a computer mouse.
Though remote access is the most beneficial, since the closer the device, the better the connection is, it also is possible from any location worldwide if the network has sufficient security and speed.
How to Stay on the Same Page with Screens?
In the modern workplace, collaborations are becoming very important.
Screen technology makes remote computing possible without the need for a computer or location.
Whatever business destination you travel to, keep yourself safe when it comes to storing data.
Native MacOS File Sharing
Usually, people have no idea that Macs are capable of sharing files with other computers or laptop systems.
For this functionality, click on Share in System Preferences to check file share.
AirDrop
Although it doesn’t provide an ideal solution, AirDrop can share files, easily, between different iPhone and iPad devices.
Choose go and then air-drop on both Macs and incoming computers.
Once you have the receiver logo, drag the desired file into the folder for sending.
Share Files between Devices
There have been many ways of sharing and transferring data.
Because emails exist everywhere, they remain the default format for file sharing, although there are obvious shortcomings.
Dropshare
You can send files from Mac to Mac directly to iCloud without needing to download anything, but Dropshare.
The app supports multiple cloud providers, including Dropbox and Google Drive, and can easily transfer your files to its menu bar.
Allow Others to Access Your Computer Using Apple Remote Desktop
Apple Remote Desktop is a powerful tool that allows you to remotely control another Mac.
It can be used for a variety of tasks, such as providing remote technical support or simply accessing files on a different computer.
If you need to allow others to access your Mac using Apple Remote Desktop, you can do so by enabling the “Remote Management” feature in Sharing preferences. This will give users the ability to control your Mac as if they were sitting in front of it.
You can select which tasks they are allowed to perform, such as viewing the screen or opening apps.
Enabling this feature can be helpful if you need to provide remote assistance to someone, or if you simply want to make it easier for others to access your computer.
FAQs
Can a Mac Connect to Windows 10 or 11 Remote?
Microsoft’s Remote Desktop tool is a free way to remotely connect to a Windows 11 computer from your Mac. It’s easy to set up and use, and it lets you access all your Windows apps, files, or anything else on Windows directly from your macOS machine.
You can even use the Microsoft Remote Desktop client to remotely connect to other PCs, such as a work PC from your home computer. All you need is the IP address of the PC you want to connect to and a few other pieces of information.
Once you have those, you can be up and running in minutes. And if you ever need to access your Windows PC from another location, such as a coffee shop or hotel room, the Microsoft Remote Desktop tool makes it easy to do so.
Whether you’re working from home or on the road, the Microsoft Remote Desktop tool is a valuable way to stay connected to your Windows PC.
How Do I Connect My Mac to Windows?
Macs and PCs have always been different, but it’s easier than ever to connect a Mac to Windows.
With the latest operating systems, all you need is a LAN cable or WiFi connection.
Once you’re connected, you can access files on the other computer just like you would any other server.
In the Finder on your Mac, choose Go > Connect to Server.
Click Browse, then find the computer’s name in the Shared section of the Finder sidebar.
Click it to connect.
You may have to click ‘All’ to view all of the connected computers.
Click ‘Connect As’ after you’ve located the shared computer or server.
In some cases, you need the network area or workgroup for the shared computer. If you don’t have this information, contact the computer’s owner or your network administrator.
If needed, provide your password and username.
Next, select ‘shared folders’ or ‘volumes’.
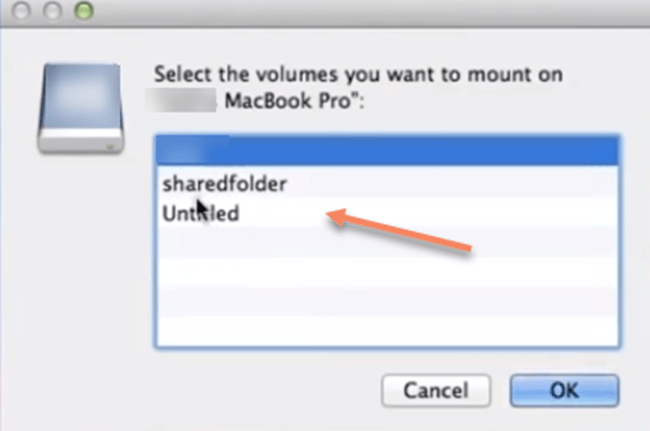
To make it easier to connect to the computer in the future, select “Remember this password in my keychain” to add your username and password for the computer to your keychain.
Now, you can access files on the other computer just like you would any other server.
Can a PC User Switch to a Mac?
These days, switching between operating systems is easier than ever.
If you’re considering making the move from Windows to Mac, there’s no need to worry about losing all your files and preferences.
With the Windows Migration Assistant, you can transfer everything from your Windows PC to your new Mac with just a few clicks.
All you need to do is open the Migration Assistant on both devices and follow the prompts.
Another option is to use third-party migration software. This type of software can typically transfer more types of data than the Windows Migration Assistant, but it may be more expensive.
In no time, you’ll be up and running on your new Mac with all your familiar files and settings intact.
Whichever method you choose, migrating from Windows to Mac is relatively straightforward and should allow you to transition with minimal fuss.
Conclusion
If you’re looking for an easy way to connect to and control your Mac from a Windows computer, Remote Desktop is the answer.
With just a few clicks, you can be up and running with full access to all of your files and programs.
Have you tried using Remote Desktop to connect to your Mac?
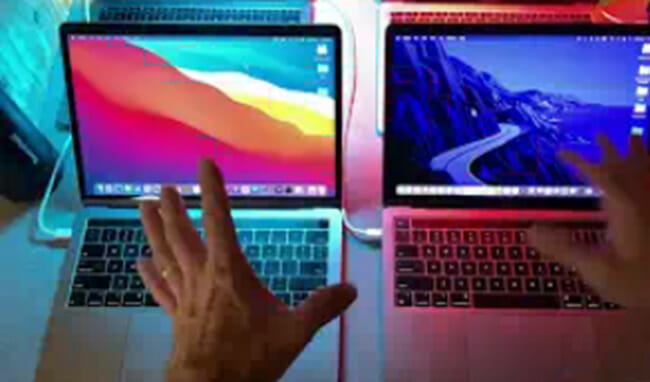
Most of us find comfort in using two computers to get things done. Using two computers may seem practical for work but the process of casting the two is fairly problematic especially if you’re running two different operating systems like Mac and Windows. Luckily, here are the easiest ways on sharing Mac screen to another device. Read on to learn how to screen share Mac to PC.
Best Ways to Mirror Mac to Windows PC
- ApowerMirror
- LetsView
- AirServer
ApowerMirror

One of the many things ApowerMirror can do is to mirror Mac to PC. This way, you can connect two computers working on different systems simultaneously. This provides a high-resolution video quality of up to 1080p without buffering. It is also a perfect third-party software that features built-in tools available both on Mac and Windows such as screen recording and taking screenshots. Simply follow the steps below to cast your Mac screen to your Windows PC.
- Download the app from the button below and install it on your Mac and Windows PC.
Download
- Connect your Mac and Windows PC under the same Wi-Fi network.

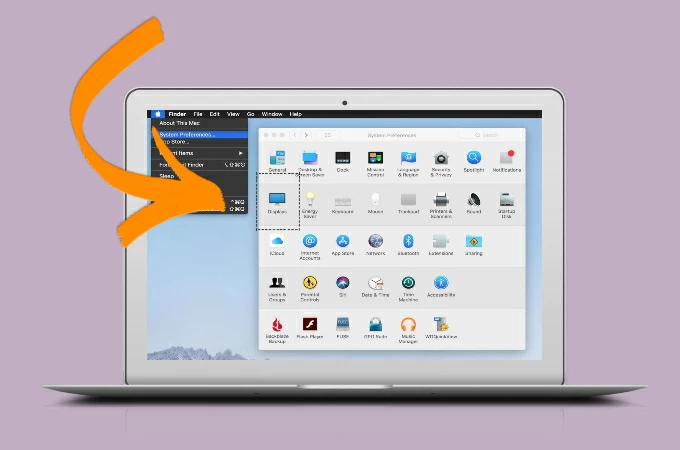
- From the Apple menu of your Mac, tap System preferences, and click Display.
- Lastly, select AirPlay Display and choose your Windows PC to start mirroring.
LetsView
Another tool you can also consider to connect Mac to Windows is the free app named LetsView. It can cast Mac to any other available devices such as on PC, Android phones, and iPhones. On top of that, LetsView also supports AirPlay from your Mac for faster and smoother screen mirroring. In the meantime, here’s a guide on how you can use this application.
- Download the app on both your Mac and Windows PC.
Download
- Connect your Windows and Mac under the same network then open the LetsView app.
- On your Mac, find the AirPlay Display and select the name of your PC that starts with LetsView. Then your Mac screen will be cast to your Windows PC immediately.
AirServer
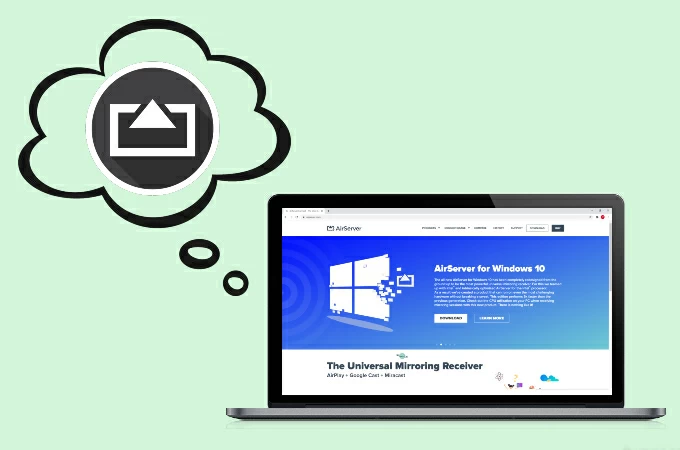
Lastly, we have AirServer. It is one of the most advanced screen mirroring applications for Mac and PC using a built-in AirPlay and Google Cast. Unfortunately, you must have a strong and reliable internet connection to get the best experience of this app. To share Mac screen on PC using AirServer, you can follow the guidance below.
Conclusion
And that’s it! Now you have three options to screen share Mac to Windows PC. All of them are practical to use. You may try one or three of these to find which one you’re most comfortable using. If you prefer a freeway, then LetsView will be the best for you.
Posted by:Amanda Smithon September 14, 2020toTips and Resources.Last updated on September 19, 2023