
1. Overview
It is now possible to run Docker containers on Windows 10 and Windows Server, leveraging Ubuntu as a hosting base.
Imagine running your own Linux applications on Windows, using a Linux distribution you are comfortable with: Ubuntu!
It is now possible to do so using the power of Docker technology and Hyper-V virtualization on Windows.

Originally authored by Mathieu Trudel-Lapierre.
2. Requirements
You will need a 64-bit x86 PC with 8GiB of RAM running Windows 10 or Windows Server, updated to include the Windows 10 Fall Creator update, released October 2017.
You will also need a recent installation of Docker.
Finally, you will need to make sure you have installed a program for decompressing the Ubuntu host container image, e.g. 7-Zip or XZ Utils
3. Install Docker for Windows
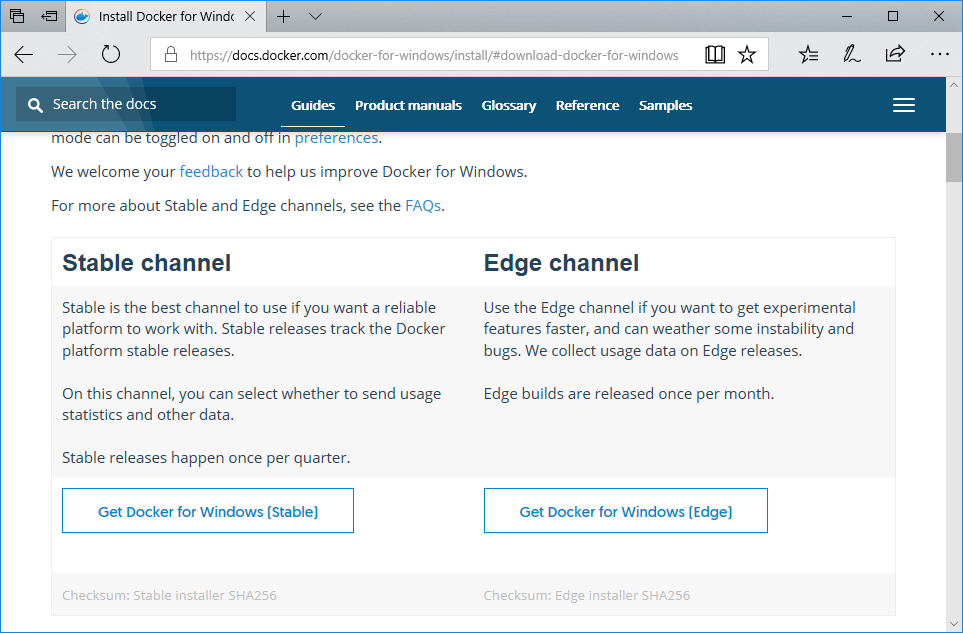
Download Docker for Windows from Docker Store.

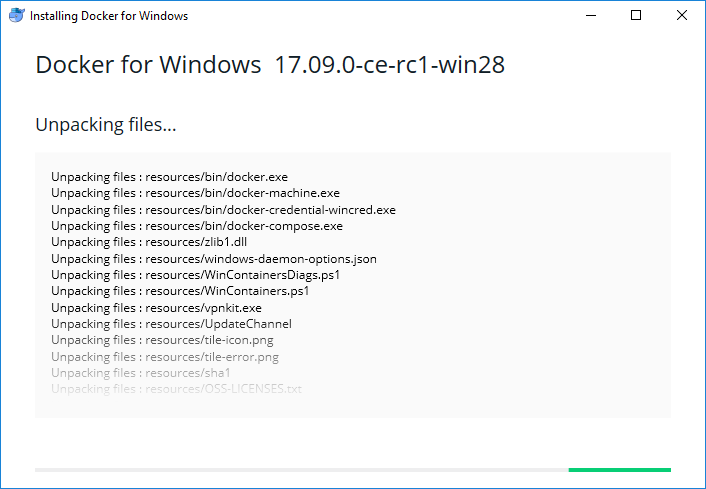
Once downloaded, proceed with the installation steps, and either logout or reboot of your system as indicated by the installer.

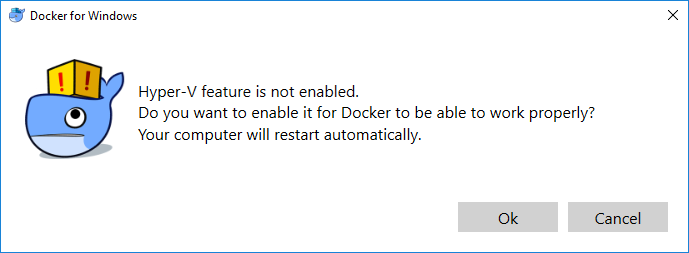
After reboot, Docker will be started. Docker requires that the Hyper-V feature is enabled, so if necessary will ask you to enable it and restart. Click OK for Docker to enable Hyper-V and restart your system.

4. Download the Ubuntu container image
Download the latest Ubuntu container image for Windows from the Canonical Partner Images website
Once downloaded, extract the image, using e.g. 7-Zip, or XZ Utils:
C:\Users\mathi\> .\xz.exe -d xenial-container-hyper-v.vhdx.xz
5. Prepare the container environment
First, create two directories:

Create C:\lcow, which will be used as scratch space for Docker while preparing the containers.
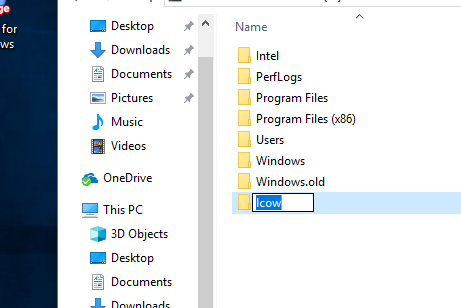
Also create C:\Program Files\Linux Containers. This is where the Ubuntu container image will live.
You will need to give this folder extra permissions to allow Docker to use the images from it. Run the following Powershell script in an administrator Powershell window:
param(
[string] $Root
)
# Give the virtual machines group full control
$acl = Get-Acl -Path $Root
$vmGroupRule = new-object System.Security.AccessControl.FileSystemAccessRule("NT VIRTUAL MACHINE\Virtual Machines", "FullControl","ContainerInherit,ObjectInherit", "None", "Allow")
$acl.SetAccessRule($vmGroupRule)
Set-Acl -AclObject $acl -Path $Root
Save this file as set_perms.ps1 and run it:
TIP You may need to run ‘Set-ExecutionPolicy -Scope process unrestricted’ to be allowed to run unsigned Powershell scripts.

C:\Users\mathi\> .\set_perms.ps1 "C:\Program Files\Linux Containers"
C:\Users\mathi\>
Now, copy the Ubuntu container image .vhdx file that was decompressed at the previous step to uvm.vhdx under C:\Program Files\Linux Containers.
6. More Docker preparation
Docker for Windows requires some pre-release features in order to work with Hyper-V isolation. While these features are not yet available in the Docker CE installation that was done previously, the necessary files can be downloaded from master.dockerproject.org.

Retrieve dockerd.exe and docker.exe from master.dockerproject.org, and put the two programs somewhere safe, such as in your own folder. They will be used to start the Ubuntu container in the next step.
7. Run an Ubuntu container on Hyper-V
You’re now ready to start your container. First, open a Command-line prompt (cmd.exe) as Administrator, and start dockerd.exe with the right environment:
C:\Users\mathi\> set LCOW_SUPPORTED=1
C:\Users\mathi\> .\dockerd.exe -D --data-root C:\lcow
Docker already running?
If the Docker installer sets Docker to run automatically at boot, you may need to quit the already running daemon, via its toolbar icon, before running the above commands.
Then, start a Powershell window as Administrator; and run docker.exe, instructing it to pull the image for your container:
C:\Users\mathi\> .\docker.exe pull ubuntu

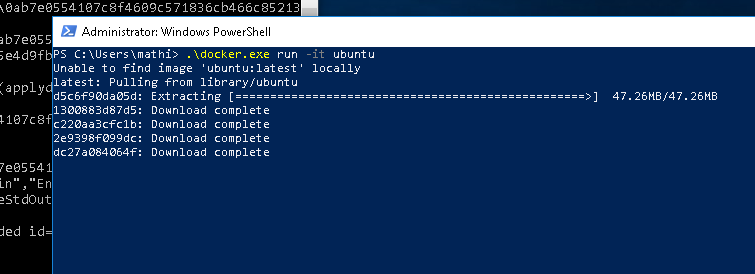
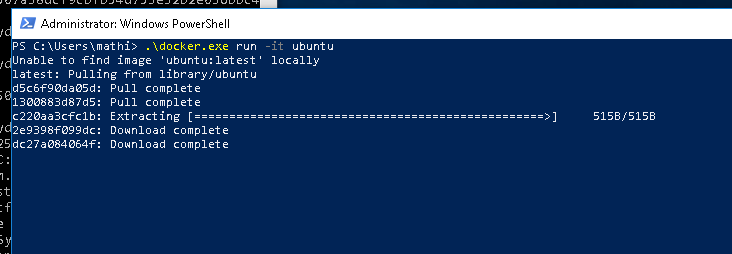
We can now finally start the container. Run docker.exe again, and tell it to run the new image:
C:\Users\mathi\> .\docker.exe run -it ubuntu
Congratulations! You have successfully set up your system to use containers with Hyper-V isolation on Windows, and have run your very own Ubuntu container.
8. Getting help
If you need some guidance getting started with the Ubuntu container images for Hyper-V, or if you get stuck, help is always at hand:
- Ask Ubuntu
- Ubuntu Forums
- IRC-based support
Was this tutorial useful?
Thank you for your feedback.
Время на прочтение5 мин
Количество просмотров27K
Привет, Хабр! Неделю назад я рассказывал вам о новой возможности, которая доступна в предварительных выпусках Docker и Windows Server/Windows 10 — запуск Linux контейнеров c Hyper-V изоляцией, аналогично Windows контейнерам с Hyper-V изоляцией. В этом пошаговом руководстве речь пойдёт про аналогичный запуск контейнеров с Ubuntu в этом окружении.

Введение
Как я уже писал до ката, контейнеры Docker теперь можно запускать в Windows 10 и Windows Server, используя Ubuntu в качестве среды хостинга. Иначе говоря, благодаря совместному использованию технологии Docker и виртуализации Hyper-V в Windows, вы сможете запускать собственные Linux-приложения в Windows, используя – Ubuntu!

Требования
1. Вам понадобится ПК x86 с 64-разрядным процессором и 8 ГБ оперативной памяти, работающий под управлением Windows 10 или Windows Server.
2. Запускать контейнеры Linux в Hyper-V могут только участники программы предварительной оценки Windows. Эта программа позволяет тестировать предварительные выпуски программного обеспечения и будущие версии Windows.
3. Если для вашего развертывания важны стабильность и конфиденциальность (программа предварительной оценки Windows позволяет Microsoft собирать информацию об использовании), лучше дождитесь выхода обновления Windows 10 Fall Creator Update в октябре 2017. В этом выпуске технология Docker с Hyper-V будет доступна без необходимости участия в ней.
4. Вам также понадобится последний выпуск Docker, его можно скачать отсюда: http://dockerproject.org.
5. Наконец, вам нужно убедиться, что вы установили программу для разархивирования образа контейнера-хоста Ubuntu, например, 7-Zip или XZ Utils.
Как присоединиться к программе предварительной оценки Windows
Если вы уже являетесь участником этой программы, переходите к следующему шагу.
I этап:
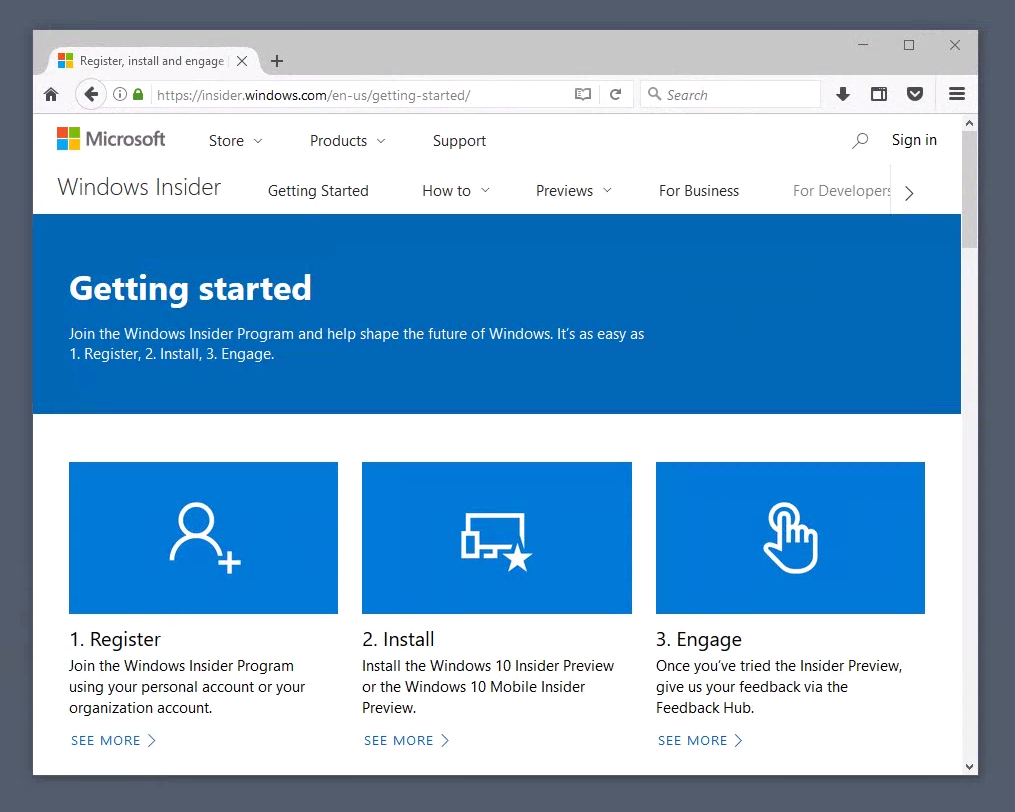
1. Откройте следующую ссылку в вашем веб-браузере:
https://insider.windows.com/en-us/getting-started/.
2. Чтобы зарегистрироваться, войдите в систему, используя ту же учетную запись Microsoft, которую вы используете для входа в Windows 10, и пройдите по ссылке Register your personal account (Зарегистрируйте свою персональную учетную запись) на странице начала работы с Программой предварительной оценки Windows. Подтвердите согласие с условиями для завершения регистрации.
3. Теперь вам нужно открыть Настройки в меню Start (Пуск) Windows 10, выбрать Updates & Security (Обновления и безопасность), а затем Windows Insider Program (Программа предварительной оценки Windows) в меню слева.
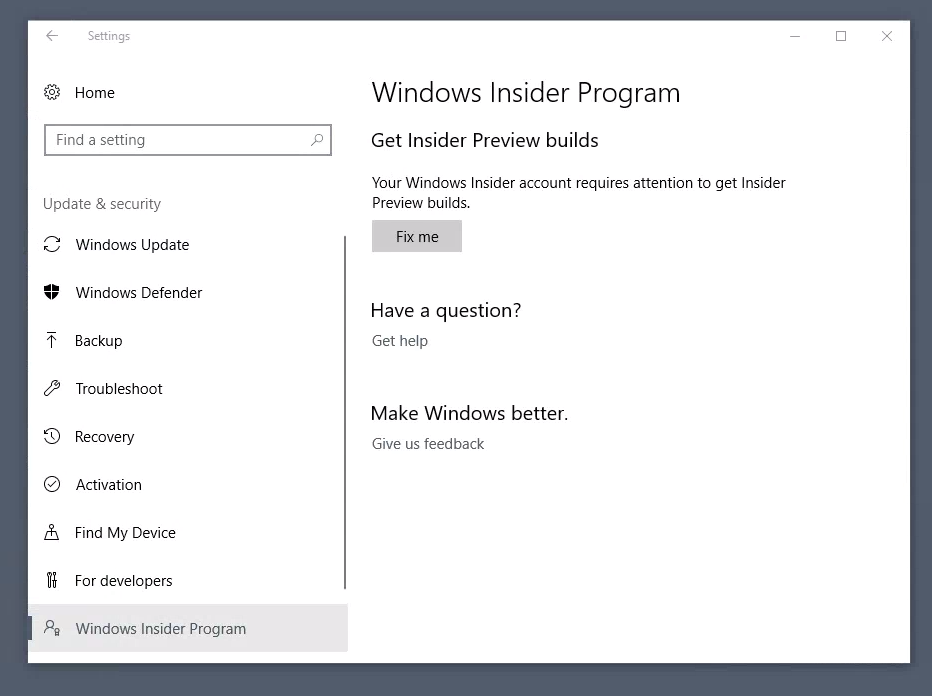
4. В случае необходимости нажмите кнопку Fix me (Исправить), если Windows выдает предупреждение Your Windows Insider Program account needs attention (Ваша учетная запись в Программе предварительной оценки Windows требует внимания).
II этап:
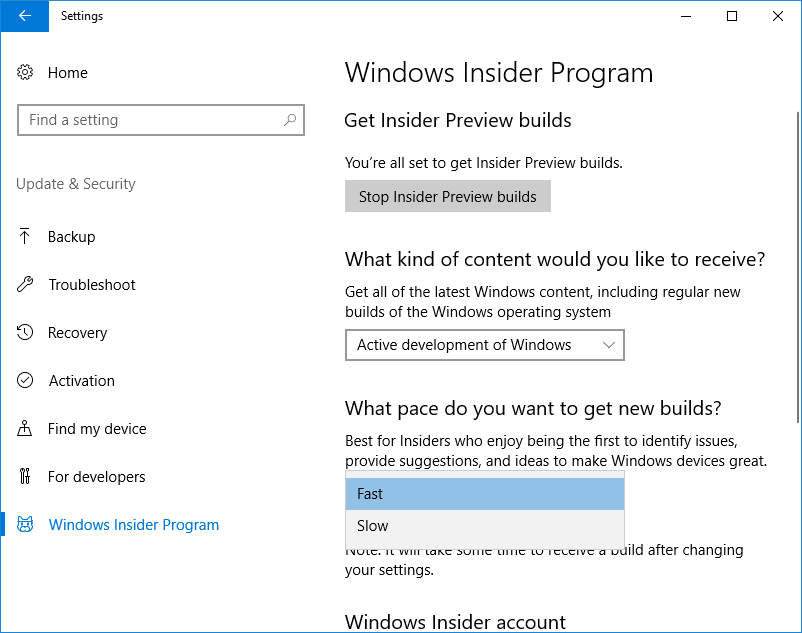
1. На панели Windows Insider Program (Программа предварительной оценки Windows) нажмите Get Started (Начать). Если ваша учетная запись Microsoft не связана с вашей копией Windows 10, войдите в систему при появлении запроса и выберите учетную запись, которую вы хотите связать с установленной копией операционной системы.
2. Теперь вы сможете выбрать, какое содержимое вы хотите получать как участник Программы предварительной оценки Windows. Чтобы обеспечить доступность средств изоляции в Hyper-V, необходимых технологии Docker, выберите Fast (Быстрый). Дважды щелкните Confirm (Подтвердить), затем позвольте Windows перезагрузить ваш компьютер. После перезагрузки вам, скорее всего, придется дождаться завершения установки некоторого количества обновлений, прежде чем перейти к следующему шагу.
Установите Docker для Windows
1. Скачайте Docker для Windows из магазина Docker Store.
2. После скачивания выполните установку и перезагрузите систему, когда появится соответствующий запрос.
3. После перезагрузки запустится Docker. Docker использует функцию Hyper-V, поэтому при необходимости он попросит вас включить ее и выполнить перезагрузку. Нажмите OK, чтобы Docker включил Hyper-V и перезагрузите систему.
Скачайте образ контейнера Ubuntu
1. Скачайте последний образ контейнера Ubuntu для Windows с веб-сайта Canonical Partner Images.
2. Разархивируйте скачанный образ с помощью 7-Zip или XZ Utils:
C:\Users\mathi\> .\xz.exe -d xenial-container-hyper-v.vhdx.xzПодготовьте окружение для контейнера
1. Сначала создайте два каталога.
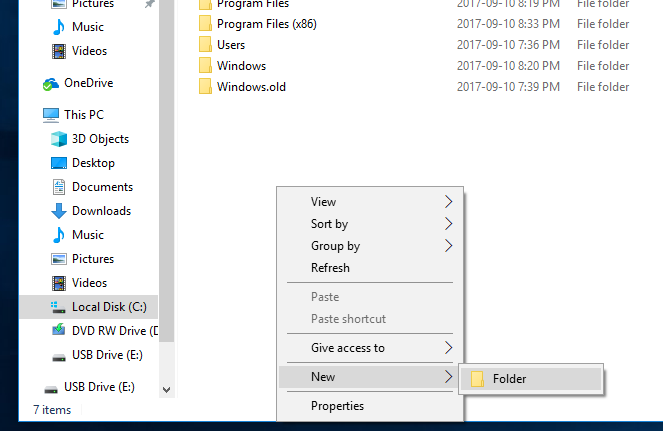
2. Создайте каталог C:\lcow, который будет использоваться как область временных файлов для Docker при подготовке контейнеров.

3. Также создайте каталог C:\Program Files\Linux Containers. В нем будет храниться образ контейнера Ubuntu.
4. Нужно будет назначить для этого каталога дополнительные разрешения, чтобы Docker мог использовать хранящиеся в нем образы. Выполните следующий скрипт Powershell в окне администратора Powershell:
param(
[string] $Root
)
# Give the virtual machines group full control
$acl = Get-Acl -Path $Root
$vmGroupRule = new-object System.Security.AccessControl.FileSystemAccessRule("NT VIRTUAL MACHINE\Virtual Machines", "FullControl","ContainerInherit,ObjectInherit", "None", "Allow")
$acl.SetAccessRule($vmGroupRule)
Set-Acl -AclObject $acl -Path $Root
Сохраните этот файл под именем set_perms.ps1 и запустите его.
СОВЕТ. Возможно, вам нужно будет выполнить команду Set-ExecutionPolicy -Scope process unrestricted, чтобы запускать неподписанные скрипты Powershell.
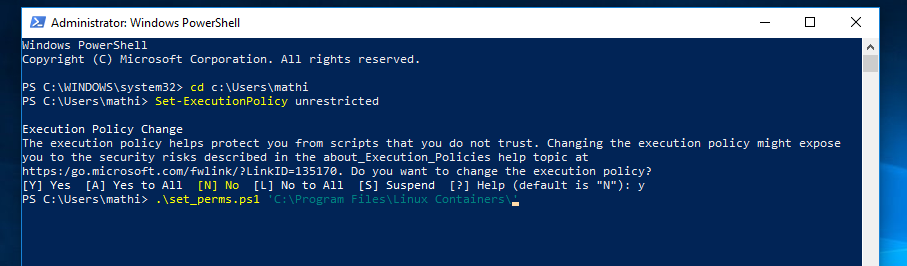
C:\Users\mathi\> .\set_perms.ps1 "C:\Program Files\Linux Containers"
C:\Users\mathi\>
5. Теперь скопируйте файл с образом контейнера Ubuntu (.vhdx), разархивированный на предыдущем шаге, присвойте ему имя uvm.vhdx и поместите в каталог C:\Program Files\Linux Containers.
Дополнительные подготовительные шаги для Docker
1. Docker для Windows требует наличия некоторых возможностей из предварительной версии для работы со средствами изоляции Hyper-V. Эти возможности пока недоступны в установленном ранее Docker CE, но вы можете скачать необходимые файлы с веб-сайта http://master.dockerproject.org.
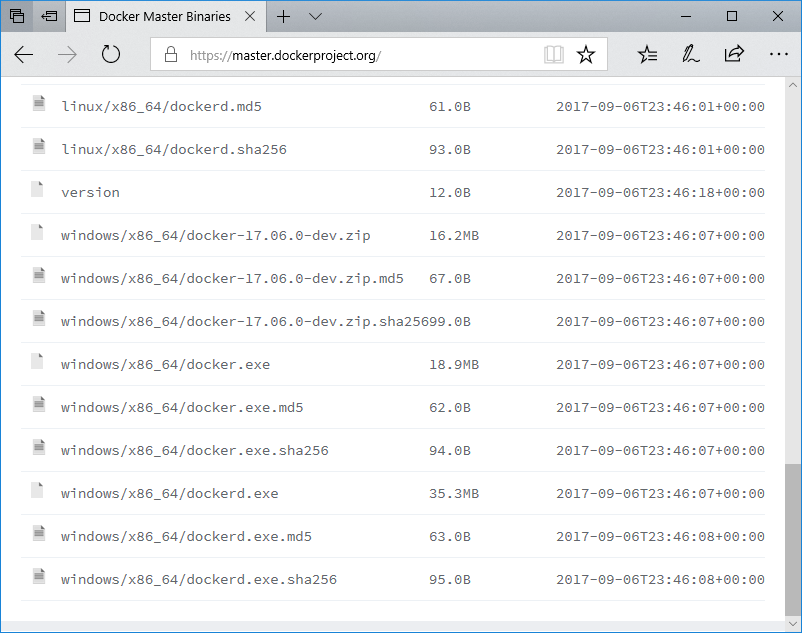
2. Скачайте файлы dockerd.exe и docker.exe с сайта http://master.dockerproject.org и сохраните в надежном месте, например, вашем собственном каталоге. Они понадобятся для запуска контейнера Ubuntu на следующем шаге.
Запустите контейнер Ubuntu в Hyper-V
1. Теперь вы готовы к запуску своего контейнера. Для начала откройте интерфейс командной строки (cmd.exe) от имени администратора и запустите dockerd.exe в нужной среде.
C:\Users\mathi\> set LCOW_SUPPORTED=1
C:\Users\mathi\> .\dockerd.exe -D --data-root C:\lcow
2. Затем откройте окно Powershell от имени администратора и запустите docker.exe, чтобы скачать образ для вашего контейнера.
C:\Users\mathi\> .\docker.exe pull ubuntu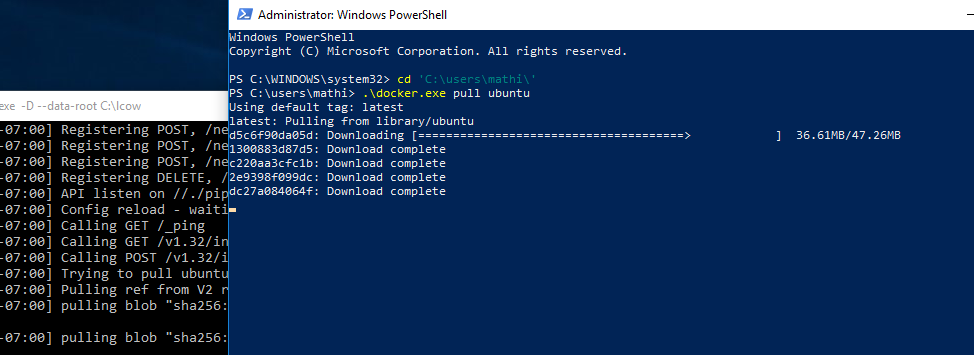
3. Наконец, настало время запустить контейнер. Снова запустите docker.exe и попросите систему развернуть новый образ.
C:\Users\mathi\> .\docker.exe run -it ubuntuПоздравляю! Вы успешно настроили свою систему для работы с контейнерами c Hyper-V изоляцией в Windows и запустили собственный контейнер Ubuntu.
Помощь
Если вам нужна помощь, чтобы начать работу с образами контейнера Ubuntu для Hyper-V или у вас возникли проблемы, поддержка всегда рядом:
- Сообщество Ask Ubuntu
- Форумы Ubuntu
- IRC-поддержка

Docker has revolutionized the way developers build, ship, and run applications. It’s an open-source platform that provides a containerization solution, enabling developers to create portable and efficient environments for their applications to run on any system, regardless of the underlying infrastructure. In this blog we will learn how to run Ubuntu on Windows.
Scenario
Let’s say you are new to Linux and want to try it out or follow some tutorial to learn some commands on CLI, you will have to install Ubuntu on a separate machine, dual boot your machine with Ubuntu or use WSL (Windows Subsytem for Linux). All options are valid but require a lot of setup and configuration to make it work(WSL is still easy to install and use as compared to others). To solve this problem we can use Ubuntu as a container using Docker. We don’t need much setup or the know-how of installation to run Ubuntu on Windows using Docker.
Pre-requisites
Before we get started, You will need to make sure that you have Docker installed on your Windows machine. You can download Docker from the official website, https://www.docker.com/, and follow the installation instructions.
Once, it’s installed, you need to launch the Docker Desktop application from the system tray.
Get Ubuntu Image
We need to get the ubuntu image from docker hub on our local machine. To do this you need to open Powershell/Terminal and type the following command:
docker pull ubuntu
It will take some time based on your connection speed.
Run Ubuntu as a container
Once the image is pulled you can check it by using the command docker images which will list all the images available on your machine. You can also check the same on Docker Desktop.
Now we need run this Ubuntu image as a container. For this we will type in the following command:
docker run -t -d --name myubuntu ubuntu
-t — Tells the container to run in a TTY mode. Reference
-d — Specifies the image to run in a detached mode.
--name — We specify the name of the conatiner we want, which can be anything.
And, lastly the image name, which is ubuntu.
After this command is executed, it will return the container ID, which tells us that the container is up and running successfully. You can verify the same by typing docker ps
Linux bash in action
Finally to work with the Linux CLI, we type in the following command:
docker exec -it myubuntu bash
-it — Will open an interative bash terminal

NOTE: The linux will be minified version and thus you will need to install the packages and dependencies you require using apt install <pacakage-name>.
Mission acomplished! We can now play around with linux and do a lot of cool stuff with it. For beginners you can learn basic navigation commands, admin tasks such as newtwork administartion, securing linux servers, user and groups managements, etc.
Happy Coding!
References
Docker Documentation
| Введение | |
| Пример | |
| Статьи про Docker |
Введение
У вас есть Windows 10 Pro или Enterprise или очень удачная версия Windows 10 Home
и вы хотите запустить
Ubuntu
в контейнере
Docker
Пример
Для этого нужно просто сказать образ командой pull и запустить его командой
run.
docker pull ubuntu
docker run -it —name myubuntu ubuntu
cat /etc/os-release
NAME=»Ubuntu»
VERSION=»20.04 LTS (Focal Fossa)»
ID=ubuntu
ID_LIKE=debian
PRETTY_NAME=»Ubuntu 20.04 LTS»
VERSION_ID=»20.04″
HOME_URL=»https://www.ubuntu.com/»
SUPPORT_URL=»https://help.ubuntu.com/»
BUG_REPORT_URL=»https://bugs.launchpad.net/ubuntu/»
PRIVACY_POLICY_URL=»https://www.ubuntu.com/legal/terms-and-policies/privacy-policy»
VERSION_CODENAME=focal
UBUNTU_CODENAME=focal
Related Articles
| Docker | |
| build: Создание контейнеров + примеры | |
| Ubuntu в контейнере на Windows 10 | |
| Создать контейнер с доступом по SSH | |
| Создать контейнер с Nginx | |
| Make |
Developer Environment Docker
This Docker container provides a fully-equipped development environment built on Ubuntu 22.04 LTS. It includes a comprehensive suite of development tools and services, orchestrated under systemd as PID 1. This configuration adheres to the principle of least privilege, enhancing security while ensuring full functionality for services and applications that rely on systemd.
Features
The container is pre-loaded with a wide array of tools and services, including:
- OBS Studio, Google Chrome, Visual Studio Code: Essential tools for development, screen recording, web testing, and source code editing.
- Python 3.10 (with
venvanddevpackages), OpenSSH Server, TigerVNC Server: For programming, secure access, and remote desktop capabilities. - VLC Media Player, Git, Curl, FFmpeg, Htop: Utilities for media playback, version control, data transfer, media processing, and system monitoring.
- XFCE Desktop Environment: A lightweight desktop environment for a better GUI experience.
- Snapd: For snap package management, enhancing application installation and maintenance.
Prerequisites
Ensure Docker is installed on your machine. For installation instructions, visit Docker’s official website.
For GPU support, the NVIDIA Container Toolkit must be installed. Follow the instructions at NVIDIA Container Toolkit’s documentation to set it up.
Getting Started
1. Pull the Docker Image
Pull the image from Docker Hub:
docker pull mscrnt/ubuntu-desktop:latest
2. Run the Docker Container
To run the container with the necessary configurations:
docker run -d \
  --tmpfs /tmp \
  --tmpfs /run \
  --tmpfs /run/lock \
  -v /sys/fs/cgroup:/sys/fs/cgroup:ro \
  -p 5901:5901 -p 3389:3389 -p 22:22 \
  -e USER=<USERNAME> -e PASSWORD=<PASSWORD> -e VNCPASSWORD=<VNCPASSWORD> \
  mscrnt/ubuntu-desktop:latest
For GPU support, add the --gpus all flag to your docker run command:
docker run -d \
  --gpus all \
  --tmpfs /tmp \
  --tmpfs /run \
  --tmpfs /run/lock \
  -v /sys/fs/cgroup:/sys/fs/cgroup:ro \
  -p 5901:5901 -p 3389:3389 -p 22:22 \
  -e USER=<USERNAME> -e PASSWORD=<PASSWORD> -e VNCPASSWORD=<VNCPASSWORD> \
  mscrnt/ubuntu-desktop:latest
3. Accessing Your Container
- Via VNC: Connect to
localhost:5901with a VNC client. - Via RDP: Use any Remote Desktop client to connect to
localhost:3389. - Via SSH: Connect using an SSH client to
localhost:22.
4. Docker Compose
For convenience, Docker Compose can be used. Create a docker-compose.yaml file with:
version: '3.8'
services:
  ubuntu-desktop:
    image: mscrnt/ubuntu-desktop:latest
    tmpfs:
      - /tmp
      - /run
      - /run/lock
    volumes:
      - /sys/fs/cgroup:/sys/fs/cgroup:ro
    ports:
      - "5901:5901"
      - "3389:3389"
      - "22:22"
    environment:
      USER: <USERNAME>
      PASSWORD: <PASSWORD>
      VNCPASSWORD: <VNCPASSWORD>
    deploy:
      resources:
        reservations:
          devices:
          - driver: nvidia
            capabilities: [gpu]
Replace placeholders with your desired configurations and run:
Building the Image
To build the image locally, clone the repository and navigate to the project directory:
git clone https://github.com/mscrnt/ubuntu-desktop-docker.git
cd ubuntu-desktop-docker
Build the image using the provided Dockerfile:
docker build -t your-image-name .