
Бесплатное приложение WinDynamicDesktop меняет фон рабочего стола в течение дня.
Одна из любимых пользователями Apple фишек в macOS Mojave — динамические обои. Когда эта опция включена, фон на рабочем столе Mac меняется с наступлением дня или ночи.
В Windows 10 такой фичи нет, но её легко можно добавить с помощью крошечной утилиты WinDynamicDesktop. Это бесплатное приложение скачивает обои и автоматически меняет их, подстраиваясь под время суток.

Установите WinDynamicDesktop, и после открытия программа поселится в системном трее. При первом запуске она попросит вас ввести название города, где вы находитесь, или включить автоматическое определение местоположения.
Затем, открыв главное окно, можно выбрать обои. По умолчанию доступны только снимки с пустыней из macOS, но, щёлкнув надпись Get more themes online, можно скачать и добавить на экран и другие фоны.
Установка сторонних тем очень проста. Откройте сайт с обоями, выберите, какие хотите скачать, и загрузите архив. Затем распакуйте его и найдите файл в формате DDW или JSON. Щёлкните кнопку Import from file в главном окне WinDynamicDesktop и выберите распакованный DDW. Тема будет добавлена в список.

Так, в числе сторонних вариантов для WinDynamicDesktop можно найти меняющийся вид с МКС (выглядит очень эффектно), вращающуюся Землю, панорамы Нью-Йорка и Сан-Франциско и рисованные фоны для фанатов игры Firewatch. А особо продвинутые пользователи могут даже создавать собственные темы по инструкции автора приложения.
WinDynamicDesktop — неофициальное приложение в Microsoft Store
Timothy JohnsonЦена: Бесплатно
Загрузить
WinDynamicDesktop →
Сторонние темы →
Выберите вариант загрузки:
- скачать с сервера SoftPortal (для Windows 32-bit, установочный exe-файл)
- скачать с сервера SoftPortal (для Windows 64-bit, установочный exe-файл)
- скачать с официального сайта (для Windows 64-bit, установочный exe-файл)
- скачать с официального сайта (для Windows 32-bit, установочный exe-файл)
- скачать с официального сайта (portable-версия для Windows 64-bit, exe-файл)
- скачать с официального сайта (portable-версия для Windows 32-bit, exe-файл)
Простая в работе утилита с открытым исходным кодом, которая позволяет автоматически менять обои на рабочем столе, исходя из местоположения пользователя, текущего времени, времени восхода и заката солнца. Также имеется возможность показа сторонних обоев (полное описание…)

Рекомендуем популярное
Carroll 1.31
Carroll — простенький инструмент для управления разрешением экрана монитора…
DisplayFusion 10.1.2
DisplayFusion — приложение, которое призвано существенно упростить жизнь владельцев…
Fences 5.8.6.8
Fences — программа с помощью которой пользователь может организовать и привести в порядок…
Seelen UI 2.0.12
Инструмент для настройки рабочего стола на Windows 10/11, который помогает повысить…
Одним из недостатков Windows является скудный набор встроенной кастомизации. Более того, с каждой версией операционной системы он становился всё меньше и меньше: сначала исчезли темы приложений, а вскоре и гаджеты Windows. Благо, в ОС от Microsoft есть достаточно возможностей для разработчиков для создания своих приложений, позволяющих кастомизировать систему на усмотрение пользователя.
- В тему: Как изменить цвет выделения в Windows 10 без сторонних программ
WinDynamicDesktop — установка динамических обоев

Это бесплатная программа с открытым исходным кодом, благодаря которой пользователи Windows с лёгкостью смогут устанавливать динамические обои из macOS, которые меняются в зависимости от времени суток (к примеру, когда у вас за окном рассвет, на обоях тоже рассвет). Сразу же после запуска, приложение спрашивает ваше местоположение для того, чтобы узнать время восхода и заката солнца в вашем регионе, также его можно ввести вручную. После этого можно выбрать одну из многих тем, доступных по умолчанию, либо создать свою.
GitHub | Microsoft Store (бесплатно)
TaskbarX — кастомизация панели задач
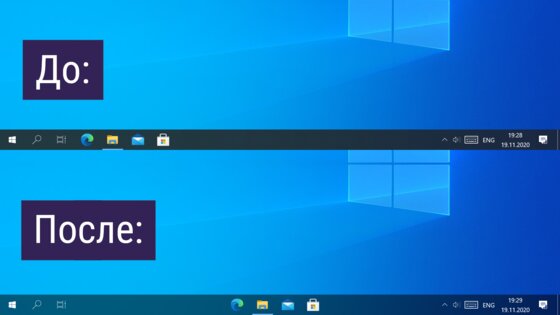
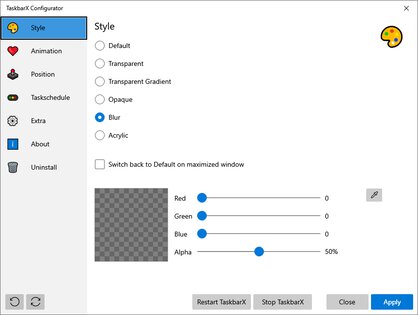
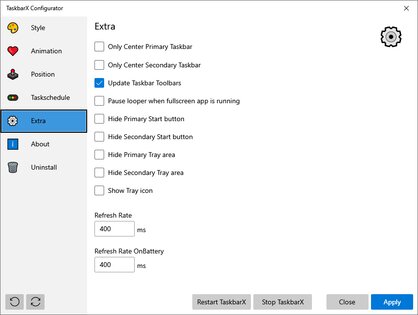
TaskbarX позволяет настроить панель задач Windows 10, изменить её фон или центрировать иконки, а также скрывать трей, иконки и кнопку пуска на других мониторах. Программа очень быстрая и легковесная, а также не затрагивает реестр, что делает ее полностью безопасной.
GitHub (бесплатно) | Microsoft Store (1 доллар)
Rainmeter — виджеты из Windows 7 и macOS
Windows Vista хоть и невзлюбили за ее нестабильность, но вот гаджеты (виджеты в Vista и 7) многим пользователям пришлись по нраву, их даже сумели портировать на Windows XP. По каким-то причинам Microsoft решила убрать этот функционал в Windows 8 (вероятнее всего, из-за живых плиток, которые выполняют похожую функцию). Да, гаджеты можно вернуть и в Windows 10, но зачем, когда есть стороннее приложение под названием Rainmeter, которое имеет даже больше функционала и регулярно обновляется?
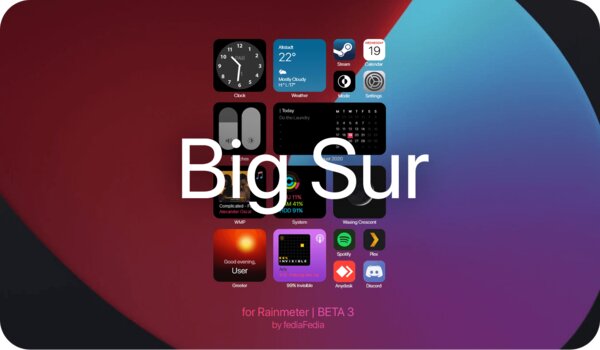
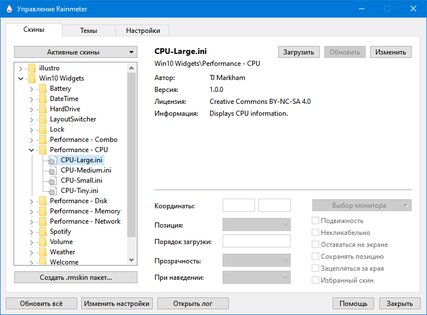
Rainmeter позволяет отображать виджеты на рабочем столе с практически любым функционалом, начиная от простых часов и заканчивая мониторингом использования процессора. В приложении есть поддержка сторонних скинов на любой вкус и цвет, коих большое количество в интернете. Один разработчик сумел даже скопировать виджеты macOS Big Sur и её Dock. Мои любимые же — Win10Widgets, которые выполнены в стиле Fluent Design и прекрасно вписываются в рабочий стол Windows 10.
Кроме этого, приложение легковесное (занимает 16 МБ ОЗУ) и потребляет минимум ресурсов, что подойдёт даже для ноутбуков. Как и первые две утилиты, эта тоже имеет открытый исходный код и совершенно бесплатна.
Официальный сайт (бесплатно)
Winaero Tweaker — твикер с кучей возможностей
Под Windows существует множество программ-твикеров для кастомизации системы, но самая мощная из них — Winaero Tweaker. Количество доступных настроек просто зашкаливает, и наверняка какая-то из них придётся вам по душе. Приложение позволяет настроить как внешний вид системы, так и её функционал, а также не требует установки.
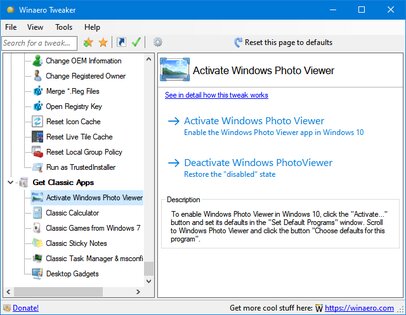
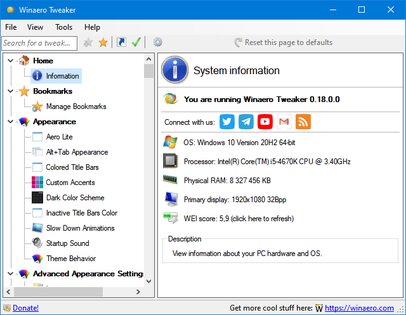
Твикер встречает нас окном с двумя частями: слева дерево доступных опций, а справа — их настройки. Под каждым пунктом есть подробное описание на английском языке. Также присутствует поиск для того, чтобы быстро найти нужный пункт.
Краткий список функций (полный список доступен на этой странице):
- возможность установить свой акцентный цвет системы;
- выключение автоматических обновлений Windows и драйверов;
- выбор звука включения ПК;
- настройки системных шрифтов и их размера;
- отключение Windows Defender;
- возможность изменения цвета и толщины рамки окон;
- отключение запроса пароля после выхода компьютера из спящего режима;
- включение старых встроенных приложений Windows (например, просмотрщика фото);
- возможность вернуть старый вид настроек громкости звука и батареи в панели задач.
ВНИМАНИЕ! Перед использованием, обязательно сделайте точку восстановления системы на случай каких-либо проблем.
Официальный сайт (бесплатно)
QuickLook — предпросмотр файлов без полного открытия
Это приложение позволяет выводить содержание файла на экран нажатием на пробел, прямо как в macOS. Таким образом можно быстро просматривать документы, фотографии и даже видео. С помощью Ctrl и колеса мыши можно увеличивать или уменьшать превью, а кликом на Enter откроется стандартное приложение для открытия данного типа файлов. Также твик поддерживает различные плагины для интеграции с другими файловыми менеджерами, либо открытия неподдерживаемых типов файлов.
GitHub | Microsoft Store (бесплатно)
SmartTaskbar — автоматическое скрытие панели задач
Данная утилита пригодится обладателям ноутбуков, позволяя автоматически скрывать панель задач при открытии окон на весь экран, тем самым увеличивая количество полезного пространства. Также у приложения есть ручной режим работы, который позволяет скрывать панель задач двойным кликом по иконке программы в трее и возможность выключить анимацию сворачивания.
GitHub | Microsoft Store (бесплатно)
PowerToys — продвинутая панель поиска и активные углы из macOS
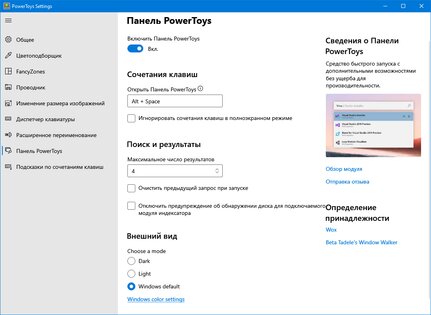
Microsoft PowerToys — это набор полезных утилит от самой Microsoft, призванных расширить функционал системы. Впервые этот набор создавался ещё для Windows 95 и позже был адаптирован под Windows XP. Спустя 12 лет, компания вспомнила об этом приложении и решила перезагрузить проект уже для Windows 10, с новыми функциями и открытым исходным кодом.
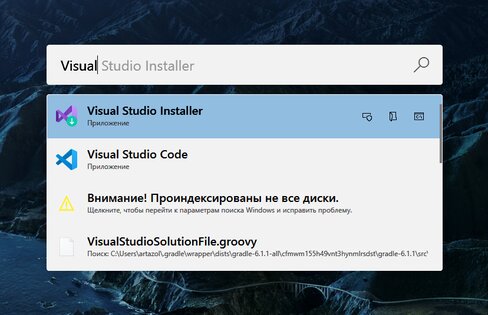
Одной из самых интересных утилит является PowerToys Run, которая добавляет в Windows 10 поиск наподобие Spotlight из macOS, которая работает по всей системе и позволяет искать приложения, файлы, запущенные процессы или даже проводить простые математические расчёты. Запускается же он сочетанием клавиш Alt + Space, при желании его можно изменить в настройках.
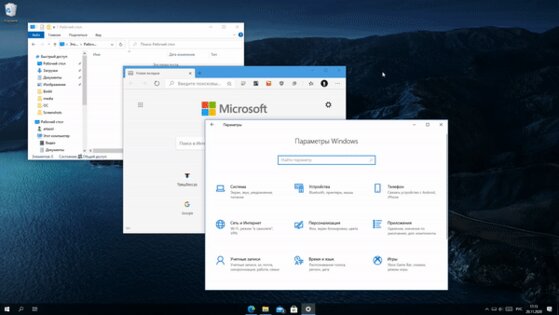
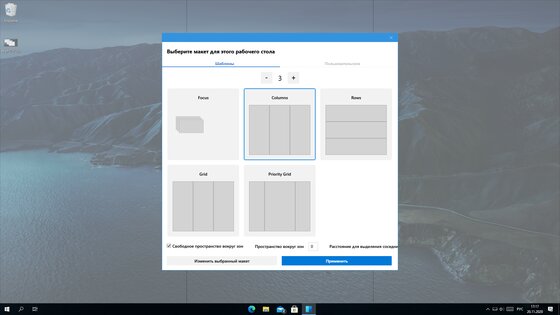
Вторая полезная функция — FancyZones. В Windows 10, если вы перетащите окно в угол или сторону экрана, оно изменится до определенного размера, заполнив половину или четверть экрана. FancyZones же позволяет создавать свои макеты расположения окон и быстро их применять. В приложении можно выбирать как заготовленные шаблоны отображения, так и создавать свои. Чтобы воспользоваться ими, достаточно зажать Shift и переместить окно приложения в нужную область.
GitHub (бесплатно)
Quick Links
-
Set Up a Slideshow That Changes on a Schedule
-
How to Change Your Desktop Backgrounds With the Task Scheduler
Apple’s macOS 10.14 Mojave offers «Dynamic Desktop» wallpapers that change based on the time of day. You can get something similar on Windows, either by using the standard background settings or by digging into the Task Scheduler.
Set Up a Slideshow That Changes on a Schedule
Windows 10 and Windows 7 both let you set up a slideshow and have it automatically change the picture after a period of time. So, if you provide four background wallpaper images, you can have Windows flip through them every six hours, changing your background depending on the time of day.
We tested this using the official macOS Mojave desktop backgrounds, which someone helpfully uploaded to Reddit. However, you can use any desktop background images you like.
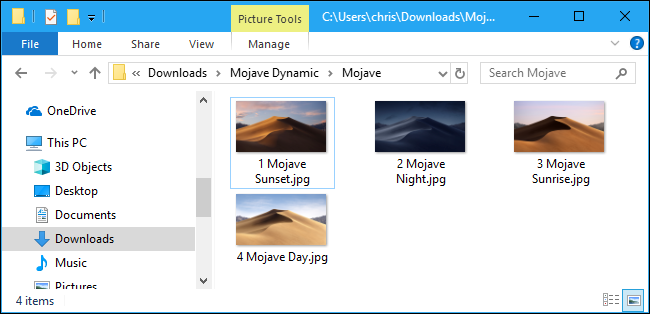
First, make a new folder and place the desktop backgrounds you want to use in it. If you plan to have your desktop background change every six hours, place four background images in it.

Windows will go through the folder in alphanumerical order, so you’ll need to name the images appropriately. The correct order depends on the current time of day.
For example, if it’s nearing the time when you want your sunset background applied, you should place a 1 in front of the filename of your sunset background, a 2 in front of your night background, a 3 in front of your sunrise background, and a 4 in front of your sunset background.
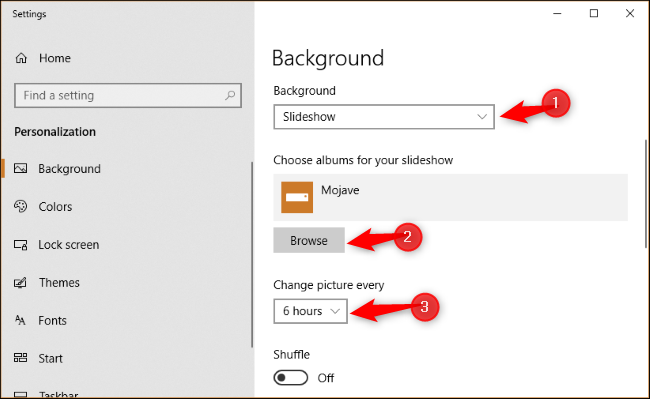
Next, open the desktop background configuration screen by right-clicking the desktop and selecting «Personalize» or by heading to Settings > Personalization > Background on Windows 10.
Click the «Background» box, and then select the «Slideshow» option. Under «Choose albums for your slideshow, click the «Browse» button, and then select the folder containing your background images. Under «Change picture every,» click the box and select «6 hours» if you have four background images you want to cycle through. You can also select «1 hour» here if you want to provide 24 background images.
Ensure the Shuffle option is turned off. If Shuffle is enabled, you’ll get random background images and they won’t match the time of day.
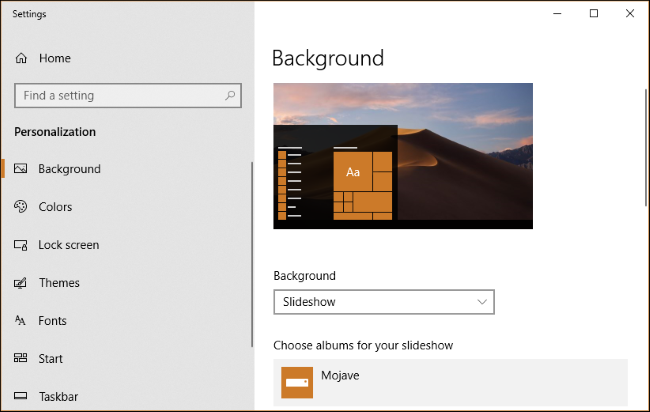
Windows will immediately set your desktop background to the image that is first alphanumerically in the folder. It will also immediately begin counting down from six hours.
In other words, if you want to see a sunset background at 4 p.m., a night background at 10 p.m., a sunrise background at 4 a.m., and a day background at 10 a.m., you should enable the slideshow background at exactly one of these times.
For example, if the sunset background is alphanumerically the first one in the folder, you should enable the slideshow background at exactly 4 p.m..
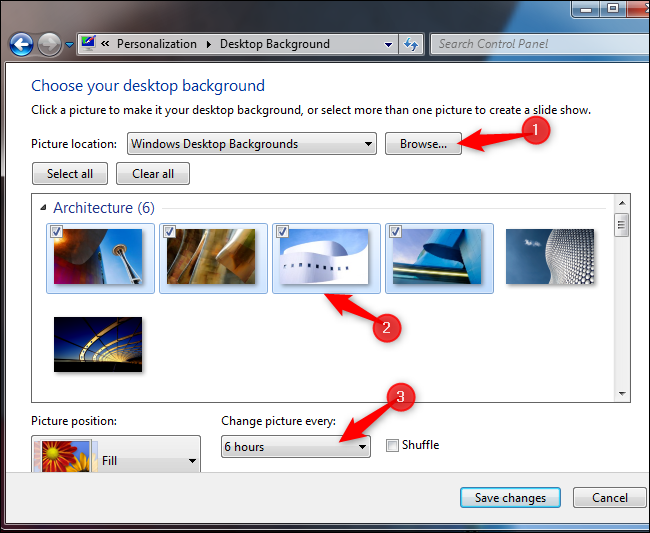
On Windows 7, the interface looks a bit different, but you can do the same thing.
Right-click the desktop, select «Personalize,» and then click the «Desktop Background» option. In the Desktop Background window, click the «Browse» button to the right of Picture location, and then choose the folder containing your wallpaper images. Select the background images you want to use, and then enable the timed slideshow feature on the «Change Picture Every» dropdown menu.
How to Change Your Desktop Backgrounds With the Task Scheduler
You can have Windows automatically change your desktop background on a schedule via the Task Scheduler, too. It’s a more complex process because Windows doesn’t include a built-in command that changes your desktop background. You can change the registry setting that points at your desktop background, but we couldn’t find a built-in command that would reliably «refresh» that setting and apply your new wallpaper.
Instead, we found that Microsoft’s own BgInfo tool worked pretty well. BgInfo is meant for writing system information text onto your desktop background, but it provides a reliable way to change your desktop background using commands. You’ll need to create several BgInfo configuration files containing the settings you want to apply, and then you’ll create scheduled tasks that automatically run these from the Task Scheduler.
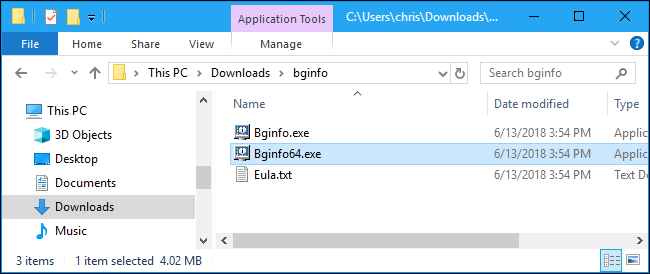
To get started, download BgInfo from Microsoft and extract its files into a folder. Launch the «Bginfo64.exe» program if you’re on a 64-bit version of Windows, or the Bginfo.exe file if you’re on a 32-bit version of Windows.
After you fire up BGInfo, first select all the text in the main box and erase it. Type a single space character (or multiple space characters) here. This will prevent BGInfo from inserting any text into your background and ensure it will only change the wallpaper.
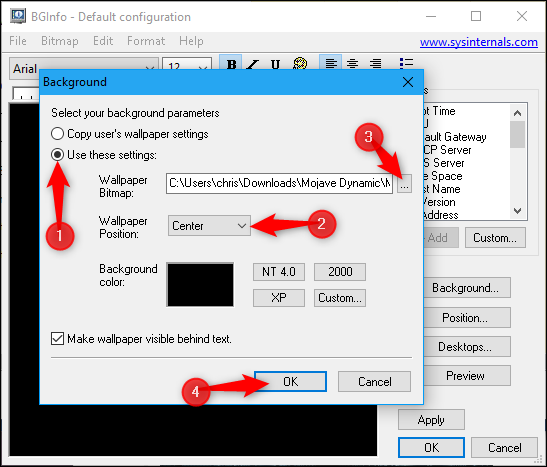
Second, click the «Background» button.

In the Background window, select the «Use These Settings» option. Set the «Wallpaper Position» to either «Center» or «Stretch»—whatever you want to do with your background image. Then, click the «…» button to the right of the «Wallpaper Bitmap» box, and then browse to one of the background images you want to use.
Click «OK» when you’re done.
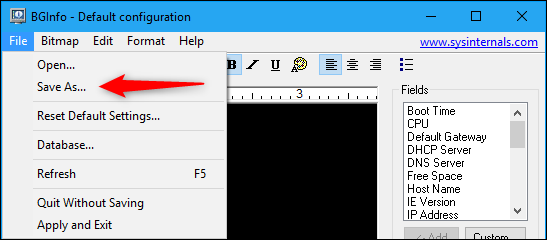
Next, click File > Save As, and then save your configuration as a .bgi file.
For example, we selected our day background image file while creating this profile, so we named it Day.bgi.
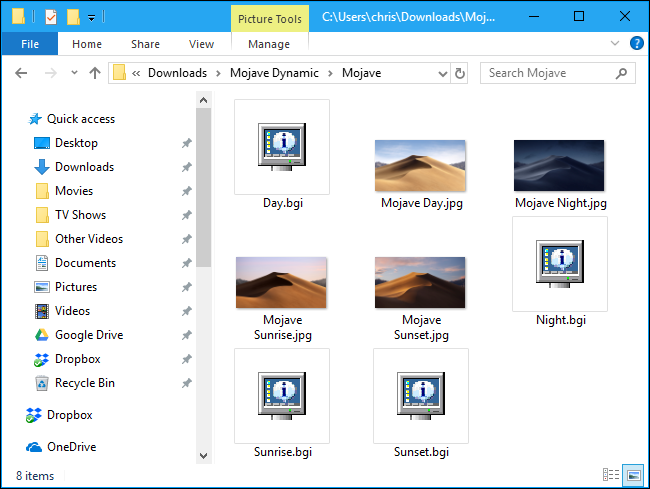
Now, you’re going to repeat this process to create a separate .bgi profile representing each of your background images, naming them after the times of day you want to use them.
When you’re done, your save folder should have all your images and a .bgi profile for each.
After you’ve created your .bgi files, you can use the Task Scheduler to automatically apply them on a schedule.
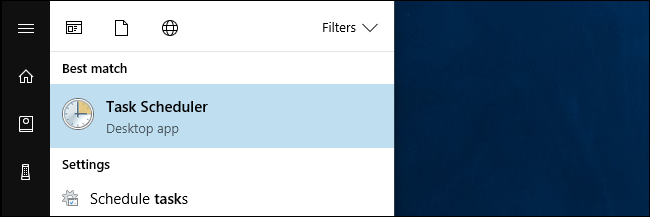
Click Start menu, type «Task Scheduler» into the search box, and then press Enter.
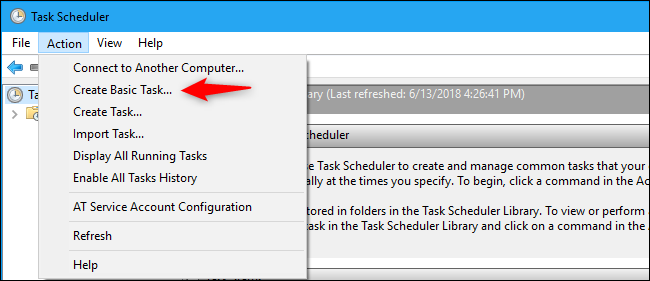
In Task Scheduler, click Action > Create Basic Task to create a new task.
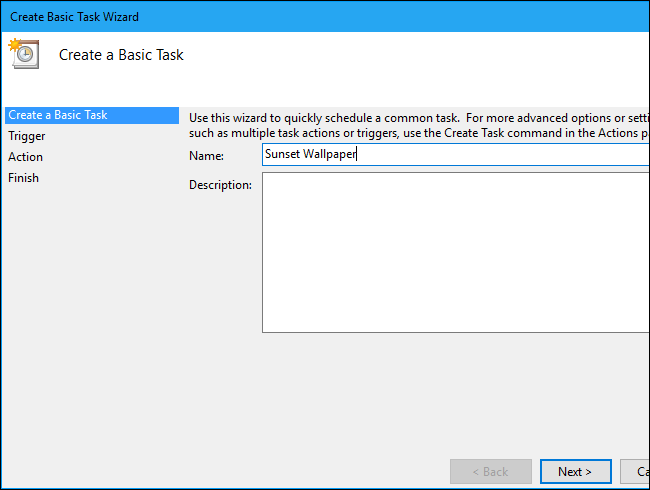
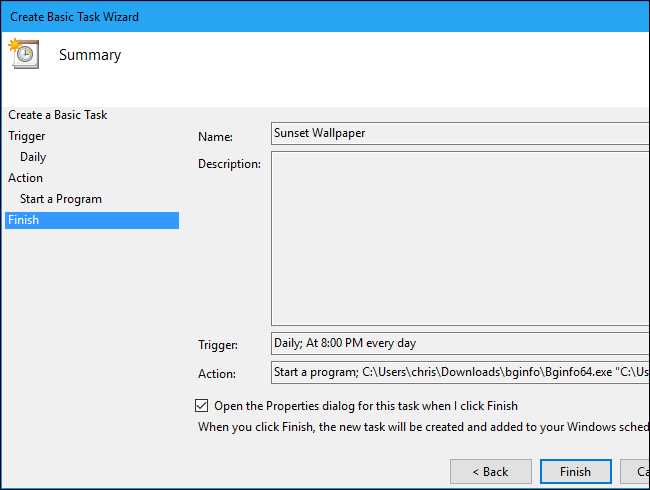
Give the task a name, and then click the «Next» button. For example, if this task will apply your sunset wallpaper around sunset, you might name it «Sunset Wallpaper.»
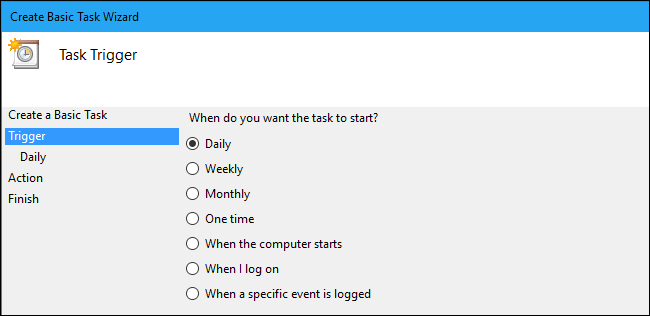
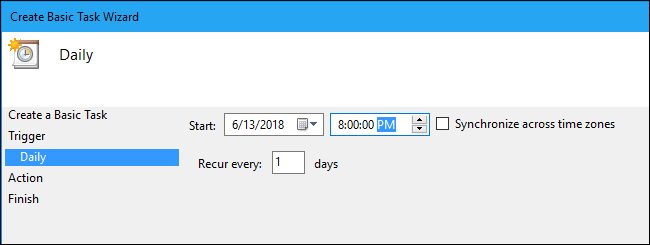
Select the «Daily» trigger, and then click the «Next» button again
Enter the time when you want the wallpaper to appear. For example, if sunset takes place around 9 p.m. in your location, you might set the wallpaper to appear at 8 p.m.. Select whatever time you like.
Ensure the task is set to recur every «1» days, and then click the «Next» button.
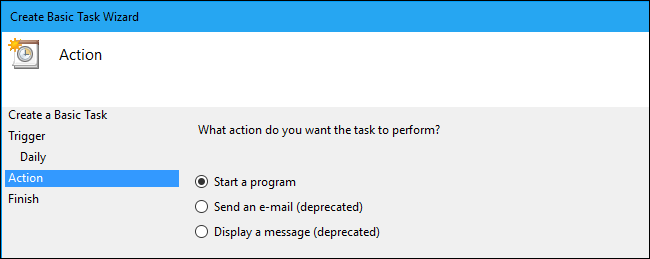
Select the «Start a Program» action, and then click «Next» again.
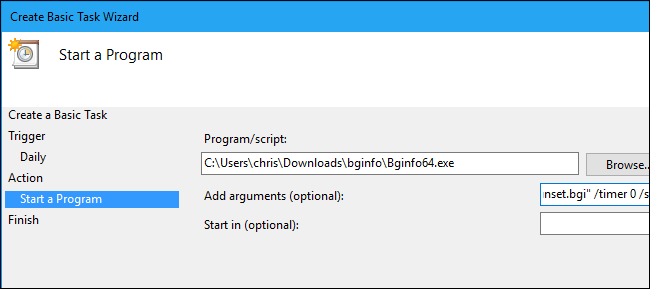
To the right of the «Program/script» text box, click the «Browse» button, and then browse to the Bginfo64.exe or Bginfo.exe program you used earlier.
In the «Add arguments (optional)» box, type the following text, replacing «C:\path\to\file.bgi» with the path to the BGI file you created earlier:
"C:\path\to\file.bgi" /timer 0 /silent
For example, if the Sunset.bgi file we created on our system is located at C:\Users\chris\Downloads\Mojave, we’d enter:
"C:\Users\chris\Downloads\Mojave\Sunset.bgi" /timer 0 /silent
Click «Next» to continue.
Select the «Open the Properties dialog for this task when I click Finish» check box, and then click «Finish» to create your task.
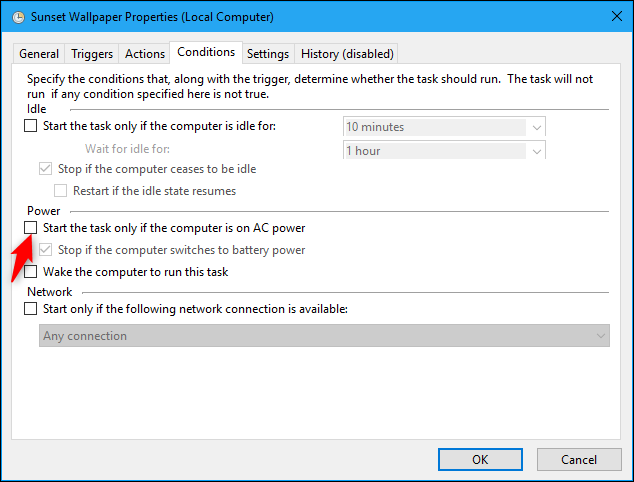
In the task window that opens, click over to the «Actions» tab, and then turn off the «Start the task only if the computer is on AC power» option. This allows the task to run even if you’re using a laptop on battery power.
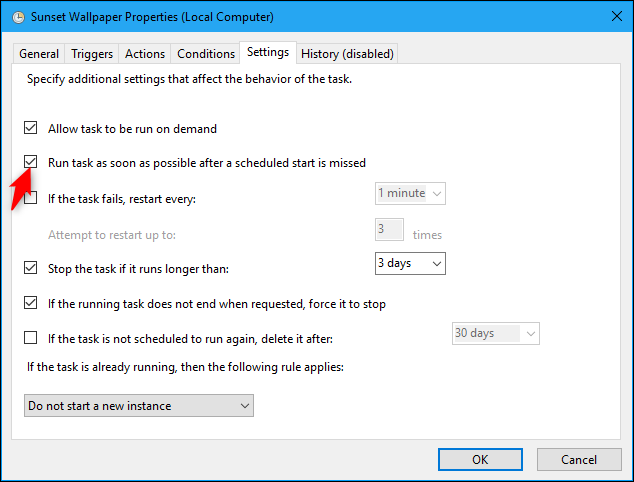
Finally, switch to the «Settings» tab, and then enable the «Run this task as soon as possible after a scheduled start is missed» option. This ensures the task will run and Windows will change your desktop background, even if your computer was shut down at the scheduled time.
Click «OK» to finish configuring the task.
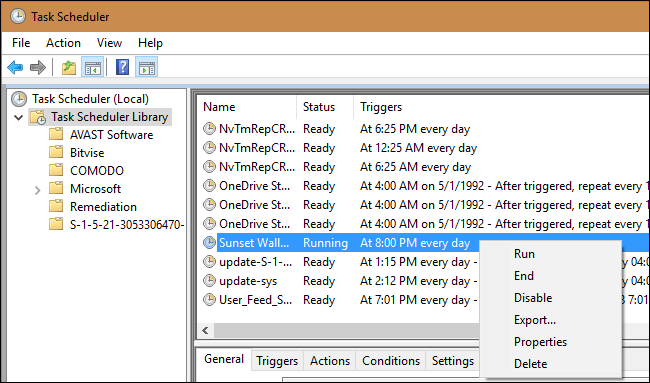
You’ll find your created task under the «Task Scheduler Library» folder in Task Manager. To check that it works properly, right-click it and select the «Run» command. Your wallpaper should immediately change.
To finish this process, create several more scheduled tasks using the same technique, selecting a different time of day and pointing each at the appropriate .BGI file you created earlier. For example, if you created four total BGI files for four backgrounds, you need to create three more scheduled tasks that will automatically change your background images at the correct time of day.
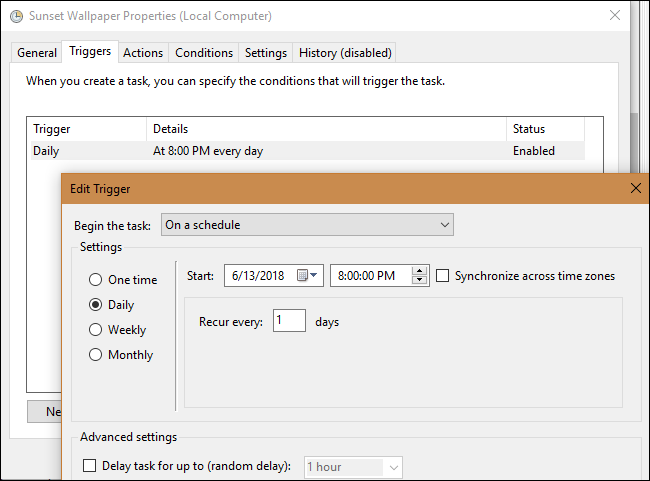
As the seasons change, you can return to the Task Scheduler and adjust the times of day when your desktop backgrounds change, too. To do so, locate a task under Task Scheduler Library and double-click it. Click the «Triggers» tab, click «Edit,» select a new time of day, and then click «OK» twice to save your changes.
Hopefully, Microsoft will add a Dynamic Desktop-style feature to a future version of Windows 10 and eliminate the need for all this fiddling.
Windows 11 already offers the ability to set up slideshows for wallpapers which change at a regular time interval. However, its nowhere close to the dynamic wallpaper found on MacOS which changes wallpapers according to the time of the day or whether it’s day or night.
That said, you can still get a pretty similar feature on your Windows 11 PC by following the steps we have listed below:
Step 1: Installing WinDynamicDesktop
First and foremost you will need to install a free app called WinDynamicDesktop as shown in the steps below:
- Click on search, type Windows Store and open the first search result.
- In the Windows Store click on search, type WinDynamicDesktop and click on the second entry. (image 1)
- Now that you’ve reached the WinDynamicDesktop’s app page click on install (image 2) [the screenshot says open as i already have the app installed].


Step 2: Configuring & Setting up WinDynamicDesktop
Now that you’ve installed the new app, you will need to run the app and configure it to your liking. You can do so by following the steps we’ve listed below:
- Click on search, type WinDynamicDesktop and open the first search result.
- Right-click on the WinDynamicDesktop icon that appears in the right corner of the taskbar and click on select theme.
- In the new window that opens select the theme that you like and hit apply to set it as a wallpaper.

In case you want to import a wallpaper of your choice then you can also do so by following these advanced steps:
- Create and download a .ddw file from a group of custom images or a .heic file that you like using a simple online tool that can be found on https://ddw-theme-creator.vercel.app/ (image 1).
- Once downloaded, go back to WindDynamicDesktop app, then click import from file and select the .ddw file that you just downloaded. (image 2)


That’s it, this is how you can get dynamic wallpapers on Windows 11. Additionally, you can find many such dynamic wallpapers and their .heic files from sources such as Dynamic Wallaper Club and WDD Themes