
Skip to content
How to Update and Patch Windows Hyper-V Hosts and Clusters
Quick Bites:
- The blog discusses the importance of updating and patching Windows Hyper-V hosts and clusters for stability and security
- It highlights tools like Windows Server Update Services (WSUS), Cluster Aware Updating (CAU), and PowerShell for managing updates effectively
- Administrators can control update timing, test patches, and automate cluster updates to ensure the smooth functioning of Hyper-V environments
- The article emphasizes the significance of applying updates in a scheduled and controlled manner to maintain the health of Hyper-V hosts and clusters
Keeping Windows Server systems updated with the latest patches is one of the key things that administrators can do to ensure their Windows Server environments are stable and secure. Patching is one of the necessary evils that administrators need to manage to keep Windows, Linux, and other environments healthy. Hyper-V hosts are part of the infrastructure that also needs to be kept updated.
Protect Your Data with BDRSuite
Table of Contents
- Tools and Technologies Used to Update and Patch Microsoft Hyper-V
- Windows Server Update Services
- Hyper-V Cluster Aware Updating
- Cluster-Aware Updating PowerShell
- Concluding Thoughts
Microsoft Hyper-V is at its core simply a role that runs on Windows Server operating systems. As such they are not excluded from Windows Server patching schedules that should be maintained. Additionally, the guest Hyper-V integration Services may need to be updated as well. In this article we will cover –
- What is involved with maintaining and implementing Windows Server patches on Hyper-V hosts?
- What tools can administrators use to apply patches and ensure patches are applied properly in Hyper-V, including Hyper-V clusters?
Let’s begin with applying updates to Microsoft Hyper-V Hosts and Clusters.
Tools and Technologies Used to Update and Patch Microsoft Hyper-V
There are a few tools and technologies that are Microsoft specific that can be used to perform updates and patch in Microsoft Hyper-V. Some tools have been around for quite some time and are general Windows Update tools. There is also another Windows Server cluster specific technology that comes into play when updating Windows Server clusters. The technologies we will take a look at include:

- Windows Server Update Services
- PowerShell
- Cluster-Aware Updates
Now, let’s take these one by one and see how each comes into play when implementing Hyper-V updates, both on single hosts or Hyper-V clusters.
Windows Server Update Services
Most Windows Server administrators have at least some experience with Windows Server Update Services or WSUS. WSUS has long been a staple of the enterprise environment as a means to control Windows updates. It provides many benefits to administrators looking to control which updates are applied and when.
Why would administrators want to control updates?
While Microsoft has a pretty decent track record of supplying fairly stable updates, there are updates that get pulled back out from time to time because of an issue that was not caught before it was released. There is certainly merit in wanting to release updates first to a test or lab environment to check for any potential stability issues before releasing them to production. WSUS gives administrators the approval control on updates that are applied.
Scheduling when updates are applied can be a critical matter as well for production workloads. Application of Windows Updates typically requires a reboot depending on which updates are applied. Using WSUS allows administrators to have better control on when the updates are released to target production workloads and when they are applied. There are a few things for administrators to note about WSUS:
- Don’t run WSUS directly on the Hyper-V host
- Choose whether or not servers download the updates directly from Microsoft or from a local repository server on site
- There are no Hyper-V specific categories to be found in WSUS. The Windows Server category distributes all Windows Server patches including Hyper-V
WSUS can certainly be used as an effective means to keep Hyper-V hosts updated. Generally, administrators will want to assign Hyper-V hosts to their own OU for management and policy purposes. This allows Group Policy settings to be applied to the Hyper-V hosts for configuring Windows Update settings to utilize the internal WSUS server for updates.
Hyper-V Cluster Aware Updating
Starting with Windows Server 2012, Microsoft introduced a feature that greatly reduces the complexity of updated Failover Cluster based platforms such as Hyper-V. The new feature is known as Cluster Aware Updating or CAU and allows for an automated approach to applying updates in a Failover Cluster configuration. Cluster Aware Updating automatically drains the roles from a node, applies updates to the node, and then reboots it. After the host comes back up, roles are failed back to the node and then CAU continues with the next node in the Failover Cluster. If there are problems along the way, the process is stopped.
Enabling Cluster Aware Updating is a fairly straightforward process. We can enable this with the Cluster Aware Updating Administrative tool that is found in the Server Manager Console.
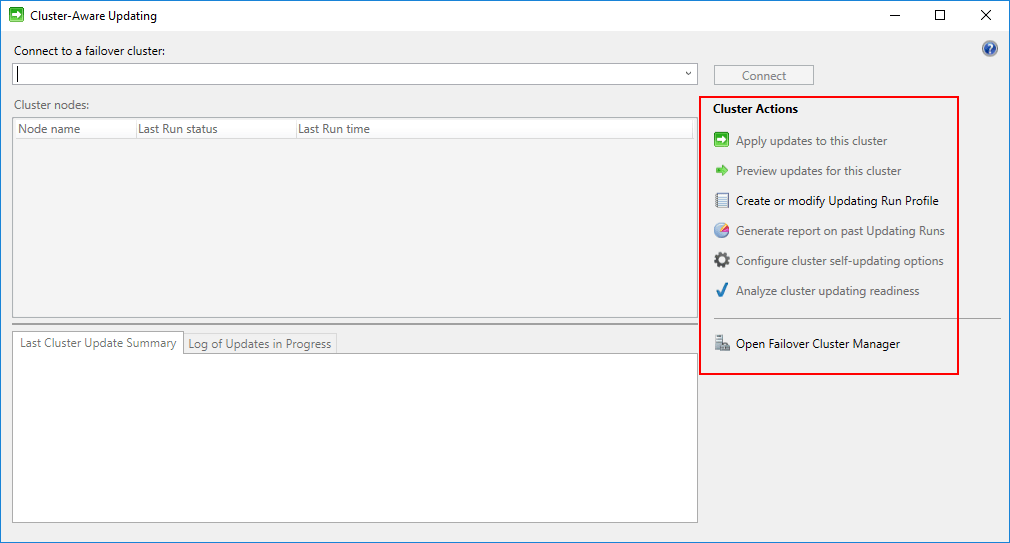
The Cluster-Aware Updating Tool allows connecting to and configuring Cluster-Aware Updating
Below, we connect to the Hyper-V cluster name. The Hyper-V hosts are enumerated and the “last run status” and “last run time” is also shown if available. Below, the tool has never been ran so this information is not available.
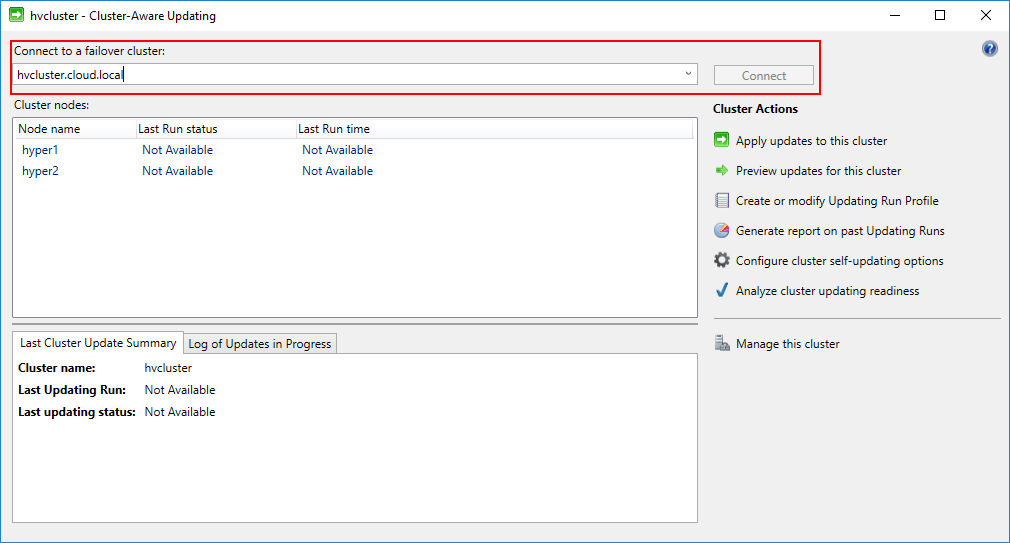
The Cluster-Aware Updating Tool allows connecting to and configuring Cluster-Aware Updating
In the Cluster Actions there is an option to Analyze cluster updating readiness which determines the readiness of the Hyper-V cluster to have the cluster aware updating functionality enabled.
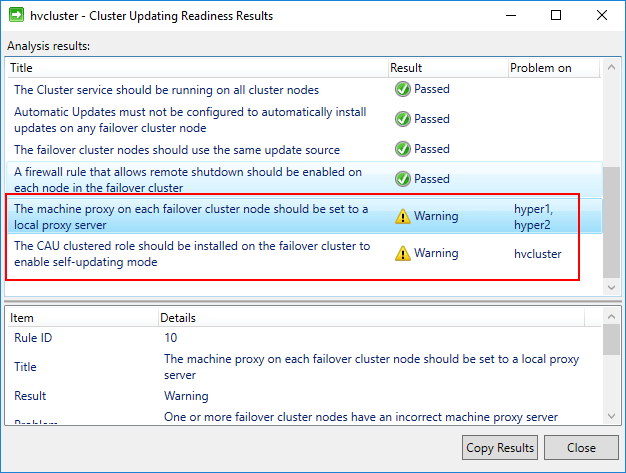
Analyzing Cluster updating readiness
To actually enable the cluster self-updating option, click the Configure cluster self-updating options under the Cluster Actions pane. This launches the Configure Self-Updating Options Wizard.
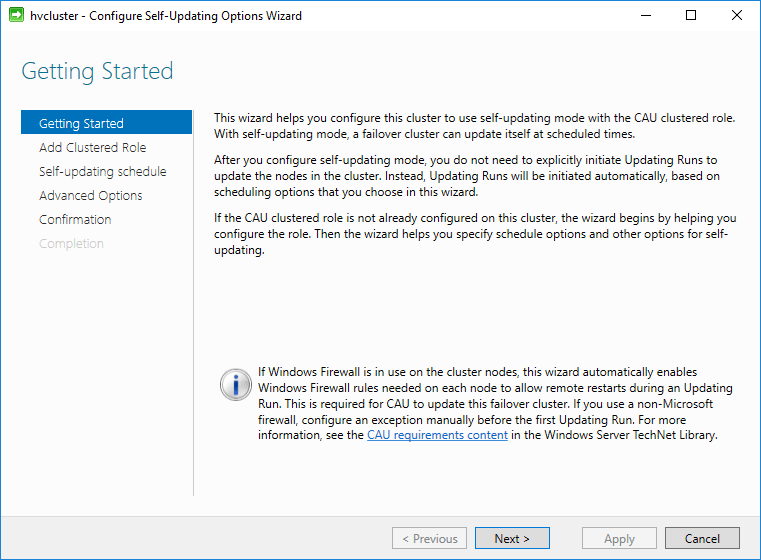
Configuring Self-Updating Options Wizard
Next, choose the checkbox next to the Add the CAU clustered role, with self-updating mode enabled, to this cluster. You can also select the I have a prestaged computer object for the CAU clustered role, if a computer object has already been prestaged for this purpose. CAU uses a special computer object for the self-updating feature. We will see this below after the wizard has completed.
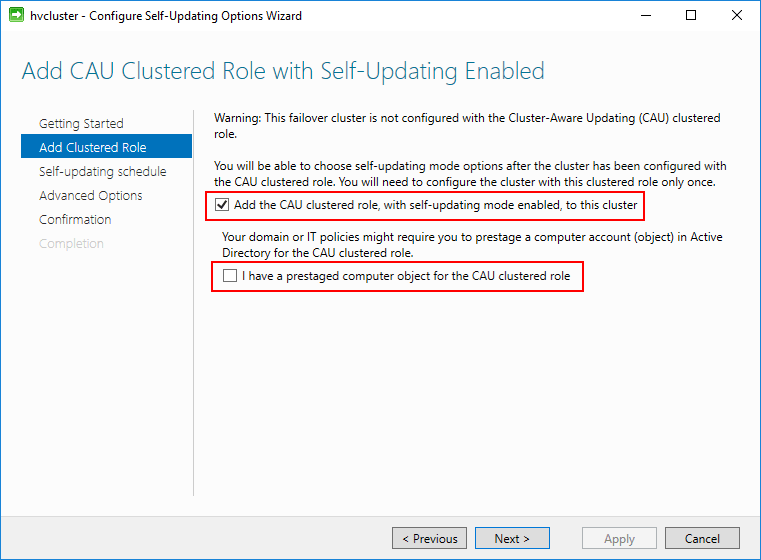
Adding the CAU clustered role with self-updating mode enabled
Next, we can configure the self-updating schedule. By default, the following options are selected. These can be changed as needed.
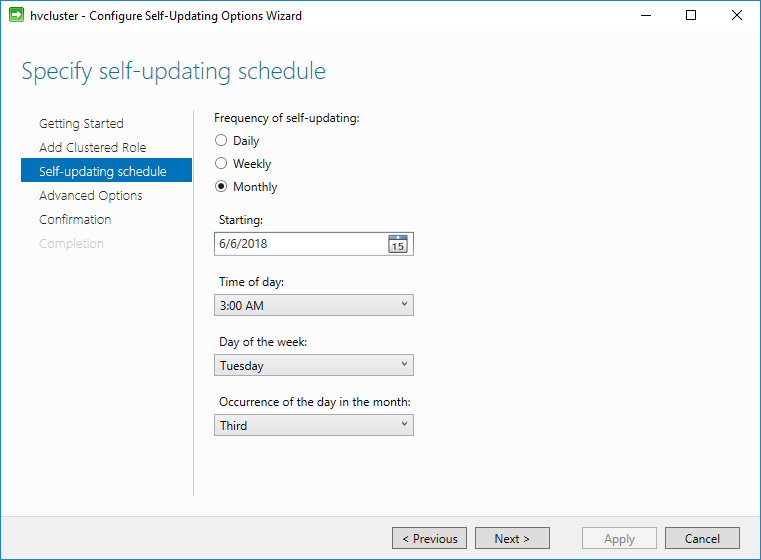
Configuring the self-updating schedule
In the Advanced Options there are many configuration parameters that can be tweaked. For most, the defaults can be selected, but the configuration allows for highly customized settings that can be utilized for various environments.
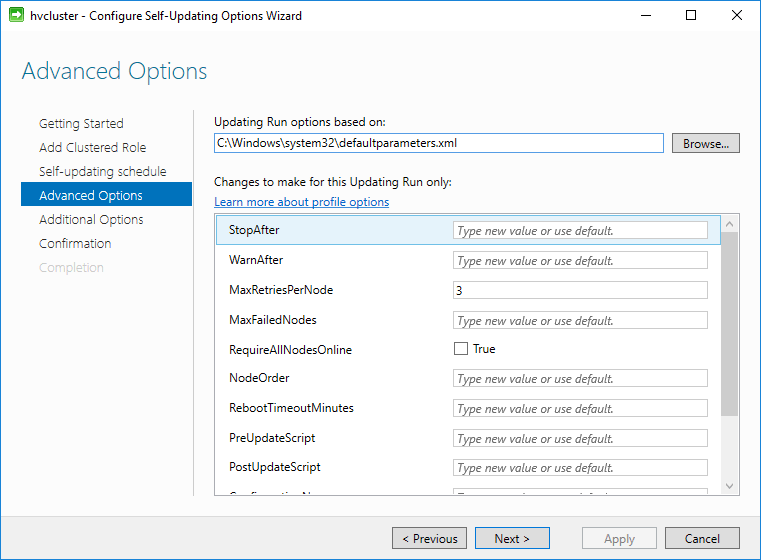
Configuring Advanced Options for Self-Updating
Additional update options can be selected such as the option to Give me recommended updates the same way that I receive important updates.
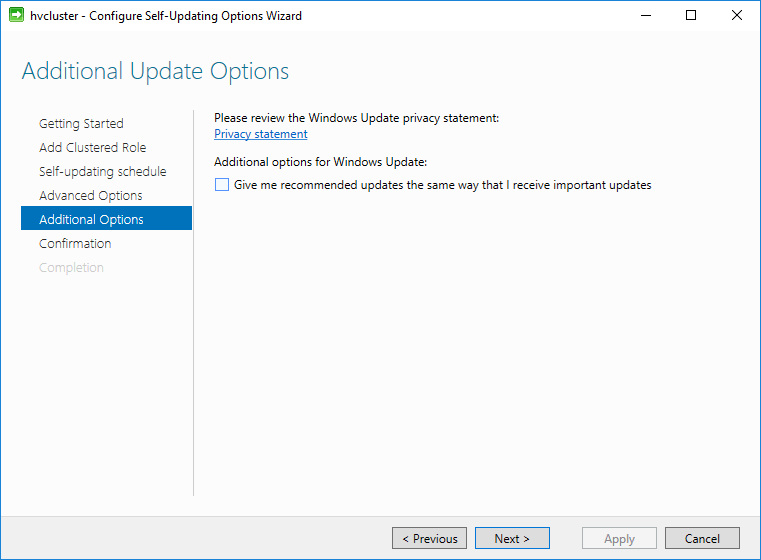
Choosing Additional self-update cluster-aware options
Finally, the wizard is ready to complete. Notice the PowerShell code that is displayed for the Command to run section. The wizard is simply running the PowerShell code for configuring the cluster aware updating option. This command could be ran manually outside of the wizard.
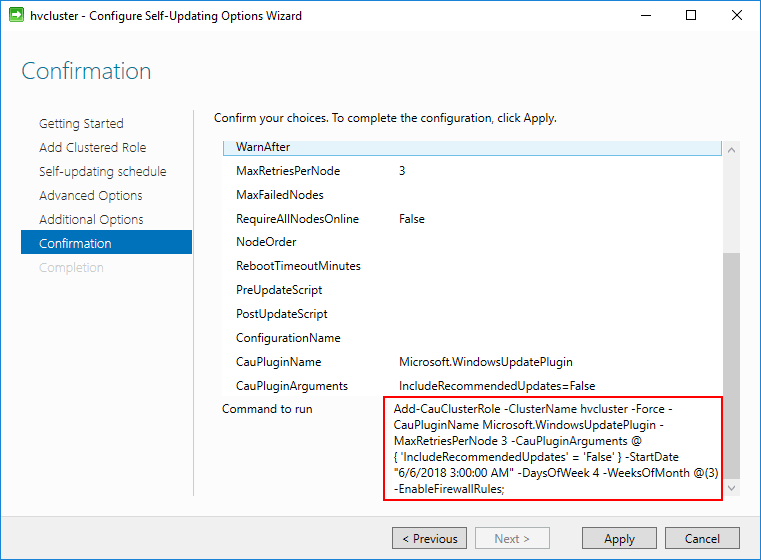
Confirming the Self-Updating Options along with PowerShell
The Self-Updating Clustered Role is configured successfully on the Hyper-V cluster.

Cluster-Aware Updating enabled on a Hyper-V cluster
Below, we see the special computer object that has been created with the completion of the Cluster self-updating process.
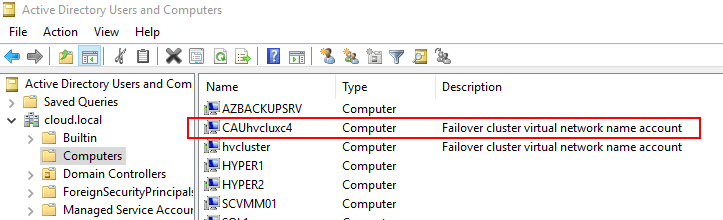
Confirming the CAU computer account is created
Another handy feature of the Cluster-Aware Updating management tool is the Preview Updates for this Cluster functionality. You can easily preview the available updates for each host in the Hyper-V cluster.
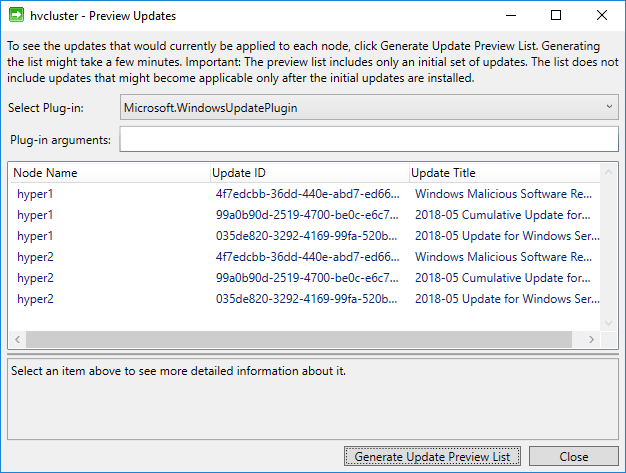
Previewing Updates available for a Hyper-V cluster
Using Cluster-Aware Updating in conjunction with Windows Server Update Services can provide a powerful means to apply updates effectively, safely, and consistently to Hyper-V clusters.
Cluster-Aware Updating PowerShell
As mentioned, PowerShell can be used to enable the Cluster-Aware updating options. Below is the snippet of PowerShell code needed to enable and configure the default options for a Hyper-V cluster.
Add-CauClusterRole -ClusterName hvcluster -Force -CauPluginName Microsoft.WindowsUpdatePlugin -‑MaxRetriesPerNode 3 ‑CauPluginArguments @{ ‘IncludeRecommendedUpdates’ = ‘True’ } ‑StartDate “6/6/2018 3:00:00 AM” ‑DaysOfWeek 4 ‑WeeksOfMonth @(2) ‑EnableFirewallRules;
Concluding Thoughts
Applying and administering updates is essential in a Windows Server environment. With Microsoft Hyper-V environments, this is crucial as well. Hyper-V hosts are simply Windows Server platforms with the Hyper-V role installed. As such, the updates and patches for Hyper-V are delivered as Windows Server updates. By utilizing available tools such as Windows Server Update Services and Cluster-Aware Updating configured on the Hyper-V cluster, administrators have a powerful set of tools that can deliver updates as needed and in a scheduled and controlled way to Hyper-V cluster hosts.
Discover the power of BDRSuite’s robust Hyper-V backup solutions with advanced features by trying our 30-days full-featured trial. Experience reliable data protection and seamless recovery firsthand!
Related Posts:
WSUS : Get Started with Windows Server Update Services (WSUS) – Part 1
WSUS : Windows Server Update Services (WSUS) installation on Windows Server 2022 – Part 2
WSUS: Post-deployment WSUS configuration – Part 3
WSUS: Create Computer groups in WSUS – Part 4
WSUS: Configure GPOs and Prepare your WSUS Clients – Part 5
Follow our Twitter and Facebook feeds for new releases, updates, insightful posts and more.
Try BDRSuite for Free!
Schedule a live demo with one of our product experts
Start your full-featured 30-day free trial
Explore detailed pricing, editions & features
Привет всем! Недавно мы написали статью, в которой рассказали вам, как один наш читатель установил Windows 10 на виртуальный диск VHD и всё у него прекрасно работало, только вот обновить десятку до новой редакции April 2018 Update он не смог, так как установленная на VHD операционная система не поддерживает обновление до новейшей версии Windows 10. Замечательный выход из ситуации подсказал Владимир, он предложил создать виртуальную машину VirtualBox и «подсунуть» ей виртуальный диск VHD с установленной Windows 10! Виртуалка VirtualBox поддерживает обновление до новой версии April 2018 Update, если система установлена на VHD. В итоге Windows 10 обновилась на виртуалке! После выхода статьи другой читатель поинтересовался вопросом: «А что делать, если Windows 10 установлена на виртуальный диск VHDX, ведь VirtualBox не поддерживает обновление до новой версии, если OS установлена на VHDX?» Друзья, в этом случае обновиться можно на виртуальной машине Hyper-V и об этом наша сегодняшняя статья!
Как обновить Windows 10, установленную на виртуальный диск VHDX
Автор Владимир!
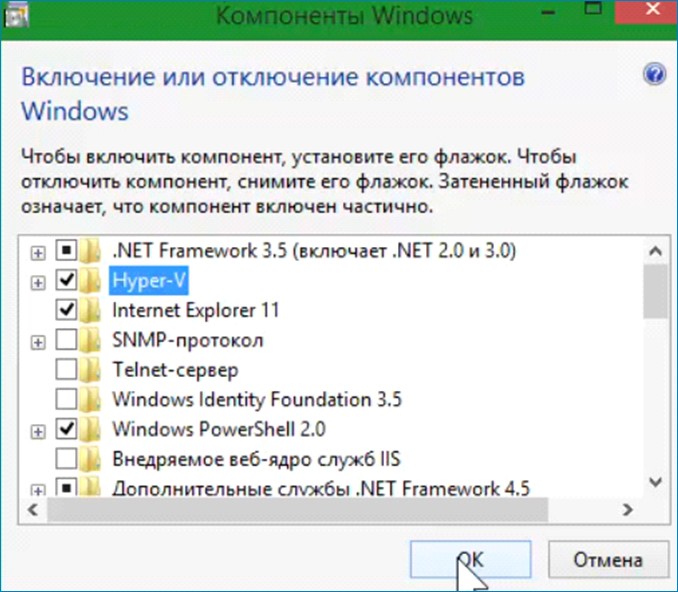
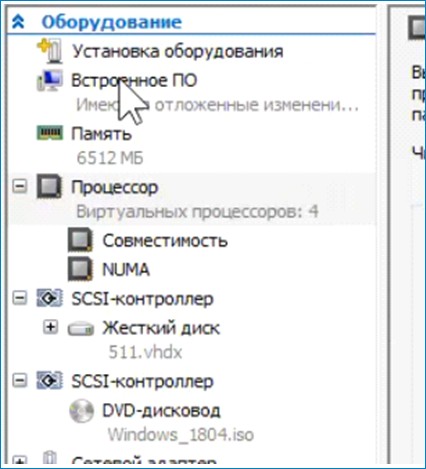
Если Windows 8, 8.1, 10 установлена на виртуальный диск VHDX, то для обновления OS до новой редакции April 2018 Update можно использовать Hyper-V. Виртуальная машина Hyper-V встроена в редакции PRO и Enterprise. По умолчанию Hyper- V выключена. Включается: Панель управления/Удаление программ/Включение отключение компонентов.
Итак, поехали! Работаю в Windows 8.1 корпоративная.
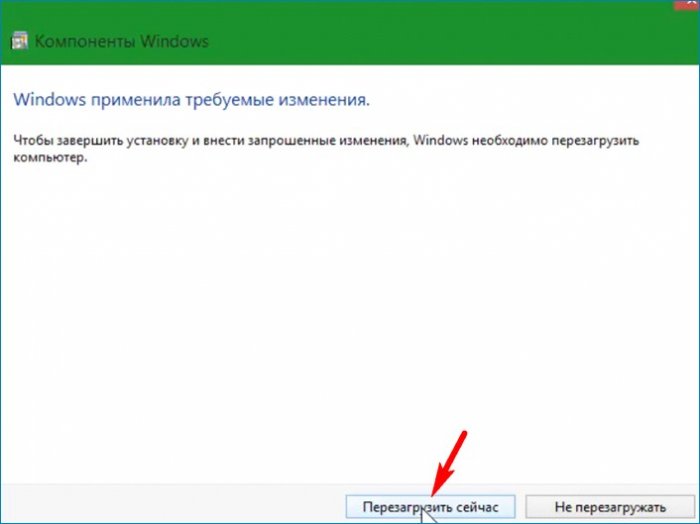
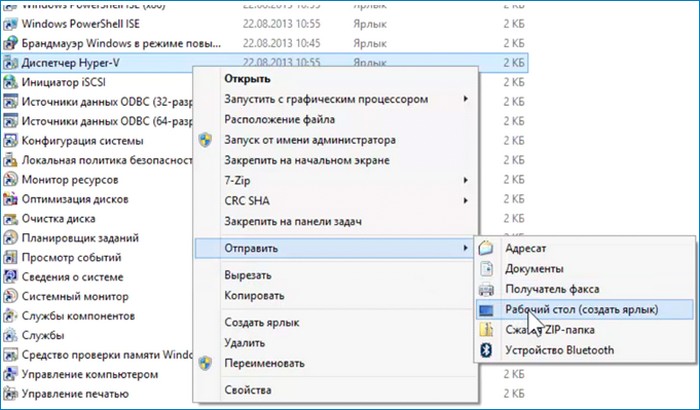
После перезагрузки Hyper-V готова к работе. Для работы нужно запустить диспетчера Hyper-V. Это можно сделать несколькими способами. Один из способов: Панель управления/Все элементы панели управления/Администрирование.

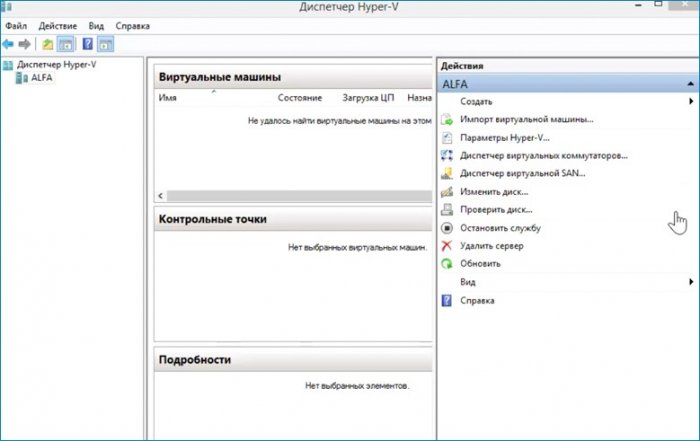
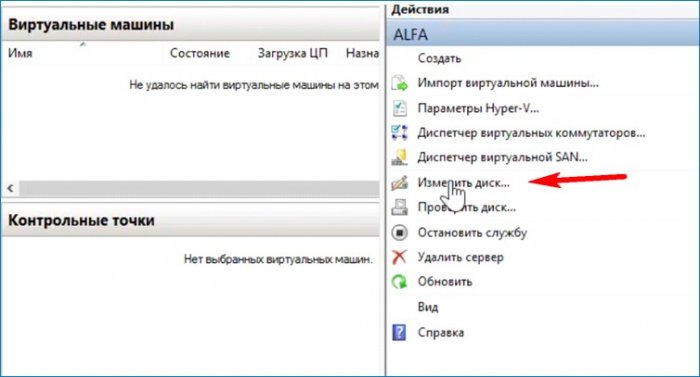
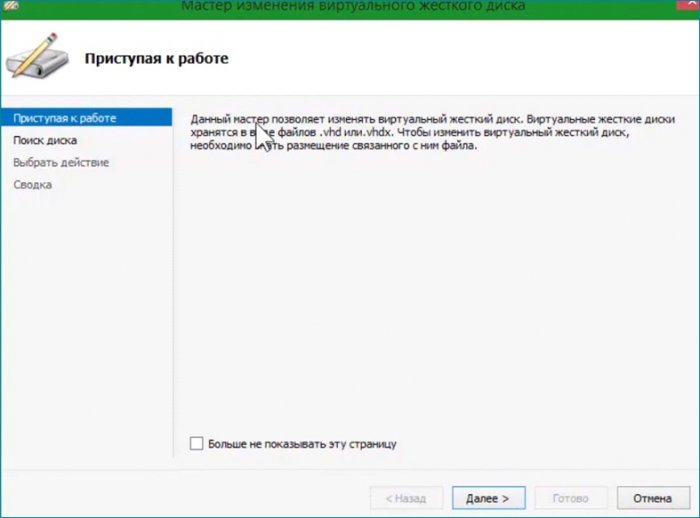
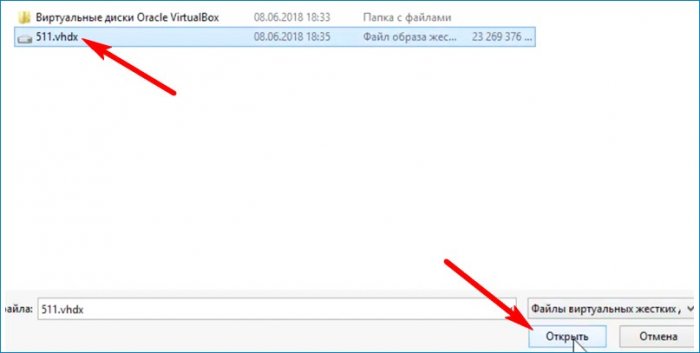
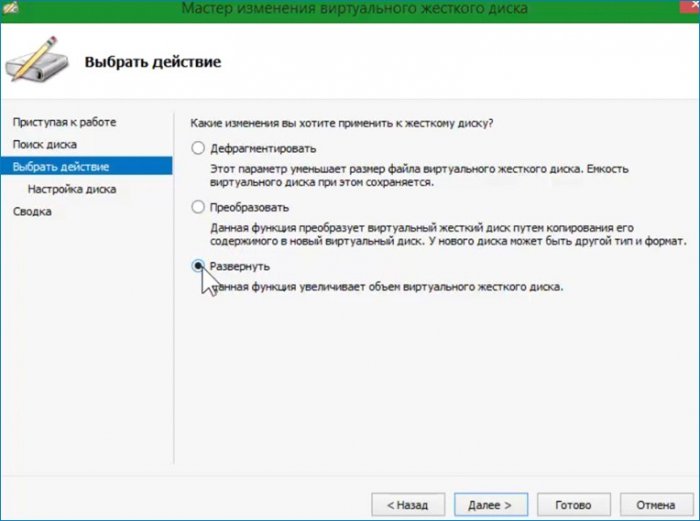
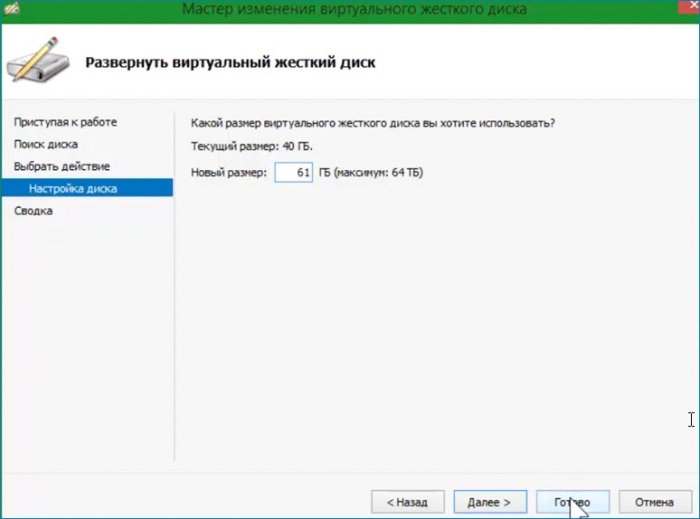
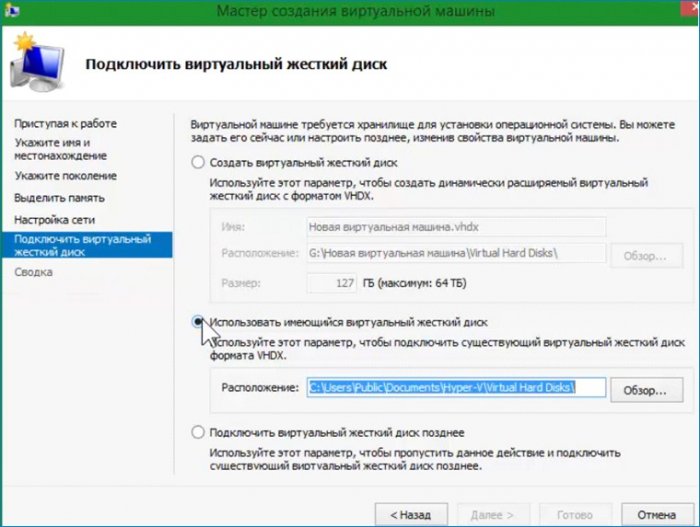
Работать с диском можно до создания виртуальной машины. На моём диске мало места для обновления не хватит, поэтому нужно его расширить. Выбираю «Изменить диск и указываю его местоположение».
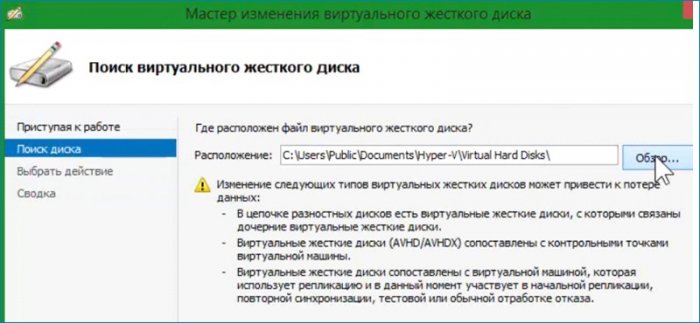
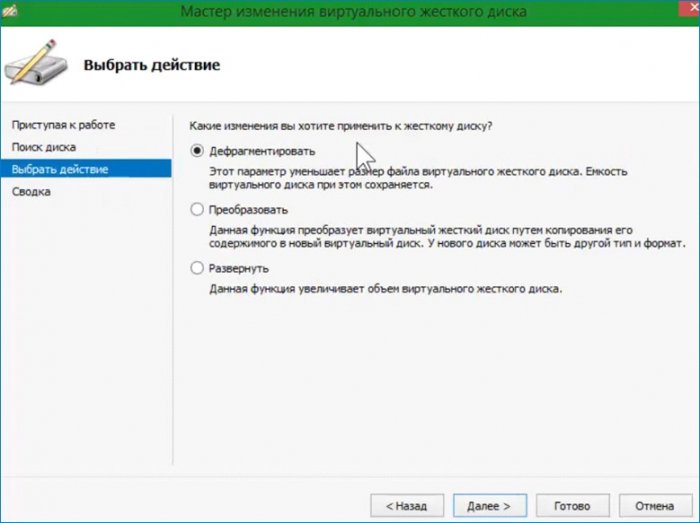
Открывается окно с выбором действия. Выбираю «Развернуть» и увеличиваю размер диска.
Создаю виртуальную машину.
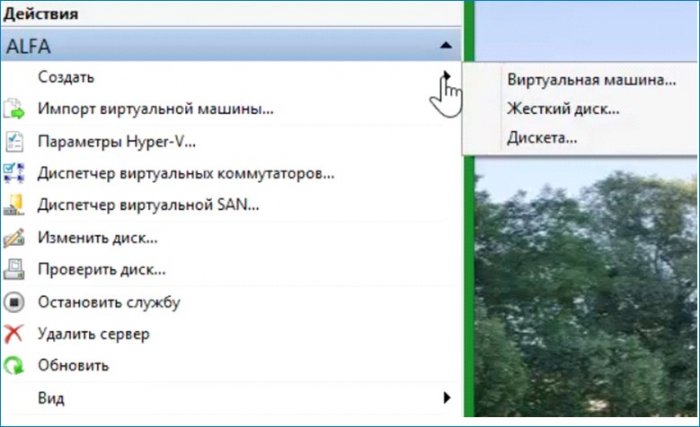
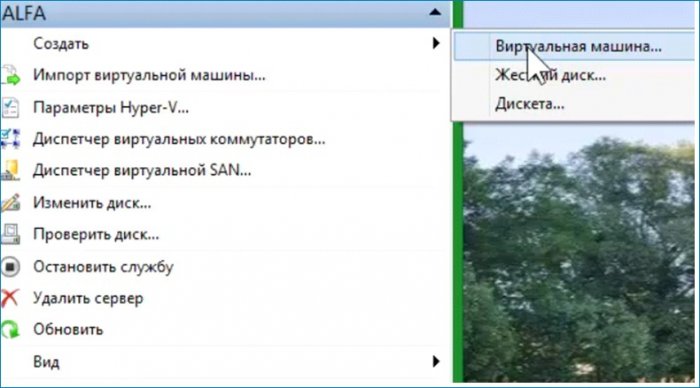
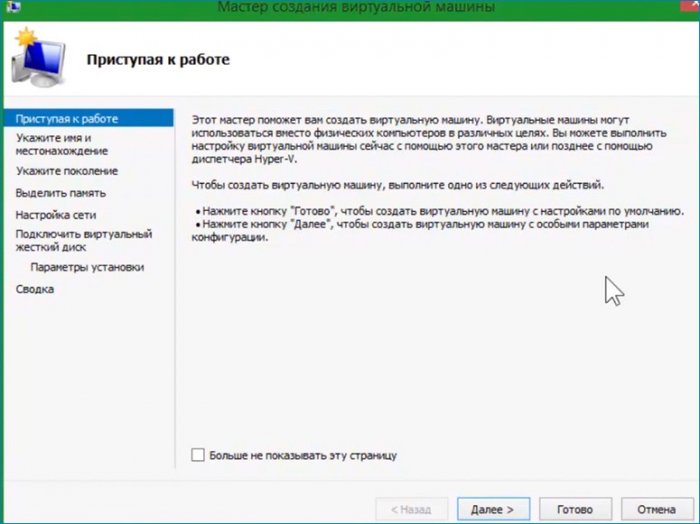
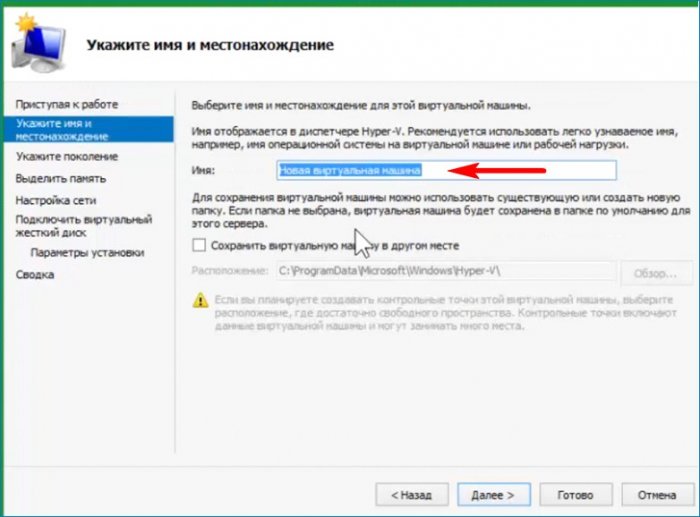
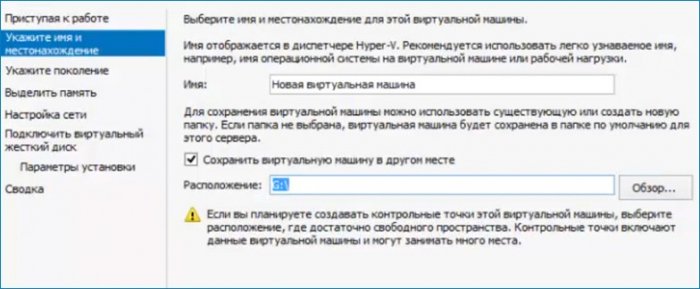
Первая настройка выбор имени виртуальной машины и места расположения. Имя оставляю предложенное, место расположения меняю.
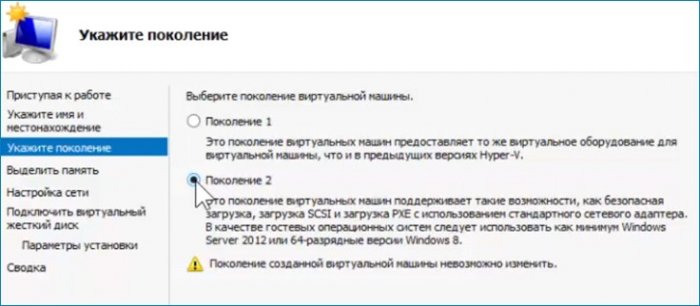
Следующая настройка «Выбор поколения».
Первое поколение поддерживает установку 32 битных и 64 битных OS на диски VHD и VHDX стиль разделов MBR.
Второе поколение поддерживает 64 битные OS на диски VHDX стиль разделов GPT. У меня GPT. Выбираю 2-е поколение.
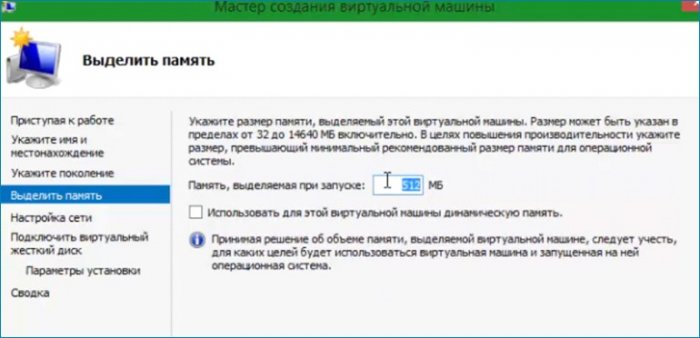
Следующая настройка «Выделение памяти».
Настройку сети пропускаю, так как для обновления сеть не нужна.
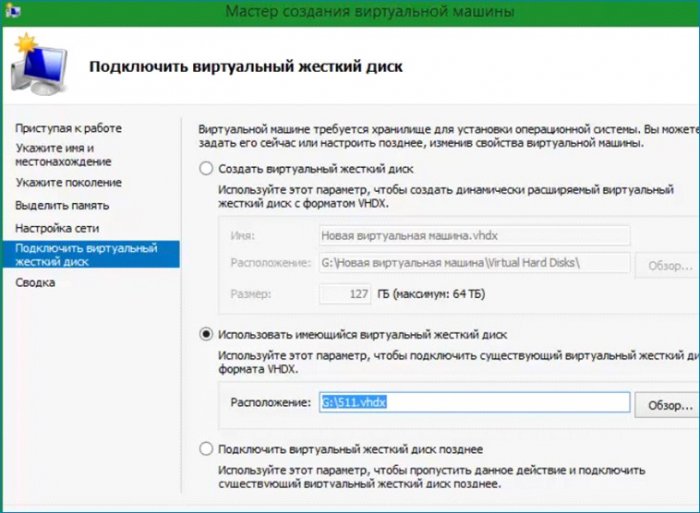
Следующим шагом выбираю свой диск находящийся на разделе (G:).
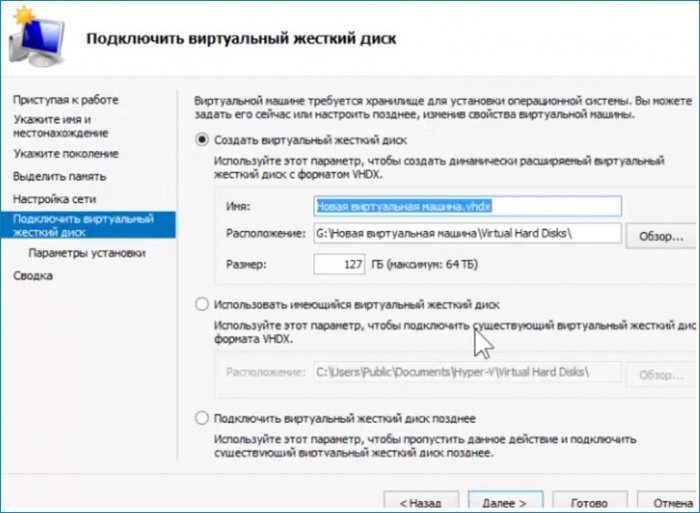
Настройки на этом закончены, проверяю что настроил и нажимаю «Готово». Виртуальная машина создана.

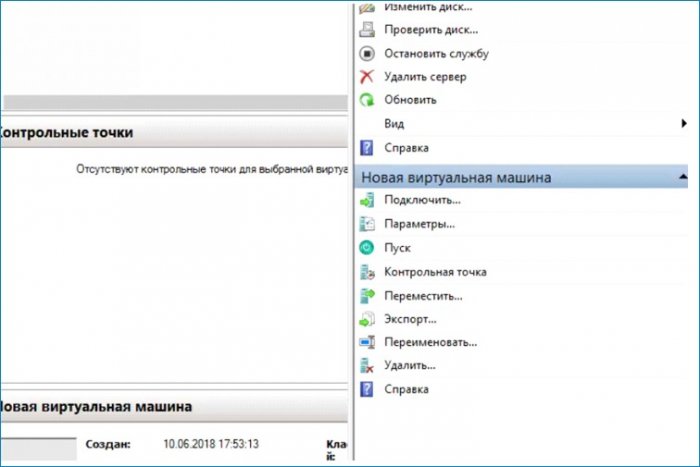
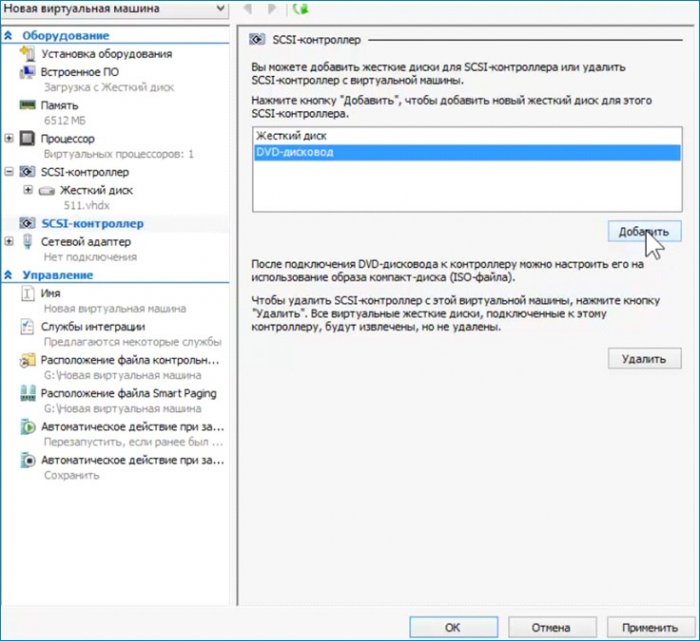
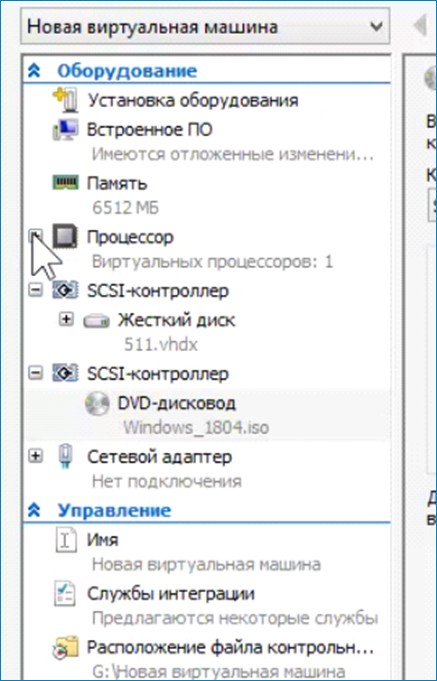
Осталось настроить несколько параметров.
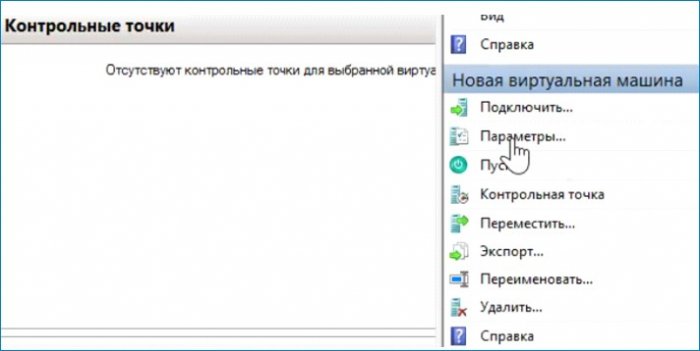
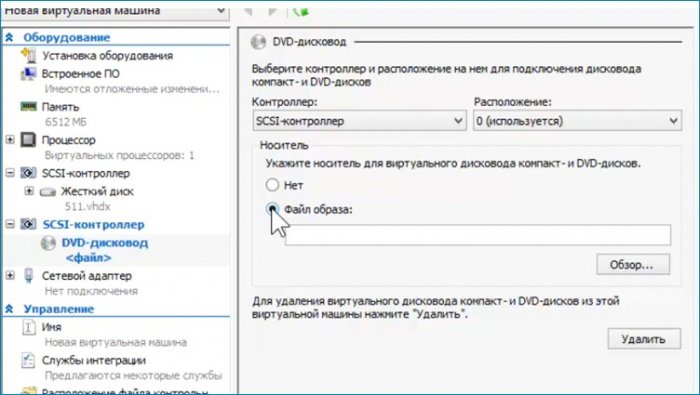
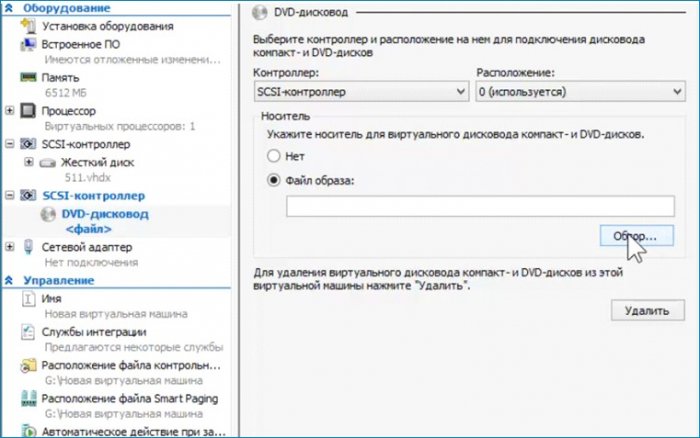
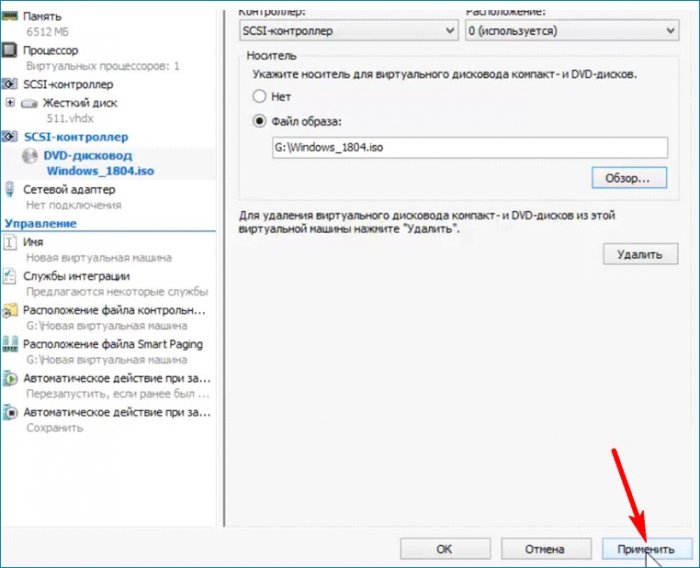
Добавляю дисковод, выбираю ISO, указываю путь к ISO.
Сохраняю сделанные настройки без выхода из параметров. Нажимаю «Применить».

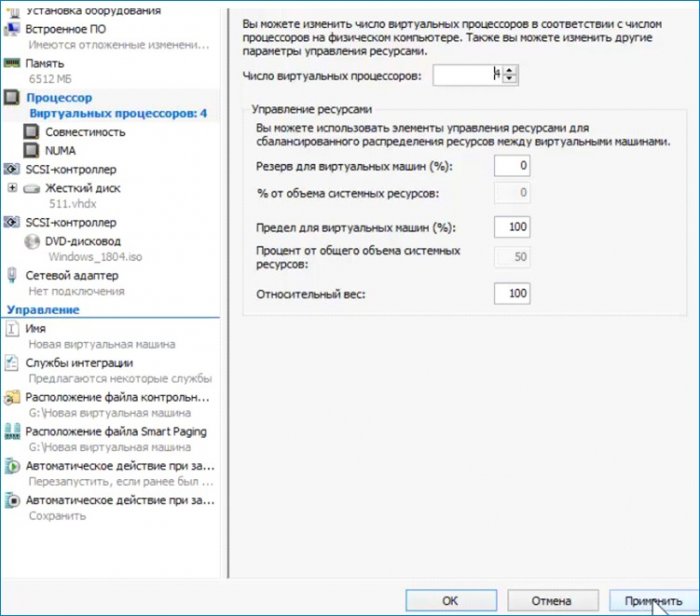
Увеличиваю количество ядер процессора. Сохраняю сделанные настройки без выхода из параметров. Нажимаю «Применить».
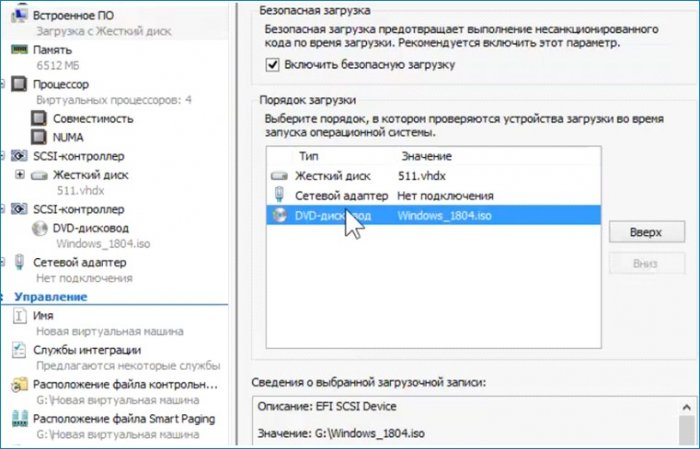
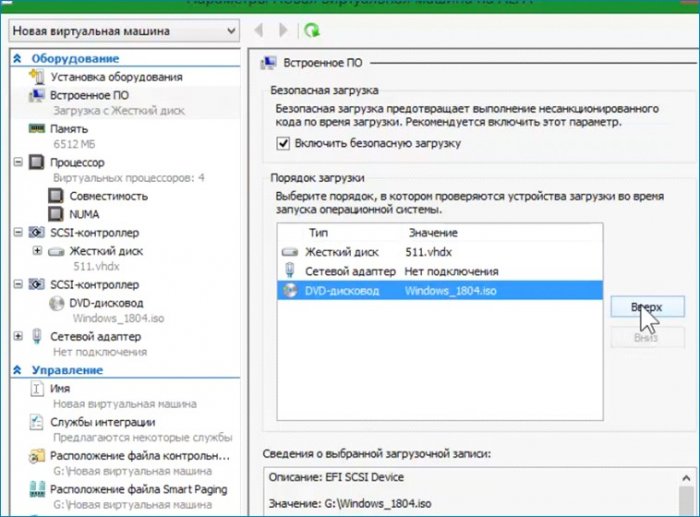
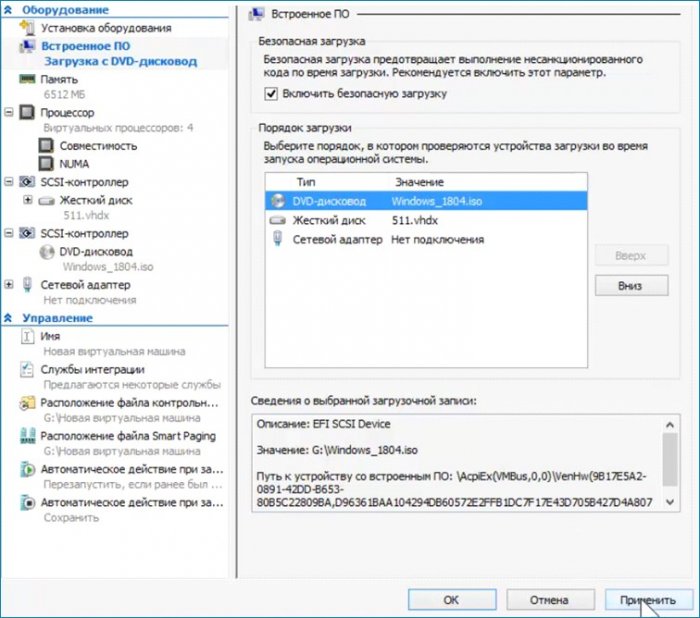
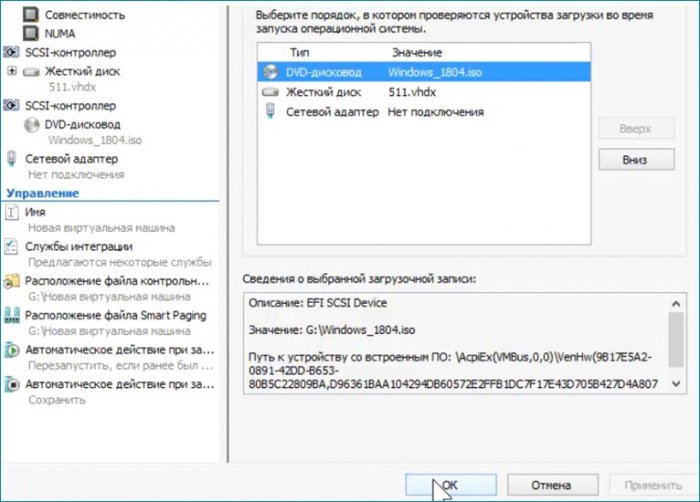
Делаю последнюю настройку. Выставляю загрузку с привода на первое место, сохраняю настройку (Применить) и выхожу из параметров (ОК).
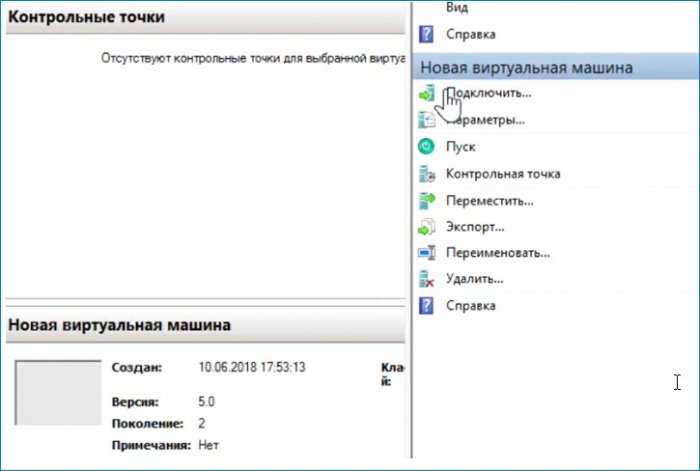
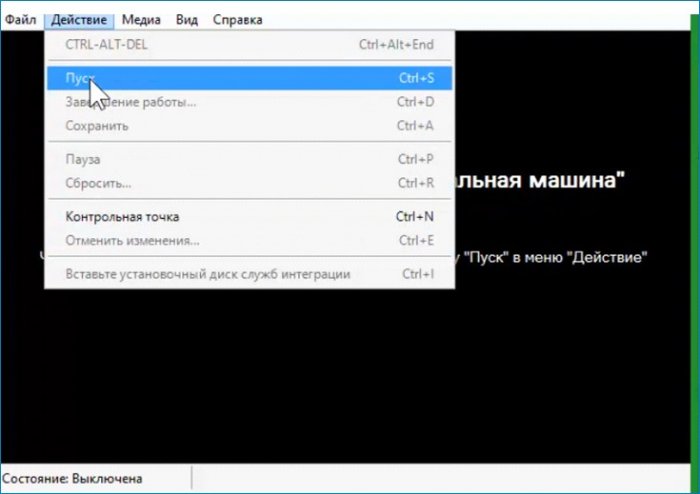
Включаю машину, запускаю, выбираю загрузку с привода, дохожу до первого окна и произвожу такие же действия как и в предыдущей статье.

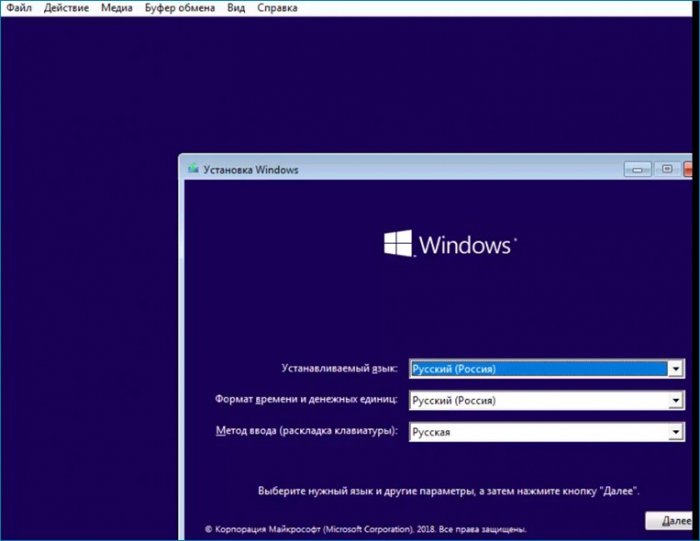
При загрузке в OS предлагается выбрать расширенный режим. Для обновления он не нужен. Оставляю базовый закрыв окно.

После этого успешно обновляю OS.
Время на прочтение4 мин
Количество просмотров45K
Как правило, установка среды Hyper-V не представляет собой ничего принципиально сложного и не занимает много времени. Однако, ее настройка может вызвать массу вопросов и точно потребует пристального внимания. Поэтому сегодня мы бы хотели дать несколько полезных советов по тому, как правильно выполнить настройку Hyper-V. Порядок их применения может быть произвольным.
1. Установите обновления, а затем решите, как будете обновлять Hyper-V в дальнейшем
Независимо от способа установки, компоненты на сервере Hyper-V необходимо будет обновлять, и вам нужно решить, как именно это делать. Обновления, требующие перезагрузки хоста, приостанавливают работающие на нем виртуальные машины и возобновляют их работу, как только хост будет снова запущен. Если такой вариант не приемлем, то следует обдумать возможности переноса виртуальной машины, использования SCVMM, выделения времени на обновления и т.д.
2. Определитесь с доменом
Есть различные точки зрения по поводу того, добавлять ли хосты Hyper-V в тот же домен Active Directory, где находится все остальное, или нет. Некоторые пользователи выделяют отдельный домен для хостов Hyper-V, другие даже не вводят хосты Hyper-V в домен. Оценить риски, рассмотреть особенности управления доменами и возможные сценарии сбоев, чтобы принять решение, лучше всего исходя из вашей оценки виртуальной среды, т.е, универсального ответа нет, и вам придется решить это самостоятельно.
Кроме того, на этом этапе нужно придумать для хоста Hyper-V подходящее имя. Лучше подбирать имя, которое будет выделяться в номенклатуре ваших серверов, потому что ошибок при работе с хостом Hyper-V допускать нельзя: они могут быть по-настоящему губительны. Перепутать названия и пустить в перезагрузку хост с виртуальными машинами почтового и файлового серверов в разгар рабочего дня – не та ситуация, ради которой внедряют виртуализацию.
3. Настройте систему хранения
Если вам необходимы драйверы MPIO и НВА-адаптера или программное обеспечение для SAN, установите все это еще до того, как добавите роль Hyper-V (речь идет о сценарии установки для Windows Server 2012). К тому времени, когда вы займетесь виртуальными машинами, все эти компоненты уже должны быть в рабочем состоянии.
4. Настройте учетные записи администраторов
Хотите использовать тот же пул администраторов, что и на всех остальных серверах Windows Server? Тогда перечитайте пункт 2.
5.Подберите понятные имена для сетевых интерфейсов
Если вы правильно настроили виртуальную среду, на ваших хостах будет несколько сетевых интерфейсов. Когда все они называются «Подключение по локальной сети» или «Подключение по локальной сети 2», это не очень удобно. Хорошо, если у вас интерфейсы разных типов (например, на базе устройств Broadcom и Intel): можно просто вспомнить, что и где стоит. Но рассчитывать только на свою память не стоит. Присвойте каждому интерфейсу понятное имя: «ЛВС хоста», «ЛВС управления» и т. д. Можно даже указать тип канала связи: «К» для кабельных, «С» для сложносоставных и т. п.
6. Отключите ненужные протоколы
Если хосты Hyper-V будут работать в центре обработки данных, вы, скорее всего, не будете использовать большинство одноранговых сетевых технологий Windows, и тем более, протокол IPv6. Все должно быть предельно просто: стоит упростить инфраструктуру и отключить такие компоненты, как протокол IPv6, служба топологии канального уровня и вообще все, чем вы точно не будете пользоваться.
7. Обязательно активируйте Windows
Независимо от того, какой способ активации вы используете: сервер управления ключами (KMS), ключ многократной активации (MAK), OEM-версию Windows или что-то еще, — убедитесь в том, что загрузка Windows не прерывается из-за предложения активировать систему с помощью консоли. Этот момент не так важен при использовании Hyper-V Server 2012, бесплатного гипервизора от Microsoft.
8. Настройте удаленное и локальное управление
Это одна из рекомендаций Microsoft, которая необходима, но которую часто игнорируют. Новый диспетчер серверов, оболочка PowerShell и диспетчер Hyper-V позволяют выполнять многие операции в удаленном режиме, не входя непосредственно на сервер. Однако при этом необходимо подобрать для себя удобный инструмент. Например, некоторые по-прежнему предпочитают входить на серверы в режиме удаленного рабочего стола, даже если приходится использовать банальную консоль с одной-единственной командной строкой, как Windows Server Core с Hyper-V или Hyper-V Server 2012.
9. Задайте пути по умолчанию к виртуальным машинам и дискам
Что может раздражать сильнее, чем случайно наткнуться на виртуальную машину на локальном диске? Как ни странно, иногда такое случается из-за ошибок администрирования. Обязательно укажите правильное местоположение в настройках виртуальных жестких дисков и виртуальных машин. Можно не ждать ничего хорошего, если вы заполните диск C:\ и хост перестанет нормально работать, поэтому даже если приведенный вариант (диск E:\ на рисунке 2) не оптимален, в ситуации, когда диск переполняется, он все равно лучше.
10. Проверьте возможность доступа по внештатному каналу
Этот совет актуален как для Hyper-V, так и для vSphere. Убедитесь в том, что вы сможете подключиться к системе, если что-то пойдет не так. Вам помогут такие инструменты, как KVM, Dell DRAC или HP iLO.
Это советы самого общего характера, основанные на опыте работы с виртуальной средой, но наверняка есть масса других полезных приемов. На самом деле, лучший способ приобрести опыт — развернуть систему, а затем зафиксировать, что именно пришлось изменять после установки.
Чтобы настроенная система виртуализации продолжала в дальнейшем оптимально функционировать, можно применять средства резервного копирования, мониторинга и анализа производительности, специально предназначенные для виртуальной среды. Дополнительно на эту тему можно посмотреть следующие ссылки:
- Бесплатное решение для управления средой Hyper-V: Veeam ONE Free Edition
- Бесплатное средство резервного копирования виртуальных машин Hyper-V: Veeam Backup Free Edition для Hyper-V
I have one big Hyper-V server, currenting running Windows Server 2022 Datacenter, that I use for lots of things (with 12 cores, 272GB RAM, 8TB of disk space). Upgrading it to Windows Server 2025 should be a straight-forward process, right? Insert the media (mounted, downloaded ISO), run SETUP.EXE, do the upgrade. But it took a few attempts before it worked:
Upgrade #1: Insufficient disk space
When upgrading a server, you do need to have sufficient disk space on the C: drive. (The other volumes don’t matter because there’s nothing really to migrate on them.) I checked before I started, and having 80GB free on a 256GB volume sounded like it would be enough. But even though the Setup process itself does some “needed free space” calculations itself and allowed the upgrade to continue, it eventually rolled back with an 80070070 error logged, not enough space on the disk. OK, time to do some more cleanup.
A useful first step is to run the “Disk Cleanup Wizard” elevated and tell it to clean up everything. That freed up about 10GB, but I wanted to check for more so I used WinDirStat to analyze the drive to tell me where the significant chunks of storage were being consumed. There were two areas that stood out:
- The C:\ProgramData\Microsoft\Windows\Hyper-V folder had over 30GB of space consumed. This was primarily in the “Planned Virtual Machines” and “Planned Snapshots” folders. From online searches, it appears these folders are used when importing or migrating a virtual machine. Looking in WMI (root\virtualization\v2), I could see an instance of Msvm_PlannedComputerSystem that was around the same date/time as the timestamps on the files (back in early 2024), linked to a VM that I had probably tried to move to a different drive. I guess it failed and didn’t clean itself up? There was no obvious way to clean it up (removing the WMI instance didn’t do anything, it just came right back), so I stopped the Hyper-V VM Management Service, deleted the files, and then restarted the service.
- The C:\ProgramData\Microsoft\Crypto\RSA\MachineKeys folder had gigabytes worth of files — over 2.3 million files altogether. Yikes. It seems like the OS wasn’t cleaning these up for some reason. I found this blog which provided a mechanism for cleaning up older files (a low-risk thing for me to do on the box because it was a workgroup device just being used for Hyper-V, although since IIS was installed for a previous failed attempt at Windows Admin Center I did take care to retain the specified files — even though I probably didn’t need to since I later removed IIS).
After cleaning those up, and a variety of other no longer needed downloads and older log files, the drive now had 160GB free. Surely that’s enough…
Upgrade #2: RDWeb error
My second attempt was fine with the available free disk space, but this time it failed on something new: an error related to the migration of RDWeb settings. RDWeb? That’s for Remote Desktop Web Access. Not sure what’s its issue was, but since I wasn’t actively using RDWeb (I moved to Tailscale and use the Windows App to access the machine remotely), I figured the simplest answer was to remove it. While I was at it, I also removed IIS (and ASP.NET) since I wasn’t using that either.
Upgrade #3: Checking for updates hang
Sometimes it seems like the world is against you. My third attempt didn’t really ever get anywhere. Immediately after starting SETUP.EXE, it checks for updates to itself. That process hung for over an hour before I killed it, rebooted, and cleaned up the $WINDOWS.~BT folder that it left behind.
Upgrade #4: Success
What else could possibly go wrong? Fortunately, nothing; the upgrade completed on the fourth try and all is good. I now have a very Windows 11-looking OS:

And yes, it has the Azure Arc Setup tray icon and installer, the same one that was delivered to earlier Windows Server releases, but it’s just as easy to remove via “Optional features”:

And VBScript and WMIC are still installed, but like with Windows 11 24H2 they are both removable, as is the (also obsolete) PowerShell ISE.
As for Hyper-V itself, there is a new Hyper-V VM configuration version 12 that I can upgrade my VMs to (not sure what improvements this provides as the Windows Server doc page doesn’t describe versions 11 or 12 yet), once I get around to it — the VMs need to be shut down and there are impacts to checkpoints and saved state. And eventually I’ll need to upgrade my Windows Server VMs too. Let’s hope that process goes more smoothly — not that this process was particularly bad, it just took longer than I had expected. Now it’s time to get back to work…
Discover more from Out of Office Hours
Subscribe to get the latest posts sent to your email.
Introduction:
In the dynamic landscape of virtualization, ensuring your Hyper-V virtual machines are running on the latest configuration version is vital for optimal performance and compatibility. In this detailed tutorial, we’ll delve into the reasons behind upgrading virtual machine configuration versions, the potential pitfalls of neglecting this process, and a step-by-step guide to seamlessly upgrade your virtual machines.
Within Microsoft Hyper-V, there exists a crucial component known as the VM configuration version, defining the configuration specifics, saved state, and snapshot capabilities of the virtual machine within the Hyper-V environment. Essentially, the VM configuration version serves as the architectural plan, outlining the features available to the virtual machine.
The general principle governing Hyper-V VM configuration versions is that modern Hyper-V hosts, equipped to support the latest VM configuration level, maintain compatibility with virtual machines configured for older VM configuration versions. However, the converse is not true – older Hyper-V hosts lack the ability to accommodate the new configuration versions.
In earlier iterations of Hyper-V, updating the Hyper-V software also automatically updated the virtual machine configuration version. However, with the advent of Windows Server 2016 Hyper-V, Microsoft introduced a departure from this automatic upgrade process. This shift brings forth distinct advantages compared to the previous automatic upgrades. It allows for increased flexibility in moving virtual machines between Hyper-V versions, catering to specific use cases prevalent in certain environments. Microsoft’s revised stance emphasizes a commitment to ensuring the backward compatibility of the VM configuration version, encompassing saved states and checkpoints.
Hyper-V administrators are strongly encouraged to proactively undertake the upgrade of the VM configuration version. This proactive approach ensures the utilization of the latest features available within Hyper-V virtual machines. By embracing this recommended practice, administrators can stay abreast of advancements, optimizing the performance and capabilities of their virtualized environments.
How to Identify a Virtual Machine Configuration Version ?
The following table shows a full list of VM configuration versions of Hyper-V VMs together with the operating system.
| Windows Client | Windows Server | Version |
|---|---|---|
| Windows Server 2008 | 1.0 | |
| Windows Server 2008 SP1 | 2.0 | |
| Windows Server 2008 R2 | 3.0 | |
| Windows 8 | Windows Server 2012 | 4.0 |
| Windows 8.1 | Windows Server 2012 R2 | 5.0 |
| Windows 10 1507 | Windows Server 2016 Technical Preview 3 | 6.2 |
| Windows 10 1511 | Windows Server 2016 Technical Preview 4 | 7.0 |
| Windows Server 2016 Technical Preview 5 | 7.1 | |
| Windows 10 Anniversary Update | Windows Server 2016 | 8.0 |
| Windows 10 Creators Update | 8.1 | |
| Windows 10 Fall Creators Update | Server 1709 | 8.2 |
| Windows 10 April 2018 Update | Server 1803 | 8.3 |
| Windows 10 October 2018 Update | Windows Server 2019 / 1809 | 9.0 |
| Windows 10 May 2019 Update | Server 1903 | 9.1 |
| Windows 10 May 2020 Update | Server 2003 | 9.2 |
| Windows 10 May 2021 Update | 9.3 | |
| Windows 11 | Windows Server 2022 | 10.0 |
What Happens if You Don’t Upgrade?
Failure to upgrade the virtual machine configuration version may lead to incompatibility with features available on the newer host OS. To unlock these advanced features, it’s highly recommended to update the configuration version once you’ve successfully upgraded the virtualization hosts to a newer Windows version.
The following table shows the minimum virtual machine configuration version required to use some Hyper-V features.
| Feature | Minimum VM configuration version |
|---|---|
| Allow additional processor features for Perfmon | 9.0 |
| Automatically expose simultaneous multithreading configuration for VMs running on hosts using the Core Scheduler | 9.0 |
| Hibernation support | 9.0 |
| Increase the default maximum number for virtual devices to 64 per device (e.g. networking and assigned devices) | 8.3 |
| Guest Virtualization-Based Security support (VBS) | 8.0 |
| Key storage drive | 8.0 |
| Large memory VMs | 8.0 |
| Nested Virtualization | 8.0 |
| Virtual processor count | 8.0 |
| XSAVE support | 8.0 |
| Virtual Machine Multi Queues (VMMQ) | 7.1 |
| Virtual Trusted Platform Module (vTPM) | 7.0 |
| Hot Add/Remove Memory | 6.2 |
| PowerShell Direct | 6.2 |
| Production Checkpoints | 6.2 |
| Secure Boot for Linux VMs | 6.2 |
| Virtual Machine Grouping | 6.2 |
Upgrading Virtual Machine Configuration Version
To upgrade a Virtual Machine Configuration Version, follow the below steps:
- Shutdown the Virtual Machine
- Select the Virtual Machine and then from the menu bar, click Action > Upgrade Configuration Version.
Note : If the Upgrade Configuration Version option is grayed out or is not available, this means that your virtual machine is already at the highest supported configuration version. - A confirmation page will open asking you if you are sure you want to upgrade the configuration version for the selected virtual machine. If your virtual machine has associated checkpoints , the operation will discard all saved state information including saved stated associated with checkpoints. If you want cancel the upgrade click Don’t Upgrade, else to continue by clicking Discard Saved State and Upgrade

- The configuration version will be upgraded, as you can see in my setup, the configuration version for the selected virtual machine was 9.0 and now it is upgraded to 10.0 .
If you click on Action from the menu bar, you will see that Upgrade Configuration Version is no longer available as your virtual machine has the latest configuration version and no longer need an upgrade.


By diligently following these steps, you ensure that your virtual machine is running on an updated configuration version, unlocking new features and performance improvements. This becomes particularly crucial when utilizing the cluster OS rolling upgrade feature, as it aligns with the updated cluster functional level.
Conclusion:
In conclusion, maintaining an up-to-date virtual machine configuration version is paramount for compatibility and leveraging the latest Hyper-V features. By incorporating these simple steps into your routine, you not only enhance the efficiency of your virtual environment but also fortify its security and stability. Stay ahead in the virtualization game by embracing the power of upgraded configuration versions.
Related Article :How To Identify If Hyper-V Virtual Machine is Generation 1 Or Generation 2
Tarek Majdalani is an accomplished Windows Expert-IT Pro MVP, honored by Microsoft for eight consecutive years from 2007-2015. Holding a B.E. in Computer Engineering from the Lebanese American University, he pursued further education while working, earning various certificates showcased in his MVP profile. Tarek is currently serving as the Director of Engineering & Technology at Alrai Media Group in Kuwait. Since 2006, he has been actively contributing to the community by writing tutorials featuring tips and tricks, amassing over 300 tutorials on diverse systems.