
,
If you want to run Windows Update from Command Prompt or PowerShell in Windows 10/11, continue reading below.
Microsoft releases updates regularly to enhance security, fix bugs, and introduce new features that improve the functionality of Windows devices.
Windows updates are divided into 2 categories: Quality updates, which are constantly released for security reasons and to fix glitches, and Feature updates, which offer improved versions and additional features.
The usual way to update Windows 10/11 is by going to Settings > Update & Security and to check and install updates, but in some cases may needed to install updates from the command line or PowerShell if the usual way doesn’t work.

This tutorial contains instructions on how run Windows Update and install or uninstall Updates with commands in Command Prompt & PowerShell.
How to Check and Install Updates from PowerShell or Command Prompt in Windows 10/11 & Server 2016/2019.
- Part 1. Install Updates from Command Line.
- Part 2. Install Updates from PowerShell.
- Part 3. Uninstall Updates from PowerShell.
Part 1. How to Run Windows Update from Command Prompt.
In previous versions of Windows you could update Windows using the command «wuauclt /detectnow /updatenow».
In latest Windows 10 versions the command ‘WUAUCLT.EXE’ does not work anymore and has been replaced by the command ‘USOCLIENT.EXE’.
Info: The ‘USOCLIENT.EXE’ is the Update Session Orchestrator client that used to download and install Windows Updates. *
* Notes:
1. According to reports, not all Windows 10 and 11 versions support the USOCLIENT. If the same is true for your device, update your system using the PowerShell method.
2. Since USOCLIENT commands do not display anything on the screen at the time they are executed, the only way to determine if the command is working is to look at the events in the following destinations.
- C:\Windows\SoftwareDistribution\ReportingEvents.log
- Task Scheduler -> Microsoft -> Windows -> Update Orchestrator
To install updates with ‘USOCLIENT.EXE’, follow these steps:
1. Launch Command Prompt or PowerShell as an Administrator and ask Yes at the UAC prompt.
2. Force Windows to Check for Updates with one of the following commands: *
-
- UsoClient StartScan
- USOClient.exe StartInteractiveScan
* Note: Some users reported that in their case one command worked and not the other. To see which of the 2 commands works in your case open Windows Update at the same time as running the command to make sure that Windows is checking for updates.

3. After finding Updates, download them with one of the following commands:
-
- UsoClient StartDownload
- ScanInstallWait
4. Proceed to install downloaded updates with this command:
- UsoClient StartInstall
5. When the updates installed, reboot your pc with this command: *
- UsoClient RestartDevice
* Note: I suggest to wait at least 30 minutes before restarting your PC.

Part 2. How to Run Windows Update from PowerShell in Windows 10/11.
If you want to download and install Windows or Drivers updates using PowerShell commands, use the instructions below.
To Install Windows Updates from PowerShell:
1. Open PowerShell as Administrator.
2. Proceed and install the ‘PowerShell Windows Update module’ with this command and ask Yes (press ‘y’), when prompted to install any other provider needed: *
- Install-Module PSWindowsUpdate
* Notes:
1. The ‘PSWindowsUpdate’ is a necessary module to install updates from PowerShell. To see all the commands available in the module, give this command:
- Get-Command -module PSWindowsUpdate
2. By default the module only look for Windows and driver updates. If you have other Microsoft Products installed (e.g. Office), and you want to get updates for them too, give also this command:
- Add-WUServiceManager -MicrosoftUpdate

3. Then give the following command to allow the execution of scripts on your machine and ask Yes at the warning when prompted.
- Set-ExecutionPolicy -ExecutionPolicy RemoteSigned

4. Now force Windows to download and list all available updates in PowerShell. *
- Get-WindowsUpdate
5. Now proceed according to what you want:
A. To install all available Windows Updates from PowerShell give this command:
- Install-WindowsUpdate

B. To install all available Windows Updates and the updates for all other Microsoft Products, give this command:
- Install-WindowsUpdate -MicrosoftUpdate
C. To install a specific Windows Update from PowerShell, give this command and ask Yes (y) when prompted: *
- Get-WindowsUpdate -KBArticleID «KB-Number” -Install
e.g. to install the KB5005463 in this example:
- Get-WindowsUpdate -KBArticleID «KB5005463» -Install

D. To prevent a Windows Update from being installed, give this command in PowerShell:
- Get-WindowsUpdate -NotKBArticle “KB-Number” -AcceptAll
e.g. to prevent the installation of the KB5005463 in this example:
- Get-WindowsUpdate -NotKBArticle “KB5005463” -AcceptAll

E. To exclude specific categories from updating, (e.g. the «Driver updates or the Feature updates, give this command:
- Install-WindowsUpdate -NotCategory «Drivers»,»FeaturePacks» -AcceptAll
Part 3. How to Uninstall Windows Updates from PowerShell.
To remove Updates using PowerShell:
1. Open PowerShell as Administrator.
2. In the PowerShell window, give the following command to get a list of all installed updates.
- wmic qfe list brief /format:table

2. Take note of the KB number associated with the Windows Update you wish to remove.

3. Now execute the following command to remove the desired update in PowerShell:
- wusa /uninstall /kb:Number
Note: Replace ‘Number’ with the KB number of the update you want to remove. For example: to remove the KB5005635 give this command:
- wusa /uninstall /kb:5005635

That’s it! Which method worked for you?
Let me know if this guide has helped you by leaving your comment about your experience. Please like and share this guide to help others.
If this article was useful for you, please consider supporting us by making a donation. Even $1 can a make a huge difference for us in our effort to continue to help others while keeping this site free:
- Author
- Recent Posts
Konstantinos is the founder and administrator of Wintips.org. Since 1995 he works and provides IT support as a computer and network expert to individuals and large companies. He is specialized in solving problems related to Windows or other Microsoft products (Windows Server, Office, Microsoft 365, etc.).
We’re all used to updating our Windows Server operating systems with the Windows Update GUI, but did you know that you can update your server using command prompt and “sconfig”?
The past few years I’ve been managing quite a few Windows Server Core Instances that as we all know, do not have a GUI. In order to update those instances, you need to run Windows Update using the command line, but this method actually also works on normal Windows Server instances with the GUI as well!
Please enjoy this video or read on for why and how!
Why?
Using a GUI is great, however sometimes it’s not needed, and sometimes it even causes problems if it looses the backend connection where it’s pulling the data from. I’ve seen this true on newer Windows operating systems where the Windows Update GUI stops updating and you just sit there thinking the updates are running, when they are actually all complete.
The GUI also creates additional overhead and clutter. If there was an easier alternative to perform this function, wouldn’t it just make sense?
On Windows Server instances that have a GUI, I find it way faster and more responsive to just open an elevated (Administrative) command prompt, and kick off Windows Updates from there.
How
You can use this method on all modern Windows Server versions:
- Windows Server (with a GUI)
- Windows Server Core (without a GUI)
This also works with Windows Server Update Services so you can use this method either connecting to Windows Update (Microsoft Update) or Windows Server Update Services (WSUS).
Now lets get started!
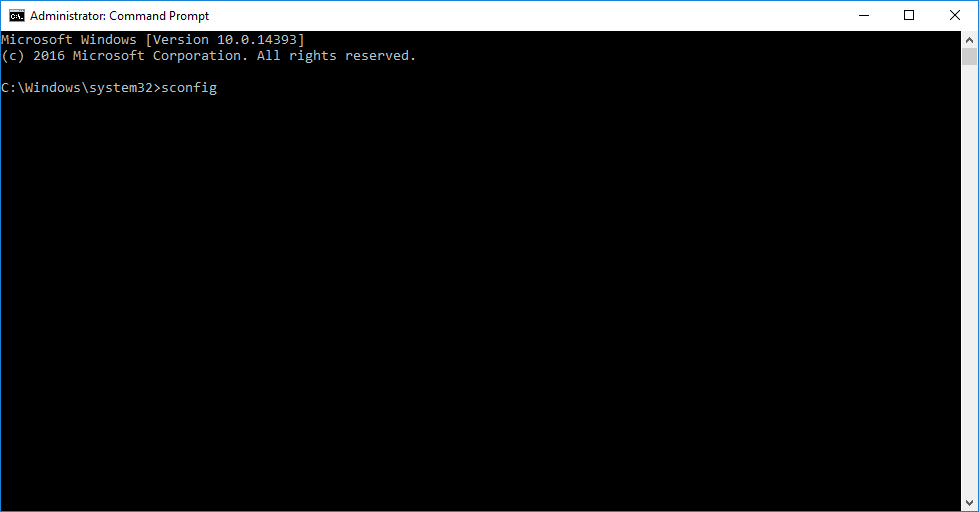
- Open an Administrative (elevated) command prompt
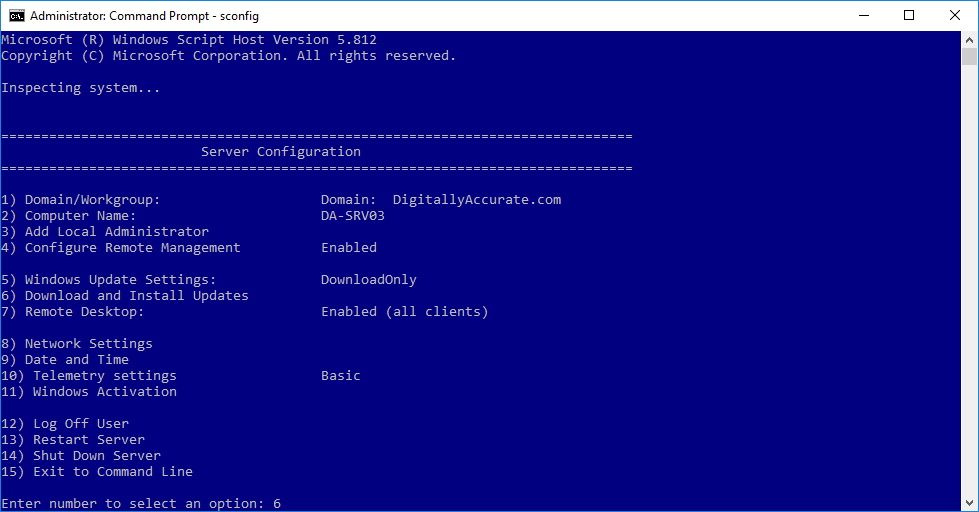
- Run “sconfig” to launch the “Server Configuration” application

- Select option “6” to “Download and Install Windows Updates”
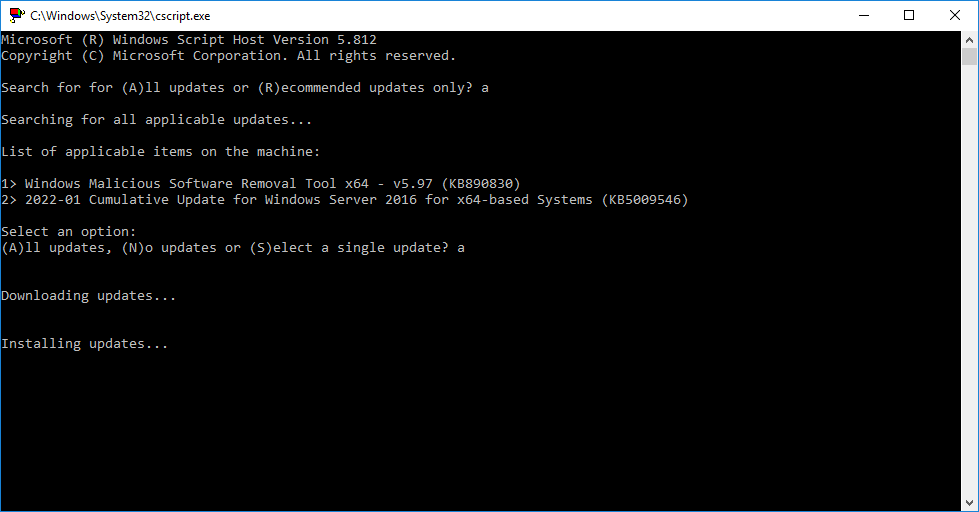
- Choose “A” for all updates, or “R” for recommended updates, and a scan will start
- After the available updates are shown, choose “A” for all updates, “N” for no updates, or “S” for single update selection
After performing the above, the updates will download and install.
I find it so much easier to use this method when updating many/multiple servers instead of the GUI. Once the updates are complete and you’re back at the “Server Configuration” application, you can use option “13” to restart Windows.
Log in to Windows Server 2019 and download the media file from Microsoft, then double-click it to update and install 2022. In the Install Windows Server window, tick I want to help make the installation better and then click Next.
How to Upgrade Windows Server 2019 to 2022
Log in to Windows Server 2019 and download the media file from Microsoft, then double-click it to update and install 2022. In the Install Windows Server window, tick I want to help make the installation better and then click Next. Input the product key of the current server and click Next ., and more items.
Since the new system is much more secure, Windows Server 2022 vs 2019 many users prefer to experience the latest version and its features, this article will show you Windows Server 2022 upgrade path. To prevent data loss, we recommend that you backup Windows Server 2019 in advance.
How to upgrade Windows Server 2016 or 2019 (imported)?
2016 or 2019 (imported) Run upgrade . Ps1to start the Windows upgrade. The script completes the following steps: Install the latest Google driver packages, which are critical for the Windows Server upgrade to succeed.
Enable access to the Emergency Management Services (EMS) consoleduring the upgrade. Launch Windows Setup (setup. exe) from the install media to perform an upgrade in silent mode. Provide a product key for the new version of Windows Server., powershell -execution Policy Bypass -File upgrade., and ps1.
Can I upgrade my cluster to Windows Server 2022?
For example, if nodes in your cluster are running Windows Server 2019 you can install Windows Server 2022 on them avoiding downtime to the cluster, which would otherwise impact Service Level Agreements. This feature is discussed in more detail at Cluster OS rolling upgrade.
Can I convert my server from Windows Server 2022 standard to datacenter?
For example, if your server is running Windows Server 2022 Standard, you can convert it to Windows Server 2022 Datacenter. Keep in mind that while you can move up from Windows Server 2022 Standard to Windows Server 2022 Datacenter, you are unable to reverse the process and go from Datacenter edition to Standard edition.
How to protect Windows Server 2022 after upgrading?
And after the upgrade, the best way to protect Windows Server 2022 is to backup your system regularly. Even if something goes wrong with your system, you can still restore it with a system backup and then use the system normally.
The Windows Update allows users to keep Windows OS up to date with the latest security patches, new features, and bug fixes from Microsoft. You can access Windows Update from the Settings app on your PC. You can also run Windows Update from CMD.
Windows Update runs automatically in the background and installs new updates when they are available. However, you can also manually check for updates at any time. This will help you get the latest features and improvements faster.
By checking regularly for new Windows updates, you can ensure your PC is running smoothly and securely, ensuring you are safe from viruses, malware, and other threats.
In this guide, you will learn how to run Windows Update from Command Prompt and PowerShell using different commands.
Table of Contents
Force Windows Update from CMD
Check for updates on all Windows versions
If you want to run Windows Update from Command Prompt, you can use the wuauclt.exe utility. This utility allows you to check for updates, download updates, and install updates from the command line. The only limitation of running Windows Update through the CMD is that it won’t show any progress. Only results are shown when the process is complete. Here is how to run Windows Update from CMD:
-
Open Command Prompt with administrative privileges
-
Run wuauclt /detectnow to check for new updates and download them
wuauclt /detectnow -
Run wuauclt /updatenow to install updates
wuauclt /updatenow -
(Optional) Run wuauclt /reportnow to report back to WSUS server (if available)
wuauclt.exe /reportnow
You can also use multiple switches in the same command:
wuauclt /detectnow /updatenowIf you want to disregard the already detected updates and force Windows Update to check for updates again immediately, you may run the following command:
wuauclt /resetauthorization /detectnowSince the command prompt does not show any progress, a better approach would be to check and install updates simultaneously. Here’s the command for this:
wuauclt /detectnow /updatenowCheck for Windows updates in Windows 11, 10
The above-mentioned command will work in all versions of Windows, including Windows 7 and Windows Server 2008 R2. But if you are using Windows 11, Windows 10 or Windows Server 2016, you can use the “UsoClient” command, which has more options than “wuauclt.” You can run UsoClient with the following switches:
-
Start checking for new updates
UsoClient /StartScan -
Start downloading updates
UsoClient /StartDownload -
Start installing updates
UsoClient /StartInstall
Force Windows Update Check using Run Command Box
I found out that the easiest way to force a Windows update check is to use a command in the Run dialog box. There are other commands from CMD and PowerShell as well, but let’s start with the easiest way to do it.
-
Open the Run Command box (Windows key + R).
-
Run the following command:
control updateCheck Windows update from the Run Command box
This will trigger the Windows Update graphical user interface which will start checking for new updates. This method works on all versions of Windows including Windows 10 and Windows 11.
There is another command that will trigger the same effect but only works in Windows 10 and 11:
ms-settings:windowsupdateRun Windows Update from PowerShell
There is no official Windows Update module for PowerShell. However, you can use “PSWindowsUpdate.” PSWindowsUpdate is a third-party module that can be used to configure Windows updates in Windows.
This module is not installed in Windows by default but you can download it from the PowerShell gallery and install and run the module to check for new updates.
Here are the three steps to run Windows Update through PowerShell:
-
Run the following command to install PSWindowsUpdate:
Install-Module PSWindowsUpdate 3")
Install PSWindowsUpdate module -
Check for available updates by running this cmdlet:
Get-WindowsUpdate 4")
Check for available Windows updates -
Now install these updates using this cmdlet:
Install-WindowsUpdate 5")
Install available Windows updates
 3")
 4")
 5")
The above-mentioned commands will only install Windows updates. If you want to update other Microsoft products, you’ll also need to enable the Microsoft Update Service. It’s pretty easy to enable it using PowerShell:
Add-WUServiceManager -MicrosoftUpdateIf you want to automatically restart your computer after installing all the updates, you can run the following command instead:
Install-WindowsUpdate -MicrosoftUpdate -AcceptAll -AutoRebootIf you don’t want to install a separate module, you can run the following command to force start Windows Update using PowerShell:
Start-Process -FilePath 'ms-settings:windowsupdate'Deploy Updates on Remote Computers
The PSWindowsUpdate PowerShell module can also be used to deploy Windows updates on remote computers. There are two commands involved in this process:
-
Create a list of computers and pass the list as a variable string using the computer names:
$computer = "comp1, comp2, comp3"You can add more computers to the string separated by commas. Replace “compX” with the name of each computer.
-
Run the following command to start checking for Windows updates on remote computers:
Invoke-WUJob -ComputerName $computer -Script {ipmo PSWindowsUpdate; Install-WindowsUpdate -MicrosoftUpdate -AcceptAll -AutoReboot} -RunNow -Confirm:$false | Out-File "\server\share\logs\$computer-$(Get-Date -f yyyy-MM-dd)-MSUpdates.log" -Force
Install Specific Updates Only
If you already know the article KB no. of the specific update you want to install, you can run the following command to install that particular update(s) only:
Get-WindowsUpdate - KBArticleID "KB5002324", "KB5002325" -InstallReplace the KB number with the one you want to install.
Prevent Specific Windows Updates from Installing
You can prevent specific updates from installing on your computer by replacing the KB numbers in the following command in PowerShell:
Install-WindowsUpdate -NotKBArticle "KB5002324, KB5002325" -AcceptAllCheck for Windows Updates using Windows Settings
To check for new updates and configure your Windows Update settings, follow the steps below:
-
Navigate to:
-
In Windows 11:
Settings app >> Windows Update
-
In Windows 10:
Settings app >> Update & Security >> Windows Update
-
-
Click “Check for updates.”
 6")
Check for pending updates
 6")
Force Windows Update to Download Already Downloaded Updates
There will be times when the updates become corrupted or for other reasons, you just don’t want to install the downloaded updates. In that situation, you can easily delete the already-downloaded updates, which will force Windows Update to run again and check for and download the updates again.
The only caveat in this situation is that the update must not have been installed on your computer. If the update is already installed, Windows will detect it as installed and will not download it again. In that case, you will need to uninstall the update first and then force Windows Update to run again.
If you want to force Windows Update to re-download all the updates again, you can do this using the steps below.
-
Navigate to the following directory using File Explorer:
C:\Windows\SoftwareDistribution\Download
This folder contains all the Windows update files that Windows OS is currently downloading or recently downloaded and installed.
-
Select and delete all the files from the “Download” folder.
 7")
Delete all files in the “Download” folder -
Run Windows Update again using the above-mentioned methods.
This will force Windows Update to check for the same updates and download them again. The download and install process for new updates is completely automated. You don’t need to do anything during the download and installation process.
 7")
Manage Windows Updates using Wuinstall
Using WuInstall, IT Administrators can automate Windows updates. Wuinstall can be used to enforce Windows Updates inquiries, downloads, and installations at times when they deem them appropriate, enabling them to make the entire update process more controlled and user-friendly.
WuInstall is a strong and flexible system management tool that can be used in a WSUS-based or standalone environment. To download the latest updates using Wuinstall, you will need to download and install Wuinstall first. Follow the steps below:
-
Go to http://www.wuinstall.com/ and install the latest free version of Wuinstall on your computer.
-
Open an elevated Command Prompt.
-
Run the following cmdlet to search for the latest available Windows updates:
wuinstall /searchThis will not only look for new updates but will also list them in the command window.
-
To download the updates, run the following command:
wuinstall /downloadThis will download all the available updates from Microsoft servers.
-
To install the updates, run the following command:
wuinstall /install
There are a few more switches that you can use with the install command:
- /quiet – will install updates without showing anything.
- /disableprompt – Disable any input from Windows.
- /autoaccepteula – Auto-accept any agreement during the update installation.
- /rebootcycle – Install updates on the next computer reboot.
Fix Corrupted Windows Updates
Sometimes Windows Update files get corrupted and the user is not able to download the files again or install the corrupted update files. In that case, we need to run a DISM command to fix the corrupted Windows Update. Here are the steps:
-
Launch the Command Prompt.
-
Run the following cmdlet:
dism.exe /Online /Cleanup-image /Restorehealth
After successfully running this command, try force downloading the updates again, and the Windows Update should start working again.
Hopefully, this will be useful in situations where you want to automate certain Windows functions. What other purposes do you want to use command line options to run Windows Update?
Run Windows Update FAQs
What is Windows Update?
Windows Update is a free Microsoft service that provides bug
fixes, security patches, and performance enhancements for Microsoft Windows operating systems. By installing these updates, users can ensure they have the latest features and security available for their operating system.
Can I use the command line to run Windows Update?
Yes, you can use Windows’ command line to run Windows Update.
What is the benefit of running Windows Update from the command line?
Running Windows Update from the command line offers flexibility,
automation, and convenience. For example, by using the command line, you can schedule updates to occur at a specific time or be triggered by an event, and even control which updates are installed.
How can I run Windows Update from the command line in Windows 10?
Follow the steps below to force Windows update with the command line:
Type cmd in the search box, choose Run as administrator, and click Yes to continue.
Type wuauclt.exe /updatenow and hit Enter.
This command will force Windows Update to check for updates and start downloading.
What is the command to run Windows Update from PowerShell?
To run Windows Update via PowerShell, enter the following command:
Start-Process -FilePath ‘ms-settings:windowsupdate’
What is “usoclient.exe” and how does it relate to Windows Update?
“Usoclient.exe” is a built-in command line tool for Windows Update that can be used to scan for updates, start updates, and even uninstall updates. It provides an alternative to Windows Update’s graphical user interface. This tool can be especially useful for IT administrators who need to run Windows Update simultaneously on multiple machines. It can be run from the command line and provides options for updating in managed environments. It also allows for more detailed control over the update process, such as setting which updates to install or uninstall.
Can Windows Update be automated using the command line?
Yes, Windows Update can be automated using the command line. This can be done by creating scripts that automatically execute Windows Update commands.
Установка обновлений рекомендуется для повышения стабильности и производительности системы, для установки или апгрейда новых компонентов, которые используются многими программами и системой, например установка Net Framework 4.7 выполняется через установку обновлений. Также регулярные обновления помогают устранять уязвимости и повышают безопасность системы в целом.
Самый простой способ установить обновления — через Центр обновлений Windows.
Для всех версий Windows Server процедура установки обновлений почти одна и та же, за исключением минимальных отличий.
Установка обновлений на Windows Server 2012 R2
Чтобы попасть в Центр обновлений Windows, нужно нажать на кнопку Стартового Меню в левом нижнем углу рабочего стола и проследовать по пути:
Старт Меню (Start Menu) -> Панель управления (Control Panel) -> Система и безопасность (System and Security) -> Центр обновления Windows (Windows Update)
Либо можно войти в Старт Меню, ввести текст «update», если у Вас англоязычная версия Windows или «Центр обновления» для русскоязычной версии Windows, Вы увидите в списке найденных программ — Центр обновления Windows (Windows Update), нажмите на данную опцию.
Также в Центр обновления Windows можно попасть через командную строку Powershell, набрав команду «control update» и подтвердив ввод кнопкой Enter
В центре обновления Windows нажмите кнопку Поиск обновлений (Cheсk for updates).
После окончания поиска видно, что найдены важные и опциональные пакеты обновлений, нажмите кнопку Установить обновления (Install updates):
После того, как пакеты обновлений будут скачаны и установлены, Вы увидите сообщение об успешном обновлении, либо кнопку с требованием перезагрузить сервер для применения новой конфигурации (после нажатия кнопки сервер перезагрузится, все программы остановят свою работу, связь через удалённый рабочий стол станет недоступна, поэтому обязательно сохраните все Ваши файлы и незавершённые настройки/программы перед нажатием кнопки).
Если готовы, нажмите кнопку Перезагрузить сейчас (Restart now):
Также сервер можно перезапустить из Стартового меню:
Далее начнётся завершение работы и установка новых компонентов, иногда это может занимать несколько минут, а иногда может занять и полчаса, поэтому Ваш сервер может быть некоторое время недоступен для подключения, подождите 5-30 минут и затем пробуйте подключаться к серверу. (Вы всегда можете отслеживать процесс загрузки системы на наших серверах, используя окно VNC/IPMI-подключения.)
Обновления установлены.
Рекомендуется повторить процедуру установки обновлений и перезагрузить сервер снова, так как не все обновления устанавливаются сразу, некоторые становятся доступны только после установки предыдущих.
Установки обновлений на Windows Server 2016 и Windows Server 2019
Процедура такая же как и для Windows Server 2012 (смотрите выше в данной статье), поэтому описывать процесс детально не буду, лишь приложу несколько скриншотов, так как графический интерфейс отличается от Windows Server 2012 r2
Чтобы попасть в Центр обновлений Windows, нужно нажать на кнопку Стартового Меню в левом нижнем углу рабочего стола и проследовать по пути:
Старт Меню (Start Menu) -> кнопка Настройки (Settings) -> Обновления и безопасность (Update and Security) -> Центр обновления Windows (Windows Update)
Или найдите через поиск в Стартовом меню, затем перейдите в опцию «Windows Update settings«:
Поиск обновлений:
Скачивание и дальнейшая установка обновлений:
По окончанию установок перезапустите систему:
Система начнет перезапуск и соединение с сервером через удалённый рабочий стол будет разорвано на время его перезапуска.
Дождитесь пока сервер снова станет доступен к подключению, приблизительное время: 5-30 минут. (Вы всегда можете отслеживать процесс загрузки системы на наших серверах, используя окно VNC/IPMI-подключения.)
Рекомендуется повторить всю процедуру, так как многие обновления становятся доступны только после установки предыдущих.
Однако обратите внимание, что не рекомендуется устанавливать полностью все обновления в Windows Server 2016-2019 на серверах с размером диска 20 Гб или менее, так как обновления имеют большой размер и могут занять все свободное пространство.