
Applies ToWindows Server 2008 R2 Service Pack 1 Windows Server 2008 R2 Datacenter Windows Server 2008 R2 Enterprise Windows Server 2008 R2 Standard Windows Server 2008 R2 Foundation Windows 7 Service Pack 1 Windows 7 Ultimate Windows 7 Enterprise Windows 7 Professional Windows 7 Home Premium Windows 7 Home Basic Windows 7 Starter Windows Thin PC
Introduction
This article describes a convenience rollup for Windows 7 Service Pack 1 (SP1)-based and Windows Server 2008 R2 SP1-based computers. This rollup package includes most updates that were released after the release of SP1 for Windows 7 and Windows Server 2008 R2, through April 2016. This convenience rollup is intended to make it easy to integrate fixes that were released after SP1 for Windows 7 and Windows Server 2008 R2. We recommend that Enterprises include this rollup package in the image creation process to make it easier to quickly set up a computer.
Known issues in this convenience rollup
-
Known issue 1 Symptoms
A new Ethernet Network Interface Card (NIC) that has default settings may replace the previous NIC and cause network issues. Any custom settings on the previous NIC persist in the registry but aren’t used.
Resolution
To fix this issue, run the following VBS script. Copy and paste this script into Notepad, and then save the file with a .vbs extension.
Instructions
Before you run the script, make sure that you back up the following registry key and subkeys:
HKEY_LOCAL_MACHINE\SYSTEM\CurrentControlSet\Enum\PCI
This script can be run on physical or virtual computers at any of the following times:
-
Immediately before installing the Convenience Rollup.
-
Immediately after installing the Convenience Rollup but before restarting the following update installation.
-
After installing Convenience Rollup 3125574 and after restarting even though the computer is in a problem state. In this situation, another restart will be required after the script is run.
Note The script also includes binary version checks around PCI.SYS file.
-
-
Known issue 2 Symptoms
After you install this rollup, virtualized applications in Microsoft Application Virtualization (App-V) versions 4.5, 4.6, and 5.0 may have problems loading. When these problems occur, you may receive an error message that resembles the following:
Launching MyApp 100%
Note In this error message, MyApp represents the name of the App-V application.
Depending on the scenario, the virtualized app may freeze after it starts, or the app may not start at all.
Important This section, method, or task contains steps that tell you how to modify the registry. However, serious problems might occur if you modify the registry incorrectly. Therefore, make sure that you follow these steps carefully. For added protection, back up the registry before you modify it. Then, you can restore the registry if a problem occurs. For more information about how to back up and restore the registry, click the following article number to view the article in the Microsoft Knowledge Base:
322756 How to back up and restore the registry in WindowsResolution
To fix this known issue, configure the TermSrvReadyEvent registry entry on the computer on which the Microsoft Application Virtualization Client is installed.
For Microsoft Application Virtualization 5.0
-
Registry Key: HKEY_LOCAL_MACHINE\Software\Microsoft\AppV\Subsystem\ObjExclusionsValue name: 93 (or any unique value)Type: REG_SZData: TermSrvReadyEvent
Example
For example, type the following command at an elevated command prompt to add the entry to a system that is running Application Virtualization 5.0:reg add HKEY_LOCAL_MACHINE\Software\Microsoft\AppV\Subsystem\ObjExclusions /v 93 /t REG_SZ /d TermSrvReadyEvent
For Microsoft Application Virtualization 4.6
-
For all supported x86-based systems
Registry Key:
HKEY_LOCAL_MACHINE\SOFTWARE\Microsoft\SoftGrid\4.5\SystemGuard\ObjExclusionsValue name:95 (or any unique value)Type:REG_SZData: TermSrvReadyEvent
Example
For example, type the following command at an elevated command prompt to add the entry to an x86-based system that is running Application Virtualization 4.6:reg add HKEY_LOCAL_MACHINE\SOFTWARE\Microsoft\SoftGrid\4.5\SystemGuard\ObjExclusions /v 95 /t REG_SZ /d TermSrvReadyEvent
-
For all supported x64-based systems
Registry Key:
HKEY_LOCAL_MACHINE\SOFTWARE\Wow6432Node\Microsoft\SoftGrid\4.5\SystemGuard\ObjExclusions
Value name: 95 (or any unique value)
Type: REG_SZ
Data: TermSrvReadyEventExample
For example, type the following command at an elevated command prompt to add the entry to an x64-based system that is running Application Virtualization 4.6:reg add HKEY_LOCAL_MACHINE\SOFTWARE\Wow6432Node\Microsoft\SoftGrid\4.5\SystemGuard\ObjExclusions /v 95 /t REG_SZ /d TermSrvReadyEvent
-
-
Known issue 3
Symptoms
After you install this rollup, if outgoing NTLM traffic is blocked by using the following group policy setting:
Policies\Windows Settings\Security Settings\Local Policies\SecurityOptions\Network Security: Restrict NTLM: Outgoing NTLM traffic to remote servers Group Policy object (GPO) backup operations will fail with both Group Policy Management Console (GPMC) as well as PowerShell with the following error message:
A directory Service error has occurred
Additionally, gpmgmt.log will log the following errors:
[XXX.XXX] DateTime [WARNING] LdapConnectServer: ldap_bind_s failed with 0x80072095
Resolution
1.
You can use a Windows 8.1 or newer operating system to perform the GPO Backups instead.
-OR-
2. To fix this known issue, configure an exception for Windows 7 and Windows Server 2008 R2 Systems doing GPO Backup operations, in order to enable outgoing NTLM authentication:
-
Configure an exception through GPO (for example: ldap/contoso.com)
Policies\Windows Settings\Security Settings\Local Policies\SecurityOptions\Network Security: Restrict NTLM: Add remote server exceptions
-
Configure an exception through the registry (for example: ldap/contoso.com)
HKLM\System\CurrentControlSet\Control\LSA\MSV1_0\<ClientAllowedNTLMServers>
-
-
Known issue 4
Symptoms
After you install this rollup, in some cases, you may notice that the robocopy mirroring (/MIR) command is not working as expected. It is observed that instead of only copying modified files from Source to Destination, robocopy is also copying the files that were not modified.
Command where the issue is observed:
Robocopy <source> <destination> /MIR [<options>]
Resolution
To fix this issue, you are advised to use archive attribute based mirroring. In this mode, robocopy mirroring makes sure to only copy files that were modified in Source and skip the rest.
Command for archive attribute based mirroring:
Robocopy <source> <destination> /MIR /A /M [<options>]
Note
In first pass, it will still copy all the files. However, in subsequent runs, it will only copy the files that were modified. -
Known issue 5
Symptoms
32-bit applications can’t change local Group Policy in 64-bit version of Windows 7 SP1 and Windows Server 2008 R2 SP1.
Resolution
To fix this issue, uninstall the update KB3125574.
Dim strPciFileVersion
Dim WindirFilePath
set WshShell = WScript.CreateObject(«WScript.Shell»)
WindirFilePath = WshShell.ExpandEnvironmentStrings(«%WinDir%»)
Dim fs
Set fs = CreateObject(«Scripting.FileSystemObject»)
strPciFileVersion = fs.getfileversion(WindirFilePath & «\\system32\\drivers\\pci.sys»)
Dim strAryFileVersion1
strAryFileVersion1 = Split(strPciFileVersion, «.»)
If (strAryFileVersion1(0) = 6 And strAryFileVersion1(1) = 1 And strAryFileVersion1(2) = 7601) Then
If (strAryFileVersion1(3) < 17630 Or (strAryFileVersion1(3) > 20000 And strAryFileVersion1(3) < 21744)) Then
Const HKEY_LOCAL_MACHINE = &H80000002
Dim oReg : Set oReg = GetObject(«winmgmts:{impersonationLevel=impersonate}!\\.\root\default:StdRegProv»)
Dim oShell : Set oShell = CreateObject(«WScript.Shell»)
Dim sPath, aSub, sKey, aSubToo, sKeyToo, dwValue, Result, SaveResult
Dim NotDeleted
NotDeleted = 0
‘ Get all keys within sPath
sPath = «SYSTEM\CurrentControlSet\Enum\PCI»
oReg.EnumKey HKEY_LOCAL_MACHINE, sPath, aSub
‘ Loop through each key
For Each sKey In aSub
‘ Get all subkeys within the key ‘sKey’
oReg.EnumKey HKEY_LOCAL_MACHINE, sPath & «\» & sKey, aSubToo
For Each sKeyToo In aSubToo
Result = oReg.DeleteKey(HKEY_LOCAL_MACHINE, sPath & «\» & sKey & «\» & sKeyToo & «\» & «\Device Parameters» & «\SlotPersistentInfo»)
‘ Allow failure only if key never existed
If (Result = 1) Or (Result > 2) Then
NotDeleted = 1
SaveResult = Result
End If
Next
Next
If (NotDeleted > 0) Then
Wscript.Echo «SlotPersistentInfo keys still exist under HKLM\System\CurrentControlSet\Enum\PCI\<deviceid>\<subdeviceid>\Device Parameters. Please delete all manually and then install the updates. Result = » & Result
End If
Else
WScript.Echo «Your system is ready to install the updates»
End If
Else
WScript.Echo «Your system is ready to install the updates»
End If
How to get this convenience rollup
Microsoft Update Catalog
To get the package for this update, go to the Microsoft Update Catalog website.
Update detail information
Prerequisites
Update replacement information
This update replaces the previously released update 2614451 and 2800422.
More Information
We intentionally did not include any specific post-Service Pack 1 updates in convenience rollup 3125574 for which the following conditions are true:
-
They don’t have broad applicability.
-
They introduce behavior changes.
-
They require additional user actions, such as making registry settings.
You may download and install such fixes manually after you determine whether they apply to your deployment scenarios. Specifically, the following fixes are not included in this convenience rollup:
2620264 You cannot start any RemoteApp applications through a Windows Server 2008-based or later Terminal Server or RD Gateway2646060 An update that selectively disables the Core Parking feature in Windows 7 or in Windows Server 2008 R2 is available2647954 The PIN dialog box does not appear or you are presented with all the certificates in the store when you try to access a WebDAV server in Windows 7 or in Windows Server 2008 R22663685 Changes that are not replicated to a downstream server are lost on the upstream server after an automatic recovery process occurs in a DFS Replication environment in Windows Server 2008 R22695321 IPsec session takes 5 to 6 minutes to connect to a storage controller on a computer that is running Windows Vista, Windows Server 2008, Windows 7, or Windows Server 2008 R22727994 You cannot open or save Office 2010 documents on a WebDAV file server on a computer that is running Windows 7 or Windows Server 2008 R22728738 You experience a long logon time when you try to log on to a Windows 7-based or a Windows Server 2008 R2-based client computer that uses roaming profiles2750841 An IPv6 readiness update is available for Windows 7 and for Windows Server 2008 R22752259 An update that improves the performance of the Printbrm.exe command-line tool in Windows 7 or in Windows Server 2008 R2 is available
2891144 Application does not draw polylines correctly when you run it through an RD Session in Windows Server 2008 R2 SP12898851 Description of the security update for the .NET Framework 3.5.1 on Windows 7 Service Pack 1 and Windows Server 2008 R2 Service Pack 1: May 13, 20142907020 «Location is not available» error when you access a mapped network drive after Windows standby or resume2918833 Third-party IMEs give users unprotected access to your Windows 7-based or Windows Server 2008 R2-based system2923766 Black screen when you plug in a monitor on a computer or open a lid of a laptop that is running in Windows2925489 You cannot establish an IPsec connection with certain third-party devices in Windows2990184 A FIPS-compliant recovery password cannot be saved to AD DS for BitLocker in Windows 7 or Windows Server 2008 R22781512 — WinRM operations to Hyper-V fail on a Windows 7 SP1-based or Windows Server 2008 R2 SP1-based computer that has Windows Management Framework 3.0 installed2823180 — Update is available for Windows Management Framework 3.0 in Windows 7 SP1, Windows Server 2008 R2 SP1, or Windows Server 2008 SP22802886 — You cannot register an SPN from a Windows 7, Windows 8, Windows Server 2008 R2 or Windows Server 2012-based client computer in a disjoint namespace2842230 — «Out of memory» error on a computer that has a customized MaxMemoryPerShellMB quota set and has WMF 3.0 installed2887064 — The Start-Process cmdlet ignores the «-Wait» parameter when the cmdlet is started remotely on a Windows 7 SP1, Windows Server 2008 R2 SP1, Windows Vista SP2, or Windows Server 2008 SP2 computer that has Windows Management Framework 3.0 installed2889748 — High memory usage by the Svchost.exe process after you install Windows Management Framework 3.0 on a Windows-based computer2830615 — $MyInvocation.MyCommand object is set to null when you run the script by using PowerShell 3.0 in Windows 8 or in Windows Server 2012
This convenience rollup also does not include any of the servicing updates for Internet Explorer. If you require the servicing updates for Internet Explorer, download and install the latest Security update for Internet Explorer.
File information
For a list of the files that are provided in this convenience rollup, download the file information for update 3125574.
References
For more information about Windows Update, and troubleshooting problems with installing updates go to the following Microsoft websites:
2509997 You can’t install updates in Windows Vista, Windows 7, Windows Server 2008, or Windows Server 2008 R2
Troubleshoot problems with installing updates
Learn about the terminology that Microsoft uses to describe software updates.
Need more help?
Want more options?
Explore subscription benefits, browse training courses, learn how to secure your device, and more.
Время на прочтение2 мин
Количество просмотров303K
Microsoft все же объявила о выпуске сабжа, но просит пользователей не называть его так.  Второй пакет обновлений называется rollup update или просто «накопительный пакет обновлений», коим он и является по сути. Набор обновлений предназначен для пользователей Windows 7 SP1 и не является обязательным, он также не будет распространяться через центр обновлений Windows Update. Пакет обновлений получил идентификатор KB3125574 (Convenience rollup update for Windows 7 SP1 and Windows Server 2008 R2 SP1).
Основная цель, которую преследует Microsoft выпуском этого пакета обновлений, заключается в том, чтобы помочь организациям, все еще повсеместно использующим Windows 7, оперативно получать установленную ОС с последними обновлениями, так как сам накопительный пакет может быть интегрирован в оффлайн дистрибутивы Windows 7. Microsoft также поменяла формат публикации пакета обновления, теперь вместо standalone-дистрибутива, он будет распространяться с использованием уже достаточно забытого механизма Microsoft Update Catalog, которым можно воспользоваться только через веб-браузер Internet Explorer.
Для установки пакета обновлений на Windows 7, пользователь должен иметь установленный SP1, а также обновление KB3020369 (April 2015 servicing stack update for Windows 7 and Windows Server 2008 R2). Пакет включает в себя все security и прочие обновления для Windows 7, которые были выпущены с начала выпуска SP1 и до апреля 2016 г. Это же обновление доступно для пользователей Windows Server 2008 R2. Напомним, что ранее Microsoft категорически открестилась от выпуска Service Pack 2 для Windows 7.
We’re happy to announce today that we’re making available a new convenience rollup for Windows 7 SP1 that will help. This convenience rollup package, available to download from catalog.update.microsoft.com/v7/site/Search.aspx?q=3125574, contains all the security and non-security fixes released since the release of Windows 7 SP1 that are suitable for general distribution, up through April 2016. Install this one update, and then you only need new updates released after April 2016.
Более подробную информацию о работе с обновлением можно получить по ссылкам ниже.
blogs.technet.microsoft.com/windowsitpro/2016/05/17/simplifying-updates-for-windows-7-and-8-1
support.microsoft.com/en-us/kb/3125574
Само обновление доступно для загрузки по следующей ссылке.
catalog.update.microsoft.com/v7/site/Search.aspx?q=3125574
Еще одним примечательным фактом является то, что Microsoft изменила политику выхода не security обновлений для Windows 7 SP1 и Windows 8.1 (включая Windows Server 2008 R2 SP1, Windows Server 2012 и Windows Server 2012 R2). Если ранее они могли выпускаться порциями несколько раз в месяц, то теперь они будут выходить строго раз в месяц и представлять из себя одно целое обновление. Обновления как и прежде будут доступны через центр обновлений Windows Update.
Привет друзья! Не секрет, что операционная система Windows 7 ещё пользуется большой популярностью и многие пользователи, чьи компьютеры совместимы с семёркой, держат Win 7 в качестве второй или даже основной операционной системы на компьютере. Зная о неугасающей популярности старенькой системы, Майкрософт ещё летом выпустила для неё очень удобный накопительный пакет обновлений «Rollup Update» (или обновление KB3125574), получивший неофициальное название — Service Pack 2, так как содержит в себе все важнейшие обновления с 2011 года. Данный накопительный пакет очень удобен, ведь всем известно, что сразу после установки на компьютер, Windows 7 начинает скачивать массу обновлений и устанавливать их с целой чередой перезагрузок, что очень неудобно для пользователя. Другое дело сразу после установки системы накатить накопительный пакет «Rollup Update» со всеми обновлениями и спокойно работать. В одной из наших предыдущих статей мы разобрали, как установить «Rollup Update» на Windows 7, но вот интересно, а возможно ли интегрировать в дистрибутив OS этот накопительный пакет, чтобы после установки все обновления были уже установлены в операционную систему. Об этом мы и поговорим в сегодняшней статье.
Во-первых скачаем программу 7-Zip по ссылке и установим её (если вы работаете в Windows 8.1, 10, то 7-Zip вам не нужна, так как эти системы прекрасно работают с ISO-образами).
Затем скачаем ISO-образ Windows 7 на официальном сайте Майкрософт. Щелкаем на ISO-образе правой мышью и выбираем «7-Zip»—>«Распаковать»
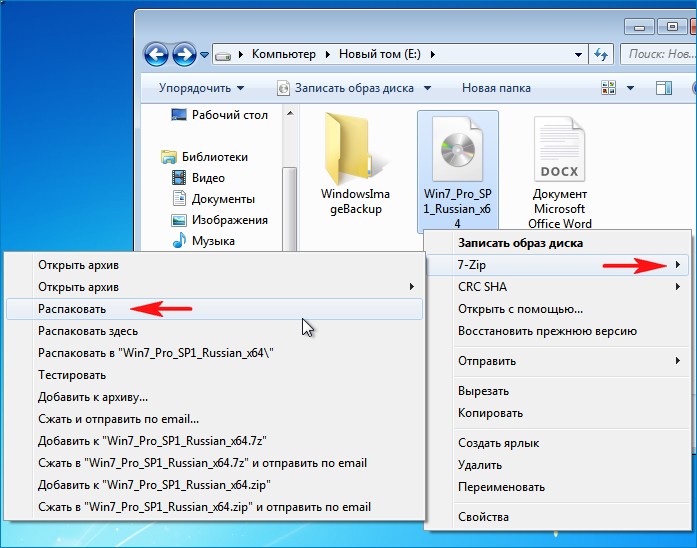
Снимаем галочку и распаковываем файлы Windows 7 на раздел (E:) с созданную нами папку «1»

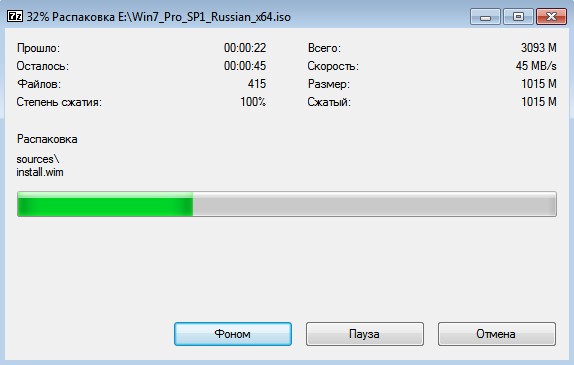
Распаковка файлов.
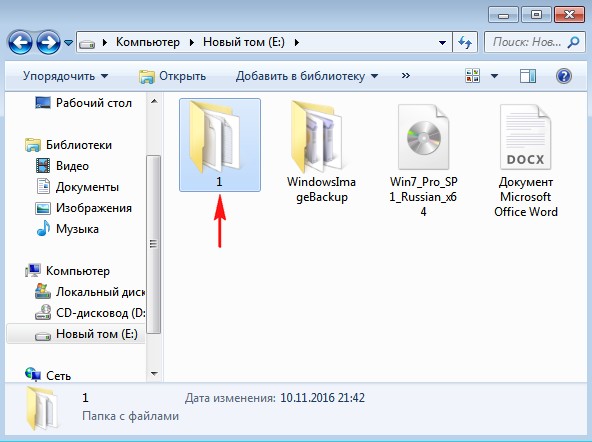
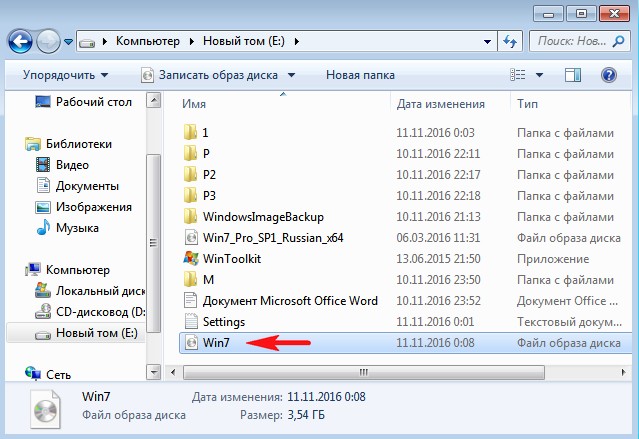
Файлы Windows 7 распакованы на раздел (E:) в папку «1».
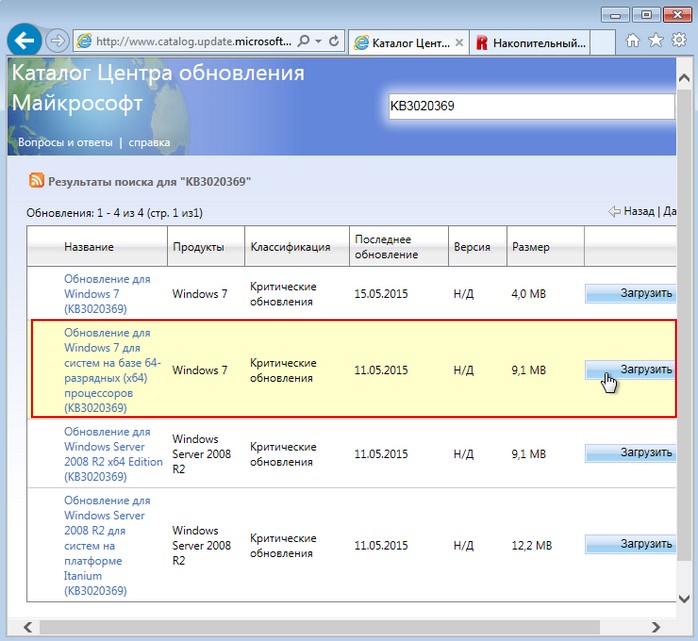
Скачиваем (обязательно в браузере Internet Explorer) три пакета обновлений KB3020369 по ссылке:
http://www.catalog.update.microsoft.com/Search.aspx?q=KB3020369
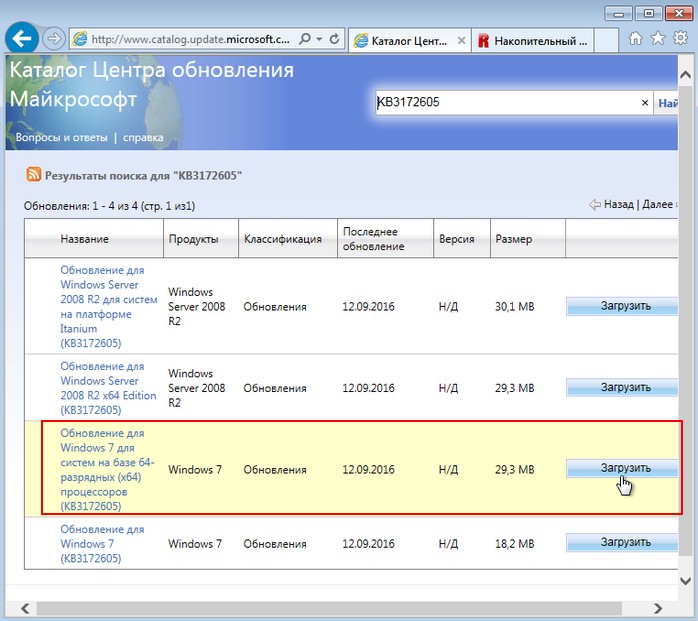
KB3172605 по ссылке:
http://www.catalog.update.microsoft.com/Search.aspx?q=KB3172605
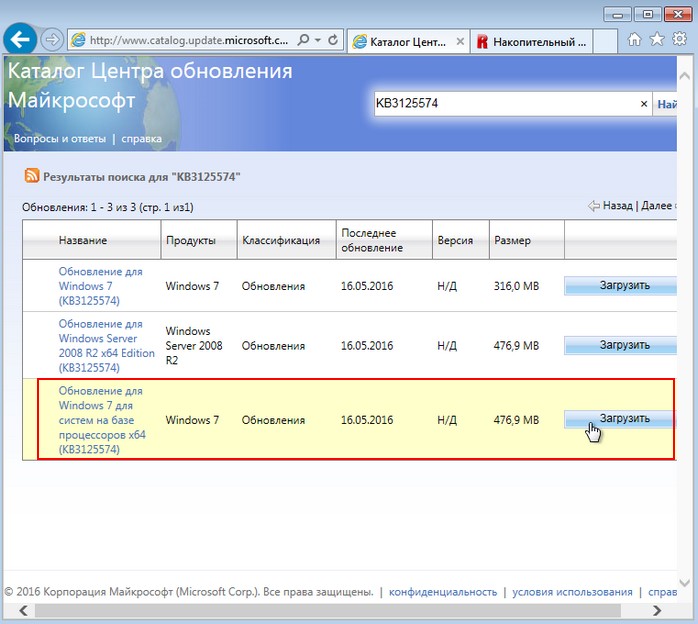
и накопительный пакет обновлений «Rollup Update» KB3125574:
http://www.catalog.update.microsoft.com/Search.aspx?q=KB3125574
Все три пакета обновлений скачаны на раздел жёсткого диска (E:)
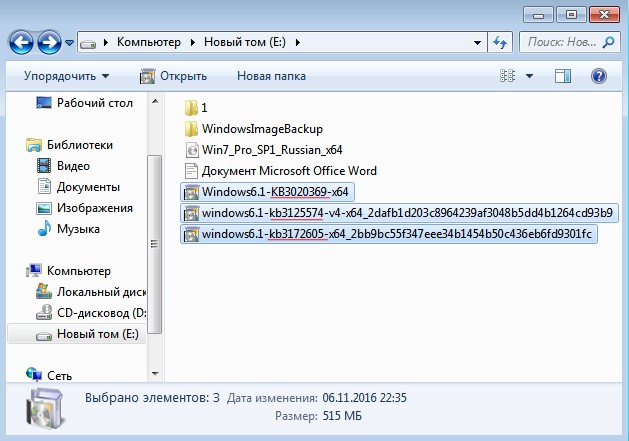
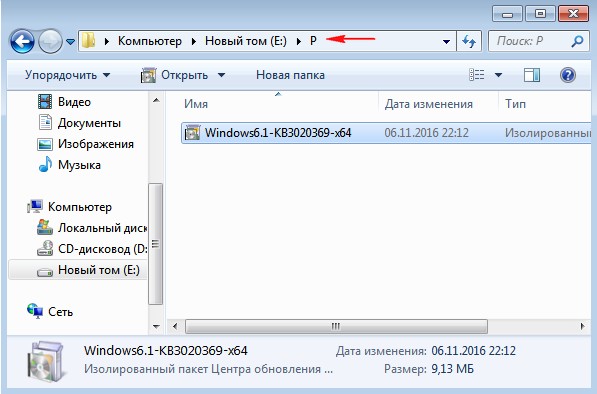
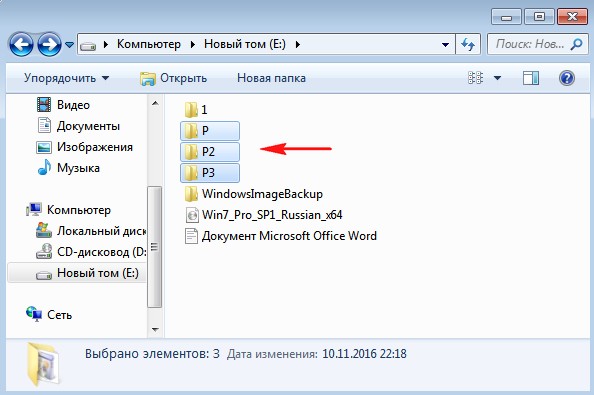
Создаём на разделе (E:) папку с названием «P» (русских букв быть не должно) и копируем в неё пакет обновлений «KB3020369».
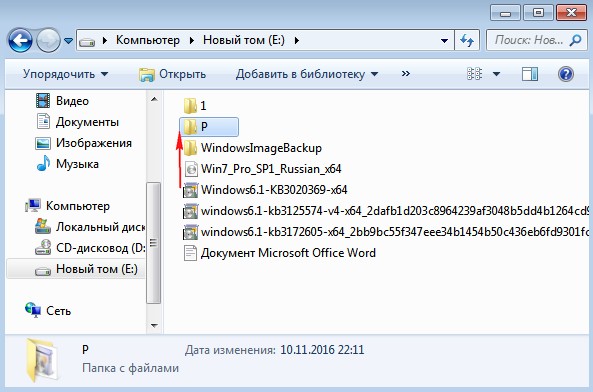
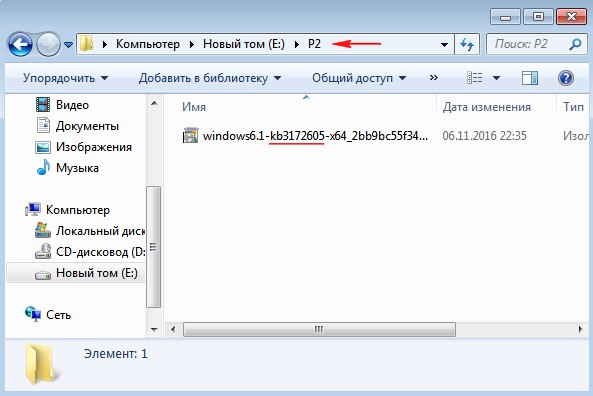
Создаём на разделе (E:) папку с названием «P2» и копируем в неё пакет обновлений «KB3172605»
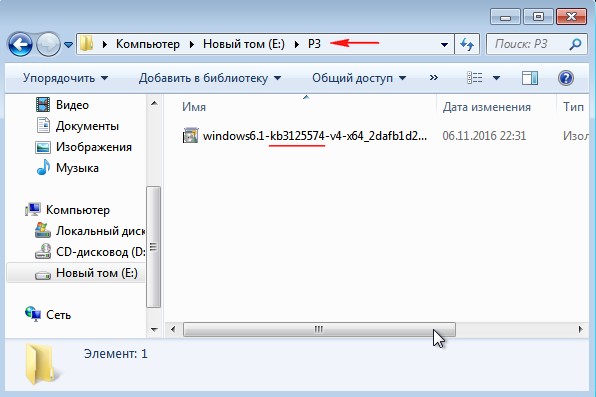
Создаём на разделе (E:) папку с названием «P3» и копируем в неё пакет обновлений «KB3125574»
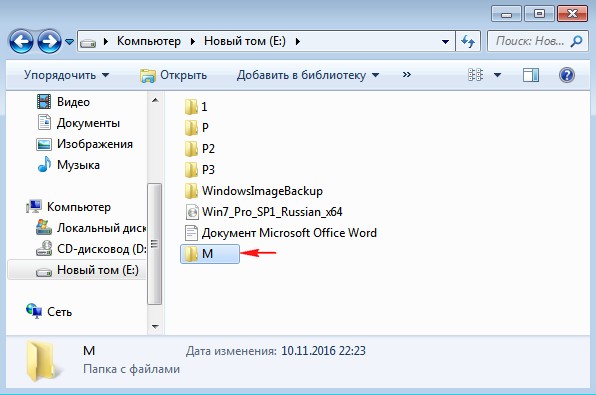
Создаём на разделе (E:) папку с названием «M», в данную папку мы смонтируем Windows 7 64-бит и затем интегрируем в неё обновления.
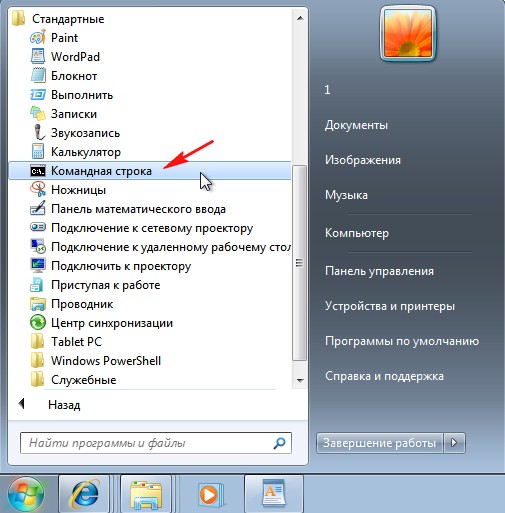
Запускаем командную строку от имени администратора
ISO-образ Windows 7 64-бит мы разархивировали с вами в начале статьи в папку «1».
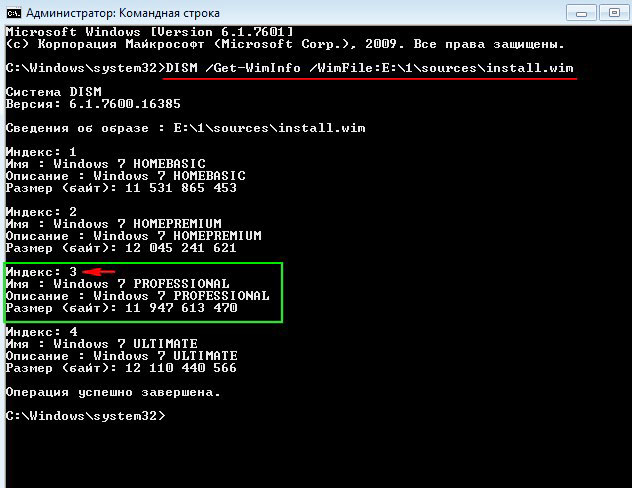
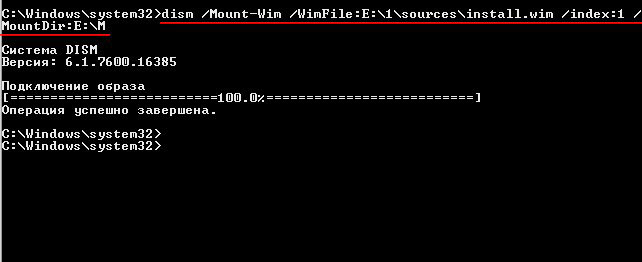
Следующей командой узнаём индекс всех релизов, находящихся в ISO-образе Windows 7.
Dism /Get-WimInfo /WimFile:E:\1\sources\install.wim
мне нужна Windows 7 Профессиональная и её индекс 3.
Следующей командой монтируем (распаковываем архив Windows 7), находящийся в папке 1, в подпапке «source» файл-образ install.wim — в папку «M» на диске (E:)
dism /Mount-Wim /WimFile:E:\1\sources\install.wim /index:3 /MountDir:E:\M
Интегрируем из папки «P» пакет обновлений «KB3020369» в смонтированный в папку M: образ Windows 7.
dism /image:E:\M /add-package /packagepath:E:\P
Интегрируем из папки «P2» пакет обновлений «KB3172605» в смонтированный в папку M: образ Windows 7.
dism /image:E:\M /add-package /packagepath:E:\P2
Интегрируем из папки «P3» пакет обновлений «KB3125574» в смонтированный в папку M: образ Windows 7.
dism /image:E:\M /add-package /packagepath:E:\P3
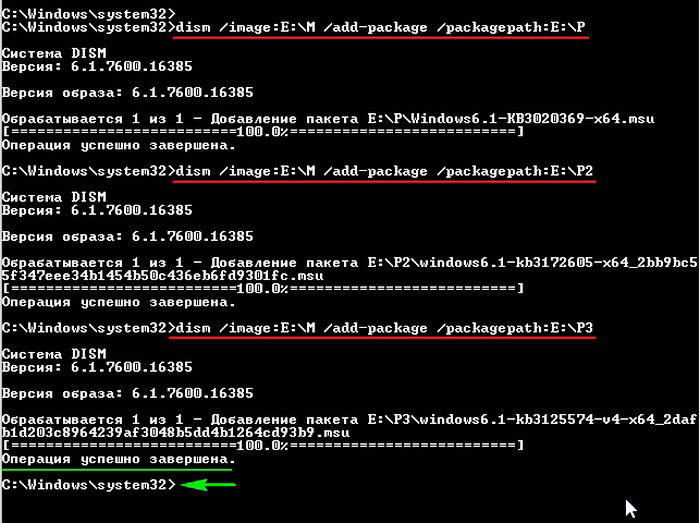
Дождитесь сообщения:
Операция успешно завершена
C:\windows\system32>
Следующей командой отключаем (размонтируем) образ Windows 7 из папки «M».
dism /unmount-wim /mountdir:E:\M /commit

Теперь нам осталось только запаковать Windows 7 с интегрированными обновлениями в ISO-образ
Скачиваем программу по ссылке WinToolkit 1.5
Щелкаем на скачанном архиве с программой WinToolkit 1.5 правой мышью и выбираем «7-Zip»—>«Распаковать»
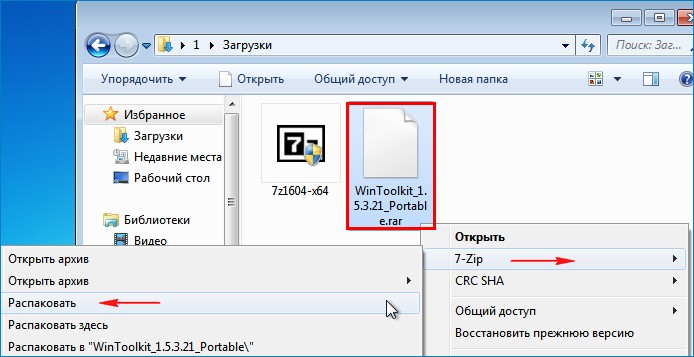
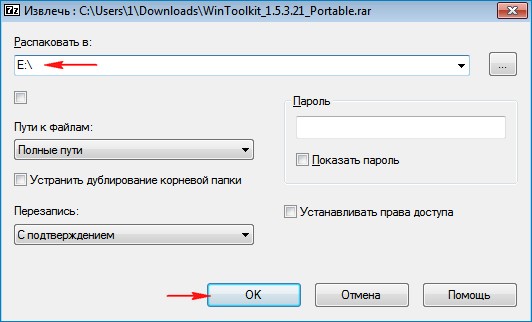
Я распакую программу на раздел (E:).
Запускаю программу WinToolkit 1.5.

Закрываем окно с рекламой.
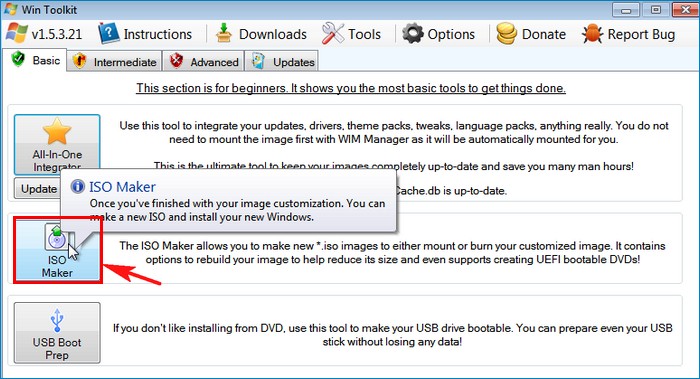
Жмём на кнопку ISO Maker для создания образа, содержащего все редакции Windows 7
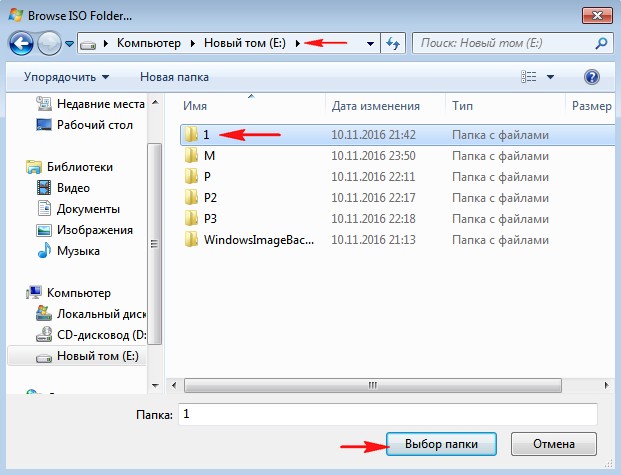
Жмём на верхнюю кнопку «Browse»

В открывшемся проводнике находим на диске (E:) папку «1» с файлами Windows 7, выделяем её левой мышью и жмём кнопку «Выбор папки»
Жмём на нижнюю кнопку «Browse»
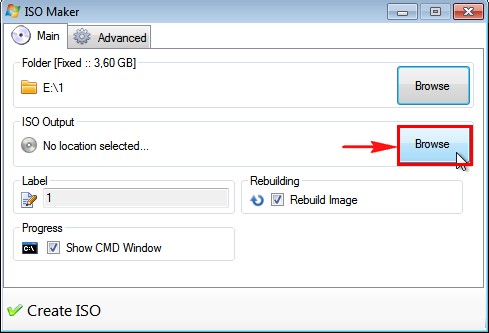
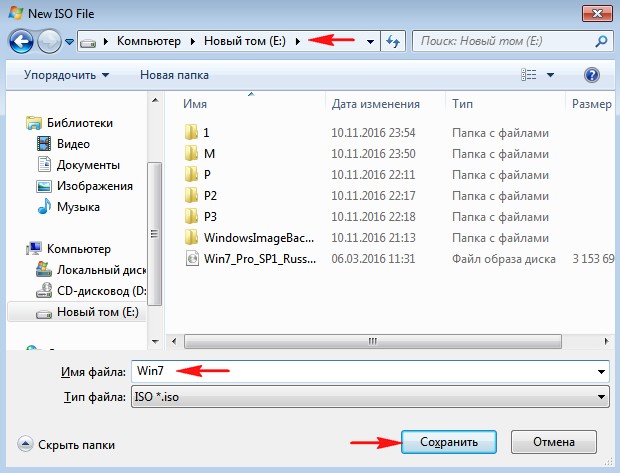
В открывшемся проводнике выбираем место сохранения будущего ISO-образа Windows 7 (раздел E:) и даём ему название «Win7», затем жмём «Сохранить»
Жму на кнопку «Create ISO»
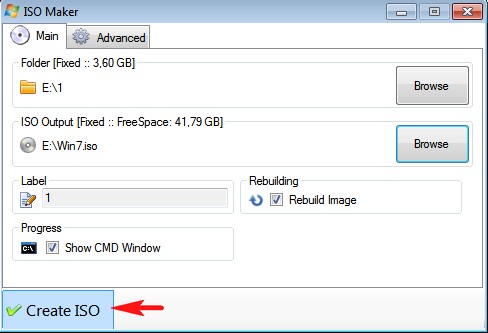
и начинается процесс создания ISO образа Windows 7
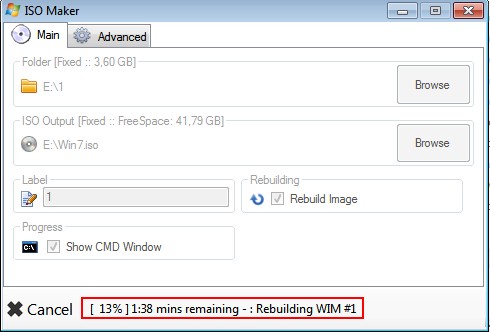
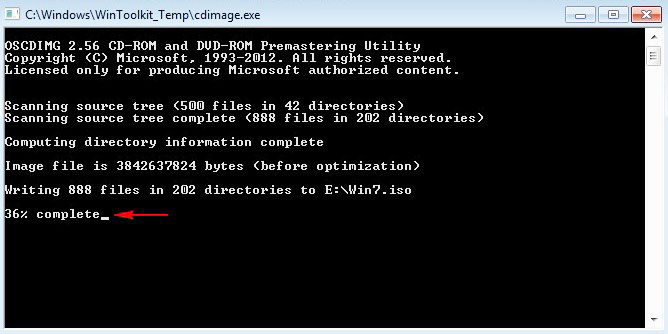
ISO-образ Windows 7 64-бит с интегрированными обновлениями готов!
«ОК»
и находится на диске (E:).
Устанавливаем Windows 7 с интегрированными обновлениями «Rollup Update» на другой компьютер
После успешной установки идём в «Центр обновления Windows» и смотрим установленные обновления.
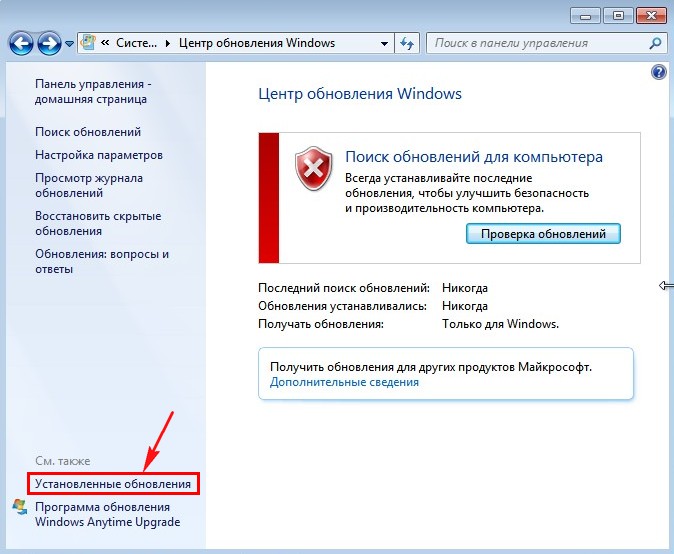
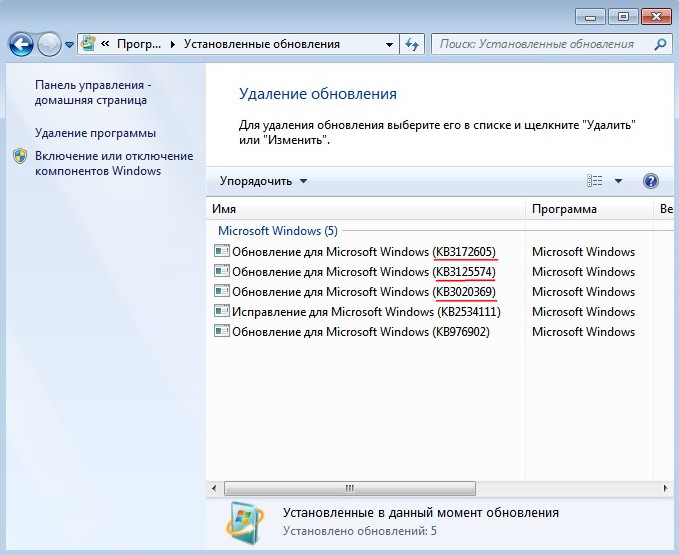
Видим наши интегрированные обновления установились вместе с операционной системой.
Возвращаемся в предыдущее окно и жмём на кнопку «Проверка обновлений»
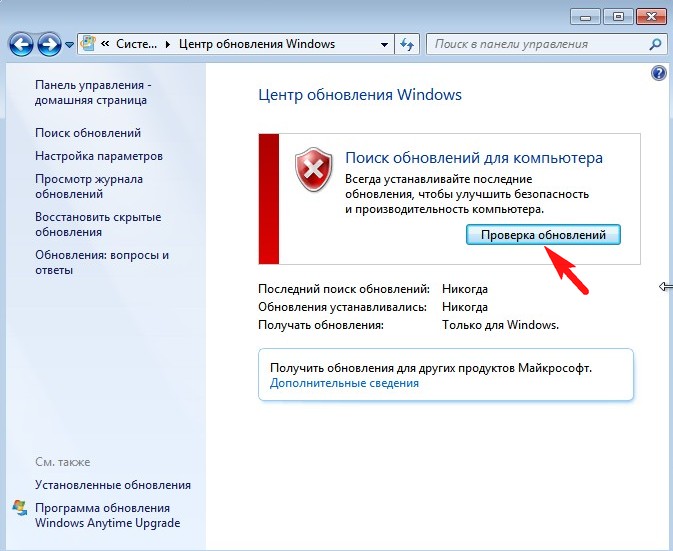
Windows 7 начинает поиск обновлений.
И обновления находятся. Жмём на кнопку «Установить обновления»
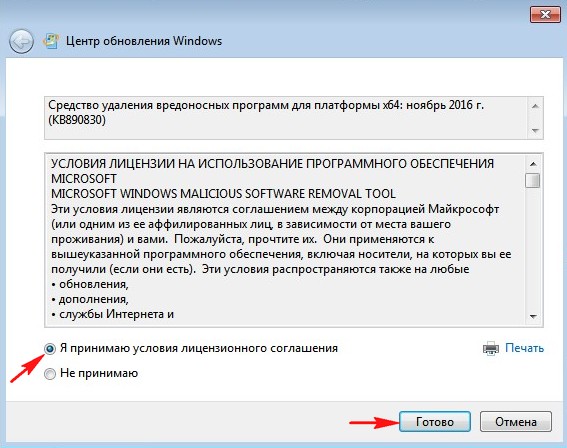
Принимаем условия лицензионного соглашения и жмём «Готово»
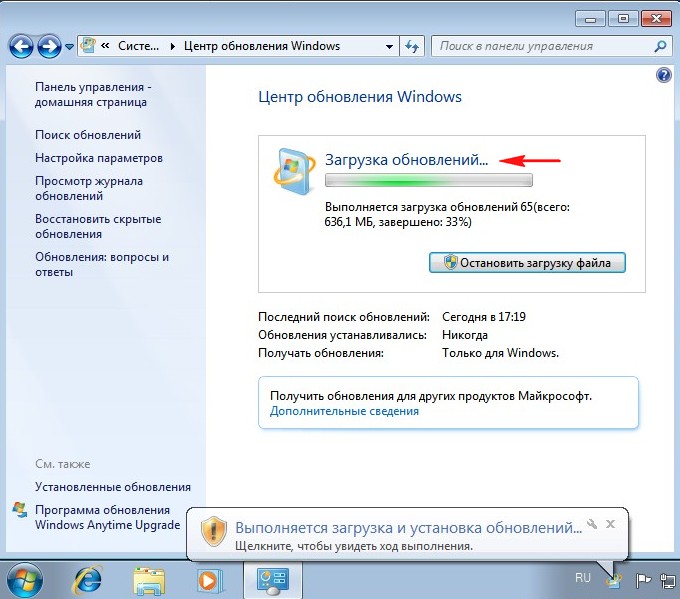
Начинается загрузка обновлений.
Выполняется установка обновлений.
После установки обновлений система просит перезагрузку.
Начинается Настройка обновлений.

После перезагрузки идём «Центр обновления Windows и видим, что все обновления установлены»

Смотрим Журнал обновлений.

Статья по этой теме:
Как создать дистрибутив Windows 7 с интегрированными обновлениями операционной системы при помощи виртуального диска VHD
Microsoft Windows 7 Convenience Rollup
Latest
October 31st, 2016
-
476.9 MB
Win 7 (64-bit)
windows6.1-kb3125574-v4-x64_2dafb1d203c8964239af3048b5dd4b1264cd93b9.msu
MD5:
65F843D233BA6F0267412A5066C6F60F
SHA1:
2DAFB1D203C8964239AF3048B5DD4B1264CD93B9
SHA256:
7BB1796827448DF30356B57AC5731BCCBC1336789DC884630E8D356DF2E1685B
-
316.0 MB
Win 7 (32-bit)
windows6.1-kb3125574-v4-x86_ba1ff5537312561795cc04db0b02fbb0a74b2cbd.msu
MD5:
2221A57FDE7A0B3B063E244B04A46137
SHA1:
BA1FF5537312561795CC04DB0B02FBB0A74B2CBD
SHA256:
930CC1C0F8838D731DBB89755B9DE12B489AB35FDC2644C01605A6B6DE3F497E
Downloaded:
25,976 times
(11.0 TB)
The Microsoft Windows 7 Update Convenience Rollup is a collection pack of a large number of individual Windows Update patches, all bundled into a single installer.
This dramatically simplifies setup of new Windows 7 systems, because it helps to avoid the Windows Update infinite hang during which the Windows Updater gets stuck and will not stop searching for updates.
Installing the Windows 7 Convenience Rollup requires Windows 7 Service Pack 1
Автор Владимир!
Привет друзья! Операционная система Windows 7 до сих пор пользуется популярностью и устанавливается пользователями на компьютеры и ноутбуки, причин тому много. К примеру, существует множество программ и компьютерных игр, которые полностью совместимы только с семёркой и не будут работать на Windows 8.1 и тем более на Windows 10. Также во многих организациях трудятся старенькие компьютеры, под управлением Win 7 и сколько ещё проработают эти машинки неизвестно, а если всё это работает стабильно и хорошо, то зачем что-то менять. Не последним здесь стоит и финансовый вопрос, если вы работаете системным администратором, то наверняка знаете, что практически невозможно в наше непростое время уговорить руководителя любой организации на модернизацию компьютерного парка, которая обойдётся ему в кругленькую сумму. Вот поэтому Windows 7 ещё долго будет оставаться актуальной виндой. Но речь сегодня не о популярности семёрки, а о том, как после установки системы накатить все обновления сразу и сэкономить время. Конечно, идеальным решением будет выглядеть создание дистрибутива OS со всеми интегрированными обновлениями. Если же вам лень создавать такой дистрибутив, то разумным решением будет сразу после установки Windows 7 накатить все обновления при помощи накопительного пакета обновлений (Rollup Update), а также ежемесячного накопительного пакета (Monthly Rollup).
- Большой накопительный пакет Rollup Update Майкрософт выпустила в 2016 году и он содержит все обновления OS за период 2011 — 2016 год.
- Небольшой ежемесячный накопительный пакет Monthly Rollup, стал выходить каждый месяц сразу после появления Rollup Update. Самый последний пакет Monthly Rollup содержит в себе все предыдущие обновления за предыдущие месяцы, включая важные исправления системы безопасности.


Как после установки Windows 7 накатить все обновления сразу с помощью накопительного пакета обновлений (Rollup Update), а также ежемесячного накопительного пакета (Monthly Rollup)
Перед прочтением статьи вы должны знать, что на данный момент Майкософт отремонтировали работу центра обновления Windows 7 и получение всех обновлений происходит без проблем, которые нам приходилось решать раньше, но всё равно получение всех апдейтов происходит долго и с несколькими перезагрузками. Короче, с уверенностью скажу, что наша сегодняшняя статья сэкономит вам 65% времени.
Итак, во-первых, в окончательной фазе установки операционной системы отложите автоматическое получение обновлений OS.

После установки Windows 7 вы хотите как можно быстрее установить все обновления ОС сразу. Как это можно сделать?
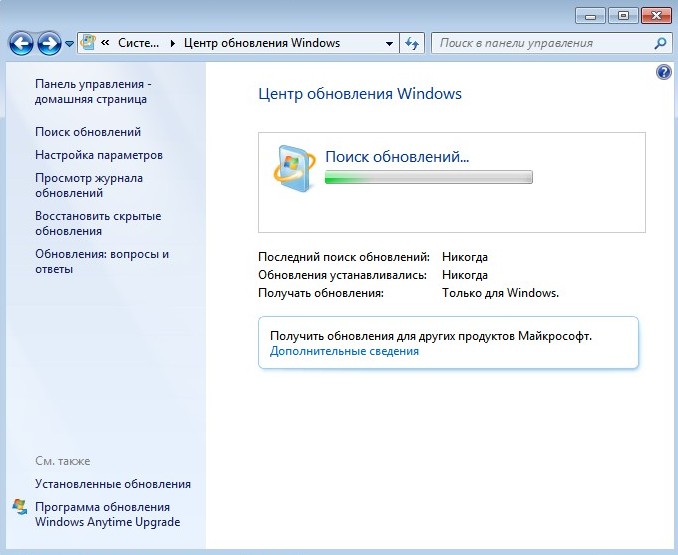
Открываем «Панель управления» и переходим в «Центр обновления Windows».
, а также ежемесячного накопительного пакета (Monthly Rollup)")
Выбираем способ установки обновлений — «Искать обновления, но решение о загрузке и установке принимается мной».
ОК.

Начинается поиск обновлений.

Установка нового программного обеспечения Центра обновления.
Жмём — «Установить сейчас».

Поиск обновлений.

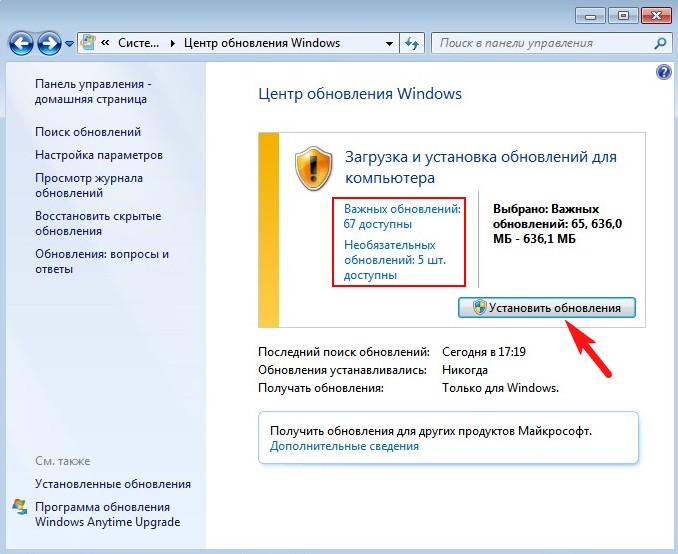
Жмём на кнопку «Важных обновлений 131 доступны».

Снимаем галочки со всех обновлений кроме: «Internet Explorer 11 for Windows 7″ и «Ежемесячный набор исправлений качества системы безопасности для систем Windows 7″.
Internet Explorer 11 нам нужен для скачивания обновления KB3020369, без которого не установится общий накопительный пакет Rollup Update. К слову говоря, Rollup Update тоже не получится скачать старым Internet Explorer 8, который по умолчанию устанавливается с Windows 7, вы получите ошибку.

Ежемесячный набор исправлений качества системы безопасности (Monthly Rollup) для систем Windows 7 за август 2017 года нам нужен для установки всех последних обновлений OS. Такой пакет выходит каждый месяц и содержит в себе все предыдущие обновления за предыдущие месяцы, включая важные исправления системы безопасности.
, а также ежемесячного накопительного пакета (Monthly Rollup)")
Установить обновления.


Для продолжения установки обновлений жмём на кнопку «Перезагрузить сейчас».


После перезагрузки заходим в Центр обновления Windows.

Жмём на кнопку «Важных обновлений 129 доступны».

Снимаем со всех обновлений галочки и жмём ОК.

Запускаем Internet Explorer 11.
ОК.

Делаем Internet Explorer 11 браузером по умолчанию.

Жмём «Выполнить».

«Сделано».

Для успешной установки общего накопительного пакета Rollup Update нам прежде нужно установить обновление KB3020369.
для 64-битной системы скачиваем здесь
https://www.microsoft.com/ru-RU/download/details.aspx?id=46817
для 32-битной системы скачиваем здесь
https://www.microsoft.com/ru-RU/download/details.aspx?id=46827
Жмём «Скачать»

«Сохранить».

Теперь скачиваем накопительный пакет обновлений Rollup Update (KB3125574) по ссылке
http://www.catalog.update.microsoft.com/Search.aspx?q=KB3125574
Я выбираю обновление KB3125574 для Windows 64-бит и жму «Загрузить»
, а также ежемесячного накопительного пакета (Monthly Rollup)")

«Сохранить».

Обновление KB3020369 и накопительный пакет Rollup Update скачиваются в папку «Загрузки».
После этого заходим в «Центр управления сетями и общим доступом», жмём на «Изменение параметров адаптера»,

отключаем интернет, это нужно для более быстрой установки накопительных пакетов.

Заходим в папку «Загрузки» и первым делом запускаем установку KB3020369.

Да.

Выполняется установка.

Закрыть.

Перезагружаем компьютер.

После перезагрузки заходим в папку «Загрузки» и запускаем установку общего накопительного пакета Rollup Update.

Да.

Выполняется установка.

Перезагрузить сейчас.

Происходит перезагрузка и установка пакета.

Общий накопительный пакет Rollup Update установлен.
Заходим в «Центр управления сетями и общим доступом», жмём на «Изменение параметров адаптера», включаем интернет.
Заходим в Центр обновлений Windows и запускаем поиск обновлений. Заодно можете просмотреть установленные нами обновления.

Видим все установленные обновления.

Найдено ещё 26 важных обновлений.
Установить обновления.

Принимаем лицензионное соглашение и жмём «Готово».

Происходит загрузка и установка обновлений.


Перезагрузить сейчас.

Происходит перезагрузка и установка обновлений в три этапа.

Заходим в Центр обновлений Windows и запускаем установку последнего обновления.


Все обновления установлены.

Статьи на эту тему:
- Как на Windows 7 установить все обновления при полном отсутствии интернета
- Накопительный пакет обновлений для Windows 7 — Rollup Update. Решено!
Метки к статье: Обновления Windows Windows 7