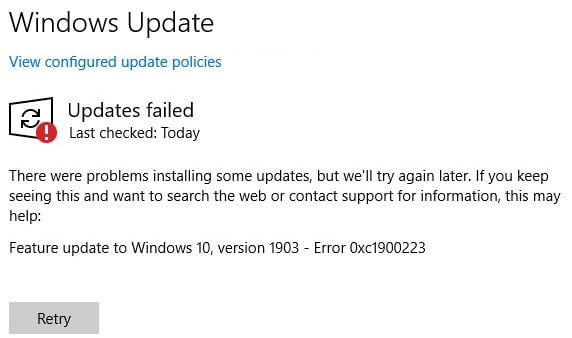
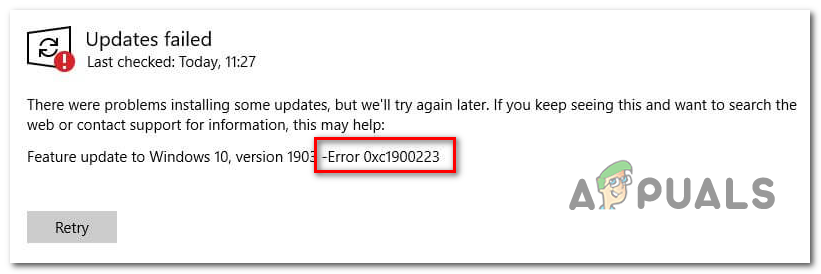
Некоторые пользователи Windows 10 сталкиваются с ошибкой 0xc1900223, когда пытаются обновить операционную систему обычным способом, т.е. через Центр обновления. В большинстве задокументированных случаев подобная ошибка возникает в процессе установки апдейта 1903, причем зачастую на 97%. Сегодня мы расскажем вам, как можно избавиться от ошибки 0xc1900223 меньше чем за 10 минут!
Решение ошибки 0xc1900223
Метод №1 Принудительное обновление ОС через папку $getcurrent
Всякий раз, когда вы пытаетесь установить ранее отложенное обновление, Windows 10 автоматически создает папки $GetCurrent и $SysReset на системном разделе. В этих папках находятся логи всех последних процессов установки апдейтов для ОС, а иногда — и установочные файлы для этих апдейтов. Вот что вам нужно сделать следующее:
- откройте Проводник системы;
- перейдите в C:/$getcurrent;
Заметка: вам нужно включить показ скрытых файлов в настройках того же Проводника (Вид → Скрытые элементы).
- найдите папку нужного вам обновления и запустите исполняемый файл внутри этой папки;
- следуйте за инструкциями на экране;
- перезагрузите ПК после завершения установки апдейта.
Метод №2 Обновление через средство создания установочного носителя
Если автоматические средства все еще отказываются нормально функционировать, то вы можете обновить Windows 10 с помощью средства создания установочного носителя. Перейдите по следующей ссылке, чтобы загрузить средство:
- https://www.microsoft.com/ru-ru/software-download/windows10
Как только средство будет у вас на компьютере, запустите его от имени администратора (!) и выбирайте опции, ответственные за обновление ОС. В таком случае вы обновите систему и никакая ошибка 0xc1900223 не появится. После работы со средством обязательно перезагрузите свой ПК, если этого не произошло автоматически.
Метод №3 Отключение блокировщика рекламы
Ошибка 0xc1900223 способна возникать при обновлении Windows 10 из-за установленных на ПК пользователя блокировщиков рекламы, по крайней мере, если верить утверждениям ряда пользователей в сети. Если на вашем компьютере установлен standalone-клиент какого-то блокировщика, то мы рекомендуем временно отключить его и посмотреть, исчезнет ли ошибка.
Метод №4 Удаление кэша DNS
По всей видимости, кэш DNS может вызывать всяческие неполадки при загрузке апдейтов для системы. Чтобы это исправить, достаточно удалить этот кэш, выполнив несколько простых команд в командной строке. Вот что вам нужно сделать:
- нажмите Win+R;
- впишите cmd и нажмите C trl+Shift+Enter;
- выполните следующий ряд команд:
- ipconfig /flushdns
- ipconfig /registerdns
- ipconfig /release
- ipconfig /renew
- после выполнения всех команд перезагрузите ПК.
Метод №5 Установка обновления через каталог Майкрософт
Если никакие из вышеуказанных методов не сработали для вас, то всегда можно прибегнуть к ручной установке нужного обновления. Рассмотрим пример на крупном апдейте 1903 для Windows 10. Чтобы начать процесс ручной установки, для начала вам нужно перейти по следующей ссылке:
- https://www.catalog.update.microsoft.com/Search.aspx?q=4522355
Далее скачайте апдейт 1903 подходящей версии. Запустите загруженный файл и следуйте инструкциям на своем экране. По окончанию установки перезагрузите компьютер. Все, обновление установлено и никакой ошибки 0xc1900223 в этом случае не появилось. По такому же принципу устанавливаются и другие обновления.
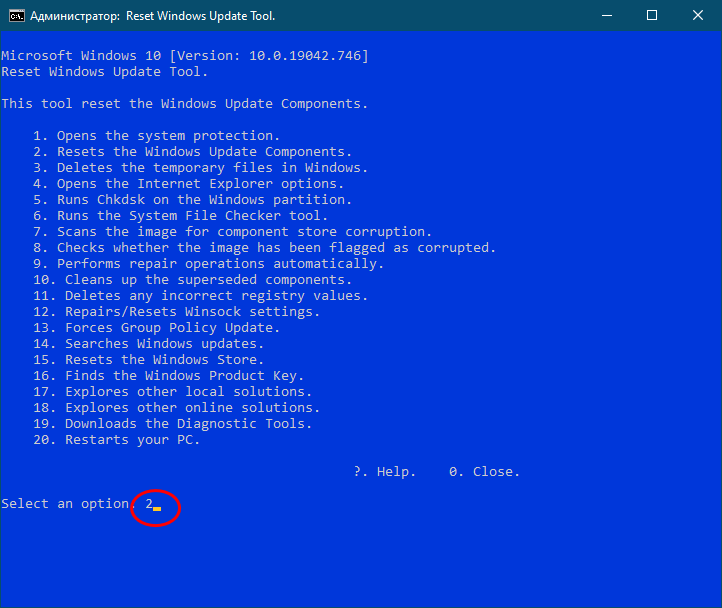
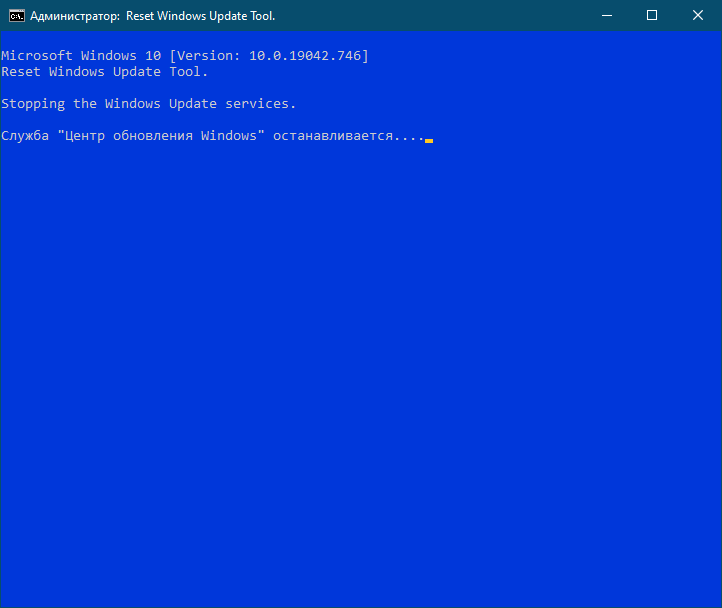
Метод №6 Сброс всех компонентов Центра обновления
Не хотите вручную обновлять Windows? Тогда давайте попытаемся с вами реанимировать Центр обновления. Предлагаем вам сбросить каждый компонент Центра обновления. Выполняется данная процедура следующим образом:
- нажмите Win+R;
- впишите в пустую строку cmd и нажмите Ctrl+Shift+Enter;
- выполните в командной строке нижеуказанный ряд команд:
- net stop wuauserv
- net stop cryptSvc
- net stop bits
- net stop msiserver
- ren C:\Windows\SoftwareDistribution SoftwareDistribution.old
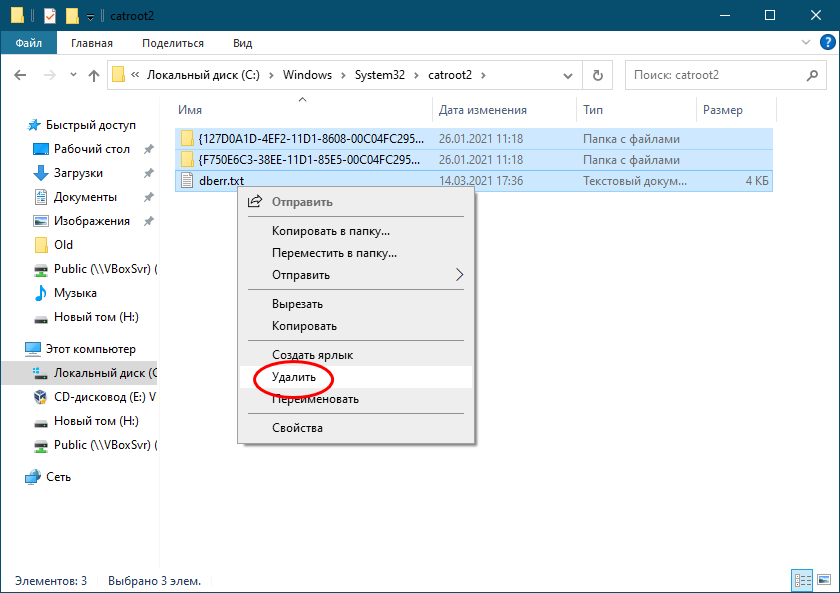
- ren C:\Windows\System32\catroot2 Catroot2.old
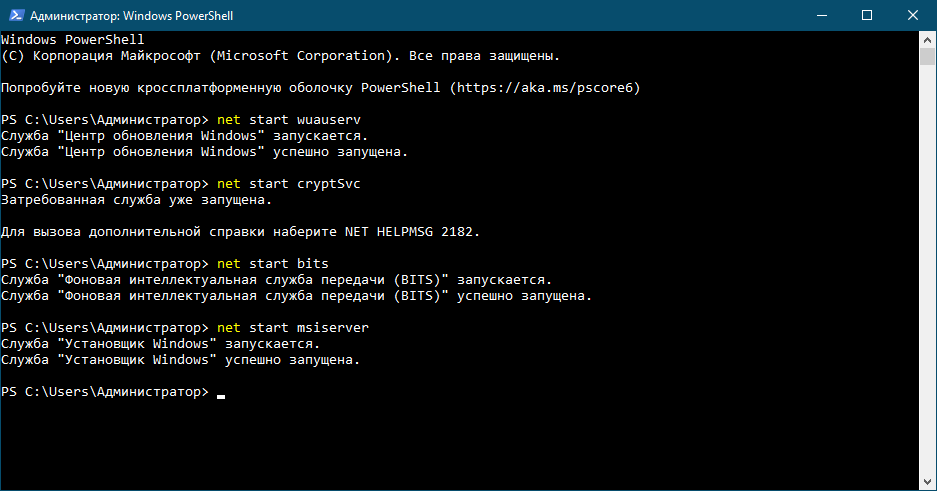
- net start wuauserv
- net start cryptSvc
- net start bits
- net start msiserver
- перезагрузите ПК.
Как только войдете в систему, запустите процесс обновления Windows. Если какой-то из компонентов Центра был действительно поврежден, то описанные выше действия должны исправить ситуацию — ошибка 0xc1900223 исчезнет.
Существует два основных способа обновления Windows 10 до новой сборки — в полуавтоматическом режиме через Центр обновлений и в режиме ручном, используя скачанный установочный ISO-образ свежей версии операционной системы. Первый способ проще и удобнее, с другой стороны, при его использовании чаще приходится сталкиваться с разного рода ошибками, например, с ошибкой с кодом 0xc1900223, возникающей после загрузки пакетов обновления на компьютер, чаще всего в тот момент, когда процедура апдейта уже подходит к концу. Появление этой ошибки было отмечено пользователями при попытке обновления до сборки 2004 и выше, но не исключено, что столкнуться с ней вам придётся и в более новых редакциях системы.
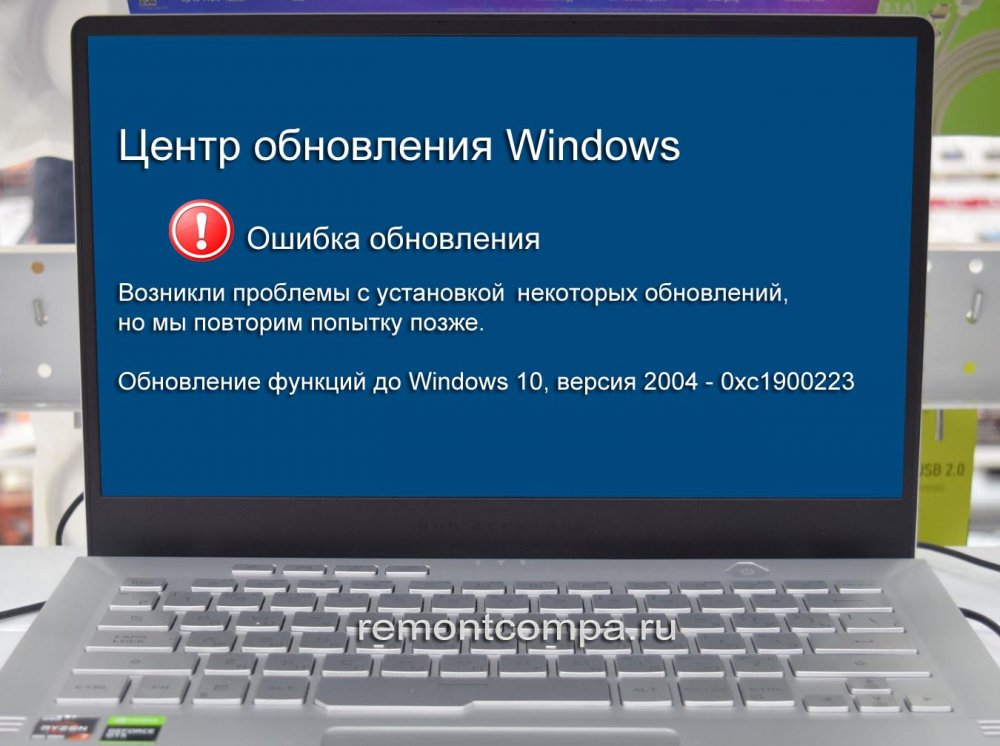
Так, схожие следствия имеет ошибка с кодом 0xc1900404, также препятствующая завершению процедуры установки обновлений, но при этом встречающаяся в Windows 10 2004. Причиной обеих ошибок чаще всего становится повреждение установочных файлов, вызванное сбоями в работе самого Центра обновления, нестабильным интернет-соединением, реже к ошибкам приводит некорректная конфигурация компьютера. Так или иначе, ошибка 0xc1900223 не является фатальной, её, как и другие подобные ошибки Центра обновлений, можно исправить достаточно простыми методами.
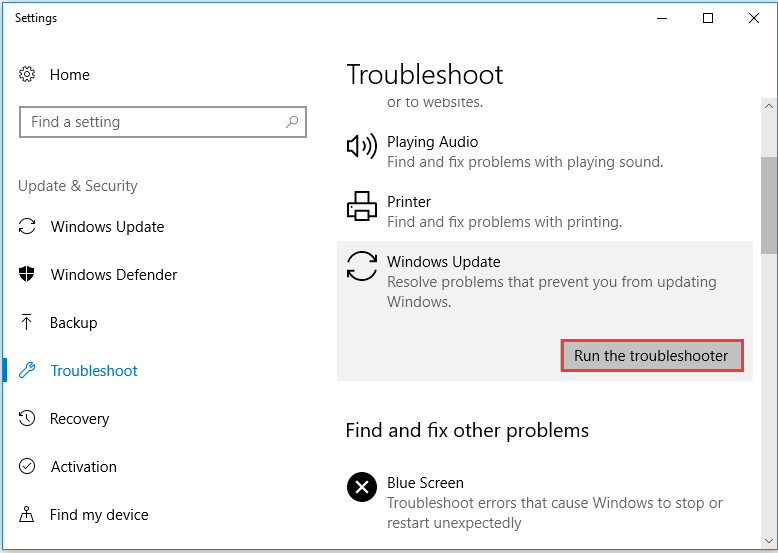
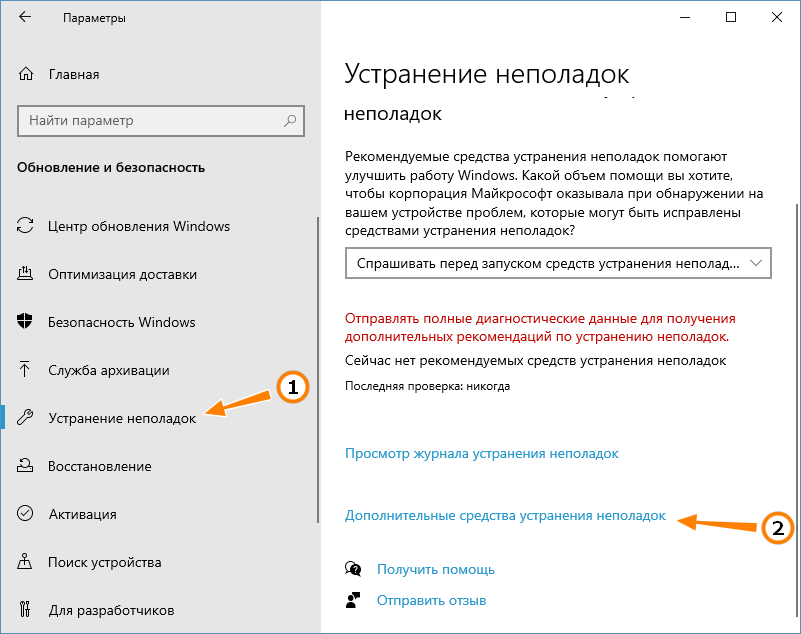
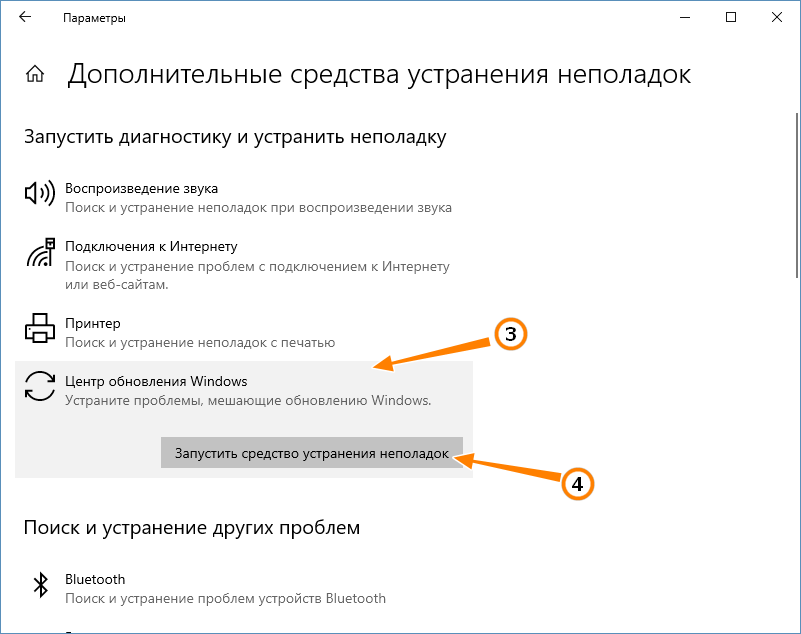
Первое, что следует предпринять в такой ситуации — пустить в ход встроенный инструмент устранения неполадок. Напоминаем, что запустить его можно из раздела «Обновление и безопасность» приложения Параметры. Выбираем Устранение неполадок → Дополнительные средства устранения неполадок → Центр обновления Windows. Если ошибки будут найдены, программа сообщит об этом и предпримет необходимые действия для решения проблемы.
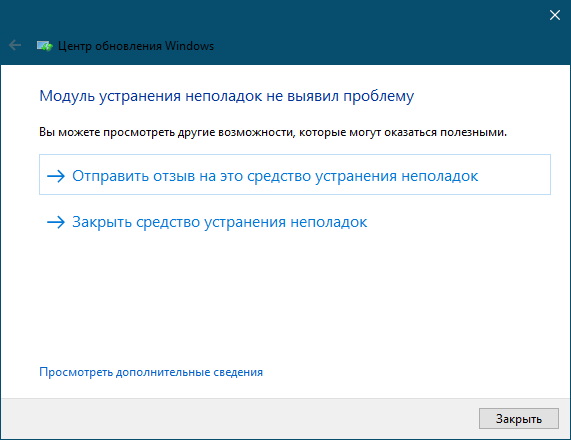
Если средство устранения неполадок не выявило проблем, но вы всё равно считаете, что Центр обновления работает некорректно, сбросьте его настройки к дефолтным. Для этих целей можно использовать утилиту WUReset или скрипт ResetWUEng, скачав их с сайта wureset.com/downloads.html.
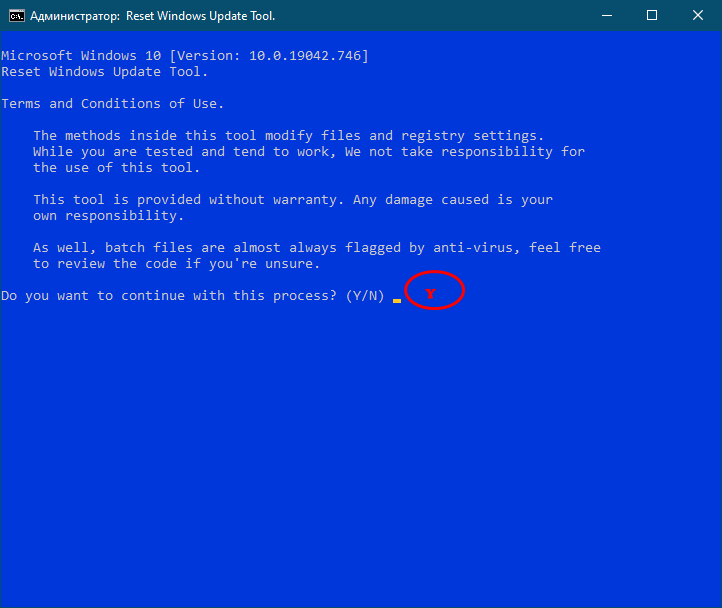
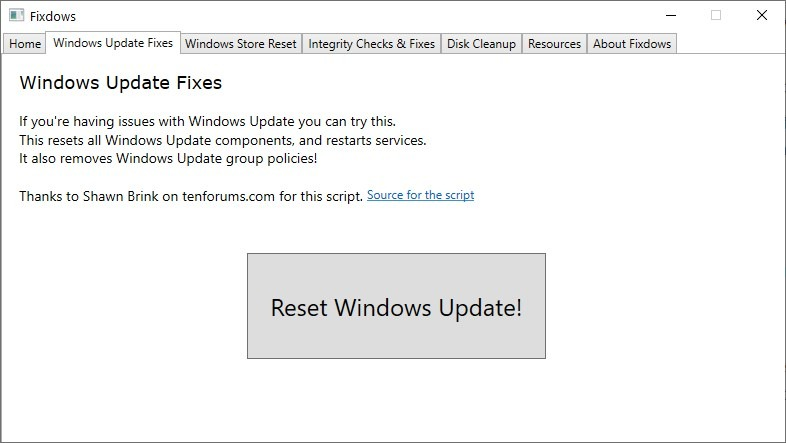
Есть ещё такой инструмент как Fixdows, упрощающий процедуру сброса Центра обновлений до максимума, нажатием одноименной кнопки, смотрите приложенный скриншот.
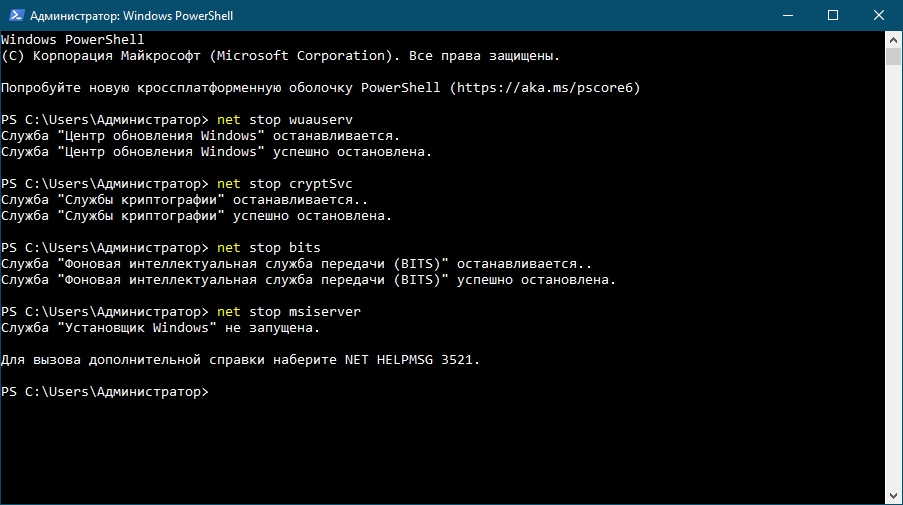
Если этого оказалось недостаточно, удалите все загруженные Центром обновления файлы апдейта вручную. Для этого нужно очистить содержимое каталогов кэша %windir%\SoftwareDistribution и %windir%\System32\catroot2, предварительно остановив связанные службы следующими командами в запущенной от имени администратора консоли CMD или PowerShell:
1. net stop wuauserv
2. net stop cryptSvc
3. net stop bits
4. net stop msiserver
Затем полностью очищаем содержимое каталога SoftwareDistribution и catroot2, после чего запускаем приостановленные службы теми же командами, заменив в них ключ «stop» на «start». В рамках очистки временных файлов рекомендуется удалить также и скрытую папку C:\$WINDOWS.~BT, если таковая имеется.

В качестве дополнительной меры рекомендуется очистить кэш DNS, сбросить сетевые настройки. Если ошибка 0xc1900223 была связана с проблемами сетевой конфигурации, эти простые действия позволят её устранить. Запустите от имени администратора командную строку или PowerShell и выполните в ней последовательно эти команды:
1. ipconfig /flushdns
2. netsh winsock reset
3. netsh winsock reset proxy
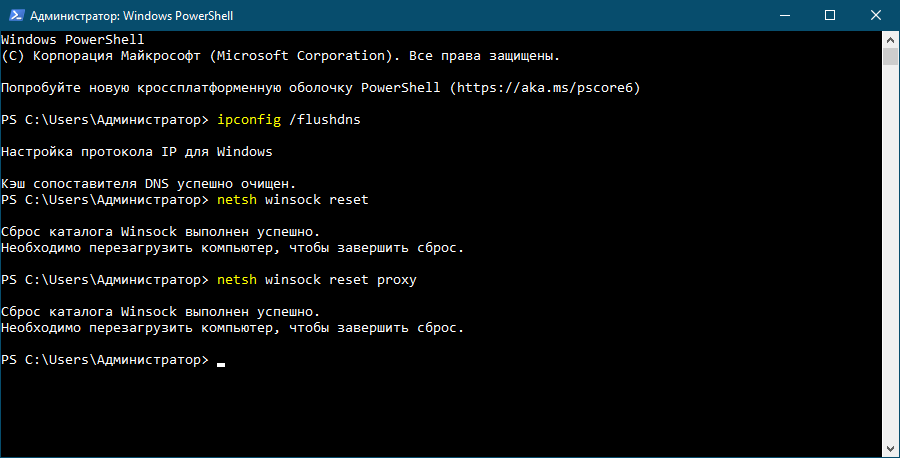
По завершении процедуры сброса перезагрузите компьютер.
Не используете сторонние программы, изменяющие конфигурацию сетевого подключение на глобальном уровне. Отключите VPN, если на компьютере у вас установлен такой инструмент как Pi-Hole для Windows, временно остановите его службу командами pihole и pihole disable, выполненными в командной строке.
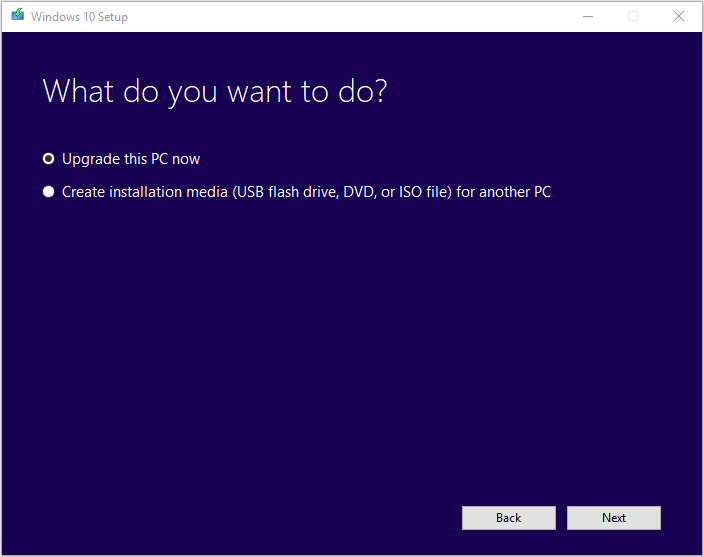
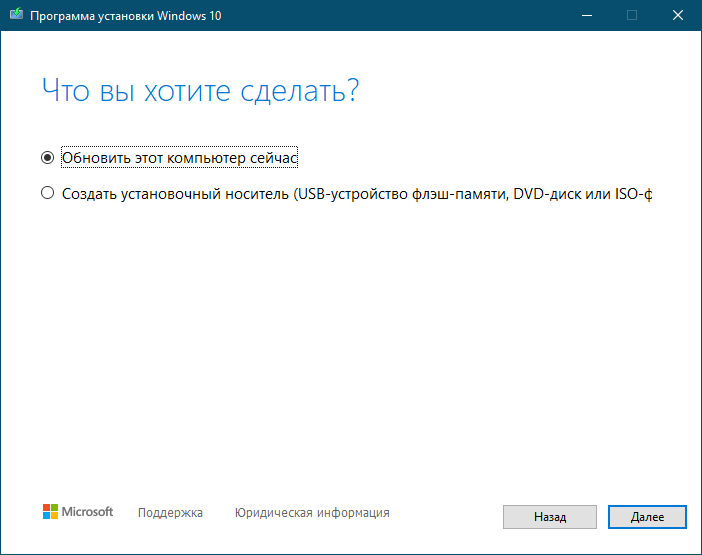
Как уже было сказано, обновить Windows 10 можно не только через Центр обновления, но и как-то иначе, например, с помощью официального инструмента Media Creation Tool, созданного Microsoft. Эта программа автоматически проверяет компьютер на совместимость с актуальной версией Windows, после чего загружает с сервера Microsoft входящие в состав дистрибутива установочные файлы и запускает процедуру обновления системы. Подробно останавливаться на данном моменте мы не будем, так как эта тема уже неоднократно раскрывалась на страницах нашего сайта.
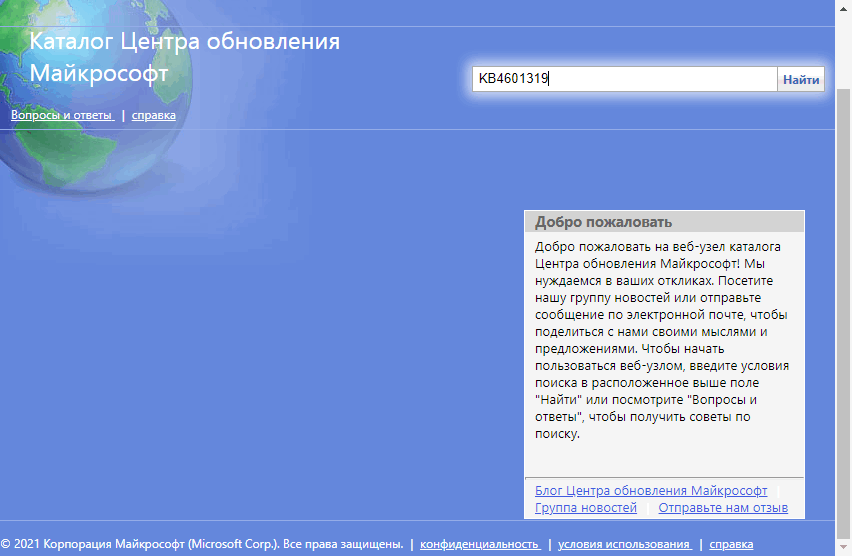
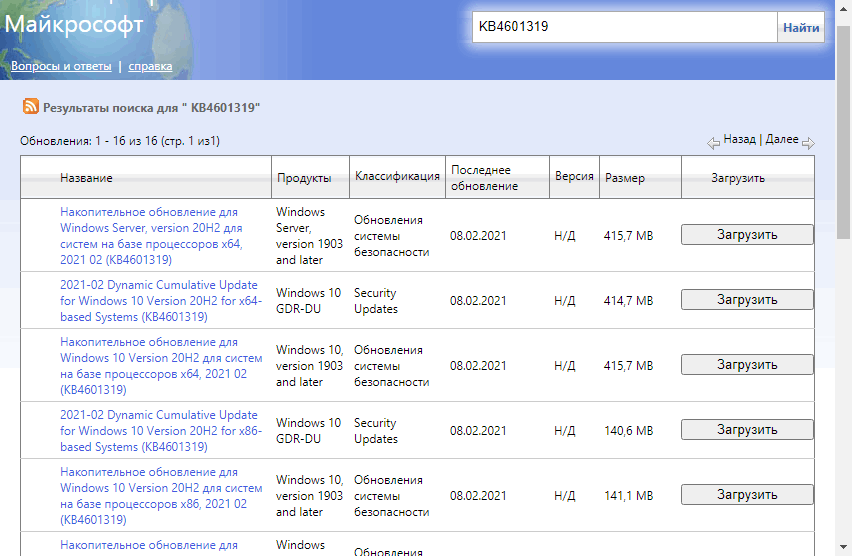
Если вы выяснили, что ошибка вызывается при попытке установки конкретного обновления, попробуйте установить его в автономном режиме, скачав соответствующий пакет с каталога Центра обновлений Microsoft. Предположим, нам нужно скачать и установить пакет KB4601319. Переходим на страницу Центра обновления Microsoft, вставляем в поисковое поле номер пакета, выполняем поиск по базе, скачиваем файл MSU или CAB. Пакет MSU устанавливаем как обычную программу, установку пакета CAB производим командой dism.exe /online /add-package /packagepath:полный-путь-к-файлу-cab.

Ну и не забываем, то упомянутая ошибка может быть вызвана повреждением системных файлов, обеспечивающих работу Центра обновлений. Выполняем в запущенной от имени администратора командной строке sfc /scannow, а если команда вернёт ошибку, то dism.exe /online /cleanup-image /restorehealth, восстанавливающую само хранилище компонентов.
Some Windows 10 users are encountering the error 0xc1900223 whenever they try to install a Windows Update conventionally. In most documented cases, the problem occurs when the user attempts to install the 1903 update, and typically, the error appears when the update reaches 97%.
In case you’re only encountering the issue with the 1903 update, you should attempt to install the update again via the $GetCurrent folder. If that doesn’t work, another convenable method that might allow you to circumvent the issue is to use the Upgrade this PC Now feature of the Media Creation Tool. Another way to circumvent the built-in WU component is to install the update manually via the Microsoft Update Catalog.
However, this issue can also be caused by a network-wide adblocker like Pi-Hole. If you’re using one, you can either disable it temporarily (while installing the update) or uninstalling the utility altogether.
In some cases, the issue can also occur due to some kind of glitch or system file corruption that ends up affecting the Windows Update component. In this case, you can try to refresh every Windows Update component or run a couple of utilities capable of fixing system file corruption (SFC, DISM or Clean Install).
Method 1: Forcing the update via $getcurrent folder
Whenever you try to install a pending Windows update, Windows 10 will automatically create a $GetCurrent and $SysReset folders in your C:\ drive. This folder will contain log files about the latest Windows Update process, but might also contain installation files from that update.
In case you’re dealing with a failed windows update (which is the case if you’re encountering the error 0xc1900223) you might be able to force install the update by accessing the media subfolder of the $getcurrent folder and re-doing the installation that way.
However, keep in mind that the $getcurrent folder is hidden by default. So, you’re either going to need to access directly via the address bar or by enabling Hidden folders from File Explorer.
Here’s a quick step by step guide on forcing the update via the c folder:
- Open File Explorer, paste the following command inside the navigation bar at the top and press Enter:
C:/$getcurrent
Note: Keep in mind that you might need to change C to the letter corresponding to your current OS drive.
Note 2: Additionally, you can access this location manually by enabling hidden items first (In File Explorer, go to View and check the box associated with Hidden Items.
View Hidden Items option is checked - After you do this, access the media folder from the list of subfolders and double-click on the Start executable.
- Once you’re inside the update installation screen, follow the on-screen prompts to install the update via the dedicated executable.
- After the update installs successfully, restart your computer and see if the issue is resolved at the next system startup.

In case the $getcurrent folder is not visible, it’s very likely that the WU component wasn’t able to update the files necessary for the installation. If this is applicable, move down to the next potential fix below.
Method 2: Updating via Media Creation Tool
If the automated WU function is not able to update to version 1903 on its own, you might be able to force the installation by using the Media Creation tool. On top of allowing you to clean install Windows 10, this tool also includes an Upgrade this PC Now feature that will convenable allow you to fix the 0xc1900223.
Several affected users have confirmed that this operation allowed them to bring their Windows 10 build up to date.
Here’s a quick guide on updating to Windows 10 version 1903 via the Media Creation Tool:
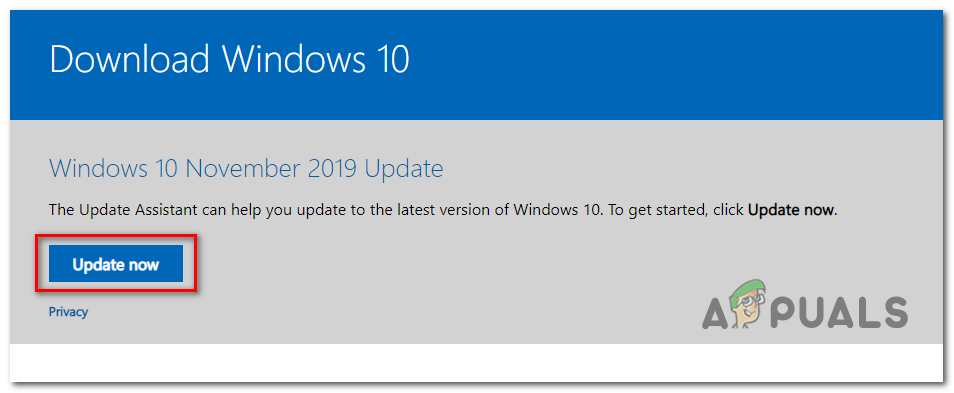
- visit this link (here) and click on the Update Now button in order to download the Windows 10 upgrade assistant.

Downloading the updating executable - After the executable is downloaded successfully, double-click on it and click Yes at the UAC (User Account Control) to grant administrative privileges.
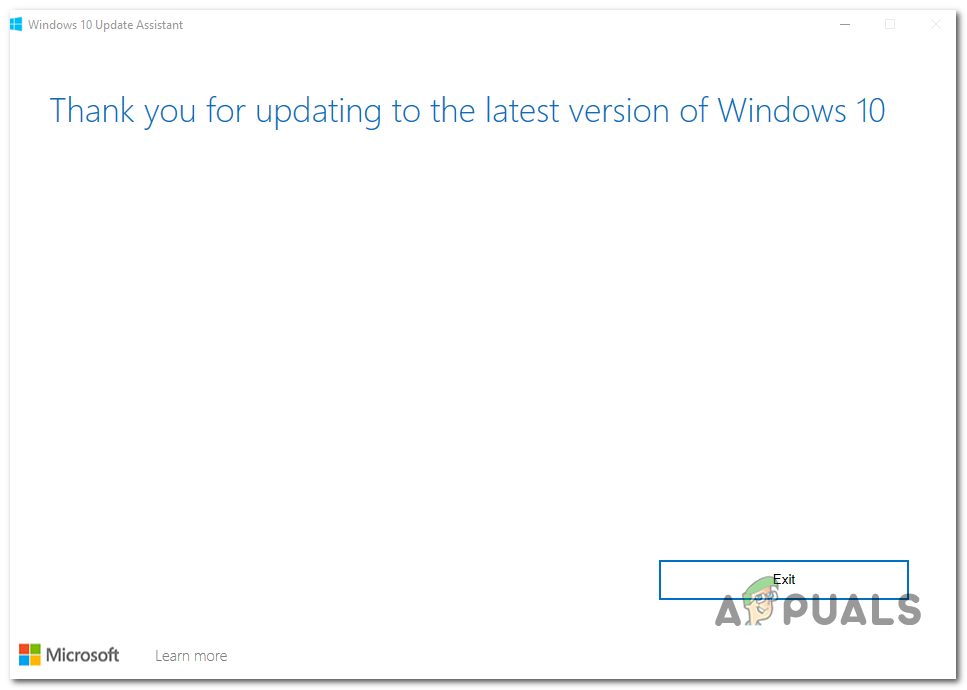
- Next, follow the on-screen prompts to complete the installation.
- Once the operation is complete, restart your computer and see if the issue is resolved at the next computer startup.

Updating to the latest version using Windows 1 Update Assistant - Once your computer boots back up, see if the issue is now resolved.
In case the Windows update installation attempt fails with the same 0xc1900223, move down to the next potential fix below.
Method 3: Disabling Pi-Hole (or a different network-wide adblocker)
As it turns out, the 0xc1900223 error code when installing a Windows 10 update can also be triggered by Pi-Hole or a similar network-wide adblocker. According to other affected users, this issue can be caused by a DNS blocklist that might end up stopping the update from completing.
Users that found themselves in a similar situation have confirmed that they managed to install the update without the same error by disabling or uninstalling Pi-Hole while the updating is taking place.
Disabling Pi-Hole Temporarily
- Press Windows key + R to open up a Run dialog box. Next, type ‘cmd’ and press Ctrl + Shift + Enter to open up an elevated CMD prompt with admin access. When you’re prompted by the UAC (User Account Control), click Yes to grant administrative privileges.
Running the Command Prompt - Once you’re inside the elevated CMD prompt, type the following command to invoke the Pi-Hole utility:
pihole
- Once Pi-Hole has been invoked, type the following command and press Enter to disable it:
pihole disable
- Now that the Pi-Hole adblocker utility is disabled, attempt to install the update that was failing again and see if you can install it without getting the 0xc1900223.
- If the update is installed successfully, run the following command in the same elevated terminal in order to enable Pi-Hole again:
pihole disable
Uninstalling Pi-Hole
- Open up a Run dialog box by pressing Windows key + R. Next, type ‘cmd’ in the text box and press Ctrl + Shift + Enter to open up an elevated CMD prompt. At the UAC (User Account Control) prompt, click Yes to grant administrative privileges.
Type “cmd” into the Run dialog - Inside the elevated CMD prompt, type the following commands and press Enter in order to commence the uninstallation of Pi-Hole:
pihole uninstall
- Once the command is successfully processed, restart your computer.
- At the next update, attempt to install the update that was previously failing with the 0xc1900223 error and see if the operation is complete.
In case this method wasn’t applicable or it didn’t resolve the issue, move down to the next potential fix below.
Method 4: Flushing the DNS cache
As it turns out, this particular issue can also occur due to a network inconsistency that can be resolved by flushing your computer’s DNS cache. The easiest way to do this is via an elevated CMD prompt.
After doing this and restarting their computer, some affected users have confirmed that they were finally able to complete the Windows Update installation without encountering the 0xc1900223 error.
Here’s a quick guide with the steps you need to take in order to flush your DNS cache from an elevated Command Prompt window:
- Open up a Run dialog box by pressing Windows key + R on your Keyboard. Then, inside the text box, type ‘cmd’ and press Ctrl + Shift + Enter to open up an elevated CMD window.
Running Command Prompt Note: When you’re prompted by the UAC (User Account Control), click Yes to grant administrative privileges.
- Once you’re inside the elevated CMD prompt, type the following commands in order and press Enter after each command:
ipconfig /flushdns
ipconfig /registerdns
ipconfig /release
ipconfig /renew
- After each command is processed successfully, restart your computer and attempt to install the update that was previously failing at the next computer startup.
If this method didn’t allow you to fix the 0xc1900223 error, move down to the next potential fix below.
Method 5: Installing the update via the Microsoft Update Catalog
If none of the methods above have allowed you to fix the issue so far, you might be able to complete the installation of 1903 by doing it manually via the Microsoft Update Catalog. This procedure will install the update directly (without involving the local WU component). This means that every corrupted dependency that might cause this issue will circumvent.
Here’s a quick guide on installing the 1903 update manually via the Microsoft Update Catalog:
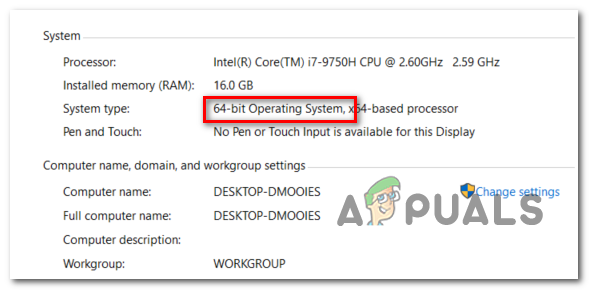
- First things first, you need to know your OS architecture (if it’s 32-bit or 64-bit). If you don’t know it, open File Explorer, right-click on This PC and choose Properties from the newly appeared context menu.
Opening the System Properties screen - Once you’re inside the System Properties screen, take a look at the System Type category. If it says 64-bit, you will need to download the 64-bit update and if it says 32-bit, you need the 32-bit version.

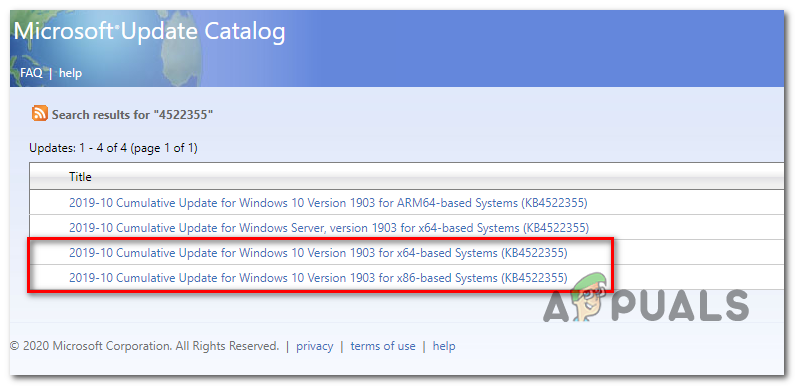
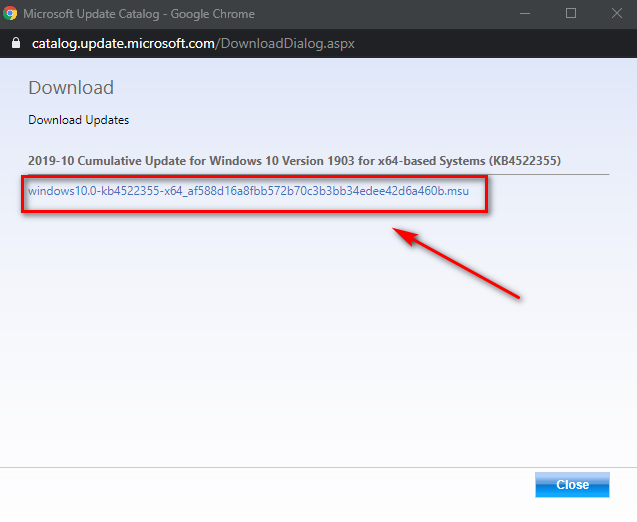
Verifying your OS architecture - Once you are certain of your OS architecture, visit this link (here) and use the search function in the top-right corner of the screen to search for ‘4522355‘ and press Enter.
- After the result page is generated, look for the correct version corresponding to your Windows 10 version (x64-based or x86-based) and click on the Download button associated with the correct Windows Update.

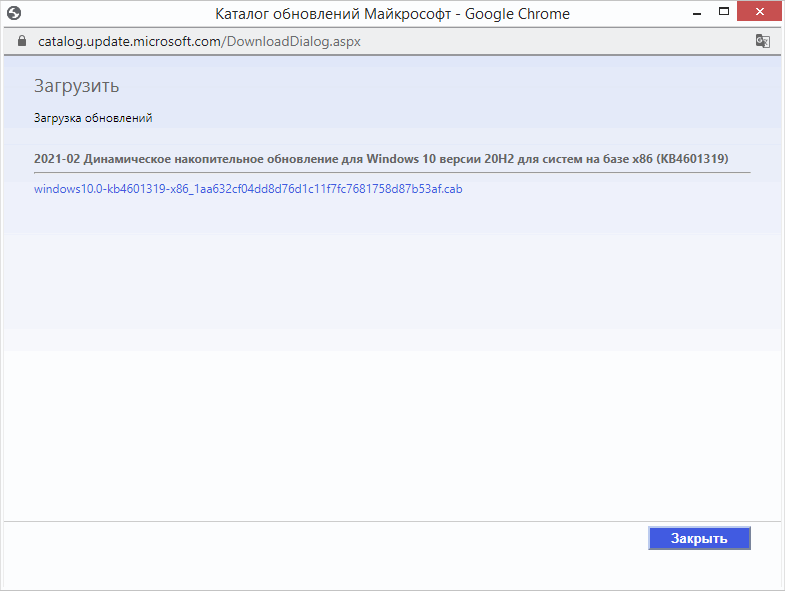
Downloading the correct Windows update manually - On the confirmation page, click on the link once again to initiate the download.

Downloading the correct Windows update - Wait patiently until the download is complete, then open the .msu installation package and follow the on-screen prompts to complete the installation.
- After the installation is complete, restart your computer to allow the remaining files to install.
In case the same issue is still occurring, or you can’t find the update that is failing conventionally using Microsoft Update Catalog, move down to the next potential fix below.
Method 6: Refresh every Windows Update component
If none of the methods so far have allowed you to resolve this issue, it’s very likely that you’re encountering this particular issue due to a Windows Update glitch that ends up inhibiting WU’s ability to install new updates. This is apparent if multiple updates are failing with this same error code (0xc1900223 error).
Several Windows users that encountered the same issue have confirmed that the issue was resolved and the 1903 build installed successfully after they followed a series of steps capable of resetting every component associated with WU (Windows Update).
Here’s a quick step-by-step guide on resetting every involved Windows Update component manually from an elevated CMD prompt:
- Open up a Run dialog box by pressing Windows key + R. Next, inside the text box, type ‘cmd’ and press Ctrl + Shift + Enter to open up an elevated Command Prompt window.
Running the Command Prompt Note: When you’re prompted by the UAC (User Account Control), click Yes to grant administrative privileges.
- After you manage to open the elevated CMD prompt, type the following commands in order and press Enter after each one in order to stop every essential WU service:
net stop wuauserv
net stop cryptSvc
net stop bits
net stop msiserver
Note: These commands will automatically stop the services associated with Windows Update, MSI Installer, Cryptographic and BITS services.
- Once you manage to disable every essential service, paste the following commands (in whichever order) and press Enter after each one to rename the two folders that Windows users to store update files (SoftwareDistribution and Catroot2):
ren C:\Windows\SoftwareDistribution SoftwareDistribution.old
ren C:\Windows\System32\catroot2 Catroot2.old
Note: If you didn’t know, SoftwareDistribution and Catroot2 are two folders responsible for storing update files that are actively being used by the Windows Updating component. Since the two cannot be deleted conventionally, the only way to limit the damage of a corrupted file is to force your OS to create new healthy copies that will take their place.
- Once you manage to delete the two folders, type these final commands and press Enter after each command to restart the same services (the same ones that we disabled at step 2):
net start wuauserv
net start cryptSvc
net start bits
net start msiserver
- After each service is restarted, attempt to install the same update that was previously filing again and see if it installs successfully now (without the 0xc1900223 error).
In case the same error code is still preventing you from installing the update, follow the final method below.
Method 7: Running DISM & SFC scans
If no potential fixed worked for you, it’s very likely that you’re dealing with some type of system file corruption that has rendered your WU component inoperable. There are multiple ways to fix it, but most affected users have managed to get the issue resolved by using a couple of built-in utilities (SFC and DISM).
Both of these tools are capable of fixing system file corruption, but they operate differently – SFC uses a local cache to replace corruption with healthy equivalents while DISM relies on a subcomponent of WU to download healthy files that will replace corrupted files.
Our advice is to run both utilities in quick succession and doing a system restart in between them.
Start by performing an SFC scan, then restart and perform a DISM scan once the next startup is complete.
If you’re still having issues, consider performing an in-place-repair (or a clean install if your data is already backed up)
Table of contents
- Why Does the Windows 10 Update Error 0xc1900223 Occur?
- How to Troubleshoot the Windows Update Error 0xc1900223?
- Make sure you have a working internet connection
- Disable metered connection
- Download updates over metered connections
- Run the Windows Update troubleshooter
- Perform a full malware scan
- Disable your VPN
- Restart Windows Update services
- Reset Winsock
- Reset your hosts File
- Change your DNS resolver
- Flush your DNS and renew/release your IP address
- Reset Windows Update сomponents
- How to Troubleshoot the Windows Update Error 0xc1900223: Answered
Updating Windows 10 is crucial, not just a good habit. These updates bring new features and improve system security by updating components like virus definitions for Windows Defender and drivers. They also ensure critical elements like the .NET Framework are up to date.
As of now, many users understand the gravity of an outdated system and try as much as possible to always install the latest updates from Microsoft. Sometimes, however, they run into a problem: the Windows Update utility throws errors, stopping the update process. One such error is the Windows Update error 0xc1900223.
This is probably the one that brought you here. We will be showing you different solutions and workarounds that have helped other users, like you, get rid of it.
Why Does the Windows 10 Update Error 0xc1900223 Occur?
Microsoft’s description of the error reads:
“This indicates that there was a problem downloading and installing the selected update. Windows Update will try again later and there is nothing you need to do at this time.”
This explanation suggests that you need to drop the ball and come back later. However, that’s not always the case. Sometimes, you keep seeing the error, no matter how many breaks you give the utility. This goes to show that there are certain underlying causes that you need to fix.
These underlying issues include internet connection problems, malware, VPN, problems with Windows Update services and components, issues with your hosts file, corrupted Winsock, and problematic DNS cache, among others.
One after the other, we’ll be showing you guides on how to resolve these issues.
How to Troubleshoot the Windows Update Error 0xc1900223?
Make sure you have a working internet connection
Sometimes, the real reason for the error message is a lack of internet connection. You might think your computer’s internet connection is good, but in reality, it isn’t. So, before you start with advanced troubleshooting, check if your Internet is working. Open up your browser and try loading a webpage.
If nothing works, you should consider restarting your router. Switch off your computer, then turn off the router’s power. After some minutes, turn your devices back on and check if your connection is back. If nothing still works, then you should contact your internet service provider (ISP).
Also read: Why Is My Internet Not Working? Pro Tips for a Quick Fix
Disable metered connection
Normally, Windows 10 can use your data however it sees fit to download whatever updates are available. This is ideal for systems with unlimited data caps. However, if you use a metered connection, the operating system will cut back its data usage, only downloading critical updates automatically and allowing you to choose whether to download other updates, such as updates for Windows Store Apps, among others.
Also read: Ultimate Guide: How to Manually Check and Install Windows Updates
It’s possible that turning on the metered connection feature is causing the Windows Update error 0xc1900223. Try disabling it and check if the update will run without problems. If you don’t know how to disable the metered connection feature, follow these steps:
- Launch the Settings app by clicking on the Start button and selecting the cogwheel icon above the power icon. You can also tap the Windows and I keys together.
- After the Settings app shows up, click on the Network & Internet icon.
- Once the Network & Internet page appears, go to the left side of the window and click on Wi-Fi.
- Next, head over to the Wi-Fi tab on the right side of the window and click on the Manage known networks link.
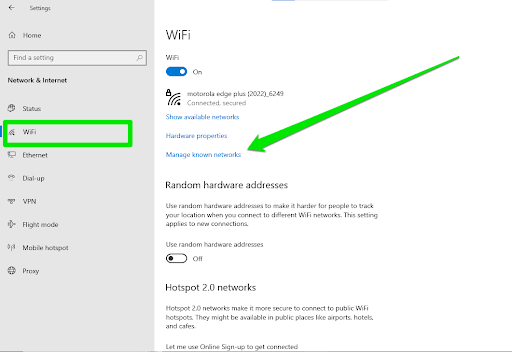
- Under Manage known networks, select your Wi-Fi network, and then click on the Properties button.
- Scroll down to the Metered connection section and turn off the switch under Set as metered connection if it’s on.
- Now, try installing the updates.
Download updates over metered connections
If your current network isn’t set as a metered connection, try turning on the switch to check if downloading the update over a metered connection will solve the problem. This seems like an odd fix, but somehow, it worked for certain users.
Run the Windows Update troubleshooter
You can use the troubleshooting tool dedicated to solving issues with the Windows Update utility. The tool will check for glitches affecting the updates, restart certain services, and resolve conflicts. The steps below will walk you through the process:
- Click on the Start button and select the cogwheel icon above the power icon. If you want to launch the Settings app faster, go to your keyboard and tap the Windows and I keys together.
- Once the Settings app opens, click on the Update & Security icon.

- Go to the left pane of the Update & Security interface and click on Troubleshoot.
- Next, navigate to the right pane and click on Windows Update under Get up and running.
- Click on the Run the troubleshooter button that slides out under Windows Update.
- The tool will now check for issues and automatically resolve them.
- Once the process is complete, reboot your system and try performing the update.
Perform a full malware scan
It’s possible that malware is the main culprit of the issue. Some malicious programs are designed to hijack your system’s network, which could go on to affect certain components of your operating system, including the Windows Update utility. It’s also possible that the malware program has tampered with some of the system files associated with Windows Update.
Running a full malware scan and removing any malicious program could resolve the problem. If you use a third-party antivirus, you can easily go to the program’s interface and run a full scan. Note that a full scan will check areas on your system that quick scans don’t. If you don’t know how to run a full scan, you can easily consult a guide on the support page of the program’s developer.
If you use the Windows Security suite as your main protection program, the following steps will show you what to do:
- Open the Settings application by right-clicking the Start button and selecting Settings from the Quick Access menu. You can also open Settings by tapping the Windows logo and I keys together.
- After the home screen of Settings shows up, go to the bottom of the page and click on Update & Security.
- When you get to the Update & Security interface, navigate to the left pane of the window and click on Windows Security.
- Now, go to the Windows Security tab to the right and click on Virus & threat protection under Protection areas.
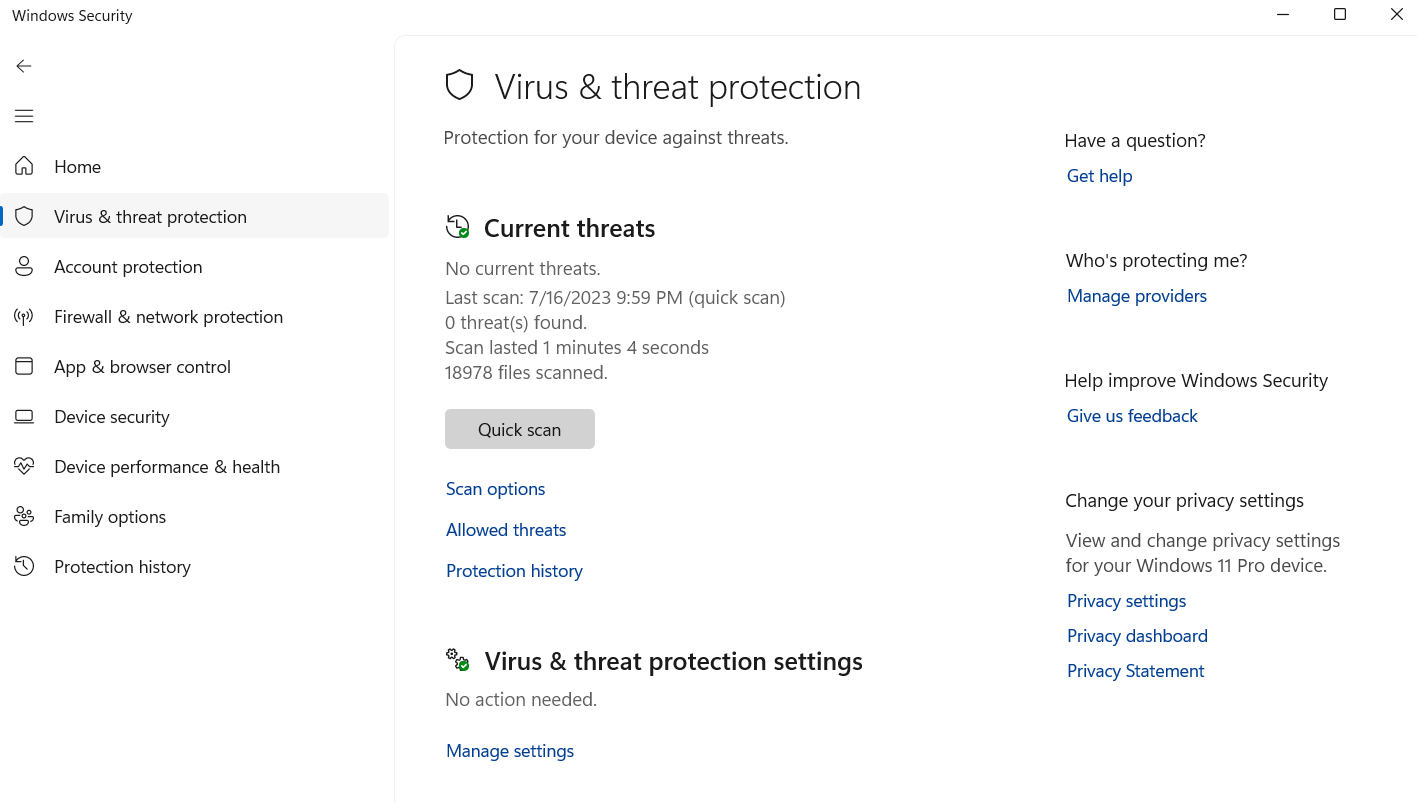
- Once you see the interface of the Virus & threat protection tool in the Windows Security app, click on Scan options.
- On the Scan options screen, go to the radio button for Full scan and select it.
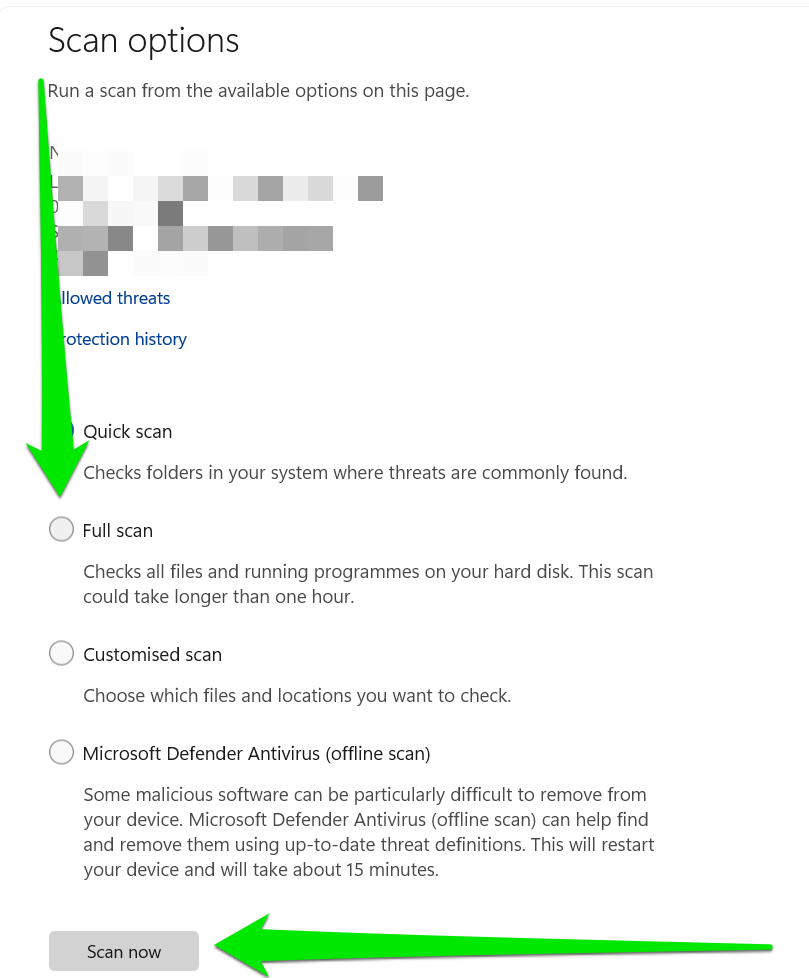
- Next, click on the Scan now button.

- The full scan will take more than one hour to complete, depending on your system’s speed.
- After the process is complete, allow the Virus & threat protection tool to kill off any malware program or file that it finds, then restart your system and check for the error.
PRO TIP
You can also boost your system’s security by installing Auslogics Anti-Malware . The tool is the perfect malware remover. It works seamlessly with Windows 10 and doesn’t cause conflicts with other antivirus programs.
Disable your VPN
If you use VPN software, it could be interfering with Windows Update’s connection to Microsoft’s servers and producing the error message as a result. Try turning off the VPN and check if that would resolve the problem. According to some users, this was the main cause of the error, and they got rid of it by disabling their VPN and removing any proxy they had set up.
Also read: Ultimate Guide: How to Fix Wi-Fi Not Working with a VPN?
Restart Windows Update services
There are certain services that are responsible for all the processes involved in downloading and installing updates on your computer. You might be getting the error 0xc1900223 because these services aren’t working properly. One way to get them to work is restarting them. If you don’t know how to do that, the following steps will help:
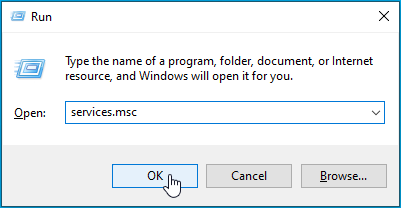
- Right-click on the Start button and select Run from the Quick Access menu. You can also punch the Windows and R keys together to open the Run dialog box.
- After Run shows up, type
services.mscinto the text field and hit the Enter key.
- After the Services application opens, locate the following services:
- Background Intelligence Transfer Service
- Cryptographic Services
- Windows Update
- Update Orchestrator Service
- Right-click each service, click on Properties, and then click on the Stop button. After that, select Automatic in the Startup type drop-down menu, and then click on OK.
- Now, try running the update.
Reset Winsock
All the input and output requests from web-based applications on your system are handled by the Winsock component. It’s a programming interface that resides in the System32 folder as a DLL file. The program is designed to relay information from an application and transport it to your networking program, such as TCP/IP.
The Winsock component can be corrupt and halt the update process you’re trying to initiate. It’s one of the known causes of the issue. Try resetting it to resolve any problems it might have and check if that gets rid of the Windows Update error. The following steps will walk you through the process:
- Launch the Run dialog box. You can do this by right-clicking the Start button and selecting Run, by searching for Run in the Start menu, or by using the
Windows + Rkeyboard combo. - After Run shows up in bottom-left corner of your screen, type “cmd,” then hit the Ctrl, Shift, and Enter keys simultaneously.
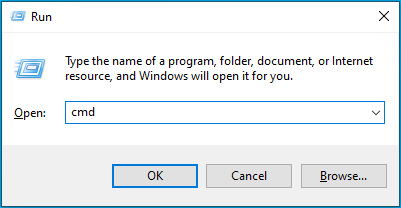
- The User Account Control dialog window will now pop up and request for permission to run Command Prompt as an administrator. Click on the Yes button once this happens.
- Once Command Prompt opens in administrator mode, type the following line into the black screen:
netsh winsock reset
- Windows will now reset the Winsock component by replacing the DLL file.
- Once the command executes successfully, restart your computer and try updating it.
Reset your hosts File
Your hosts file is a text file that contains different network configurations. It is where the alphanumeric identifiers of hostnames are mapped to their corresponding IP addresses. This particular file is a critical component of any Windows computer’s network infrastructure. It’s possible that the error message is showing up because the hosts file is corrupt or now contains wrong parameters.
To resolve the issue, try resetting the file to default. You have to be logged into an administrator account to be able to do this. The steps below will show you the process involved in applying this fix:
- Open the File Explorer window by right-clicking the Start button and selecting File Explorer.
- Click on This PC in the left pane of the window.
- Open your main drive. This is normally Local Disk (C:).
- Once the drive opens, double-click on the Windows folder.
- Open the System32 folder after you get to the Windows folder, then double-click the Drivers folder.
- Now, open the Etc folder.
- Locate the hosts file, right-click it, choose Rename from the context menu, then rename it to something else, “hosts.old” (without the quotes), for example.
- Now, open the Start menu, search for Notepad, and launch the app.
- Once Notepad opens, paste the following into the new note:
# Copyright (c) 1993-2006 Microsoft Corp.

#

# This is a sample HOSTS file used by Microsoft TCP/IP for Windows.

#

# This file contains the mappings of IP addresses to host names. Each

# entry should be kept on an individual line. The IP address should

# be placed in the first column followed by the corresponding host name.

# The IP address and the host name should be separated by at least one

# space.

#

# Additionally, comments (such as these) may be inserted on individual

# lines or following the machine name denoted by a '#' symbol.

#

# For example:

#

#      102.54.94.97     rhino.acme.com          # source server

#       38.25.63.10     x.acme.com              # x client host

# localhost name resolution is handle within DNS itself.

#       127.0.0.1       localhost

#       ::1             localhost
- Now, click on File at the top of the window and select Save as from the drop-down or press the Ctrl, Shift, and S keys simultaneously.
- Once the Save as dialog box opens, navigate to the C: > Windows > System32 > Drivers > Etc path, type “hosts” (no quotes) in the File name text box, and then click on the Save button.
- Click on Yes if the User Account Control dialog prompts for permission. If a dialog tells you that you don’t have permission to save in the folder, click on Yes to save in the Documents folder instead, then close Notepad and move the file from the Documents folder to the C: > Windows > System32 > Drivers > Etc folder.
- You can now check for the problem.
Change your DNS resolver
If you’re using a DNS address that points to ad-blocking servers like Pi-Hole, this could be the cause of your problems. Consider changing your DNS resolver to Google’s or Cloudflare’s and check if that solves the problem. The steps below will show you what to do:
- Open the search function beside the Start button by clicking on the magnifying glass icon on the taskbar or by pressing
Windows + S. - Type “control panel” (no quotes) into the text field after the search utility appears.
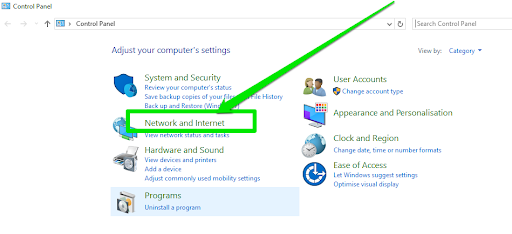
- Once the Control Panel opens, click on Network and Internet.
- On the next screen, click on Network and Sharing Center.
- Once the Network and Sharing Center page opens, go to the left pane and click on Change adapter settings.
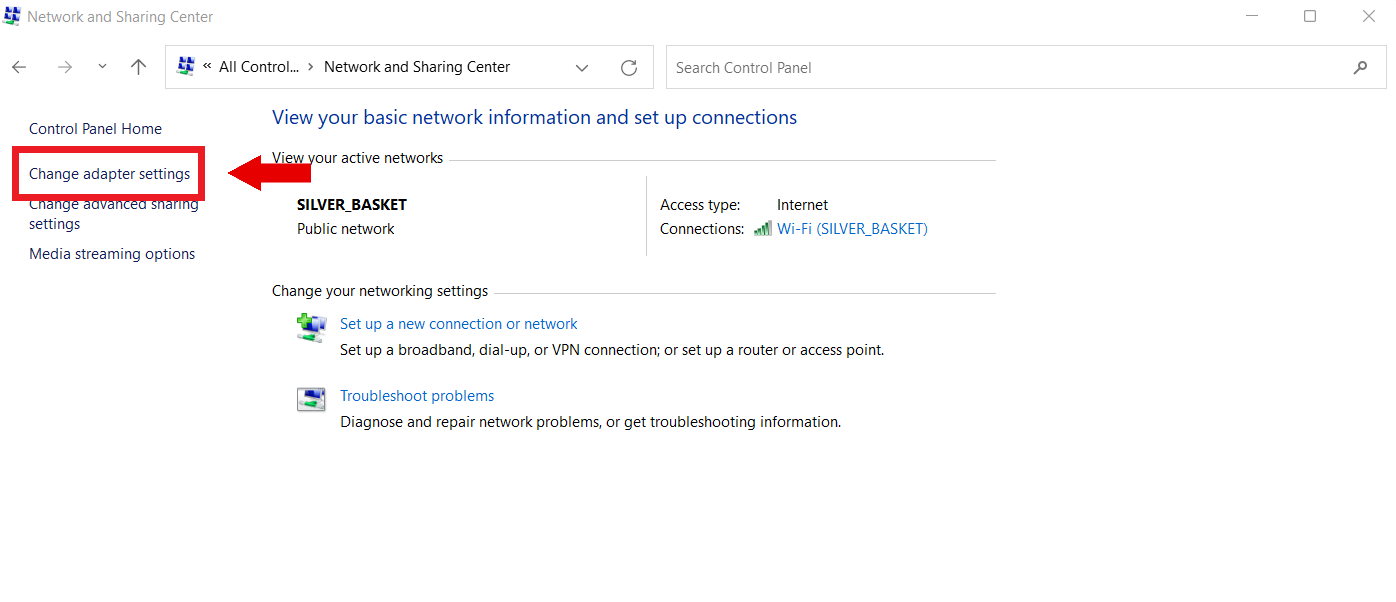
- Now, locate your current network device, right-click it, and then click on Properties.
- Go to the list under This connection uses the following items, right-click Internet Protocol Version 4 (TCP/IPv4), and then select Properties.
- Once the Properties dialog for Internet Protocol Version 4 (TCP/IPv4) shows up, click on the radio button for Use the following DNS server addresses.
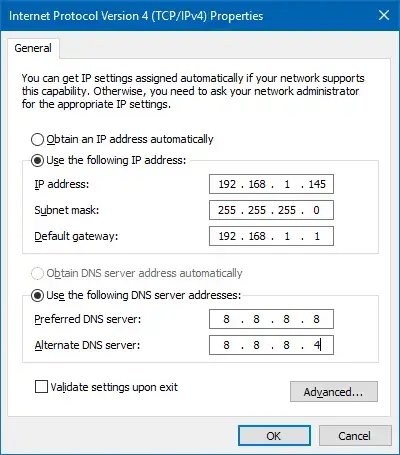
- Now, for Preferred DNS server, enter 8.8.8.8, and for Alternate DNS server, enter 8.8.4.4.
- Click on the OK button, then try performing the update.
Flush your DNS and renew/release your IP address
Your DNS cache stores information that helps point a human-friendly domain name server to its numeric IP address. The IP address is then used to request information from the relevant server. There are times when connection issues occur because the cache contains wrong parameters. This could be the reason for the Windows Update error you’re experiencing.
To resolve the problem here, you have to clear the entire cache through a process called flushing.
Another process that goes with flushing the DNS cache is releasing and renewing your IP address. Normally, your system is assigned an IP address by your router that it uses to access the Internet. If the IP address becomes problematic, you need to get a new one. To do that, you first have to release the IP, then renew it.
Follow the steps below:
- Go to the taskbar and click on the magnifying glass icon to open the search utility beside the Start button. You can also tap the Windows and S keys together to summon the utility.
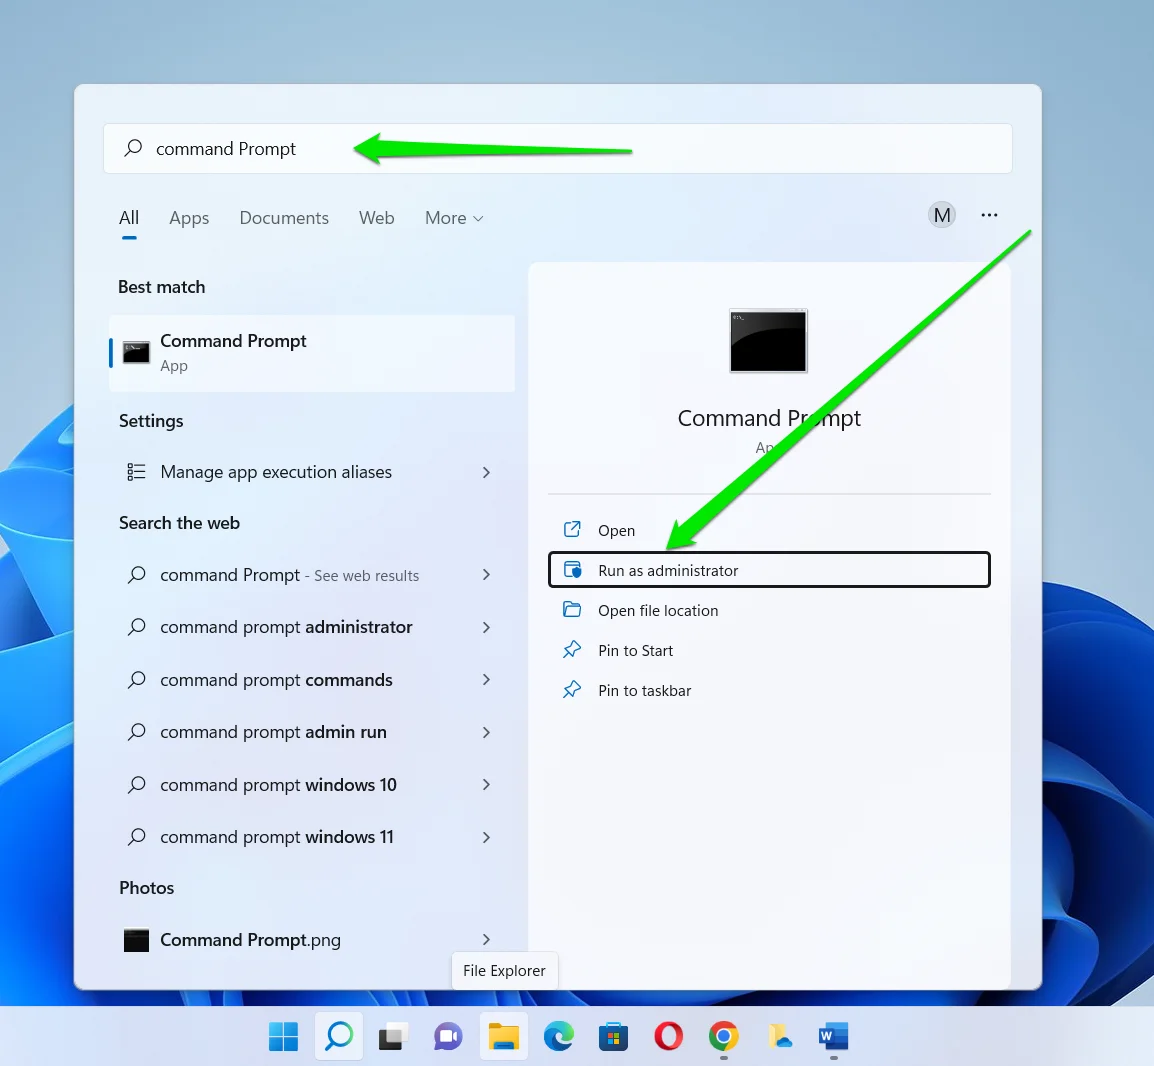
- Once the search bar opens, type “command prompt” (without the quotes) into the text box.
- After Command Prompt appears in the search results, select Run as administrator from the right-side menu.
- Click on the Yes button once the User Account Control dialog window appears.
- When you see the elevated Command Prompt window, type the following lines into the black screen and hit the Enter key after typing each line:
ipconfig /release

ipconfig /renew

ipconfig /flushdns
- Exit Command Prompt and try updating your system.
Also read: [FIXED] “Your DNS Server Might Be Unavailable” Error on Windows 10
Reset Windows Update сomponents
If nothing has worked till this point, then you should reset all the components related to Windows Update. The process might seem like quite a lot, but it can be worth it in the end. Make sure you follow all the steps in the guide below carefully.
- Launch the Run dialog box by right-clicking the Start button and selecting Run or by using the
Windows + Rkeyboard combo. - After Run shows up, type “cmd” (without the quotes), then hit the Ctrl, Shift, and Enter keys simultaneously.
- The User Account Control dialog window will now pop up and request permission. Click on the Yes button.
- Once the Command Prompt window opens in administrator mode, type the following lines into the black screen and hit the Enter key after typing each:
net stop bits

net stop wuauserv

net stop appidsvc

net stop cryptsvc
- Now that you’ve stopped the Windows Update services, go to the next line in Command Prompt and enter the line below to delete the qmgr*.dat files:
Del “%ALLUSERSPROFILE%\Application Data\Microsoft\Network\Downloader\qmgr*.dat”
- Hit the Enter key.
- Next, use the command lines below to rename the SoftwareDistribution and Catroot2 folders. Make sure you hit the Enter key after typing each line:
Ren %systemroot%\SoftwareDistribution SoftwareDistribution.bak

Ren %systemroot%\system32\catroot2 catroot2.bak
- The next step involves resetting the Background Intelligent Transfer Service and Windows Update service to their default security descriptors. Type or copy and paste the command lines below and hit the Enter key after each:
sc.exe sdset bits D:(A;;CCLCSWRPWPDTLOCRRC;;;SY)(A;;CCDCLCSWRPWPDTLOCRSDRCWDWO;;;BA)(A;;CCLCSWLOCRRC;;;AU)(A;;CCLCSWRPWPDTLOCRRC;;;PU)

sc.exe sdset wuauserv D:(A;;CCLCSWRPWPDTLOCRRC;;;SY)(A;;CCDCLCSWRPWPDTLOCRSDRCWDWO;;;BA)(A;;CCLCSWLOCRRC;;;AU)(A;;CCLCSWRPWPDTLOCRRC;;;PU)
- Type the following into Command Prompt and hit Enter to go to the System32 folder:
cd /d %windir%\system32
- You’ll now be registering all the Background Intelligent Transfer Service components. To do this, type the lines below into Command Prompt and make sure you hit the Enter key after typing each line. They’re quite many, so take your time and get it right:
regsvr32.exe atl.dll

regsvr32.exe urlmon.dll

regsvr32.exe mshtml.dll

regsvr32.exe shdocvw.dll

regsvr32.exe browseui.dll

regsvr32.exe jscript.dll

regsvr32.exe vbscript.dll

regsvr32.exe scrrun.dll

regsvr32.exe msxml.dll

regsvr32.exe msxml3.dll

regsvr32.exe msxml6.dll

regsvr32.exe actxprxy.dll

regsvr32.exe softpub.dll

regsvr32.exe wintrust.dll

regsvr32.exe dssenh.dll

regsvr32.exe rsaenh.dll

regsvr32.exe gpkcsp.dll

regsvr32.exe sccbase.dll

regsvr32.exe slbcsp.dll

regsvr32.exe cryptdlg.dll

regsvr32.exe oleaut32.dll

regsvr32.exe ole32.dll

regsvr32.exe shell32.dll

regsvr32.exe initpki.dll

regsvr32.exe wuapi.dll

regsvr32.exe wuaueng.dll

regsvr32.exe wuaueng1.dll

regsvr32.exe wucltui.dll

regsvr32.exe wups.dll

regsvr32.exe wups2.dll

regsvr32.exe wuweb.dll

regsvr32.exe qmgr.dll

regsvr32.exe qmgrprxy.dll

regsvr32.exe wucltux.dll

regsvr32.exe muweb.dll

regsvr32.exe wuwebv.dll
- The next step involves deleting some unnecessary registry entries. Before you continue, you must note that editing the registry is a sensitive undertaking, and you must follow the steps below carefully. To be on the safe side, back up your registry before applying this fix. Now, follow these steps to remove the unneeded registry keys:
- Use the Windows + R keyboard combo to launch Run.
- After Run shows up in the bottom-left corner of your screen, type “regedit” (without the quotes), then hit the Enter key.
- The User Account Control dialog window will now pop up and request permission. Click on the Yes button.
- Once the Registry Editor opens, go to the left pane and drill down to HKEY_LOCAL_MACHINE\COMPONENTS.
- Under COMPONENTS, check if the following keys are present and delete them:
-
PendingXmlIdentifier
-
NextQueueEntryIndex
-
AdvancedInstallersNeedResolving
-
- Lastly, go to administrator Command Prompt and enter the following lines one after the other to restart the services you stopped earlier:
net start bits

net start wuauserv

net start appidsvc

net start cryptsvc
- Reboot your PC and try updating your system.
Download Auslogics BoostSpeed
Your one-stop PC maintenance and optimization tool, this program will clean, speed up, repair, and tweak your system to ensure maximum speed and efficiency.
How to Troubleshoot the Windows Update Error 0xc1900223: Answered
Navigating through the maze of the Windows Update error 0xc1900223 can be daunting. But, with the right approach, it’s very manageable. Common causes for the error are internet connectivity, VPN interference, and system file corruption. Address the causes for the issue, and you will get your updates back on track in no time!
Remember: keeping your system updated is crucial for maintaining security and performance.