
Windows Update errors can be as delightful as stepping on a Lego brick, especially when you’re eager to get the latest features, security patches, or simply ensure your system is running smoothly. One of the more pesky culprits in the realm of Windows Update issues is the error code 0xc1900131. If you’ve found yourself battling this error, fear not! This guide aims to unravel the complexities surrounding this glitch and offers various remedial steps to help you move forward.

What is Error 0xc1900131?
Error 0xc1900131 typically surfaces during the Windows Update process, indicating that the system is unable to complete the requested update. There’s a whole smorgasbord of potential causes, ranging from insufficient storage space on your C drive to conflicts with your third-party antivirus software or even corrupted system files. Let’s break down the solutions you can implement to alleviate this issue.
Pre-check: Power Supply
Before diving into the technical solutions, ensure you perform a simple yet crucial check: make sure your laptop’s battery is sufficiently charged, or better yet, keep it plugged into the mains. Having enough power can prevent interruptions during the update process, which might exacerbate the issue.
Step-by-Step Solutions to Fix the 0xc1900131 Error
1. Use a Different Internet Connection
Sometimes, the issue could be tied to your internet itself. If your connection is unstable or sluggish, it may hinder the Windows Update process. Consider these steps:
- Power cycle your Wi-Fi router: Unplug your router, wait for about a minute, and plug it back in.
- Switch networks: If possible, try connecting to a different Wi-Fi network to see if the update downloads smoothly.
2. Temporarily Disable Third-Party Antivirus
Your third-party antivirus software may perceive the Windows Update process as a threat, blocking its progress. To check if this is the case:
- Temporarily disable your antivirus software and retry the update.
- If the update works this time, remember to reenable your antivirus immediately afterward—your security is paramount!
3. Run the Windows Update Troubleshooter
Windows has built-in utilities specifically designed to detect and rectify update-related issues. Here’s how to use the Windows Update Troubleshooter:
- Open Settings (
Win + I). - Navigate to System > Troubleshoot > Other troubleshooters.
- Find and run the Windows Update Troubleshooter. This tool runs automated diagnostics and may fix underlying issues affecting your updates.
4. Repair Corrupted System Files
Corrupted system image files can also hinder updates. Here’s how you can remedy this:
- Run the System File Checker (SFC):
- Open Command Prompt as an administrator (search for «cmd» in the Start menu, right-click, and select «Run as administrator»).
- Type the command:
sfc /scannowand hit Enter. This will scan your system for corrupt files and attempt to fix them. - Deploy the DISM tool: In the same Command Prompt window, type:
Code:
DISM /Online /Cleanup-Image /RestoreHealthThis command will check and repair the underlying Windows image.
5. Clear the Software Distribution Folder
Corrupt cached files in the Software Distribution folder can also create chaos for Windows Updates. Here’s how to clear it:
- Open Command Prompt as an administrator.
- Stop the Windows Update services with:
Code:
net stop wuauserv net stop cryptSvc net stop bits net stop msiserver - Navigate to the Software Distribution folder (located at
C:\Windows\SoftwareDistribution) and delete its contents. - Restart the Windows Update services:
Code:
net start wuauserv
net start cryptSvc
net start bits
net start msiserver
6. Manually Install the Update via Microsoft Update Catalog
If all else fails, you might need to manually download the update:
- Go to the Windows Update section in your settings to check the KB number of the failed update.
- Visit the Microsoft Update Catalog website.
- Search for the update using the noted KB number, download the appropriate version for your system architecture, and proceed with the installation.
In Summary: Mastering the 0xc1900131 Error
Encountering the 0xc1900131 Windows update error can be a frustrating experience, but with the steps outlined above, you should be well on your way to resolving the issue. Always remember the importance of powering your device during updates and keeping your antivirus software updated and monitored. In the ever-evolving landscape of Windows updates, proactive measures combined with quick troubleshooting can save you time and headaches.
If you have any experiences or additional tips to tackle this particular error, feel free to share your insights in the comments! Your unique perspective might help another Windows user make sense of their update woes. Happy updating!
Source: The Windows Club Fix 0xc1900131 Windows Update Error
Issue: Hello, I have been having some issues with installing the Windows version 23H2. The update downloads fine, but then it results in the installation failure with an error code 0xc1900131.
Solved Answer
Importance of Windows Updates and error 0xc1900131
The updates for Windows are essential in order to keep your OS stable, secure, and well-performing. Microsoft periodically publishes these updates to introduce new improvements, patches that fix detected vulnerabilities, and add new features.
Large updates, such as 23H2 or 24H2, simply refer to major version upgrades that also include changes at the graphical level and optimizations of the system. Each update is assigned a unique Knowledge Base number, which enables tracking of its specifics. However, not all updates proceed smoothly, and some may encounter issues like the Windows update error 0xc1900131, which prevents successful installation.
Why the 0xc1900131 error occurs
The 0xc1900131 error mostly arises during major version upgrades, when the installer fails to verify the integrity of a particular file or package. Common causes include corrupted or incomplete installation files, conflicts between the installer and the system’s configuration, or storage problems causing data misreads.
It can also occur if the file has been tampered with or altered, triggering security checks to block the installation. The 0xc1900131 error interrupts the upgrade process, leaving the system unable to complete the installation. For instance, some users have reported encountering this issue while upgrading to the 23H2 or 24H2.
Fixing the 0xc1900131 error
While there are several potential fixes for error 0xc1900131, they typically involve addressing the root causes such as clearing disk space, updating drivers, or repairing system files. Advanced methods may include resetting Windows Update components or performing an in-place upgrade.
Detailed instructions for resolving the issue will be provided below. For a convenient and automated solution, you can consider using FortectMac Washing Machine X9 repair, which can detect and fix underlying Windows issues, streamlining the update process and restoring system functionality.

Fix 1. Run Windows update troubleshooter
Windows update troubleshooter is a useful tool that can help you find potential issues related to the update process and fix them automatically. To run it, follow these steps:
- Type Troubleshoot in Windows search and press Enter.
- Select Additional troubleshooters/Other troubleshooters.
- Find Windows Update from the list.
- Click it and select Run the troubleshooter/Run.
- Restart your computer when the update process is finished.

Fix 2. Perform a Disk Cleanup
Fix it now!
Fix it now!
To repair damaged system, you will have a 24hr Free Trial and the ability to purchase the licensed version of the Fortect Mac Washing Machine X9.
Disk Cleanup is really useful when the reason for the 0xc1900131 error is the bugged cache that could be preventing the new updates from being installed on your PC. Disk Cleanup performs an excellent job at removing these files and also frees up some space.
- Type Disk Cleanup in Windows search and hit Enter.
- If your Windows is installed on drive C, pick it from the list (it should be by default) and press OK.
- Click Clean up system files.
- Select your main disk again and click OK.
- Here, select the largest portions of the data used – these typically include Temporary Internet Files, Windows Update, Temporary Files, Recycle Bin, Delivery Optimization Files, and others.
- Click OK – the process should be finished shortly.

Fix 3. Scan for malware
Malware can intercept certain system files and damage them in the process. Therefore, you should make sure that it’s not malware that’s causing problems with Windows updates. You can use Microsoft Safety Scanner or employ deep scan with Microsoft Defender:
- Type Windows Security in the Windows search bar and hit Enter.
- Select Virus & threat protection.
- Pick Scan options.
- Choose Microsoft Defender Offline scan and click Scan now.
- Your computer will immediately restart to begin a deep scan.
Fix 4. Perform Check Disk
Fix it now!
Fix it now!
To repair damaged system, you will have a 24hr Free Trial and the ability to purchase the licensed version of the Fortect Mac Washing Machine X9.
Ensure that your hard drive/solid state drive does not have any corrupted sectors with the Check Disk command.
- Type cmd in Windows search.
- Right-click on Command Prompt and select Run as administrator.
- When User Account Control shows up, click Yes.
- In the new window, type in the following command and press Enter after:
chkdsk c: /f
(Note: use chkdsk c: /f /r /x command if you are using SSD as your primary partition) - If you receive an error, type in Y, close down Command Prompt and restart your device.
- Wait until the scan is finished – you can find the results in the Event Viewer.
Fix 5. Reset Windows update components
Working Windows update components can be detrimental to a successful installation of updates.
- Open Command Prompt as administrator.
- User Account Control window will show up – click Yes when prompted.
- Stop the BITS, Windows Update, and Cryptographic services by typing the following commands, and pressing Enter after each:
- net stop bits
- net stop wuauserv
- net stop appidsvc
- net stop cryptsvc
- To rename the SoftwareDistribution and Catroot2 folders (where Windows stores update files), type the following commands:
- ren %systemroot%\SoftwareDistribution SoftwareDistribution.old
- ren %systemroot%\system32\catroot2 catroot2.old
- regsvr32.exe /s atl.dll
- regsvr32.exe /s urlmon.dll
- regsvr32.exe /s mshtml.dll
- netsh winsock reset
- netsh winsock reset proxy
- Restart the services stopped earlier by typing the following commands:
- net start bits
- net start wuauserv
- net start appidsvc
- net start cryptsvc
- Close the Command Prompt and restart your computer, then try updating Windows again.

Fix 6. Repair corrupted system files
Fix it now!
Fix it now!
To repair damaged system, you will have a 24hr Free Trial and the ability to purchase the licensed version of the Fortect Mac Washing Machine X9.
To fix system file corruption, you can always run SFC and DISM tools in the elevated Command Prompt.
- Open Command Prompt as administrator.
- In the Command Prompt window, copy and paste the following command and press Enter:
sfc /scannow - Wait for the scan to complete – this might take a while, depending on your system configuration and disk size.
- Once the SFC scan is finished, run the following set of DISM commands, pressing Enter after each one:
DISM /Online /Cleanup-Image /CheckHealth
DISM /Online /Cleanup-Image /ScanHealth
DISM /Online /Cleanup-Image /RestoreHealth - After completing the DISM commands, restart your computer.

Fix 7. Use Media Creation Tool
Media Creation Tool is a great
- Visit the official Microsoft website and download Windows 10 installation media (Windows 11 version).
- Double-click the installer and select Yes when UAC shows up.
- Agree to terms.
- Select Upgrade this PC now and select Next.
- Windows will now download all the necessary files – it might take a while.
- Agree to terms once again and click Next.
- Before installing, make sure that you are happy with your choices (otherwise, you can click Change what to keep option).
- Click Install to begin the upgrade process.

Repair your Errors automatically
ugetfix.com team is trying to do its best to help users find the best solutions for eliminating their errors. If you don’t want to struggle with manual repair techniques, please use the automatic software. All recommended products have been tested and approved by our professionals. Tools that you can use to fix your error are listed bellow:
do it now!
Download Fix
Happiness
Guarantee
do it now!
Download Fix
Happiness
Guarantee
Compatible with Microsoft Windows
Compatible with OS X
Still having problems?
If you failed to fix your error using FortectMac Washing Machine X9, reach our support team for help. Please, let us know all details that you think we should know about your problem.
Fortect will diagnose your damaged PC. It will scan all System Files that have been damaged by security threats. Mac Washing Machine X9 will diagnose your damaged computer. It will scan all System Files and Registry Keys that have been damaged by security threats. To repair damaged system, you will have a 24hr Free Trial and the ability to purchase the licensed version of the Fortect malware removal tool. To repair damaged system, you have to purchase the licensed version of Mac Washing Machine X9 malware removal tool.
Protect your online privacy with a VPN client
A VPN is crucial when it comes to user privacy. Online trackers such as cookies can not only be used by social media platforms and other websites but also your Internet Service Provider and the government. Even if you apply the most secure settings via your web browser, you can still be tracked via apps that are connected to the internet. Besides, privacy-focused browsers like Tor is are not an optimal choice due to diminished connection speeds. The best solution for your ultimate privacy is Private Internet Access – be anonymous and secure online.
Data recovery tools can prevent permanent file loss
Data recovery software is one of the options that could help you recover your files. Once you delete a file, it does not vanish into thin air – it remains on your system as long as no new data is written on top of it. Data Recovery Pro is recovery software that searchers for working copies of deleted files within your hard drive. By using the tool, you can prevent loss of valuable documents, school work, personal pictures, and other crucial files.
Ошибка обновления Windows 10 20h2
Пользователи операционных систем Microsoft могут сталкиваться с ошибками при обновлении Windows 10 до версии 20H2 (October 2020 update). Рассмотрим две, наиболее часто встречающиеся.
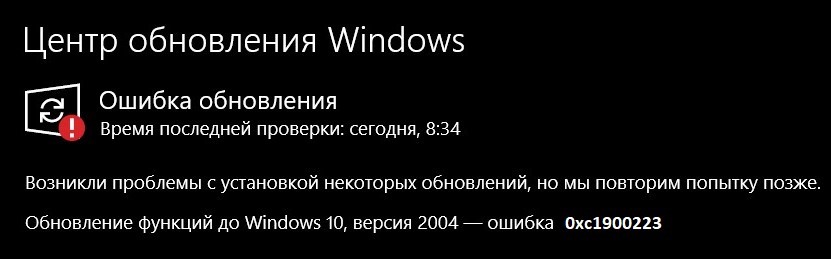
1. Ошибка 0xc1900223
0xc1900223 ошибка обновления Windows 10 20h2 может проявляться наиболее раздражающим пользователя способом – прерывая установку обновления в самом конце процесса, когда шкала приближается к 100%. Решить это ситуацию можно несколькими способами.
Способ 1. Использование установочного носителя.
Это наиболее может стать наиболее эффективным методом решения проблемы. Для этого необходимо зайти на официальный сайт Microsoft и загрузить средство создания установочного носителя. Далее его необходимо запустить от имени администратора и выбрать пункт обновления операционной системы. В конце перезагружаем ПК и проверяем результат.
Способ 2. Выключение блокировщика рекламы.
Ряд пользователей сталкивался с подобным сбоем в результате работы блокировщика рекламы. Проверить это несложно – временно отключаем этот сервис и проверяем наличие ошибки.
Способ 3. Удаление кэша DNS.
При загрузке обновлений есть вероятность, что кэш DNS вызовет сбой процесса. Поправить это можно с помощью командной строки. Для этого вызываем консоль сочетанием клавиш Win+R, вводим cmd и нажимаем Ctrl+Shift+Enter, а затем последовательно вводим команды:
- ipconfig /flushdns
- ipconfig /registerdns
- ipconfig /release
- ipconfig /renew
По завершении процесса перезагружаем ПК и проверяем, не исчезла ли ошибка.
Способ 4. Сброс компонентов Центра обновления
Для устранения ошибки можно попробовать «встряхнуть» Центр обновления Windows. Пользователю необходимо сбросить каждый компонент и заново запустить обновление.
Запускаем командную строку – нажимаем сочетание клавиш Win+R, вписываем команду cmd и нажимаем Ctrl+Shift+Enter. В консоли вводим список команд:
- net stop wuauserv
- net stop cryptSvc
- net stop bits
- net stop msiserver
- ren C:\Windows\SoftwareDistribution SoftwareDistribution.old
- ren C:\Windows\System32\catroot2 Catroot2.old
- net start wuauserv
- net start cryptSvc
- net start bits
- net start msiserver
Далее перезагружаем компьютер и повторно запускаем процесс обновления операционной системы.
2. Ошибка 0xc1900101.
Ошибка 0xc1900101 при обновлении Windows 10 20h2 возникает при апдейте предыдущих версий ОС к новой через Центр обновлений или при установке системы поверх предыдущей версии.
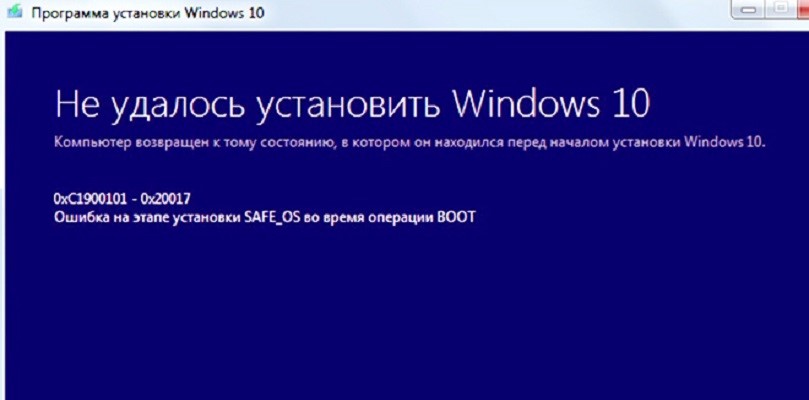
Попробовать устранить сбой можно рядом простых способов, которые помогут в большинстве случаев.
Способ 1. Удаление антивирусного ПО.
Так как ошибка установки обновления Windows 10 20h2 может быть связана с некорректной работой антивируса, рекомендуется его удалить и заменить другим. При деинсталляции лучше пользоваться утилитой соответствующего разработчика, а после удаления обязательно перезагрузить компьютер.
Способ 2. Отключение «лишних» устройств.
Перед установкой обновления системы можно попробовать отключить от ПК внешние устройства, не влияющие непосредственно на его работу – принтеры, кардридеры, геймпады и тд.
После этого запускаем чистую загрузку операционной системы и запускаем обновления.
Способ 3. Очистка диска.
Забитый до отказа жесткий диск также не способствует нормальное работе. Перед установкой обновлений в случае появления ошибок рекомендуется произвести его очистку.
Приведенных способов в большинстве случаев будет достаточно, чтобы возобновить нормальный процесс обновления и работы операционной системы. А чтобы избежать появления сбоев, вы можете купить ключ активации Windows у проверенного источника – онлайн-магазина программного обеспечения El-store.biz.

How to Solve Windows Store Error 0XC1900131 in Windows 10. How do I fix error code 0XC1900131 in Windows 10. Error Code 0XC1900131 when installing Windows Updates Fix. Steps to Fix Error 0XC1900131 Windows. Solution to Windows 10 Error Code 0XC1900131. Fix Windows Update error code 0XC1900131 .
Works on Laptops, PCs and Tablets made by Samsung, Lenovo, Toshiba, Asus, Acer, HP, Dell, Alienware.
Copy and paste this:
net stop bits
net stop wuauserv
net stop appidsvc
net stop cryptsvc
Del “%ALLUSERSPROFILE%Application DataMicrosoftNetworkDownloader*.*”
rmdir %systemroot%SoftwareDistribution /S /Q
rmdir %systemroot%system32catroot2 /S /Q
sc.exe sdset bits D:(A;;CCLCSWRPWPDTLOCRRC;;;SY)(A;;CCDCLCSWRPWPDTLOCRSDRCWDWO;;;BA)(A;;CCLCSWLOCRRC;;;AU)(A;;CCLCSWRPWPDTLOCRRC;;;PU)
sc.exe sdset wuauserv D:(A;;CCLCSWRPWPDTLOCRRC;;;SY)(A;;CCDCLCSWRPWPDTLOCRSDRCWDWO;;;BA)(A;;CCLCSWLOCRRC;;;AU)(A;;CCLCSWRPWPDTLOCRRC;;;PU)
cd /d %windir%system32
regsvr32.exe /s atl.dll
regsvr32.exe /s urlmon.dll
regsvr32.exe /s mshtml.dll
regsvr32.exe /s shdocvw.dll
regsvr32.exe /s browseui.dll
regsvr32.exe /s jscript.dll
regsvr32.exe /s vbscript.dll
regsvr32.exe /s scrrun.dll
regsvr32.exe /s msxml.dll
regsvr32.exe /s msxml3.dll
regsvr32.exe /s msxml6.dll
regsvr32.exe /s actxprxy.dll
regsvr32.exe /s softpub.dll
regsvr32.exe /s wintrust.dll
regsvr32.exe /s dssenh.dll
regsvr32.exe /s rsaenh.dll
regsvr32.exe /s gpkcsp.dll
regsvr32.exe /s sccbase.dll
regsvr32.exe /s slbcsp.dll
regsvr32.exe /s cryptdlg.dll
regsvr32.exe /s oleaut32.dll
regsvr32.exe /s ole32.dll
regsvr32.exe /s shell32.dll
regsvr32.exe /s initpki.dll
regsvr32.exe /s wuapi.dll
regsvr32.exe /s wuaueng.dll
regsvr32.exe /s wuaueng1.dll
regsvr32.exe /s wucltui.dll
regsvr32.exe /s wups.dll
regsvr32.exe /s wups2.dll
regsvr32.exe /s wuweb.dll
regsvr32.exe /s qmgr.dll
regsvr32.exe /s qmgrprxy.dll
regsvr32.exe /s wucltux.dll
regsvr32.exe /s muweb.dll
regsvr32.exe /s wuwebv.dll
netsh winsock reset
netsh winsock reset proxy
net start bits
net start wuauserv
net start appidsvc
net start cryptsvc
source
how to repair windows 10
На чтение5 мин
Опубликовано
Обновлено
Ошибка 0xc1900131 на Windows 10 может возникнуть во время попытки установки обновления функций до последней версии операционной системы, в том числе при обновлении до Windows 10 версия 20H2. Эта ошибка указывает на возникновение проблемы во время обновления, которая может быть связана с отсутствием необходимых системных файлов или наличием конфликтов с уже установленными программами и драйверами.
Существует несколько способов исправить ошибку 0xc1900131 при обновлении до Windows 10 версия 20H2. Один из вариантов — это проверить наличие свободного места на жестком диске, поскольку недостаток свободного пространства может привести к возникновению ошибки. Также рекомендуется выполнить чистку системных файлов, удалить временные файлы и кэш, чтобы устранить возможные конфликты при обновлении.
Другой способ — проверить наличие обновленных драйверов для устройств, установленных на компьютере. Устаревшие или несовместимые драйверы могут привести к возникновению ошибки 0xc1900131. Для этого можно воспользоваться инструментом Обновление драйверов в Менеджере устройств либо загрузить последние версии драйверов с веб-сайта производителя.
Важно отметить, что перед выполнением каких-либо действий при исправлении ошибки 0xc1900131 необходимо сделать резервные копии всех важных данных. Это позволит вам восстановить систему в случае возникновения непредвиденных проблем в процессе обновления.
Если вы все еще сталкиваетесь с ошибкой 0xc1900131 при обновлении до Windows 10 версия 20H2, рекомендуется обратиться к официальной поддержке Microsoft или проконсультироваться с опытным специалистом. Они смогут оказать вам дополнительную помощь и предложить индивидуальные рекомендации, основанные на вашей специфической ситуации.
Как исправить ошибку 0xc1900131
Ошибка 0xc1900131 может возникать при обновлении функций до Windows 10 версия 20H2 и может указывать на проблемы с устройством или конфликты программного обеспечения. Вот несколько возможных решений:
- Проверьте системные требования: убедитесь, что ваше устройство соответствует минимальным требованиям для обновления до Windows 10 версия 20H2. Учтите, что некоторые старые устройства могут быть несовместимы с этой версией операционной системы.
- Обновите все драйверы: проверьте наличие обновленных драйверов для всех устройств на вашем компьютере, включая графическую карту, звуковую карту и сетевой адаптер. Загрузите и установите актуальные версии драйверов с официальных веб-сайтов производителей.
- Отключите антивирусное программное обеспечение: временно отключите антивирусные программы на своем компьютере и попробуйте выполнить обновление еще раз. Некоторые антивирусные программы могут блокировать процесс обновления и вызывать ошибку 0xc1900131.
- Очистите временные файлы: удалите временные файлы с вашего компьютера, чтобы освободить место и избавиться от возможных проблем с обновлением. Используйте команду «Чистый диск» в меню «Пуск» или сторонние программы для очистки диска.
- Отключите ненужное ПО: временно отключите или удалите любое ненужное программное обеспечение на вашем компьютере. Некоторые сторонние программы могут вызывать конфликты с обновлением и приводить к ошибке 0xc1900131. Вы можете снова установить эти программы после успешного обновления.
Если ни одно из этих решений не помогло, обратитесь к официальной документации Microsoft или обратитесь в службу поддержки.
Обновление функций до Windows 10 версия 20H2
Ошибка 0xc1900131 обычно возникает из-за несовместимости некоторых драйверов или программного обеспечения с новой версией Windows. Чтобы исправить эту ошибку, необходимо выполнить следующие действия:
| Шаг | Инструкции |
|---|---|
| Шаг 1 | Отключите временно антивирусное программное обеспечение на вашем компьютере. Некоторые антивирусные программы могут блокировать обновление и вызывать ошибку 0xc1900131. |
| Шаг 2 | Удалите все неподдерживаемые программы или драйверы, которые могут вызывать конфликты при обновлении на Windows 10 версия 20H2. Для этого зайдите в «Панель управления» > «Установка и удаление программ» и удалите ненужные программы. |
| Шаг 3 | Обновите все драйверы на вашем компьютере до последних версий, совместимых с Windows 10 версия 20H2. Можно загрузить и установить драйверы с официальных веб-сайтов производителя вашего устройства. |
| Шаг 4 | Установите все доступные обновления Windows, включая исправления ошибок. Часто Microsoft выпускает дополнительные исправления для обновления функций, которые могут помочь в устранении ошибки 0xc1900131. |
| Шаг 5 | Запустите процесс обновления снова и следуйте инструкциям на экране. Теперь обновление должно произойти успешно без ошибки 0xc1900131. |
Если эти действия не помогли исправить ошибку 0xc1900131, вы можете обратиться в службу поддержки Microsoft для получения дополнительной помощи и рекомендаций.
Пожалуйста, имейте в виду, что перед выполнением любых изменений на своем компьютере рекомендуется создать точку восстановления или выполнять резервное копирование данных, чтобы в случае непредвиденных последствий можно было вернуть систему к предыдущему состоянию.
Ошибка 0xc1900131: причины и последствия
Одной из основных причин ошибки 0xc1900131 является наличие поврежденных или устаревших системных файлов. Это может произойти, например, в результате сбоев в работе компьютера, прерывания обновления или неправильной установки предыдущих обновлений.
Другой возможной причиной ошибки является недостаток свободного места на жестком диске. Если на компьютере не осталось достаточно места для установки обновления, то процесс может привести к ошибке 0xc1900131.
Последствия ошибки 0xc1900131 могут быть различными. Некоторые пользователи могут заметить, что обновление не завершается и процесс обновления автоматически отменяется. Другие могут столкнуться с неправильной работой системы после обновления, такой как проблемы с запуском приложений или нестабильная работа операционной системы в целом.
Чтобы исправить ошибку 0xc1900131, можно предпринять несколько действий. Сначала рекомендуется проверить наличие поврежденных или устаревших системных файлов и в случае необходимости выполнить восстановление системы. Также следует убедиться, что на компьютере достаточно свободного места для установки обновления. В некоторых случаях может потребоваться отключение антивирусного программного обеспечения или запуск обновления в безопасном режиме.
В заключение, ошибка 0xc1900131 может быть вызвана несколькими причинами и иметь различные последствия. Однако, с помощью соответствующих мер по исправлению этой ошибки, можно решить проблему и успешно обновить функции до Windows 10 версия 20H2.
Появление ошибки и ее влияние на работу системы
Ошибка 0xc1900131 может возникать при попытке обновления функций до Windows 10 версия 20H2. Эта ошибка указывает на проблемы с совместимостью установленных программ и драйверов с новой версией операционной системы.
Появление ошибки может негативно сказаться на работе системы и привести к различным проблемам. Некоторые из них могут быть следующими:
| Проблемы с работой программ | Некоторые установленные программы могут перестать работать или работать неправильно после обновления до Windows 10 версия 20H2. Это может произойти из-за несовместимости программ с новой версией операционной системы или из-за несовместимости совместно используемых компонентов. |
| Снижение производительности | Ошибка 0xc1900131 может привести к снижению производительности компьютера. Это может произойти из-за неправильной работы программ или драйверов после обновления. |
| Проблемы с оборудованием | Некоторые устройства и драйверы могут быть несовместимы с новой версией операционной системы, что может вызвать проблемы с работой оборудования. Например, принтеры, сканеры, веб-камеры и другие устройства могут перестать работать или работать неправильно. |
| Потеря данных | В случае возникновения ошибки 0xc1900131 в процессе обновления, есть риск потери данных. Поэтому рекомендуется перед обновлением создать резервную копию всех важных данных. |
Для исправления ошибки 0xc1900131 следует принимать соответствующие меры, о которых будет рассказано в следующих разделах.