
Все способы:
- Способ 1: Встроенное средство устранения неполадок
- Способ 2: Изменение типа запуска некоторых служб
- Способ 3: Ручная очистка кеша обновлений
- Способ 4: Активация компонента .NET Framework 3.5
- Способ 5: Сброс компонентов «Центра обновлений Windows»
- Способ 6: Отключение антивируса
- Способ 7: Проверка системных файлов
- Вопросы и ответы: 0
Способ 1: Встроенное средство устранения неполадок
Если обновление не происходит из-за ошибки под кодом 0x80240034, то в первую очередь попробуйте использовать предустановленное средство, которое сканирует систему на наличие неполадок в работе различных компонентов, затем исправляет найденные проблемы.
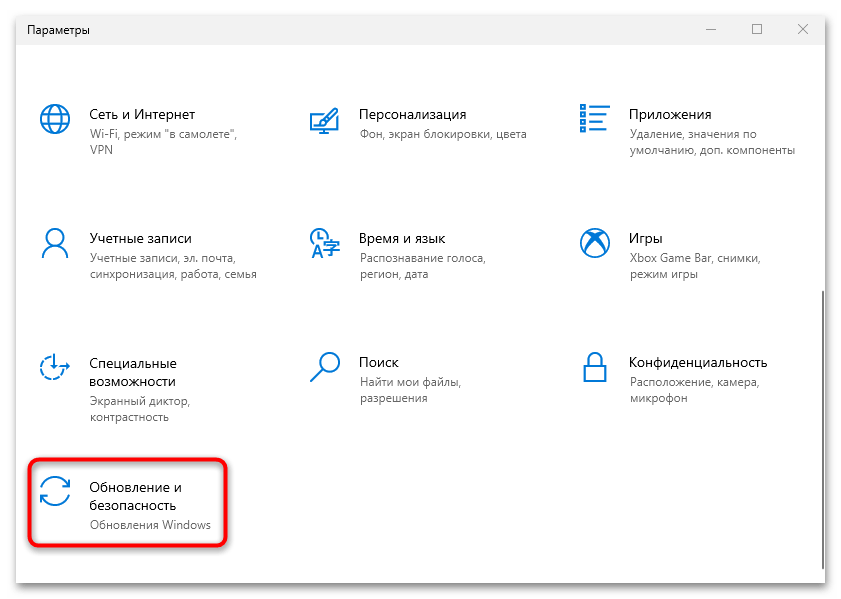
- Через главное меню, нажав на кнопку «Пуск», запустите «Параметры».
- В открывшемся окне выберите «Обновление и безопасность».
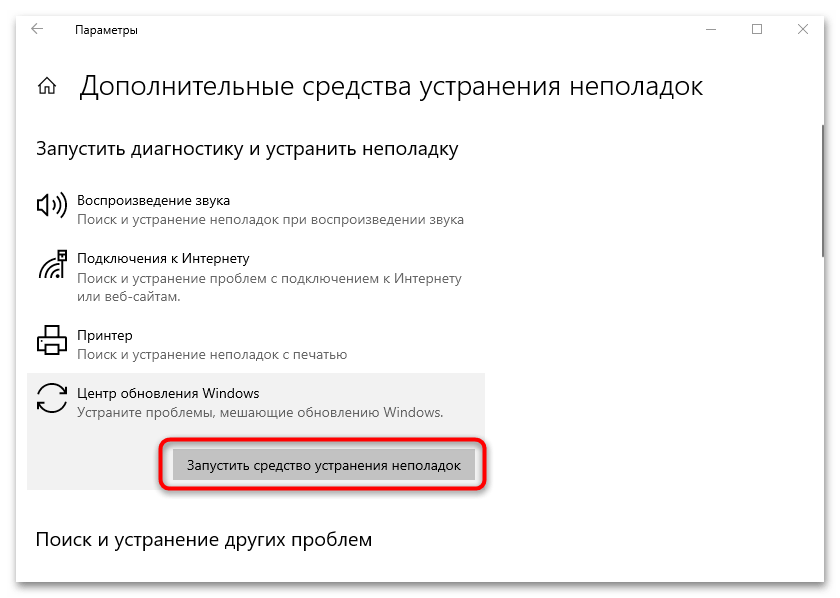
- Кликните по строке «Устранение неполадок» слева, а в основной части окна нажмите на строку «Дополнительные средства устранения неполадок».
- Найдите «Центр обновления Windows» и кликните по этой строчке, в результате чего появится кнопка, запускающая средство.

Останется подождать, пока проблемы не окажутся выявлены. Если средство обнаружит неполадки, которые могут вызывать данную ошибку, то предложит пути решения.
Способ 2: Изменение типа запуска некоторых служб
За многие действия в Windows 10 отвечают специальные службы, и процедура обновления – не исключение. Вероятно, что по каким-то причинам они были случайно отключены, а вам необходимо активировать их вновь и установить автоматический тип запуска. Делается это с помощью специальных команд:
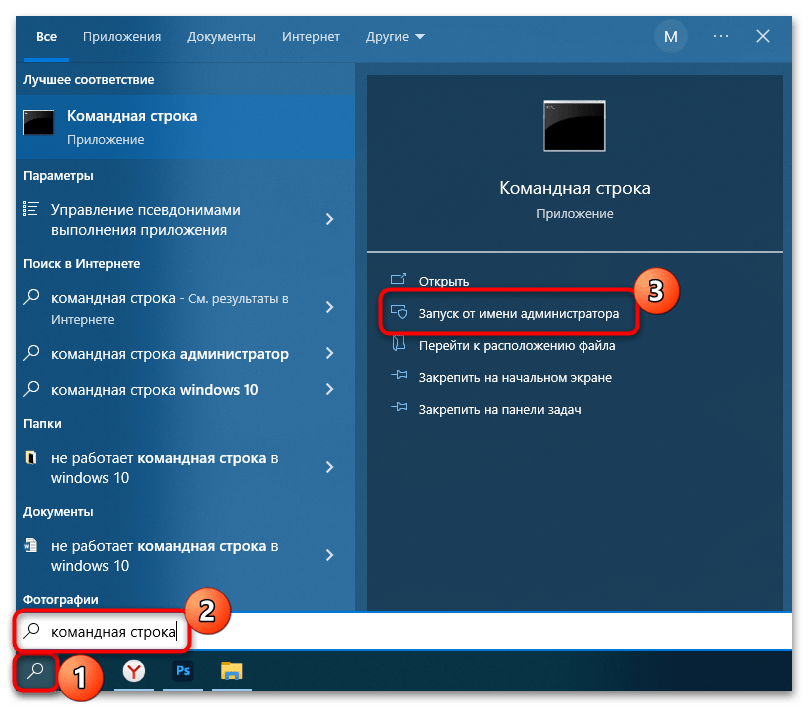
- Запустите «Командную строку» от имени администратора. Для этого можете использовать системный поиск, а потом выбрать соответствующий тип запуска на панели справа.
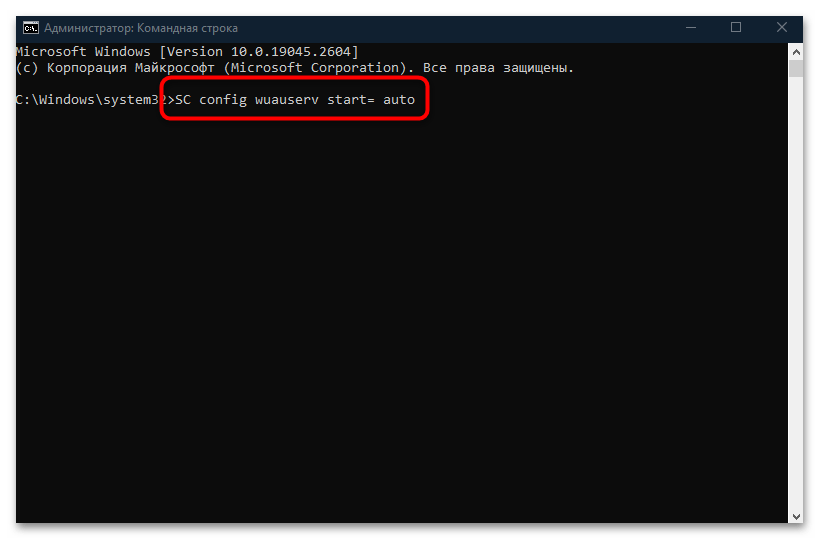
- Далее останется ввести несколько команд, после каждой из которых нужно нажимать на клавишу «Enter» для их выполнения:
SC config wuauserv start= auto

SC config bits start= auto

SC config cryptsvc start= auto

SC config trustedinstaller start= auto
После того как вы выполните все команды, перезагрузите компьютер и проверьте, исправлена ли ошибка, связанная с обновлениями Windows 10.
Способ 3: Ручная очистка кеша обновлений
Убрать ошибку 0x80240034 иногда помогает ручная очистка кеша обновлений, который хранится на локальном диске. Способ может сработать, если при попытке установить обновления, например, происходит конфликт программного обеспечения – новых апдейтов с хранящимся кешем.
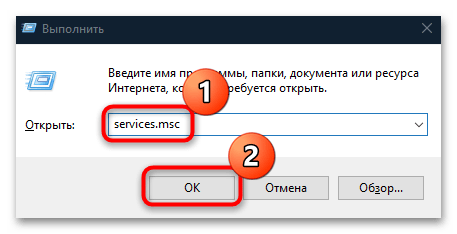
- Для начала нужно остановить службу «Центр обновления», которая отвечает за их установку. Для этого одновременно нажмите на клавиши «Win + R», затем введите команду
services.mscи выполните ее, нажав на кнопку «ОК». - Далее в списке служб отыщите «Центр обновления Windows» и дважды кликните по ней.
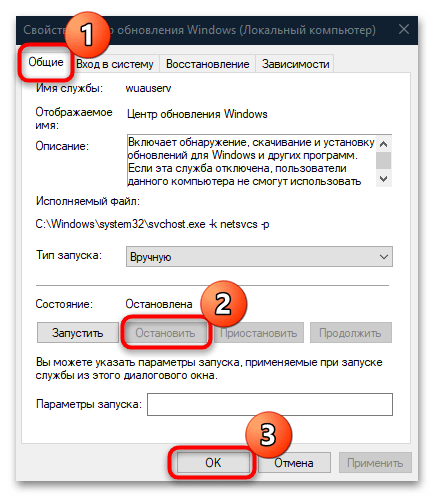
- В открывшемся окне на вкладке «Общие» нажмите на «Остановить» и подтвердите действие.
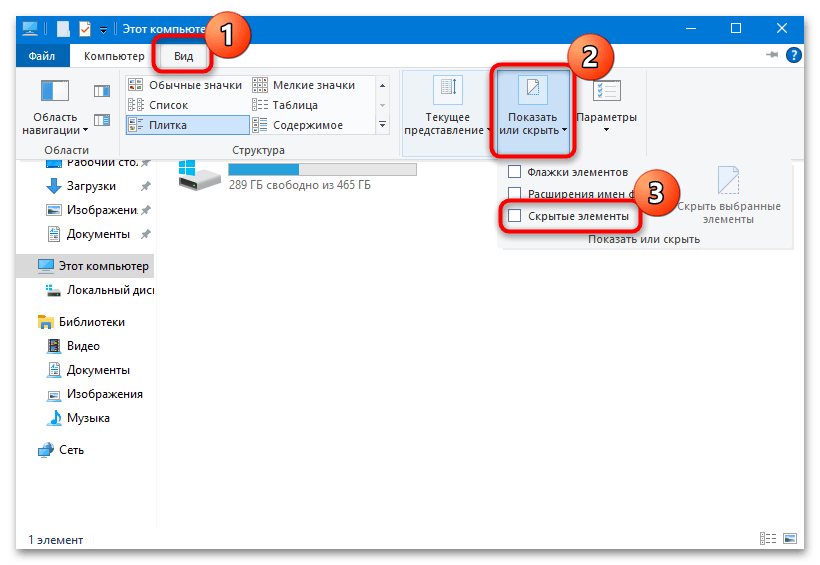
- Далее переходите к непосредственной очистке кеша. Для этого откройте «Проводник» или «Этот компьютер». Файлы временных данных по умолчанию невидимы, поэтому сперва придется включить отображение скрытых элементов. Перейдите на вкладку «Вид», затем на верхней панели в блоке «Показать или скрыть» поставьте отметку у пункта «Скрытые элементы».
- Перейдите по следующему пути:
C:\Windows\SoftwareDistribution\Download. Все файлы, которые находятся в папке «Download», удалите любым удобным способом.


На этом удаление кеша обновлений Windows 10 завершено. Попробуйте снова установить апдейты и проверить, решена ли проблема.
Способ 4: Активация компонента .NET Framework 3.5
На работу обновлений также влияет компонент .NET Framework 3.5, поэтому активируйте его:
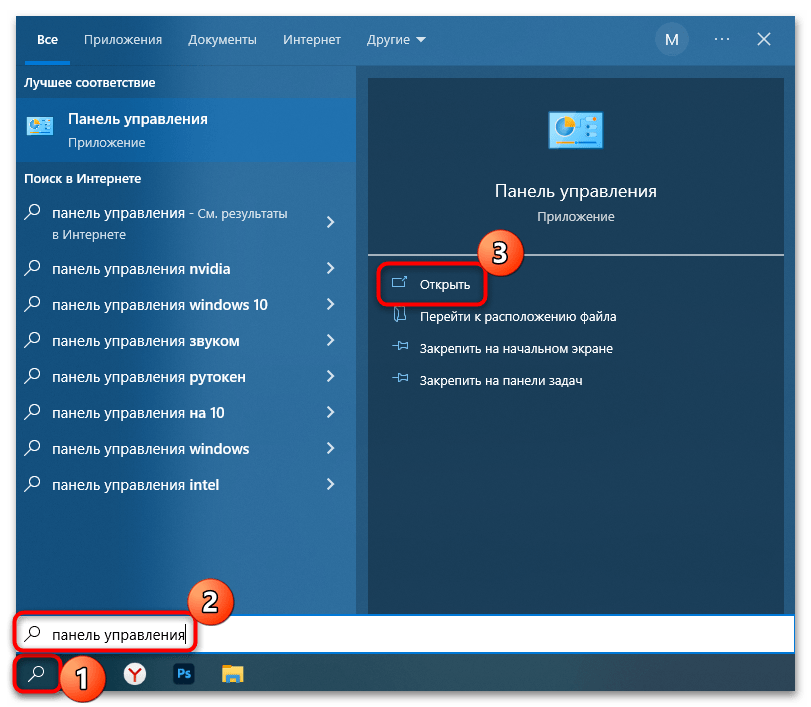
- Найдите через системный поиск встроенный инструмент «Панель управления».
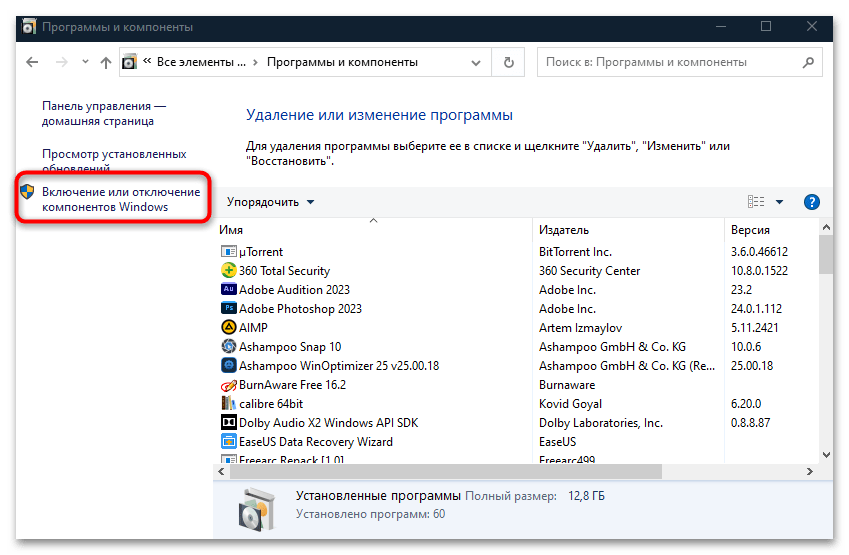
- Для удобства в качестве просмотра разделов задайте тип «Крупные значки», затем выберите «Программы и компоненты».
- На панели слева кликните по строке «Включение или отключение компонентов Windows».
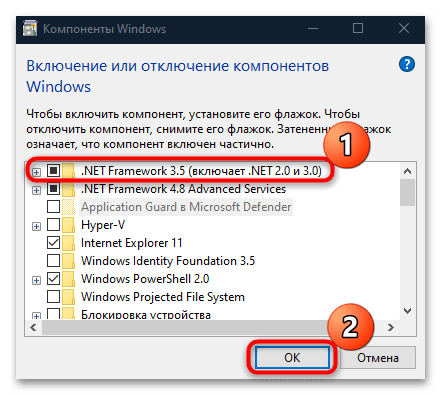
- Отметьте пункт «.NET Framework 3.5» и нажмите на кнопку «ОК».

Останется перезагрузить компьютер, чтобы изменения вступили в силу.
Способ 5: Сброс компонентов «Центра обновлений Windows»
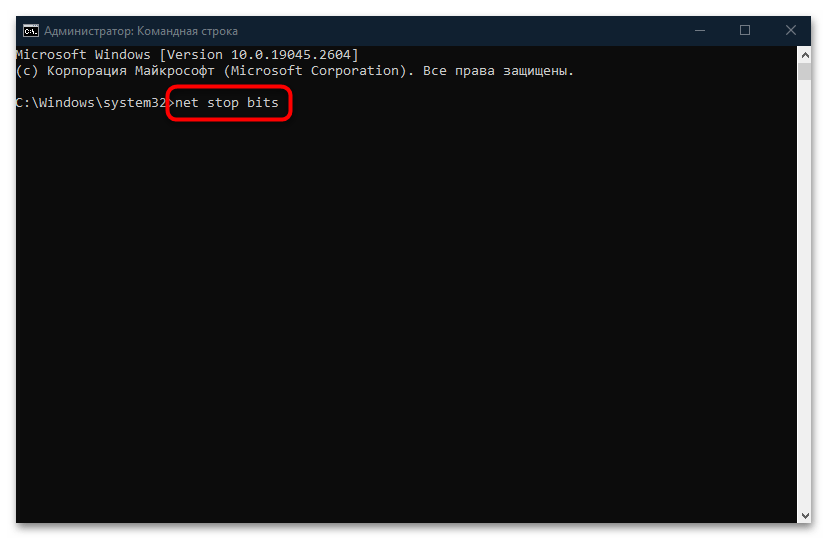
Иногда ошибка под кодом 0x80240034 является следствием повреждения некоторых компонентов «Центра обновлений», поэтому есть смысл сбросить их, используя ряд команд в системной консоли операционной системы. Достаточно запустить «Командную строку» с расширенными правами так же, как в Способе 2, затем выполнить следующие команды, поочередно нажимая после каждой на клавишу ввода:
net stop bits

net stop wuauserv

net stop appidsvc

net stop cryptsvc
Del «%ALLUSERSPROFILE%\Application Data\Microsoft\Network\Downloader\qmgr*.dat»
sc.exe sdset bits D:(A;;CCLCSWRPWPDTLOCRRC;;;SY)(A;;CCDCLCSWRPWPDTLOCRSDRCWDWO;;;BA)(A;;CCLCSWLOCRRC;;;AU)(A;;CCLCSWRPWPDTLOCRRC;;;PU)
sc.exe sdset wuauserv D:(A;;CCLCSWRPWPDTLOCRRC;;;SY)(A;;CCDCLCSWRPWPDTLOCRSDRCWDWO;;;BA)(A;;CCLCSWLOCRRC;;;AU)(A;;CCLCSWRPWPDTLOCRRC;;;PU)
cd /d %windir%\system32
regsvr32.exe atl.dll

regsvr32.exe urlmon.dll

regsvr32.exe mshtml.dll

regsvr32.exe shdocvw.dll

regsvr32.exe browseui.dll

regsvr32.exe jscript.dll

regsvr32.exe vbscript.dll

regsvr32.exe scrrun.dll

regsvr32.exe msxml.dll

regsvr32.exe msxml3.dll

regsvr32.exe msxml6.dll

regsvr32.exe actxprxy.dll

regsvr32.exe softpub.dll

regsvr32.exe wintrust.dll

regsvr32.exe dssenh.dll

regsvr32.exe rsaenh.dll

regsvr32.exe gpkcsp.dll

regsvr32.exe sccbase.dll

regsvr32.exe slbcsp.dll

regsvr32.exe cryptdlg.dll

regsvr32.exe oleaut32.dll

regsvr32.exe ole32.dll

regsvr32.exe shell32.dll

regsvr32.exe initpki.dll

regsvr32.exe wuapi.dll

regsvr32.exe wuaueng.dll

regsvr32.exe wuaueng1.dll

regsvr32.exe wucltui.dll

regsvr32.exe wups.dll

regsvr32.exe wups2.dll

regsvr32.exe wuweb.dll

regsvr32.exe qmgr.dll

regsvr32.exe qmgrprxy.dll

regsvr32.exe wucltux.dll

regsvr32.exe muweb.dll

regsvr32.exe wuwebv.dll

netsh winsock reset

netsh winhttp reset proxy

net start bits

net start wuauserv

net start appidsvc

net start cryptsvc
Команд довольно много, но при этом все службы, которые как-то связаны с «Центром обновлений» и самой установкой апдейтов, будут перезапущены, а кешированные данные — удалены. Когда закончите всю процедуру, перезагрузите ваш компьютер.
Способ 6: Отключение антивируса
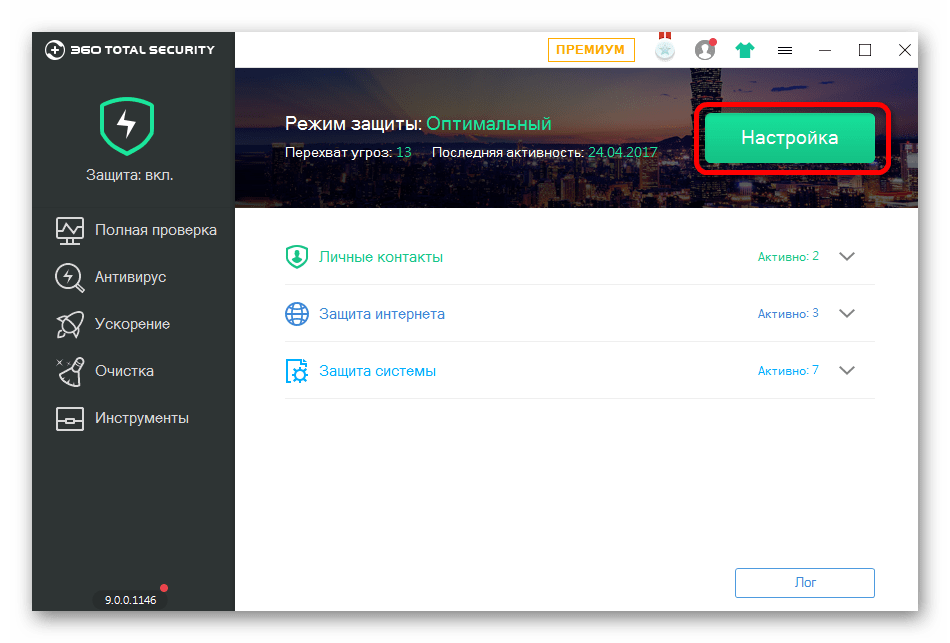
Если вы используете антивирус, то отключите его перед тем, как устанавливать обновления. Вероятно, программа, обеспечивающая защиту, ошибочно блокирует инсталляцию апдейтов, вызывая тем самым рассматриваемую ошибку. Если у вас стороннее антивирусное ПО, то для деактивации может потребоваться поиск инструкции на официальном сайте разработчика. Также можете воспользоваться нашим руководством, где разобраны наиболее популярные решения.
Подробнее: Отключение антивируса
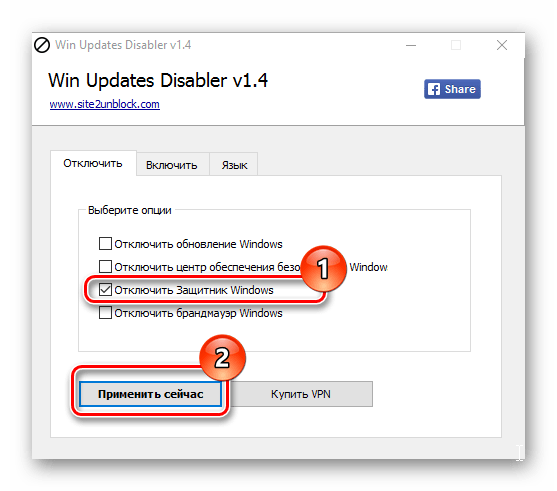
Что касается встроенного антивируса от компании Microsoft (Windows Defender), то он вряд ли станет блокировать обновления, но и такое изредка случается. Попробуйте его временно отключить, ознакомившись с нашей отдельной статьей.
Подробнее: Отключение Защитника в Windows 10
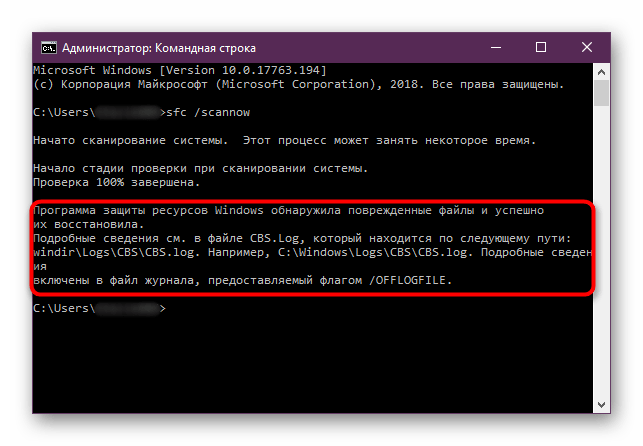
Способ 7: Проверка системных файлов
В случае повреждения по каким-то причинам (вирусы или серьезные сбои в работе ОС) системных файлов при попытке обновления также может появляться ошибка 0x80240034. Но в Windows 10 предустановлены инструменты, с помощью которых можно проверить их целостность и восстановить поврежденные элементы, если это потребуется. Ранее о таком типе проверки мы писали более детально:
Подробнее: Использование и восстановление проверки целостности системных файлов в Windows 10
Наша группа в TelegramПолезные советы и помощь
Рекомендуем: Как избежать проблем с установкой Windows 10 October 2018 Update.
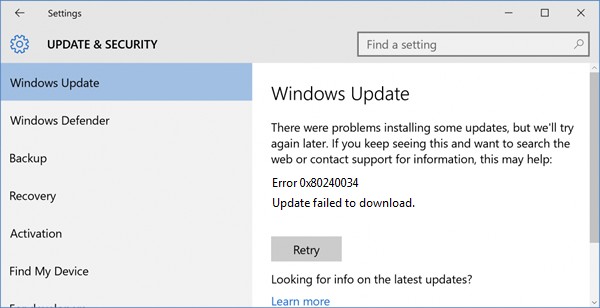
Некоторые пользователи сообщили, что обновление загружаться — снова и снова, после того, как оно достигает определённой пороговой точки. Журнал обновлений в некоторых случаях сообщает код ошибки 0x80240034, в котором указано, что попытка установки обновления не выполнена.
Если Центр обновления Windows не работает должным образом, хорошая мысль запустить Средство устранения неполадок обновлений Windows. Эта проблема не является новой, и подобные вещи продолжают происходить во время обновления Windows. Если вы столкнулись с проблемами при загрузке или установке обновлений, вот как вы можете это исправить.
ИСПРАВЛЕНИЕ: Windows 10 не удалось установить (0x80240034).
Когда обновление устанавливается многократно и не удается завершить установку, каждый раз, наиболее вероятной причиной этой проблемы является поврежденная база данных обновлений. Поврежденные компоненты Windows Update также могут способствовать возникновению подобной ситуации. В зависимости от истории обновлений вашей системы, для обоих элементов может потребоваться устранить неполадки перед загрузкой.
Чтобы исправить оба этих компонента, запустите средство устранения неполадок для Центра обновления Windows. Утилита автоматически исправит поврежденные элементы, а также устранит любые другие проблемы с Центром обновления Windows (например, проблемы с службами Windows Update).
«Центр обновления Windows» Устраните проблемы, мешающие обновлению Windows.
Нажмите сочетание клавиш Win + I чтобы перейти в приложение «Параметры».

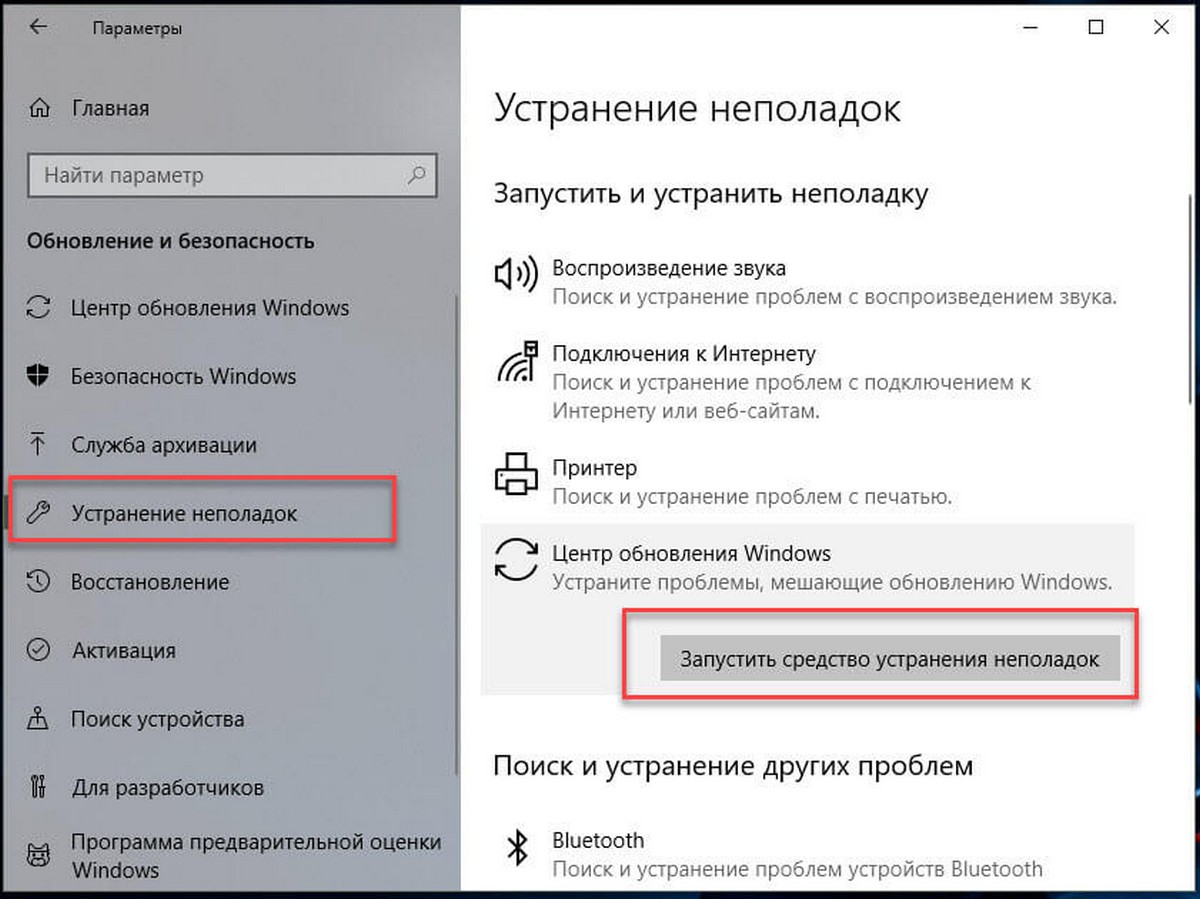
Перейдите в раздел «Обновление и безопасность» → «Устранение неполадок».
На странице Устранение неполадок кликните мышкой «Центр обновления Windows» и нажмите кнопку «Запустить средство устранения неполадок».
После того как средство закончит работу, необходимо перезагрузить компьютер и попытаться установить обновление заново.
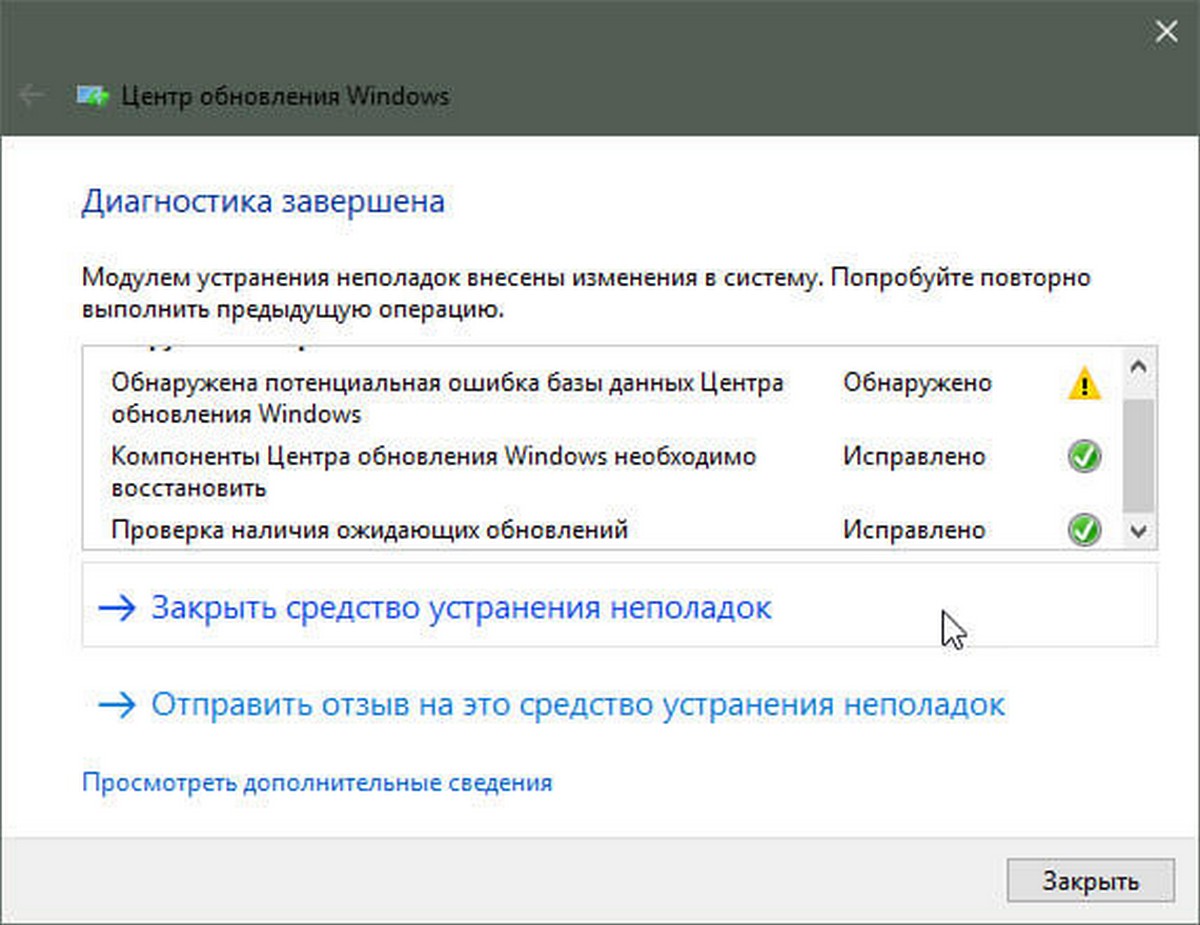
Теперь обновление пройдет как и должно.
В случае, если устранение неполадок не может исправить базу данных обновлений, вы можете вручную исправить ее, как указано ниже:
Использование командной строки
Откройте «Командную строку» или «PowerShell» и введите следующие команды поочередно, нажимая клавишу Enter.
net stop wuauserv
net stop cryptSvc
net stop bits
net stop msiserver
Ren C:\Windows\SoftwareDistribution SoftwareDistribution.old
Ren C:\Windows\System32\catroot2 Catroot2.old
net start wuauserv
net start cryptSvc
net start bits
net start msiserver
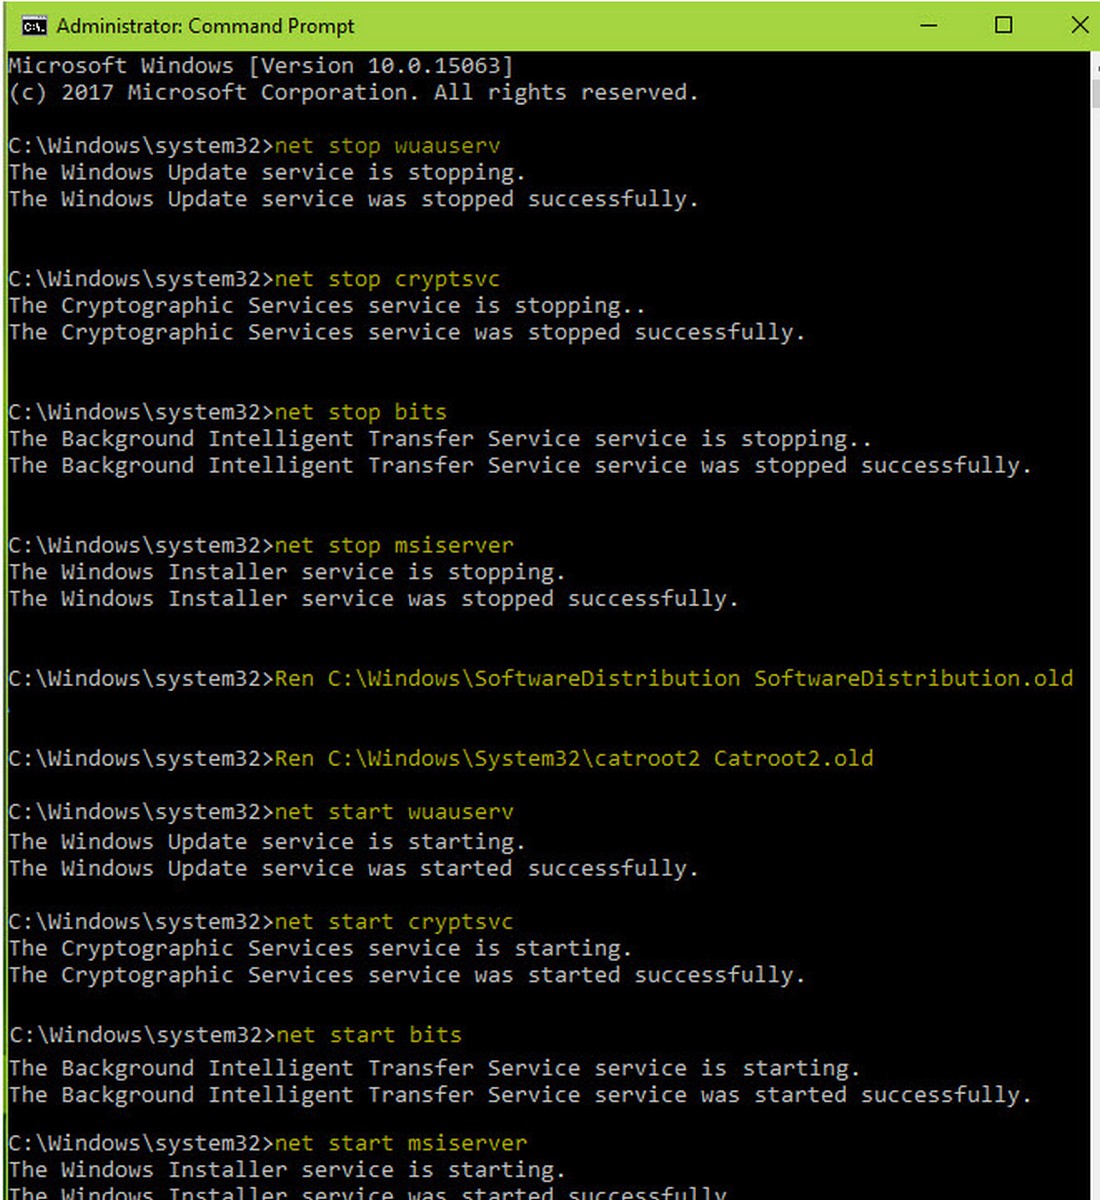
Закройте окно командной строки и перезагрузите компьютер.
После перезагрузки повторите попытку установки доступных вам обновлений Windows, теперь они должны работать нормально.
Если у вас все еще есть проблемы с получением обновлений в Центре обновления Windows, вы можете обновить систему с помощью файла ISO.
0x80240034 — это ошибка, которая может появиться во время установки обновления для операционной системы Windows 10 в Центре обновления. Данная ошибка появилась приблизительно полгода назад — после релиза Windows 10 Insider Preview версии 16226.
Казалось бы, за прошедшее время Майкрософт могли бы уже искоренить проблему, которая вызывает ошибку 0x80240034, тем не менее она все еще присутствует в системе. Например, не так давно, пользователи Windows 10 пожаловались на ошибку 0x80240034 во время установки кумулятивного обновления под номером KB4048955.
Появиться данная ошибка на вашем компьютере могла по множеству причин, например, некоторые компоненты Центра обновления были повреждены, сторонний антивирус, установленный в системе, вмешался в процесс обновления, некорректные настройки, отсутствие .NET Framework 3.5 и прочее. В общем, причин — море. Однако, несмотря на все вышесказанное, ошибку 0x80240034 на Windows 10 все же можно устранить с помощью нескольких методов. Именно об этих методах мы и поведаем вам в нашей сегодняшней статье.
Методы решения для ошибки 0x80240034 на Windows 10
Метод №1 Средство устранения неполадок
Вашим самым первым действием при появлении ошибки 0x80240034 должно стать применение средства устранения неполадок Центра обновления Windows. Майкрософт прекрасно знает, что во время автоматического обновления их операционной системы всегда что-то может пойти не так. Именно с целью устранения проблем при обновлении ими было разработано средство, которое, в теории, способно помочь вам с возникшими трудностями.
Запустить это средство устранения неполадок достаточно просто. Давайте посмотрим, как это сделать:
- откройте меню Пуск и кликните левой кнопкой мыши на значок шестеренки, чтобы открыть Параметры системы;
- далее найдите и перейдите в раздел под названием «Обновления и безопасность»;
- далее перейдите во вкладку «Устранения неполадок»;
- кликните на пункт «Центр обновления Windows», находящийся в разделе «Запустить и работать»;
- нажмите на кнопку «Запустить средство устранения неполадок»;
Как только вы кликните на вышеуказанную кнопку, перед вами появится небольшое окошко средства устранения неполадок. Оно начнет проводить сканирование вашей системы на присутствие каким-то проблем, препятствующих корректной работе Центра обновления Windows. Все, что вам нужно делать — это наблюдать за процессом и выполнять все, что вам будет предложено средством устранения неполадок. Закончив с ним, попробуйте снова запустить обновление Windows, чтобы проверить наличие ошибки 0x80240034.
К сожалению, средство устранения неполадок довольно редко осуществляет заложенные в него функции в отношении Центра обновления Windows. Многие пользователи, воспользовавшись им, утверждают, что его работа не дала какого бы то ни было результата. Однако, в сети можно найти счастливчиков, которым данное системное средство все-таки помогло. Возможно, вы один из таких счастливчиков.
Метод №2 Изменение типа запуска нескольких служб
Возможно, вы столкнулись с ошибкой 0x80240034 по той причине, что службы, необходимые для проведения обновления, была попросту деактивированы. Такое время от времени происходит в Windows, к сожалению, но эту ситуацию можно исправить, просто выставив для этих служб автоматический тип запуска, т.е. они будут автоматически запускаться с запуском самой операционной системы, как, собственно, и было задумано.
Вы можете выставить нужным службам автоматически тип запуска через графический интерфейс Windows 10, тем не менее мы предлагаем вам поступить немножечко по-другому: ввести в Командную строку несколько команд, которые активируют нужный тип запуска для этих служб. Поверьте, это гораздо быстрее, нежели копание в системных настройках.
Итак, нажмите правой кнопкой мыши на Пуск и выберите «Командная строка(администратор)». Как только перед вами покажется черное окошко системной консоли, впишите в нее следующий список команд:
- SC config wuauserv start= auto
- SC config bits start= auto
- SC config cryptsvc start= auto
- SC config trustedinstaller start= auto
Выполнив в Командной строке вышеуказанные команды, перезагрузите свой компьютер, а затем снова попытайтесь провести обновление операционной системы Windows 10, чтобы убедиться в устранении ошибки 0x80240034.
Метод №3 Активирование .NET Framework 3.5
Еще один методом, с помощью которого можно разрешить эту проблему, является активирование такого элемента системы, как .NET Framework 3.5. Однако, вам не придется ничего загружать на свой компьютер, как вы могли подумать, так как все необходимое уже давно находится в вашей системе.
Чтобы активировать .NET Framework 3.5, вам нужно сделать следующее:
- откройте Панель управления и откройте элемент «Программы и компоненты»;
- нажмите на ссылку «Включение и отключение компонентов Windows»;
- поставьте галочку возле пункта «.NET Framework 3.5»;
- закройте Панель управления, и перезагрузите свой компьютер.
Активировав .NET Framework 3.5 для своей Windows 10, попробуйте снова провести обновление ОС. Возможно, причина ошибки 0x80240034 действительно заключалась в отсутствии данного элемента.
Метод №4 Сброс компонентов Центра обновления Windows
Стоит заметить, что ошибка 0x80240034 может быть результатом повреждения некоторых компонентов Центра обновления Windows. К счастью, если проблема действительно заключается в этом, вы можете запросто сбросить данные компоненты с помощью ряда команд для системной консоли.
Откройте Командную строку, как это уже было продемонстрировано в вышеуказанных методах, а затем впишите в нее описанные ниже команды:
- net stop bits
- net stop wuauserv
- net stop appidsvc
- net stop cryptsvc
- Del «%ALLUSERSPROFILE%\Application Data\Microsoft\Network\Downloader\qmgr*.dat»
- sc.exe sdset bits D:(A;;CCLCSWRPWPDTLOCRRC;;;SY)(A;;CCDCLCSWRPWPDTLOCRSDRCWDWO;;;BA)(A;;CCLCSWLOCRRC;;;AU)(A;;CCLCSWRPWPDTLOCRRC;;;PU)
- sc.exe sdset wuauserv D:(A;;CCLCSWRPWPDTLOCRRC;;;SY)(A;;CCDCLCSWRPWPDTLOCRSDRCWDWO;;;BA)(A;;CCLCSWLOCRRC;;;AU)(A;;CCLCSWRPWPDTLOCRRC;;;PU)
- cd /d %windir%\system32
- regsvr32.exe atl.dll
- regsvr32.exe urlmon.dll
- regsvr32.exe mshtml.dll
- regsvr32.exe shdocvw.dll
- regsvr32.exe browseui.dll
- regsvr32.exe jscript.dll
- regsvr32.exe vbscript.dll
- regsvr32.exe scrrun.dll
- regsvr32.exe msxml.dll
- regsvr32.exe msxml3.dll
- regsvr32.exe msxml6.dll
- regsvr32.exe actxprxy.dll
- regsvr32.exe softpub.dll
- regsvr32.exe wintrust.dll
- regsvr32.exe dssenh.dll
- regsvr32.exe rsaenh.dll
- regsvr32.exe gpkcsp.dll
- regsvr32.exe sccbase.dll
- regsvr32.exe slbcsp.dll
- regsvr32.exe cryptdlg.dll
- regsvr32.exe oleaut32.dll
- regsvr32.exe ole32.dll
- regsvr32.exe shell32.dll
- regsvr32.exe initpki.dll
- regsvr32.exe wuapi.dll
- regsvr32.exe wuaueng.dll
- regsvr32.exe wuaueng1.dll
- regsvr32.exe wucltui.dll
- regsvr32.exe wups.dll
- regsvr32.exe wups2.dll
- regsvr32.exe wuweb.dll
- regsvr32.exe qmgr.dll
- regsvr32.exe qmgrprxy.dll
- regsvr32.exe wucltux.dll
- regsvr32.exe muweb.dll
- regsvr32.exe wuwebv.dll
- netsh winsock reset
- netsh winhttp reset proxy
- net start bits
- net start wuauserv
- net start appidsvc
- net start cryptsvc
Введите команды для сброса Центра обновления Windows, а затем перезагрузите свой компьютер. Попробуйте снова провести обновления, дабы проверить, была ли устранена ошибка 0x80240034 или нет.
Have you ever encountered the frustrating situation where a Windows update gets stuck at 1% and eventually fails, accompanied by the error code 0x80240034? This error indicates that the installation of an update was unsuccessful.
But what is the 0x80240034 error all about? Why does it cause the update installation to fail? Let’s find out about that and more below.
What Is the Error Code 0x80240034?
As mentioned above, the Windows 10/11 0x80240034 error tells you that an update failed to install. It isn’t specific to a certain Windows operating system version. Many Windows users reportedly experienced this problem while trying to install different builds. This error usually comes with the following codes: 0x80240034 1903 and 0x80240034 1803.
Although the exact cause of the Windows Update 0x80240034 error is not known, experts suggest that it is related to corrupted update files. That is why the most common fix for the problem involves resetting the Windows Update cache.
Other affected users, however, tried resolving the Windows error 0x80240034 by using an ISO file and checking the “Do not keep the previous settings during the update” option.
Are you already confused about what fixes to try? Relax. You have plenty of options, and we don’t suggest trying each one of them. We’ll discuss the most effective solutions below.
Ways to Resolve the Windows Error 0x80240034
Let’s get down to the working solutions. Go over them one by one until you find one that works best for your situation.
Solution #1: Use the Windows Update Troubleshooter
If you are facing a lot of issues while installing Windows updates, you may want to use the Windows Update Troubleshooter by Microsoft. It is designed to identify and troubleshoot any problem that is keeping you from installing or downloading Windows updates.
In addition, it will clear any temporary files related to the Windows Update tool. It also deletes the contents of the SoftwareDistribution folder and repairs faulty Windows Update components.
To use the troubleshooter, perform these steps:
- Go to the Start menu and type settings into the search field. Hit the Enter key to start the search.
- The Settings window will now launch. Go to Update and Security and select Troubleshoot.
- Locate Windows Update and click the Run the Troubleshooter button.
- Follow the on-screen prompts.
- Restart your computer for all the changes to be applied. Check if the error is gone.
Solution #2: Run an SFC Scan
An SFC scan inspects all your important Windows files, including DLL files. If a problem is detected, the System File Checker tool will resolve it by replacing the affected file.
To run an SFC scan, follow these easy steps:
- Press the Win + Q shortcut and input cmd.
- Right-click on Command Prompt and select Run as Administrator.
- The Command Prompt window should now appear.
- Type the sfc /scannow command and hit the Enter key.
- Wait for the scan to be completed.
- After the scan, restart your device and see if it has resolved the error.
Solution #3: Run a DISM Scan
The Deployment Image Servicing and Management, or DISM, utility is a command-line tool that is used by many administrators to modify and repair problematic system images, including the Windows Setup, Windows Recovery Environment, and Windows PE.
Here’s a guide on how to run a DISM scan:
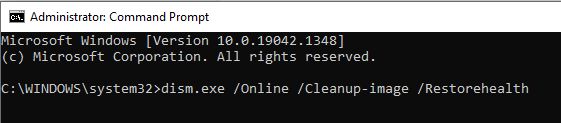
- Press the Win + X shortcut to launch the Command Prompt with administrator rights.
- Type this command: dism.exe /Online /Cleanup-image /Restorehealth. Hit the Enter key.

- If the DISM utility fails to obtain replacements for the problematic files, use your installation media instead. Connect it to your device and type this command into the Command Prompt window: dism.exe /Online /Cleanup-Image /RestoreHealth /Source:C:/Repair/Source/Windows /LimitAccess.
- Make sure that you replace the value of C:/Repair/Source/Windows with the actual location of your installation media.
- Hit Enter to execute the command.
Solution #4: Download the Update Manually
If the automatic methods fail, you can download the Windows update manually instead. It may be a bit tricky, but it’s definitely worth the shot.
Here’s what you should do:
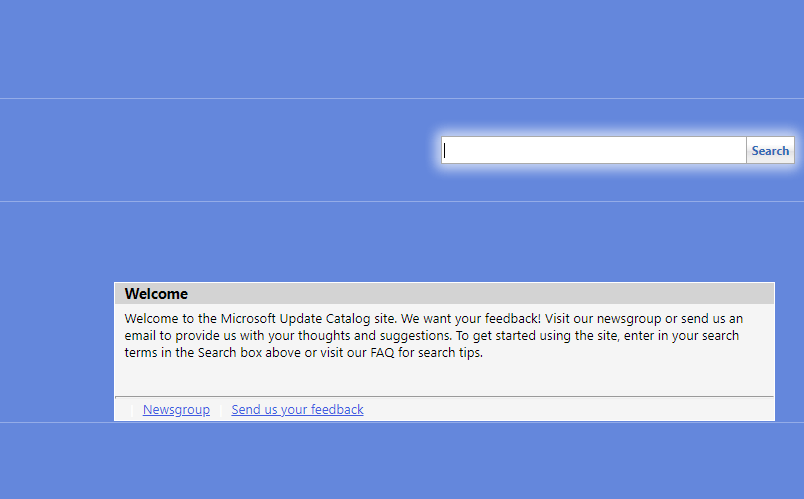
- Open your preferred browser and visit the official Microsoft Update Catalog website.
- Use the search field to find the update version you are trying to install. Hit Enter to begin the search.

- You should see a list of matching updates. Find the specific update that is compatible with your system’s architecture.
- Click the Download button next to it.
- Once the download is complete, run the setup file and follow the on-screen instructions.
- Restart your Windows computer.
Solution #5: Run a Complete System Scan
Though it rarely happens, malware can also trigger the Windows Update 0x80240034 error to appear. To resolve this, simply perform a complete system scan using your preferred antivirus software.
Malicious entities are notorious for causing Windows Update errors. By using an antivirus software program, you can detect and get rid of viruses and other types of malware, such as adware, Trojans, worms, and more.
Antivirus programs also ensure your computer has the most up-to-date software protection. This is because new threats are being developed every minute, and the developers of antivirus software know about that, which is why they continuously update their virus databases and tools to deal with all these threats.
If you don’t have an antivirus program installed, we suggest that you find a reliable one. Make sure that you download a tool that doesn’t conflict with your system processes in any way. Also, download antivirus software from trusted sources only. If possible, visit the website of your preferred tool’s manufacturer and get the software there. This is to avoid further infection that may result in more error codes.
Solution #6: Use a PC Repair Tool
Aside from performing a complete virus scan, running a PC repair tool such as Outbyte PC Repair is worth trying. This tool is designed to eliminate unneeded files that eat up a significant amount of your system space. It can also get rid of system malfunctions and performance-related issues on your PC.
With all the unwanted files eliminated, your computer is optimized, which means it will run smoothly and error-free.
Solution #7: Reset Some Windows Update Components
Windows Update is an important Windows 10/11 component that allows you to install updates, which come with the latest security patches and bug fixes. However, there are instances when it fails to do its job because of errors. To resolve this, you may have to reset its components.
Here’s how:
- Press the Win + X shortcut and choose Command Prompt (Admin).
- Into the Command Prompt window, input the following commands:
- net stop wuauserv
- net stop cryptSvc
- net stop bits
- net stop msiserver
- rmdir %windir%SoftwareDistribution /S /Q
- net start wuauserv
- net start cryptSvc
- net start bits
- net start msiserver
- Make sure you press Enter after each command.
- After that, check if the problem has been fixed.
Solution #8: Clear the SoftwareDistribution Folder
For some affected users, clearing the Windows Update cache has resolved the error. You can easily clear the cache by deleting everything in the Windows SoftwareDistribution folder.
Unfortunately, Windows cannot clear the contents of this folder once they are corrupted. But clearing it will force Windows to redownload the contents and possibly fix the Windows Update error 0x80240034.
Follow this step-by-step guide to clear the SoftwareDistribution folder:
- Press the Win + S shortcut.
- Into the search field, type command prompt.
- Right-click on the top result and choose Run as Administrator.
- Type the net stop wuauserv command and hit Enter.
- Next, input the rmdir %windir%\SoftwareDistribution /S /Q command and hit the Enter key.
- Now, type the net start wuauserv command and hit Enter.
- Once done, restart Windows and the error should be gone.
Solution #9: Update Windows Using an ISO File
If none of the solutions has worked so far, then you can use Windows installation media to install the latest Windows 10 version. Many users have found success in resolving the error by using this solution.
The reason it works is that the issue has something to do with the Windows Update utility. Any new update is generally downloaded via the Windows Update client, but if you install the update you need via an ISO file, you can avoid problems that are associated with the client itself.
Take note, though, that when you use installation media, you will be asked to decide what you wish to do with your previous apps and settings. Many would prefer not to keep the old settings, but we suggest keeping them until the update is successfully downloaded. If it works, then good for you. Otherwise, you can choose whether or not to proceed with the installation of the latest Windows version.
Now, here’s how to install updates using Windows installation media:
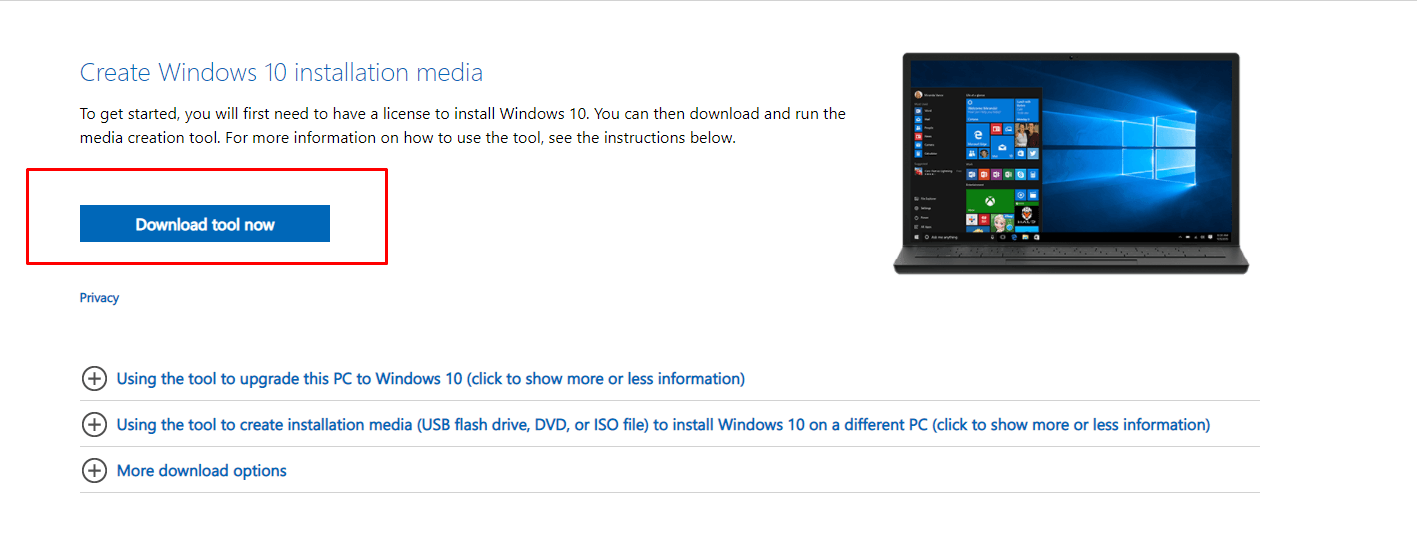
- Go to this address https://www.microsoft.com/en-us/software-download/windows10.
- Click the Download Tool Now button.

- Select the Use the tool to create installation media option and follow the steps provided.
- Once done, go to the location where the ISO file is saved.
- Right-click on it and choose the Open with option.
- Click File Explorer.
- Next, double-click on the setup.exe file.
- Follow the on-screen prompts to complete setting up the installation media.
- You will be asked whether to perform a clean install or keep your personal files. Do not keep your personal files.
- Proceed with the rest of the steps and choose the options that suit you.
Conclusion
The error code 0x80240034 may show at any time while trying to install a new Windows 10 version via the Windows Update tool. While the exact culprit behind this error remains unknown, experts think that corrupted update files are to blame.
Regardless of what’s causing it, there are different ways to resolve the error, and most of them have worked for many users. First, you can use the Windows Update Troubleshooter to fix any error with the Windows Update client. You can also perform SFC and DISM scans to repair problematic system files and images.
If the three methods don’t work, download the update manually by getting it from the official Microsoft Update Catalog website. You should also perform a malware scan as the error 0x80240034 may also be caused by a malware infection.
Other technical fixes you may try include clearing the contents of the SoftwareDistribution folder and using Windows installation media.
Now, if you have exhausted all the possible methods you know but the error 0x80240034 still shows, then do not hesitate to ask for help from Microsoft’s support team. Better yet, take your device to an authorized service center. It could be the case of a hardware-level issue, and one of your hardware components may need to be repaired or replaced.
Let us know which of the solutions above has worked for you by commenting below.
Give us some love and rate our post!
Readers help support Windows Report. We may get a commission if you buy through our links.
Read our disclosure page to find out how can you help Windows Report sustain the editorial team. Read more
Several Windows 10 users who experience the error 0x80240034 reported that their Windows Update gets stuck at 1% and it fails entirely.
You can see the Windows Update error 0x80240034 when you view the update history which indicates that the update has failed, though downloading might be 100% complete.
You’ll find in this guide a few effective solutions that can be applied to fix the installerror 0x80240034 once and for all.
How can I fix the Windows Update error 0x80240034?
- Free up some space by deleting unnecessary files or apps
- Disconnect external hardware that you’re not using (peripherals, USB media)
- Use the Get help option in Settings
Now let’s get down to the actual solutions. Take them one by one, and don’t forget to restart your device after each to apply the changes.
1. Use Windows Update troubleshooter
-
1. Go to Start, type Settings and then hit the Enter key.
-
2. Head over to Update & Security and choose Troubleshoot.
-
3. Find Windows Update, and click Run the troubleshooter.

-
4. Follow the on-screen instructions to complete the troubleshooting process.
-
5. Once done, restart the computer for the changes to come into effect.
The built-in Windows Update troubleshooter effectively eliminates a lot of issues, and allows users to download updates that are throwing errors. And the best part, it’s all done automatically.

2. Run SFC
- Press Windows+Q and type cmd.
- From the search results, right-click Command Prompt and choose Run as Administrator.
- A new cmd window appears. Type sfc /scannow and then hit the Enter key.

- Wait until the scan and repair process is finished.

It can happen that the SFC command will not bring useful results to completely fix this. Yet, there are alternative methods, such as professional repair tools that scan the Windows OS and restore it automatically.
3. Run DISM
- Press Windows key + X and run Command Prompt (Admin).
- Copy and paste the following command on the command line:
dism.exe /Online /Cleanup-image /Restorehealth

- In case the DISM can’t obtain files online, try using your installation USB or DVD. Insert media and type the following command:
dism.exe /Online /Cleanup-Image /RestoreHealth /Source:C:/Repair/Source/Windows /LimitAccess
- Be sure to replace C:/Repair/Source/Windows with the path of your DVD or USB.

NOTE
Note: Please ensure that you replace the repair source path with your own.
4. Download the update manually
- Go to the Microsoft Update Catalog website.

- In the search box, type the update code in the search box and then hit the Enter key.
- From the list of matching updates, locate the update that uses the same architecture as your system.
- Click the Download button next to the update to download it.
- Once you download the update, run the setup file and follow the instructions.
- After the update is complete, restart your Windows PC.

5. Run a full system scan
Sometimes a malware infection can cause a 0x80240034 Windows update error. To fix the problem, we advise you to perform a full system scan with your antivirus.
In case you don’t have a reliable antivirus, we strongly recommend trying out a fast one that won’t interfere with your system in any way.
To find the most suitable choice in terms of antivirus protection, it is highly recommended to choose a professional solution from the best antivirus software for Windows 10.
6. Reset Windows Updates Components
- Open Win + X menu and select Command Prompt (Admin) from the list. You can do that by pressing the Windows Key + X shortcut.
- Once the Command Prompt opens, type the following commands:
net stop wuauservnet stop cryptSvcnet stop bitsnet stop msiserverrmdir %windir%SoftwareDistribution /S /Qnet start wuauservnet start cryptSvcnet start bitsnet start msiserver
- Hit the Enter key afterward and then check to see if the problem is resolved.
In addition, you can create a reset script using the steps outlined in our WUReset script guide.
- Recent Windows 11 update lets you disable profanity filter in voice typing
- Windows 11 KB5055627 update makes File Explorer more fluid
- A few keyboard settings are moving from Control Panel to Settings app in Windows 11
- Microsoft finally launches the controversial Recall feature after a long delay
- Details of Windows 11 25H2 spotted in the wild; likely to be a smaller update
Windows Update error 0x80240034 can be problematic, but we hope that you managed to fix it using one of our solutions.
We’d like to know if this article was helpful or if you have tried other solutions. Get in touch with us using the comments section.
Ivan Jenic
Windows Hardware Expert
Passionate about all elements related to Windows and combined with his innate curiosity, Ivan has delved deep into understanding this operating system, with a specialization in drivers and driver troubleshooting.
When he’s not tackling diverse driver-related problems, Ivan enjoys watching good movies and spending time hiking with his family and friends.