Table of contents
- Why Upgrade Vista to Windows 10?
- How to Upgrade Windows Vista to Windows 10 for Free?
- Can Windows Vista Be Upgraded to Windows 10 on an Old PC?
- Remember to Back up Your Things
- How to Upgrade Vista to Windows 10
- What to Do After Installing Windows 10?
- Solution 1: Check for available updates
- Solution 2: Update Your Drivers
- Solution 3: Protect your PC against malware
- Conclusion
- FAQ
Although being conservative about your tastes and values may be among the winning parts of your personality, clinging to the past is by no means a good strategy when it comes to using Microsoft products.
With that said, we suppose that you should admit that even if your good old Windows Vista has served you well, it is actually over the hill now and therefore needs replacement.
In this article, you will learn how to upgrade Windows Vista to Windows 10 , the most popular OS in the world as of this writing.
Why Upgrade Vista to Windows 10?
The sad truth is, Windows Vista is somewhat ancient: it was released in far 2006 and reached the end of its life cycle on April 11, 2017.
That means Microsoft stopped supporting it. As a result, it is now vulnerable, insecure and prone to error.
In a case like this, switching to a newer version of Windows would be the best course of action.
The first option that pops into one’s mind is Windows 10 – this latest brainchild of Microsoft offers up a whole bunch of striking features.
But is it possible to upgrade Windows Vista to Windows 10 for free? That is the question for which you will find the right answer below. Just read on and make sure not to miss any important points.
How to Upgrade Windows Vista to Windows 10 for Free?
Sorry, you can’t do it. Persistent users keep asking how to upgrade Windows Vista to Windows 10 for free without a CD, and the answer may seem somewhat disappointing – you will have to spend some money on a licensed copy of Win 10.
Regrettably, the Windows 10 free upgrade offer ran out on July 29, 2016, and Windows Vista was not even included in it. No chance, you see.
As such, now you have only two options to choose between: you can either buy a new PC or install Windows 10 from scratch on your current device.
The second option is obviously cheaper, so let’s look in detail at the best way to carry out this manoeuvre.
Can Windows Vista Be Upgraded to Windows 10 on an Old PC?
That is the first question you should ask when toying with the idea of an upgrade. The problem is, if your computer is literally an old-timer, you might need to invest in a newer machine.
With this in mind, you should go to the official website of Microsoft and check if your computer meets the Windows 10 system requirements.
Besides, it is a wise idea to figure out what factors might influence its upgradability.
To wrap things up, you are supposed to have at least a 1 gigahertz (GHz) or faster processor or SoC and no fewer than one gigabyte of memory for installing the 32-bit edition of Win 10.
If you crave for the 64-bit version, make sure you have at least 2 GBs of memory at your disposal.
As for your hard disk, it should have 16 GB and 20 GB of free space for a 32-bit and a 64-bit OS respectively. Your graphics card must be DirectX 9 or later with the driver WDDM 1.0.
Last but not least, the minimum display resolution needed is 800×600.
If you are OK with these requirements, you should buy a copy of Windows 10 from Microsoft and proceed to install it.
Remember to Back up Your Things
Clean installing Windows 10 will wipe all the data off your drive, so make sure to back up your important files in advance.
For this purpose, you can use a cloud solution, such as Google Drive, OneDrive, Yandex Drive, or Dropbox.
Also, portable storage devices like USB drives, compact disks or external drives will come in very handy. Furthermore, you can consider moving your files to another laptop.
The problem is, most of the solutions above require plenty of manual work and are therefore quite time-consuming.
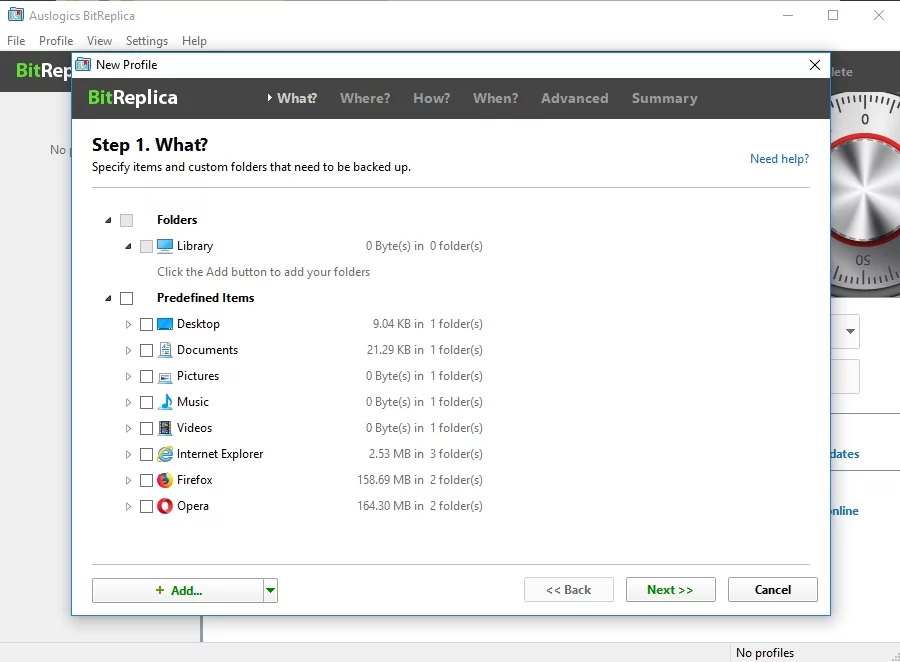
For this reason, we recommend using Auslogics BitReplica: this tool will save you a lot time and effort by providing automatic backups.
Besides, it will put your docs in a cloud so that you can easily access them from your devices.
Here is how you can back up your important data with Auslogics BitReplica:
- Go to bitreplica.com and click the Download Now button.
- Run BitReplica’s installation file and wait until the app is installed onto your PC.
- BitReplica will prompt you to choose what you want to back up and where you want to keep your backups.
- Then decide on how and when you want to back up your files.
- Follow the on-screen instructions to proceed with your backup.
You should also bear in mind that all your apps will disappear as well. Starting fresh means that you will have to install them again, so make sure the installers you will need are kept handy.
How to Upgrade Vista to Windows 10
You might be aware of the way that involves upgrading from Windows Vista to Windows 7 first and then moving to Windows 10, but we consider this path costly and tedious. We are sure that performing a clean installation of Windows 10 will be the best option in this regard.
To do that, you will need a USB drive with at least 8GB of storage. Bear in mind that its contents will be erased, so it had better be blank.
To clean install Windows 10 on your computer, make use of the step-by-step guide provided below:
- Go to the Microsoft support site and get a license to install Win 10.
- Then you will need to download the media creation tool from the same website and run it on your PC. The media creation tool will help you create bootable installation media (a USB drive in your case).
- Make sure your Internet connection is OK. Then you should create your installation media: click on Download tool now and press Run. You will need administrator privileges to run it.
- Accept the license terms and go to the What do you want to do? page. You should opt for Create installation media for another PC. Then select Next.
- You will be asked to select your language. Do so and provide your confirmation.
- When selecting the edition, choose Windows 10 and confirm your choice.
- Now it is time to choose between the 64-bit and the 32-bit versions. You can press
Windows key + R, typemsinfo32and press Enter in order to check your system information and decide on which Win 10 edition will suit you. - Set USB flash drive as your media and attach it to your PC.
- Restart your computer and hit any key to boot from your USB drive. If Windows Vista happens to start, you should enter your BIOS or UEFI settings (the exact combination of keys depends on your device model) after switching your computer on. There you should navigate to the boot order menu and configure your PC to boot from the media.
- After booting from your installation USB drive, you will see the Install Windows screen. There configure your language, time and keyboard settings. Click on “Next” to proceed.
- Select Install Windows. You will be guided through the installation process – just follow the on-screen prompts.
What to Do After Installing Windows 10?
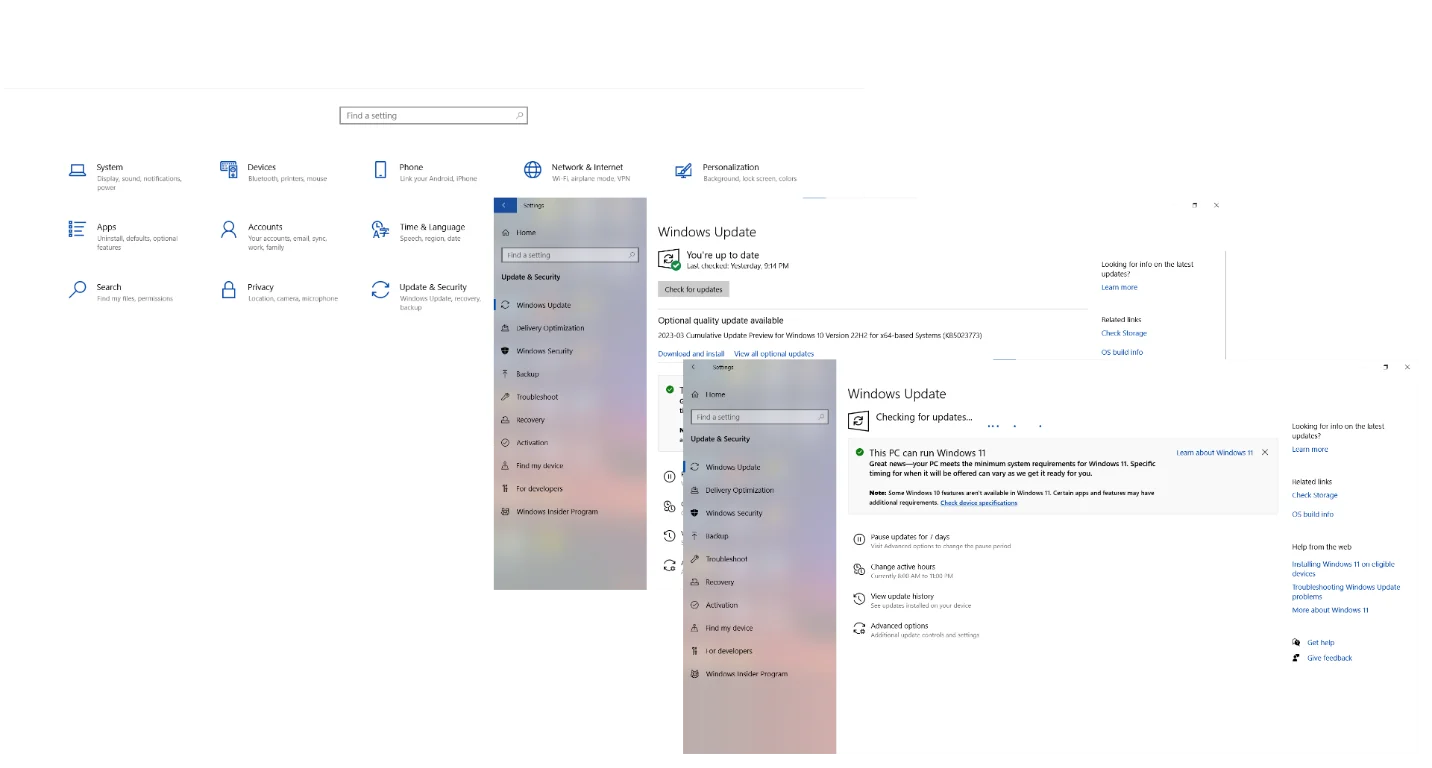
Solution 1: Check for available updates
First and foremost, you should check your Windows Update center and download any available updates:
Settings -> Update & Security -> Windows Update -> Check for updates
Solution 2: Update Your Drivers
Make sure all your drivers are up to date. To do so, you can visit the support sites of your vendors and check them for the latest driver versions.
You may also wish to employ Device Manager for the same purpose:
- Press the
Windows + Xshortcut. - Select Device Manager.
- Locate the device whose driver software you want to update, right-click on it and select Search automatically for drivers.
Evidently, both of the options above imply updating your drivers one by one, which requires a lot of time and effort.
Besides, you may accidentally install the wrong driver for your device and complicate the matters even further.
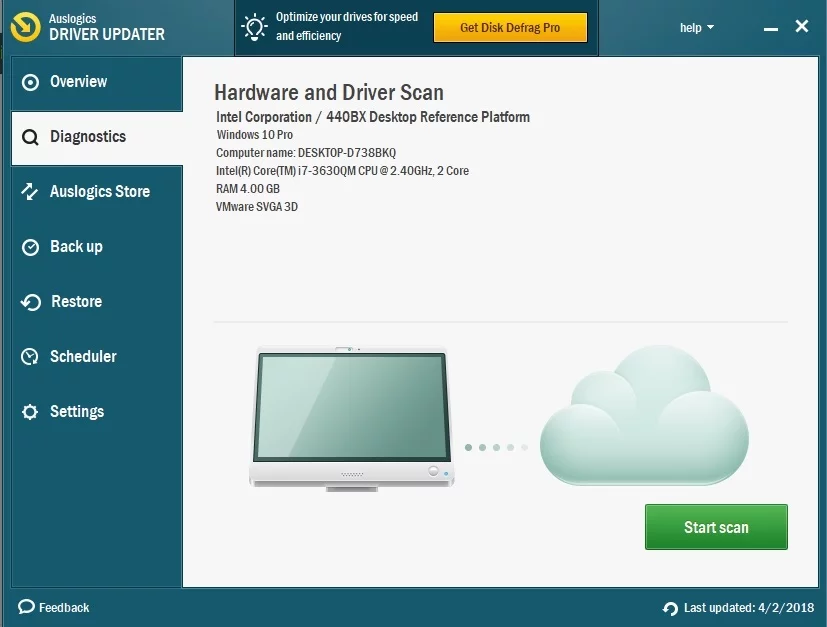
Fortunately, you can update all your drivers to their latest manufacturer-recommended versions both effortlessly and efficiently – just install Auslogics Driver Updater and press one button to get the job done.
Related: How to Update Drivers on Windows 10 PC? [Easy Guide]
Here is how you can employ the tool in question:
- Download and install Auslogics Driver Updater onto your computer.
- Launch the tool once it is installed.
- Auslogics Driver Updater will automatically start scanning your PC for driver issues.
- Once the scan is over, let the tool fix the detected driver problems if there are any.
Solution 3: Protect your PC against malware
With malware increasingly wreaking havoc on computers all over the world, you need to make sure your OS is properly protected after updating it.
One of the best steps to take in this regard is to enable real-time protection in Windows Security, Microsoft’s main antivirus tool, by following these steps:
- Press the
Windows + Icombination on your keyboard to launch the Settings app. - Click on the Update & Security tile.
- From the left pane, select Windows Security by clicking on it.
- Click on Virus & threat protection.
- Navigate to Virus & threat protection settings and click on Manage settings.
- Make sure Real-time protection is set to On.
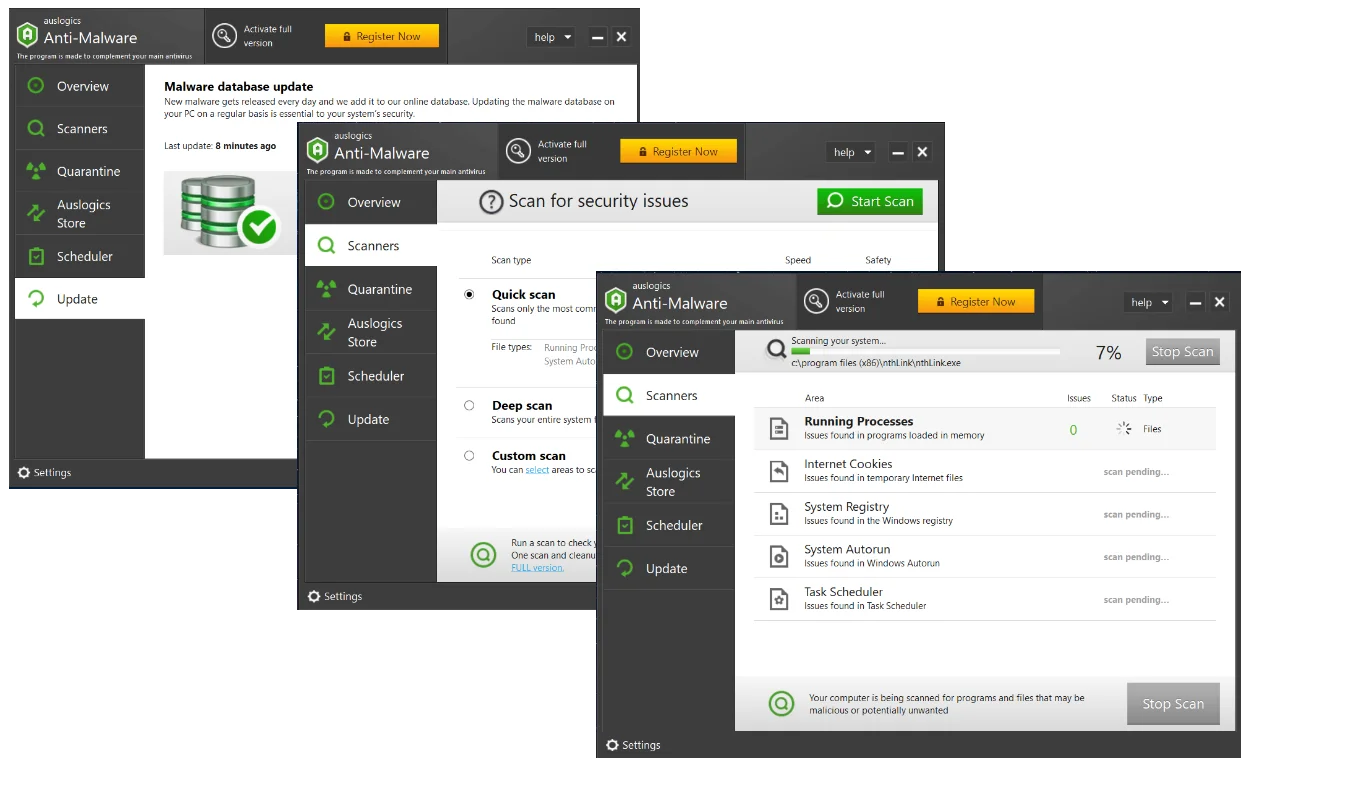
If you want to keep all kinds of malware at bay when using your Windows PC, we recommend you to safeguard it with Auslogics Anti-Malware – an innovative tool created by a reputable Australian developer.
This flexible and easy-to-use app is designed to detect malicious entities other antivirus tools may miss and thoroughly scan every nook and cranny of your system.
Download Auslogics Anti-Malware
Detects malware, spyware and viruses, then safely removes them from your PC to help keep it as secure as possible. The program is made to complement your main antivirus.
Here is how you can run the Anti-Malware tool:
- Install Auslogics Anti-Malware and make sure its database is updated.
- Go to the Scanners tab and select the type of scan you want to run.
- Click on the green Start Scan button in the bottom-right corner.
- You have to wait until Auslogics Anti-Malware is done scanning your computer.
- If threats are detected, let the tool remove or quarantine them.
Conclusion
There you have it. Go through the steps given to upgrade Windows Vista to Windows 10. If there’s any tip or method we didn’t discuss, let us know in the comments below!
FAQ
How to speed up Windows 10?
While Windows 10 is designed to be a fast and responsive operating system, it may become sluggish over time and begin to stutter due to various factors.
If you want to improve your Windows 10 computer’s performance and speed, your best bet is to optimize your system’s configuration.
Should I upgrade to the Windows 10 or Windows 11 OS?
The answer to this question depends on factors like your needs and preferences and your hardware specifications.
To make a well-informed decision, you need to understand the differences between Windows 10 and Windows 11 and how they will affect your user experience.
Is it safe to upgrade from Windows Vista?
Windows Vista is no longer supported by Microsoft, and using this OS causes significant security risks.
Upgrading from it to Windows 10 or Windows 11 is both reasonable and safe. However, before performing an upgrade, you need to make sure your hardware supports it.
You should also back up your data before introducing any changes to your computer’s configuration.