
Quick Tips
- Ensure the printer is online, not in an error state, and has enough paper and ink/toner.
- Ensure your printer drivers are up to date to avoid compatibility issues.
- Utilize the built-in troubleshooter in Windows or Mac to diagnose and fix common printer problems.
Method 1: Disable Fast Startup
Step 1: Click the search icon on the taskbar, type control panel, and press Enter.
Step 2: In the top-right corner, change the view type to Large icons and select Power Options.

Step 3: Click on Choose what the power buttons do from the left pane.

Step 4: Click on Change settings that are currently unavailable.

Step 5: Select Yes when the User Account Control (UAC) prompt appears.
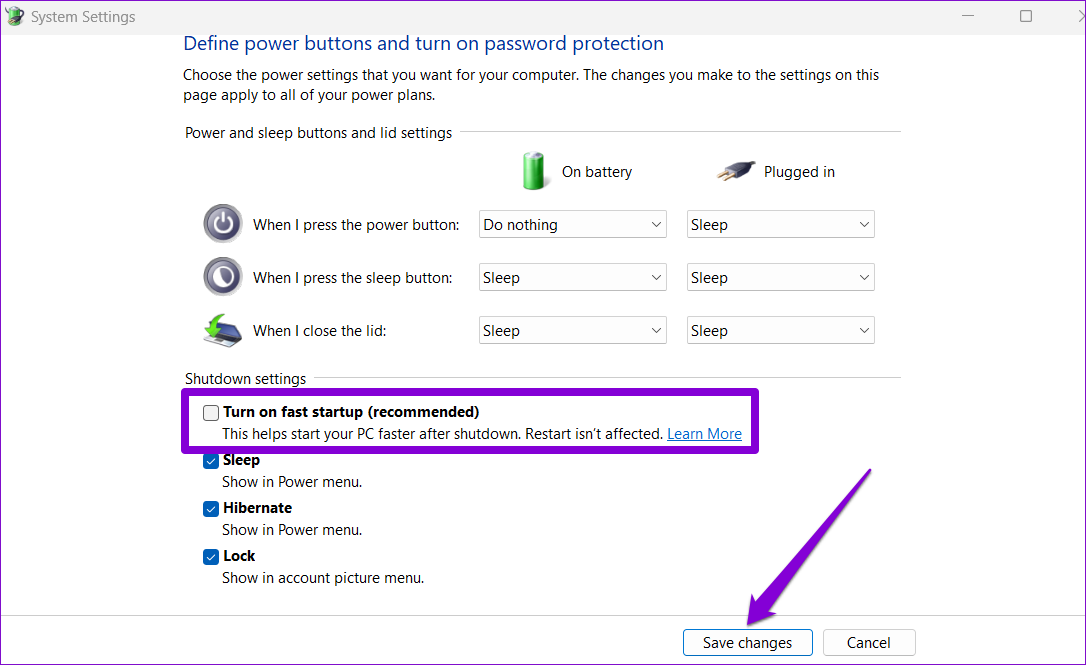
Step 6: Clear the Turn on fast startup (recommended) checkbox and click the Save changes button.
Method 2: Modify Registry Files
Step 1: Click the search icon on the taskbar, type registry editor, and select Run as administrator.
Step 2: Select Yes when the User Account Control (UAC) prompt appears.
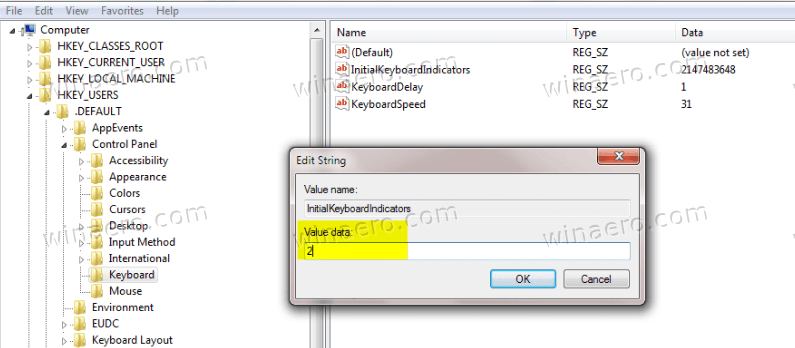
Step 3: In the Registry Editor window, paste the following path in the address bar at the top and press Enter.
HKEY_USERS.Default\Control Panel\Keyboard

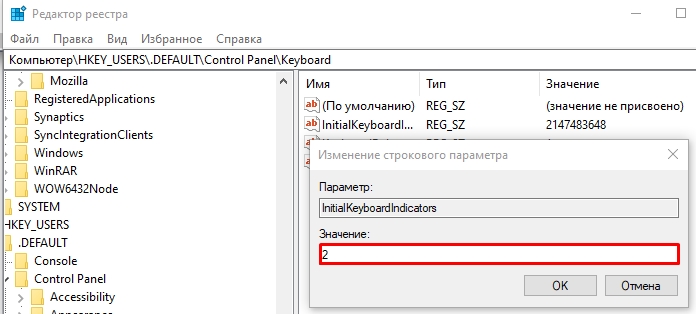
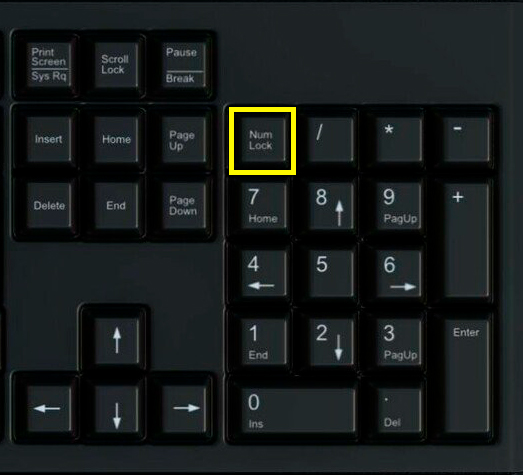
Step 4: Double-click the InitialKeyboardIndicators entry in the right pane and enter 0 in the Value data field to disable Num Lock at startup.
Alternatively, if you want to keep the Num Lock always on, enter 2 instead. Then, click OK.

Restart your PC after this for the changes to take effect.
Method 3: Run Num Lock Script at Startup
Step 1: Press the Windows key + S, type Notepad, and press Enter.
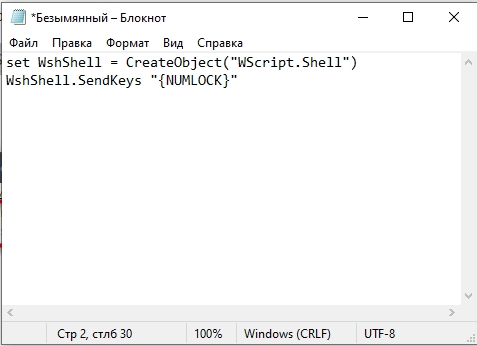
Step 2: Paste the following code in the Notepad window.
set WshShell = CreateObject("WScript.Shell")
WshShell.SendKeys "{NUMLOCK}"
Step 3: Click the File menu at the top and select Save as.

Step 4: Select the All files option in the Save as type drop-down menu. Enter a suitable name followed by .vbs extension in the File name box. Then, click Save.

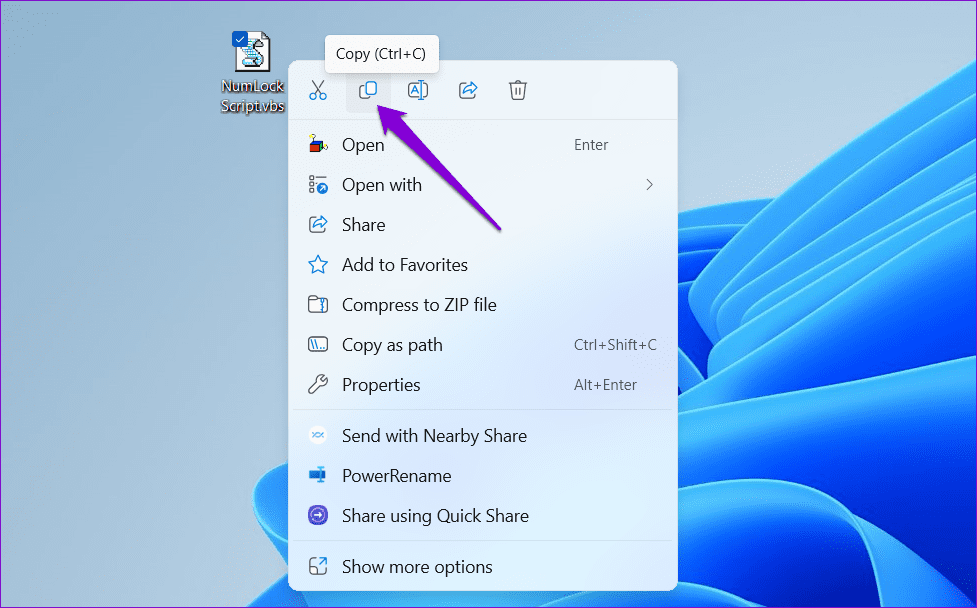
Step 5: Locate the VBScript on your computer, right-click on it, and click the copy icon.
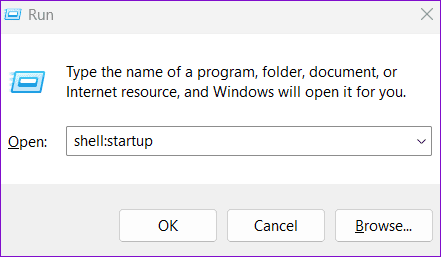
Step 6: Press the Windows key + R, type shell:startup in the box, and press Enter.
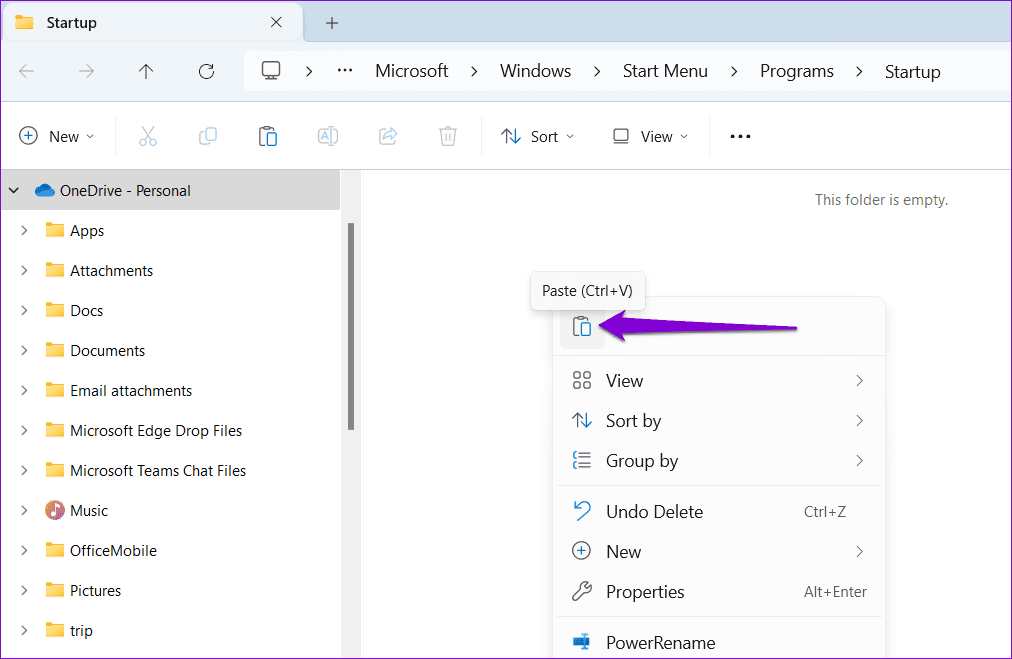
Step 7: In the Startup folder, right-click anywhere on the empty space and select the paste icon.
Restart your PC after this to ensure that the script is running as expected. The script above will emulate pressing the Num Lock key once. This will switch the state of the Num Lock key, so if it is on by default, it will turn off, and if it is off by default, it will turn on.
Method 4: Change BIOS Settings
Step 1: Press Windows + S to open the search menu. Type recovery options and press Enter.
Step 2: Click the Restart now button next to Advanced startup.
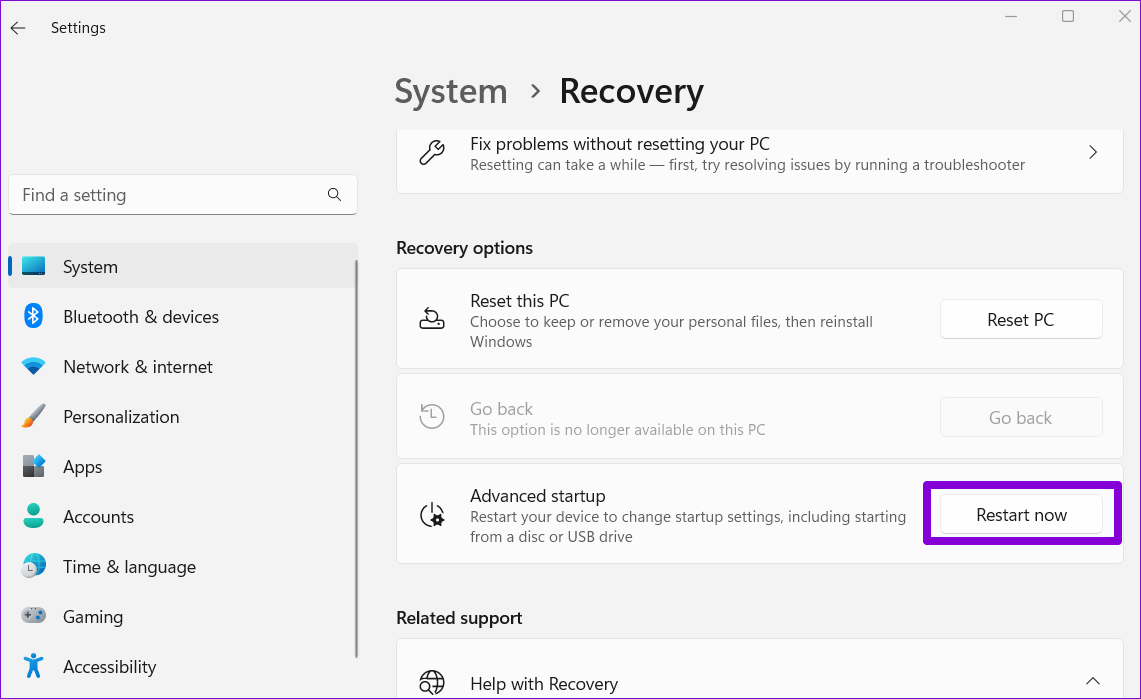
Step 3: Click the Restart now button.

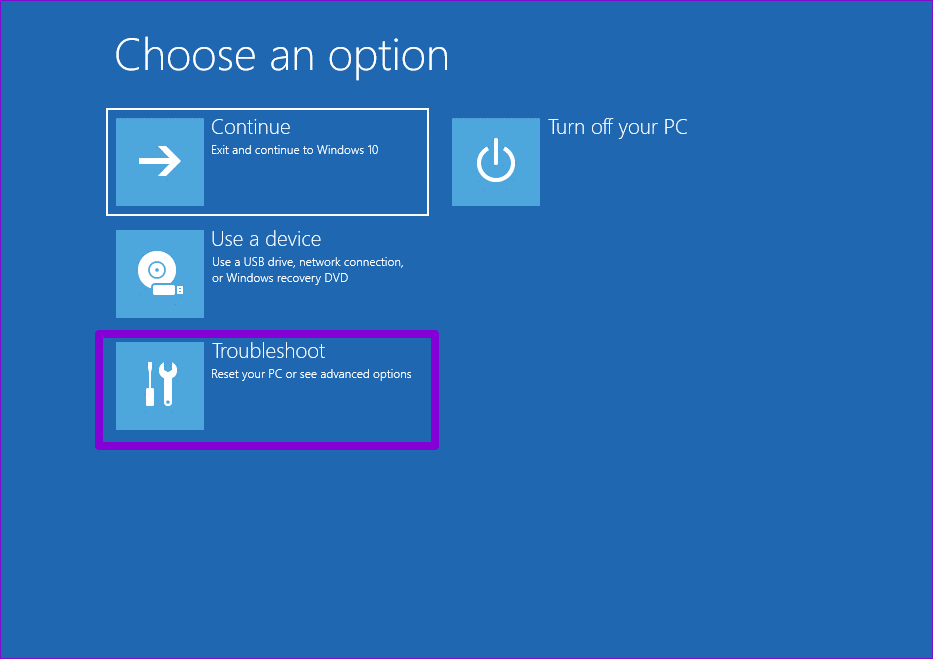
Step 4: Once your PC reboots, a blue screen should appear. Click the Troubleshoot option to continue.
Step 5: Select Advanced options.
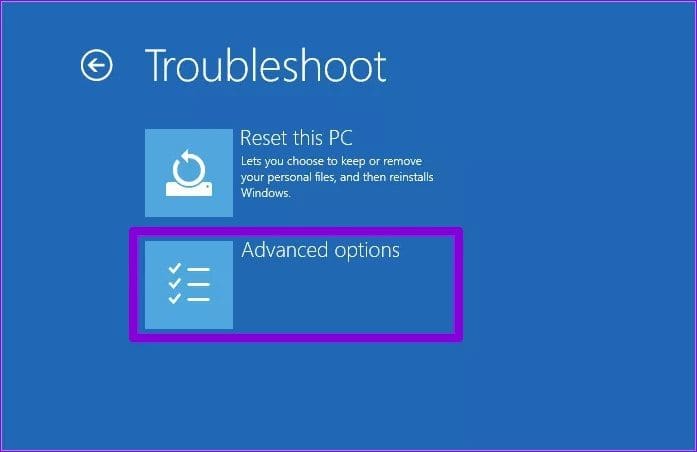
Step 6: Click the UEFI Firmware Settings option.
Note: The UEFI settings screen may appear different depending on your PC’s manufacturer and model.

Step 7: Once you’re in BIOS, head to the Boot menu and set your preferred Bootup NumLock State. Then, press F4 or the appropriate key to save your changes and exit BIOS.

The state of the Num Lock on your computer is typically determined by the manufacturer’s settings. However, this may not always be what you want or need. Fortunately, it’s easy to enable or disable the Num Lock key at Windows startup using the methods mentioned above.
Was this helpful?
Thanks for your feedback!
The article above may contain affiliate links which help support Guiding Tech. The content remains unbiased and authentic and will never affect our editorial integrity.
Some Windows users like to have their keyboard’s Num Lock feature in the ON state by default when their computer starts up. For this, it is important to know how to turn on Num Lock on your laptop. With the help of the Control Panel and Registry Editor, we can enable the Num Lock feature in Windows 10.
On the other hand, some users prefer not to have the Num Lock feature in the ON state when their system starts up. You can enable or disable the Num Lock feature in your system by altering Registry settings and Powershell options. You must be cautious while modifying the registry settings. Even a single wrong alteration will cause severe damages to other features of the system. You should always have a backup file of your registry whenever you are altering any settings in it.

Table of Contents
If you wish to turn on your Num Lock on your computer, you can use the following methods:
Method 1: Using Registry Editor
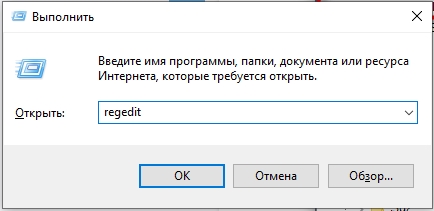
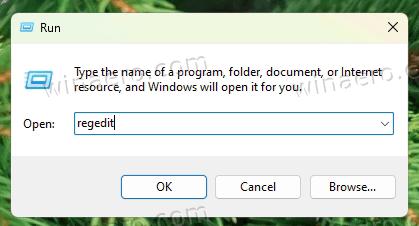
1. Open the Run dialog box by pressing Windows key + R together and type regedit and hit Enter.
2. Click OK and navigate the following path in the Registry Editor:
Computer\HKEY_USERS\.DEFAULT\Control Panel\Keyboard

3. Set the value of InitialKeyboardIndicators to 2 to turn on Num lock on your device.

Method 2: Using PowerShell Command
1. Log in to your PC.
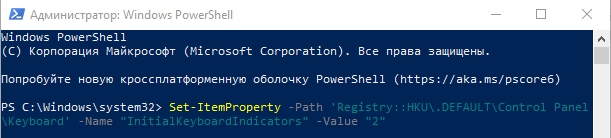
2. Launch PowerShell by going to the search menu and typing Windows PowerShell. Then click on Run as Administrator.

3. Type the following command into your PowerShell window:
Set-ItemProperty -Path 'Registry::HKU\.DEFAULT\Control Panel\Keyboard' -Name "InitialKeyboardIndicators"
4. Hit the Enter key and Windows 10 will ask you to enter a value. Set the value to “2” to turn on the Num Lock on the laptop.

Method 3: Using Function Keys
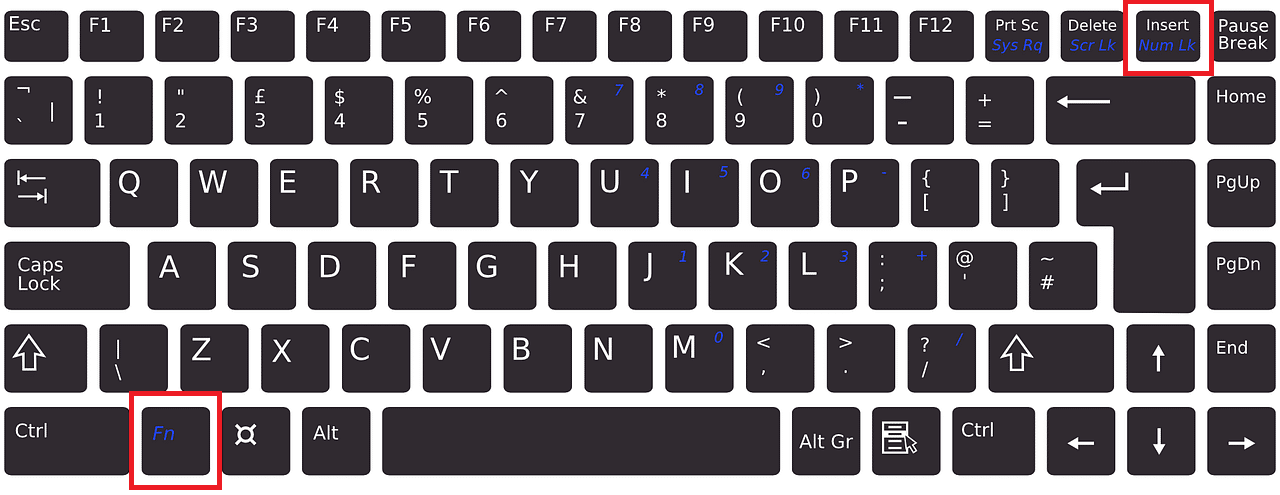
Sometimes you may accidentally hold the function key and the Num Lock key together. Such a combination can make certain letters of your alpha keyboard function as a numeric keyboard for a while. This happens more often for laptop users. This is how it can be resolved:
1. Search your keyboard for Function key (Fn) and Number Lock key (NumLk).
2. Hold these two keys, “Fn + NumLk,” to enable or disable the Num Lock feature on your device.
Method 4: Using BIOS Setting
Some BIOS set up in the computer can enable or disable the Num Lock feature in your system during start-up. Follow the given steps to alter the function of the Num Lock key:
1. While loading your Windows, click the “Delete” or “F1” key. You will enter it into BIOS.

2. Find the setting to enable or disable the Num Lock feature in your system.

Also Read: How to Remove or Reset the BIOS Password
Method 5: Using Login Script
You can use a Logon Script to enable or disable Num Lock on your system during startup if you are the system administrator.
1. Go to Notepad.
2. You can either type the following or copy & paste the following:
set WshShell = CreateObject("WScript.Shell")
WshShell.SendKeys "{NUMLOCK}"

3. Save the notepad file as numlock.vbs and place it in the “Startup” folder.
4. You can use any one of the following folders to place your numlock.vbs file:
a. Local logon script path:
- Press Windows Key + R then type %SystemRoot% and hit Enter.
- Under Windows, navigate to System32 > GroupPolicy > User > Scripts.
- Double-click on “Logon.”

b. Domain logon script path:
- Open File Explorer then navigate to \Windows\SYSVOL\sysvol\DomainName.
- Under DomainName, double-click on Scripts.
5. Type mmc in the Run dialog box and click on OK.
6. Launch File and click on Add/Remove Snap-in.
7. Click on Add as explained below.

8. Launch Group Policy.
9. Click on your desired GPO by using the Browse option.
10. Click on Finish. Click on the Close option followed by OK.
11. Navigate to Computer Configuration in Group Policy Management.
12. Go to Windows Settings and then Scripts. Click twice on the Logon script.
13. Click on Add. Browse and select the numlock.vbs file.
14. Click on Open and double-tap the OK prompt.
Note: This script acts like a Num Lock toggle button.
This may seem like a lengthy procedure, and you may feel comfortable using the Registry method, but the script method will help challenge situations.
How to Disable Num Lock on Windows 10 PC
If you wish to turn off Num Lock on your computer, you can use any of the following methods:
Method 1: Using regedit in Registry
1. Open the Run dialog box by pressing Windows key + R together and type regedit and hit Enter.
2. Click OK and navigate the following path in the Registry Editor:
Computer\HKEY_USERS\.DEFAULT\Control Panel\Keyboard
3. Set the value of InitialKeyboardIndicators to 0 to turn off the Num lock on your device.

Also Read: Fix Keyboard Typing Numbers Instead of Letters
Method 2: Using PowerShell Command
1. Launch PowerShell by going to the search menu and typing Windows PowerShell. Then click on Run as Administrator.
2. Type the following command into your PowerShell window:
Set-ItemProperty -Path 'Registry::HKU\.DEFAULT\Control Panel\Keyboard' -Name "InitialKeyboardIndicators"
3. Hit the Enter key and Windows 10 will ask you to enter a value.
4. Set the value to 0 to turn off the Num lock on the computer.

Recommended:
- How to Enable Num Lock on Startup in Windows 10
- Fix Windows Script Host Errors on Startup Windows 10
- Fix Unreal Engine Exiting Due To D3D Device Being Lost
- How to Fix iCUE Not Detecting Devices
We hope this article was helpful and you were able to enable or disable Num Lock. If you have any queries, reach out to us through the comments section below.
Всем привет, дорогие друзья! Сегодня будет короткая статья, и в ней мы посмотрим, как включить режим Num Lock при загрузке Windows 10 и Windows 11. Также статья подойдет и для более старых версий «Окон». Если ни один из первых вариантов вам не поможет – почитайте рекомендации из последней статьи.
Содержание
- Способ 1: Редактор реестра
- Способ 2: PowerShell
- Способ 3: Автозагрузка
- Способ 4: Физическое включение
- Что делать если при автозагрузке NumLock не включается?
- Задать вопрос автору статьи
Способ 1: Редактор реестра

Включить режим NumLock при загрузке Windows 10, 11, 7 или 8 можно с помощью нескольких параметров в редакторе реестра. Давайте сделаем это вместе.
- Зажмите две клавиши:
+ R
- Далее используем запрос команды:
regedit
- Проходим по пути:
HKEY_USERS\.Default\Control Panel\Keyboard
- Открываем параметр «InitialKeyboardIndicators» и меняем его значение на:
2
- Нажмите «ОК» и перезагрузите комп.
- Если этот вариант не сработает, зайдите опять туда же и измените тот же параметр на значение:
80000002
- Опять перезагружаемся.
Способ 2: PowerShell
Включить NumLock при загрузке Windows можно с помощью более продвинутой консоли, которая есть в десятой и одиннадцатой версии «Окон». Откройте Windows PowerShell с правами администратора, кликнув правой кнопкой по «Пуск». Далее используем команду:
Set-ItemProperty -Path 'Registry::HKU\.DEFAULT\Control Panel\Keyboard' -Name "InitialKeyboardIndicators" -Value "2"
Как вы могли догадаться, здесь мы просто изменили параметр в реестре, как и в первом способе. Чтобы изменения вступили в силу, перезапустите операционную систему. Ну и так же как и в первом случае – если команда не сработает, замените двойку на:
80000002
Способ 3: Автозагрузка
В этой главе мы создадим специальный скрипт, который должен включать режим Num Lock. Данный скрипт нужно будет закинуть в папку автозагрузки, чтобы файлик срабатывал при запуске операционной системы.
- Откройте программу «Блокнот».
- Скопируйте и вставьте эти команды:
set WshShell = CreateObject("WScript.Shell")

WshShell.SendKeys "{NUMLOCK}"
- Зажимаем клавиши:
Ctrl + Shift + S
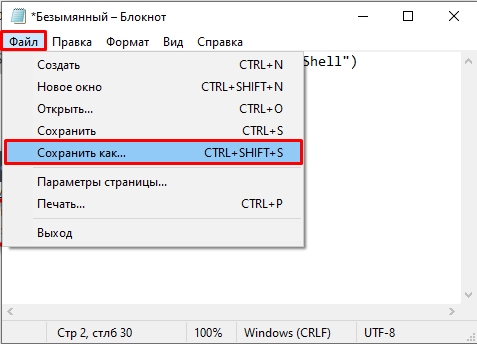
- Введите название на английском языке и установите «Тип файла» – «Все файлы». В конце установите формат:
.vbs

- Закиньте файлик в папку:
C:\Users\ПОЛЬЗОВАТЕЛЬ_ПК\AppData\Roaming\Microsoft\Windows\Start Menu\Programs\Startup

Способ 4: Физическое включение
Здесь мы рассмотрим вариант использования NumLock при начальной загрузке в BIOS. Обычно достаточно просто нажать на функциональную клавишу и режим работы с дополнительной панелью будет включен. Попробуйте это сделать. Если кнопка NumLock не работает на клавиатуре в BIOS, то проверьте, чтобы работали и другие клавиши. Если она не работает даже в загруженной Windows, то скорее всего, есть проблема в физической поломке. Возможно, на контакты платы попала посторонняя жидкость, сладкий чай, кофе или грязная вода.
Что делать если при автозагрузке NumLock не включается?
Такое часто происходит на ноутбуках и компьютерах, на которых включен режим гибернации и спящий режим. В таком случае система загружается не с жесткого диска, как это обычно происходит, а из отдельного файла hiberfil.sys. Поэтому если ни один из первых трех способов не дал результата, отключите эти режимы.
- Как отключить режим гибернации.
- Как отключить спящий режим.
После этого проблема должна будет решиться, а кнопка будет включаться при каждой загрузке ОС. На этом все, дорогие читатели. Если вы хотите получить персональную и бесплатную помощь от специалистов портала WiFiGiD.RU – подробно опишите свою проблему в комментариях. Всем добра и берегите себя!
In this post, we will review how to enable NumLock by default in Windows 11 and 10. So it will be turned on startup when you sign in to or restart the OS. It is very useful when your username or password has numbers that you type on the numeric keypad. But by default, the keypad is off and works as navigation keys. Luckily, there are several methods to change this. It is important to note that all of them also work in Windows 8.1/8, Windows 7 and even older versions of the operating system.
We will start with a Registry tweak that will allow to automatically turn it on every time you start your computer. So when it reaches the sign-in screen, the keypad will allow entering numbers. In Windows 11 and Windows 10 do the following.
Always Enable NumLock on Startup
- Press Win + R to open the Run dialog, and type regedit; hit Enter to launch the Registry Editor app.

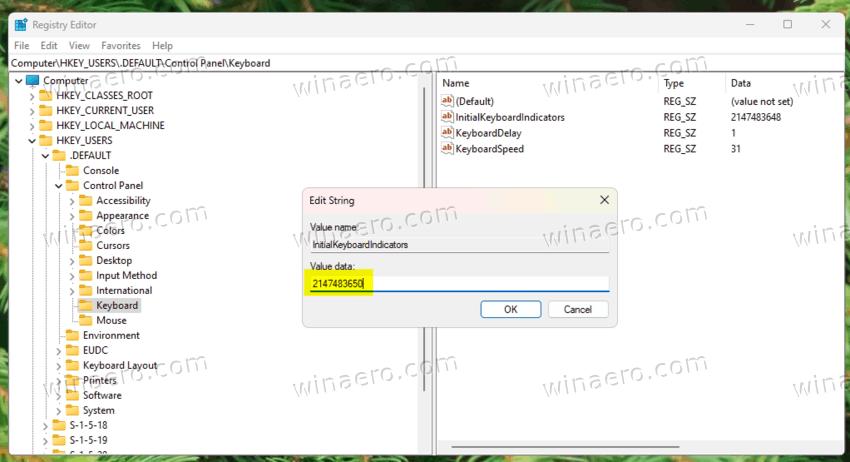
- Navigate to the following key: HKEY_USERS\.DEFAULT\Control Panel\Keyboard. You can paste this path to the address bar for faster navigation.
- On the right, double-click to modify the string value InitialKeyboardIndicators and set it to 2147483650.

- Restart the operating system.
Done! Next time you start Windows, you will have Numlock enabled on Startup, so the keypad number keys will now be available on the login screen.
Use the 2147483650 value if you are running Windows 11 or Windows 10.
To undo the change, modify the InitialKeyboardIndicators value and set its data to 2147483648.
Other useful values
There are more data that will allow you to manage the state of other modifier keys. Refer to the table below.
| InitialKeyboardIndicators Value | Description |
| 2147483648 | Turn all indicators off (NumLock, CapsLock, ScrollLock) |
| 2147483649 | Turn CapsLock on |
| 2147483650 | Turn NumLock on |
| 2147483651 | Turn CapsLock and NumLock on |
| 2147483652 | Turn ScrollLock on |
| 2147483653 | Turn CapsLock and ScrollLock on |
| 2147483654 | Turn NumLock and ScrollLock on |
| 2147483655 | Turn all indicators on (NumLock, CapsLock, ScrollLock) |
Windows 8.1 and Windows 8
In Windows 8.1, you can use the same 2147483650 value. But in the original version of Windows 8 it may fail, depending of what exactly updates you have installed. If the mentioned value has no effect on your computer, try settings InitialKeyboardIndicators to 80000002.

To undo the change, set it to 80000000.
Also, see the «Windows 7» chapter for more values. Just add 80000000 to Windows 7 value data.
Windows 7
In Windows 7, you must set InitialKeyboardIndicators to 2. This value will also work in any older version of the operating system, say Vista or XP. The undo value is 0 (zero).
For reference, the legacy values for InitialKeyboardIndicators look as follows.
| Legacy value | What enables or disables |
| 0 | Disables all key indicators |
| 1 | Enables CapsLock |
| 2 | Enables NumLock |
| 3 | Enables NumLock and CapsLock |
| 4 | EnablesScrollLock |
| 5 | Enables ScrollLock and CapsLock |
| 6 | Enables ScrollLock and NumLock |
| 7 | All key indicators are enabled |
As a reminder, in Windows 8 try to use values like 80000000,80000001,80000002, i.e. add 80000000 to a Windows 7 value.
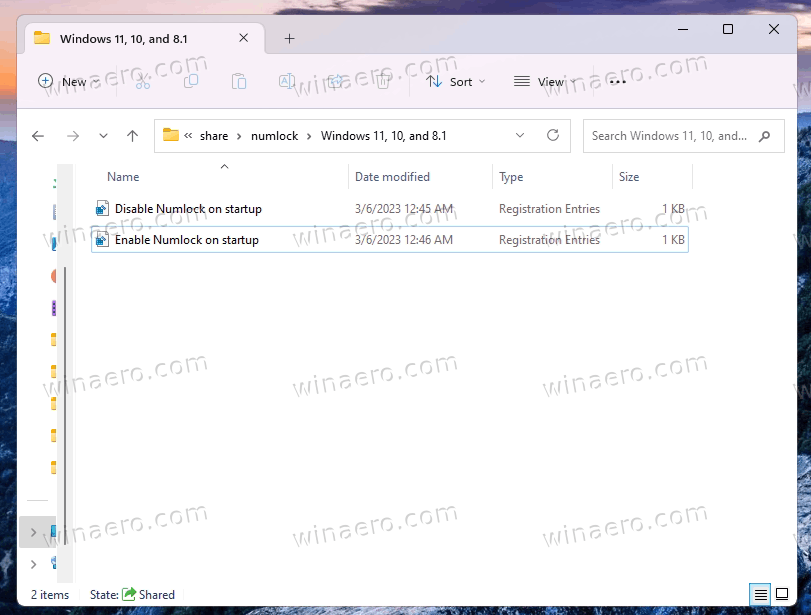
Download ready-to-use REG files
To save your time, I have prepared a set of ready-made Registry files that you can use to quickly enable or disable Numlock on Startup.
Download the ZIP archive linked here, and extract its content to any folder of your choice. You will find three folders:
- Windows 11, 10, and 8.1
- Windows 8
- Windows 7 and older
Depending on the Windows version you are running, open the appropriate folder and click on the file Enable Numlock on startup.reg.
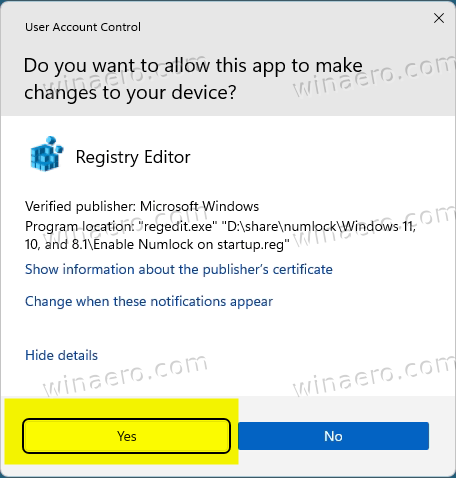
Click Yes in the User Account Control prompt, and one more time in the Registry Editor prompt. Voila, you have enabled Numlock on startup.
The undo tweak is also available; it is the Disable Numlock on startup.reg file.
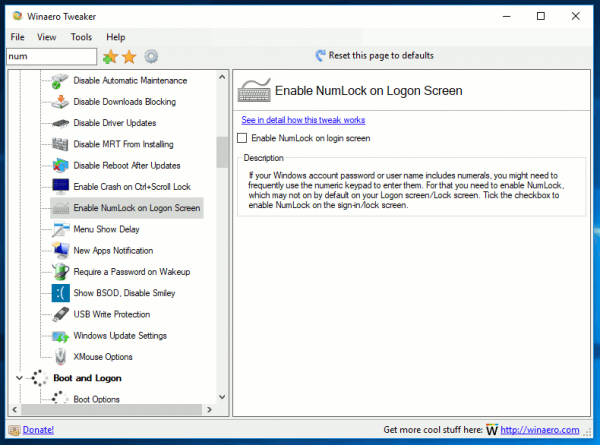
Using Winaero Tweaker
Finally, Winaero Tweaker users can use the app to quickly the Numlock startup state. Download Winaero Tweaker, install and launch it.
Look for the «Enable NumLock on Logon Screen» feature on the left. On the right, simply turn on (check) the appropriate checkbox, and you are good to go.
Winaero Tweaker also supports exporting and importing your tweaks, so you can easily transfer the changes you made from one PC to another.
The Command Prompt method
Finally, if you are interested in automating the Numlock state for the login screen, this can easily be done with the console REG.EXE app. It is bundled with all Windows versions.
To enable NumLock for the login screen from the command prompt, do the following.
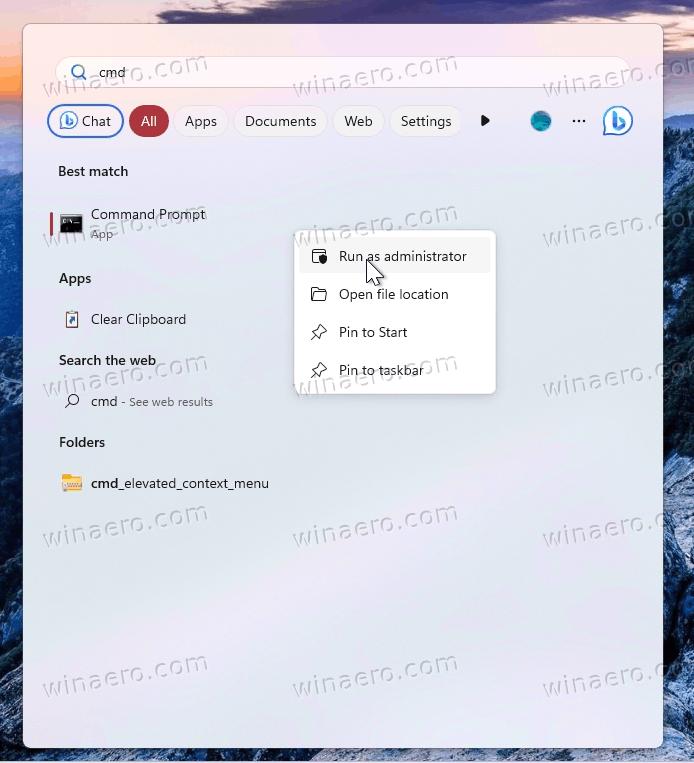
- Open the Start menu, and directly type cmd.exe.
- In the search result, select Run as administrator to open it elevated.

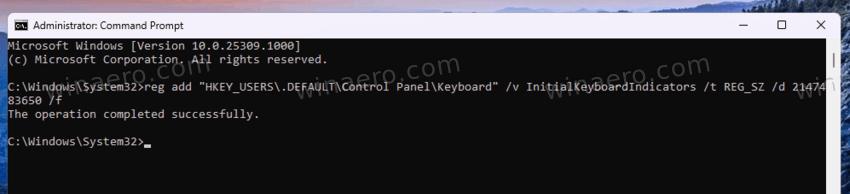
- Finally, type one of the following commands.
- Windows 11, 10, and 8.1:
reg add "HKEY_USERS\.DEFAULT\Control Panel\Keyboard" /v InitialKeyboardIndicators /t REG_SZ /d 2147483650 /f.
- Windows 8:
reg add "HKEY_USERS\.DEFAULT\Control Panel\Keyboard" /v InitialKeyboardIndicators /t REG_SZ /d 80000002 /f - Windows 7 and older:
reg add "HKEY_USERS\.DEFAULT\Control Panel\Keyboard" /v InitialKeyboardIndicators /t REG_SZ /d 2 /f.
- Windows 11, 10, and 8.1:
Change NumLock state for the current user account
You may need to change the default NumLock state for your current user account, e.g. via an automated setup. In this case, you need to change the InitialKeyboardIndicators value under a different Registry key. Here you go.
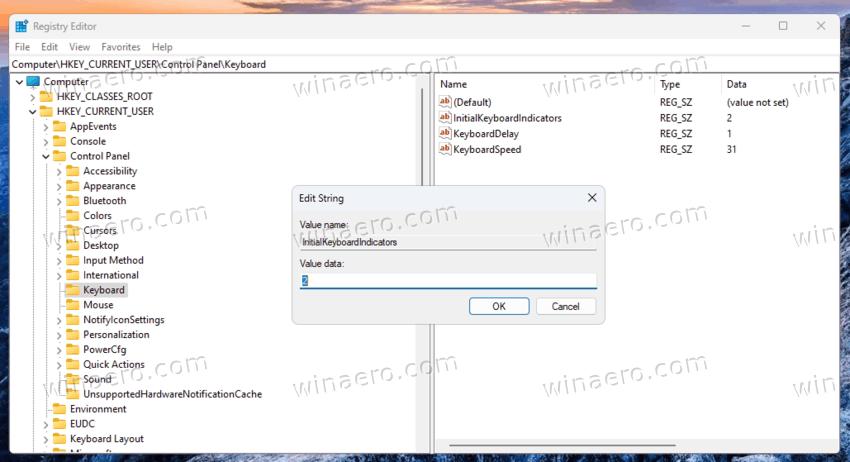
- Open regedit.exe (Win + R > regedit).
- On the left, expand the tree to the HKEY_CURRENT_USER\Control Panel\Keyboard key.
- Double-click the InitialKeyboardIndicators and set it to 2.
- You can now close the Registry editor.
Done! Setting the InitialKeyboardIndicators value to 2 under this key works in all Windows versions.
Using command prompt
In this very case, you need to open a regular command prompt (cmd.exe). The command doesn’t require to be executed as Administrator. So, to change the NumLock status from the command prompt for your user account, run cmd.exe and issue the following command:
reg add "HKEY_CURRENT_USER\Control Panel\Keyboard" /v InitialKeyboardIndicators /t REG_SZ /d 2 /f
Make NumLock turned on by default for new users
When you create a new user account on your PC, you may want it to have NumLock turned on by default when you sign in to it. For that, Windows allows customizing the default user profile. You can use for that the Regedit app, or customize it from the command prompt with the reg.exe app.
Enable NumLock for new user accounts
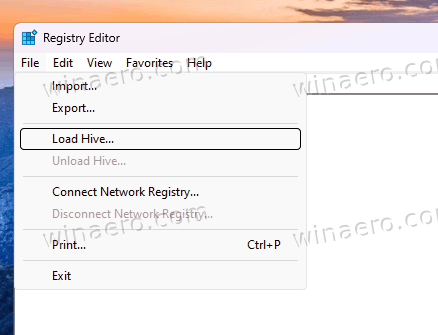
- Type regedit.exe in Windows Search and run it.
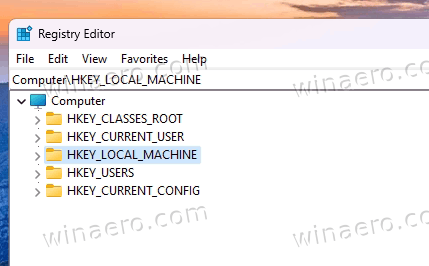
- In the Registry editor, select HKEY_LOCAL_MACHINE in the left area.

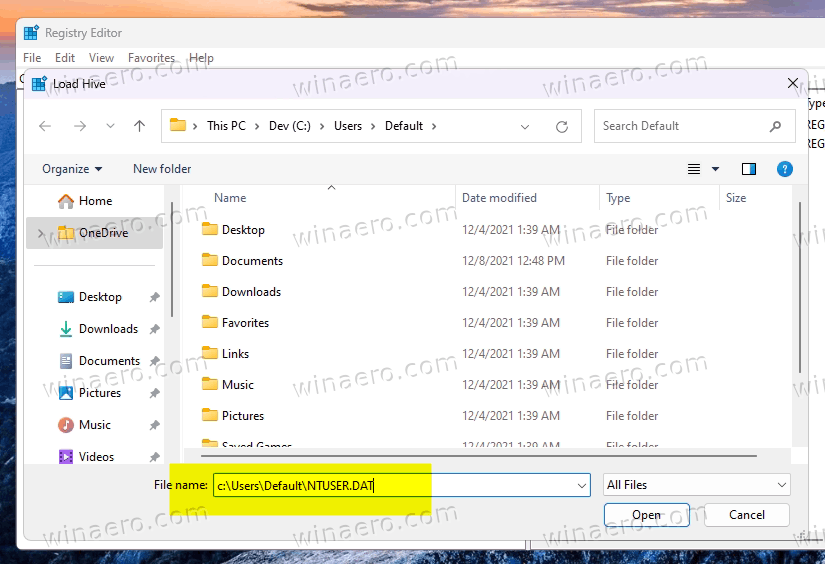
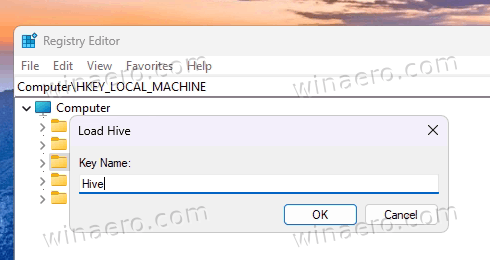
- Click on the File menu and select Load hive….
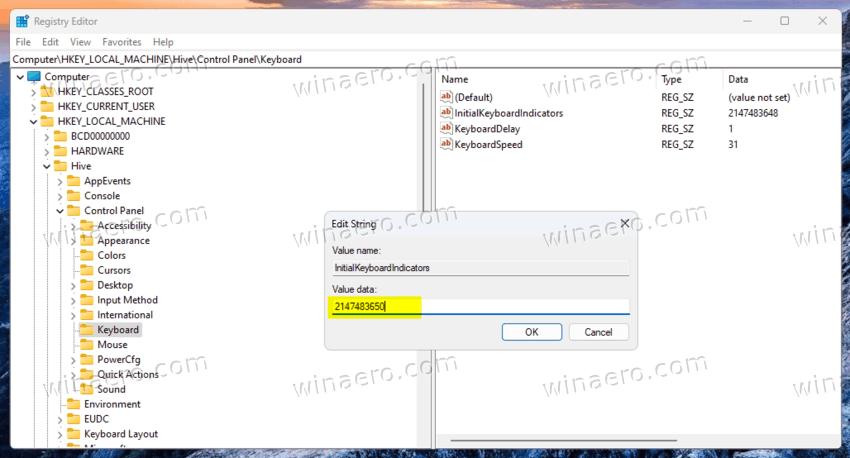
- In Windows 11, 10 and 8.1, set it to
2147483650.
- In Windows 8, set it to
80000002 - Windows 7 and older — set it to
2.
You are done! Windows will now remember your customizations. So if you create a new user account, it will have NumLock enabled by default.
As mentioned above, the same can be automated with help of the reg.exe tool.
The automated method
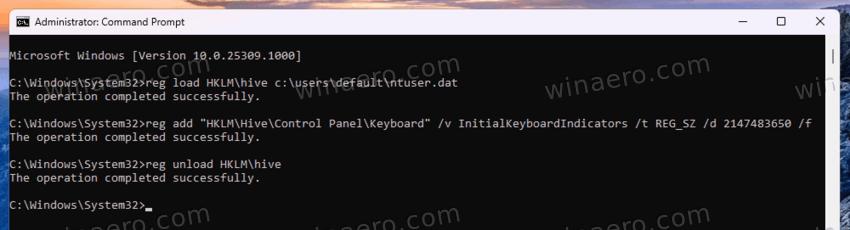
Open a new command prompt (cmd.exe) as Administrator, and type the following commands, one after one.
reg load HKLM\hive c:\users\default\ntuser.datreg add "HKLM\Hive\Control Panel\Keyboard" /v InitialKeyboardIndicators /t REG_SZ /d 2147483650 /freg unload HKLM\hive
Again, if you are running Windows 8 or Windows 7, use 80000002 or 2 instead of 2147483650, respectively.
Save the commands as a batch file, and you will be able to run it on demand after reinstalling the OS.
This does not require any Registry hacks or changes to system settings.
Simply boot to the login screen or the Lock screen, and do the following:
- On the Logon/Lock screen, press the NumLock key on the keyboard to turn it on.
- The Login screen contains a power button in the bottom right corner. Use it to reboot Windows:

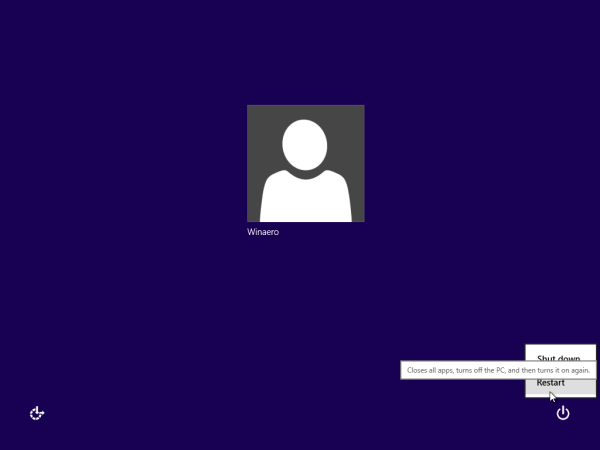
The next time Windows boots, NumLock will be automatically enabled. If this trick does not work for you for some reason, try the Registry tweak below. It should work in all modern Windows versions including Windows 11, 10 and Windows 8.x.
Fix Windows doesn’t remember the NumLock state
There are user reports that regardless of the method they used NumLock remains off on the sign-in screen. This is because of the Fast Boot feature which is enabled by default in modern Windows.
Fast Boot partially puts the operating system to the hibernation state when you shut down it. It unloads the running apps from memory, but writes the state of the OS kernel and drivers to the hard drive. Next time you start your PC, it quickly reads the saved state and hits the user login screen in a few seconds.
The problem here is that Windows may not «see» the changes you have done to the Registry as it doesn’t re-read the appropriate key. Here’s what you can to do.
Workaround #1. Modify the Registry and restart the OS.
- Apply all the required changes to the Registry. E.g. set InitialKeyboardIndicators to 2147483650 in the HKEY_USERS subree, and to 2 under HKEY_CURRENT_USER.
- Restart Windows to make it «remember» the change.
Alternatively, you can disable Fast Boot. The operating system will start slightly slower, but on modern devices with NVMe/SSD the increase of boot time is not that notable.
Workaround #2. Disable fast boot
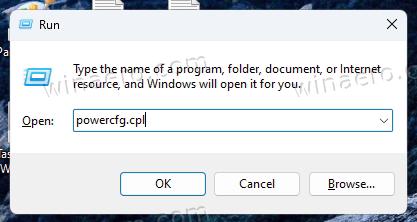
- Press Win + R, type powercfg.cpl in the Run box, and hit Enter.

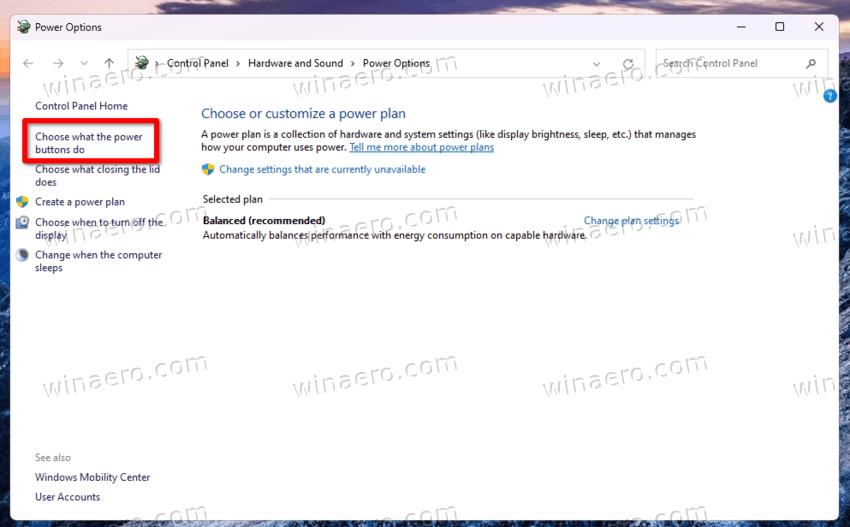
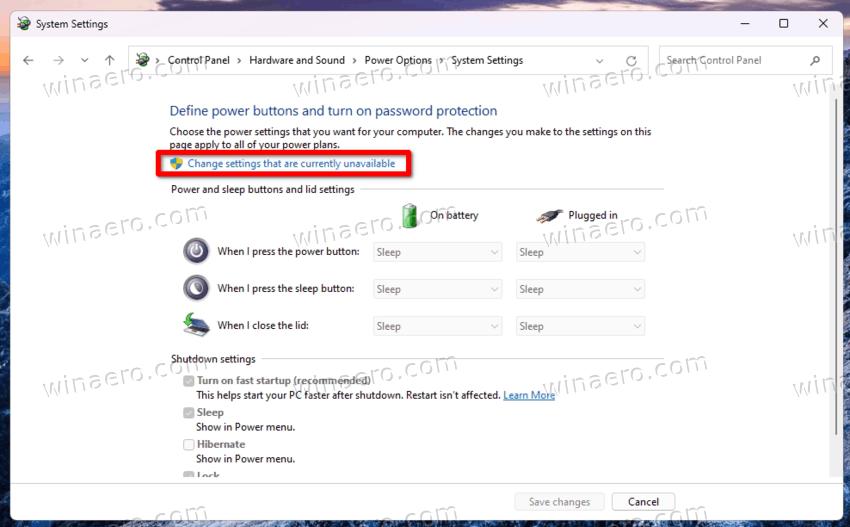
- In the Power Options window, click on the Choose what the Power buttons do link on the left.

- Now, click on the Change settings that are currently unavailable link on the right.
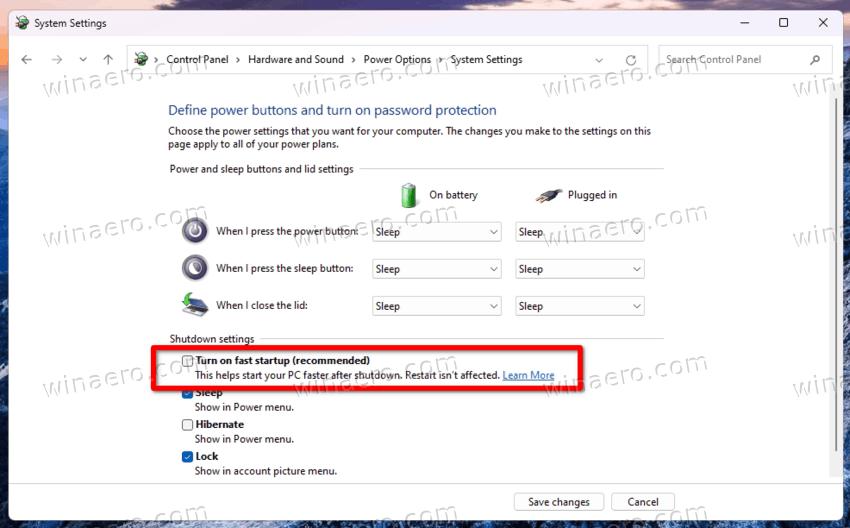
- Finally, remove the check mark from the Turn on fast startup (recommended) option.

- Click on the Save settings button.
- Restart Windows.
You are done. You have disabled the Fast Startup feature. Now you can apply the reviewed tweaks, or turn on the NumLock indicator button on the sign-in screen. Windows should remember the change.
That’s it.
Support us
Winaero greatly relies on your support. You can help the site keep bringing you interesting and useful content and software by using these options:
If you like this article, please share it using the buttons below. It won’t take a lot from you, but it will help us grow. Thanks for your support!