Все способы:
- Способ 1: Стандартные средства
- Способ 2: Редактирование параметра реестра
- Способ 3: Использование команды для PowerShell
- Способ 4: Добавление скрипта в автозагрузку
- Решение возможных проблем с автоматическим включением NumLock
- Вопросы и ответы: 3
Клавиша NumLock управляет цифровым блоком на клавиатуре и по умолчанию отключена, что вызывает надобность активировать ее, например, чтобы ввести пин-код во время входа в Windows 10. Существуют способы, позволяющие настроить автоматическое включение цифрового блока при загрузке операционной системы. Сегодня мы предлагаем разобраться со всеми ними, чтобы любой пользователь смог подобрать понравившийся вариант и без проблем реализовать его.
Способ 1: Стандартные средства
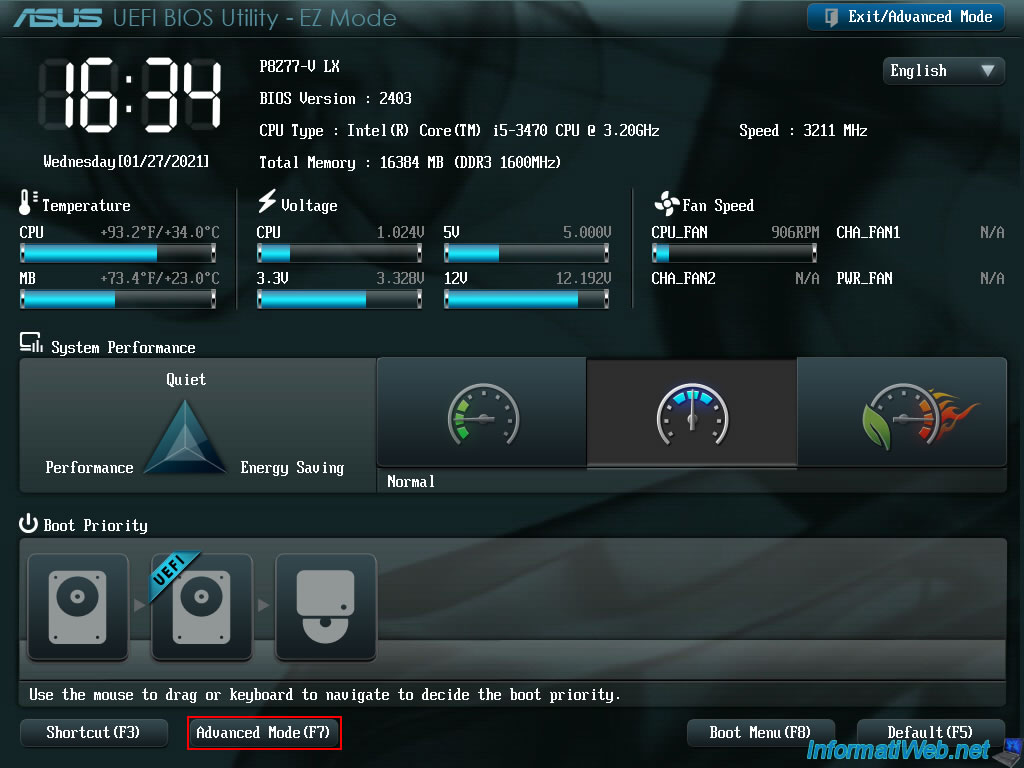
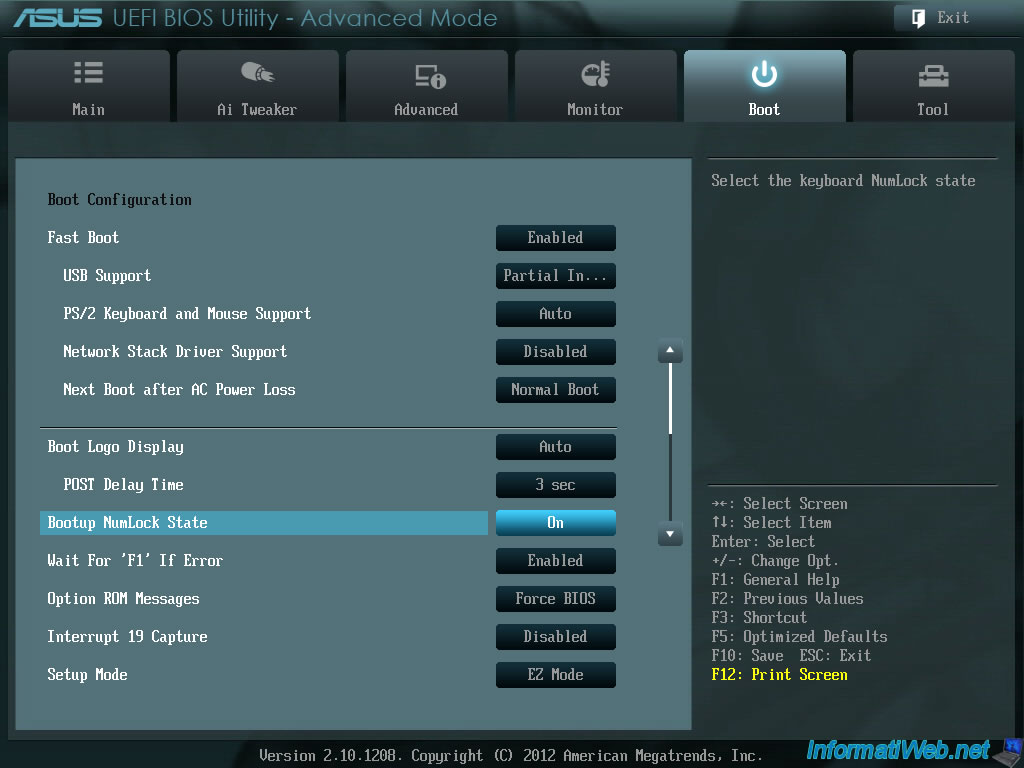
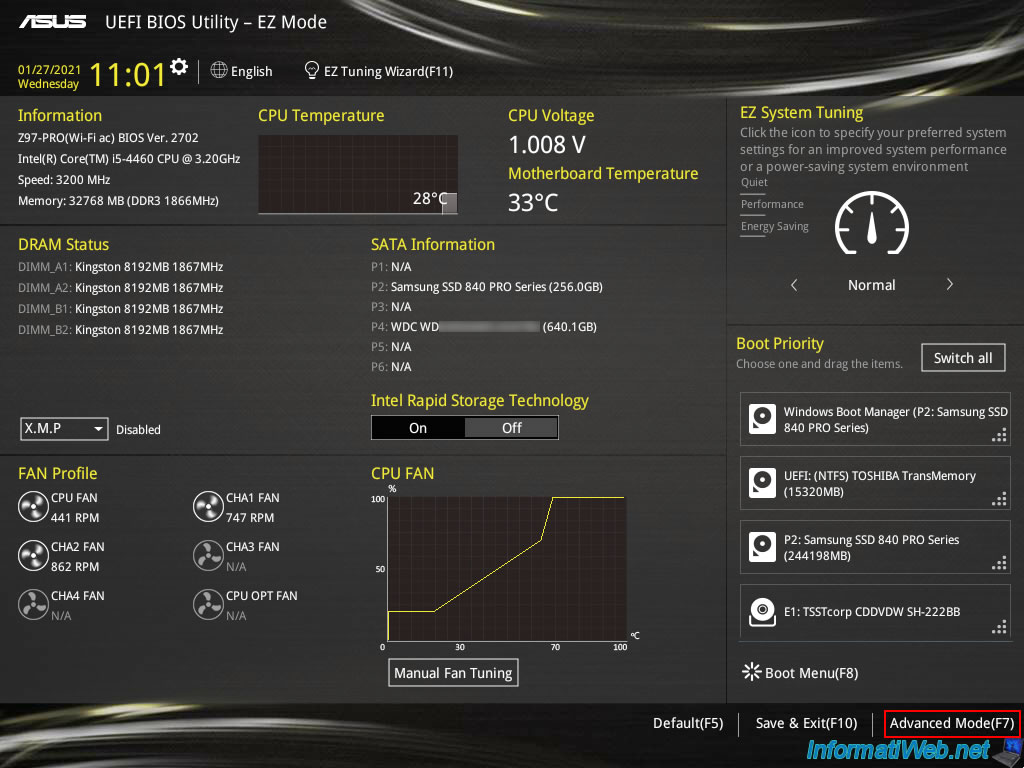
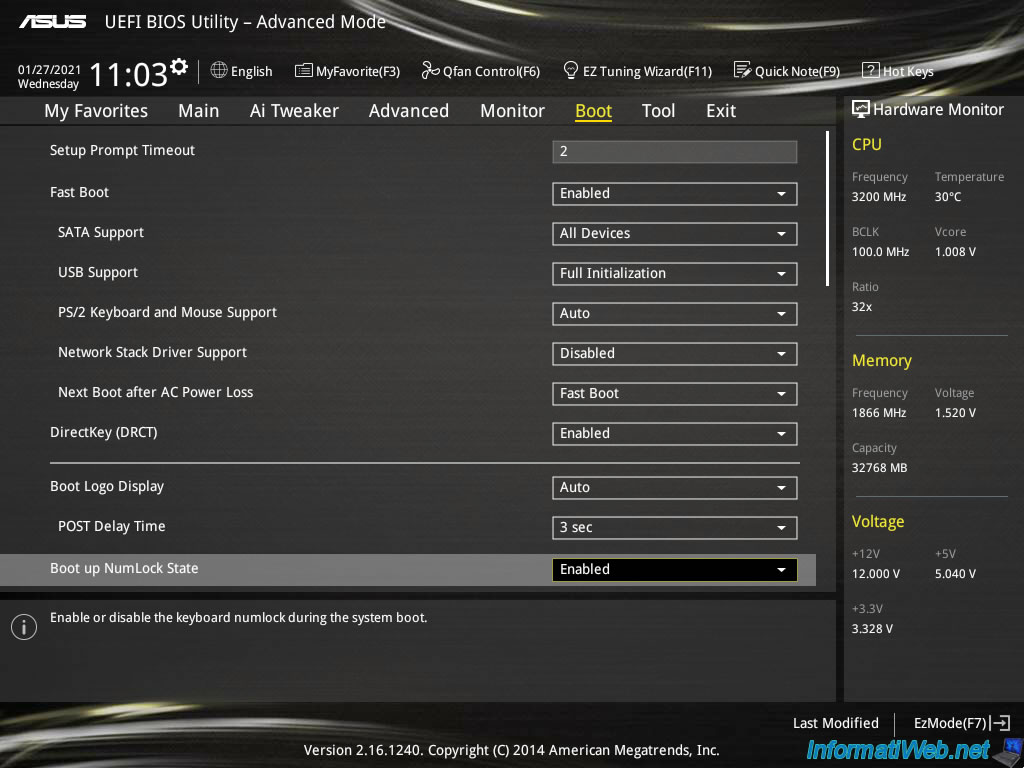
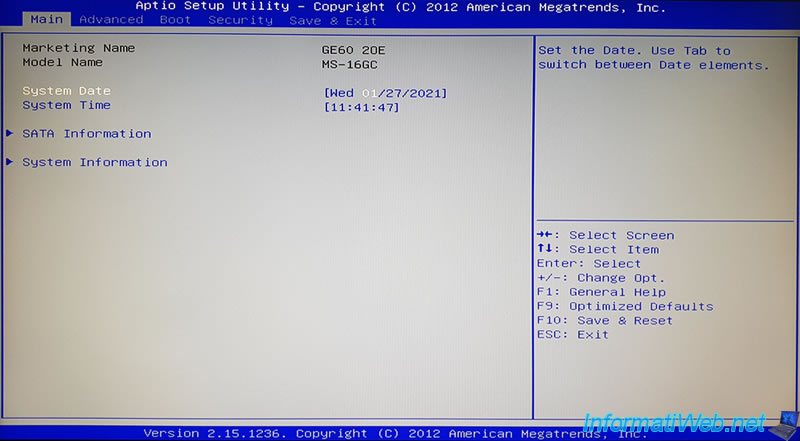
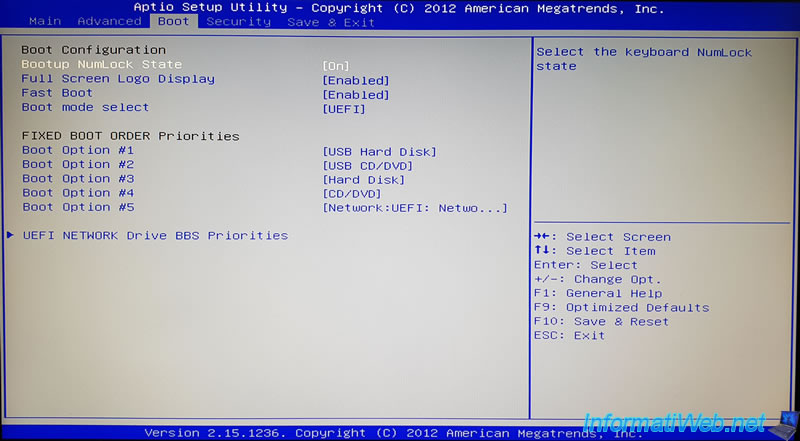
В первую очередь поговорим о стандартных средствах, которые позволяют быстро активировать NumLock и начать использовать цифровой блок. Сюда относится сама клавиша, расположенная на клавиатуре, функциональные клавиши ноутбука и настройки BIOS, отвечающие за работоспособность рассматриваемой опции. Обо всем этом вы можете прочесть в другом материале на нашем сайте, нажав по следующей ссылке.
Подробнее: Как включить цифровой блок клавиш
Однако представленные в упомянутом руководстве методы не всегда работают именно при загрузке Виндовс и не активируют цифровой блок автоматически, поэтому мы предлагаем ознакомиться с более сложными вариантами, благодаря которым цифровой блок будет переходить в рабочее состояние самостоятельно.
Способ 2: Редактирование параметра реестра
В редакторе реестра есть ключ, отвечающий за функционирование определенных клавиш на клавиатуре, куда относится и NumLock. Если его правильно отредактировать, блок дополнительных цифр справа будет автоматически активирован при загрузке операционной системы. От пользователя требуется выполнить всего несколько простых действий.
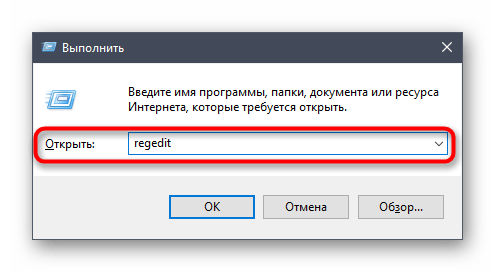
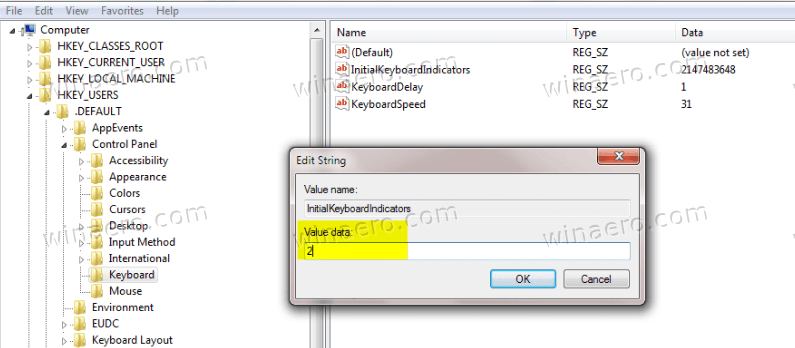
- Откройте утилиту «Выполнить», зажав стандартную комбинацию клавиш Win + R. Там введите
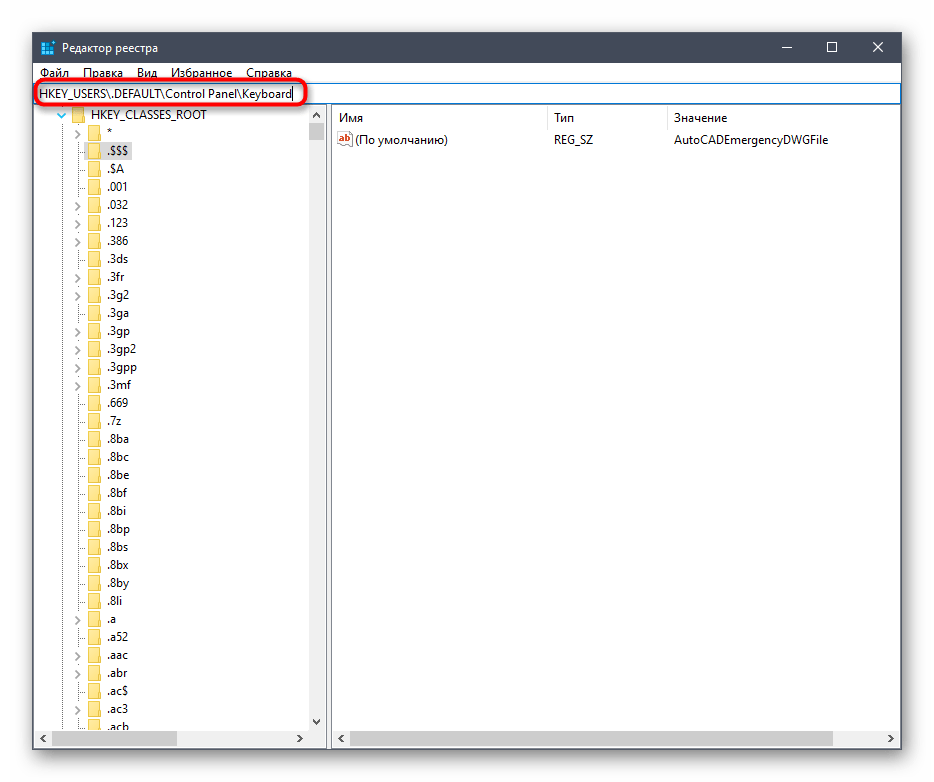
regeditи нажмите на Enter. - Перейдите по пути
HKEY_USERS\.Default\Control Panel\Keyboard. - В корне ключа отыщите параметр «InitialKeyboardIndicators» и дважды кликните по нему левой кнопкой мыши, чтобы открыть настройки.
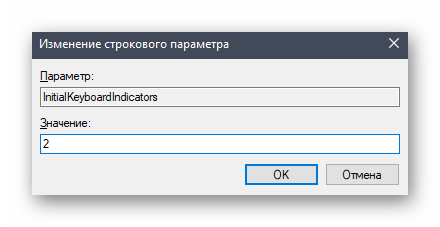
- Измените стандартное значение на «2» и сохраните изменения.
- Если это не принесет результата, вернитесь к изменению строкового параметра и задайте для него значение «80000002».


Все изменения, вносимые в редактор реестра, вступят в силу только после перезагрузки компьютера, поэтому осуществите повторный вход в систему, а затем проверяйте результат выполненных действий.
Способ 3: Использование команды для PowerShell
Расширенная оболочка PowerShell позволяет использовать различные команды для внесения изменений в системные настройки. Это можно сделать и для определенных ключей реестра, изменяя их значения путем ввода всего одной строчки кода. Если вы не боитесь работать с такой оболочкой, осуществите следующие шаги:
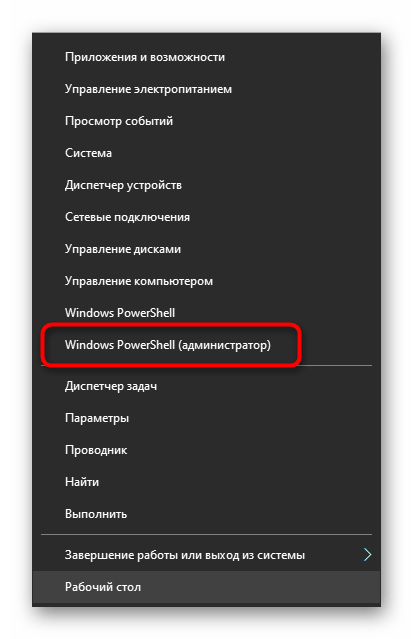
- Щелкните ПКМ по значку «Пуск» и в появившемся контекстном меню отыщите пункт «Windows PowerShell (администратор)».
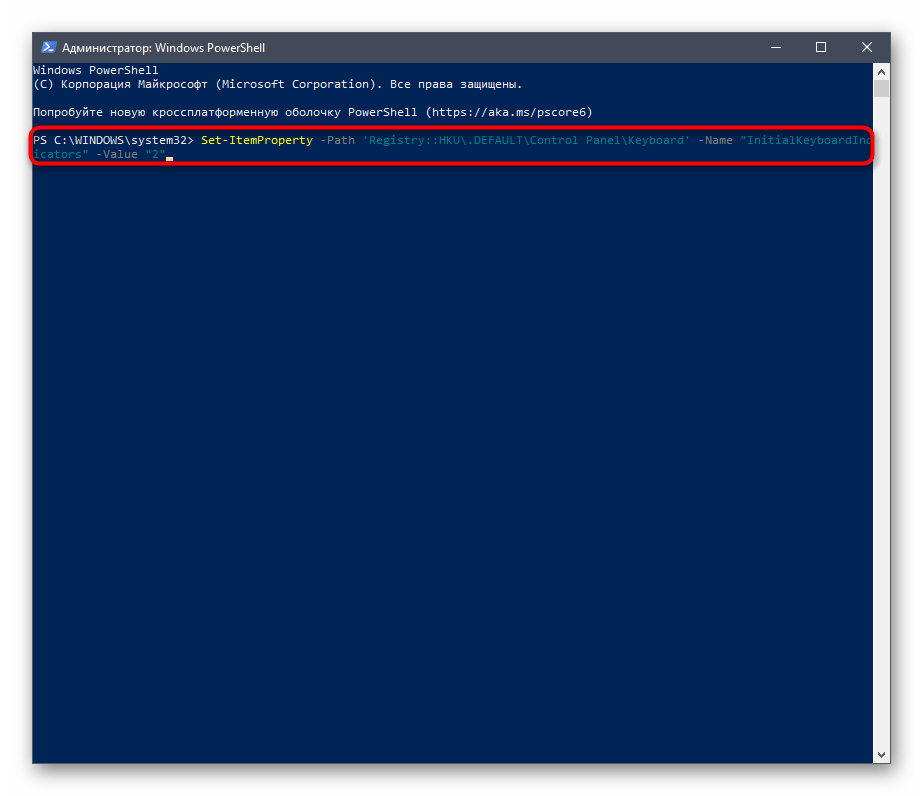
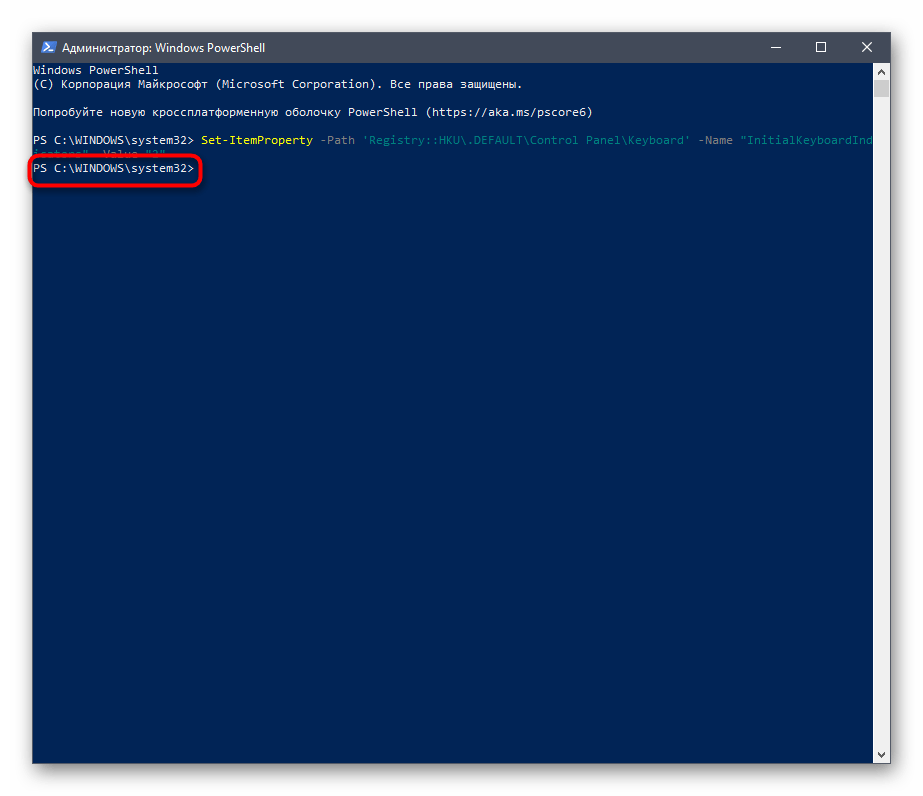
- После загрузки оболочки вставьте туда команду
Set-ItemProperty -Path 'Registry::HKU\.DEFAULT\Control Panel\Keyboard' -Name "InitialKeyboardIndicators" -Value "2"и нажмите на Enter для ее активации. Замените значение на «80000002», если в первом случае настройка не сработает. - Об успешном выполнении действия сообщит появившаяся строка ввода без дополнительных уведомлений об ошибках.
В этом случае тоже следует перезагрузить операционную систему, чтобы все изменения вступили в силу. При следующем входе в Виндовс уже можно проверить, работает ли цифровой блок на клавиатуре без предварительной его активации.
Способ 4: Добавление скрипта в автозагрузку
Этот вариант рекомендуется использовать только в той ситуации, если два описанных выше метода не помогли и NumLock все еще не включается автоматически при старте Windows 10. Его суть заключается в добавлении скрипта в автозагрузку, который и будет отвечать за включение цифрового блока.
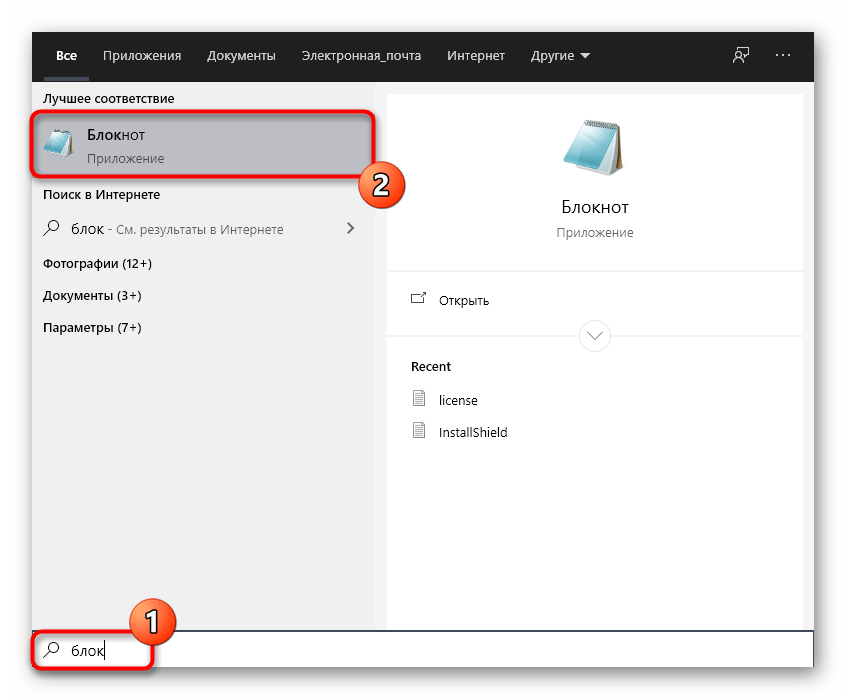
- Для этого откройте «Пуск» и запустите оттуда приложение «Блокнот».
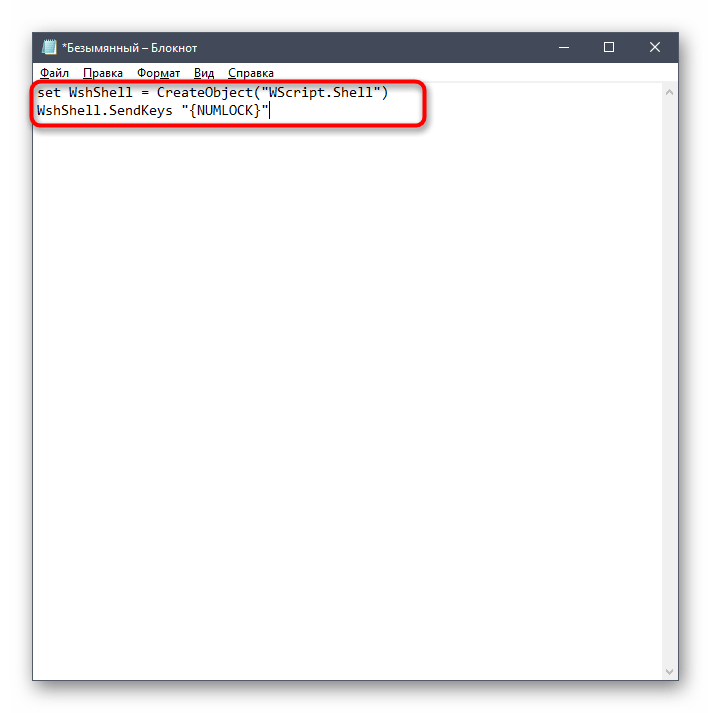
- Вставьте туда следующее содержимое:
set WshShell = CreateObject("WScript.Shell")
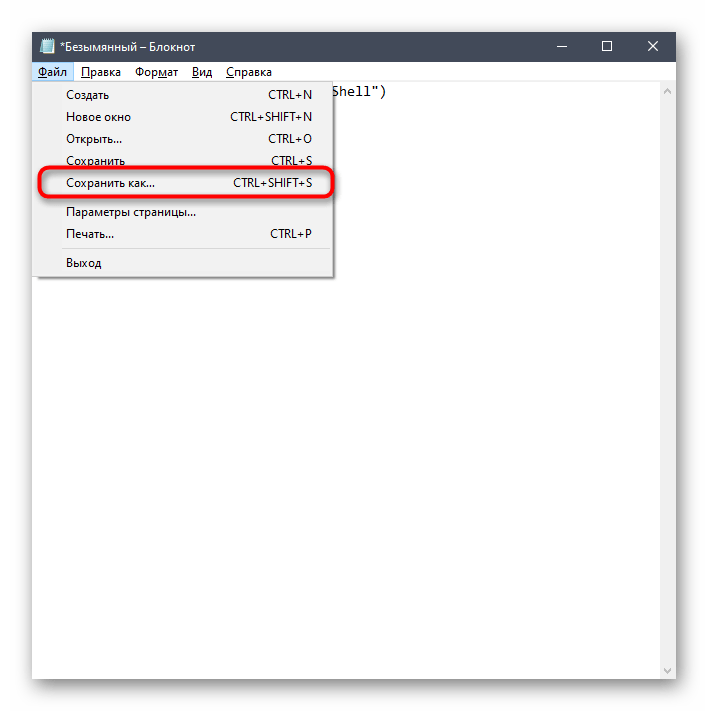
WshShell.SendKeys "{NUMLOCK}" - Через меню «Файл» перейдите в «Сохранить как…». Эту же команду можно вызвать комбинацией Ctrl + Shift + S.
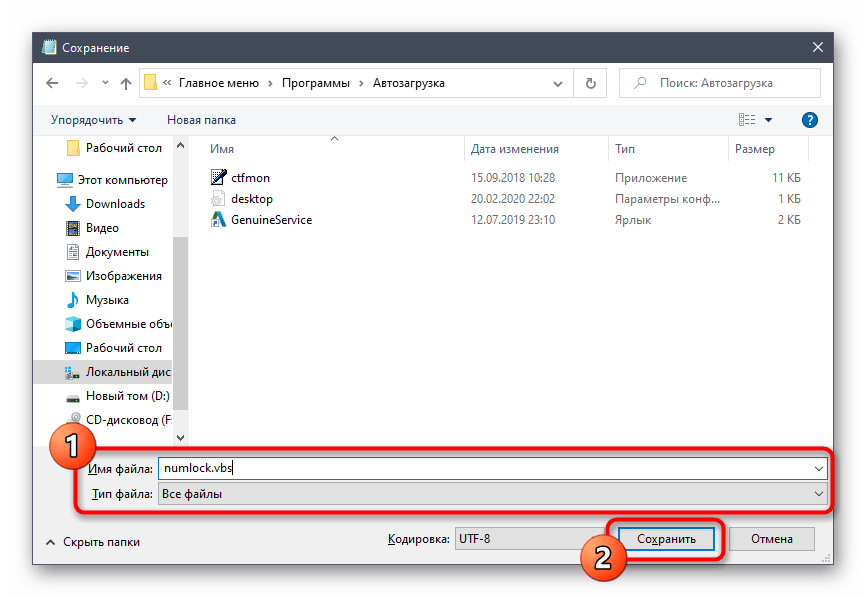
- В открывшемся окне Проводника перейдите по пути
C:\Users\ИМЯ_ПОЛЬЗОВАТЕЛЯ\AppData\Roaming\Microsoft\Windows\Start Menu\Programs\Startup. - Выберите тип файла «Все файлы» и задайте имя
numlock.vbs, а уже после нажмите по кнопке «Сохранить».

Решение возможных проблем с автоматическим включением NumLock
Некоторые пользователи при выполнении описанных выше действий могут столкнуться с проблемой, что цифровой блок по-прежнему не активируется автоматически. В большинстве случаев это связано с настройками питания, мешающими корректному включению цифрового блока. Проверить и исправить ситуацию можно так:
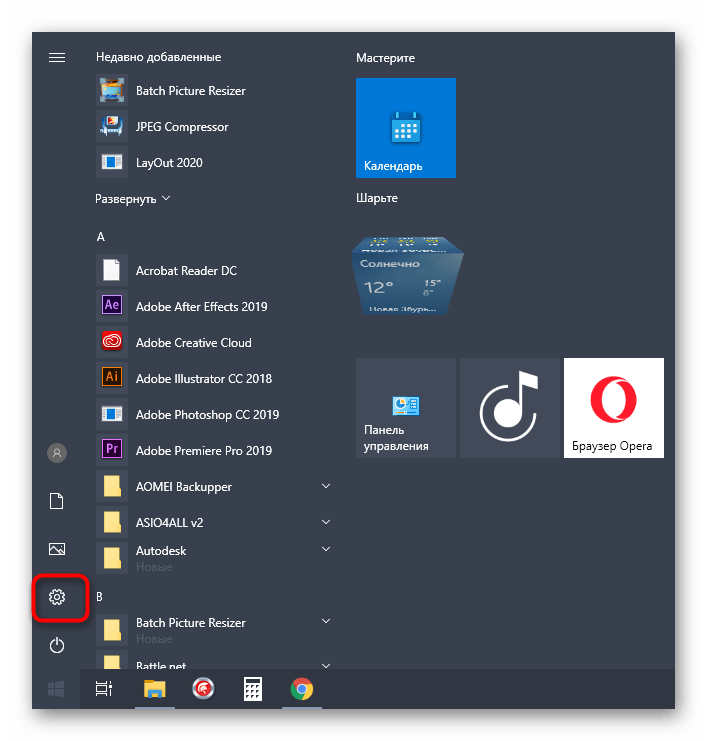
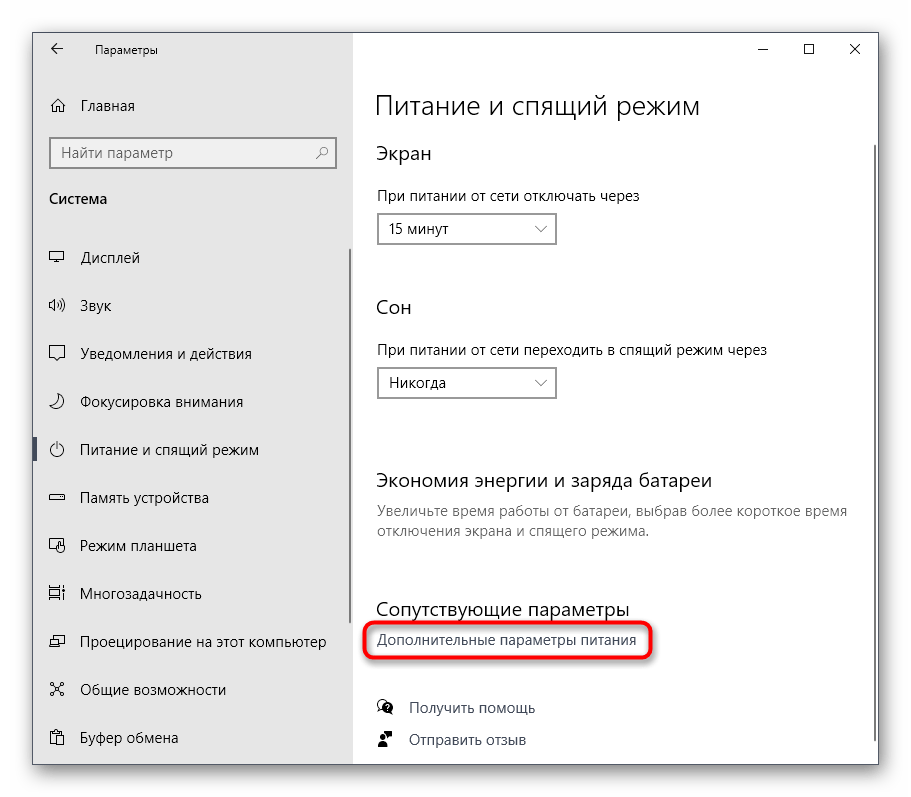
- Откройте «Пуск» и перейдите в «Параметры».
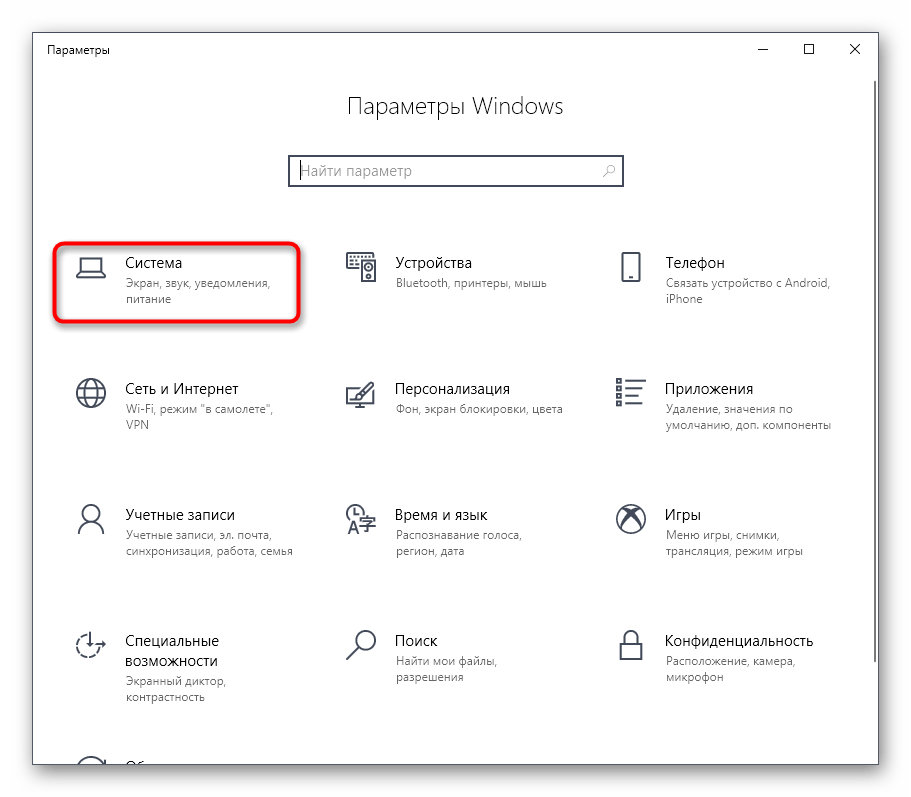
- Выберите раздел «Система».
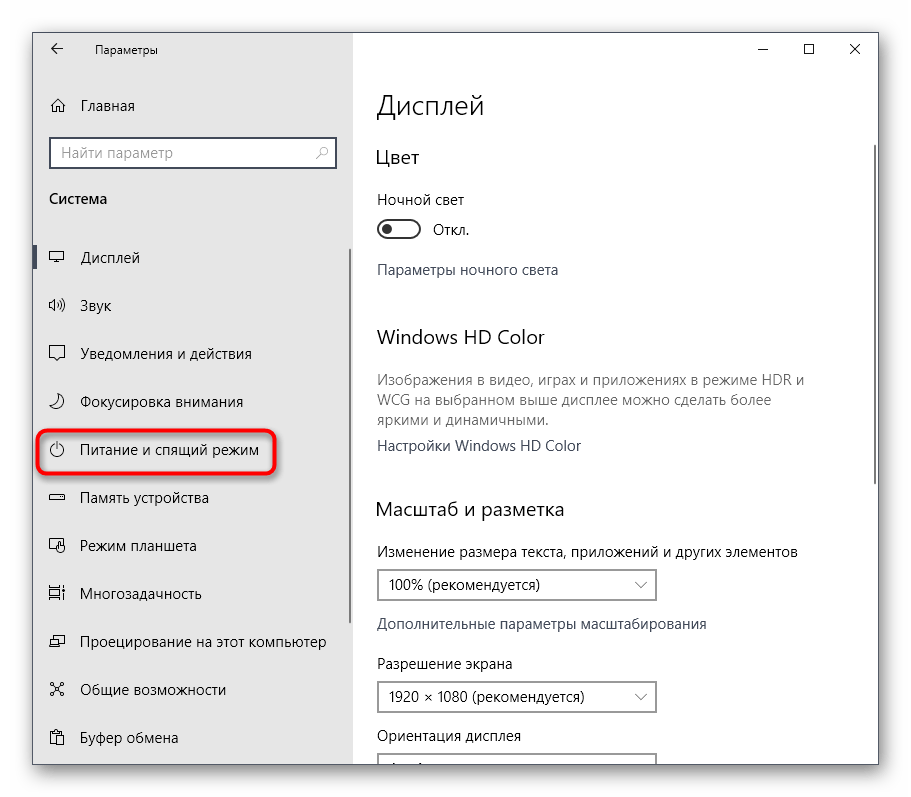
- Через левое меню перейдите в «Питание и спящий режим».
- В категории «Сопутствующие параметры» кликните по надписи «Дополнительные параметры питания».
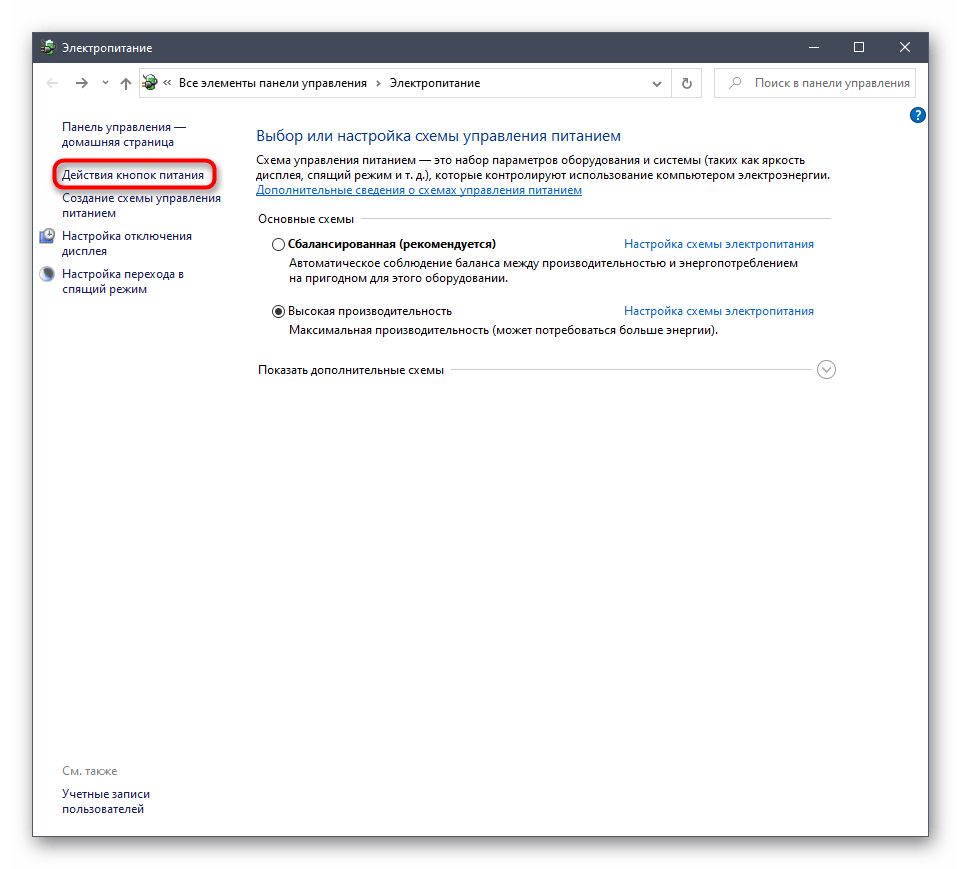
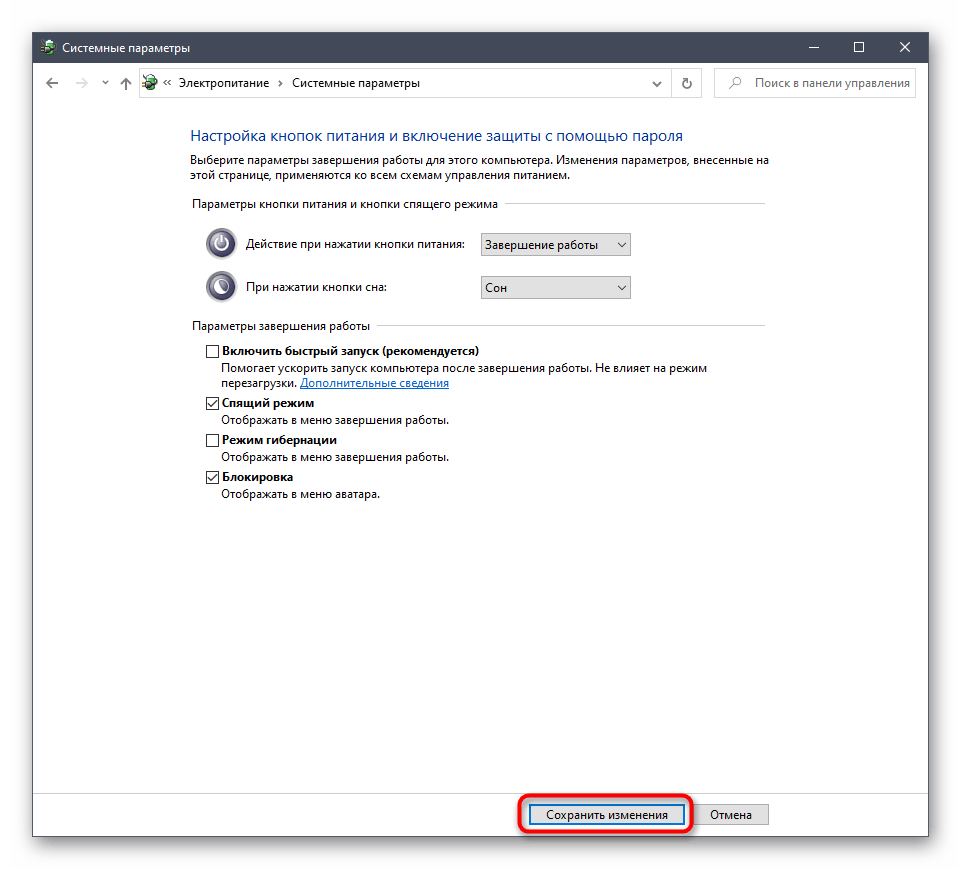
- Откроется новое окно «Электропитание», где нужно переместиться в «Действия кнопок питания».
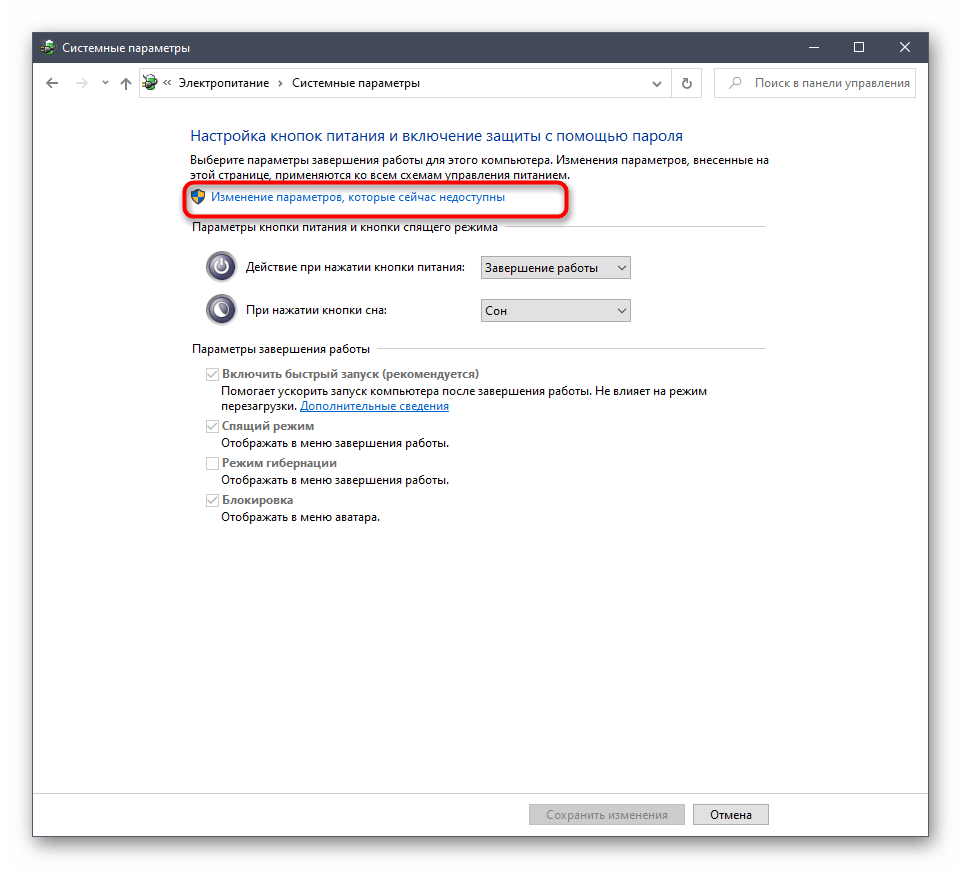
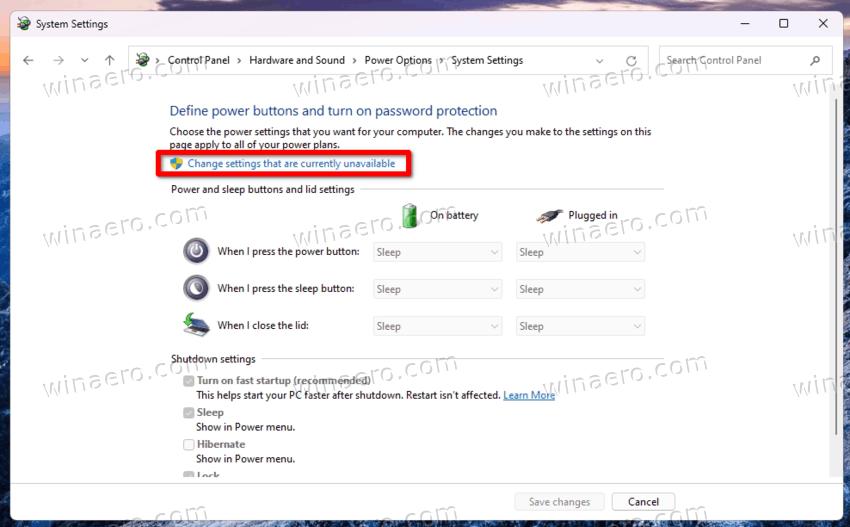
- Щелкните по надписи «Изменение параметров, которые сейчас недоступны».
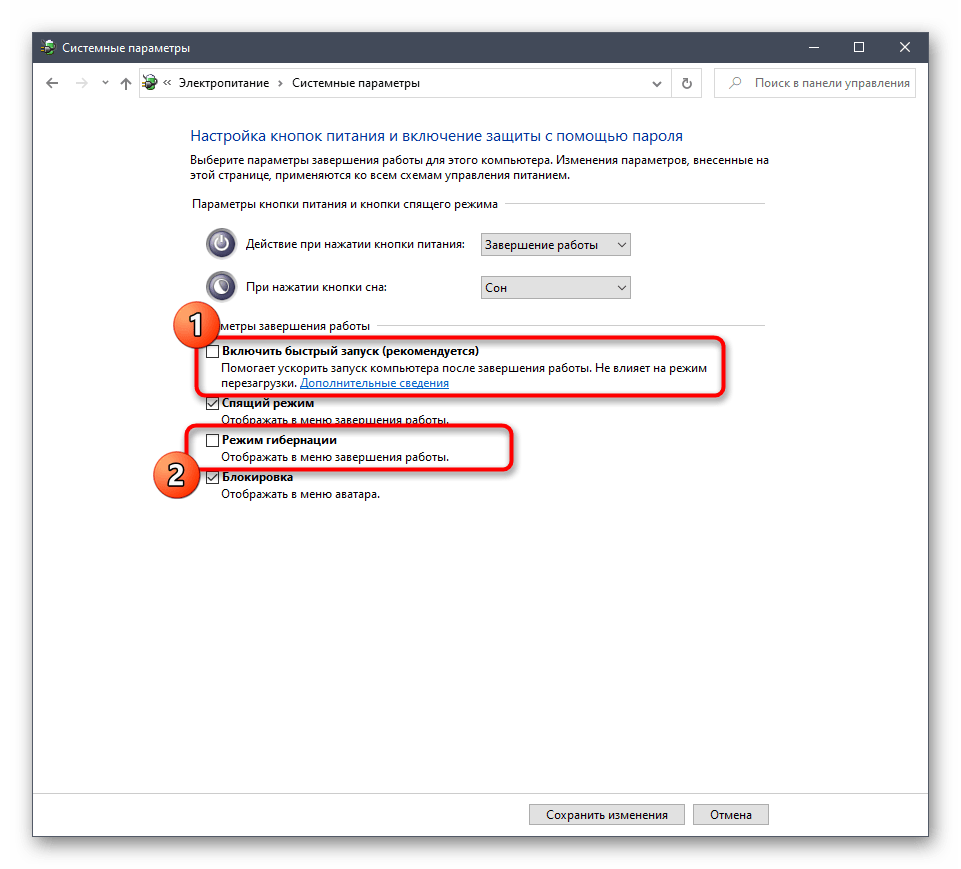
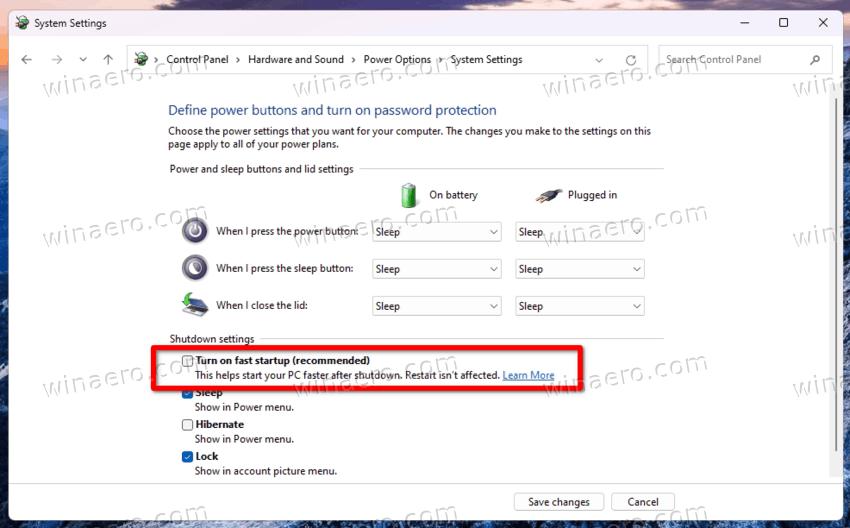
- Снимите галочки с пунктов «Включить быстрый запуск» и «Режим гибернации».
- Сохраните изменения и перезапустите компьютер.
Теперь вы знакомы со всеми доступными методами активации NumLock при загрузке Windows 10, а также знаете о решении возможных проблем с осуществлением поставленной задачи.
Наша группа в TelegramПолезные советы и помощь
Ярослав
16.06.2018 — 12:54 пп
Не помогло, по прежнему не работает!
Reply
Equil
30.12.2018 — 9:27 дп
Сделал всё по инструкции, всё работает! Не знаю, что там у Ярослава не так. 🙂
Reply
Boss
17.03.2019 — 2:43 пп
Мне помогло это! 80000002
Reply
BonD
03.04.2019 — 5:42 дп
А мне не помогло ни «2», ни «80000002»…
Reply
Leo Seo
25.08.2019 — 8:50 дп
При первой перезагрузке сработало, а при последующих все по-прежнему стало
Reply
Дмитрий
17.02.2020 — 9:37 дп
Надо убрать гипернацию и будет счастье=)
Reply
Capybara
17.06.2020 — 5:58 пп
Спасибо, помогло.
Reply
Денис
14.08.2020 — 2:18 пп
HKEY_USERS\.Default\Control Panel\Keyboard
and edit the string value «InitialKeyboardIndicators» to one of the following values:
0 — turns off Scroll Lock, Num Lock, Caps Lock (default)
1 — turn on Caps Lock
2 — turn on Num Lock
3 — turn on both Num Lock and Caps Lock
4 — turn on Scroll Lock
5 — turn on both Scroll Lock and Caps Lock
6 — turn on both Scroll Lock and Num Lock
7 — turn on all three
Цифра это bitmask(битовая маска) от клавиш и их состояния.
Reply
жека
18.02.2021 — 3:38 дп
Данная настройка помогает при перезагрузке компьютера. Если же вы включаете компьютер — не работает
Reply
Алексей
30.06.2021 — 6:33 дп
спасибо, работает!
Reply
Бека
04.09.2021 — 10:00 дп
Мне помогло — СПАСИБО!
Reply
Евгений
22.02.2022 — 2:20 дп
Смею предположить что у всех, у кого не работает проблема в том, что настройку нужно делать не в HKEY_USERS\.DEFAULT, а в HKEY_CURRENT_USER. Настройка из .DEFAULT берётся когда создается новый пользователь, а когда он уже есть, то все настройки лежат в CURRENT. Например у меня на ПК в .DEFAULT то самое длинное числовое значение 2147483648, а в CURRENT стоит 2 и намлок при загрузке включён.
Reply
Коля
23.01.2024 — 1:32 пп
Именно!
Reply
Вячеслав
05.05.2023 — 5:52 дп
Помогло! Спасибо
Reply
Users report a very common problem in Microsoft Windows where the Num Lock is not enabled on startup or reboot in Windows 10. Although this issue is not limited to Windows 10 as the previous version of Windows, have also faced this issue. The main problem is the Num Lock not being automatically turned on at Startup, which is a very annoying issue for any Windows user. Thankfully there are few possible fixes for this issue which we are going to discuss in this guide today, but before moving forward, let’s understand the main cause of this problem.

Why is Num Lock disabled at Startup?
The main cause for this issue seems to be Fast Startup which disables the Num Lock on Startup. Fast Startup is a feature in Windows 10 which is also called a Hybrid Shutdown because when you click shutdown, the system only partially shuts down and partially hibernates. Then, when you power on your system, the Windows starts up very quickly because it only has to boot up partially and partially wake up. The Fast Startup helps Windows booting up faster than the previous Windows version, which didn’t support Fast Startup.
In other words, when you shut down your PC, Windows will save some of your computer’s system files to a hibernation file upon shutdown, and when you turn on your system, Windows will use these saved files to boot up quickly. Now Fast Startup turns off unnecessary features to save time and thus help in booting up quickly. To fix this issue, we must disable Fast Startup, and the issue will be resolved easily.
Make sure to create a restore point just in case something goes wrong.
Method 1: Disable Fast Startup
1. Press Windows Key + R then type powercfg.cpl and hit enter to open Power Options.
2. Click on Choose what the power buttons do in the top-left column.

3. Next, click on Change settings that are currently unavailable.

4. Uncheck Turn on Fast startup under Shutdown settings.
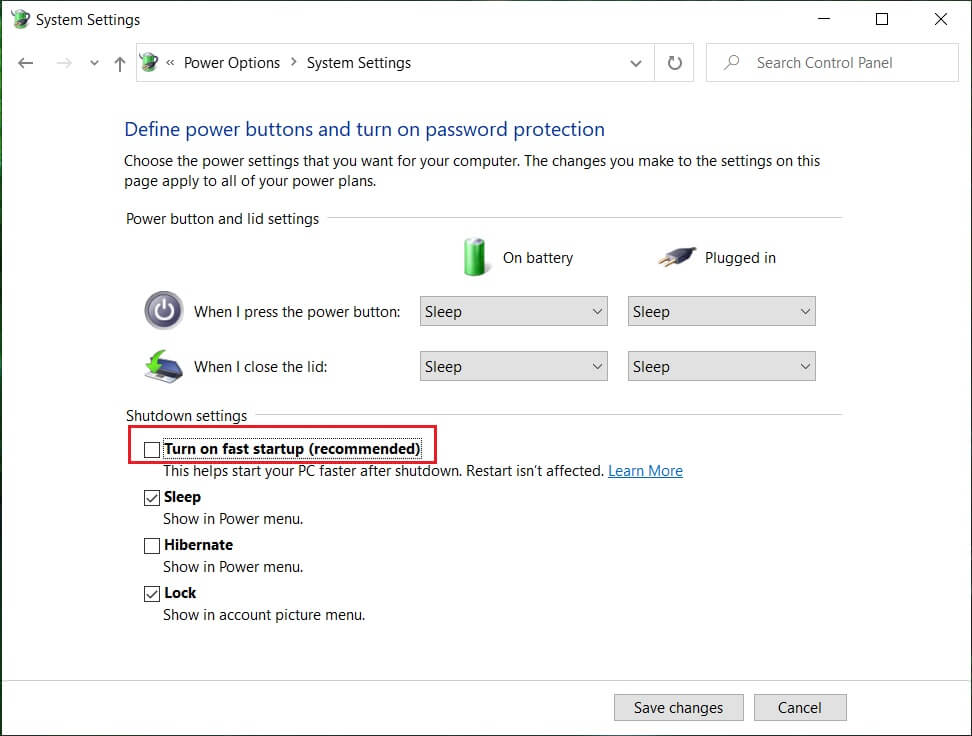
5. Now click Save Changes and Restart your PC.
If the above fails to disable fast startup, then try this:
1. Press Windows Key + X then click Command Prompt (Admin).
2. Type the following command in cmd and hit Enter:
powercfg -h off
3. Reboot to save changes.
This should definitely Enable Num Lock on Startup in Windows 10 but then continue to the next method.
Method 2: Registry Fix
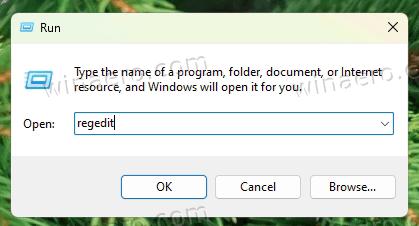
1.Press Windows Key + R then type regedit and hit Enter.
2. Navigate to the following registry key:
HKEY_USERS\.Default\Control Panel\Keyboard
3. Double click on the InitialKeyboardIndicators key and change its value to 2147483648.

4. Close Registry Editor and reboot your PC to save changes.
5. If the issue is still not resolved, then again go back to the key InitialKeyboardIndicators and change it’s value to 2147483650.
6. Restart and again check.
Recommended:
- How to Change Desktop Icon Spacing Windows 10
- How to Export Drivers Using PowerShell
- Fix Windows Stuck on Splash Screen
- 7 ways to fix Cortana can’t hear me
That’s it you have successfully learned How to Enable Num Lock on Startup in Windows 10 if you still have any questions regarding this guide then feel free to ask them in the comment’s section.
In this post, we will review how to enable NumLock by default in Windows 11 and 10. So it will be turned on startup when you sign in to or restart the OS. It is very useful when your username or password has numbers that you type on the numeric keypad. But by default, the keypad is off and works as navigation keys. Luckily, there are several methods to change this. It is important to note that all of them also work in Windows 8.1/8, Windows 7 and even older versions of the operating system.
We will start with a Registry tweak that will allow to automatically turn it on every time you start your computer. So when it reaches the sign-in screen, the keypad will allow entering numbers. In Windows 11 and Windows 10 do the following.
Always Enable NumLock on Startup
- Press Win + R to open the Run dialog, and type regedit; hit Enter to launch the Registry Editor app.

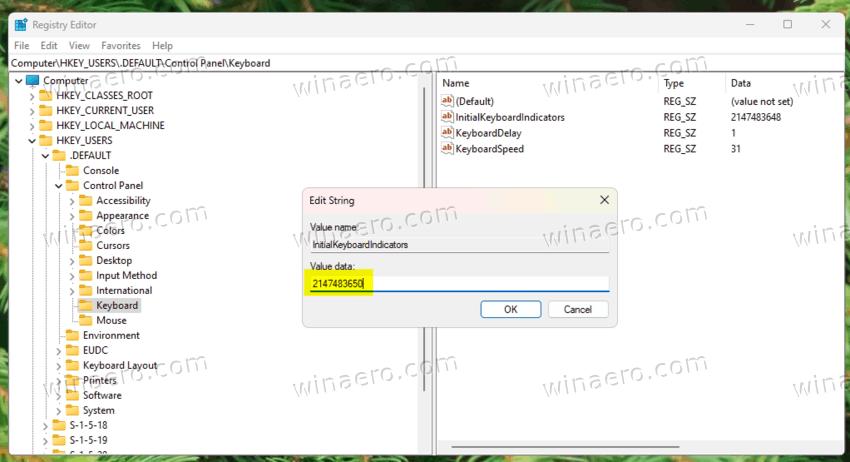
- Navigate to the following key: HKEY_USERS\.DEFAULT\Control Panel\Keyboard. You can paste this path to the address bar for faster navigation.
- On the right, double-click to modify the string value InitialKeyboardIndicators and set it to 2147483650.

- Restart the operating system.
Done! Next time you start Windows, you will have Numlock enabled on Startup, so the keypad number keys will now be available on the login screen.
Use the 2147483650 value if you are running Windows 11 or Windows 10.
To undo the change, modify the InitialKeyboardIndicators value and set its data to 2147483648.
Other useful values
There are more data that will allow you to manage the state of other modifier keys. Refer to the table below.
| InitialKeyboardIndicators Value | Description |
| 2147483648 | Turn all indicators off (NumLock, CapsLock, ScrollLock) |
| 2147483649 | Turn CapsLock on |
| 2147483650 | Turn NumLock on |
| 2147483651 | Turn CapsLock and NumLock on |
| 2147483652 | Turn ScrollLock on |
| 2147483653 | Turn CapsLock and ScrollLock on |
| 2147483654 | Turn NumLock and ScrollLock on |
| 2147483655 | Turn all indicators on (NumLock, CapsLock, ScrollLock) |
Windows 8.1 and Windows 8
In Windows 8.1, you can use the same 2147483650 value. But in the original version of Windows 8 it may fail, depending of what exactly updates you have installed. If the mentioned value has no effect on your computer, try settings InitialKeyboardIndicators to 80000002.

To undo the change, set it to 80000000.
Also, see the «Windows 7» chapter for more values. Just add 80000000 to Windows 7 value data.
Windows 7
In Windows 7, you must set InitialKeyboardIndicators to 2. This value will also work in any older version of the operating system, say Vista or XP. The undo value is 0 (zero).
For reference, the legacy values for InitialKeyboardIndicators look as follows.
| Legacy value | What enables or disables |
| 0 | Disables all key indicators |
| 1 | Enables CapsLock |
| 2 | Enables NumLock |
| 3 | Enables NumLock and CapsLock |
| 4 | EnablesScrollLock |
| 5 | Enables ScrollLock and CapsLock |
| 6 | Enables ScrollLock and NumLock |
| 7 | All key indicators are enabled |
As a reminder, in Windows 8 try to use values like 80000000,80000001,80000002, i.e. add 80000000 to a Windows 7 value.
Download ready-to-use REG files
To save your time, I have prepared a set of ready-made Registry files that you can use to quickly enable or disable Numlock on Startup.
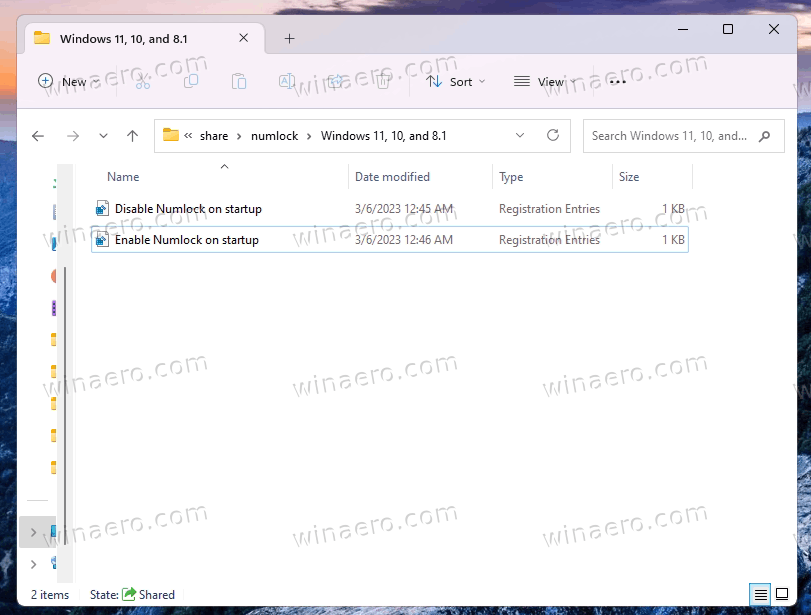
Download the ZIP archive linked here, and extract its content to any folder of your choice. You will find three folders:
- Windows 11, 10, and 8.1
- Windows 8
- Windows 7 and older
Depending on the Windows version you are running, open the appropriate folder and click on the file Enable Numlock on startup.reg.
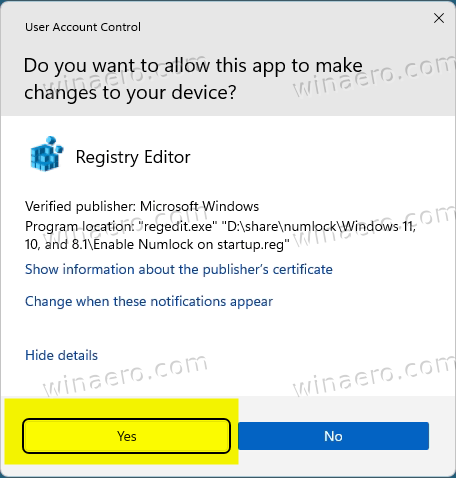
Click Yes in the User Account Control prompt, and one more time in the Registry Editor prompt. Voila, you have enabled Numlock on startup.
The undo tweak is also available; it is the Disable Numlock on startup.reg file.
Using Winaero Tweaker
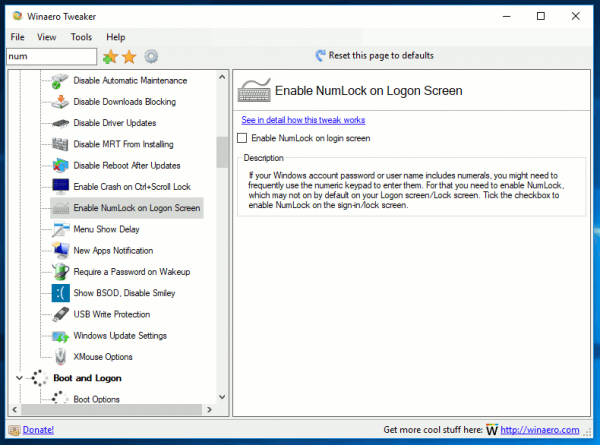
Finally, Winaero Tweaker users can use the app to quickly the Numlock startup state. Download Winaero Tweaker, install and launch it.
Look for the «Enable NumLock on Logon Screen» feature on the left. On the right, simply turn on (check) the appropriate checkbox, and you are good to go.
Winaero Tweaker also supports exporting and importing your tweaks, so you can easily transfer the changes you made from one PC to another.
The Command Prompt method
Finally, if you are interested in automating the Numlock state for the login screen, this can easily be done with the console REG.EXE app. It is bundled with all Windows versions.
To enable NumLock for the login screen from the command prompt, do the following.
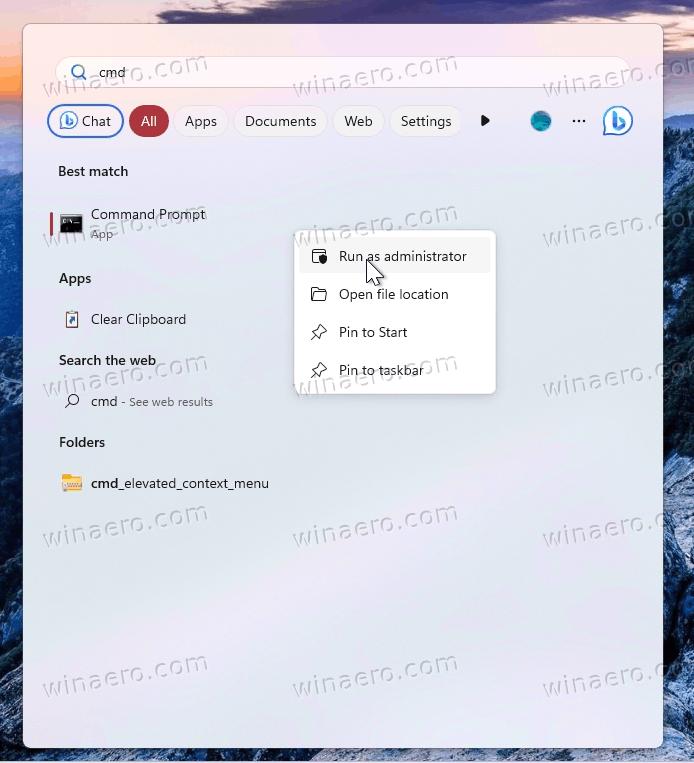
- Open the Start menu, and directly type cmd.exe.
- In the search result, select Run as administrator to open it elevated.

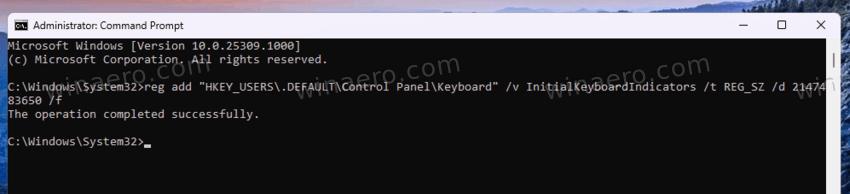
- Finally, type one of the following commands.
- Windows 11, 10, and 8.1:
reg add "HKEY_USERS\.DEFAULT\Control Panel\Keyboard" /v InitialKeyboardIndicators /t REG_SZ /d 2147483650 /f.
- Windows 8:
reg add "HKEY_USERS\.DEFAULT\Control Panel\Keyboard" /v InitialKeyboardIndicators /t REG_SZ /d 80000002 /f - Windows 7 and older:
reg add "HKEY_USERS\.DEFAULT\Control Panel\Keyboard" /v InitialKeyboardIndicators /t REG_SZ /d 2 /f.
- Windows 11, 10, and 8.1:
Change NumLock state for the current user account
You may need to change the default NumLock state for your current user account, e.g. via an automated setup. In this case, you need to change the InitialKeyboardIndicators value under a different Registry key. Here you go.
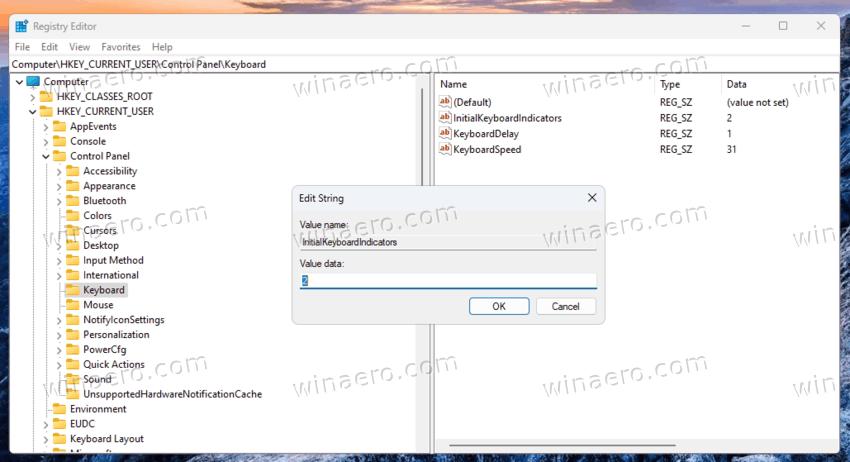
- Open regedit.exe (Win + R > regedit).
- On the left, expand the tree to the HKEY_CURRENT_USER\Control Panel\Keyboard key.
- Double-click the InitialKeyboardIndicators and set it to 2.
- You can now close the Registry editor.
Done! Setting the InitialKeyboardIndicators value to 2 under this key works in all Windows versions.
Using command prompt
In this very case, you need to open a regular command prompt (cmd.exe). The command doesn’t require to be executed as Administrator. So, to change the NumLock status from the command prompt for your user account, run cmd.exe and issue the following command:
reg add "HKEY_CURRENT_USER\Control Panel\Keyboard" /v InitialKeyboardIndicators /t REG_SZ /d 2 /f
Make NumLock turned on by default for new users
When you create a new user account on your PC, you may want it to have NumLock turned on by default when you sign in to it. For that, Windows allows customizing the default user profile. You can use for that the Regedit app, or customize it from the command prompt with the reg.exe app.
Enable NumLock for new user accounts
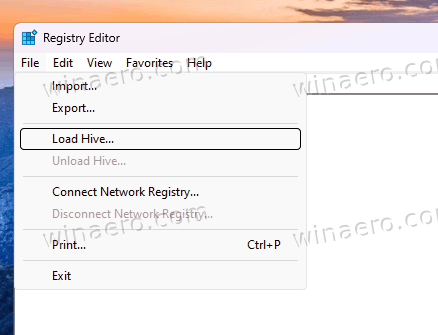
- Type regedit.exe in Windows Search and run it.
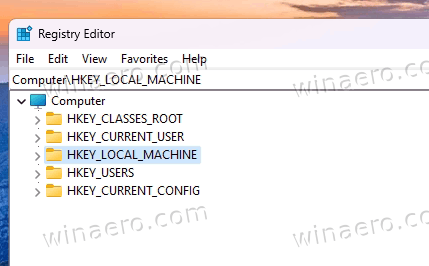
- In the Registry editor, select HKEY_LOCAL_MACHINE in the left area.

- Click on the File menu and select Load hive….
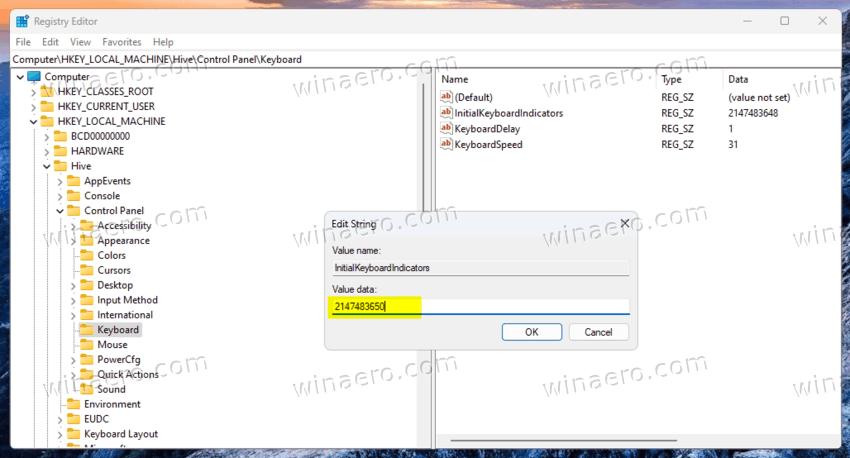
- In Windows 11, 10 and 8.1, set it to
2147483650.
- In Windows 8, set it to
80000002 - Windows 7 and older — set it to
2.
You are done! Windows will now remember your customizations. So if you create a new user account, it will have NumLock enabled by default.
As mentioned above, the same can be automated with help of the reg.exe tool.
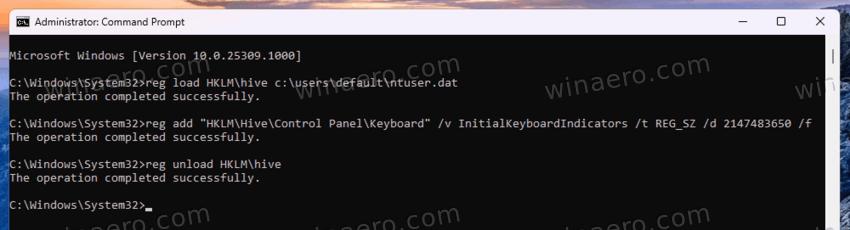
The automated method
Open a new command prompt (cmd.exe) as Administrator, and type the following commands, one after one.
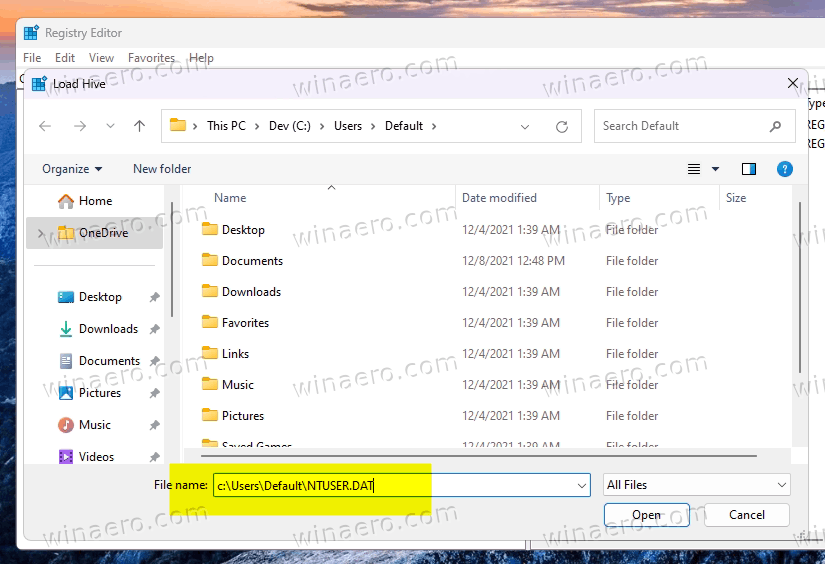
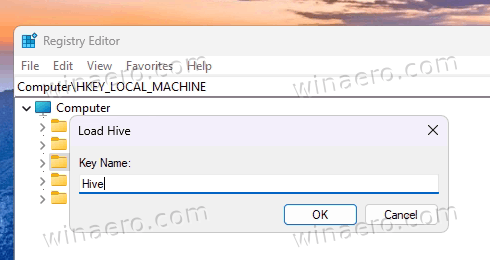
reg load HKLM\hive c:\users\default\ntuser.datreg add "HKLM\Hive\Control Panel\Keyboard" /v InitialKeyboardIndicators /t REG_SZ /d 2147483650 /freg unload HKLM\hive
Again, if you are running Windows 8 or Windows 7, use 80000002 or 2 instead of 2147483650, respectively.
Save the commands as a batch file, and you will be able to run it on demand after reinstalling the OS.
This does not require any Registry hacks or changes to system settings.
Simply boot to the login screen or the Lock screen, and do the following:
- On the Logon/Lock screen, press the NumLock key on the keyboard to turn it on.
- The Login screen contains a power button in the bottom right corner. Use it to reboot Windows:

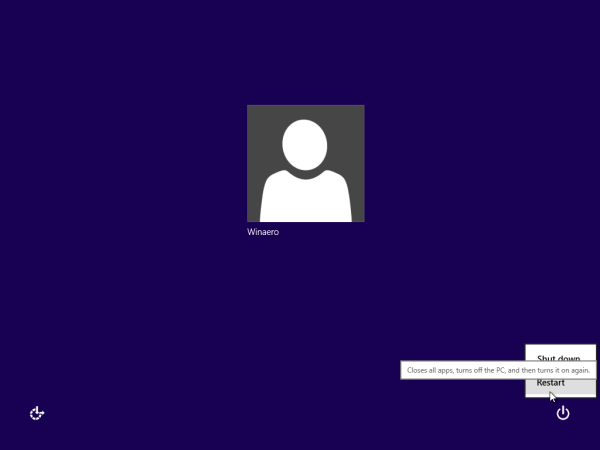
The next time Windows boots, NumLock will be automatically enabled. If this trick does not work for you for some reason, try the Registry tweak below. It should work in all modern Windows versions including Windows 11, 10 and Windows 8.x.
Fix Windows doesn’t remember the NumLock state
There are user reports that regardless of the method they used NumLock remains off on the sign-in screen. This is because of the Fast Boot feature which is enabled by default in modern Windows.
Fast Boot partially puts the operating system to the hibernation state when you shut down it. It unloads the running apps from memory, but writes the state of the OS kernel and drivers to the hard drive. Next time you start your PC, it quickly reads the saved state and hits the user login screen in a few seconds.
The problem here is that Windows may not «see» the changes you have done to the Registry as it doesn’t re-read the appropriate key. Here’s what you can to do.
Workaround #1. Modify the Registry and restart the OS.
- Apply all the required changes to the Registry. E.g. set InitialKeyboardIndicators to 2147483650 in the HKEY_USERS subree, and to 2 under HKEY_CURRENT_USER.
- Restart Windows to make it «remember» the change.
Alternatively, you can disable Fast Boot. The operating system will start slightly slower, but on modern devices with NVMe/SSD the increase of boot time is not that notable.
Workaround #2. Disable fast boot
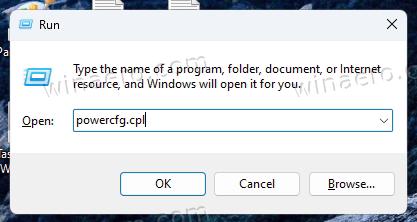
- Press Win + R, type powercfg.cpl in the Run box, and hit Enter.

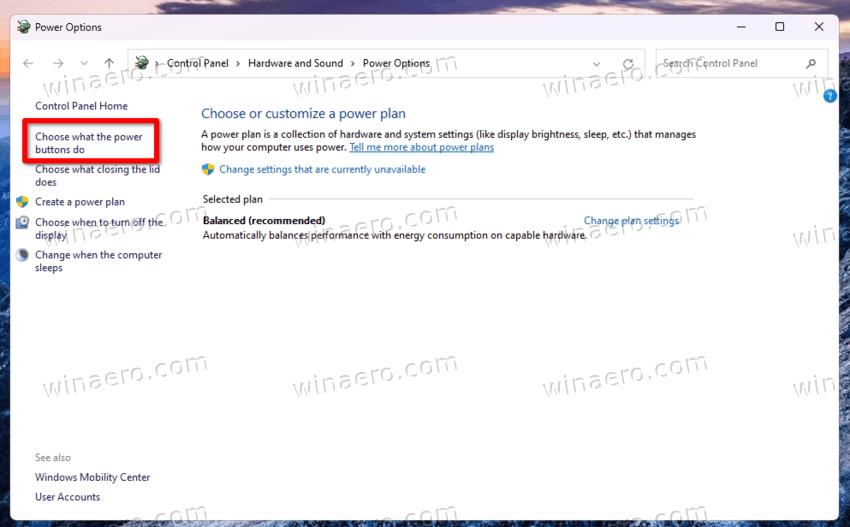
- In the Power Options window, click on the Choose what the Power buttons do link on the left.

- Now, click on the Change settings that are currently unavailable link on the right.
- Finally, remove the check mark from the Turn on fast startup (recommended) option.

- Click on the Save settings button.
- Restart Windows.
You are done. You have disabled the Fast Startup feature. Now you can apply the reviewed tweaks, or turn on the NumLock indicator button on the sign-in screen. Windows should remember the change.
That’s it.
Support us
Winaero greatly relies on your support. You can help the site keep bringing you interesting and useful content and software by using these options:
If you like this article, please share it using the buttons below. It won’t take a lot from you, but it will help us grow. Thanks for your support!