
Table of contents
- What Is the Ntkrnlmp.exe BSOD Caused By?
- Solution 1: Perform a system restore
- Solution 2: Disabling C-States and EIST in BIOS
- Intel EIST
- Intel C-State
- Solution 3: Access the Blue Screen Troubleshooter
Many people have a love-hate relationship with Windows 10. While it is efficient and convenient, it is riddled with issues, with the ntkrnlmp.exe Blue Screen of Death (BSOD) error as one of the recent additions to the bulky list. It shows up randomly, making it difficult for users to identify what triggers it. If you’re experiencing the same issue, do not panic. In this post, we will teach you how to fix the ntkrnlmp.exe on Windows 10.
What Is the Ntkrnlmp.exe BSOD Caused By?
The ntkrnlmp.exe file is a legitimate Windows component. It stands for ‘NT Kernel, Multi-processor version,’ and its primary function is to manage the majority of low-level internal files. Suffice to say, it can be considered as one of the most critical Windows files.
In most cases, when you see the ntkrnlmp.exe BSOD, it is accompanied by a ‘CRITICAL PROCESS DIED’ error message. It is possible that the file has been infected by malware. On the other hand, this error message can be prompted by malfunctioning or corrupted graphics card drivers. Whatever the root cause of the issue may be, you can use our solutions below to get rid of the ntkrnlmp.exe error.
Solution 1: Perform a system restore
One of the best ways to resolve this problem is by performing a System Restore. You simply need to go back to a previous restore point where the ntkrnlmp.exe error did not exist. If you do not have a habit of creating restore points, don’t worry because Windows automatically creates them for you. While this method does not affect your personal files and data, it can possibly remove your recently installed programs and drivers. Of course, you can still re-install them once you’ve removed the error.
Solution 2: Disabling C-States and EIST in BIOS
For this solution, you need to access your PC’s BIOS. If you do not know how to do this, you can consult your user manual. Once you’ve accessed the BIOS of your computer, you can proceed to these steps:
- Go to Advanced, then look for the CPU Configuration option.
- Locate CPU Power Management, then disable these options:
Intel EIST
Intel C-State
- Save the changes you made, then exit BIOS.
- Restart your PC, then check if the ntkrnlmp.exe error is gone.
Solution 3: Access the Blue Screen Troubleshooter
Microsoft understands that Blue Screen of Death errors are common in Windows 10. As such, the tech company included a built-in troubleshooter designed to specifically address them. You can access the Blue Screen troubleshooter by following the instructions below:
- Open the Settings app by pressing Windows Key+I on your keyboard.
- Now, select Update & Security.
- Go to the left-pane menu, then click Troubleshoot.
- On the right pane, click Blue Screen.
- Click the Run the Troubleshooter button.
Complete the repair process by following the instructions on the wizard.
Pro Tip: As we’ve mentioned, it is possible that the ntkrnlmp.exe has been infected by malware. If you want to prevent the problem from springing up again, we suggest installing Auslogics Anti-Malware. This powerful security tool can detect threats and malicious programs you’d never thought existed.
What’s the next BSOD error you’d like us to fix?
Share your ideas in the comments section below!
Contents:
- NTKRNLMP.EXE BSOD Overview
- How to Fix Windows 10 NTKRNLMP.exe BSOD?
- What is NTKRNLMP.exe?
- Why NTKRNLMP.exe Blue Screen of Death Comes up on Windows 10?
NTKRNLMP.EXE BSOD Overview
It is a common phenomenon that when you start Windows 10 or just install Windows 10 update KB4056892, a blue screen of death error of ntkrnlmp.exe pops up and prompts you that your PC ran into a problem that it couldn’t handle, now it needs to restart.
And sometimes, when you occurs a Blue Screen and using windbg analysis, the error displays: Probably caused by: ntkrnlmp.exe (nt!KeStackAttachProcess+115).
So you would better work hard to troubleshoot this ntkrnlmp.exe BSOD on Windows 10 and fix this issue with targeted measures.
Before that, there is much need for you to grasp what the ntkrnlmp.exe is and why you stumble upon the BSOD by this file.
How to Fix Windows 10 NTKRNLMP.exe BSOD?
The ways below can help you resolve the ntkrnlmp error efficiently for Windows 10. You may as well try them one by one to figure out what leads to your BSOD and then deal with this issue quickly.
Solutions:
1: Enter Safe Mode
2: Uninstall and Update Drivers
3: Uninstall the problematic Applications
4: Stop Windows 10 Overclocking
5: Disable BIOS C-States and ELST
Solution 1: Enter Safe Mode
If the ntkrnlmp.exe BSOD appears again and again when you reboot your computer, you should go to the safe mode at first. In safe mode, do the next things.
Solution 2: Uninstall and Update Drivers
The incompatible drivers may cause ntkrnlmp.exe BSOD, so uninstall the faulty drivers and update all the drivers have the chance to fix this issue.
1. Open Device Manager.
2. Check if there is an faulty driver. If yes, uninstall it.
3. Try to update drivers by find the driver and click Update Driver.
There is a problem that maybe you do not know what driver is outdated, so you can try to update the outdated drivers with Driver Booster.
Driver Booster, an automatically drivers download and update tool, can help users to get the latest graphic driver, audio driver, USB driver, mouse driver etc. with one click. And as the best driver scanner, it can detect the most outdated and missing drivers for your computer.
4. Download, install and run Driver Booster on Windows 10.
5. Click Scan. After that, Driver Booster will scan all the hardware device drivers, find the outdated, missing and faulty drivers.

6. Click Update Now. Select all the drivers, and click Update Now. It will help you download and update all the drivers with this one click.
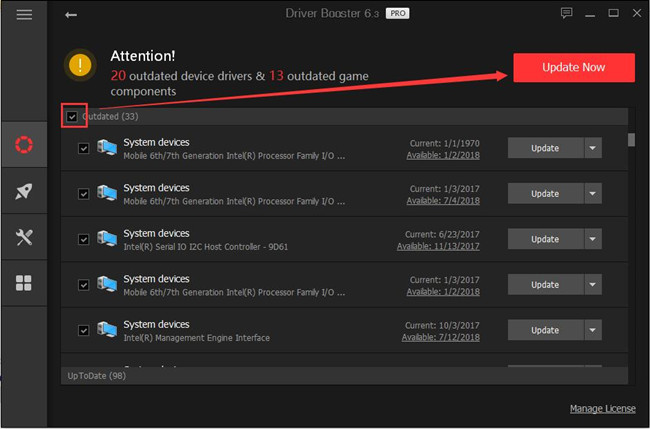
All the download and install process is automatically.
With the newly updated graphics driver, now you are free from being plagued by ntkrnlmp.exe blue screen of death Windows 10.
Solution 3: Uninstall the problematic Applications
The ntkrnlmp.exe BSOD can be caused by the problematic applications. If you installed a programs but it has some bugs, or install a program with a wrong way, this error will occurs.
So you should go the control panel > program and features to find the problematic applications and uninstall it.
Solution 4: Stop Windows 10 Overclocking
By default, overclocking settings is used to make some of your programs or components run at higher speed. But according to recent reports, overclocking can to some extent give rise to ntkrnlmp.exe BSOD on Windows 10.
Therefore, it is wise for you to disable this functionality in order to fix the blue screen of death.
You need to enter BIOS settings if you are to stop overclocking.
1. Go to Start > Settings > Update & Security.
2. Then under Recovery, click Restart now.
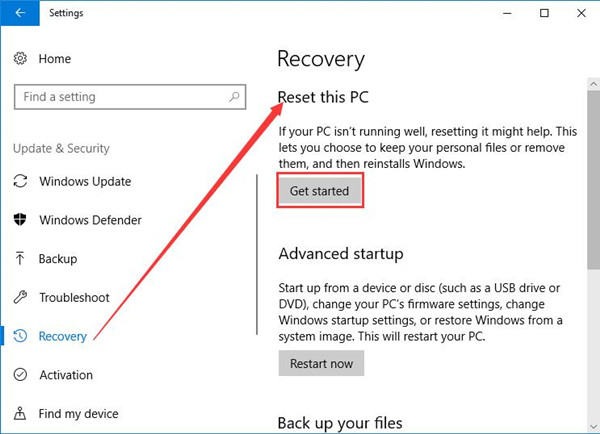
3. Then you will navigate to the startup option list, here go as the path: Troubleshoot > Advanced option > UEFI Firmware Settings.
4. Hit Restart again in the following window.
Then in BIOS settings, under the Advanced tab, click Performance, and then disable the Overclocking.
Shortly after that, try to save changes and exit from the BIOS. Here to get into BIOS settings, if you are in ntkrnlmp.exe BSOD on Windows 10, you may fail to enter it directly from Update & Security.
Once you have disabled Overclocking for your CPU or GPU, you can see the ntkrnlmp.exe blue screen of death disappeared.
Solution 5: Disable BIOS C-States and ELST
In reality, apart from the Overclocking for GPU or CPU on Windows 10, the C-States and ELST in BIOS settings can also result in the BSOD by ntkrnkmp.exe.
For most users, the C-States and ELST (Enhanced Intel SpeedStep Technology) developed by Intel on your computer can sometimes occupy much of your CPU or voltage, therefore, you would better make an attempt to disable these two options in BIOS.
It is rather foolproof to achieve this action.
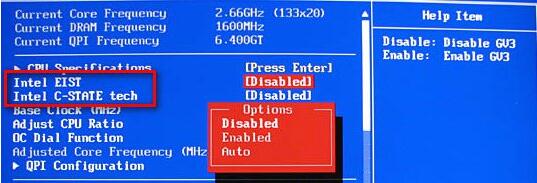
In BIOS settings, move to Advanced menu > CPU configuration > CPU Power Management.
And then find out C-States and ELST and determine to set them Disabled one by one.
In a nutshell, to assist you in fixing ntkrnlmp.exe BSOD for Windows 10, this post shows you how to update the graphics card driver, disable overclocking, C-States, and ELST in BIOS settings on Windows 10.
But if you even find these methods do not work for your ntkrnlmp.exe on Windows 10, it is feasible for you to restore Windows 10 to see whether the blue screen of death error can be resolved.
What is NTKRNLMP.exe?
Ntkrnlmp represents NT Kernel, Multi-processor version, it is legal in Windows systems, be Windows 7, 8 or 10, and it often refers to Kernel image in your PC.
Concerning its usage, as a Windows system file, the ntkrnlmp.exe is a vital system file that controls the activities of various files on Windows 10.
Sometimes, when you check the memory dump files, or try to boot your PC, or experience Windows 10 update, this ntkrnlmp.exe BSOD Windows 10 will come to you unwittingly.
Why NTKRNLMP.exe Blue Screen of Death Comes up on Windows 10?
In terms of the reasons for the BSOD of ntkrnlmp.exe, it may be caused by outdated or incompatible graphics driver, the erroneous BIOS settings, or overclocking on Windows 10.
Based on the causes of your problem, now you are to follow up to get the effective methods to remove the blue screen of death error.
Related Articles:
Fix Ntoskrnl.exe Blue Screen of Death on Windows 10
Solved: VIDEO_TDR_FAILURE (nvlddmkm.sys) BSOD Windows 10, 7
Fixed: Bugcode USB Driver BSOD Error
Did you recently encounter a Blue Screen issue that displays an error message containing “ntkrnlmp.exe”? Well, in this guide, we discuss the probable causes that might cause this bug check in the first place. In addition to this, we also explore some of the working solutions that can address this STOP Error.
We all know the importance of different device drivers on the Windows operating system. They play a crucial role in executing different operations on our device. In case, any driver becomes corrupt somehow, this may lead to the ntkrnlmp.exe BSOD trouble. Updating the Graphics card drivers and configuring the Driver Verifier Manager are the best ways to address this blue screen bug check.

What is ntkrnlmp.exe?
There is an executable file called ntkrnlmp.exe that belongs to the Windows OS. When the Windows operating system starts, the program containing ntkrnlmp.exe will be executed and loaded into RAM, and it will run as an NT Kernel & System process. Ntkrnlmp.exe blue screens are commonly caused by corrupt graphics card drivers. You may also experience the ntkrnlmp.exe blue screen if your computer has a virus or malware.
What Causes Ntkrnlmp.exe Errors?
The term Ntkrnlmp refers to NT Kernel Multi-Processor Version, which acts as the to-do list in your computer. Kernels in operating systems manage a computer’s applications, processes, and other data to ensure the seamless operation of the system. A problem with any of those programs can stall Ntkrnlmp.exe and cause the computer to crash.
Here are some possible causes of Ntkrnlmp.exe errors:
- Malware and viruses.
- The power cord or adapter is damaged.
- Performing system updates on Windows.
- A new driver, software update, or device installation.
- The installation of third-party software that is poorly designed or unproven.
What are C-States and EIST in BIOS
The C-states and EIST in BIOS keep the record of power-saving features and control the processor’s clock speed. Once this option is enabled, it could cause the blue screen of death issues. So, disable this as soon as possible. If no fixes seem to be helpful then you can try to undo your previous settings using a system restore point.
- Open the PC in Safe Mode
- Update graphics card drivers
- Disable C-states and EIST in BIOS
- Configure Driver Verifier Manager
- Disable driver verifier
- Enable System Restore Point
Open the PC in Safe Mode
As we have told you earlier that this is a blue screen type error, you cannot access your login screen. If that’s the case then open the system in safe mode first and try the below fixes. Here is the process of safe mode:
- First, insert the Windows installation media like, and press the power button.
- Open the system starting up and press the function key like
Esc, Delete, F2, F8, F10, F12, or backspacedepending upon the system architecture. - Now choose your preferable language and click Next for further process.
- Go ahead and click on the Repair your computer option located at the bottom.
- Thereafter click on the Troubleshoot category followed by Advanced Options.
- Here choose Startup Settings and wait for the next option.
- On the next window select “Enable Safe Mode” with its supported function key.
- Lastly, tap the Restart button and wait for your PC startup. If this process is completed successfully, try our solution to resolve the ntkrnlmp.exe BSOD error.
Here are the solutions to fix ntkrnlmp.exe BSOD on Windows 10 –
1] Update graphics card drivers
The main reason causing the ntkrnlmp.exe BSOD issue on the System is not proper synchronization between Windows OS and the Driver. Hence updating the faulty driver is the best possible solution to resolve this BSOD problem. Here is the process-
- Right-click on the Start icon at the left bottom corner of the taskbar and choose Device Manager.
- Next, expand Display adapters from the list and right-click on the graphics card driver.
- Now choose Update driver from the context menu.
- On the succeeding screen, click Search automatically for updated driver software. Just keep patience until the task is finished.

After the process is completed, restart your PC and check whether the ntkrnlmp.exe BSOD issue has been solved or not. If not, follow the below solutions.
2] Disable C-states and EIST in BIOS
Sometimes the C-states and EIST in BIOS are set as enabled. This could also be one of the reasons behind ntkrnlmp.exe BSOD on your Windows OS. The Enhanced Intel Speed Step Technology (EIST) is a power-saving feature that permits the operating system to control the clock speed of Intel processor cores. When this option is set as enabled may lead to the blue screen of Death error (BSOD). This is why just disable the C-states and EIST in BIOS and in turn it could solve the ntkrnlmp.exe BSOD issue.
- Firstly, turn off the PC and press the power button again.
- When the OS is loading, press the supported function key like F2, Del, Esc, etc. to load the system into BIOS mode.
- When the BIOS setup utility appears, tap the Advanced tab.
- From the list of options click CPU configuration or CPU specifications thereafter hit the CPU Power Management option on the further screen.
- Henceforth, click the C-state and Intel EIST options and set their value as disabled.
- Save the changes and exit from the current screen.
Finally, Restart the PC and check if the ntkrnlmp.exe BSOD issue has been solved or not.
3] Configure Driver Verifier Manager
Sometimes the faulty driver itself is responsible for this ntkrnlmp.exe BSOD issue. Hence, run the Driver Verifier Manager to find the troublesome drivers and try to repair them if possible.
- Go to the Search box and type verifier in the blank box then hit Enter to launch this app.
- If the User Account Control appears, click Yes to let this app opens up.
- Here, select Create Standard Settings then hit on the Next button.
- Henceforth, activate the checkbox Automatically select all drivers installed on this computer followed by pressing the Finish button.

- This will start verifying the trouble. Keep patience until the Driver Verifier Manager scans each driver and displays a message with a specific location of the buggy driver if found.
- Once the process is completed, click OK and reboot your PC.
- Lastly, follow the described solutions to resolve this trouble.
4] Disable driver verifier
When the driver verifier solves the ntkrnlmp.exe BSOD issue you must disable this app by following the below methods-
- First of all, launch Command Prompt as an Administrator.
- Click Yes on the UAC prompt to authorize the access.
- On the prompt area, type verifier and hit Enter to execute the code.
- When the Driver Verifier Manager appears up, select the Delete existing settings checkbox and hit Finish.

- Lastly, click Yes and Restart your PC again.
5] Enable System Restore Point
If you have tried all the above-described methods but no one proves suitable to solve this Ntkrnlmp.exe BSOD issue, roll back your past settings created before occurring this problem. To use this, you should have previously created a System Restore point.
- Go to Cortana and type system restore then hit on the Create a Restore Point option to launch the window.
- Tap the System Protection tab thereafter System Restore on the same dialog box.
- On the further screen click Next and let the window go ahead.
- Here, select the restore point which is created before the Ntkrnlmp.exe BSOD issue, and tap the Next button.

- Now your PC will automatically roll back the previous settings and avoid the recently installed apps and drivers.
- Once the process is finished, reboot the PC. This tool surely helps you to avoid the Ntkrnlmp.exe BSOD issue and your system starts working normally.
That’s would be all, If you still have doubts or suggestions about this error, write to us in the comment box.
Where is ntkrnlmp.exe located?
ntkrnlmp.exe is a legitimate file which is also called Windows NT Kerenal Memory Management. This is an executable file and you may locate this file by reaching out to the following path – C:\Windows\System32.
There are times when some virus copies this name and resides inside your computer. Users often read it as a legitimate file and thus don’t remove it from their systems. The perfect way to differentiate between a system file and a virus is by reaching out to its path location. If its path location is anywhere different than C:\Windows\System32, you are having a malware attack on your Windows PC. Consider performing a full scan of your computer, and have this file removed.
You are here: Home / How to / [Fix] ntkrnlmp.exe Blue Screen of Death Error in Windows | Quickly & Easily
If you have encountered with ntkrnlmp.exe Blue Screen Error then don’t get worried because here you will get a pack of solutions that is sufficient to resolve the issue and you just need to unpack it carefully. But before heading towards the goal, let’s have an overview of this error.
Overview of ntkrnlmp.exe
ntkrnlmp.exe stands for the NT Kernel, Multi-processor version and it is a system file that comes with the Windows OS whose sole aim is to manage the internal files. Whenever the OS runs, then the applications which contain the ntkrnlmp.exe start performing in the NT Kernel System process. The primary task of this system file is to manage the vast majority of low-level internal files.
When ntkrnlmp.exe deals with the bad files and fails to manage them, then it crashes and led to BSOD especially when Windows users check the memory Dump file related to the crash. Attribution of the error to this file doesn’t mean that this file is creating the error but it is an indication that this file was dealing the bad data during the crash. So, you just need to look for those factors which hamper the smooth running of the ntkrnlmp.exe file.

Though this Blue Screen of Death error can occur due to various reasons and it is very difficult to pinpoint the exact reason behind this issue. However, I have mentioned some of the most common reasons reported by the users:
- Outdated or incompatible graphics drivers.
- Two non-identical RAM sticks.
- Corrupted RAID controller driver.
- STORE_DATA_STRUCTURE_CORRUPTION
- Due to the latest Windows updates.
- C-states and EIST are enabled in BIOS.
- SYSTEM_SERVICE_EXCEPTION
- A power adapter causing voltage issue when your PC switches from a stress state to idle.
Fix ntkrnlmp.exe Blue Screen of Death Error?

Disable CPU or GPU overclocking
First of all, you must know that what is overclocking a CPU? Many users reported that Blue Screen of Death error is the most common error occurring in the systems having overclocked CPU. They have also managed to fix the issue by reducing their overclocked frequencies.
So if you currently using the overclocked CPU then it is recommended to set the frequencies and all relevant values to default and check for the occurrence of the error. By doing this if the crashes stop then gently tune-down the custom clocked frequency until unless your system reaches a stable state and the BSOD error is gone.
Note: This is to notice that the above said method is only referred to those who overclocked components manually. If your PC is having some manufacturer-provided technology that can automatically boost the CPU frequencies, then it is recommended to not disable it as it can create severe errors.
Disable C-states and EIST from BIOS
Like all others, your computer is also using C-state and EIST (Enhanced Intel SpeedStep Technology) to save energy when the CPU is in idle mode. This process mainly works on the principle of altering the CPU voltage during idle times or in other low-load circumstances. This can result in an insufficient voltage mainly Undervoltage that will create Blue Screen of Death error depending on your CPU model.
To get rid of this error you can test this method by disabling the two technologies C-states and EIST from BIOS. The exact steps to disable these technologies may vary depending on your motherboard. However, on most of the BIOS versions, these two settings are located in Advanced menu > CPU configuration > CPU Power Management. Just visit these locations and then set to disabled and save your configuration.

If the error is still there after disabling these two services then re-enable the services and try the next solution.
Troubleshoot Non-identical RAM sticks
The Blue Screen of Death error related to ntkrnlmp.exe is mostly seen on computers with non-identical RAM sticks. It is not necessary that the two RAM sticks from the same manufacturer would be identical (frequency-wise).
Note: Especially Corsair sticks are known for varying timings, thus creating a BSOD error.
If two unmatching RAM sticks are installed on your system then take out anyone stick and check for the error. If the BSOD error is not occurring by doing this, it proves there is some sort of incompatibility caused by the non-identical RAM sticks. If that is the actual case then you can remove this error by investing in a proper dual-channel RAM kit.

If you fund that the RAM sticks are properly functioning and still you are facing the BSOD error then proceed to the next solution to fix this error.
Update Graphic Card Driver
Windows Update is a feature of the Microsoft which automatically installs the updates of the drivers. But, it is not always possible and sometimes users need to perform the task manually. The outdated graphics card is one of the reasons behind this issue and to resolve the same you need to update the graphic card manually.
- Hover your cursor to the ‘Start’ menu, right-click on it and then choose ‘Device Manager’ from the listed options.

- Thereafter, Device Manager Page will appear on your screen, select Display Adapter. Now, click on the arrow button located at the left end of the Display Adapter to get the list of graphics card drivers.

- Select the driver, right-click on it and then choose ‘Update driver’.

- After the completion of the task, restart your computer.
Scan your PC using Windows Defender
The virus is dangerous for the PC and sometimes due to Windows Defender error, the viruses bypass the scan and affect the PC. So, if you have any kind of Windows Defender error, then go to the troubleshooting section and then fix it. However, if the antivirus is working fine, then follow the steps to remove the virus.
- Click on the ‘Start’ menu and choose ‘Settings’ which is listed above the Power menu.
- After getting entry into the Setting page, move to the ‘Update and Security’ section.

- In the left-end of the page, you will get a few options, click on ‘Windows Security’.

- Thereafter, the security page will appear which will feature a list of options, select ‘Virus and threat protection’.

- A new pop-up window will appear, click on ‘Run a new advanced scan’.

- Now, select the way to scan the PC, but it is always recommended to choose ‘Full Scan’. And after selecting the option, click on the ‘Scan now’ button.

Access the Blue Screen Troubleshooter
The Blue Screen of Death error is common in Windows 10. However, Windows has a built-in troubleshooter designed to specifically resolve these errors. You can access the Blue Screen troubleshooter by following these steps:
- Press Windows+I key simultaneously to open the Settings app.

- Select Update & Security.

- From the left-pane menu, click Troubleshoot.

- From the right pane, click the Blue Screen and further click Run the Troubleshooter button.

- Follow the on-screen instructions to complete the process.
Disable Speedstep
Disable Speedstep Windows 10 is a unique feature to resolve the error ntkrnlmp.exe. In other terms, Speedstep is known as Enhanced Intel SpeedStep Technology which enables the applications to control the clock speed of the processor. So, if you disable this feature, then your issue will be resolved.
- Turn your computer off completely.

- Now press the power button and get access to the BIOS Setup Well, the entry into the BIOS differs and depends upon the computer. So, you can check the function keys as per the model of your computer.

- After entering into the BIOS Setup page, select the ‘Advanced’ tab and then choose an option ‘CPU Configuration’. You can perform the task using the arrow keys.

- Thereafter, you will get a bunch of options, select ‘CPU Power Management Configuration’.

- Soon, a CPU feature page will appear, select Intel EIST and turn it in Disable Mode.

- After completing the above step, move to the Intel C-State section which is listed beneath Intel EIST and make sure to disable the same.
- That’s it; now save the settings and restart your computer.
Use Driver Verifier Manager
Driver Verifier is an inbuilt tool that manages the kernel drivers and also resolves the issue if found in the drivers.
- Click on the ‘Start’ menu and type ‘CMD’ in the search box.

- After getting the Command Box on the search page, select it and then right-click on it to choose an option ‘Run as administrator’. You can also open the Command Prompt Windows directly by pressing Win+X+A keys together.

- If any confirmation is asked, then click on the ‘Yes’ button.
- Soon, a command box will appear on your screen and here you need to type ‘verifier’ in the box and then press the ‘Enter’ key.

- The above step will bring you to the Driver Verifier Manager page.
- Now, click on ‘Create standard-setting’ and further click on the ‘Next’ button.

- Thereafter, you will be asked to choose the drivers, click on ‘Automatically select all drivers installed on this computer’ and further click on the ‘Finish’ button.

- After that, a pop-up window will appear asking you to restart your computer, click on the ‘OK’ button.
- After restarting the computer, you will get the report of the drivers and once you found the error on the particular driver, then reinstall the same using Device Manager feature.
Reinstall Graphic Card Driver
If the above report stated the issue in the graphic card, then reinstall it and the process for the same is listed below.
- Hover your cursor to the ‘Start’ menu, right-click on it and then choose ‘Device Manager’.

- Now, move to the ‘Display Adapter’ section and then click on the arrow button to expand the features.

- After getting the list of graphic drivers, select the one, right-click on it and then choose ‘Uninstall device’.

- Now restart your computer.
- After restarting the PC, Windows will download the graphics card driver automatically.
Update Windows
Lack of Windows Update can also cause the ntkrnlmp.exe Blue Screen Error. So, you must update Windows to match the drivers with the latest configuration and the steps for the same are listed below.
- Click on the ‘Start’ menu. Further click on the gear icon which symbolizes ‘Settings’ located above the Power menu.

- Soon, you will find the ‘Settings’ page on your screen, click on ‘Update and Security’.

- Now, click on ‘Check for updates’. The Windows will find the updates and once it installs all the available updates.

- And then you will have to restart your computer.
Conclusion
Hence, these were some of the effective solutions to fix the issue ntkrnlmp.exe. However, if you stuck amid the steps or need any assistance, then feel free to ask our experts using the comment box. Our techies will assist you and will resolve the issue effectively.
If you feel this article helpful please like, share and follow our Facebook page and keep visiting our website for such tutorials.
The ntkrnlmp.exe file is a file associated with the Windows operating system’s NT Kernel and other system processes. It is also related to the “CRITICAL PROCESS DIED” error. So if you encounter a Blue Screen of Death error that’s related to this file, then you’ve come to the right place as this post will guide you in fixing the ntkrnlmp.exe Blue Screen error.
This kind of Blue Screen error might be caused by the file getting corrupted or infected with some malware. Aside from these causes, the error might also be due to the corruption and malfunction of the graphics card drivers.
Before you troubleshoot the problem, you might want to try performing System Restore especially if you tend to create a System Restore point every now and then. Performing System Restore could help you resolve the ntkrnlmp.exe Stop error. You can do this option either by booting into Safe Mode or in System Restore. If you are already in the Advanced Startup Options, just directly select System Restore and proceed with the next steps. And if you have just booted your PC into Safe Mode, refer to the steps below.
- Tap the Win + R keys to open the Run dialog box.
- After that, type in “sysdm.cpl” in the field and tap Enter.
- Next, go to the System Protection tab then click the System Restore button. This will open a new window where you have to select your preferred System Restore point.
- After that, follow the on-screen instructions to finish the process and then restart your computer and check if the problem is fixed or not.
If System Restore didn’t help, then proceed to the given options below.
Option 1 – Disable the C-states and EIST in the BIOS
The first thing you can do is try to disable the C-states and EIST in the BIOS. To do that, refer to the steps given below.
- Go to the BIOS and from there look for an option named CPU Configuration which can usually be found under the Advanced menu.
- Next, look for CPU Power Management and under that section, disable both the “Intel EIST” and “Intel C-state” options.
- After you disable them, save the changes you’ve made and exit the BIOS.
- Now restart your computer and check if the ntkrnlmp.exe BSOD error is now fixed.
Option 2 – Try to update, rollback or disable drivers
If the first option didn’t help in fixing the ntkrnlmp.exe Blue Screen error the next thing you can do is to roll back, or update, or disable device drivers in your computer. It is most likely that after you updated your Windows computer that your driver also needs a refresh. On the other hand, if you have just updated your device drivers then you need to roll back the drivers to their previous versions. Whichever applies to you, refer to the steps below.
- Open the Devices Manager from the Win X Menu.
- Then locate the device drivers and right-click on them to open the Properties.
- After that, switch to the Driver tab and click on the Uninstall Device button.
- Follow the screen option to completely uninstall it.
- Finally, restart your computer. It will just reinstall the device drivers automatically.
Note: You can install a dedicated driver on your computer in case you have it or you could also look for it directly from the website of the manufacturer.
Option 3 – Configure the Driver Verifier Manager
The Driver Verifier Manager is another tool in Windows that could help you fix driver-related issues. And so if you want to fix the ntkrnlmp.exe Blue Screen error you need to use the Driver Verifier Manager:
- Type in the keyword “Verifier” in the Cortana search box to search for Verifier in Windows 10.
- After that, select the option “Create custom settings”.
- Make sure that you have checked everything except the options “DDI compliance checking” and “Randomized low resources simulation”.
- Next, select the option “Select driver names from a list” option.
- Afterward, you have to select all the drivers from any unofficial or third-party provider. To simply put it, you have to select all the drivers that are not supplied by Microsoft.
- Then click on the Finish button.
- Open Command Prompt as administrator and execute this command – verifier /querysettings
- The command you just executed will display the Driver Verifier settings so if you see any of the flags enabled boot your Windows 10 PC into Safe Mode.
- Open the Command Prompt as admin again and run this command – verifier /reset
- The command will reset the Driver Verifier. Once the process is done, restart your PC and check.
Option 4 – Run the Blue Screen Troubleshooter
The Blue Screen troubleshooter is a built-in tool in Windows 10 that helps users in fixing BSOD errors like ntkrnlmp.exe. It can be found on the Settings Troubleshooters page. To use it, refer to these steps:
- Tap the Win + I keys to open the Settings panel.
- Then go to Update & Security > Troubleshoot.
- From there, look for the option called “Blue Screen” on your right-hand side and then click the “Run the troubleshooter” button to run the Blue Screen Troubleshooter and then follow the next on-screen options. Note that you might have to boot your PC into Safe Mode.
Do You Need Help with Your Device?
Our Team of Experts May Help
Troubleshoot.Tech Experts are There for You!
GET HELP
Troubleshoot.Tech experts work with all versions of Microsoft Windows including Windows 11, with Android, Mac, and more.
Share this article:
You might also like
If you were trying to update your Windows 10 computer and failed due to Error Code 0x80240438, then you’ve come to the right place as this post will give you a couple of suggestions you can check out to resolve this error.
You can encounter Error Code 0x80240438 not just in Windows Updates but also in Microsoft Store. This is due to the fact that the delivery mechanism for both Windows Updates and Microsoft Store is common and interdependent. This is why a lot of Windows Update and Microsoft Store error codes are similar. And so fixing them won’t be that hard as well since most methods are basically the same.
When you encounter this kind of error in Windows Update or Microsoft Store, you will see the following error message on your screen:
“There were some problems installing updates, but we’ll try again later. If you keep seeing this and want to search the web or contact support for information, this may help – (0x80240438).”
To resolve Error Code 0x80240438, here are some potential fixes you need to check out:
Option 1 – Try to run the Windows Update Troubleshooter
The Windows 10 Store Apps Troubleshooter will help you in fixing the Error Code 0x80240438. This is a great built-in tool from Microsoft that helps users fix any app installation issues. So this is worth a try to solve the problem. This built-in tool also helps you fix the Windows 10 Store if it isn’t working.
To use the Windows Store Troubleshooter, follow the steps below.
- Tap Win + I keys again to open the Windows Settings panel.
- Go to Update & Security and then go to Troubleshoot.
- Under the Troubleshoot section, on your left-hand side, scroll down to find Windows Update and then click on Run the troubleshooter option and follow the on-screen instructions and then see if it fixes the problem.
Option 2 – Try to temporarily disable anti-virus and Windows Defender Firewall
As mentioned, the error could be due to the antivirus program or the Windows Defender Firewall installed on your computer. Thus, disabling them or any security software installed in your computer is always a good idea you can try when you’re not able to access the shared drive on your computer. There are times when you encounter problems like Error Code 0x80240438 due to interference of antivirus or security programs. Thus, you have to disable both your antivirus program and Windows Defender Firewall for the meantime and check if it fixes the error or not.
Option 3 – Disable the Proxy server
You can also try to disable the Proxy server for your LAN to fix Error Code 0x80240438 especially if your computer was attacked by some malware or adware recently. In such cases, there is a chance that the malware or adware has changed your network settings in order to generate intrusive advertisements. Thus, you have to disable the proxy server and you can do that by following these steps:
- Tap the Win + R keys to open the Run dialog box.
- Then type “inetcpl.cpl” in the field and hit Enter to pull up the Internet Properties.
- After that, go to the Connections tab and select the LAN settings.
- From there. Uncheck the “Use a Proxy Server” option for your LAN and then make sure that the “Automatically detect settings” option is checked.
- Now click the OK and the Apply buttons.
- Restart your PC.
Note: If you are using a third-party proxy service, you have to disable it.
Option 4 – Try modifying the “Remove access to use all the Windows Update features” Policy
- Start by tapping the Win + R key combination to open the Run utility.
- Then type “gpedit.msc” in the field and tap Enter to open the Group Policy Editor.
- Once you’ve pulled up the Group Policy Editor, navigate to this setting: User Configuration > Administrative Templates > Windows Components > Windows Update
- Next, double click on the “Remove access to use all the Windows Update features” policy and set its radio button to “Not Configured”. As you can see, this policy setting has the following description:
“This setting allows you to remove access to Windows Update. If you enable this setting, all Windows Update features are removed. This includes blocking access to the Windows Update Web site at http://windowsupdate.microsoft.com, from the Windows Update hyperlink on the Start menu, and also on the Tools menu in Internet Explorer. Windows automatic updating is also disabled; you will neither be notified about nor will you receive critical updates from Windows Update. This setting also prevents Device Manager from automatically installing driver updates from the Windows Update Web site.”
If you enable this policy setting, you can configure one of the following notification options:
- 0 = Do not show any notifications: This setting will remove all access to Windows Update features, and no notifications will be shown.
- 1 = Show restart required notifications – This setting will show notifications about restarts that are required to complete an installation.
- Now you need to exit the Group Policy Editor and restart your computer for the changes to take effect.
Option 5 – Try resetting the Windows Update folders
Resetting the Windows Update folders can also help in fixing the error in both Windows Update and Microsoft Store. All you have to do is delete the contents in both the SoftwareDistribution folder and reset the Catroot2 folder as well.
Option 6 – Try downloading and installing the Windows Updates manually
Error Code 0x80240438 might be due to a Windows Update that has failed. So if it is not a feature update and only a cumulative update, you can download the Windows Update and install it manually. But first, you need to find out which update has failed, and to do so, refer to the following steps:
- Go to Settings and from there go to Update and Security > View Update History.
- Next, check which particular update has failed. Note that Updates that have failed to install will be displayed under the Status column which has a label of “Failed”.
- After that, go to the Microsoft Download Center and look for that update using its KB number and once you find it, download and then install it manually.
Note: You can also use the Microsoft Update Catalog, a service from Microsoft that provides a list of software updates that can be distributed over a corporate network. With the help of this service, it can be easier for you to find Microsoft software updates, drivers as well as fixes.
Read More
This post will guide you on how you can fix the Error 0x80070079. This kind of error mostly occurs during the transfer of files across the networks. It could be caused by several factors which include the incorrect configuration of drivers or the network, as well as deadlock state or the server is loaded with a lot of tasks and if any location is not available. This error could also appear when you try to create a System Image or copy or move files on your computer. Here’s the full context of the error message:
“Error 0x80070079: The semaphore timeout period has expired.”
To fix this error, you can try to run the three built-in Network-related troubleshooters or update or reinstall the network adapter drivers or perform a network reset. For more details, follow the options laid out below.
Option 1 – Try to run the three built-in Network-related troubleshooters
The first thing you could do to fix the problem is to run any of the three built-in troubleshooters related to Networks such as Incoming Connections, Network Adapter, and Shared Folders troubleshooters. To access them, just open the Windows Settings app, and go to Update & security > Troubleshoot. From there, run any or each one of the aforementioned troubleshooters.
Option 2 – Update the Network Adapter drivers
You might also want to update the Network Adapter drivers by following these steps:
- Tap the Win + R keys to launch the Run window and then type in the “MSC” command and hit Enter to open the Device Manager window.
- Under the Device Manager, you will see a list of drivers. From there, look for the Network Adapters and expand them.
- Then right-click on each one of the Network drivers and update them all.
- Restart your PC and see if it helped in fixing the BSOD error.
Note: If updating the network drivers didn’t help in fixing the “Windows could not find a driver for your network adapter” error, you can also try to uninstall the very same drivers and restart your Windows 10 PC. After that, the system itself will reinstall the drivers you just uninstalled. Alternatively, you can also download and install the drivers from the manufacturer’s website directly.
To reinstall the network adapter driver, refer to these steps:
- Open the Devices Manager from the Win X Menu.
- Then locate the device drivers and right-click on them to open the Properties.
- After that, switch to the Driver tab and click on the Uninstall Device button.
- Follow the screen option to completely uninstall it.
- Finally, restart your computer. It will just reinstall the device drivers automatically.
Option 3 – Perform a Network Reset
Network Reset is a feature in Windows 10 that will help you reinstall the Network adapters as well as reset the Networking Components back to their original settings.
- Open the Start Menu and click on the Settings icon.
- Next, click on the Status link on the left side where you should see the status of your Network. Aside from that, you should also see a link that will let you open the Network Troubleshooter – click on that link to expand Network Troubleshooter.
- Under Network Troubleshooter, select the link for “Network reset”.
- After you click on Network reset, it should redirect you to the following page. From there, click on the Reset now button.
Read More
What is TrayApp Error 1706?
A TrayApp Error 1706 is not something you want to see. It is generally caused by an error in hexadecimal formatting, which is a common format employed by software programmers for Windows OS-compatible hardware drivers, Windows system files, and software apps.
Developers and manufacturers of hardware drivers and software apps employ different codes in order to indicate different types of errors.
The TrayApp error 1706 occurs in a long numeric code with a technical explanation of the cause. In many cases, the TrayApp error 1706 can have different TrayApp error 1706 parameters.
It will usually sport a message like:
- Install Error 1706 Trayapp
- Reinstall Error 1706 Trayapp
- Error 1706 Trayapp crash
- Error 1706 Trayapp is missing
- Remove Error 1706 Trayapp
- Download Error 1706 Trayapp
- Error 1706 Trayapp virus
Solution
Error Causes
More often than not, the TrayApp error will occur because there are damaged files in your operating system.
When the Windows system file entry gets corrupt, it means that there malfunctioning in your system and it can be exposed to major security threats.
And if it’s not resolved, it can potentially result in complete and permanent data loss and can make your storage media or your system as a whole inoperable.
There can be other triggers for the TrayApp error, the common of which include:
- Incomplete installation of software
- Incomplete un-installation of software
- Improper deleting of hardware drivers
- Improper deleting of software applications
If you have the TrayApp error, you realize how common it is when restarting your system followed an improper shutdown or a recent malware or virus recovery.
These situations result in corruption or deletion of essential system files. When Windows system files get corrupted or go missing, the data that is needed to run software won’t be linked properly.
Further Information and Manual Repair
There are two common manual ways of fixing TrayApp error 1706. The manual solution is:
Boot Your System and Log in As Administrator.
- Click on Start and select All Programs.
- Go to Accessories, then System Tools, and select System Restore.
- In the dialog box, select, ‘Restore computer to an earlier date’ and then click on Next.
Click next twice on the dialog boxes and then the Automatic System Restore will start and restart your device.
Reimage Plus Fix for Trayapp Error 1706
This is the easiest way to resolve TrayApp Error 1706. However, there are cases when the manual process may not really work, and this can be caused by improper maintenance of your system.
For that, Restoro is your short and comprehensive answer. Restoro is a multi-functional PC Fixer that works as an antivirus, registry cleaner, system optimizer, and much more.
It can not only help resolve TrayApp Error 1706, but can also resolve other errors that can hinder the performance of your system, programs, and applications.
It can also clean your registry and optimize your system to make it faster and quick loading. The software is compatible with all Windows versions.
Just click here and download Restoro and get rid of any issues in your system!
Read More
Error 0x80004005 — What is it?
Error 0x80004005 is a typical Outlook error. This error code occurs either when sending emails or receiving them. The error message may be displayed in either of the following formats:
‘Sending and receiving reported error «0x80004005»: The operation failed.’
‘This message could not be sent. Try sending the message again or contact your network administrator. The client operation failed. Error is [OX80004005- 0X0004B9-OXOO501].’
Error Causes
There are several causes for the error 0x80004005 such as:
- The Script Blocking Feature Enabled While Using Norton Antivirus
- Spyware
- Viruses
- Registry problems-Missing or corrupt registry keys
It is advisable to repair and resolve error 0x80004005 immediately as it may cause a great deal of inconvenience to you.
This error may hamper your ability to receive and send emails from your Outlook account and lower your productivity too as you may be unable to communicate with your peers.
Further Information and Manual Repair
To fix error 0x80004005, you don’t have to wait for the network personnel or be a technical expert yourself. This may be a critical error but the good news is that it is easy to resolve.
Here are some effective methods and quick fixes to resolve the error 0x80004005 instantly.
Method 1: Disable Script Blocking Feature in Norton Antivirus
After installing Norton Antivirus on your PC, if you start experiencing the Outlook error 0x80004005, then the best way to resolve it is to simply disable the script blocking feature.
However, the downside of this is that by disabling this feature your PC will become vulnerable to viruses and malware.
Method 2: Disable the New-Mail Notification Feature in MS Outlook
If you don’t have Norton Antivirus downloaded on your PC, then try method 2. This method involves disabling the new-mail notification feature in MS Outlook. The error code 0x80004005 is often resolved by switching off this feature. Try it to see if it works.
To disable the new-mail feature all you have to do is open your Outlook account and then go to the Tools menu, then go to Options and then select the ‘Preferences’ tab.
After that click on the ‘Emails Options’ tab and then simply uncheck the check-box against ‘Display a notification message when new mail arrives’.
To confirm changes press OK.
Method 3: Scan for Viruses
The error 0x80004005 may also be triggered due to viral infection or spyware. Such malicious software enters your PC through phishing emails and while downloading files and attachments. You may not be aware of this but your PC may be infected by viruses.
It is important you remove them immediately as they can expose you to serious risks including privacy issues, identity thefts, data breaches, and more.
Read More
One of the issues with external storage devices is that unplugging them right away without using the “Safely Remove Hardware” feature is not safe and doing so could lead to data corruption and data loss. However, in some cases, even when you use the “Safely Remove Hardware” feature, you could get an error that says:
“Windows can’t stop your ‘Generic volume’ device because a program is still using it. Close any programs that might be using the device, and then try again later.”
It is possible that the system is still using the external device – for instance, a copy operation might still be in progress, or Windows is still indexing the contents of the drive in the background or it could also be that the drive is not configured to be quickly removed. To fix this error, there are a couple of suggestions you can try. You can try to close all the open programs and file explorer windows, or you could also configure the Device Removal Policy or change its file system to FAT32. In addition, you can also try to change its drive letter or use the DISKPART utility to get the drive to be offline or simply manage the hogging process that prevents it from being safely removed.
Follow each one of the given potential fixes below to resolve the error when using the Safely Remove Hardware feature.
Option 1 – Close all the open programs and File Explorer windows
The first thing you have to do to resolve the error is to close any open programs as well as File Explorer windows. This is because there are some programs and File Explorer instances that could be using the external device in the background which explains why you’re getting the error when you try to safely remove your device.
Option 2 – Try to configure the Device Removal Policy
The next thing you can do is to configure the Device Removal Policy. How? Refer to these steps:
- Open File Explorer and right-click on the drive where you encountered the error.
- Next, select Properties from the context menu.
- After that, navigate to the Hardware tab and select the disk drive where you got the error under the “All disk drives” section.
- Then select Properties under the Device Properties section. This will open a new mini window and from there, select Change Settings on the bottom portion of the window.
- Now navigate to the Policies tab and select the “Quick Removal (default)” option under the Removal Policy section.
- Click on the OK and Apply buttons to save the changes made and then see if the error is now fixed.
Option 3 – Try to manage the hogging process
You could also try managing the hogging process to get rid of the error.
- Tap the Ctrl + Shift + Esc key combination to open the Task Manager.
- Then look for the running processes and programs that are hogging your USB storage device. If there is a program that’s using your device, it will hog on some Disk or CPU while transferring data and interacting with the device which is why you’re getting an error when you safely remove the device.
- Next, select the concerned processed and right-click on each one of them, and then select the End Task or End Process option. You can also restart the Explorer.exe process and see if that helps.
Option 4 – Try to change the drive letters
- Tap the Win + R keys to open the Run utility and then type “diskmgmt.msc” in the field and click OK or tap Enter to open Disk Management.
- Next, look for your USB storage device using the drive letter that’s assigned to it. Right-click on your device and select the “Change Drive Letter and Paths…” option.
- This will open a mini window and from there select the drive letter you want to change and click on the Change button.
- After that, another smaller window will appear where you’ll have to select the new drive letter from the drop-down menu.
- Click OK and if you got a warning prompt, just click on Yes.
- Now restart your computer.
Option 5 – Try using DISKPART utility to get the drive to be offline
The next thing you can try to resolve the issue is to use DISKPART. Refer to the given steps below to do so.
- Tap the Win + R keys to launch Run and then type “cmd” in the field and tap Enter or click OK to open an elevated Command Prompt.
- Next, type and enter this command to execute it: diskpart
- The command you entered will initiate the DISKPART utility. After that, type and enter this second command: list disk
- Next, type and enter this third command: list volume
- The commands you just executed will help you in either listing all the Disk connects or all the partitions on those disks formed and from there, you need to select one command depending on the “list” command you entered. You can execute either of the two following commands:
- select disk #
- select volume #
- After that, it will select the Disk or Partition you want to select.
- Now type either one of the following commands:
- offline disk #offline volume #
- The command you entered will mark the selected disk is Offline. Afterward, try to safely remove your USB Storage device. Just remember that when you plug it back in again, you have to carry out the same method except for the last given command as this time you will have to enter either of these commands in order to get your USB storage device back online:
- online disk #
- online volume #
Option 6 – Try to change the file system to FAT32
If you keep getting this error on a particular USB device, you might have to format the disk and change its file system to FAT32. Make sure that you copy its contents safely into another location before you format the disk. Keep in mind that formatting the disk will remove all the contents of your drive.
- Open File Explorer and right-click on the drive where you got the error and then select Format from the context menu.
- Next, in the newly opened mini window, select the FAT32 (Default) option from the drop-down menu under File System.
- Now check the Quick Format checkbox and then click on the Start button to start formatting your drive.
Read More
In case you don’t know, the Windows Script Host provides capabilities such as batch files but it also includes many other features like it can be used by a user manual as well as created by the operating system to automate the flow of operations in the system. However, there are a lot of errors that could take place in such a process. One of them is the following error:
“Script: <PATH of the VBS Script>
Line: x
Char: x
Error: The description of the error.
Code: xxxxxxxx
Source: (Source of the error)”
At the time of writing, it isn’t clear yet what the root cause of the error really is but there are several potential fixes you can check out to fix it. You can try to run the System File Checker or set the default value for the .vbs key, or troubleshoot the problem in a Clean Boot State. You could also try to repair Install Windows 10 or scan your computer for malware. For more detailed instructions refer to the following options.
Option 1 – Try to run a System File Checker scan
- In the Windows Start Search, type “command prompt” and right-click on Command Prompt from the search results, and then select the “Run as administrator” option.
- After opening Command Prompt with admin privileges, type the “sfc /scannow” and tap Enter to execute it.
- Once the scan is finished, restart your computer and see if the Windows Script Host error.
Option 2 – Try setting the default value for the .vbs key
- Tap the Win + R keys to open the Run dialog box and type “Regedit” in the field and tap Enter to open the Registry Editor.
- Next, navigate to this registry path: ComputerHKEY_CLASSES_ROOT.vbs
- From there, double click on the default string and change its Value data to “VBSFile”.
- Exit the Registry Editor and restart your computer for the changes to take effect.
Option 3 – Try troubleshooting the problem in a Clean Boot State
Setting your computer in a Clean Boot State can help you diagnose and later troubleshoot the problems in your computer. During this state, the system will start with a minimal number of drivers and startup programs that help in isolating the problem with the interfering software. To put your computer in a Clean Boot State, follow the given steps below.
- Log onto your computer as an administrator.
- Type in MSConfig in the Start Search to open the System Configuration utility.
- From there, go to the General tab and click “Selective startup”.
- Clear the “Load Startup items” check box and make sure that the “Load System Services” and “Use Original boot configuration” options are checked.
- Next, click the Services tab and select the “Hide All Microsoft Services” check box.
- Click Disable all.
- Click on Apply/OK and restart your PC. (This will put your PC into a Clean Boot State. And configure Windows to use the usual startup, just simply undo the changes.)
- From there, start to isolate the problem by checking which one of the programs you installed recently is the root cause of the problem.
Option 4 – Try to repair install Windows 10
- First, you have to click this link and then click the Download Tool Now button.
- Next, click the “Use the tool to create installation media (USB flash drive, DVD, or ISO file)…” option and follow the next given instructions on the screen.
- Now select the ISO file option in step 5.
- After that, you should now have an ISO file.
- Next, go to the location where you’ve downloaded the ISO file.
- Then right-click on the Windows 10 ISO file and select the Open with option and then select File Explorer.
- Now click on “setup.exe” and follow the next instructions that appear on the screen. When asked, you have to select either Nothing (clean install) or Keep personal files only option. Take note that you must not select the “Keep personal files, apps, and Windows settings”.
Option 5 – Try scanning your computer using Windows Defender
It is possible that your computer is infected with malware which could be why you’re getting the Windows Host Script error. Thus, you need to scan your computer using Windows Defender.
- Tap the Win + I keys to open Update & Security.
- Then click on the Windows Security option and open Windows Defender Security Center.
- Next, click on Virus & threat protection > Run a new advanced scan.
- Now make sure that Full Scan is selected from the menu and then click the Scan Now button to get started.
Read More
Error 651 — What is it?
Are you a Windows 7 PC user? Are you experiencing error 651? If yes, then read on. We will discuss what is this error, the causes, and easy DIY solutions to help you resolve this issue immediately.
Error 651 is a common Windows 7 error. This error occurs when you try to connect using your PPPoE connections. The error message is displayed in the following format:
“Error 651: The Modem (or other connecting device) has reported an error.”
Solution
Error Causes
The error code 651 occurs due to multiple reasons. However, some of the most common error causes include:
- The raspppoe.sys file saved in the wrong location
- IP setting issues
- Registry issues
Further Information and Manual Repair
Here are some of the best and easiest solutions to resolve the error code 651 on your system immediately. These solutions are so easy to perform that you don’t need any technical expertise or knowledge to get started. So here we go!
Solution 1: Reset TCP/IP Settings
To reset TCP/IP settings on your PC, here’s what you need to do.
Simply replace the RAS PPPoE driver. First open a command prompt, then write the following command in the command prompt: TAKEOWN /F»C:Windowssystem32driversraspppoe.sys» ICACLS «C:Windowssystem32driversraspppoe.sys» /grant administrators:F. After that, press enter to continue.
Now close the command prompt and go to the folder C:\Windows\system32\drivers, here rename the raspppoe.sys file to raspppoe2.sys. Now right click on save the link as Vista RAS PPPoE Driver and save it in the C:\Windows\system32\drivers folder.
Once this process is complete, to activate changes made, restart your PC.
This is most likely to resolve the error code 651 on your system.
Solution 2: Try Power Cycling your Modem and your Router
This is another way to resolve error 651. However, before you try this solution, it is recommended that you save all your work on your system, close all your open applications, and then shut down your PC.
After that first turn your router off and wait for about 2 minutes. Then turn off your modem too. Now disconnect all the Ethernet cables that are connected to your modem, router and your system.
Reconnect them again and make sure that the connections are not loose. After reconnecting the cables, reboot your PC and switch on the modem first.
After your modem gets initialized, turn on the router. See if this procedure works. If it does, then that’s great the issue is resolved. However, if the error persists, then this indicates deeper problems. The error message is triggered due to registry issues.
Solution 3: Clean and Repair the Registry
Sometimes the underlying cause of error 651 is a corrupt and damaged registry. Registry is the database where operating system stores all the information associated with installed programs and activities performed on your PC. Registry issues typically result due to poor PC maintenance.
When you don’t clean the registry the unnecessary and obsolete files accumulate and acquire a lot space. It damages the registry and DLL files.
This often leads to disk fragmentation and files are then saved in segments in different locations. This also slows down your PC performance. This could also be the reason for why the raspppoe.sys file is saved in the wrong location.
Though you can repair the registry manually but it may be complex for you especially if you are not technically sound. And besides, it is also slightly time-consuming.
Restoro — Premier Registry Cleaner
Therefore, to resolve errors like 651 triggered by the registry issues on your system in seconds, it is advisable to download Restoro.
Restoro is a cutting-edge and multi-functional PC Fixer. It is deployed with a powerful intuitive algorithm and multiple highly functional utilities designed to resolve practically all types of PC errors. It includes utilities like a registry cleaner, an antivirus, and a system optimizer.
The registry cleaning feature scans for all types of registry issues and errors and resolves them instantly. It wipes out unnecessary and redundant files like cookies, internet history, junk files, and bad/ invalid registry entries. It cleans the registry freeing up space.
Furthermore, it also repairs the damaged files and restores the registry back to normal.
Restoro Special Features
Other features include an antivirus that removes all types of malicious software hiding in your PC including viruses, Trojans, spyware, malware, and adware. The system optimizer feature ensures that your computer performs at its optimal level at all times.
Restoro is safe and bug-free. Its user-friendly interface and simple navigations makes it quite easy for users to operate it without any difficulty. Furthermore, compatibility is not an issue with this software. You can download it on any Windows version.
Click here to download Restoro and fix error 651 on your PC today!
Read More
What is Error 0xe06d7363?
Error 0xe06d7363 is displayed when a process or an operation is not launched, or completed by an application.
This error can prevent the user from performing some operations. It might close the application unconditionally. Sometimes a ‘GetLastError()’, a ‘GetExceptionCode()’, or a ‘GetExceptionInformation()’ is displayed with this error.
Error Causes
Error 0xe06d7363 can occur for a number of reasons. Damaged, corrupted, or missing files in the registry database are the main reasons why the error might occur. Another reason is when the system files are not configured correctly, thus they corrupt system files in applications. They can also affect the hardware devices.
All code-generated exceptions in the Microsoft Visual C + + compiler will contain this error. As this error is compiler-generated, the code will not be listed in Win32 API header files. This code is a cryptic device, with ‘e’ for exception while the final 3 bytes represent ‘msc’ ASCII values.
Further Information and Manual Repair
To resolve this error, you will have to debug an application. While using Microsoft Visual Studio, you can stop the program when the error 0xe06d7363 occurs. To start debugging, follow these steps:
- Start debugging application
- From Debug menu, click on Exceptions
- In the Exceptions window, select error 0xe06d7363
- In Action, Change to Stop always from Stop if not handled
Another fix for this issue is reverting back to an earlier copy or the last update of the same Windows. Error 0xe06d7363 can occur is when you try running a client application using Microsoft.SqlServer.Types.dll component on your computer that has Microsoft SQL Server 2008 Server Pack 2 installed. With the error, the following text can be seen:
“unable to load DLL ‘SqlServerSpatial.dll’ Exception from HRESULT 0xe06d7363″.
A Cumulative Update 7 was initially released for SQL Server 2008 Service Pack 2 in order to fix this issue. Since the builds are cumulative, every new fix released contains hotfixes and all security fixes which were also included in the previous SQL Server 2008 fix release. This error can be found in all Microsoft products that are listed in the Applies to Category.
Microsoft SQL Server 2008 hotfixes are created to resolve errors like 0xe06d7363 on specific SQL Server service packs. This error is by design and has commonly occurred in the previous versions of Windows before Windows 7.
Congratulations, you have just fixed Error 0xe06d7363 in Windows 10 all by yourself. If you would like to read more helpful articles and tips about various software and hardware visit errortools.com daily.
Now that’s how you fix Error 0xe06d7363 in Windows 10 on a computer. On the other hand, if your computer is going through some system-related issues that have to get fixed, there is a one-click solution known as Restoro you could check out to resolve them. This program is a useful tool that could repair corrupted registries and optimize your PC’s overall performance. Aside from that, it also cleans out your computer for any junk or corrupted files that help you eliminate any unwanted files from your system. This is basically a solution that’s within your grasp with just a click. It’s easy to use as it is user-friendly. For a complete set of instructions in downloading and using it, refer to the steps below
Perform a full system scan using Restoro. To do so, follow the instructions below.
-
-
- Download and install Restoro from the official site.
- Once the installation process is completed, run Restoro to perform a full system scan.

- After the scan is completed click the “Start Repair” button.
-


Read More
Lately, Microsoft has trying to fix Print Nightmare with various methods and patches. The last patch has seemingly fixed Print Nightmare but it has broken the Alt-tab key combination.
It has been reported that the latest patch has broken famous key combinations for quickly switching from window to window. It seems that combination is not working or it is switching to desktop, even going to blank screen if switching from the full-screen game.
Fixing the issue
Luckily this issue is easily fixable.
The first and easier fix for this issue is surprising to turn off the news and info widget, right-click on it and choose News and interests and then click on turn off.
The second solution would be to uninstall the update. Go to Settings, then to Update & Security, and from there view Update History and remove the update.
Read More
Open Source Software is developed, tested, or improved through public collaboration and distributed with the idea that the must be shared with others, ensuring an open future collaboration. In other words, it is free software developed and maintained by public contribution. Many open-source projects have reached performance and usability like their paid alternatives, some have even surpassed them. Here we will explore open source alternatives to paid applications, you will find alternatives to paid ones that aim to do the same task.
-
LINUX — alternative to Windows or macOS
When it comes to the operating system, Windows and macOS mostly dominate the home market, but if you go a little deeper into the OS world you will hear this talk about LINUX and its distributions. LINUX is an open-source operating system, it has many various distributions aimed at different types of users and they are also open source as well. Its security and account privileges, as well as complete control over it, make it one of the best-operating systems in the world, many servers that run websites today use LINUX as their choice of operating system mostly due to its superior security features. If LINUX is good enough for big web companies, I am sure it will be at least satisfactory to you as well. Get your LINUX distribution here.

-
Thunderbird — alternative to outlook
A great alternative to any mail client actually, connect all of your emails into thunderbird and use it as the centralized email client for all of your email needs. Thunderbird does not lack any features that its paid counterparts have and overall it is a great application worth installing. Grab it from here.

-
VLC media player — media player able to play almost anything
Are you looking for a great media player alternative to Windows media player or iTunes? Look no further, VLC is a lightweight media player that can play almost any file type, it is customizable and packed with features even its paid counterparts would envy. Its playback features are unmatched by other applications and once you try it, I am sure you will hardly go back from it. Give it a go and grab it from here.

-
KeePass — password manager
Keepass is a simple, user-friendly lightweight password generator and manager, it uses industry-standard AES encryption and two-factor authentication to keep the details of your accounts safe and secure. you can store him and the database on a USB stick for safekeeping making it a great one to use on a go, wherever you need it. Get it from this link.

-
FileZilla — FTP client
A lightweight and future-rich FTP solution. It supports remote file editing and resuming of lost transfers, overall great application which anyone who needs this type of software should not overlook. Download it from its official website.

-
Audacity — alternative to Audition, Fl, apple logic pro,…
Digital audio editor and recording computer software with some great features like recording audio from multiple sources, post-processing of all types of audio, including podcasts by adding effects such as normalization, trimming, and fading in and out. Audacity has a great following and it is well documented, easy to learn and use. Grab it from here.

-
Shortcut — alternative to adobe premiere, avid media composer, DaVinci resolve
The shortcut is a video editor application that demonstrates how long an open-source project can go if enough dedication and work are put into it, started as not so great and not so feature-packed in beginning, today it can easily contend with its paid counterparts with its non-destructive editing, color gradation, keyframing, etc. It is running and using FFmpeg, an open-source video framework that lets it open and works with virtually any video or audio format. Download it from here.

-
Gimp — alternative to adobe photoshop
This one has been around since 1996 and it is one of the best maintained open source applications. With its features like built-in support for layers, filters, and automatic photo enhancement. It also makes it easy to create new graphic design elements and you can really take things to the next level by downloading plug-ins created by the broader GIMP open source community. Gimp is the best pixel manipulation-free tool on the market and with the right skills, it can go side by side with adobe’s flagship product. Check it out here.

-
Inkscape — alternative to adobe illustrator, Corel draw
What is Gimp for photoshop that is Inkscape for illustrator. This free open-source vector graphic tool does not fall behind with its tools in comparison to its paid counterparts and I would highly recommend it for anyone. Features like alpha blending, cloning on-point path manipulations can assure that you can create anything you want inside it. get your copy from here.

-
Libre office — alternative to MS office
Libre office is one of the most quality office suite there, it has spreadsheets, word processor, presentation app, calculation applications, database application, and diagrams. All these applications create and make one great suite that can open Microsoft Office files and even work with them naturally. Completely free and active in development there is no reason, not t use it in your daily routine. Go to its official website and download it for a test run.
-
Amarok — alternative to iTunes
Amarok is an audio player with a broad range of features like integration with multiple Web audio services, dynamic playlists, bookmarks, scripting, context view, and more. get it from here.

-
PDF Creator — alternative to adobe acrobat
As its paid counterpart PDF Creator lets you make PDF files from any application that could print. It works the same way as adobe acrobat and supports encryption and digital signature, it lacks in PDF forms a little but if that is not something that you need, it is a great alternative to acrobat and completely free. Download it from here.

-
Blender — Alternative to Autodesk Maya, Autodesk 3dmax, foundry Modo, cinema4d,…
3D modeling and animation software is very expensive. From the point of home user long it has been lost dream to have industry quality 3D modeling, animation, and rendering application for an affordable price. Blender has made that dream a possibility, completely free and open-source this package offers everything that its paid counterparts offer, some could even argue that since its open-source nature and availability of full code it offers even more. Why you are still here? Go get it here.
-
Bluefish — alternative to Adobe Dreamweaver
When it comes to web editing and code editing applications, notepad ++ seems like a person go-to application, but if you prefer a more professional suited IDE for web development check out Bluefish, auto-filling, code syntax, and constant development make sure that this application will not go away soon and it is worth investing your time in it. Get it from here.

-
ClamWin — alternative to Kaspersky, BItdefender, Norton
This antivirus has over 600000 users and active database updates also feature a full email scanner, scanning scheduler, and File Explorer integration. It is far better than other freeware alternatives and if you are looking for a free antivirus option look no further, ClamWin is here to stay. Grab it from here.

-
Natron — alternative to adobe aftereffects, foundry nuke
Full-featured node-based composition and effects suite. Natron is a powerful Digital Compositor that can handle all of your 2D/2.5D needs. Its robust OIIO file formats and OpenFX architecture is what makes Natron the most flexible open-source compositor for the visual effects community. Its interface and functionally are the same across all platforms such as macOS, Linux, and Windows. Natron has a powerful keying, roto/roto paint, 2D tracking tools that are staple for all current film production project that requires visual effects. Get natron from here.
-
Clonezilla — alternative to Norton Ghost
When it comes to cloning hard drives usually there is only one application, Norton ghost. Clonezilla tends to change that by offering the same usability as the ghost. Grab your copy from here.

-
FreeCAD — alternative to Autodesk AutoCAD
Autodesk AutoCAD has years of development and dedication of its team behind it to keep it as the best CAD application on the market and it shows. However, if you are not really a hardcore professional who needs all of AutoCAD features and can live without some automation inside it FreeCAD is one of the best free open source options, it will certainly get the job done and with its dynamic simulation and analysis, it is guaranteed that you can achieve same results as in AutoCAD with little more time investment. Get if here.

-
Octave — alternative to MATLAB
Octave is the best open-source educational tool used for numerical computation with an interactive environment. The tool features powerful mathematics-oriented syntax with built-in plotting and visualization tools and also Octave syntax is largely compatible with Matlab. Get your copy from here.

-
Godot — alternative to Unity3D, Unreal
Godot is a lightweight feature-packed node-based game development engine, completely open-source and free to use for commercial projects. The engine has reached 3.2 version and it is more and more adopted by various independent game makers across the globe, recently there are to of video tutorials and documentation to get you up and running and its open-source nature lets you modify the engine itself in any way that suits and benefits you. Also, any project made with Godot is completely yours, there are no hidden fees or anything similar. Download it from here.

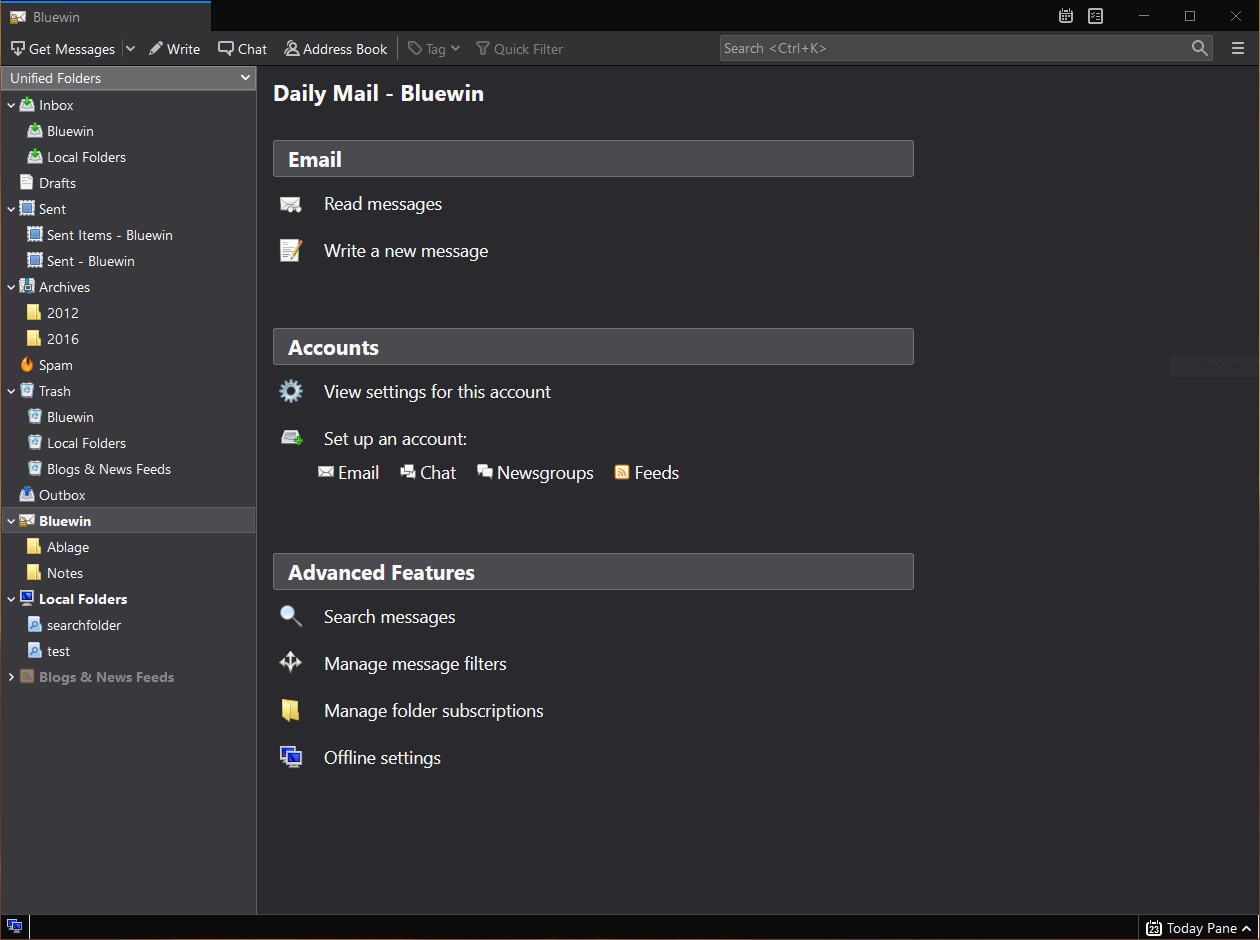
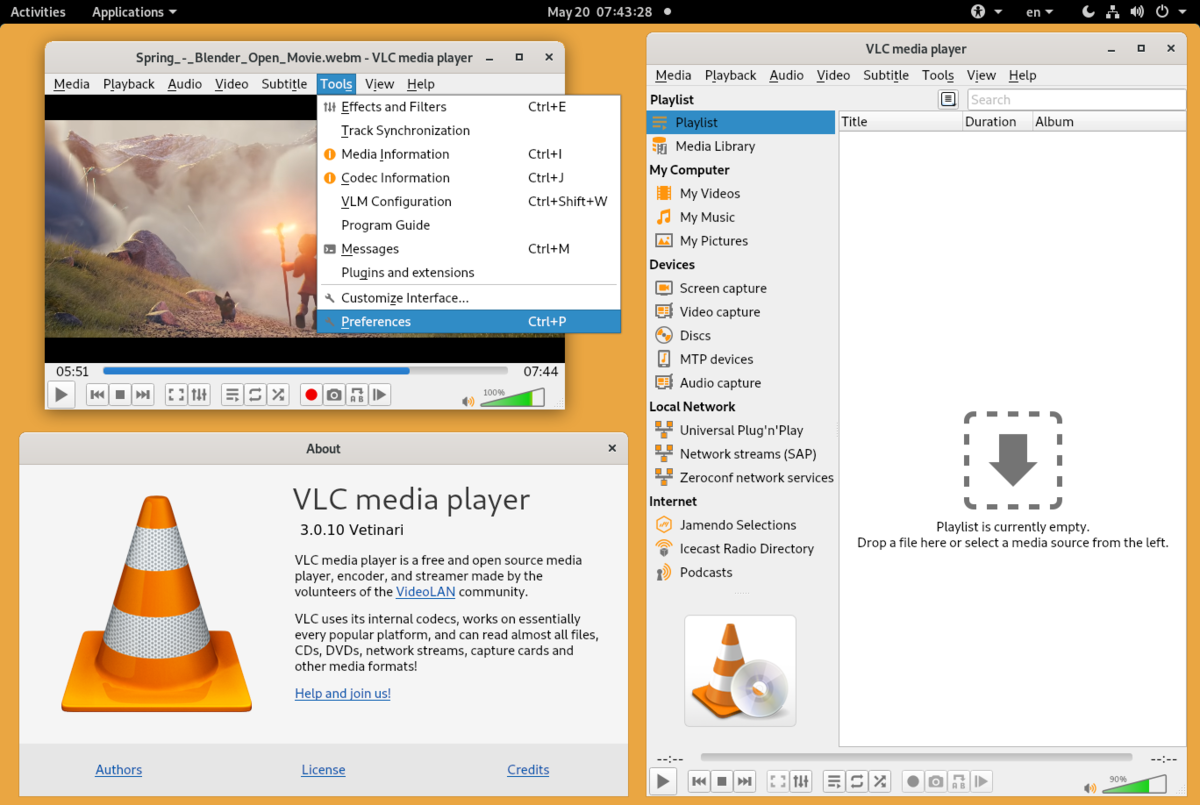
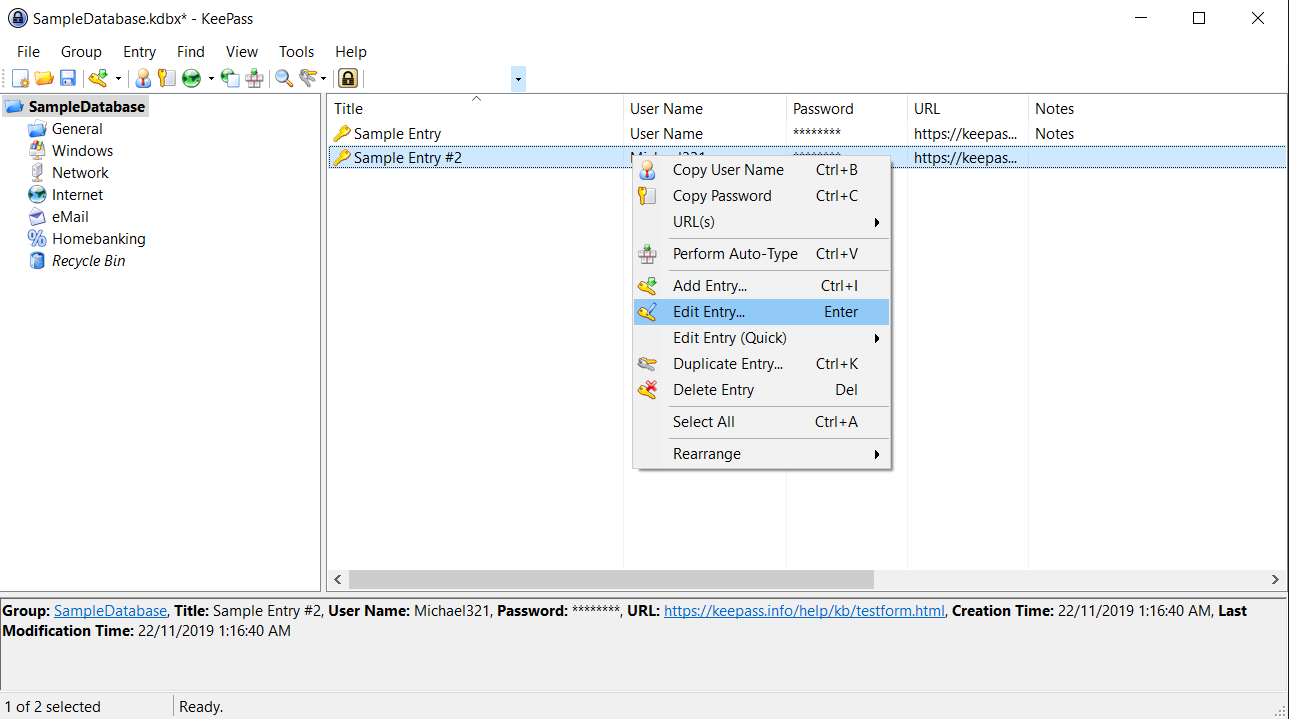
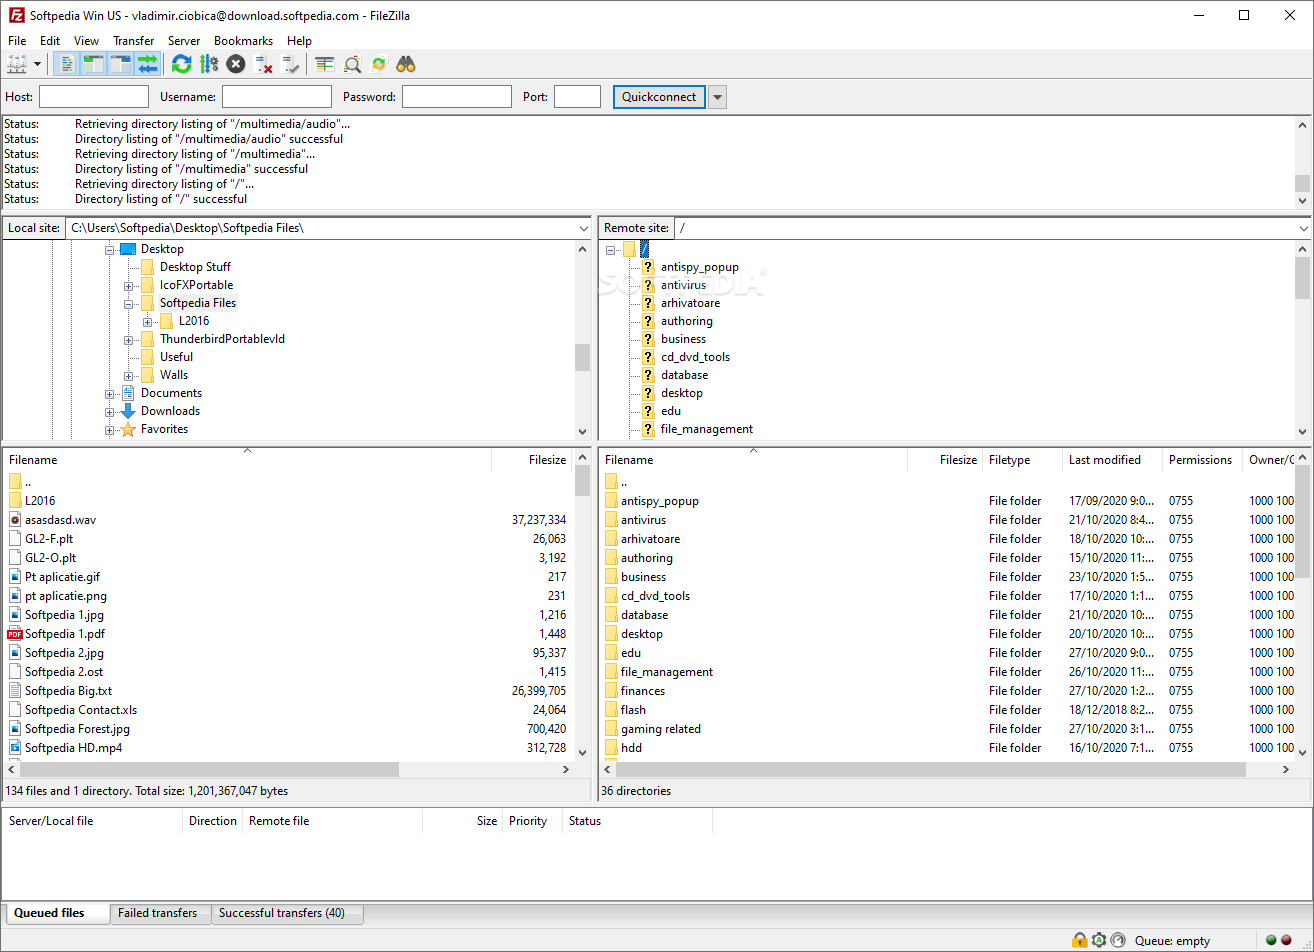
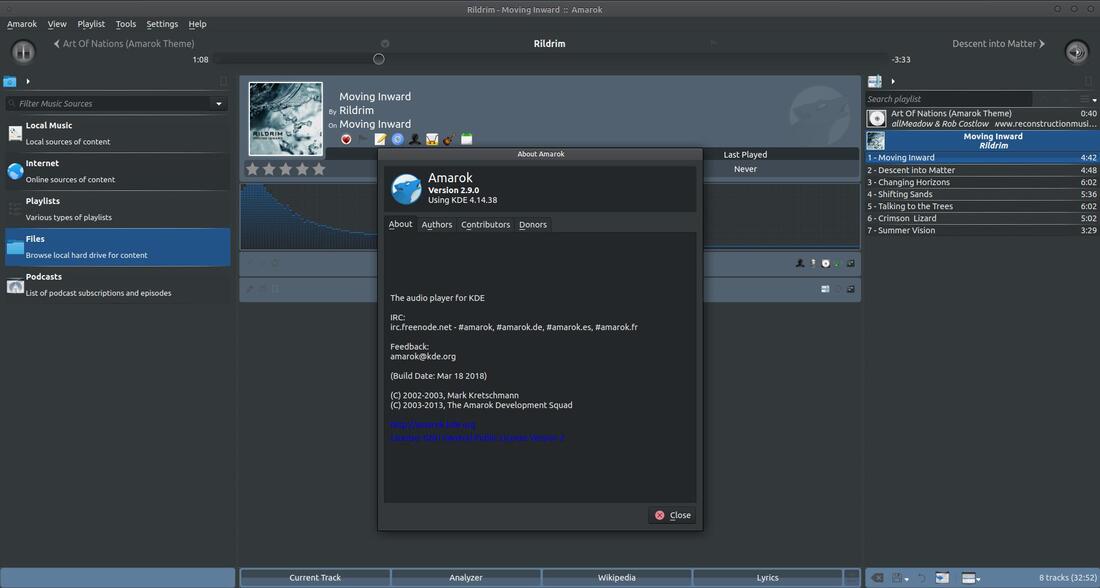
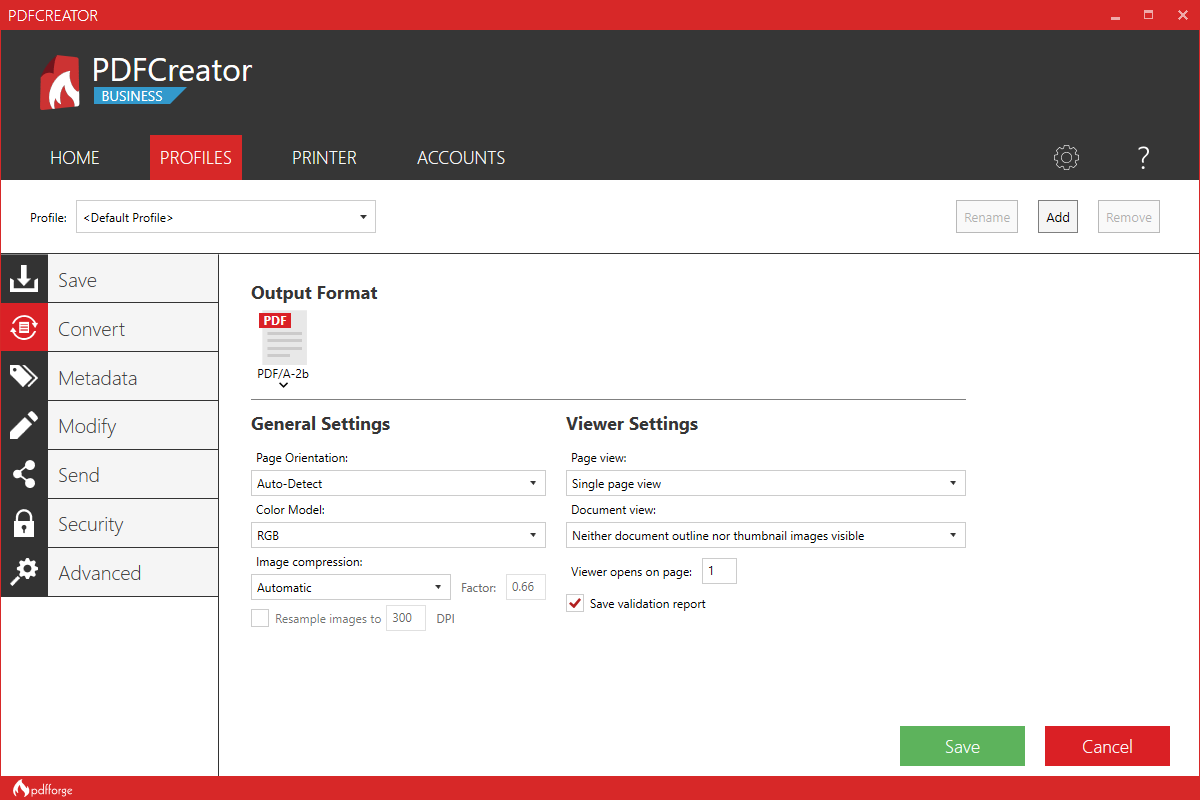

Conclusion
That’s it, my pick for 20 open source alternatives which I believe you should at least try and if you end up with at least one, you have saved some hard-earned money.
And always remember:
- Open-source programs give you complete freedom without any shady terms and conditions.
- Open-source software code is readily available for anyone who wants it, so anyone can use it, share it, modify it for their own needs, and study it.
- No spying eyes, no tracking, and no telemetry
- In some cases, open-source tools offer features or performance benefits that surpass their commercial counterparts.
- No hidden charges, completely free.
If you would like to read more helpful articles and tips about various software and hardware visit errortools.com daily.
Read More
Copyright © 2023, ErrorTools. All Rights Reserved
Trademark: Microsoft Windows logos are registered trademarks of Microsoft. Disclaimer: ErrorTools.com is not affiliated with Microsoft, nor claims direct affiliation.
The information on this page is provided for information purposes only.