
Apart from working with Apple devices, the AirPods also work with Windows 11 PCs and laptops to deliver quality audio to users via Bluetooth. However, many users have reported that they are experiencing the AirPods not working issue on their Windows devices after updating to Microsoft’s latest Windows 11 platform.
As you are already reading this article, we presume you are facing the AirPods not working issue or some other issues with your AirPods on your Windows 11 PC or laptop. Fret not, as we have curated this in-depth guide to help you resolve the issue and use your Apple AirPods seamlessly with your Windows 11 computer. Check out the following sections for all the details!
Fix AirPods Not Working on Windows 11 PC or Laptop
Although Apple’s AirPods are designed to work best with iPhones, iPads, and Macs, they work quite well with Windows 11 PCs and laptops with Bluetooth, offering most features of the earphones to users. I have been using the AirPods Pro 2 with my Windows 11 laptop, and it has been a splendid experience, at least most of the time. At times, however, I experience connection failures, audio issues, and minor glitches here and there.
So, after scouring through various guides and user reports online, I have found some of the most effective fixes to resolve the AirPods not working issue on Windows 11 PCs and laptops. With these fixes and suggestions, I have tried to address most issues that you may face with your AirPods while using them with your Windows 11 devices.
I have also provided easy-to-follow, step-by-step guides to help you execute the fixes on your Windows 11 PC or laptop to get the TWS earbuds working again. Check them out below to fix the AirPods not working issue on your Windows 11 device right now!
1. Check Your AirPods Firmware Version
Okay, let’s put first things first! Much like how the iPhone has iOS, your AirPods also has firmware that you need to keep updated. If your AirPods is running an outdated firmware version, you can experience various issues, including the AirPods not working issue in Windows 11. So, check the current firmware version of your AirPods and make sure it is running the latest version.
Now, to check the AirPods firmware version, you need an iPhone, iPad, or Mac. You can refer to the Check Your AirPods Firmware section in our in-depth guide on how to fix AirPods not connecting to iPhone to learn how you can use your iPhone to check the AirPods firmware and make sure it is up to date.
If your AirPods firmware is updated to the latest version, you can proceed to the next section. However, if it is not updated, you need to update the AirPods firmware before using it further. Unfortunately, there is no direct way to update the AirPods.
All you can do is keep them connected to your iPhone and keep the iPhone sufficiently charged and connected to an active internet network. The AirPods firmware will be automatically updated.
After the update, use our guide on How to Connect AirPods to Windows 11 PCs and laptops to properly pair and connect them to your device. After a successful connection, the AirPods should properly work on your Windows 11 computer.
2. Check If Your AirPods Are Still Connected to Your iPhone or Other Device(s)
Now, if you wear the AirPods and hear the connection chime in your ears, but do not get any audio output from your Windows 11 PC or laptop, chances are your earbuds have connected to another Bluetooth device nearby. You see the AirPods are designed to automatically connect to the device to which they were connected in their last session.
So, even if Bluetooth is enabled on your Windows 11 PC or laptop and you have already paired the AirPods with it, the earbuds might still not automatically connect to your Windows 11 device.
Previously, if you used them with, say your iPhone, before putting them back in the charging case, the next time you put them on, they will automatically connect to your iPhone, if it is nearby. Hence, it is recommended that you check whether or not your AirPods are connected to any other device instead of your Windows 11 PC or laptop when you are using them.
On your iPhone, you can open the Control Center and tap the AirPlay button in the Music tile to check if the AirPods are connected to it. If the AirPods are indeed connected, tap the iPhone option to temporarily disconnect them.
Once they are disconnected from your iPhone or any other device, open the Bluetooth & devices settings on your Windows 11 PC or laptop, and manually connect the AirPods using the Connect button.
3. Make Sure Bluetooth is Properly Working in Windows 11
It is needless to say, for the AirPods to properly work with your Windows 11 PC or laptop, the Bluetooth functionality of your device should be properly working. You see much like any other feature on a Windows 11 PC or laptop, Bluetooth operations can sometimes run into issues, which in turn could cause the AirPods not working issue in Windows 11.
In this case, you can go through our in-depth guide on how to fix Bluetooth not working in Windows 11 to identify the issue with the wireless functionality of your Windows 11 device and get it resolved. You can try updating or reinstalling the Bluetooth driver, running the Bluetooth troubleshooter, or trying any of the other fixes mentioned in the linked guide.
After resolving the Bluetooth issue on your Windows 11 PC or laptop, reconnect the AirPods to it and check whether or not the earbuds are working as expected.
If you did not find an effective fix in the How to Fix Bluetooth in Windows 11 guide, you can also check out our in-depth guide on How to Fix Bluetooth headphones not working in Windows 11 via the provided link.
4. Make Sure AirPods are Selected to Audio in Windows 11
Another common situation that often causes the AirPods not working issue or the no-sound issue for the AirPods on Windows 11 devices is when the earbuds are not selected for audio. You see if you use multiple audio devices on your Windows 11 PC or laptop, the AirPods might not be automatically selected to output audio right after you connect them to Windows 11.
In this case, you can use the following steps to make sure that the AirPods are selected to output audio on your Windows 11 PC or laptop:
1. While on any screen on your Windows 11 PC or laptop, press the Windows + A shortcut to open the Action Center.
2. On the Action Center UI, click the Select a sound output button at the bottom.
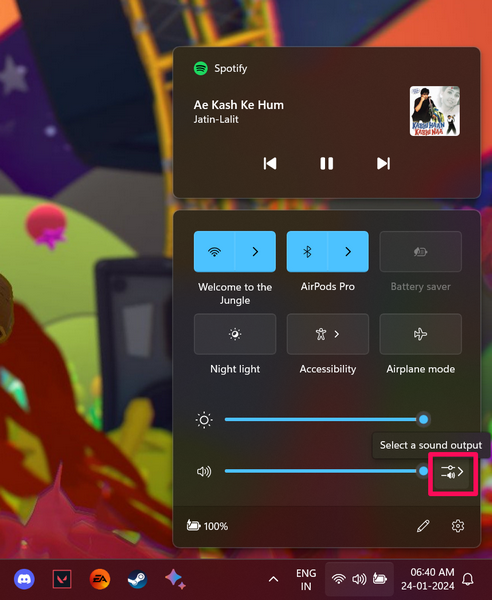
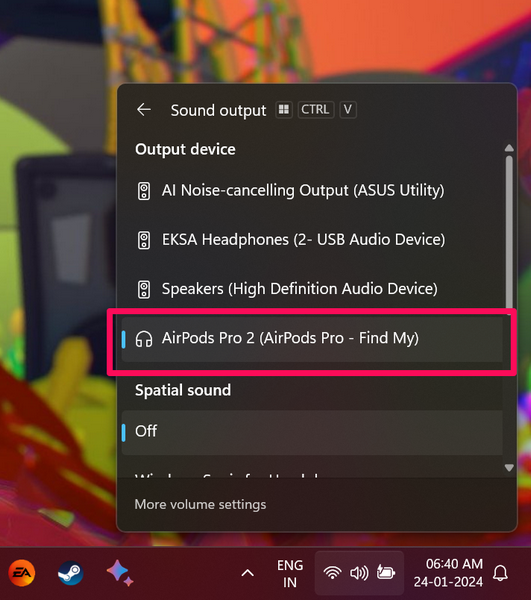
3. Now, make sure that your AirPods are selected for audio on your Windows 11 PC or laptop.
5. Reconnect the AirPods to Your Windows 11 PC or Laptop
Now, if you are still experiencing the AirPods not working issue on your Windows 11 PC or laptop, you can try disconnecting the AirPods from your computer and then reconnecting them again. This trick can get rid of any connection issues that might be causing interference between the AirPods and your Windows 11 PC or laptop, and resolve the AirPods not working issue right away.
So, you can follow the steps right below to disconnect the AirPods from your Windows 11 device and then connect them back:
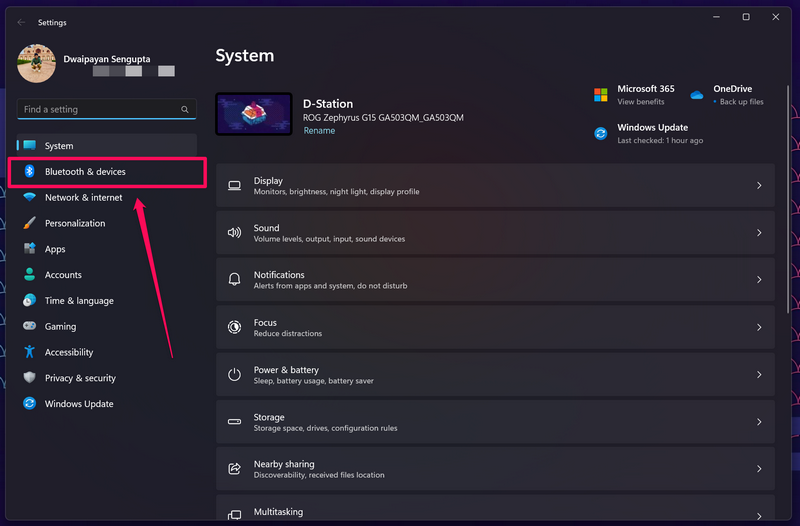
1. Use Windows + I to open the Settings app on your Windows 11 PC or laptop.
2. Go to the Bluetooth & devices tab on the left navigation bar.
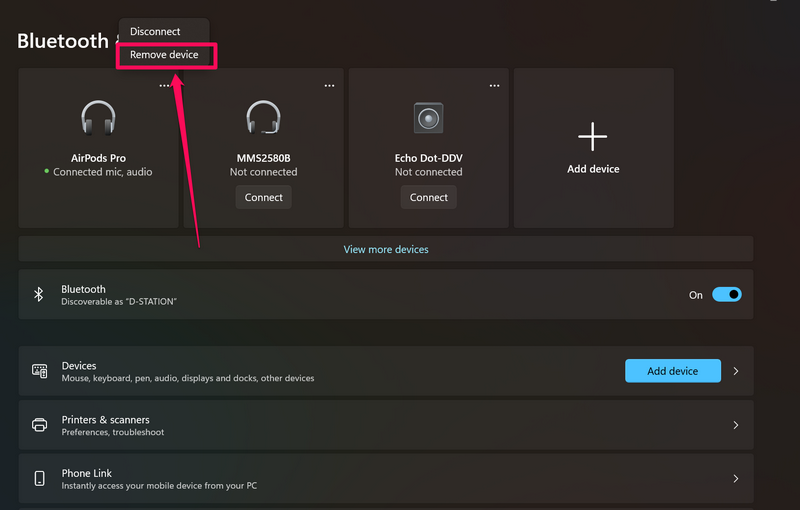
3. Locate the AirPods on the right pane and click the three-dot (more) button to open the context menu.
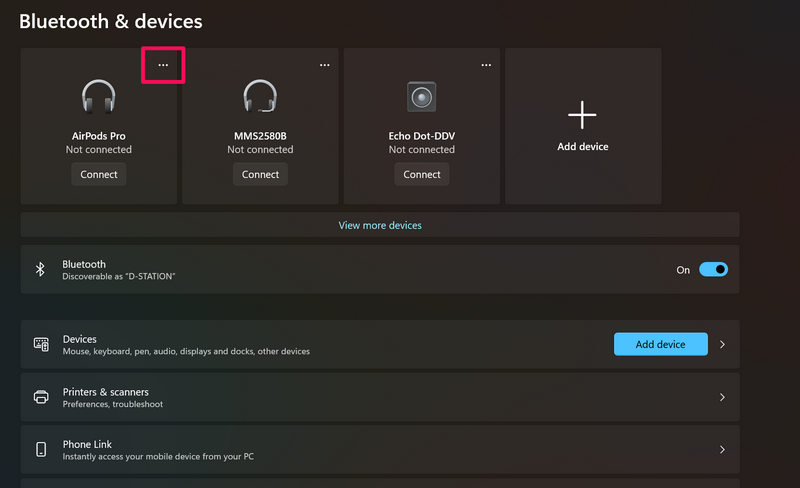
4. Click the Remove device option to instantly disconnect the AirPods from your Windows 11 PC or laptop.
5. Once the earbuds are removed from the Bluetooth & device settings page on your Windows 11 device, use the previously-mentioned How to Connect AirPods to Windows 11 guide to reconnect the earbuds.
After reconnecting the AirPods to your Windows 11 PC or laptop, they should work fine in case the AirPods not working issue on your device was due to a connection issue.
6. Turn Off Audio Enhancements and Spatial Sound for AirPods in Windows 11
If you are experiencing bad audio quality or audio glitches on your AirPods while using them with your Windows 11 PC or laptop, you can try turning off the Audio enhancements and Spatial sound features. This trick has worked for many users who were experiencing poor audio output from their AirPods on their Windows 11 devices.
So, there is a high chance that it will resolve the issues for your AirPods and get it fixed in no time. You can follow the steps right below to turn off Audio enhancements and Spatial sound for the AirPods on your Windows 11 PC or laptop:
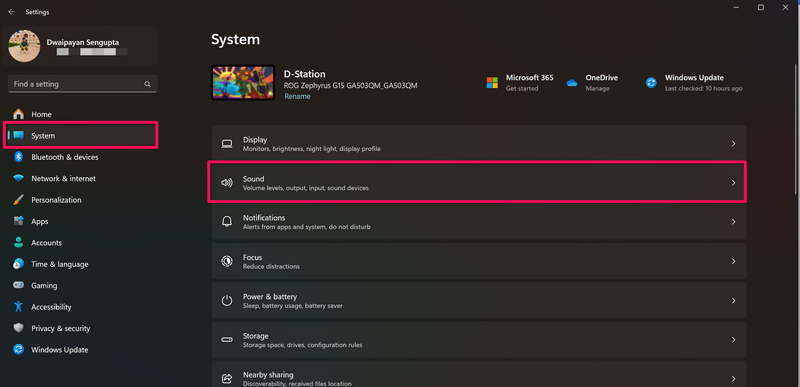
1. Press Windows + I to launch the Settings app on your Windows 11 device.
2. Under the System tab on the left navigation bar, click the Sound option.
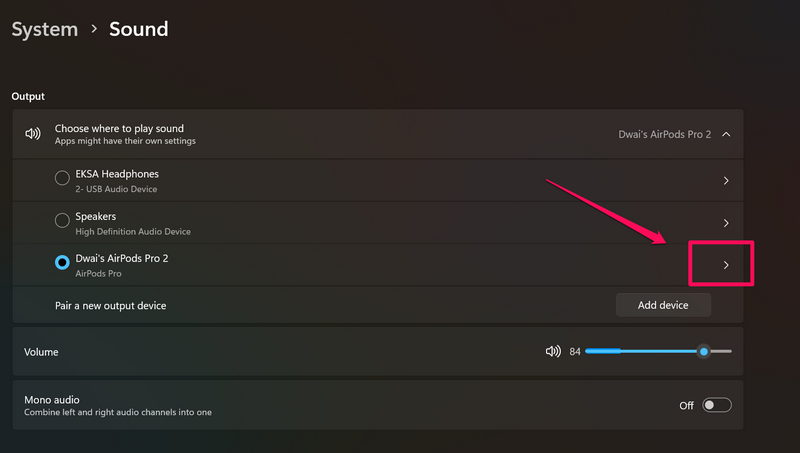
3. Locate your AirPods on the list and click the arrow next to it to open its Properties.
4. On the following page, scroll down to find the Audio enhancements and Spatial sound options.
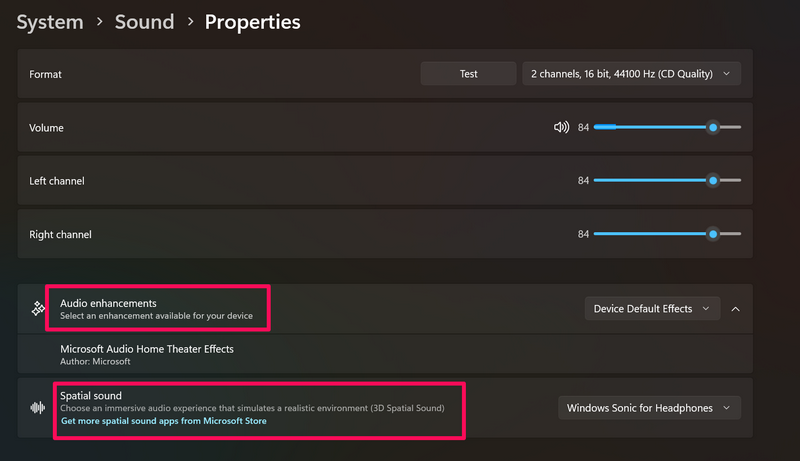
5. Click the boxes next to the mentioned options and set them both to Off.

This will turn off the additional audio enhancements and spatial audio features for the AirPods on your Windows 11 PC or laptop. So, if these features were interfering with the operations of the AirPods, causing them to malfunction, this fix should get them working on your Windows device right away.
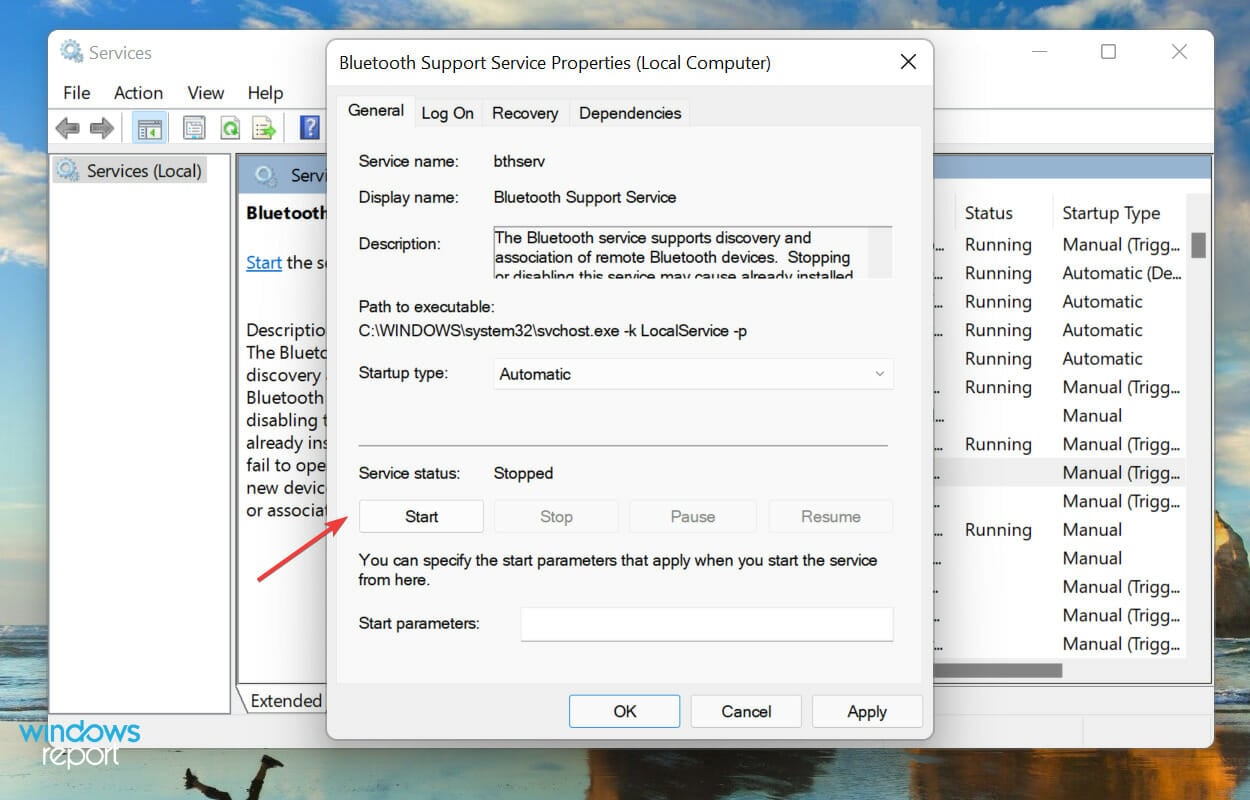
7. Make Sure Bluetooth Services are Set to Automatic in Windows 11
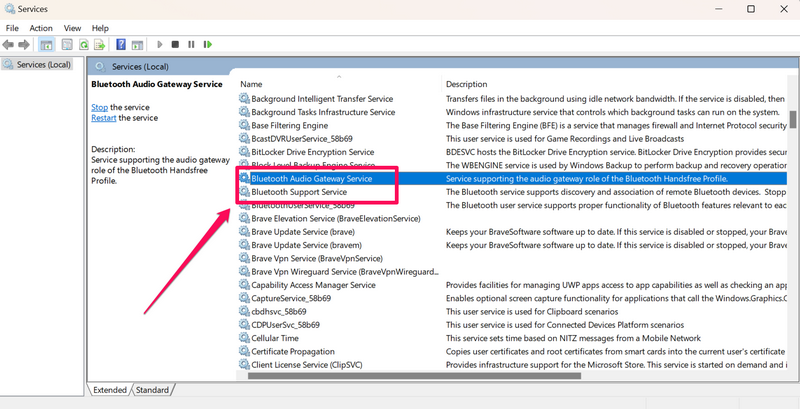
Now, another fix you can try when you experience the AirPods not working issue on your Windows 11 device is to ensure the Bluetooth Support Service and the Bluetooth Audio Gateway Service are set to Automatic. These services make sure all the Bluetooth audio accessories are discoverable by your Windows 11 PC or laptop and work every time you connect them to the device.
So, if these services on your Windows 11 PC or laptop are set to run manually, you might face the AirPods not connecting or AirPods not working issue on your computer. You can follow the steps right below to make sure the aforesaid Bluetooth services are set to Automatic on your Windows 11 device:
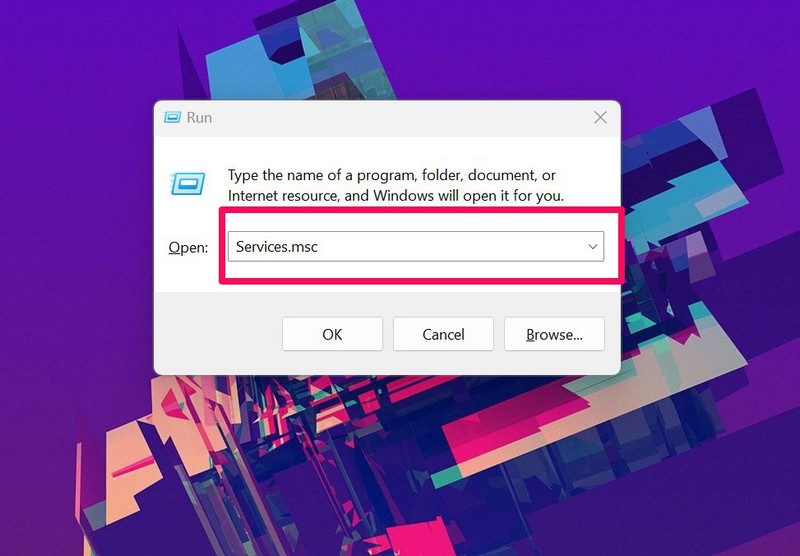
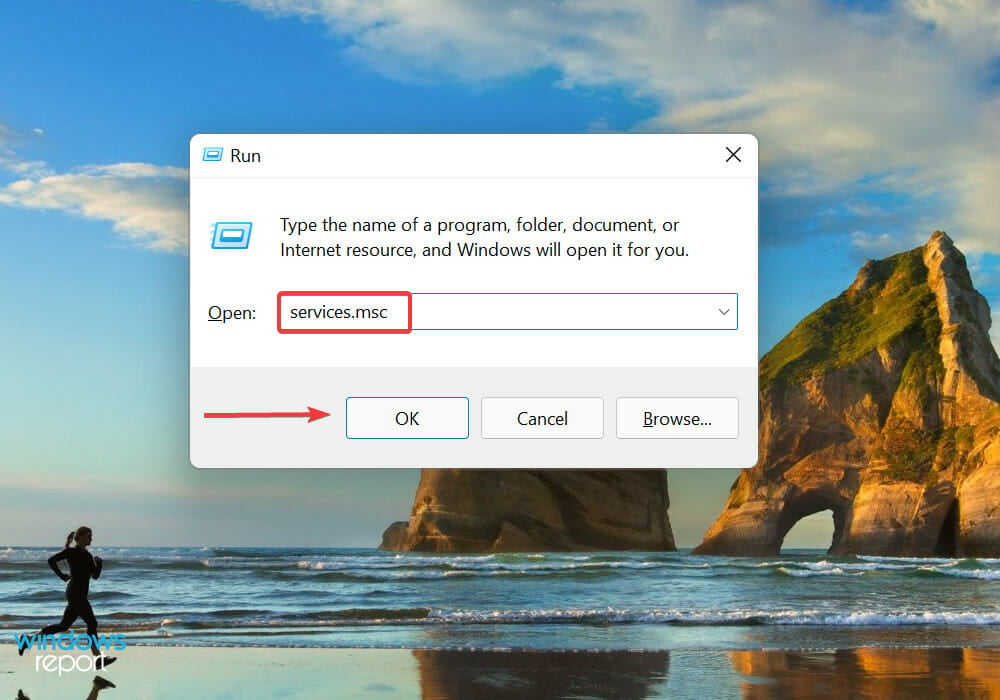
1. Use Windows + R to open the Run tool on your PC or laptop.
2. Type in “services.msc” (without quotes) and press Enter to open the Services window on your device.
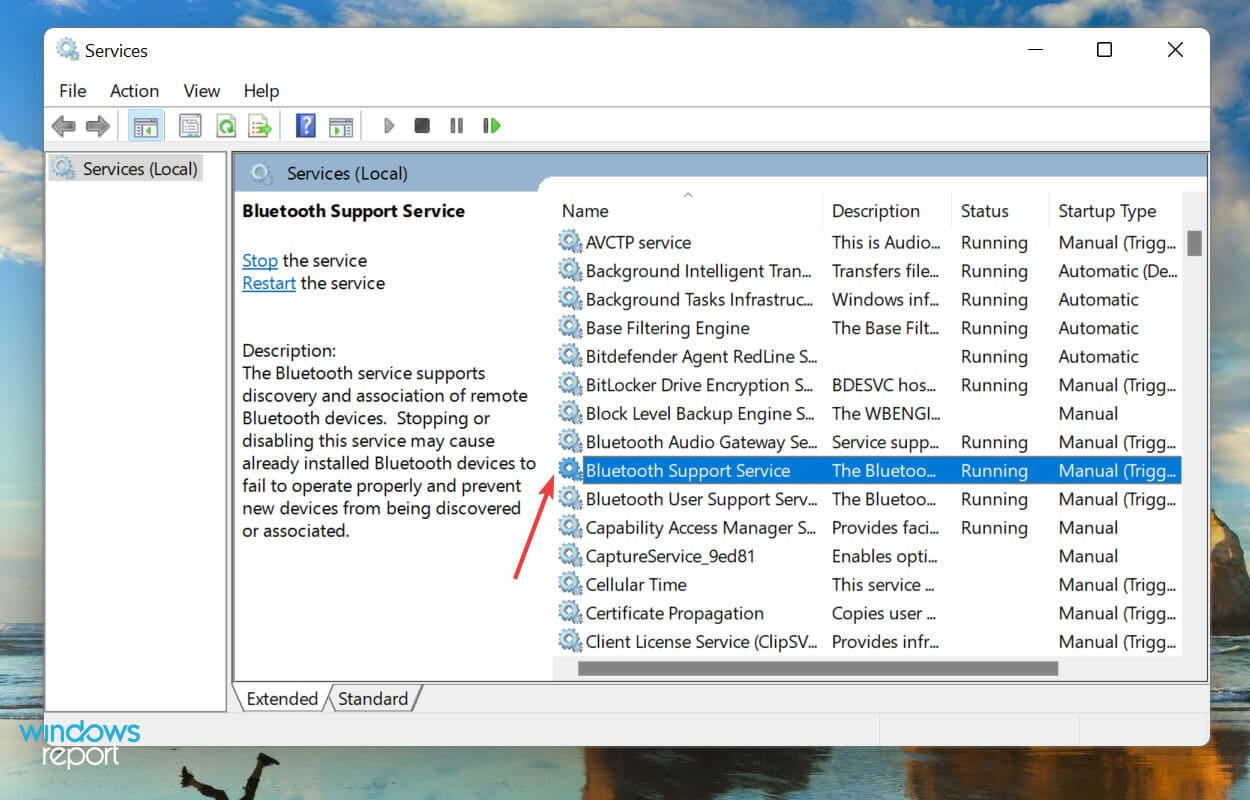
3. Now, locate the Bluetooth Audio Gateway Service and the Bluetooth Support Service on the right pane.
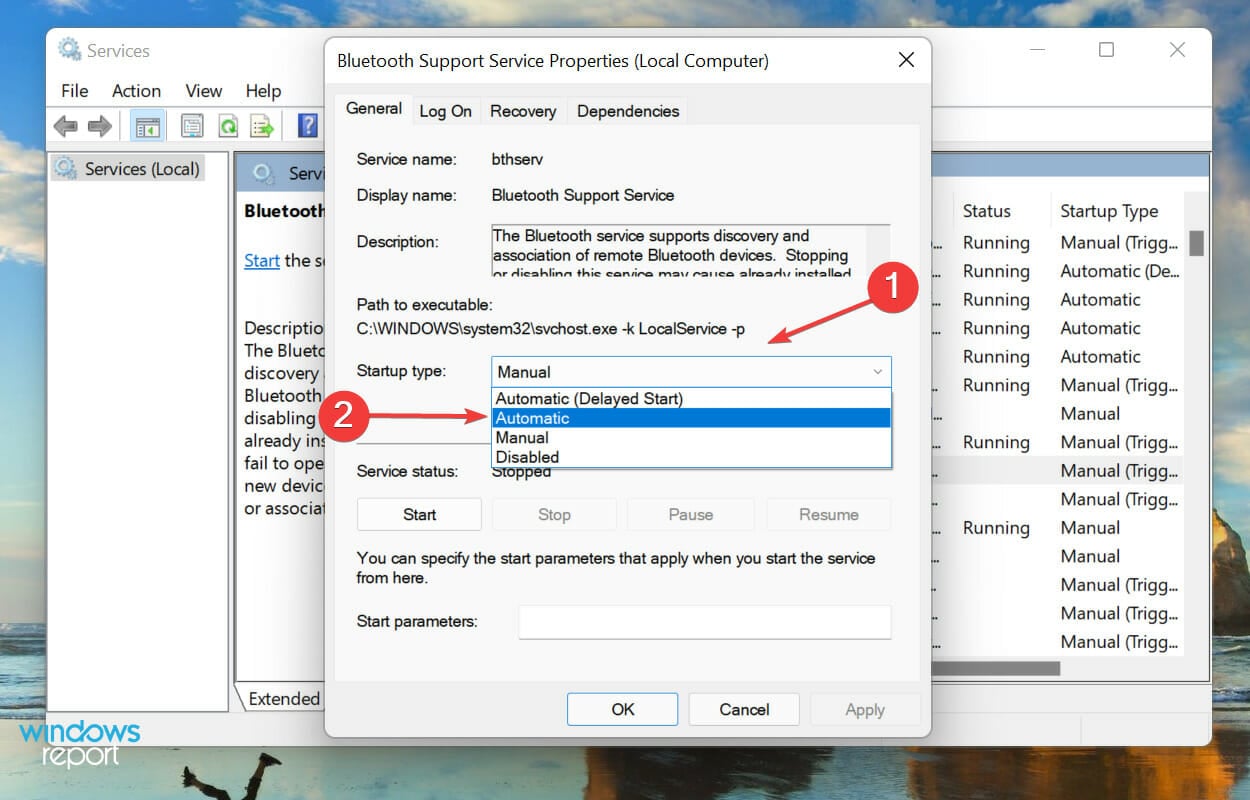
4. You can then double-click each of the services to open their properties and set the Startup type to Automatic.
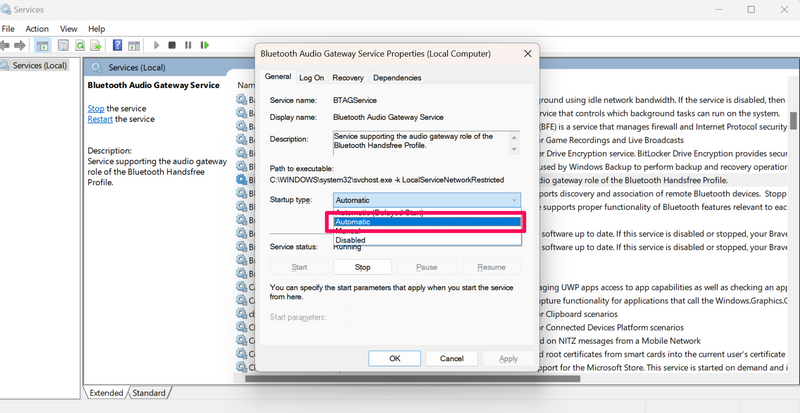
5. After the change, make sure to click the Apply button to save it on your Windows 11 PC or laptop.
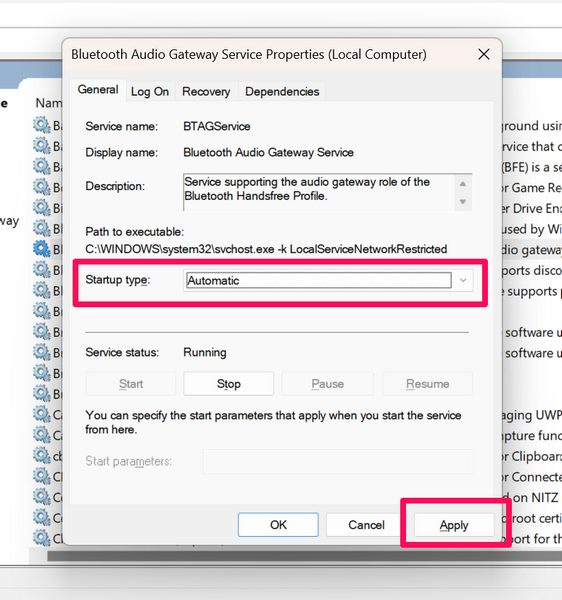
Once you have set the Bluetooth Audio Gateway Service and the Bluetooth Support Service to Automatic, restart your Windows 11 PC or laptop. Following the restart, check whether or not the AirPods not working issue has been resolved on your device.
8. Check for Windows 11 Updates
Microsoft keeps rolling out new Windows 11 updates for users every now and then to fix known bugs and issues in the operating system. So, if you have not updated your Windows 11 PC or laptop in a while, chances are you are running an outdated Windows 11 version with bugs that might be causing your AirPods to malfunction.
In this case, you can check for the latest Windows 11 updates on your PC or laptop and get them installed as soon as possible. Use the following steps to do on your Windows 11 device:
1. Press Windows + I to open the Settings app.
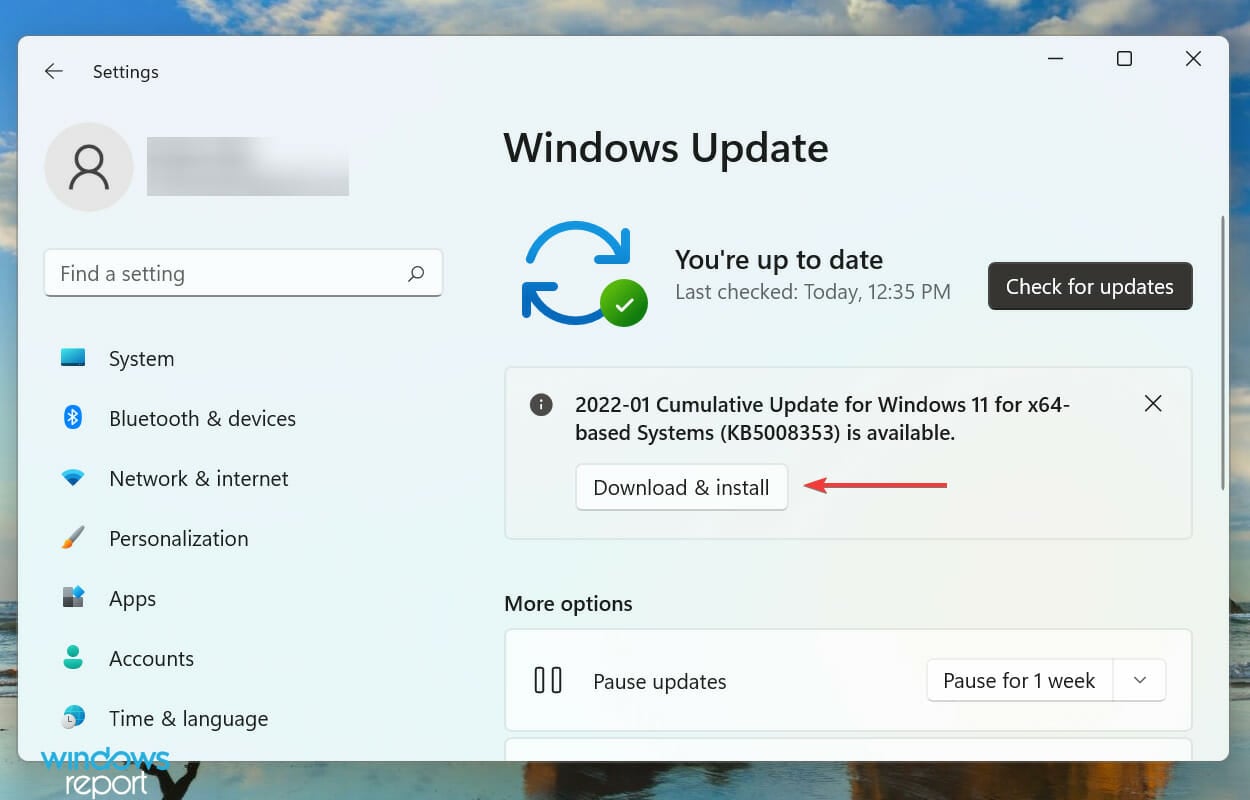
2. Go to the Windows Update tab on the left navigation bar and click the Check for updates button.

Note: Make sure your Windows 11 PC or laptop is connected to an active internet network during this stage.
3. Once the Windows updates are ready, click the Download and install button to initiate the update process.
4. Wait for the Windows update to complete.
5. Restart your Windows 11 PC or laptop if it is not restarted automatically.
After the restart, connect your AirPods to the Windows 11 device and check whether or not it is working properly.
9. Reset Your AirPods
Another thing that you can try when you experience the AirPods not working issue on your Windows 11 PC or laptop is resetting the Bluetooth earbuds from Apple. If the AirPods are not working properly with your Windows 11 device due to a system glitch, a reset should get rid of it.
You can follow the steps right below to reset your AirPods to try and resolve the AirPods not working issue in Windows 11:
1. With the earbuds inside, open the lid of the AirPods charging case.
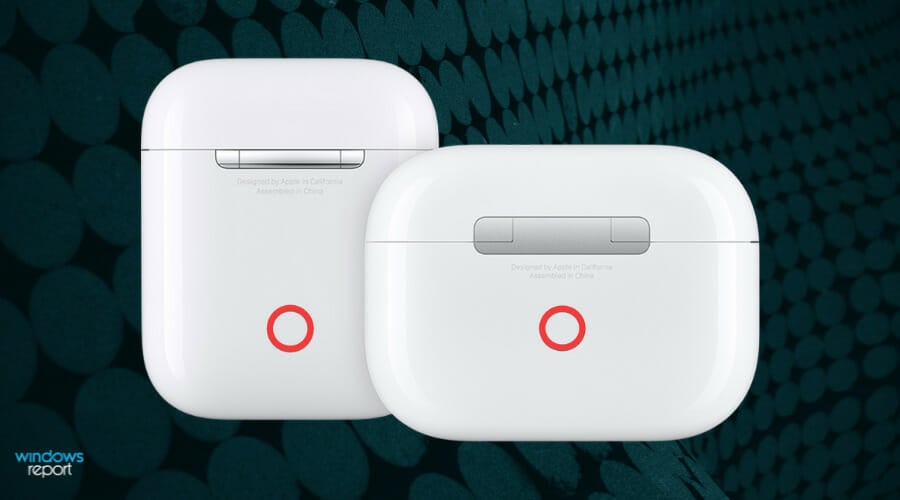
2. Now, press and hold the physical button on the AirPods case.
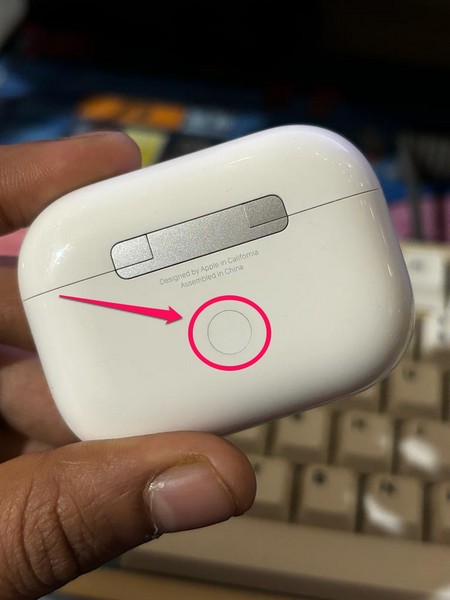
3. Continue holding the button until you see the indicator LED of the AirPods flash amber and then white.
This will reset your AirPods and get it back to its factory settings. After the reset, pair the AirPods with your Windows 11 PC or laptop once again and check whether or not the earbuds are working properly.
10. Contact Apple Support
Now, if none of the above-mentioned methods helped you to resolve the AirPods not working issue on your Windows 11 device, you might want to contact Apple’s support team. There might be a hardware issue with your AirPods that might be preventing it from connecting and working with a Windows 11 PC or laptop.
So, we’d recommend you download the Apple Support app on your iPhone or go to the official Apple Support page to explore all the options. However, it is best to take your AirPods to a nearby Apple Store or an Apple-authorized service center to directly consult with a technician who might be able to better understand the issue and get it fixed.
FAQs
Do Apple AirPods work with Windows 11?
Yes, Apple’s AirPods, ranging from the 1st-Gen AirPods to the AirPods Max, seamlessly work with Microsoft’s Windows 11 platform. The Windows 11 PC or laptop must have Bluetooth connectivity for the AirPods to connect and output high-quality audio.
How to connect my AirPods to my Windows 11 computer?
To connect AirPods to a Windows 11 PC or laptop, you can go to the Bluetooth & device settings and add a new device. Next, press and hold the button on the AirPods case to make it discoverable to nearby Bluetooth devices, and then, select the AirPods on the Add a Device UI on the Windows 11 computer to connect.
Why is the AirPods not working with my Windows 11 computer?
There can be various reasons why the AirPods might not work with a Windows 11 PC or laptop. These include issues with the Bluetooth functionality of the Windows device, outdated AirPods firmware, issues with the Bluetooth drivers, or an outdated Windows 11 version.
Wrapping Up
There you have it, folks! This was our comprehensive guide on how to fix AirPods not working on Windows 11 PCs and laptops. Apple’s AirPods are great audio accessories that are quite expensive compared to the competition. So, if you use an iPhone and a Windows computer, using the AirPods with both your devices is how you can fully utilize the TWS earbuds.
Hence, we hope this article helps you resolve any issue that you might experience with the AirPods and your Windows 11 computer. If you were facing such an issue and one of the fixes helped you resolve it, don’t forget to let us know in the comments below. We will see you in our next guide!
How to Fix AirPods When They Won’t Connect to a Windows 10 or 11 PC
In recent years, Apple’s AirPods have become synonymous with high-quality wireless audio. Their sleek design, ease of use, and seamless integration with Apple devices make them a preferred choice for many music lovers and those who enjoy podcasts or audiobooks. However, while AirPods are primarily designed to work flawlessly within the Apple ecosystem, they are also compatible with non-Apple devices, including Windows 10 and Windows 11 PCs. Unfortunately, users sometimes experience connectivity issues when attempting to pair their AirPods with Windows systems. This article will guide you through troubleshooting steps to fix AirPods that won’t connect to your Windows 10 or 11 PC.
Understanding the Bluetooth Connection
Before diving into the troubleshooting process, it’s essential to understand how Bluetooth works. Bluetooth is a standard for short-range wireless communication that allows devices like headphones and computers to connect and communicate. When connecting AirPods to a Windows computer, the Windows machine serves as the Bluetooth source, while your AirPods act as a Bluetooth receiver.
Initial Checks
Check AirPods Functionality
Before troubleshooting connection issues, make sure that your AirPods are functioning correctly. You can test them by connecting them to a different device, such as an iPhone or Android phone. If they connect without any issues, the problem likely lies with your Windows PC.
Update Windows
It’s essential to keep your operating system updated. Microsoft regularly releases updates that may include bug fixes and improvements in Bluetooth connectivity.
- Go to Settings > Update & Security.
- Click on Check for updates.
- If updates are available, download and install them.
- Restart your PC afterward.
Basic Pairing Steps
Connecting AirPods to a Windows PC follows a standard Bluetooth pairing procedure. Here’s a brief overview to ensure you’re starting on the right path:
-
Enable Bluetooth: Make sure Bluetooth is enabled on your Windows PC. Go to Settings > Devices > Bluetooth & other devices. Toggle the switch to turn on Bluetooth if it’s off.
-
Put AirPods in Pairing Mode: To activate pairing mode, place both AirPods in their charging case and open the lid. Press and hold the button on the back of the case until the LED indicator starts flashing white.
-
Add a Bluetooth Device: On your Windows PC, return to the Bluetooth settings (as mentioned above). Click on Add Bluetooth or other device, then choose Bluetooth to search for available devices.
-
Select AirPods: When your AirPods appear in the list, select them to connect. You may hear a confirmation chime in the AirPods.
-
Test the Connection: Once connected, play some audio to test the sound quality and connectivity.
If your AirPods won’t connect despite following these steps, proceed to the advanced troubleshooting methods outlined below.
Advanced Troubleshooting Steps
1. Disable and Re-Enable the Bluetooth
Sometimes, simply toggling the Bluetooth feature off and on can resolve connectivity issues:
- Go to Settings > Devices > Bluetooth & other devices.
- Turn off Bluetooth, wait for a few seconds, then turn it back on.
- Try to reconnect your AirPods.
2. Remove and Re-Pair the AirPods
If the AirPods have previously paired but are acting up, removing them from the Bluetooth list and re-pairing can often resolve issues:
- In the Bluetooth settings, locate your AirPods in the list of paired devices.
- Click on your AirPods and select Remove Device.
- Repeat the pairing process as outlined in the basic steps.
3. Update Bluetooth Drivers
Outdated or incompatible Bluetooth drivers can prevent devices from connecting correctly:
- Right-click the Start menu and select Device Manager.
- Expand the Bluetooth category.
- Right-click your Bluetooth adapter (it may have a name like «Generic Bluetooth Adapter») and choose Update Driver.
- Select Search automatically for updated driver software. Windows will look for available updates.
- If an update is found, follow the on-screen instructions to install it.
- Restart your computer afterward.
4. Check the Bluetooth Services
Sometimes, specific Bluetooth services may not be running, leading to connection issues:
- Press Windows + R to open the Run dialog box.
- Type
services.mscand hit Enter. - In the Services window, scroll down to find Bluetooth Support Service.
- Right-click it and select Start if it’s not already running. If it is running, use Restart.
- Ensure the startup type is set to Automatic.
- Close the Services window and attempt to reconnect your AirPods.
5. Modify Audio Settings
Misconfigured audio settings can prevent sound from coming through your AirPods even if they are connected:
- Right-click the sound icon in the system tray and select Sounds.
- Go to the Playback tab. Ensure your AirPods are listed and set as the default device.
- If they are not recognized, right-click on the blank space and mark Show Disabled Devices.
- If AirPods still don’t appear, you may need to reinstall the Bluetooth driver as outlined earlier.
6. Check for Interference
Wireless signals can be disrupted by various electronic devices, including microwaves, Wi-Fi routers, and even other Bluetooth devices. Ensure that you are in a range free of interference, which can be challenging in crowded environments.
7. Reset AirPods
Resetting your AirPods can resolve persistent issues:
- Place both AirPods in the charging case and close the lid. Wait for 30 seconds.
- Open the lid and press and hold the setup button until the LED flashes amber, then white.
- Your AirPods are now reset. Try the pairing process again.
Additional Considerations
1. Windows Sound Settings
If your AirPods connect but you do not hear any sound, check your Windows sound settings:
- Ensure that the volume is up and that the system isn’t muted.
- Open Settings > System > Sound.
- Check that your AirPods are selected as the output device.
2. Check for Audio Enhancements
Windows 10/11 comes with multiple audio enhancements which may not work well with Bluetooth devices:
- Right-click the sound icon in the taskbar and select Sounds.
- Go to the Playback tab, double-click your AirPods, and navigate to the Enhancements tab.
- Disable all enhancements and test your AirPods again.
Conclusion
While AirPods are designed primarily for compatibility with Apple devices, they can efficiently function with Windows 10 and 11 PCs. Connectivity issues can arise due to various reasons, including outdated drivers, Bluetooth settings, or interference from other devices. This guide provided a series of troubleshooting steps to help you restore connectivity to your AirPods.
In case you have performed all the recommended steps and are still facing issues, consider consulting with Apple Support or a professional technician. While these advanced steps usually resolve the most common connectivity problems, every situation is unique, and further assistance is wise when necessary. Remember, technology might be temperamental at times, but with patience and the right methodology, you can overcome nearly every obstacle. Enjoy your wireless audio experience with AirPods and your Windows PC!
Readers help support Windows Report. We may get a commission if you buy through our links.
Read our disclosure page to find out how can you help Windows Report sustain the editorial team. Read more
Several users have reported that their AirPods are not working in Windows 11. If there are problems with the connection, or an outdated driver is installed, you might encounter issues with it.
Apart from that, running an older version of the OS is just as likely to cause the error. Many a time, it’s the selection of the audio output device that can lead to issues with AirPods in Windows 11.
What can I do if the AirPods are not working in Windows 11?
1. Reconnect the AirPods
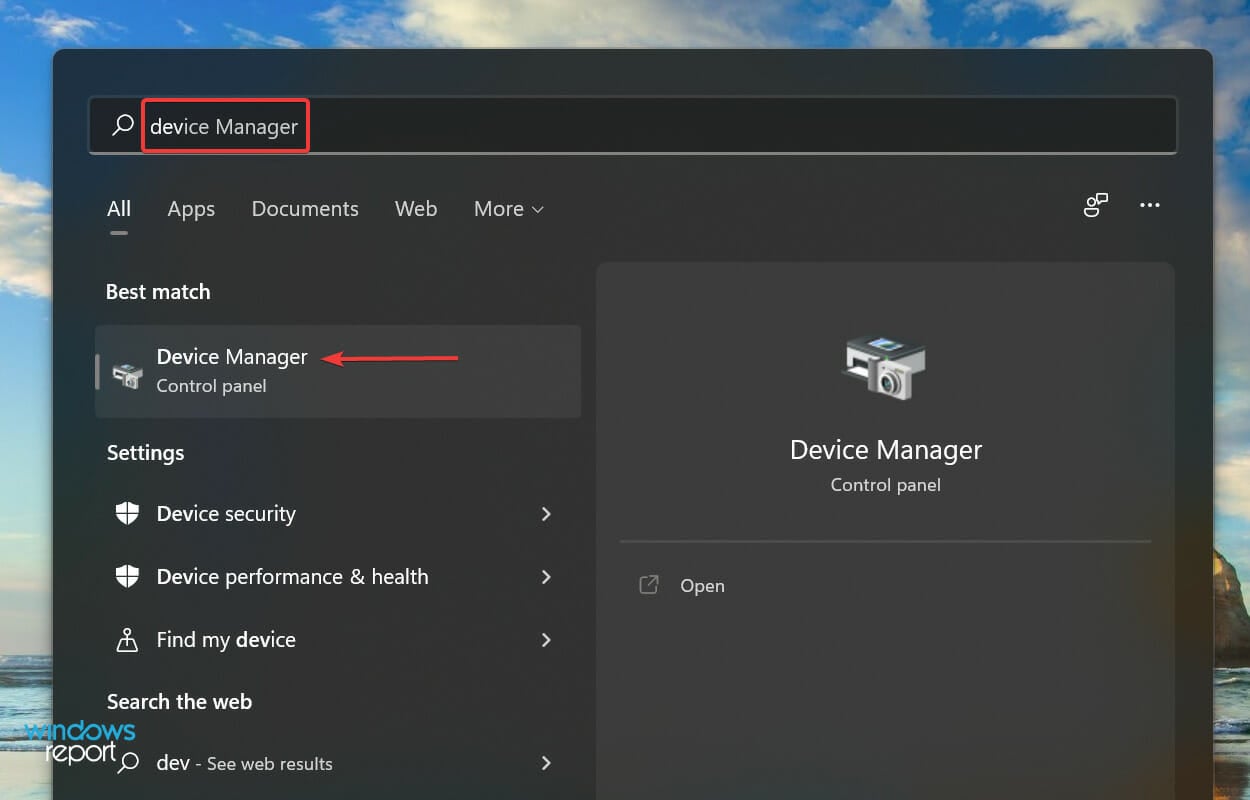
- Press Windows + S to launch the Search menu, enter Device Manager in the text field at the top, and click on the relevant search result.

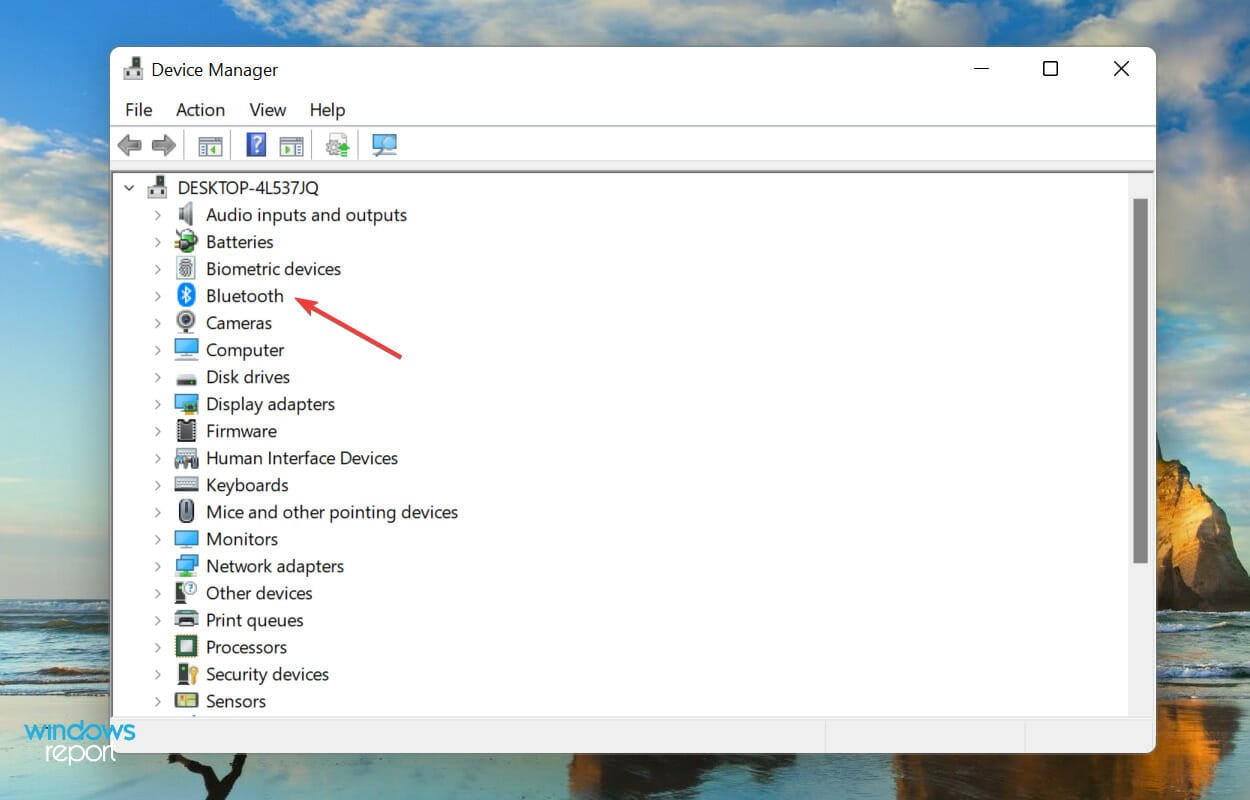
- Double-click on the Bluetooth entry to expand and view the devices under it.
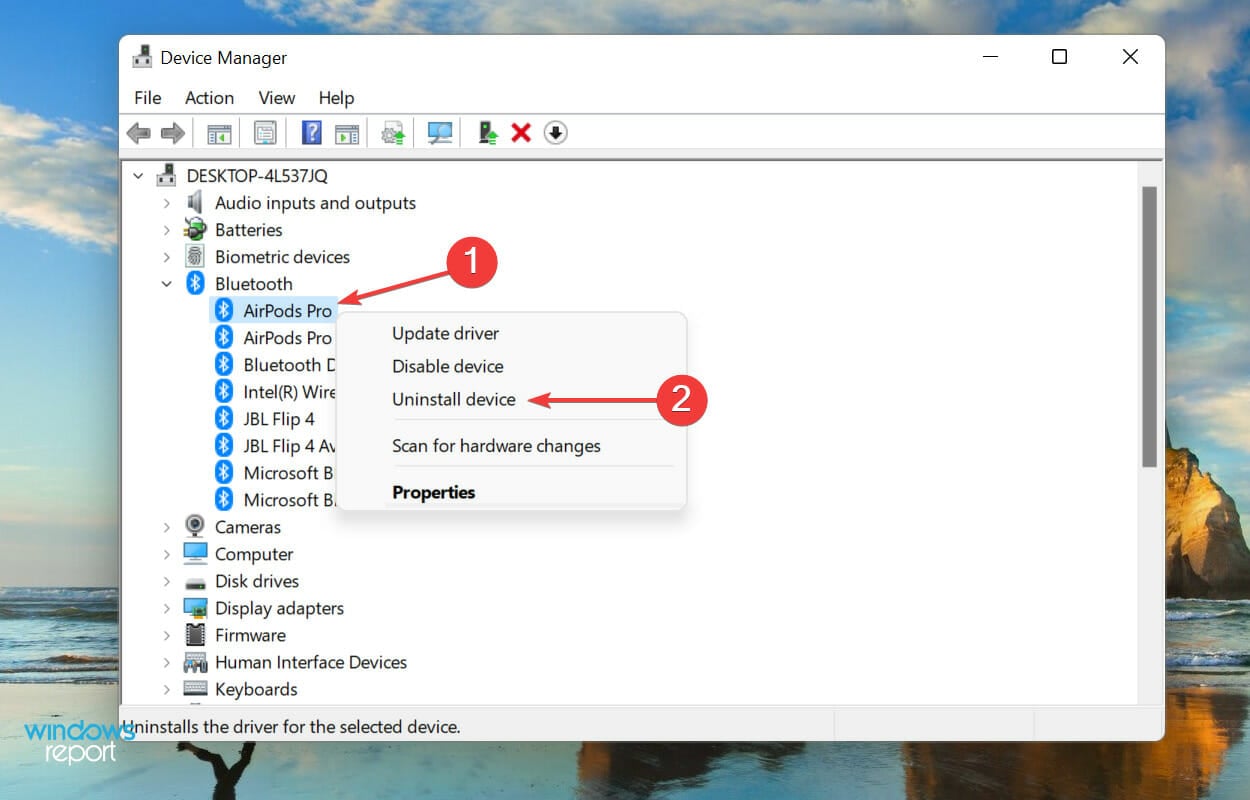
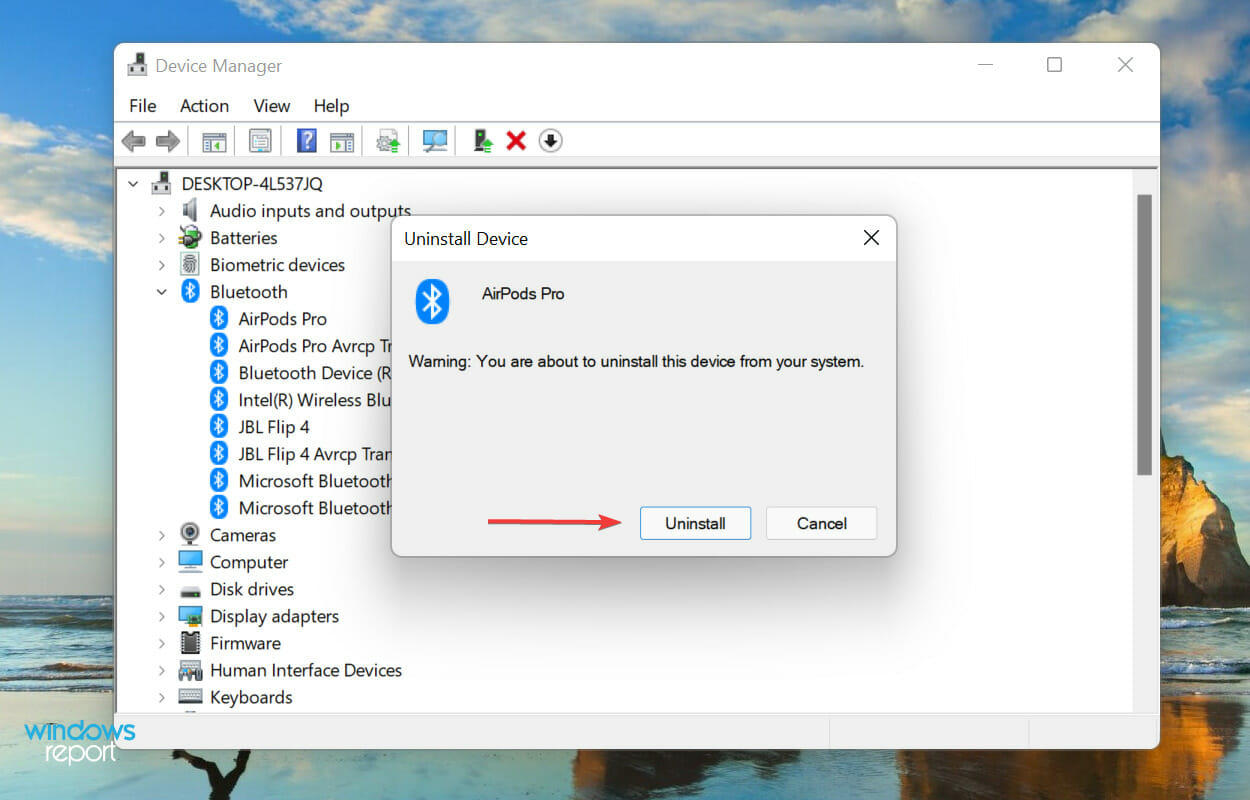
- Locate all the devices that start with AirPods, right-click on them, and select Uninstall device from the context menu.
- Click Uninstall in the confirmation box that pops up.
- Now, open the AirPods case, and hold the button on the its back for around 10 seconds until the amber light appears and then turns white.

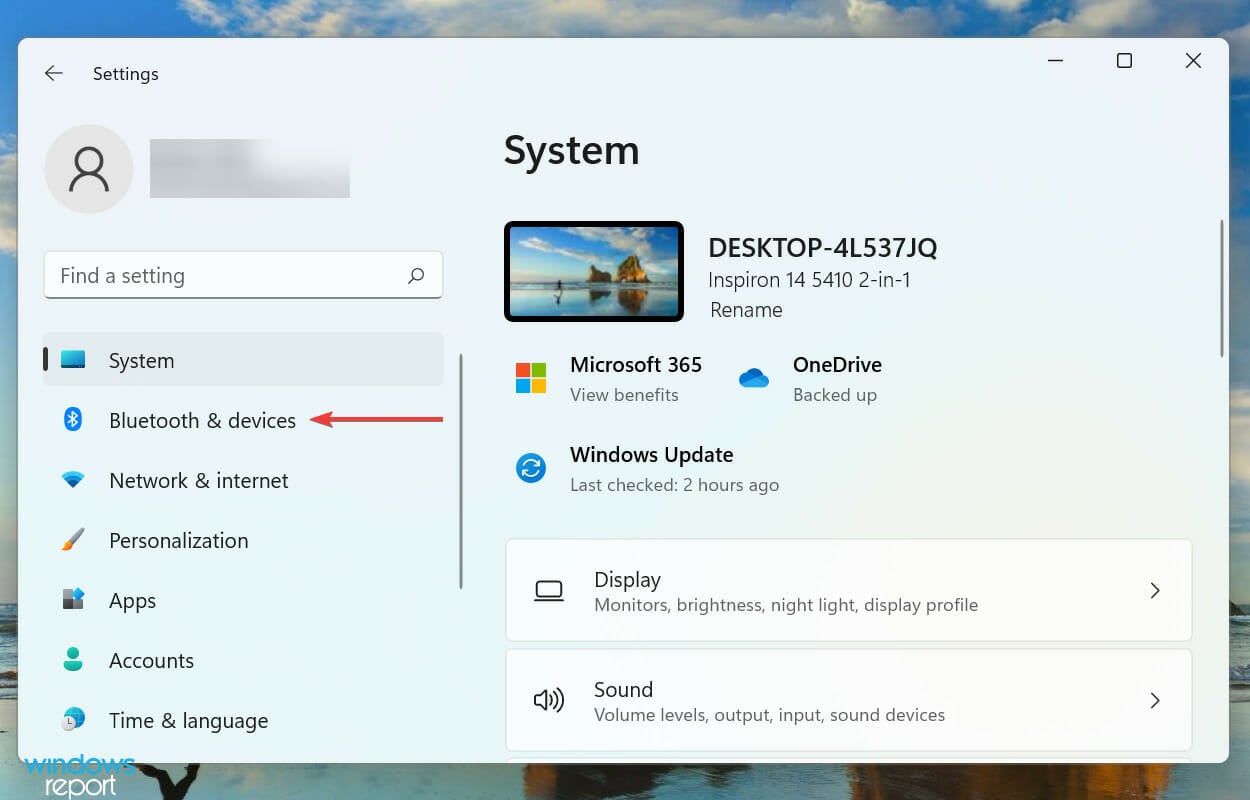
- Now, restart the computer. Once it’s turned on, press Windows + I to launch the Settings app, and select Bluetooth & devices from the tabs listed in the navigation pane on the left.
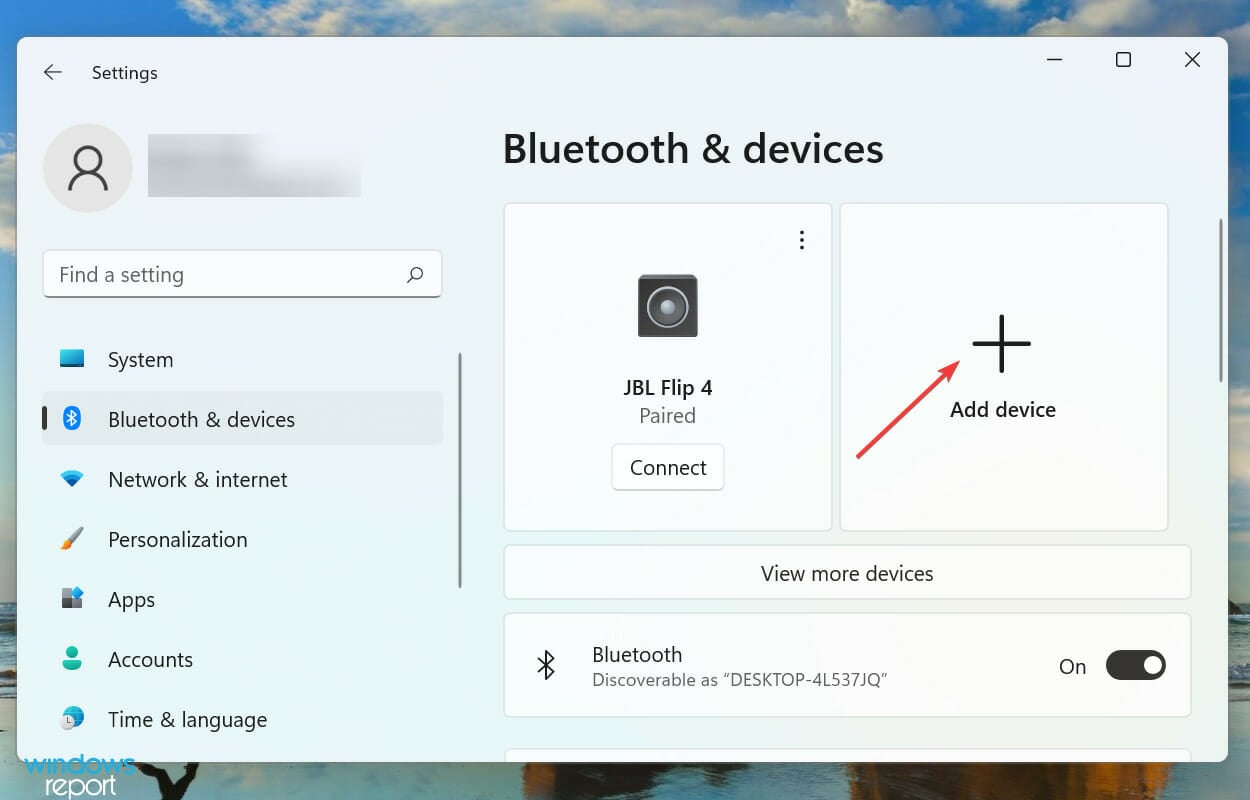
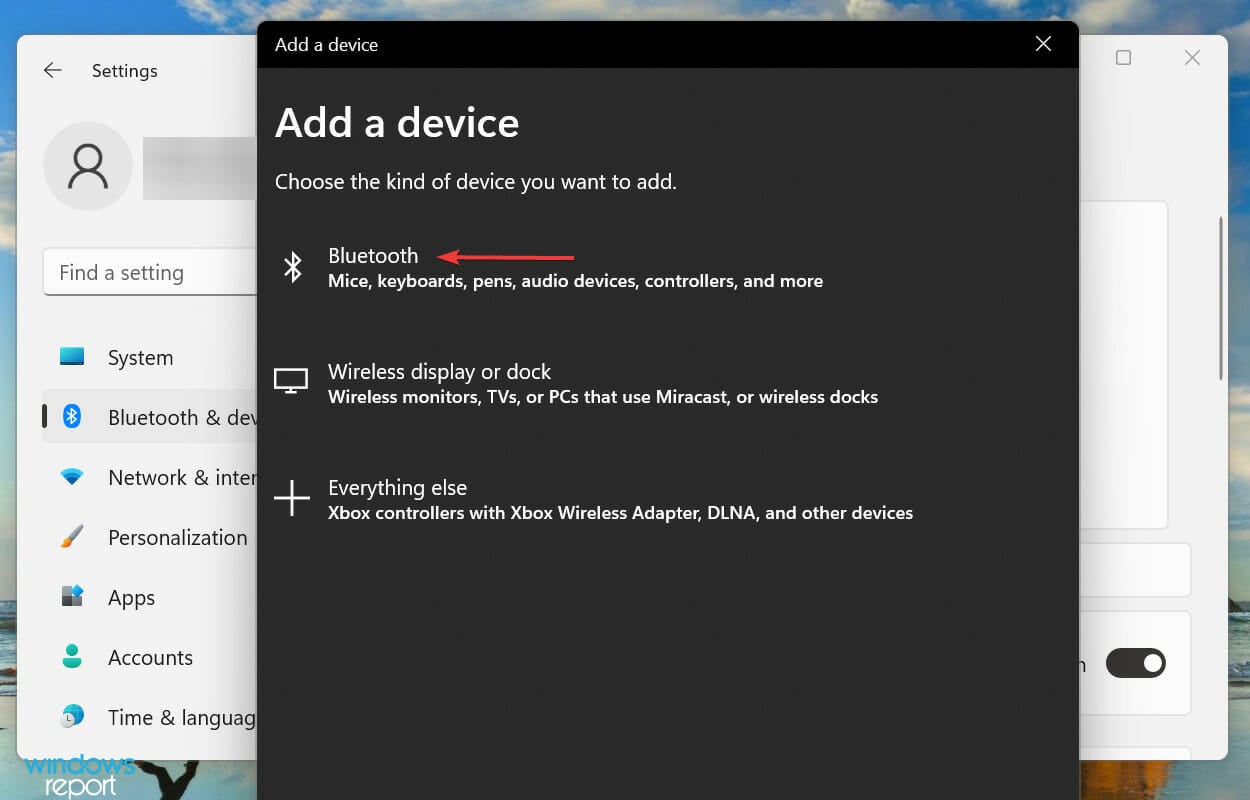
- Click on the Add device option.
- Next, select Bluetooth from the three options listed here.
- Wait for your AirPods to appear here, and then click on them to connect.

2. Set AirPods as default device
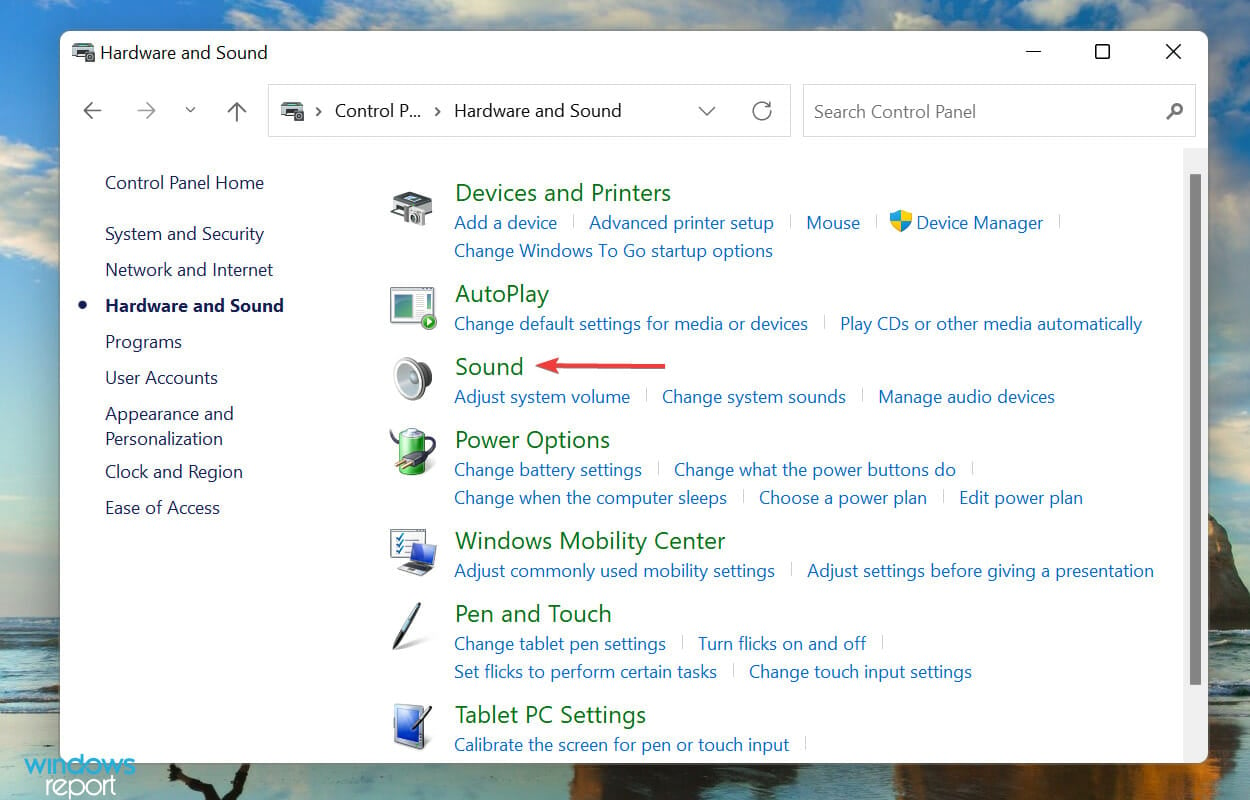
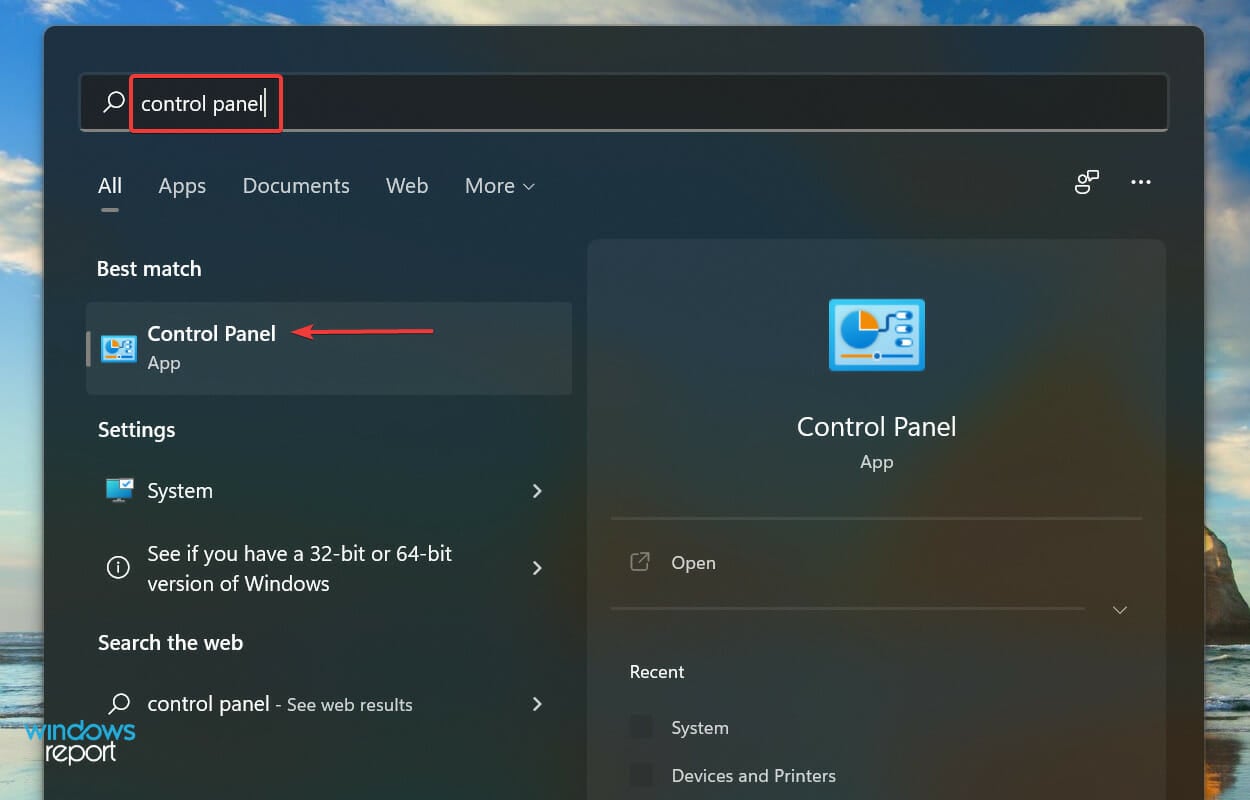
- Press Windows + S to launch the Search menu, enter Control Panel in the text field at the top, and click on the relevant search result that appears.
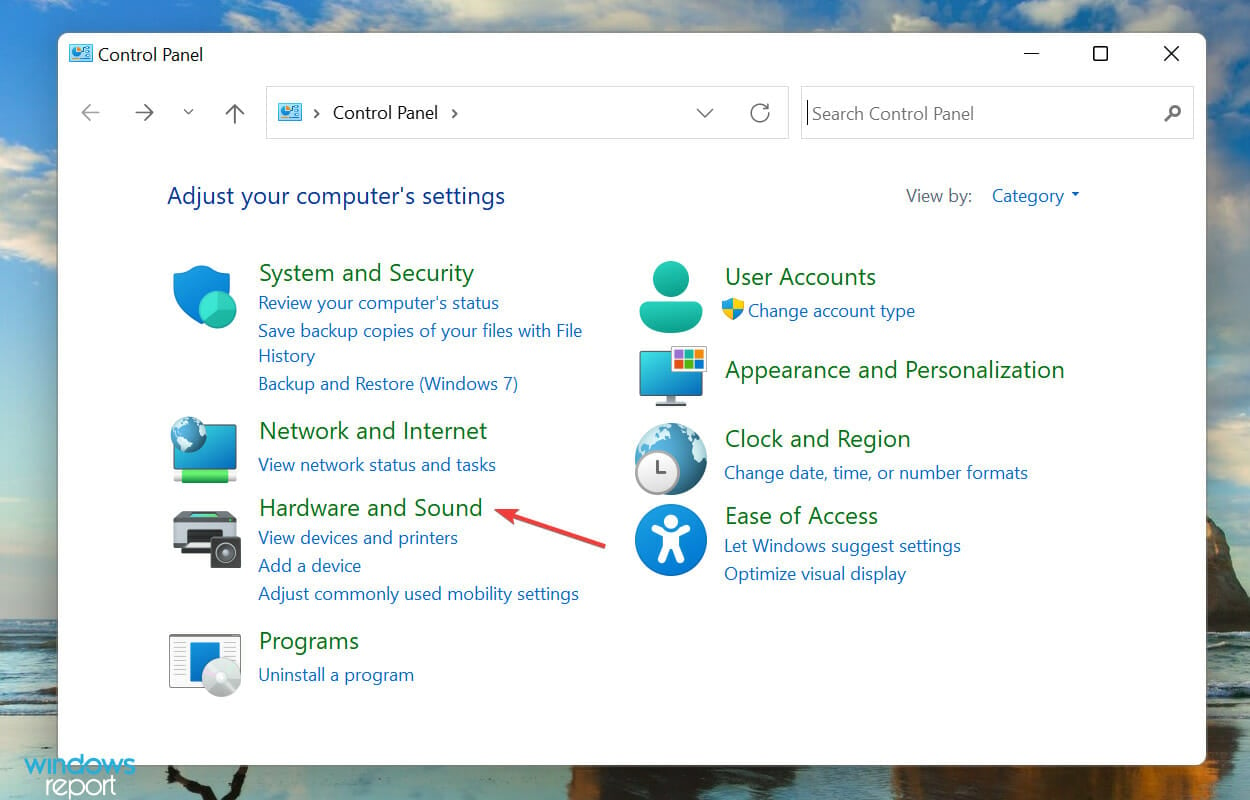
- Click on Hardware and Sound from the options listed here.
- Next, click on Sound.
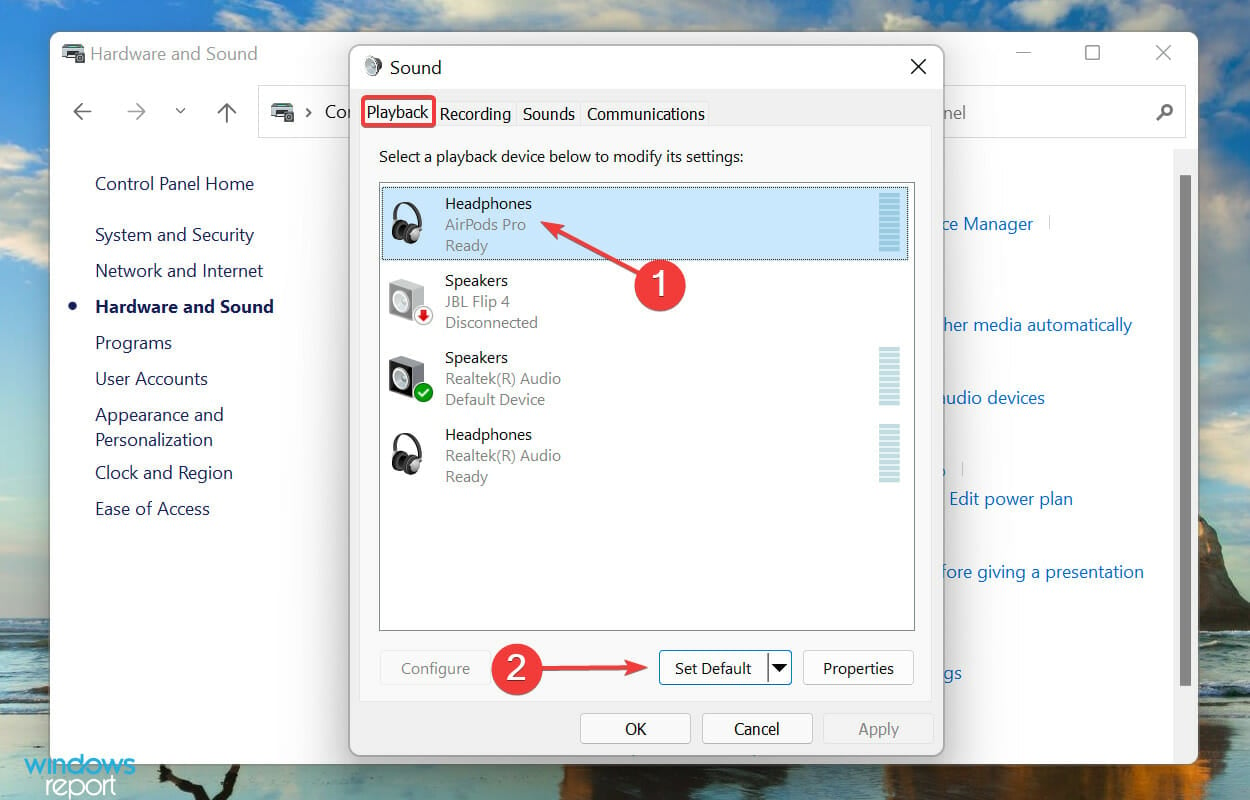
- Now, under the Playback tab, select AirPods (likely listed as a headphone) entry and click on Set Default.
- Finally, click on OK at the bottom to save the changes and close the window.


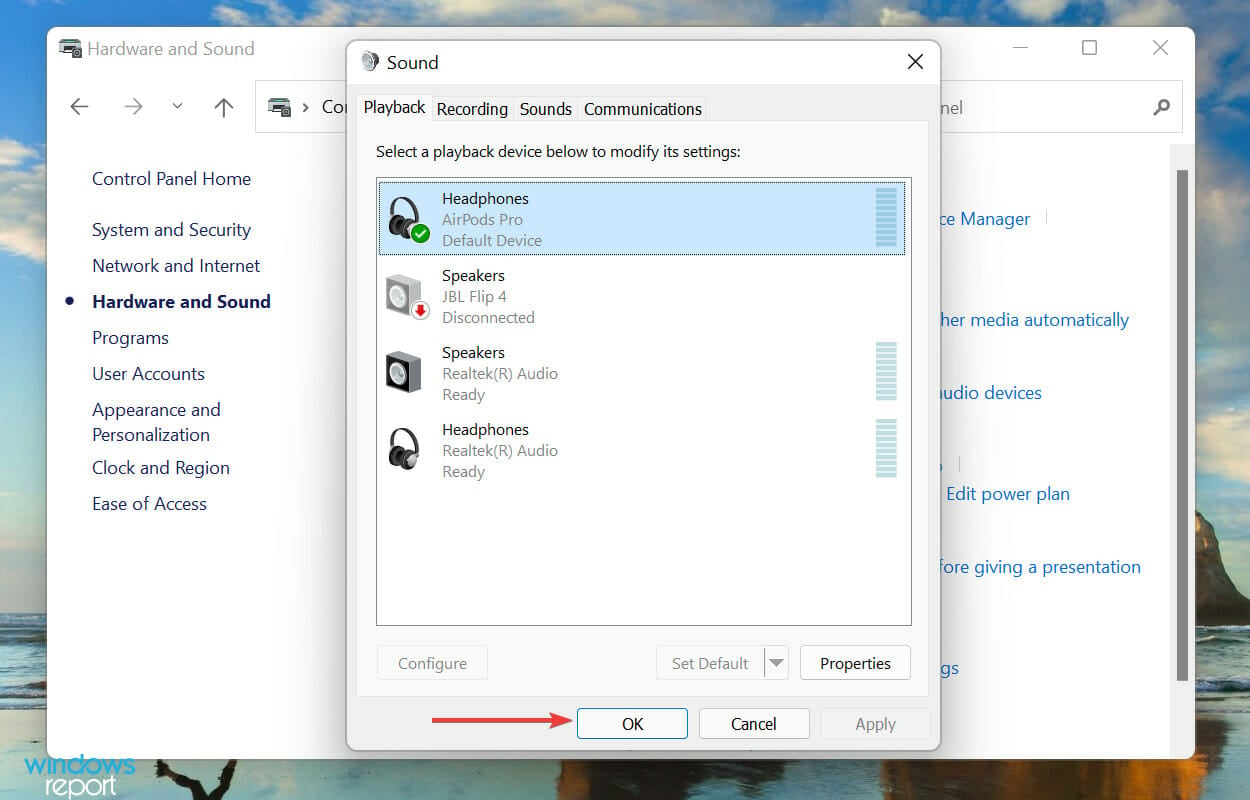
If you have the AirPods connected in Windows 11 but there’s no sound, it could be likely that the playback device selection is misconfigured. Setting your AirPods as the default device should fix the issue.
3. Run the Bluetooth troubleshooter
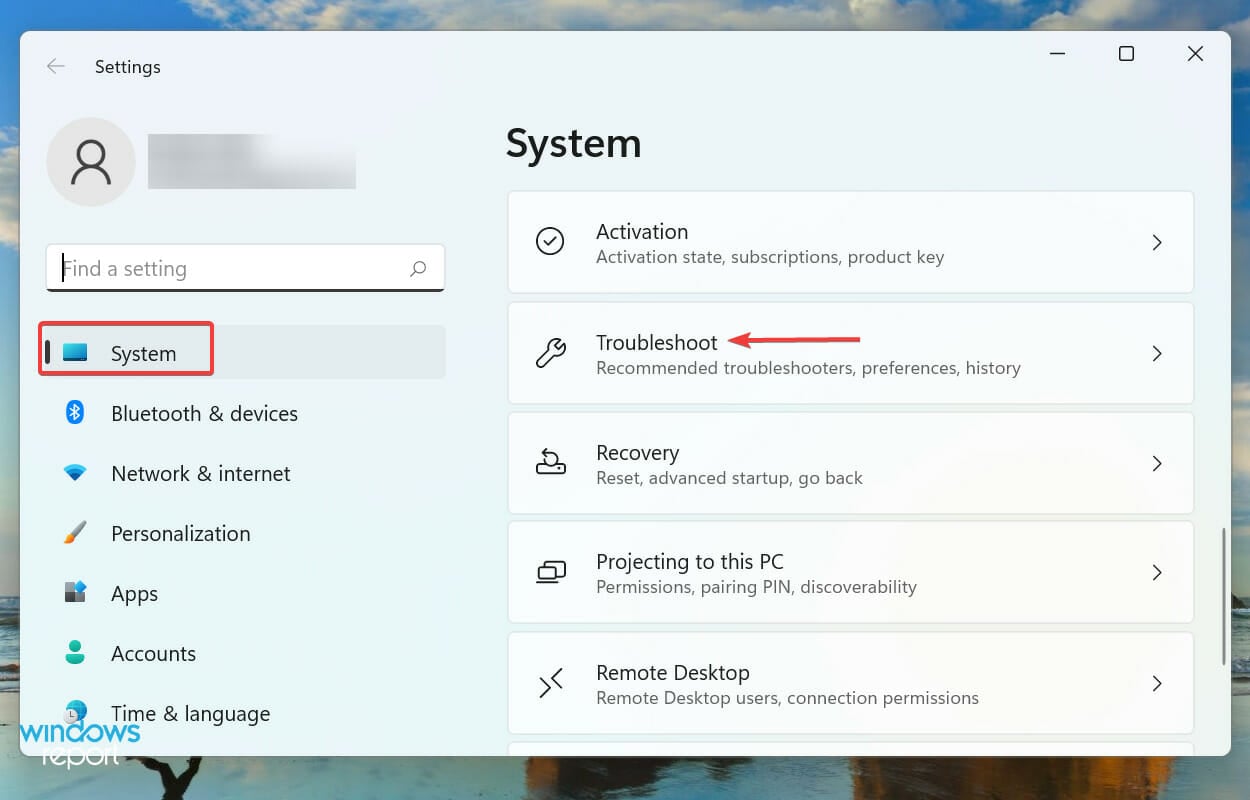
- Press Windows + I to launch the Settings app, and click on Troubleshoot on the right in the System tab.
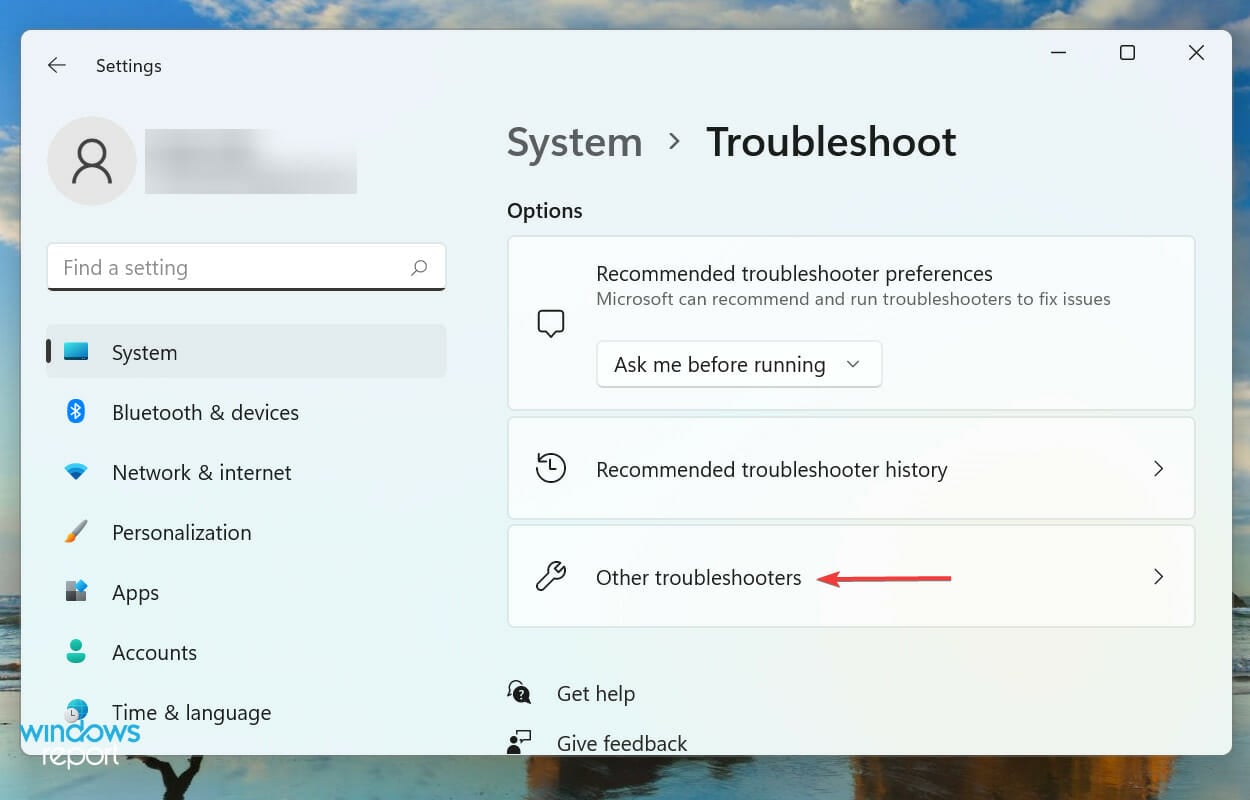
- Next, click on Other troubleshooters.
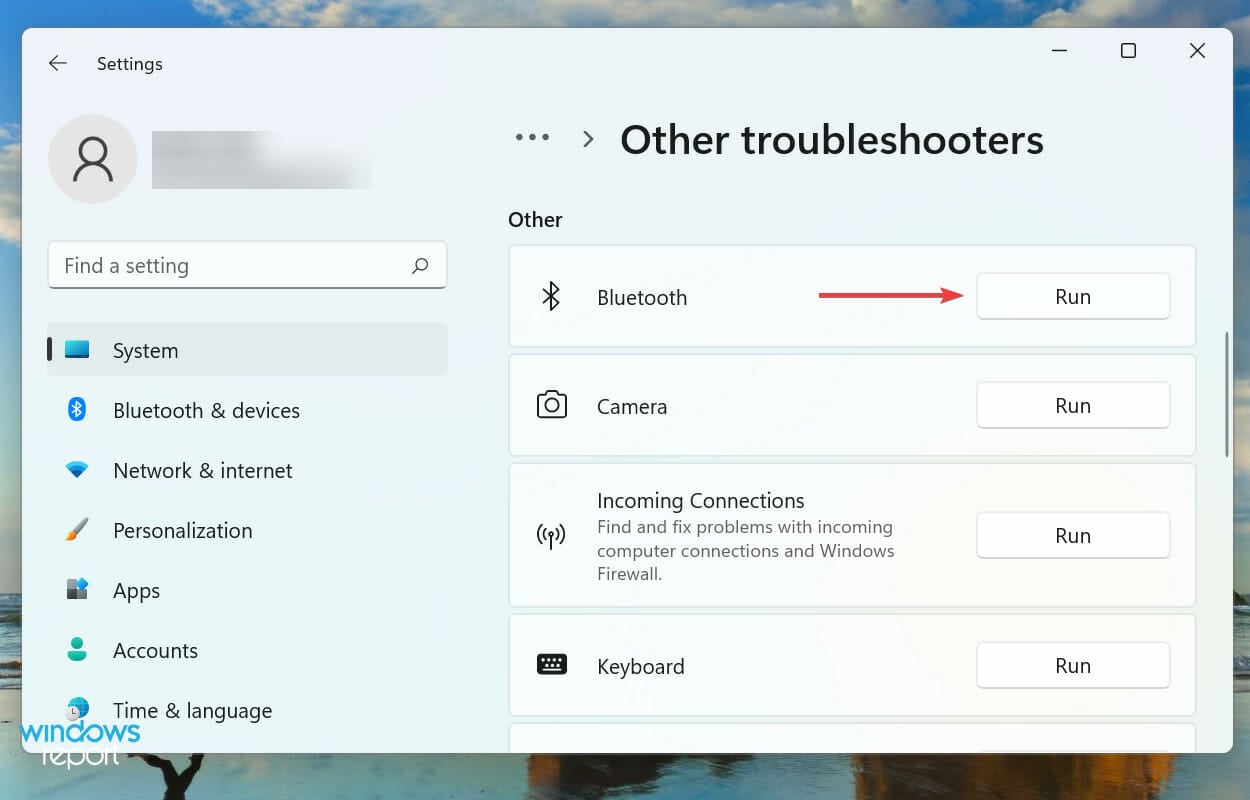
- Locate the Bluetooth troubleshooter and click on the Run button next to it.
- Follow the on-screen instructions and make the recommended changes, if any, to eliminate the problem.
Whenever facing a problem in Windows, it’s recommended that you look for a built-in troubleshooter. Microsoft offers several of these to diagnose and eliminate problems with the system and connected devices.
4. Update Bluetooth drivers
- Press Windows + S to launch the Search menu, enter Device Manager in the text field at the top, and click on the relevant search result that appears.
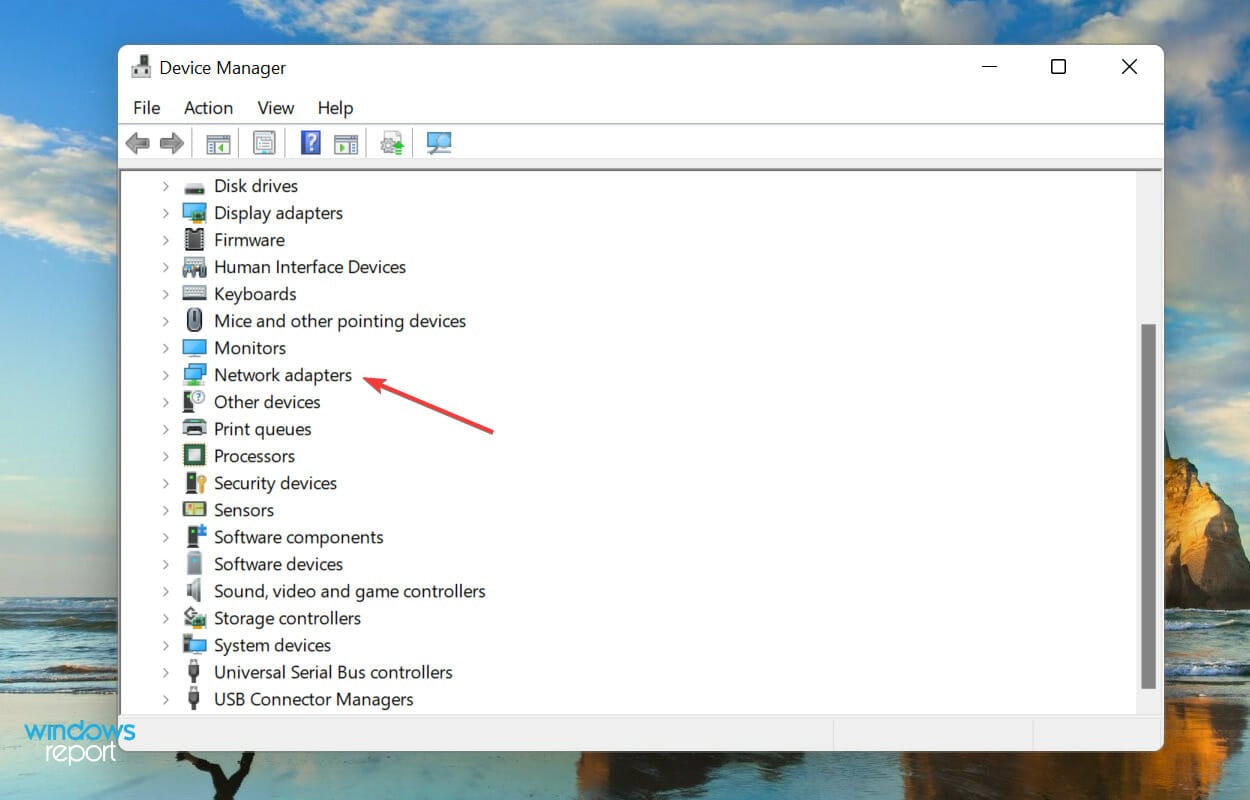
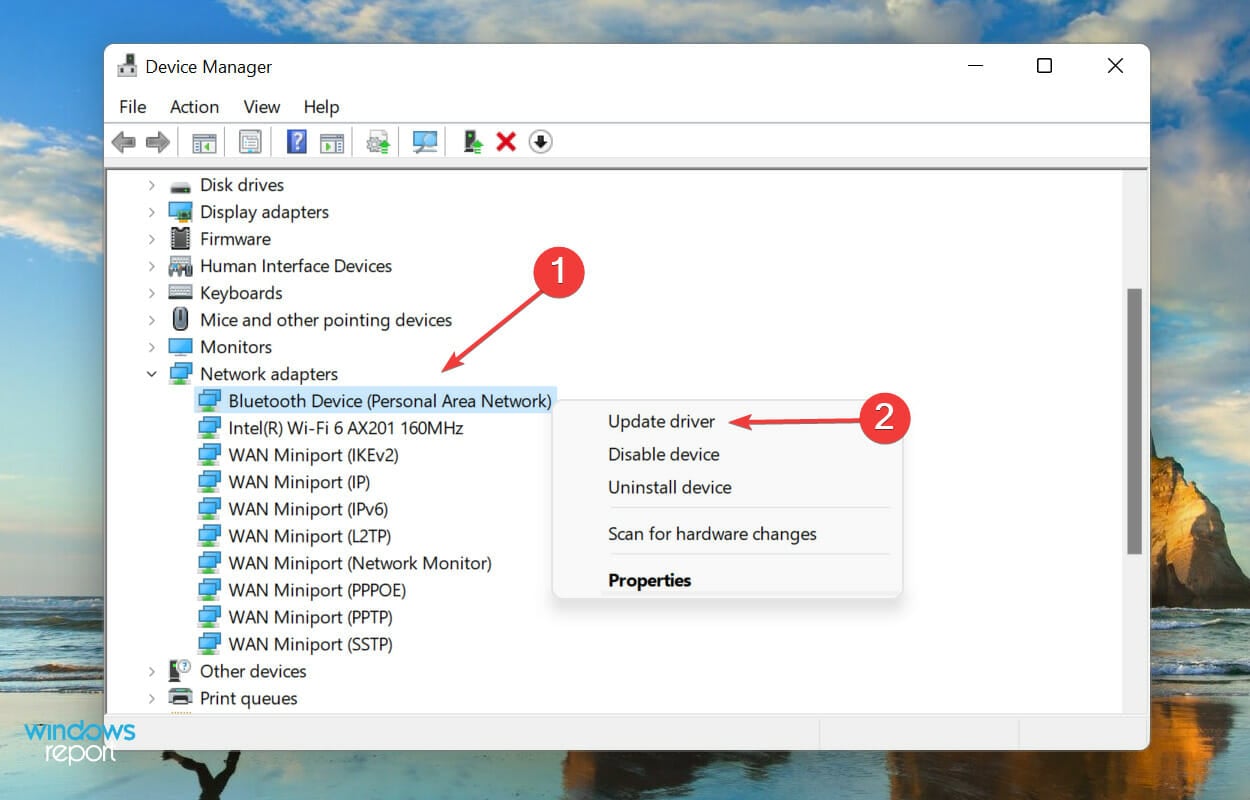
- Double-click on the Network adapters entry.
- Right-click on the Bluetooth adapter, and select Update driver from the context menu.
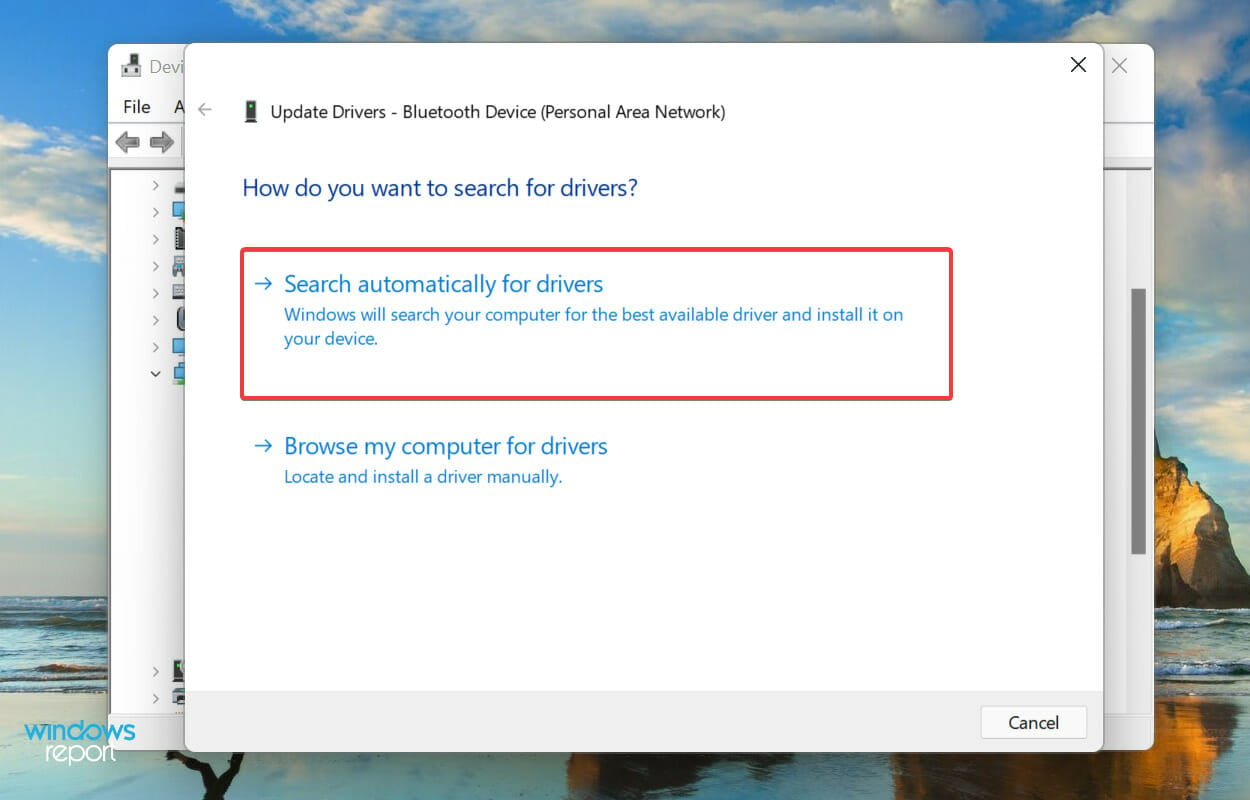
- Next, select Search automatically for drivers from the two options in the Update Drivers window.
- Wait for Windows to scan for the best available driver and install it for the Bluetooth adapter.

Drivers are extremely critical for the effective functioning of any device since these are primarily responsible for the relay of commands between the OS and the hardware. Also, it’s imperative that you have the latest version of it installed.
Now, the Device Manager method listed above only scans for the driver versions available on the computer, and in case you haven’t downloaded one previously, the chances of it being updated are bleak.
In this case, you can search for the latest version in Windows Update or manually download the setup from the manufacturer’s website and install it.
Several users find the process of updating drivers monotonous and tricky, and that’s where third-party apps come to your rescue.
We recommend using PC HelpSoft Driver Updater, a dedicated tool that scans all available sources for updates and keeps the installed drivers up-to-date. After updating the Bluetooth driver, check if the AirPods are now working in Windows 11.
⇒ Get PC HelpSoft Driver Updater
5. Update Windows 11
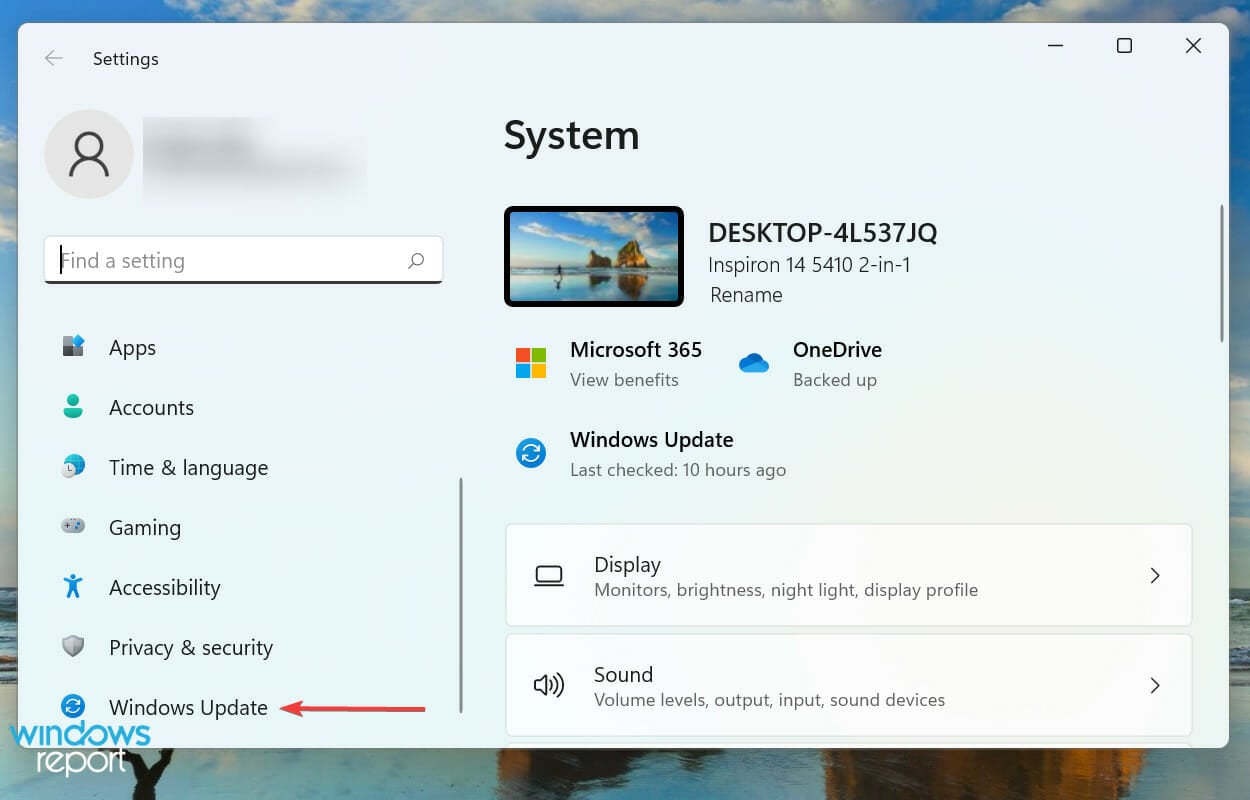
- Press Windows + I to launch the Settings app, and select Windows Update from the list of tabs in the navigation pane on the left.
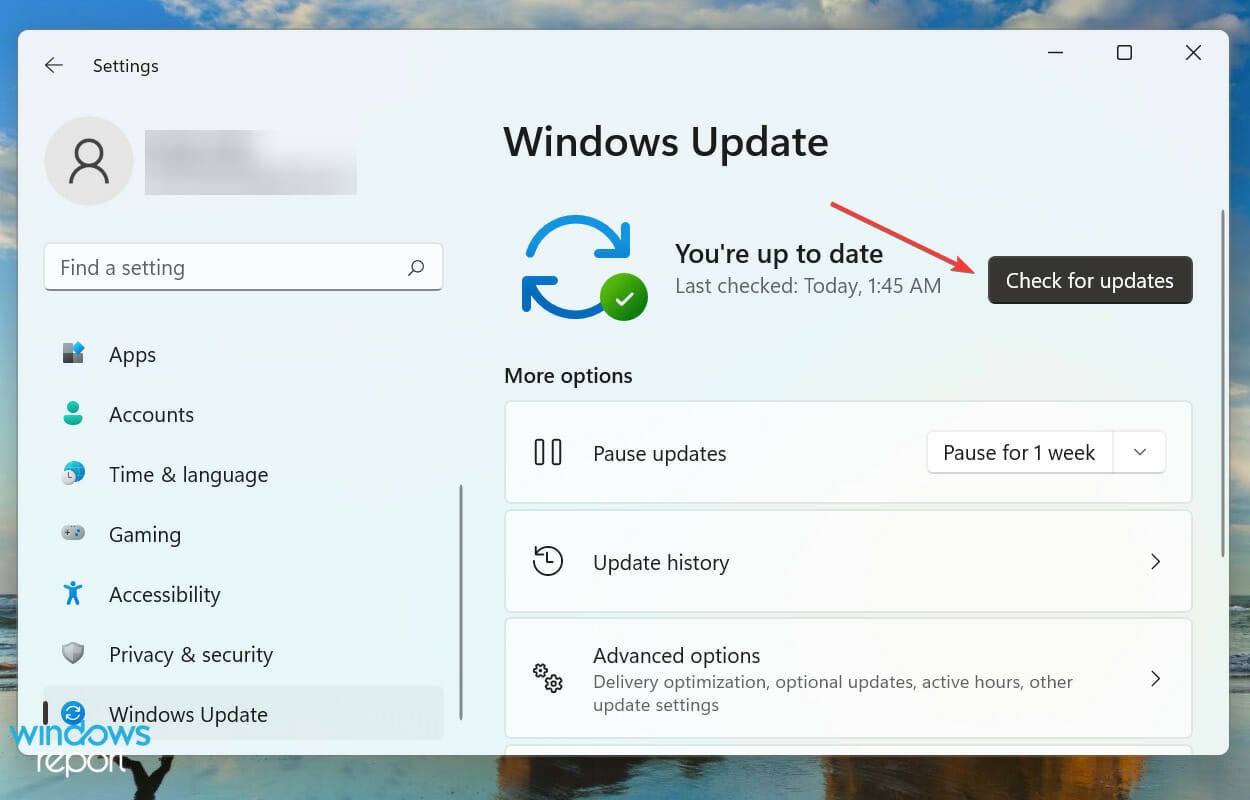
- Click on Check for updates on the right to scan for any available newer versions of the OS.
- If any are available and listed after the scan, click on Download & install.
Running an older version of Windows 11 is just as likely to affect the working of AirPods. With each update, Microsoft releases patches for bugs along with various features and performance enhancements. And that’s why we recommend keeping the OS updated.
6. Verify if the Bluetooth Support Service is running
- Press Windows + R to launch the Run command, type services.msc in the text field, and either click on OK or hit Enter to launch the Services app.

- Locate and double-click on the Bluetooth Support Service. The services here are listed either in the alphabetical or reverse-alphabetical order, so it shouldn’t be difficult finding one.
- Click on the Startup type dropdown menu, and select Automatic from the list of options.
- Now, click on the Start button under Service status.
- Finally, click on OK at the bottom to save the changes and close the Properties window.

7. Disable Wireless iAP service
- Press Windows + S to launch the Search menu, enter Control Panel in the text field at the top, and click on the relevant search result that appears.
- Click on Hardware and Sound.
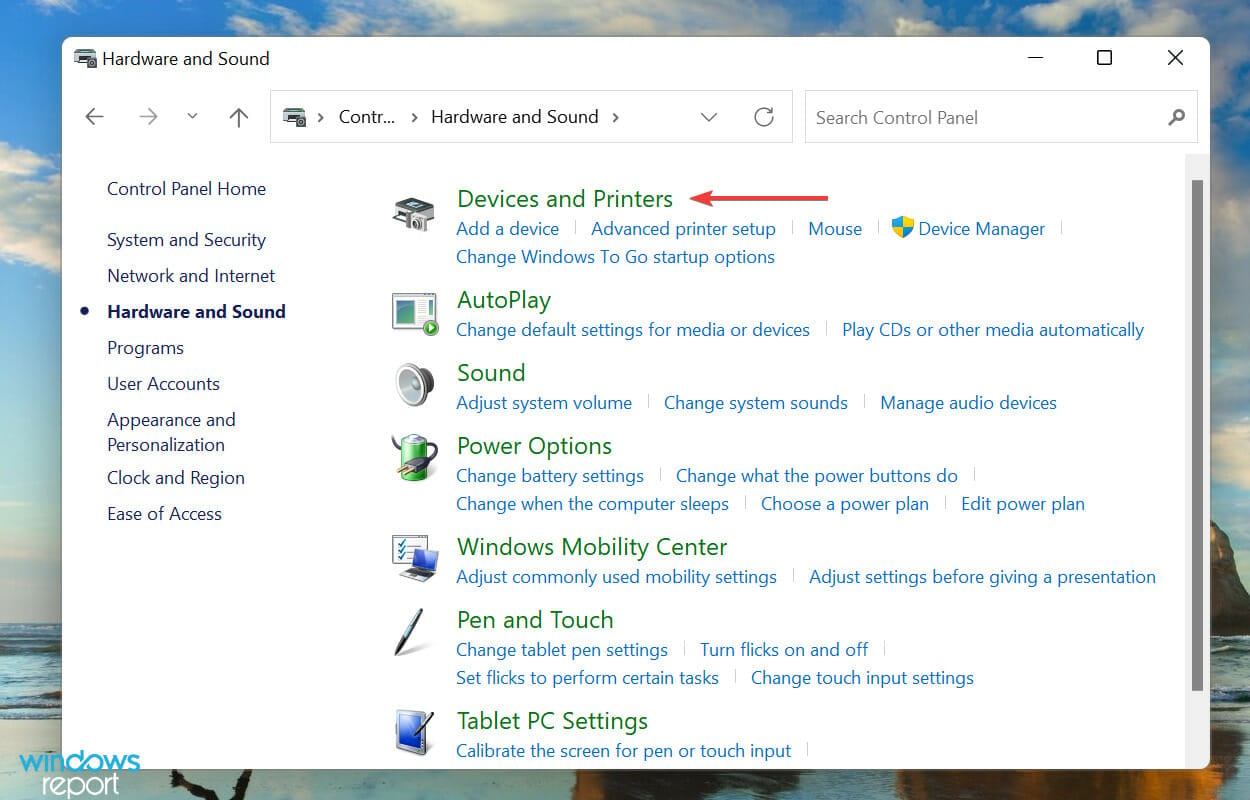
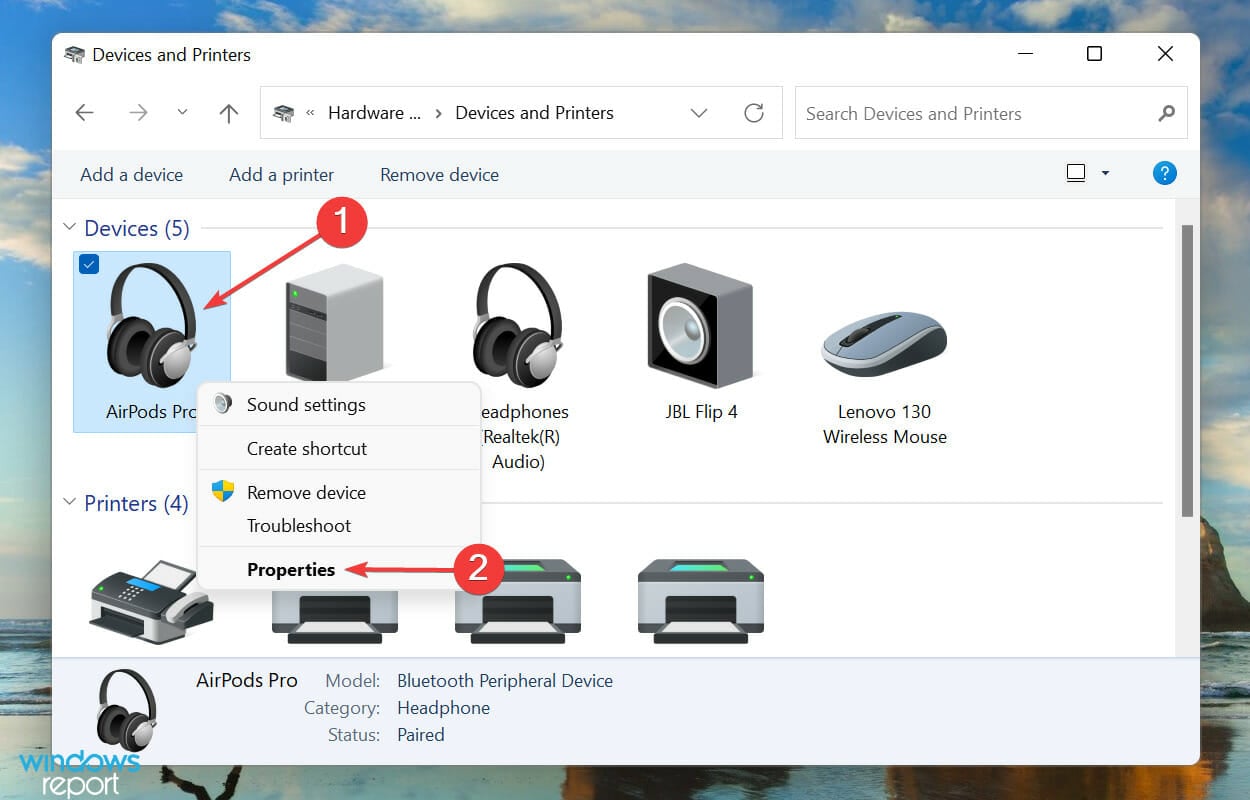
- Next, click on Devices and Printers.
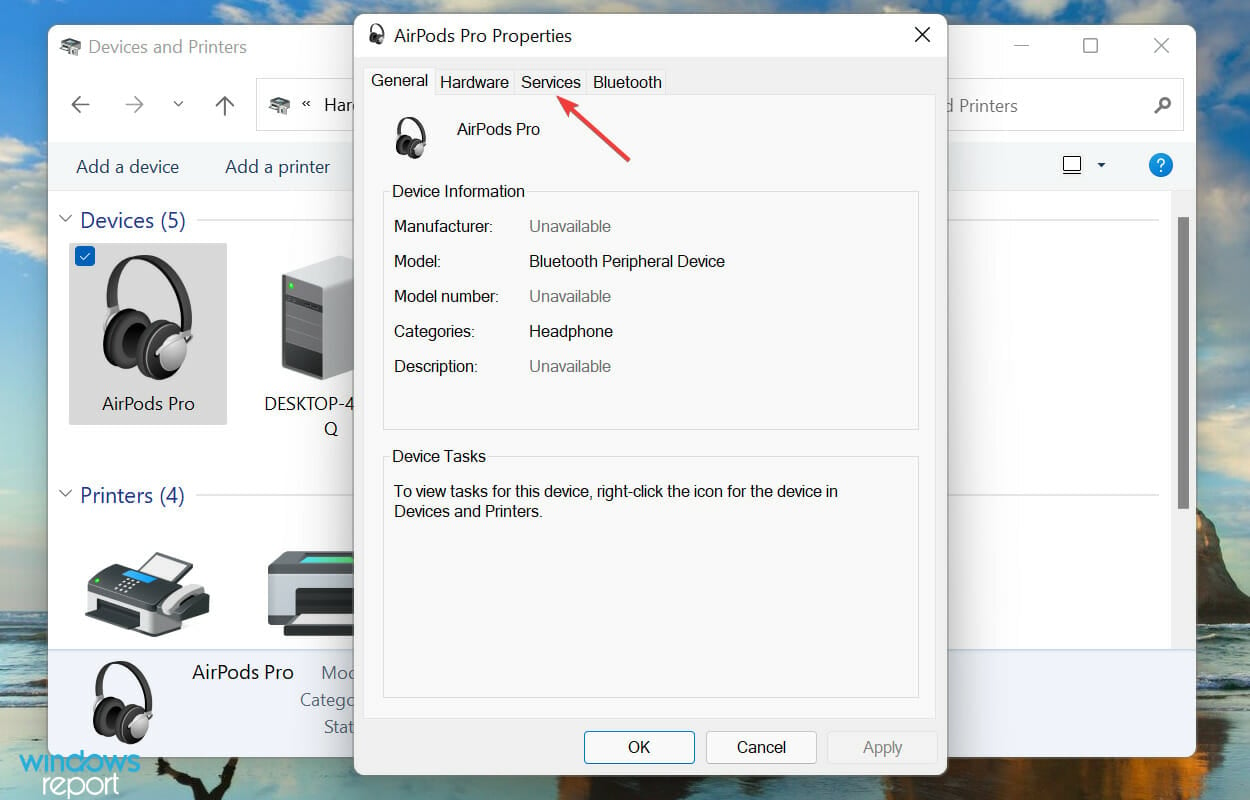
- Right-click on the AirPods entry under Devices, and select Properties from the context menu.
- Navigate to the Services tab.
- Untick the checkbox for Wireless iAP and click on OK at the bottom to save the changes.
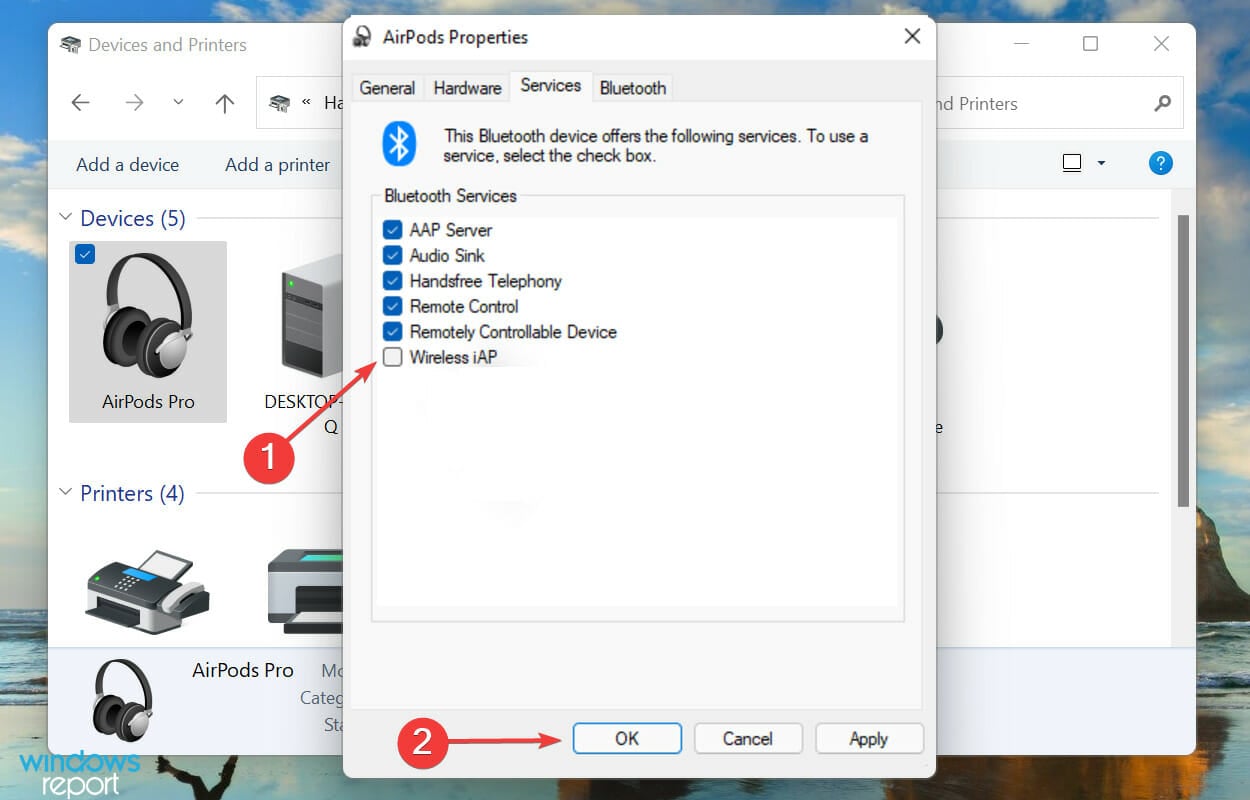
The Wireless iAP service makes it possible for you to use voice commands in Windows using AirDods, however, it is also known to affect its functioning.
Therefore, if none of the fixes listed above work, disable the service and your AirPods would now be working just fine in Windows 11.
Do AirPods work better in Windows 11?
Yes, Microsoft has been working on the wideband speech feature to enhance the AirPods experience, and it’s finally released for users. The feature works for all available models of AirPods and has gotten users all enthusiastic.
Wideband speech offers a much wider frequency range when it comes to audio output, thus enhancing the sound quality. If you have a pair of AirPods and a Windows PC, you are in for a treat.
At the time of writing this article, the feature was still in the Dev channel, and we expect it to be released in the coming months for all users. Make sure to keep checking for updates and not miss out.
Here are some other AirPods issues encountered by users:
- AirPods not connecting to Windows 11 – follow the solutions below to reconnect and troubleshoot.
- AirPods keep disconnecting from Windows 11 – this is due to faulty drivers, and can be easily fixed by updating Bluetooth drivers (solution below). Find out more about audio drivers for Windows 11.
- AirPods microphone not working – this can be a problem on both Mac and PC and we covered the solutions in depth.
These are all the ways you can eliminate issues preventing your AirPods from working in Windows 11, along with the other relevant information that might come in handy during the troubleshooting process.
If the microphone is not working in your AirPods, check this article to find out the fixes for it. Also, learn how to resolve problems with Bluetooth in Windows 11.
Tell us which fix worked and your experience of AirPods in Windows 11 thus far, in the comments section below.
Kazim Ali Alvi
Windows Hardware Expert
Kazim has always been fond of technology, be it scrolling through the settings on his iPhone, Android device, or Windows PC. He’s specialized in hardware devices, always ready to remove a screw or two to find out the real cause of a problem.
Long-time Windows user, Kazim is ready to provide a solution for your every software & hardware error on Windows 11, Windows 10 and any previous iteration. He’s also one of our experts in Networking & Security.
Title: Can’t Connect AirPods to Windows 11: Troubleshooting Guide and Solutions
Introduction
In the ever-evolving world of technology, compatibility issues between devices can often lead to frustration. If you’ve recently tried connecting your AirPods to a Windows 11 computer and encountered difficulties, you’re not alone. While AirPods are primarily designed for Apple devices, they can be paired with non-Apple products, including PCs running Windows 11. However, this compatibility can sometimes come with its own set of challenges. In this extensive article, we’ll explore common problems and solutions for connecting AirPods to Windows 11, ensuring a seamless wireless listening experience.
Understanding Bluetooth Basics
Before diving into troubleshooting, it’s vital to understand how Bluetooth connections work. Bluetooth is a wireless technology that allows devices to communicate with each other over short distances. When connecting AirPods to Windows 11, a few fundamental steps are involved:
- Enable Bluetooth on PC: Your Windows 11 computer must have Bluetooth capability turned on.
- Pairing Mode: AirPods need to be in pairing mode to establish a connection with your PC.
- Drivers and Updates: Ensuring your PC has the necessary drivers and updates can help avoid compatibility issues.
If you grasp these basics, you’ll be in a better position to tackle any connection issues.
Setting Up
Ensure Bluetooth is Enabled on Windows 11
The first step in troubleshooting AirPods connectivity is ensuring that Bluetooth is enabled on your Windows 11 PC. Here’s how to check:
- Settings App: Click on the Start menu and select the “Settings” app.
- Devices Section: Navigate to the “Devices” section on the left pane.
- Bluetooth & Devices: Click on «Bluetooth & devices» and make sure the Bluetooth toggle is switched on. If it’s off, switch it on.
Check Compatibility
AirPods should theoretically work with any Bluetooth-enabled device, including Windows 11. However, some features, like Siri and the ability to see battery stats, may not be available on non-Apple devices. Ensure that your Windows 11 device supports Bluetooth 4.0 or higher for optimal performance.
Charge Your AirPods
Before establishing a connection, ensure your AirPods are charged. Place them in the charging case, and make sure the LED light indicates that they are charging. If the battery is depleted, you won’t be able to connect them to your Windows 11 PC.
Put AirPods in Pairing Mode
To connect AirPods to Windows 11, put them into pairing mode:
- Open the Case: With the AirPods inside, open the lid of the charging case.
- Press the Button: Locate the small button on the back of the case and hold it until you see the LED light on the front start flashing white, indicating that they are in pairing mode.
Connect AirPods to Windows 11
After ensuring that Bluetooth is on and your AirPods are in pairing mode, follow these steps to connect:
-
Add Bluetooth Device:
- Open the “Settings” app.
- Go to “Bluetooth & Devices.”
- Click on “Add device.”
- Choose “Bluetooth” from the list of device types.
-
Select AirPods: Your AirPods should appear in the list of available devices. Click on them to connect.
-
Complete the Connection: Follow any on-screen instructions prompting you to complete the pairing process.
Common Troubleshooting Tips
If, after following the steps, you still can’t connect your AirPods to Windows 11, consider the following troubleshooting tips:
Restart Your Devices
Sometimes a simple restart can resolve connectivity issues. Restart both your Windows 11 computer and your AirPods by placing them back in their case and closing the lid for about 15 seconds. Open the lid, then take them out and reattempt the pairing process.
Forget and Retry
If your AirPods previously connected to the PC but are having issues now, they may need to be “forgotten”:
- Go to “Settings” > “Bluetooth & Devices.”
- Find your AirPods in the list, click on them, and choose “Remove device.”
- Retry the pairing process.
Update Windows
Running an outdated version of Windows can lead to various issues, including Bluetooth connectivity problems. Ensure your Windows 11 is up to date:
- Open “Settings” and go to “Windows Update.”
- Click on “Check for updates” and install any pending updates.
Update Bluetooth Drivers
Outdated or corrupted Bluetooth drivers can cause connectivity issues. Here’s how to update them:
- Right-click the Start button and select “Device Manager.”
- Expand the “Bluetooth” section.
- Right-click your Bluetooth adapter and choose “Update driver.”
- Select “Search automatically for drivers” and follow the prompts.
Disable Bluetooth Power Saving Mode
Bluetooth power-saving features, although helpful, can sometimes interfere with connectivity. Here’s how to disable it:
- Go to “Device Manager.”
- Expand the “Bluetooth” section and right-click on your Bluetooth adapter.
- Choose “Properties” > “Power Management.”
- Uncheck the box that says “Allow the computer to turn off this device to save power.”
Reset AirPods
If all else fails, resetting your AirPods can help:
- Place your AirPods inside the charging case and close the lid for about 30 seconds.
- Open the lid and press and hold the button on the back of the case until the LED light flashes amber, then white.
- Retry connecting to your Windows 11 PC.
Check for Other Bluetooth Devices
Sometimes, too many devices connected to your Bluetooth can cause issues. Disconnect other devices and try again.
Use Troubleshoot Tool
Windows 11 comes with built-in troubleshooting tools that can help you identify and fix connection issues:
- Go to “Settings” > “System” > “Troubleshoot” > “Other troubleshooters.”
- Find and run the Bluetooth troubleshooter and follow the instructions.
Check for Interference
Wi-Fi networks and other wireless devices can sometimes interfere with Bluetooth signals. Ensure there are no other competing signals around when trying to connect your AirPods.
Reinstall Bluetooth Drivers
If you suspect that the Bluetooth drivers for your PC are corrupted, reinstalling them might help. Go to “Device Manager,” right-click on your Bluetooth adapter, and choose “Uninstall device.” Restart your PC, and Windows 11 should automatically reinstall the driver.
Use Windows Feedback Hub
If you believe there’s a bug affecting Bluetooth functionality in Windows 11, you can submit feedback via the Windows Feedback Hub app. Microsoft continually updates Windows 11 based on user feedback, and reporting issues can help improve future updates.
Alternative Solutions
If you continue having difficulties connecting AirPods to your Windows 11 PC despite all troubleshooting steps, consider the following alternatives:
Use a Bluetooth Adapter
If your PC has an outdated Bluetooth chipset or you’re having consistent connectivity issues, purchasing a USB Bluetooth adapter can enhance performance. These adapters are plugged into a USB port and can provide improved connectivity and compatibility with various devices.
Use a Different Device
If connecting to your Windows 11 PC proves impossible, consider using your AirPods with another device, such as a smartphone or tablet. This will help determine whether the issue is with the AirPods or the Windows device.
Investigate Software Conflicts
Third-party software, especially security and system optimization tools, can sometimes interfere with Bluetooth operations. Temporarily disabling such software can help identify potential causes.
Reset Windows Network Settings
As a last resort, resetting your network settings can resolve various connectivity issues, but it will remove all saved networks and Bluetooth connections. Here’s how:
- Open “Settings” and go to “Network & Internet.”
- Click on “Advanced network settings.”
- Choose “Network reset” and follow the instructions.
Conclusion
Connecting AirPods to a Windows 11 device can occasionally present challenges. With a bit of patience and the right troubleshooting steps, most users can successfully establish a connection. Whether it’s checking Bluetooth compatibility, ensuring devices are charged, updating drivers, or even resetting your network settings, there are numerous avenues to explore in resolving connectivity issues.
By following the guidelines provided in this article, we hope that you can enjoy your AirPods seamlessly with your Windows 11 PC. In a world of technology that differs in ecosystems, learning how to bridge these gaps can lead to a more enjoyable and connected experience. So, grab your AirPods and dive into your favorite playlists without hindrance!
Are you having trouble connecting your Apple AirPods to your Windows 10 PC? Chances are there’s a minor Bluetooth glitch on your PC. There may also be a conflicting nearby device, an issue with Windows 10 updates, or another reason.
Regardless of what’s caused the issue, you might be more interested in finding out how to resolve the issue. Luckily, there are various methods you can follow to potentially fix your AirPods issue and get them to connect to your PC.
1. Re-Pair the AirPods With Your Windows PC
If there’s a minor Bluetooth glitch causing your AirPods not to connect to your PC, try unpairing your AirPods from your PC and then re-pairing them. This should fix most connection-related issues with your devices.
You can unpair your AirPods on your Windows 10 PC as follows:
- Press Win + I to open the Settings app.
- Click Devices on the Settings window.
- In Devices, click Bluetooth & other devices in the left sidebar. (In Windows 11, you can access this section by going to Bluetooth & devices > Devices)
- On the right, find your AirPods and click them. However, if you’re on Windows 11, you can click on the three-dots icon instead.
- Select the Remove device option.
- Click Yes in the prompt to remove your AirPods from your PC.

You have successfully unpaired your AirPods that weren’t working. Now, you can proceed to pair your AirPods again. If you’re unsure about the procedure, feel free to check out our guide on connecting AirPods to a Windows 10 or 11 PC.
2. Toggle Bluetooth Off and On on Your PC
Sometimes, the Bluetooth on your PC doesn’t work as it’s supposed to. This could happen due to various reasons, but most of the time, you can fix it by turning Bluetooth off and back on.
This gives Bluetooth a fresh chance to start, and you can then connect your AirPods to your PC.
To restart Bluetooth, follow these simple instructions:
- Open the Settings app by pressing Win + I keys simultaneously.
- In Settings, click the Devices option.
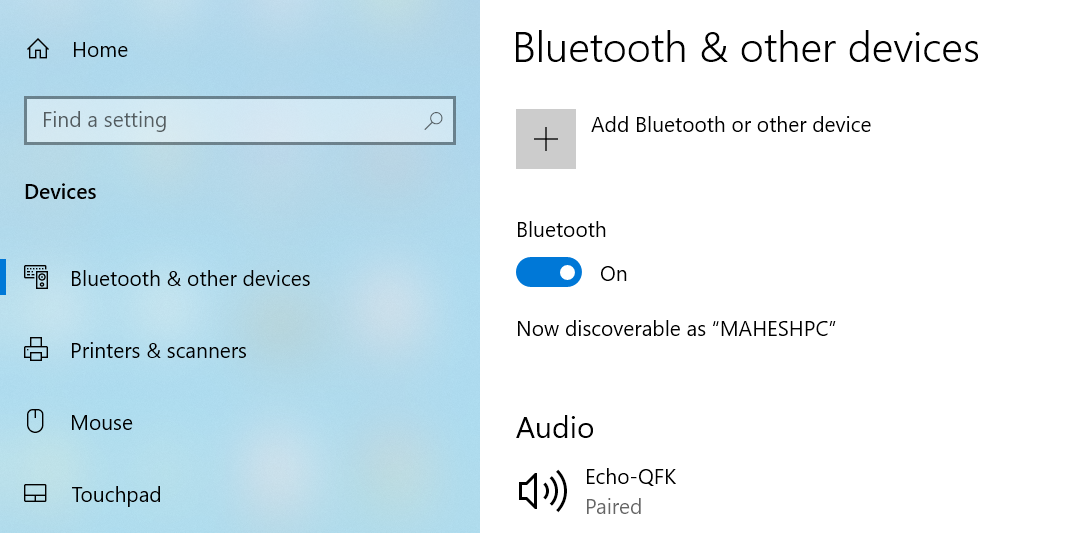
- On the Devices screen, from the sidebar to the left, select Bluetooth & other devices.
- In the pane on the right, turn the Bluetooth toggle off.
- Wait for about half a minute, and turn the toggle back on.
3. Use One AirPod at a Time
Apple designed the AirPods so that you can use each one independently. If you’re experiencing issues connecting AirPods to your PC, use one AirPod to connect and see if that works.
You’ll follow the same connection process whether you’re connecting a single AirPod or both AirPods. Simply bring one AirPod out of your AirPods case, wait for your Windows 10 PC to detect it, and it should then connect.
If one of your AirPods isn’t working, put it back into the case and bring the other AirPod out. See if this one connects to your PC.
4. Disable Bluetooth on Your Other Devices
A common reason for most Bluetooth issues is conflicting Bluetooth devices in the surrounding area. If you’ve enabled Bluetooth on your other devices, like your iPhone or Android phone, turn the feature off on these devices and see if your AirPods then connect to your PC.
How to Disable Bluetooth on an iPhone
- Open the Settings app on the iPhone.
- Tap Bluetooth.
- Turn the Bluetooth option to the off position.
How to Disable Bluetooth on an Android Phone
- Pull down from the top of your screen.
- Tap on the Bluetooth toggle to disable the feature.
Likewise, you can manually turn off other Bluetooth devices nearby, like your wireless headset, mice, keyboards, etc., and then see if you’re able to connect your AirPods to your Windows 10 or 11 PC.
5. Use Windows’s Hardware Troubleshooter
Windows has many troubleshooters to help you detect and resolve issues with various components on your computer. For example, one of these troubleshooters helps you fix hardware issues, like the one you’re experiencing with your AirPods.
It’s a good idea to run this troubleshooter and allow it to find and fix issues with your computer’s hardware devices.
To use this troubleshooter:
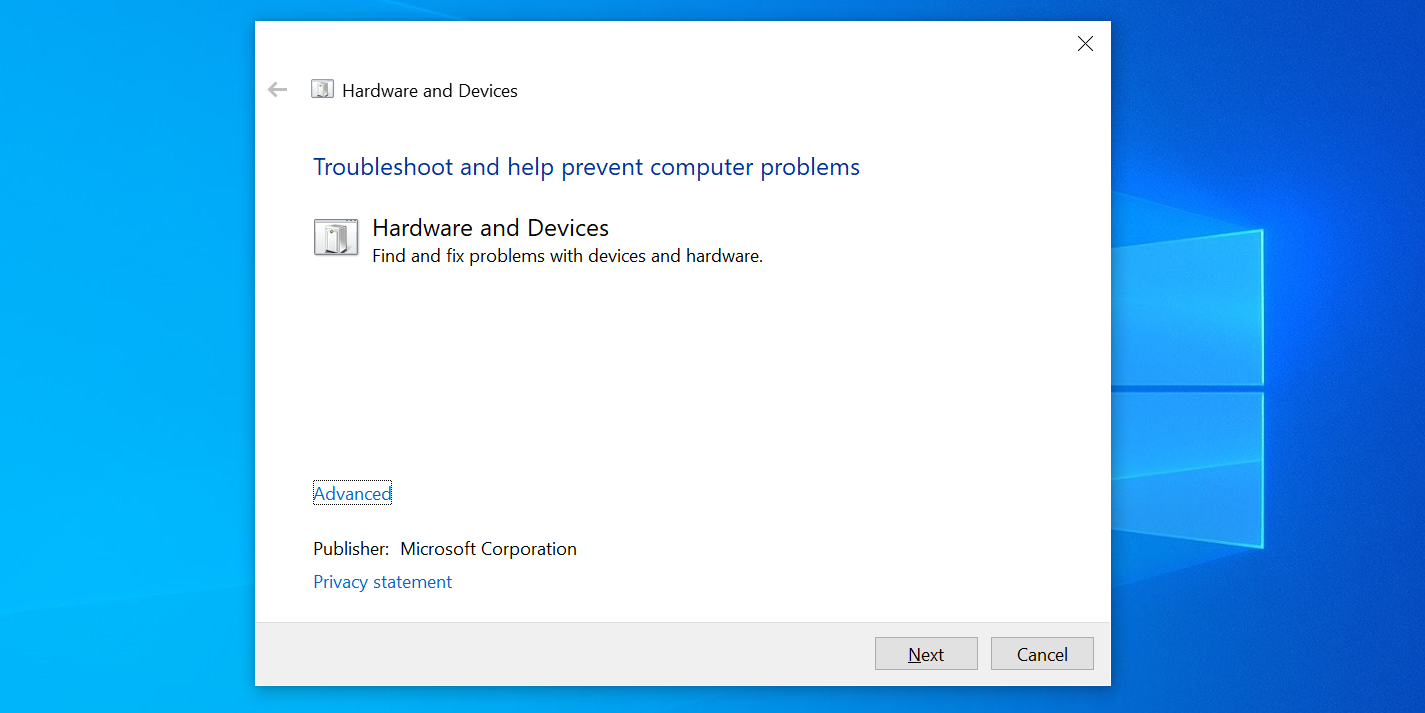
- Press Win + R at the same time to open Run.
- Type the following in Run and hit Enter: msdt.exe -id DeviceDiagnostic
- In the Hardware and Devices window that opens, click Next to run the troubleshooter.
- Follow the on-screen instructions to troubleshoot your devices.
If the Windows troubleshooter couldn’t identify the problem—which isn’t uncommon—don’t panic; there are still other things you can do to connect your AirPods to Windows 10 and 11.
6. Turn Off Swift Pair on Windows 10 and 11
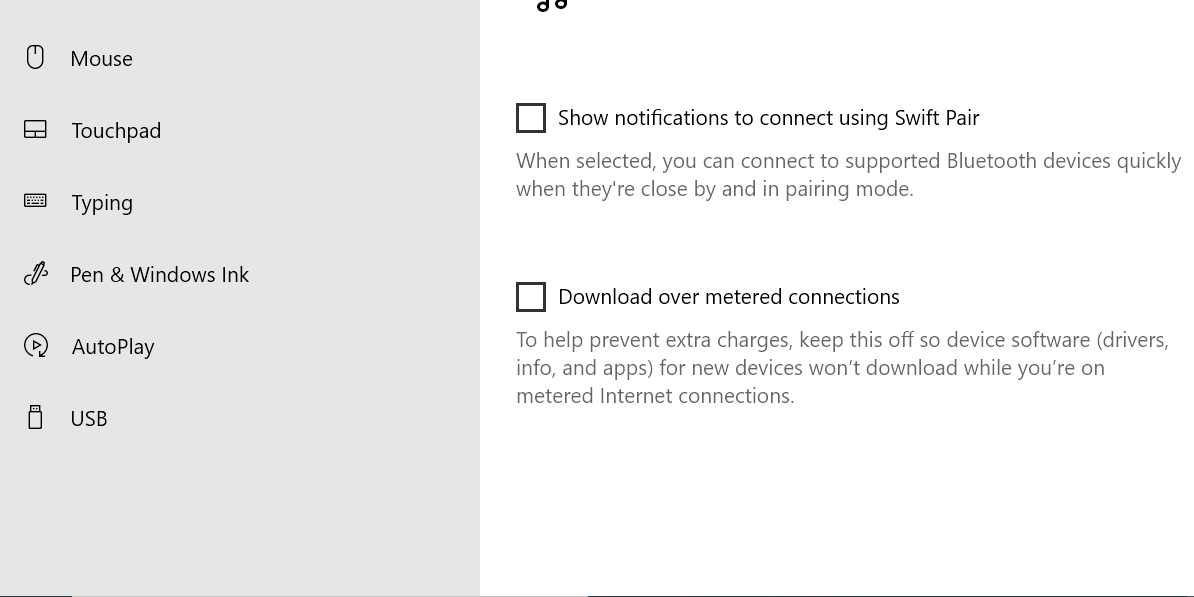
To help you easily and quickly connect to nearby Bluetooth devices, Windows offers a feature called Swift Pair. Unfortunately, while this feature is useful for making Bluetooth connections within seconds, it might also be the reason why your AirPods refuse to connect to your PC.
To rule out this possibility, turn Swift Pair off on your PC and then see if your AirPods connect:
- Access the Settings app by pressing Windows + I keys at the same time.
- Select Devices from the Settings window.
- Choose Bluetooth & other devices from the sidebar to the left. (In Windows 11, you can access this section by going to Bluetooth & devices > Devices)
- Scroll down to the right pane and disable the Show notifications to connect using Swift Pair option.
7. Update Your AirPods’ Firmware
Like other devices, Apple’s AirPods receive firmware updates. These updates ensure your AirPods remain bug-free and that they continue to run at their optimal performance levels.
These AirPods firmware updates aren’t as regular as other updates, but you must install these to rid your AirPods of any issues, including when the AirPods won’t connect to your PC.
We’ve written a guide on how to update your AirPods, so check that out to learn how to go about updating the firmware version on your AirPods. But remember that if you don’t have an Apple device, you’re out of luck.
8. Roll Back a Windows Update
Windows updates are supposed to fix existing issues and bring new features to your PCs. However, sometimes, they’re the reason you have problems with your computer. For example, if your AirPods don’t connect to your PC after installing a Windows update, the chances are that update is the culprit.
In this case, you can roll back that update and undo all the changes it made to your computer. This doesn’t delete any of your data from your PC.
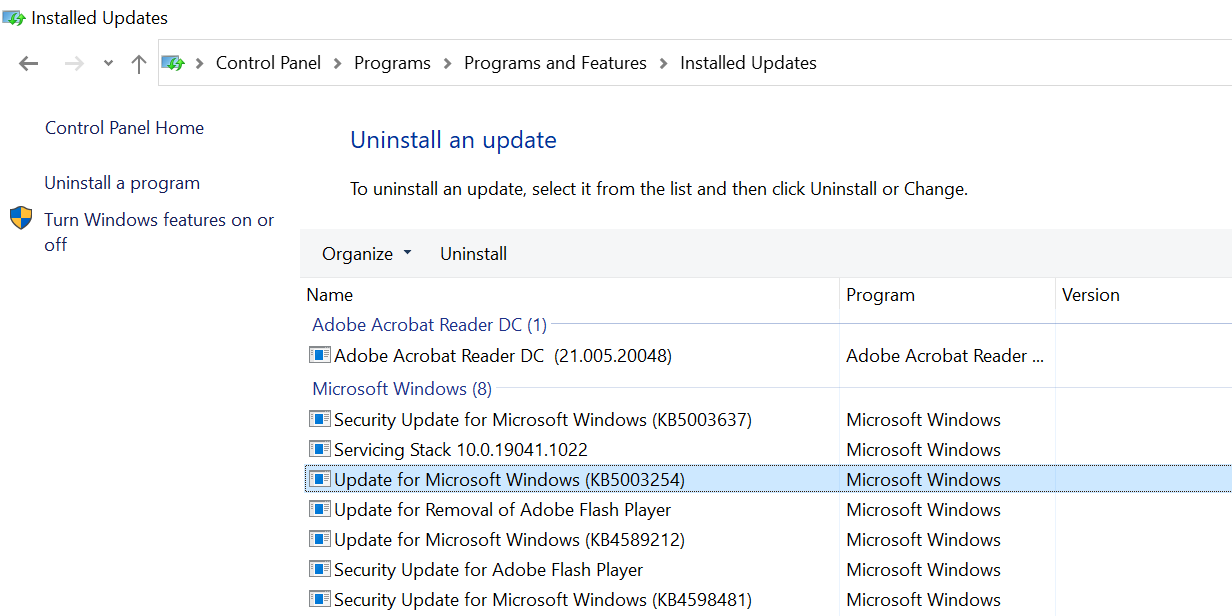
Here’s how to do that:
- Open the Start menu, search for Control Panel, and select it in the search results.
- Click Uninstall a program under Programs.
- In the sidebar on the left, click View installed updates.
- You’ll see the installed updates on the right.
- Select the most recent update in the list and click Uninstall at the top.
Resolve Connection Issues With AirPods and Windows 10/11
If you ever have difficulties connecting your AirPods to your Windows 10 or Windows 11 PC, follow the methods outlined above, and you should be able to fix the problem. Whether you’re on Windows 10 or Windows 11, the troubleshooting steps to fix and connect your AirPods remain the same. Sometimes, especially with Bluetooth issues, all it takes is changing an option here and there to resolve the problem.