
Ручное включение и выключение ночного режима в Windows 10
Ночной режим Windows 10 вы можете в любое время активировать и, соответственно, деактивировать в центре уведомлений:
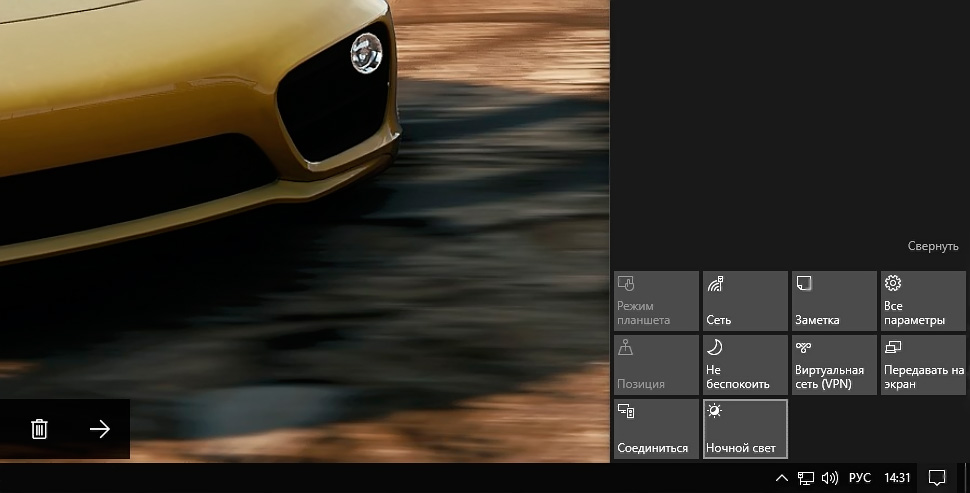
- Кликните левой кнопкой мышки на «Центр уведомлений» (значок, обозначаемый «облачком» разговора, расположен в углу экрана, справа от часов) в панели задач.
- Активируйте ночной режим, кликнув левой кнопкой мыши на плитку с надписью «Ночной свет». Повторным кликом на эту плитку ночной режим выключается.
- Если данная плитка отсутствует, то нужно нажать на ссылку «Развернуть», чтобы увидеть все пункты соответствующего меню.
Настраиваем ночной режим Windows 10
Каким именно образом должна выглядеть цветовая температура экрана в ночном режиме, можно отрегулировать в «Настройках»:
- Откройте центр уведомлений в панели задач.
- Кликните правой кнопкой мышки на плитку с надписью «Ночной свет» и выберите опцию «Перейти к параметрам».
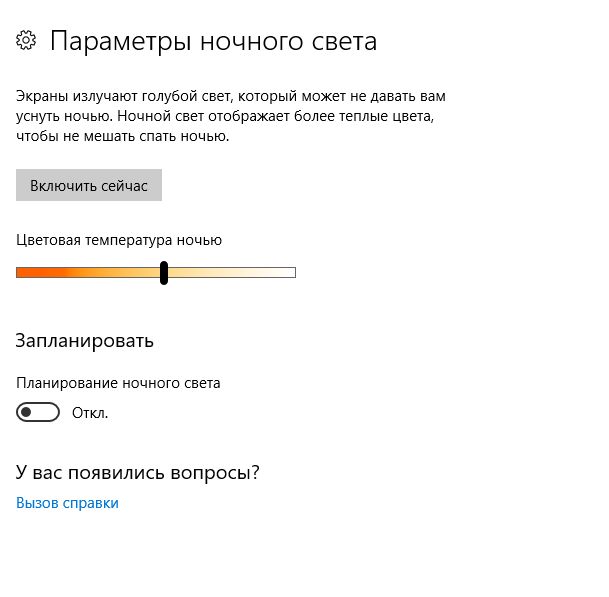
- В открывшемся окне кликните на пункт «Параметры ночного света».
- Теперь у вас будет возможность отрегулировать «Цветовую температуру ночью» в соответствии с личными предпочтениями. Выбранная вами цветовая температура в режиме реального времени будет сразу же отображаться на экране.
Программирование ночного режима в Windows 10
Вы можете настроить автоматическое включение и выключение ночного режима Windows 10 по определенному расписанию:
- Откройте центр уведомлений Windows 10, кликнув на значок диалога в панели задач.
- Кликните на плитку с надписью «Ночной свет» правой кнопкой мышки и выберите «Перейти к параметрам». В открывшемся окне кликните на «Параметры ночного света».
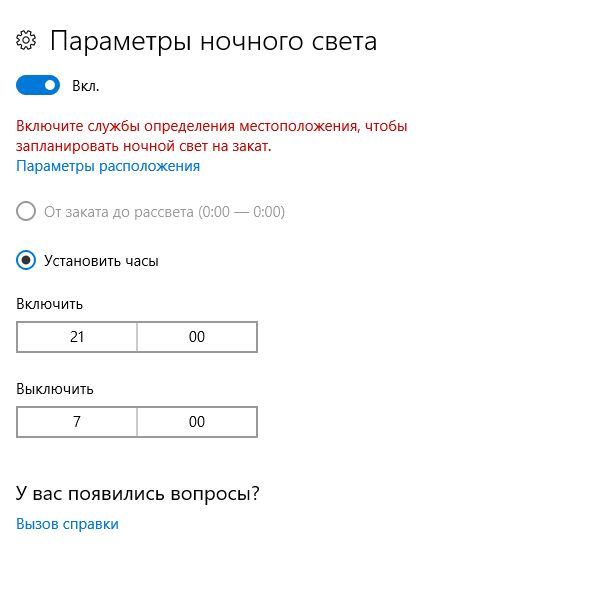
- В зоне «Запланировать» передвиньте переключатель на «Вкл». После этого вы можете определить время включения и выключения ночного режима. Если в вашей системе активированы службы определения местоположения, то вы можете настроить автоматическую активацию/деактивацию ночного режима в зависимости от времени захода/восхода солнца.
Last Updated :
08 Aug, 2024
The Windows 10 Night Light feature is designed to reduce eye strain by adjusting the color temperature of your screen to a warmer hue. This feature can be particularly beneficial during nighttime use, as it reduces the blue light emitted by your display, which can interfere with your sleep patterns.
In this guide, we will show you how to use Windows 10 Night Light, including how to enable Night Light in Windows 10 and configure its settings for optimal use.
Table of Content
- 1. How to Enable Night Light in Windows 10?
- 2. How to Adjust the Color Temperature Strength of Night Light?
- 3. How to Set the Schedule for the Night Light?
- 4. How to update display driver?
- How to Use the Windows 10 Night Light Feature — FAQs
1. How to Enable Night Light in Windows 10?
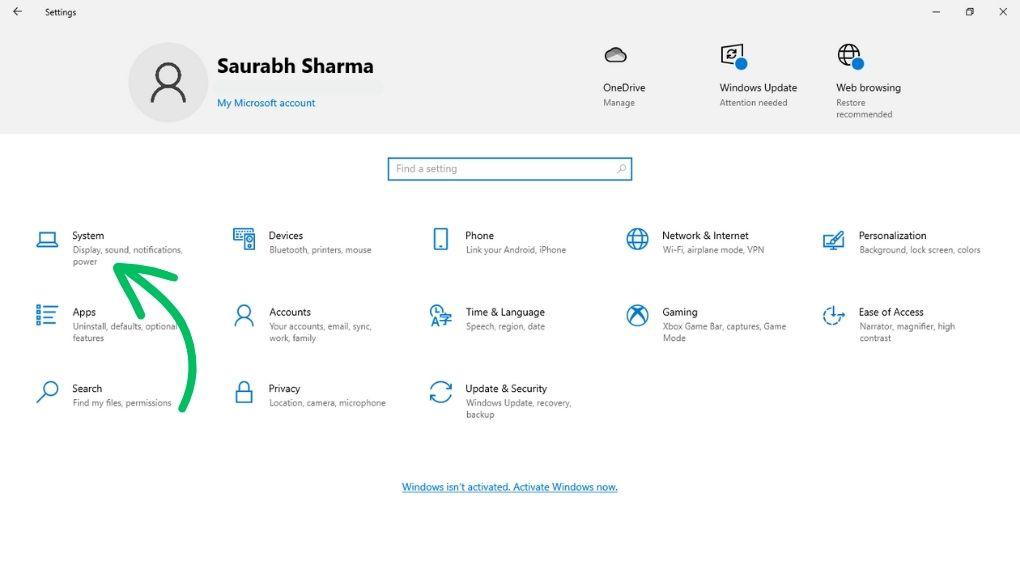
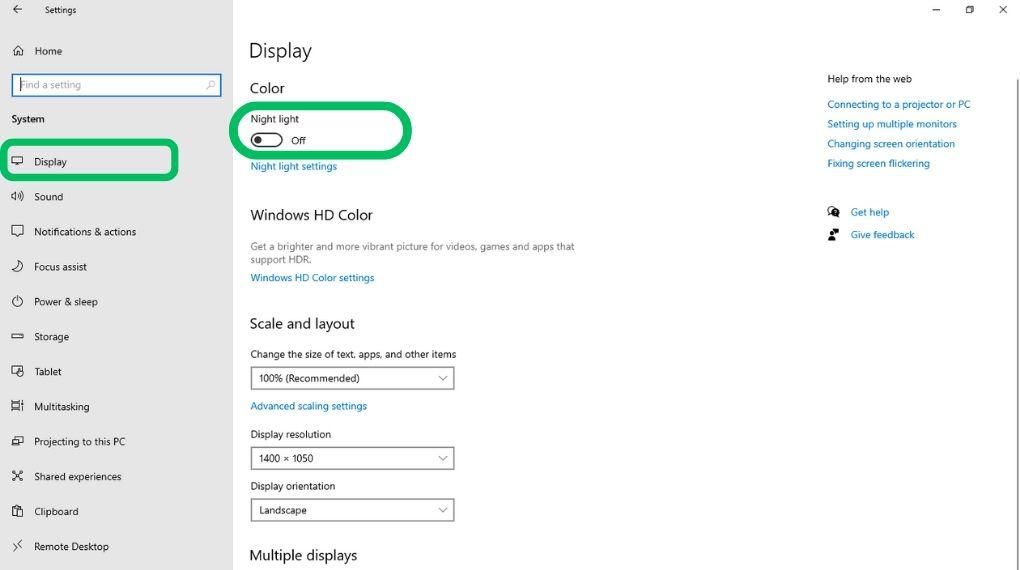
Step 1: Open settings by pressing Windows Key + I then navigate to «System«
Step 2: Then, On the left pane click on «Display»
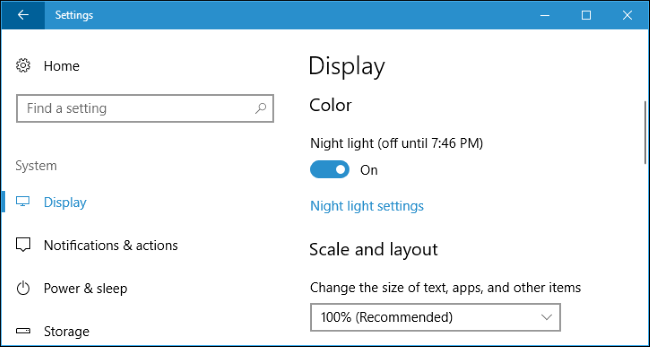
Step 3: On the right pane, Toggle on the «Night Lights«
2. How to Adjust the Color Temperature Strength of Night Light?
Step 1: Open settings by pressing Windows Key + I then navigate to «System«
Step 2: Then, On the left pane click on «Display»
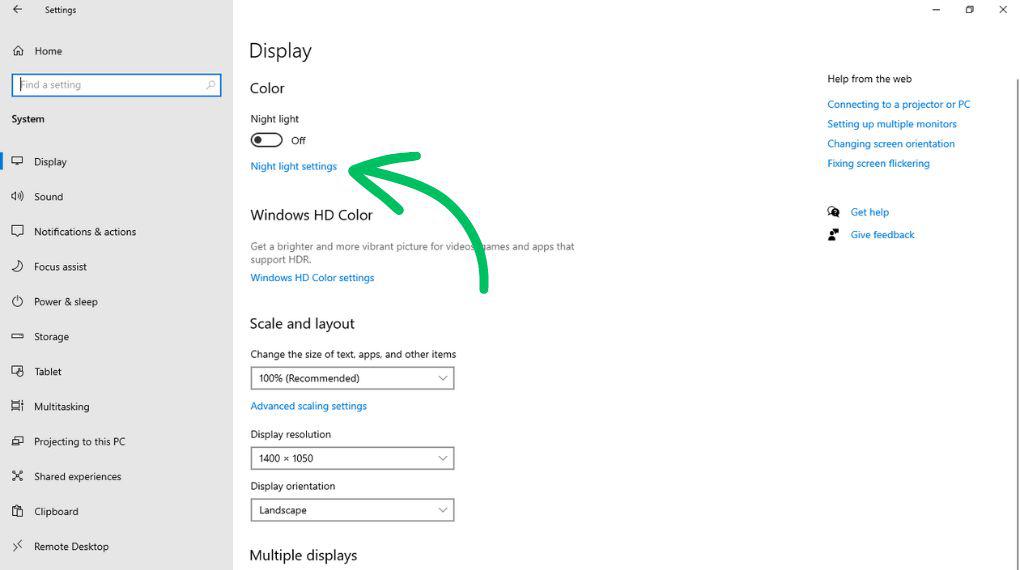
Step 3: On the right side pane, Click on the «Night Light Settings«
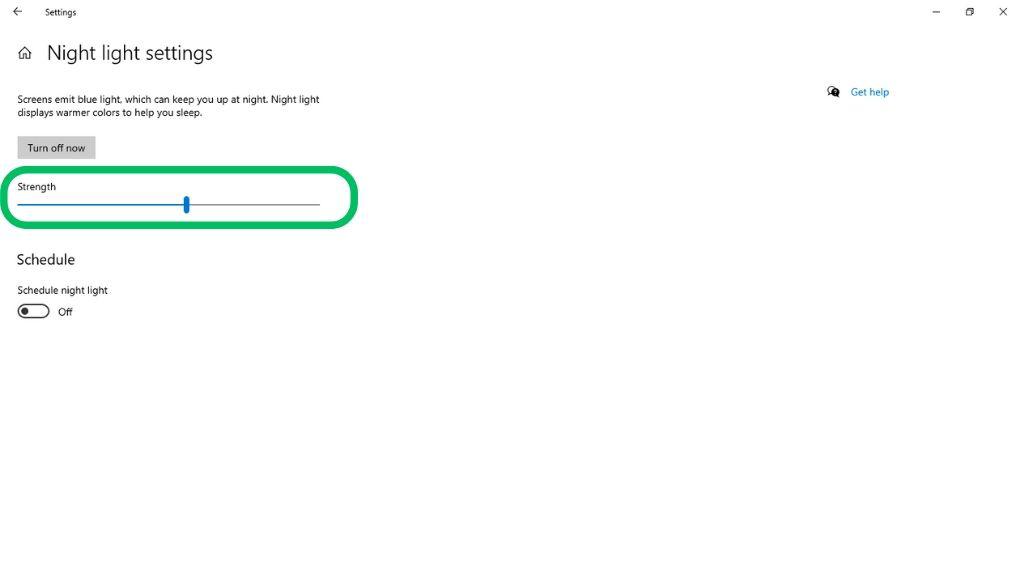
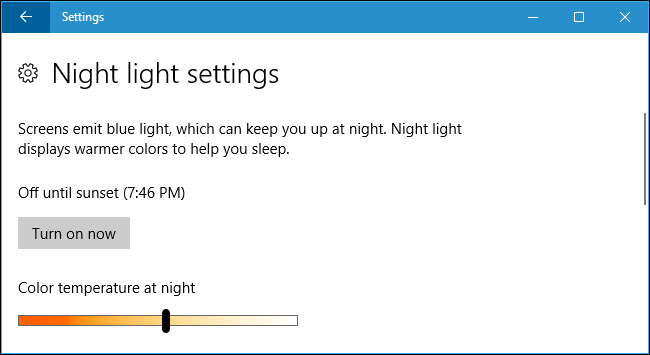
Step 4: Use the Color temperature strength slider to adjust the color temperature to your preference.
3. How to Set the Schedule for the Night Light?
Step 1: Open settings by pressing Windows Key + I then navigate to «System«
Step 2: Then, On the left pane click on «Display»
Step 3: On the right side pane, Click on the «Night Light Settings«
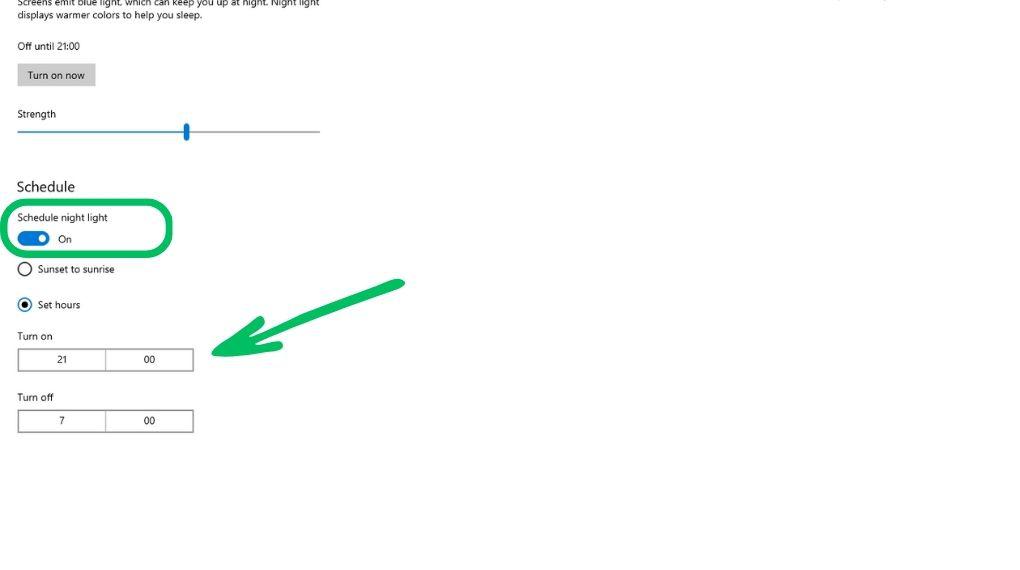
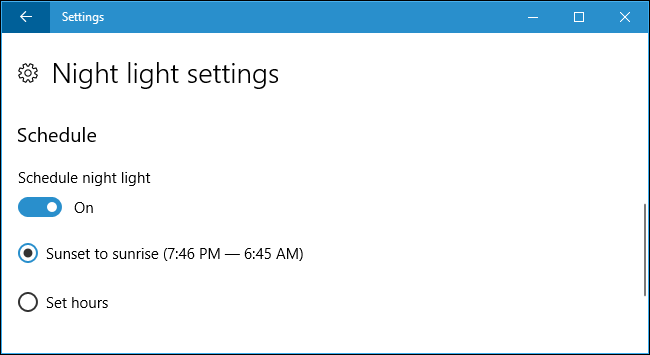
Step 4: Toggle the Schedule Night Light switch to On.
Step 5: Choose Sunset to sunrise, or set custom hours for the Night Light to activate
Tips for Night Light in Windows
|
Set Your Night Light Schedule |
Make sure to set your Night Light to activate automatically during your preferred hours. |
|
Increase Night Light Strength |
Boost the Night Light strength if the warm color effect seems too weak. |
|
Activate Location Services |
Turn on location services on your device to enable the ‘Sunset to Sunrise’ schedule. |
Troubleshooting Night Light in Windows
|
Update or Reinstall Your Display Driver |
Affecting Night Light functionality, outdated or corrupt display drivers should be updated or reinstalled via Device Manager. |
|
Update or Reinstall Your Display Driver |
Affecting Night Light functionality, outdated or corrupt display drivers should be updated or reinstalled via Device Manager. |
|
Correct Your Date and Time Settings |
To prevent scheduling issues, configure your date and time settings to update automatically. |
|
Restart Your Computer |
Resolve temporary Night Light glitches by restarting your computer. |
|
Manually Reset Night Light Settings |
Persisting issues may require a manual reset of the Night Light settings. |
|
Keep Windows 10 Updated |
Regular updates to your Windows 10 can fix issues related to Night Light. |
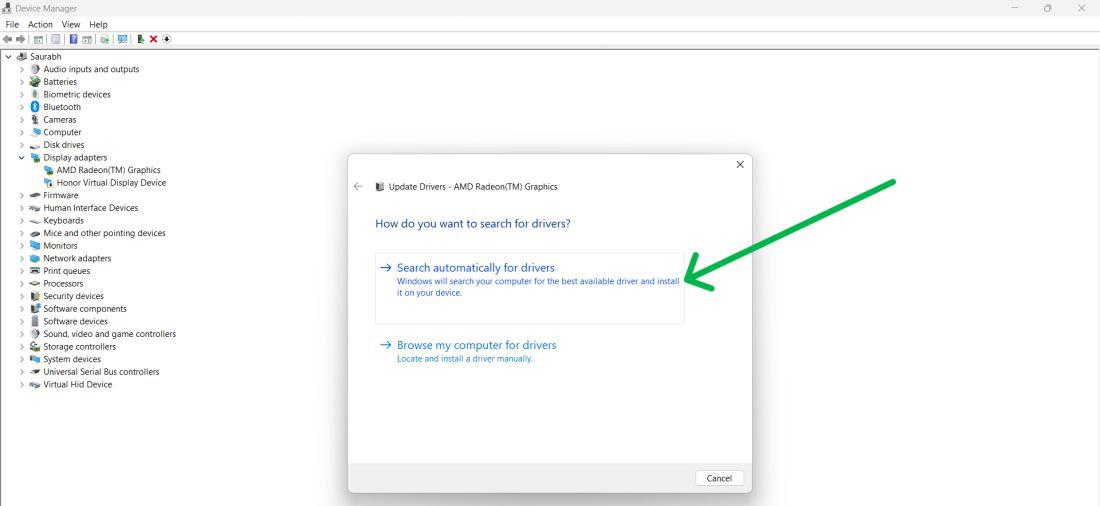
4. How to update display driver?
Step 1: Press the Windows key + X, and select Device Manager.
Step 2: Expand the device category.
Step 3: Right-click the device, and select “Update driver.”
Step 4: Choose «Search automatically for driver «
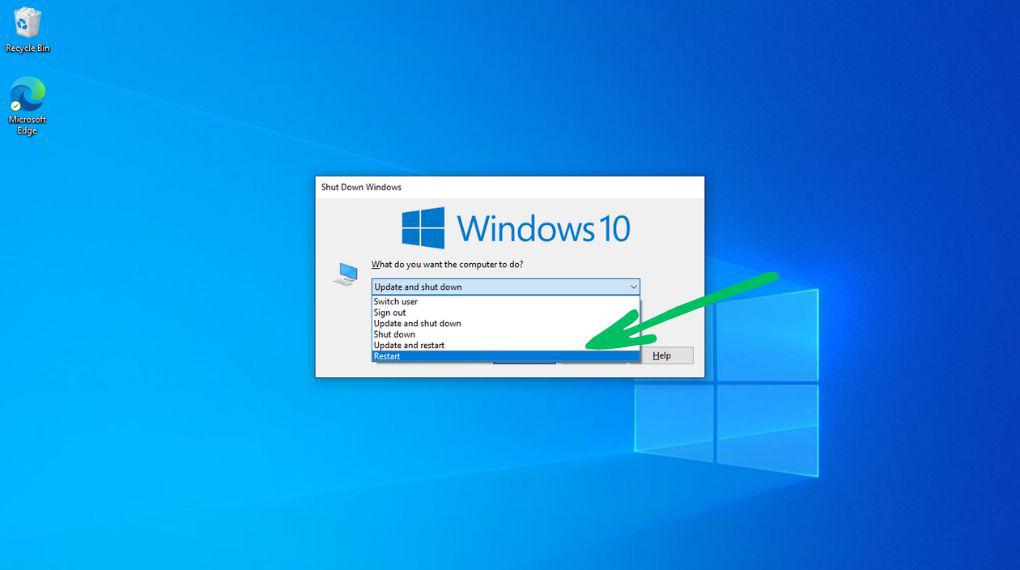
To Restart Your Computer your computer follow these steps
Step 1: Press Windows Key + D simultaneously to close all apps
Step 2: Press Alt + F4 together
Step 3: A popup window titled «Shut Down Windows» will appear, offering several options. From the dropdown menu, select «Restart.»
Conclusion
By following the steps outlined in this guide, you can easily use the Windows 10 Night Light feature to reduce eye strain and improve your sleep quality. Enabling and configuring Night Light settings in Windows 10 is straightforward and can make a significant difference in your overall comfort while using your computer at night. Take advantage of this built-in feature to create a more comfortable and healthier screen viewing experience.
Also Read
- How to Enable Dark Mode on Windows 11?
- How to Check if An App is In Dark Mode and Change it To Light Mode in Android?
- Enable In-Built Dark Mode on Windows 10
Знаете ли вы что с выходом обновления Windows 10 Creators Update появилась возможность автоматически снижать интенсивность синего спектра излучения от вашего ПК в ночное время суток с помощью функции Ночной свет (Night light)?
Если вы работаете с девайсом допоздна, оптимальное свечение помогает вашему мозгу подготовиться к качественному ночному сну. Пользователи смартфонов уже по достоинству оценили эту функцию и вот теперь, с выходом обновления Creators Update, она появилась и в ОС Windows 10.
Вот как включить Ночной свет (Night light):
Нажимаем сочетание кнопок Windows key + I или заходим в Параметры – Система — Экран, после чего включаем Ночной свет (Night light). Вы также можете настроить цветовую температуру и расписание в разделе Параметры ночного света.
В новой версии Windows 10 появилась очень полезная функция, защищающая глаза при работе в ночное время.
Если вы привыкли допоздна засиживаться за монитором, то знаете, насколько неприятно смотреть на яркий экран в полной темноте. Не только неприятно, но и вредно для зрения. Кроме этого, синее излучение негативно влияет на нервную систему, вызывая нарушения сна.
В Windows 10 Creators Update появилась функция «Ночной свет», которая должна решить эти проблемы. Для её активации откройте «Параметры» → «Система» → «Экран». Здесь, в разделе «Яркость и цвет», необходимо передвинуть переключатель «Ночной свет».

Здесь же вы увидите ссылку на настройки режима «Ночной свет». Они позволяют задать цветовую температуру, а также расписание автоматического включения. При этом можно установить как жёсткие временные рамки, так и зависящие от наступления заката и рассвета в вашем регионе. В последнем случае должна быть включена служба определения местоположения.
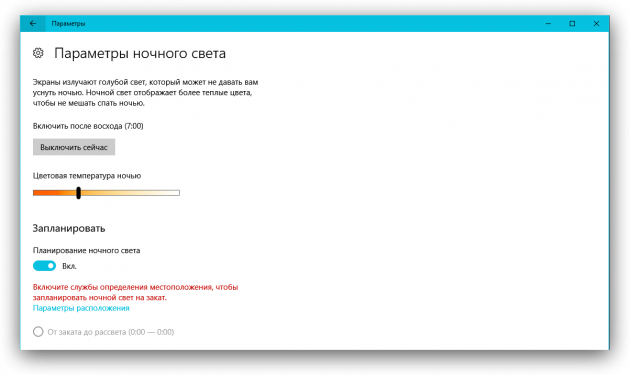
Функция «Ночной свет» позволит избежать переутомления глаз при работе, чтении или просмотре фильмов в условиях слабого освещения. Особенно она пригодится пользователям планшетов под управлением Windows 10, которые не расстаются со своим гаджетом даже перед сном.
Напомним, что обновление Windows 10 Creators Update уже доступно для загрузки. Как его скачать и установить, Лайфхакер рассказал в этой статье.
Sign in to your How-To Geek account
Quick Links
Windows 10’s Creators Update includes Night Light, a «blue light filter» that makes your display use warmer colors at night to help you sleep better and reduce eyestrain. It works just like Night Shift on the iPhone and Mac, Night Mode on Android, Blue Shade on Amazon’s Fire tablets, and the f.lux application that started it all.
Screens emit bright blue light that looks a lot like the sun, throwing off your body’s internal clock at night and preventing the secretion of melatonin, which causes you to become sleepy. Night Light makes your screen use dimmer, warmer colors at night, helping you sleep. That’s the theory that some studies have supported, although more research on the subject would certainly be helpful. Aside from better sleep, many people also report that using the softer colors—especially in darkened rooms—is just easier on their eyes.
Enable Night Light
You’ll find this option at Settings > System > Display if your Windows 10 PC has been upgraded to the Creators Update. Set the «Night light» feature here to «On» to enable it, or «Off» to disable it.
If you enable this feature during the day, Night Light won’t take effect immediately. Instead, you’ll see that it’s «Off until» whatever time sunset occurs in your current location. At sunset—that’s the time displayed in this window—Windows automatically enables the Night light filter. Windows automatically disables it at sunrise, too.
Configure Night Light
While enabling it is all you have to do to get started with Night Light, you can configure it further by clicking the «Night light settings» link under the toggle.
Click the «Turn On Now» or «Turn Off Now» button to immediately enable or disable the Night Light feature, no matter what time of day it is. You can use this button to see exactly what Night Light mode looks like without waiting for sunset.
Adjust the «Color temperature at night» slider to make the colors on your screen look cooler or warmer, if you like. You’ll see the colors change on your screen as you drag the slider, so you can immediately see what different colors will look like.
Choose whichever color temperature is most comfortable for you. However, be aware that choosing a color temperature far to the right side of the slider will cause Windows 10 to not filter much blue light at all, reducing Night Light’s effectiveness.
Windows automatically sets up a schedule for Night Light after you enable it. Windows activates Night Light from sunset to sunrise, and it automatically adjust these times to stay in sync with the movements of the sun in your geographical location.
If you prefer, you can manually schedule Night Light hours instead. Perhaps you work on your PC until after sunset and don’t want colors changing until later at night. Turn the «Schedule night light» toggle on and then select the «Set hours» option so you can choose the times of day Night Light should turn on and off.
Because this feature changes how colors appear on your display, you won’t want to have it enabled if you’re doing any sort of color-sensitive work with images or videos at night. But it probably doesn’t matter if your screen looks a bit different when you’re just browsing the web, for example.
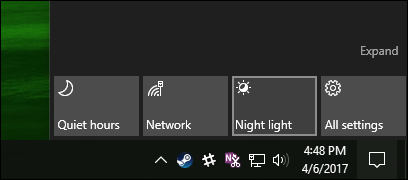
Windows also offers a Night Light quick action button for the Action Center, so you can turn Night Light on or off without having to dive into Settings. If you don’t see it in the top row of quick action buttons, just click «Expand.» And if you’d like to move your button to a new location—or make other changes—we’ve got a guide customizing your quick action buttons.
So whether it ends up helping your sleep or not, you should give Night Light a try. It certainly beats staring into a bright, white browser window in a darkened room.