Applies ToWindows 11 Windows 10
Ошибка 0xA00F4244 NoCamerasAreAttached часто связана с проблемами с драйвером камеры. Если драйвер камеры устарел или поврежден, он может неправильно взаимодействовать с оборудованием камеры.
Решение этой проблемы часто может быть таким же простым, как обновление драйвера камеры.
Средство устранения неполадок Камера Windows в приложении «Получить справку» — еще одно полезное средство. Он содержит автоматизированные шаги, которые могут устранить большинство проблем, связанных с камерой.
Однако если средство устранения неполадок не может устранить проблему, используйте следующие варианты, чтобы попытаться устранить проблему:
Если на клиентский компонент Центра обновления Windows не было обновленного драйвера или обновленный драйвер на клиентский компонент Центра обновления Windows не удалось устранить проблему, попробуйте использовать универсальный драйвер USB-видеоустройства:
-
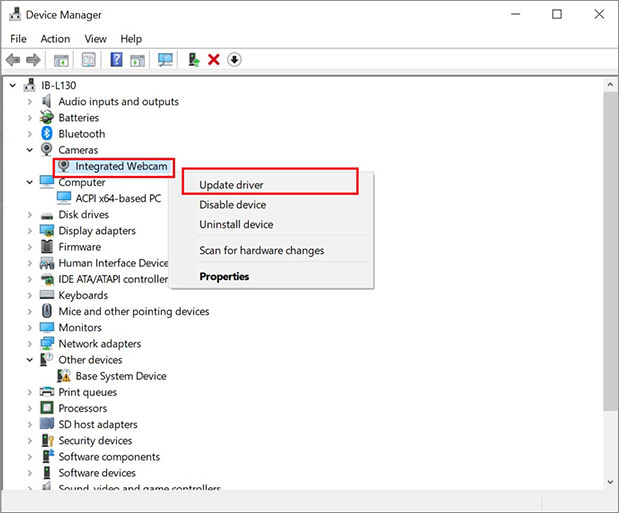
Щелкните правой кнопкой мыши меню Пуск и выберите диспетчер устройств.
-
В открывавшемся окне диспетчер устройств щелкните стрелку рядом с элементом Камеры, чтобы развернуть категорию.
-
В развернутой категории Камеры щелкните правой кнопкой мыши камеру с проблемой и выберите Пункт Свойства.
-
В открывавшемся окне Свойства камеры выберите вкладку Драйвер .
-
На вкладке Драйвер нажмите кнопку Обновить драйвер .
-
В открывавшемся окне Обновление драйверов выберите Обзор моего компьютера для поиска драйверов.
-
В окне Обзор драйверов на компьютере выберите Разрешить выбрать из списка доступных драйверов на моем компьютере.
-
В окне Выберите драйвер устройства, который требуется установить для этого оборудования , выберите USB-видеоустройство, а затем нажмите кнопкуДалее , чтобы установить драйвер.
-
В окне Windows успешно обновлены драйверы , нажмите кнопку Закрыть .
Другой вариант, чтобы устранить проблему, — скачать обновленный драйвер камеры непосредственно с веб-сайта производителя камеры. Первым шагом в этом процессе является попытка определить производителя камеры и номер модели:
-
Щелкните правой кнопкой мыши меню Пуск и выберите диспетчер устройств.
-
В открывавшемся окне диспетчер устройств щелкните стрелку рядом с элементом Камеры, чтобы развернуть категорию.
-
В развернутой категории Камеры щелкните правой кнопкой мыши камеру с проблемой и выберите Пункт Свойства.
-
В открывавшемся окне Свойства камеры на вкладке Общие определите имя производителя рядом с полем Производитель. Окно также может содержать сведения о конкретной модели или имени камеры.
Примечание: Если производитель указан как Майкрософт, камера может использовать универсальный драйвер. Дополнительные сведения о производителе камеры см. в документации по камере. Если камера встроена в устройство Windows, ознакомьтесь с документацией по устройству Windows или веб-сайтом изготовителя устройства Windows.
После определения производителя камеры и модели или имени используйте эти сведения, чтобы найти веб-сайт производителя и страницу загрузки драйвера через поисковую систему. Дополнительные сведения, включая установку драйвера, скачаного с веб-сайта производителя, см. в разделе Обновление драйвера вручную в следующей статье:
Обновление драйверов с помощью диспетчер устройств в Windows
Статьи по теме
-
Камера не работает в Windows.
Нужна дополнительная помощь?
Нужны дополнительные параметры?
Изучите преимущества подписки, просмотрите учебные курсы, узнайте, как защитить свое устройство и т. д.
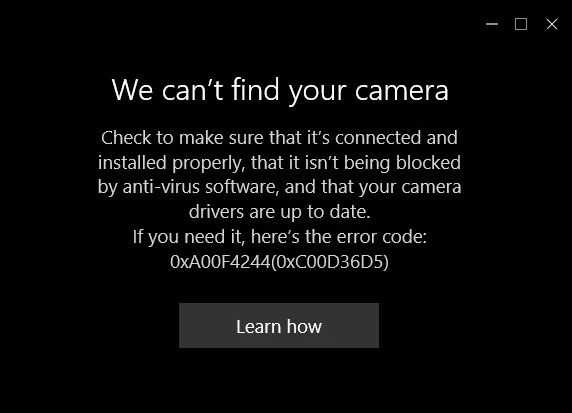
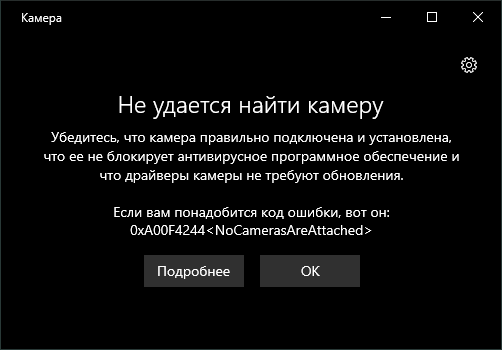
Иногда, запустив приложение «Камера» в Windows 10 вы можете получить сообщение об ошибке: «Не удается найти камеру. Убедитесь, что камера правильно подключена и установлена, что ее не блокирует антивирусное программное обеспечение и что драйверы камеры не требуют обновления» с кодом 0xA00F4244 NoCamerasAreAttached.
В этой инструкции подробно о том, как исправить эту ошибку и о причинах, которые её могут вызывать.
Что следует проверить, если камера сообщает об ошибке 0xA00F4244 NoCamerasAreAttached
Прежде всего, столкнувшись с рассматриваемой проблемой, проверьте именно то, о чем сообщается в информации об ошибке:
- Если это ПК и камера подключена по USB, проверьте подключение физически: кто-то случайно мог задеть и выдернуть провод или что-то подобное. Также можно переключить её в другой разъем USB.
- Если вы в последнее время устанавливали какой-то антивирус или иное защитное ПО, попробуйте временно отключить его и перезапустить приложение «Камера».
- На некоторых ноутбуках может быть клавиша в верхнем ряду для отключения камеры. Например, F6 (или Fn+F6) на ноутбуках MSI, как сообщают в комментариях.
Если эти простые методы не подходят (например, веб-камера встроена) или ни на что не влияют, следующие рекомендуемые шаги выглядят так:
- Откройте диспетчер устройств (для этого можно нажать правой кнопкой мыши по кнопке «Пуск» и выбрать нужный пункт контекстного меню).
- В диспетчере устройств обратите внимание: присутствует ли раздел «Камеры»? Есть ли в нем веб-камера? Нет ли рядом со значком камеры каких-либо значков (стрелка, как на скриншоте, восклицательного знака)?
- Если камера есть, но присутствует стрелка, нажмите по ней правой кнопкой мыши и выберите пункт «Включить устройство».
- Если камера есть в списке, но на ней отображается восклицательный знак или даже ничего не отображается (просто камера), следует попробовать обновить драйвер. Самое важное здесь: обновить драйвер не означает нажать «Обновить драйвер» в диспетчере устройств, скорее всего вы получите сообщение о том, что драйвер не нуждается в обновлении (потому что других у Windows и Microsoft нету). Обновить драйвер означает зайти на официальный сайт производителя ноутбука, найти там оригинальные драйверы веб-камеры для вашей модели ноутбука (даже если там доступны лишь драйверы для Windows1, 8 или Windows 7), скачать их и установить. Если это не сработало или вы не нашли файл драйвера, попробуйте также два первых метода из статьи Не работает веб-камера Windows 10.
- В ситуации, когда камера отсутствует в списке, при этом она точно подключена, в диспетчере нет неизвестных устройств (при их наличии, используйте шаг 4 — возможно неизвестное устройство и есть веб-камера), рекомендую проверить параметры БИОС: на некоторых ноутбуках там можно отключить веб-камеру, обычно в разделе, связанным с Integrated Peripherals или Onboard Devices.
Надеюсь, один из методов сработает в вашем случае. Если же нет, опишите подробно в комментариях, как именно и после каких действий стала проявляться ошибка и что уже было проделано, возможно, мне удастся помочь.
Are you trying to run the camera app in Windows 10 but are unable to?
Maybe you’re encountering the 0xa00f4244 nocamerasareattached error, or you might be getting the «we can’t find your camera» message. Sometimes, the error message «no cameras are attached» may display instead.
Don’t worry. Follow these tested methods to fix the 0xa00f4244 nocamerasareattached error code, and start your Windows camera once again.
1. Check Your Antivirus Program
Although a lifeline for all Windows computers, the antivirus program is known to cause trouble with the running of other programs occasionally. To make sure that it’s not the case with your camera app, check your antivirus settings and see if it is blocking the camera.
Even if everything is clear in the settings, to ensure that your antivirus does not cause the problem, temporarily disable it and then recheck your camera.
2. Turn On the Camera App
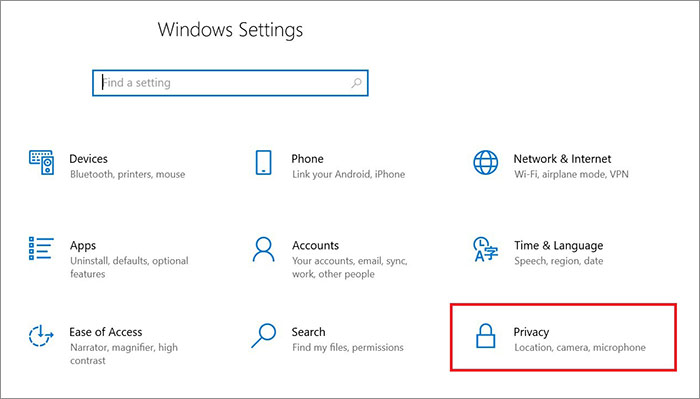
Often, the 0xa00f4244 nocamerasareattached error code is caused when the Windows Camera app is turned off. To ensure that this is not the case in your situation, press Windows Key + I to open the Settings, then select Privacy.
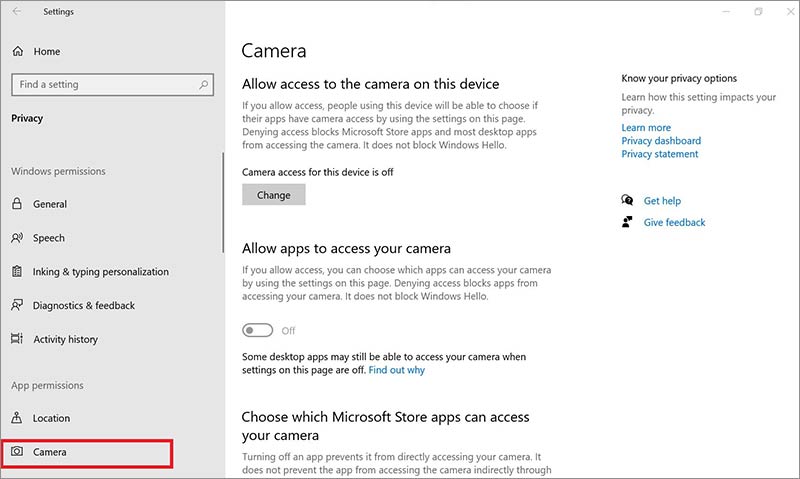
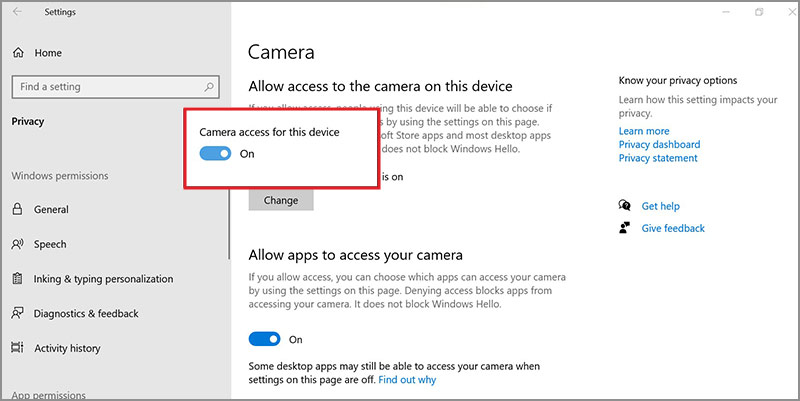
Now, click on Camera, and toggle it On if it is set as Off.
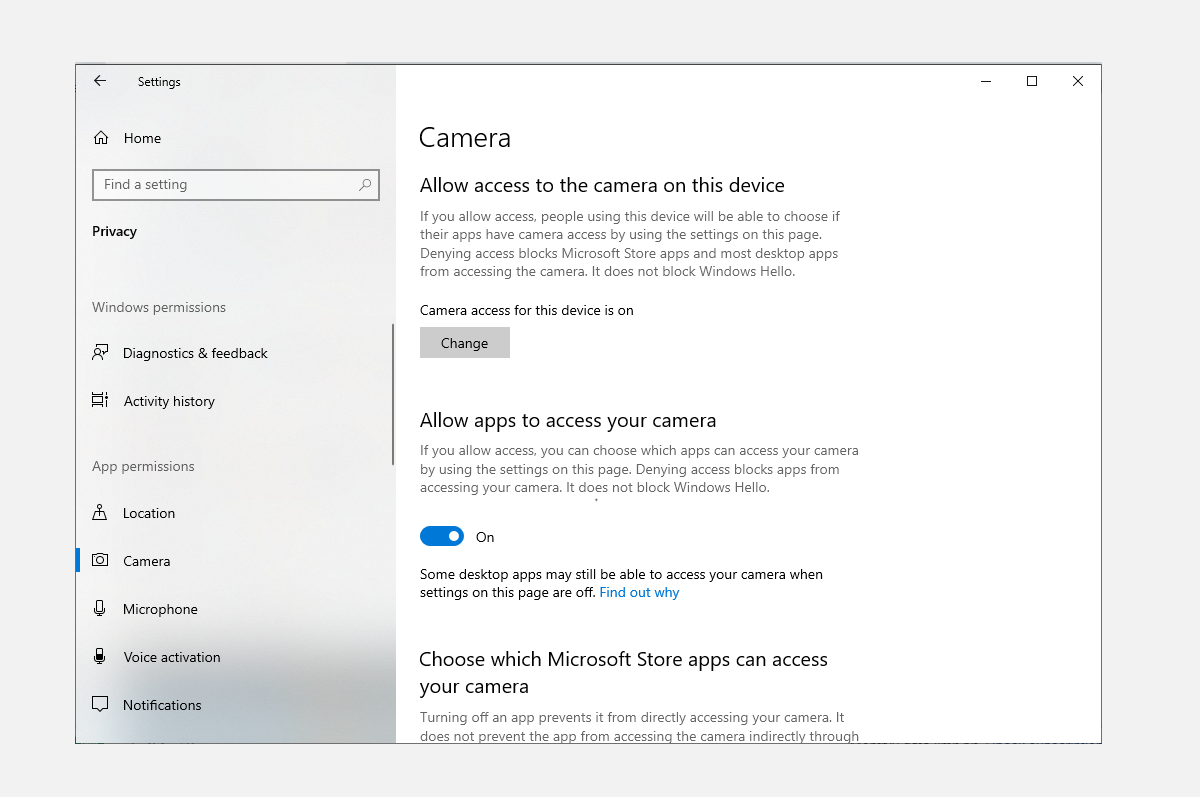
If this was indeed the cause of error code 0xa00f4244, it will be resolved by following the above steps.
3. Scan for Malware & Viruses
Virus and malware attacks are harmful to the smooth working of a Windows computer. Incidentally, they are known to cause problems with device drivers too, and therefore, it might not be a bad idea to scan your PC for such vulnerabilities.
To do that, scan your system through the Windows Defender, a free tool by Windows for removing malware & viruses.
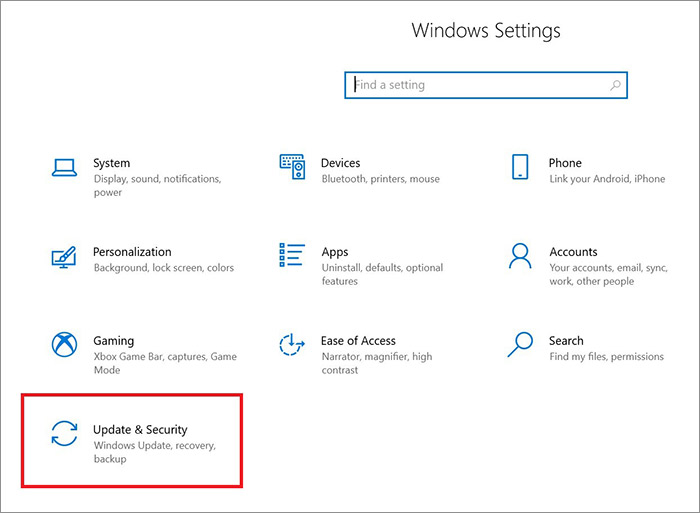
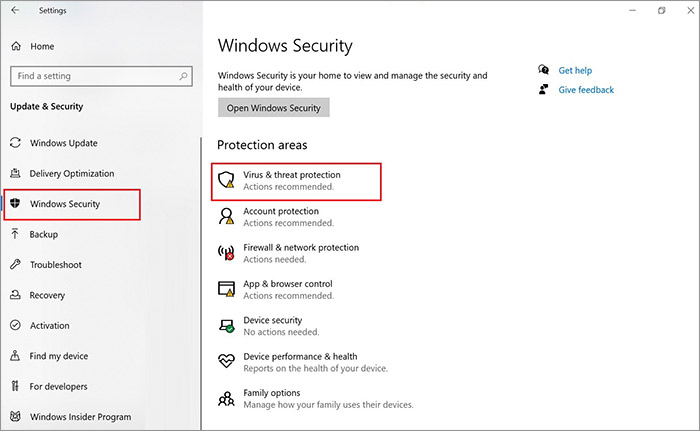
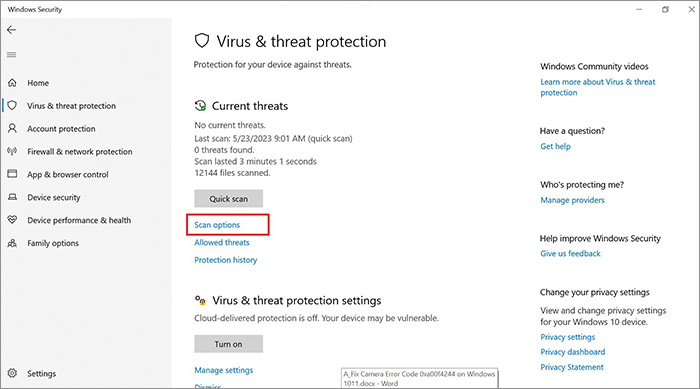
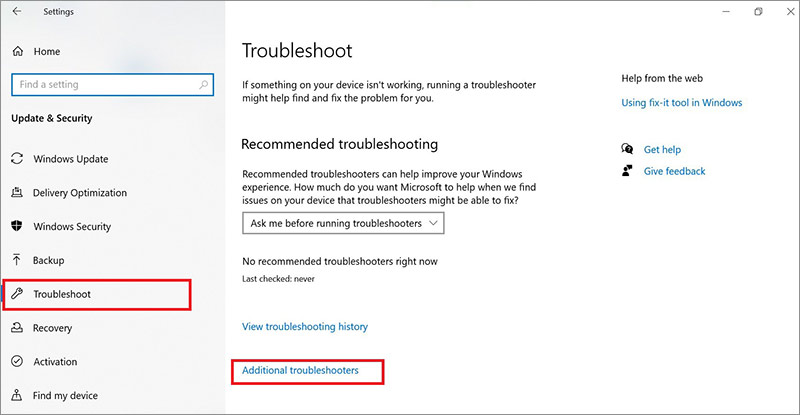
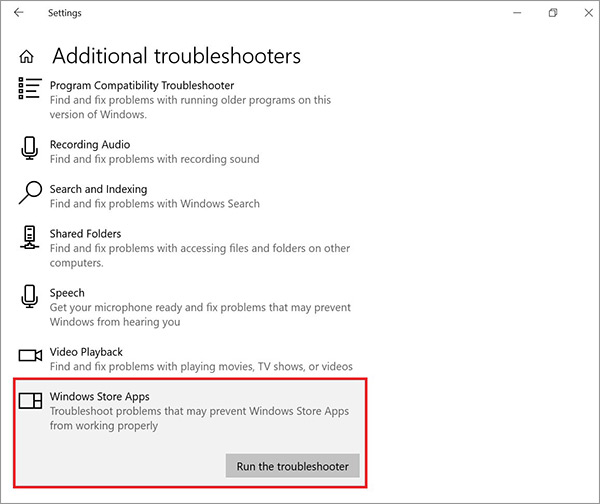
Go to Settings > Update & Security. From there, click on Windows Security > Virus & threat protection.
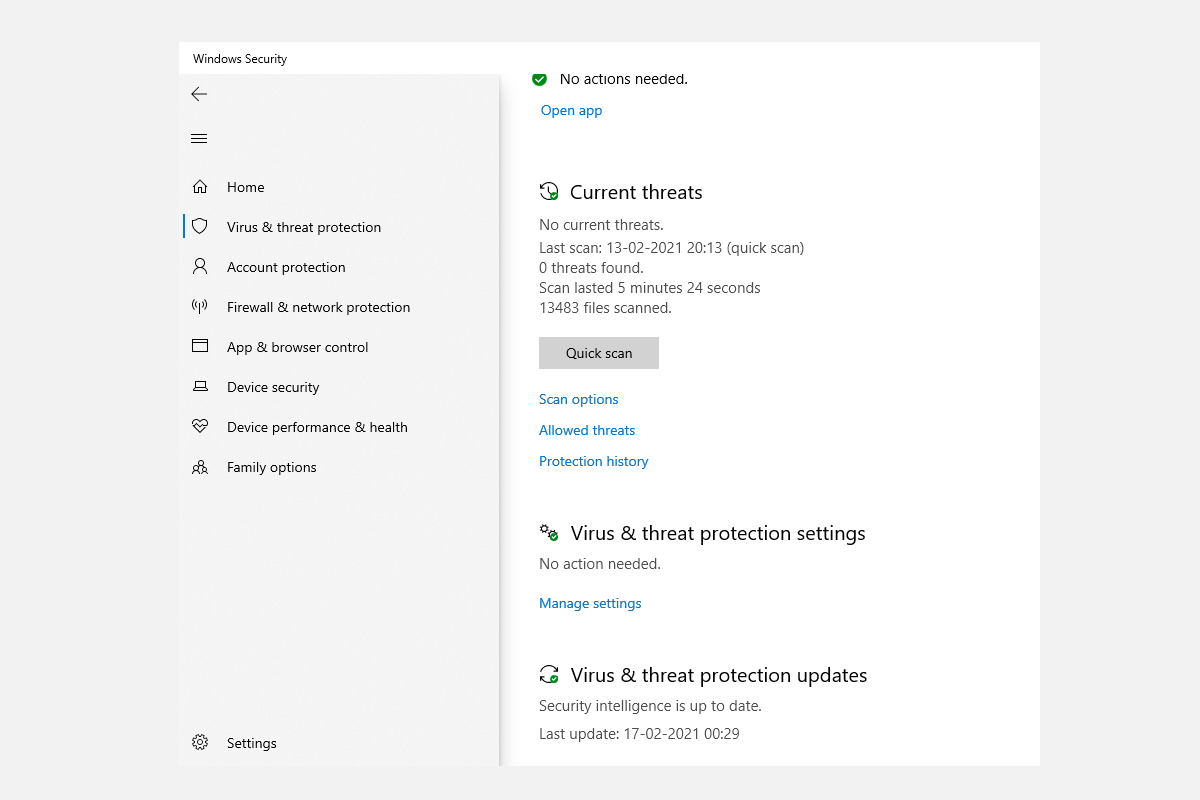
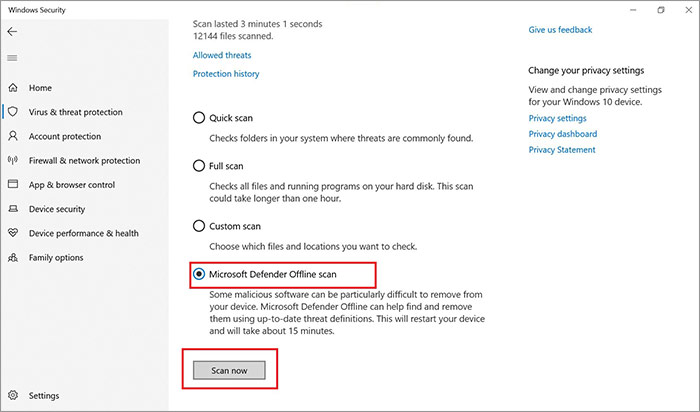
Now, click on Scan options, choose Windows Defender Offline scan, and hit Scan now.
Windows 10 will restart and undergo a scan. Open Windows Defender the same way to check the report. If there were any issues, you will see them there.
4. Check the Camera Driver
If the above methods haven’t worked so far, you’ll now have to check your camera’s device driver.
Remember, a device driver is what lets your computer hardware communicate with its software. So, if something is wrong with your camera driver, it could be the cause of the 0xa00f4244 nocamerasareattached error.
Follow these steps to check your camera driver on Windows 10.
- Open the Device Manager App from the search bar.
- Find the Cameras icon.
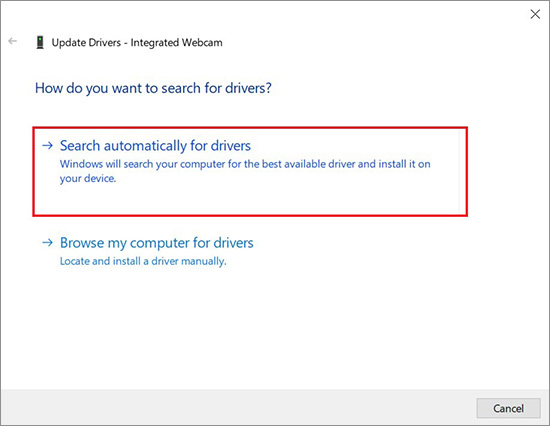
- Right-click your device’s Camera and click on Update Driver.
- Then, select Search automatically for driver.
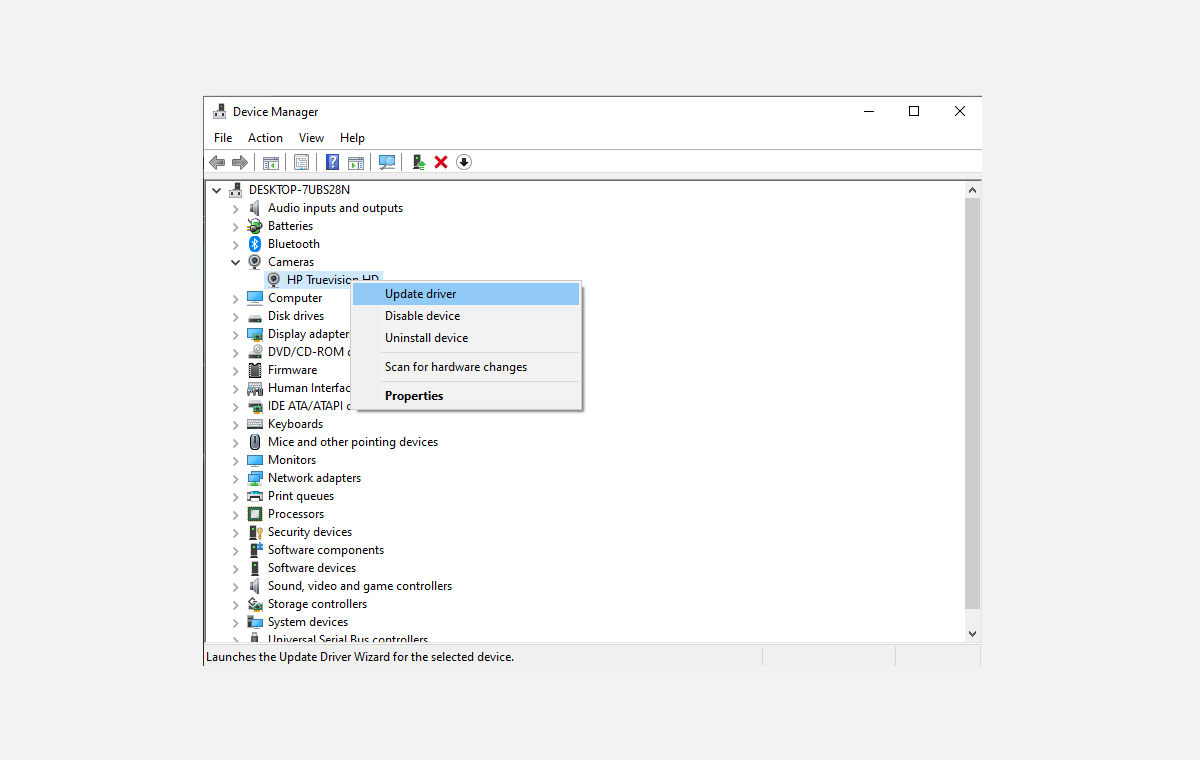
The Device Manager will then search for the most updated driver available on your computer.
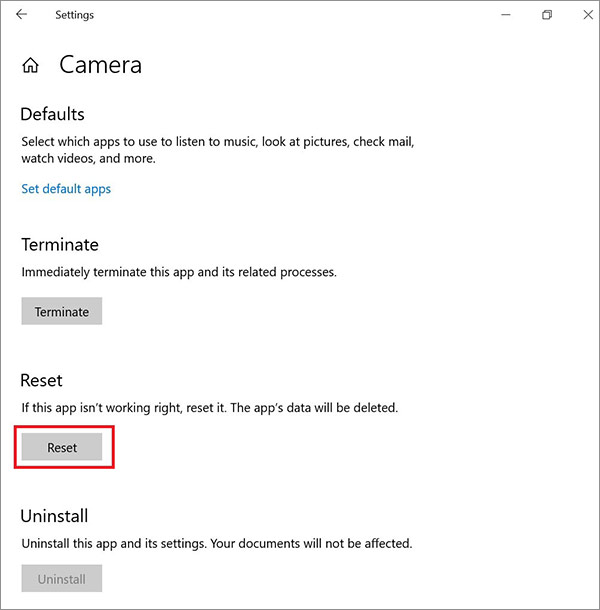
5. Reset the Camera App
Try this if none of the solutions from above have worked so far. Sometimes, problems or changes in the Camera app over a period of time can eventually lead to the 0xa00f4244 nocamerasareattached error.
By performing a simple reset of your camera settings, your camera will be taken back to its original pre-modified state. Follow the steps below to get started:
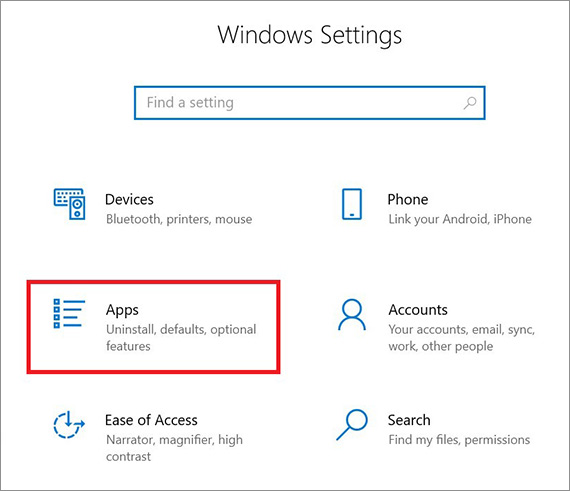
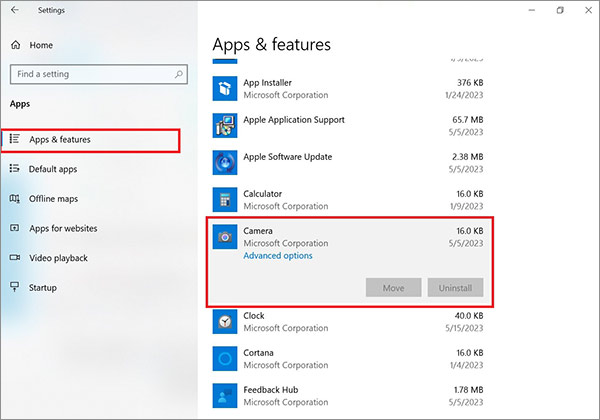
1. Click on Settings > Apps > Apps & Features.
2. Then, click on the Camera > Advanced Settings.
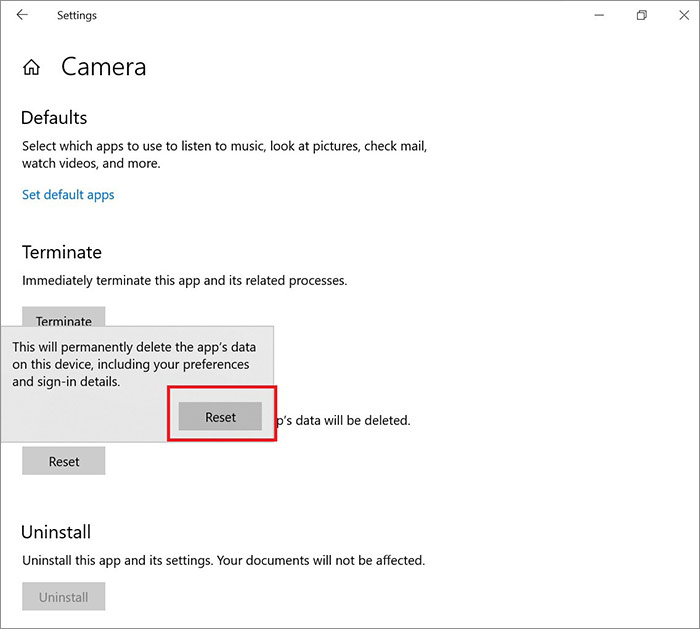
3. Now, click on the Reset button to reset your Camera app.
This will result in a complete reset of all changes done to your camera settings.
6. Reinstall Camera Driver
If the camera driver is the cause of 0xa00f4244 nocamerasareattached, then removing and reinstalling it should do the trick.
To do this, hit the Windows Key + R, type devmgmt.msc, and hit Enter. In the Device Manager, expand the Cameras section and click on Uninstall device.
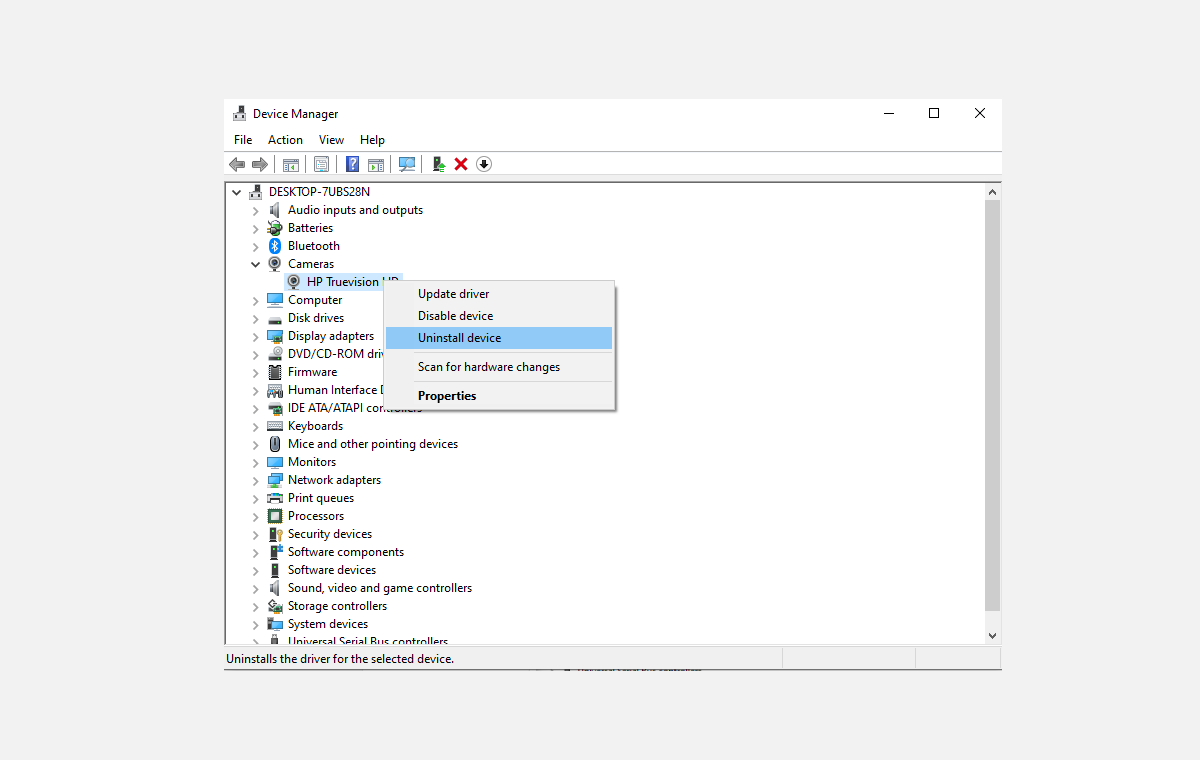
After the driver is removed, reboot your PC. On the next start-up, open the Device Manager and click on Scan for hardware changes to install the driver once again.
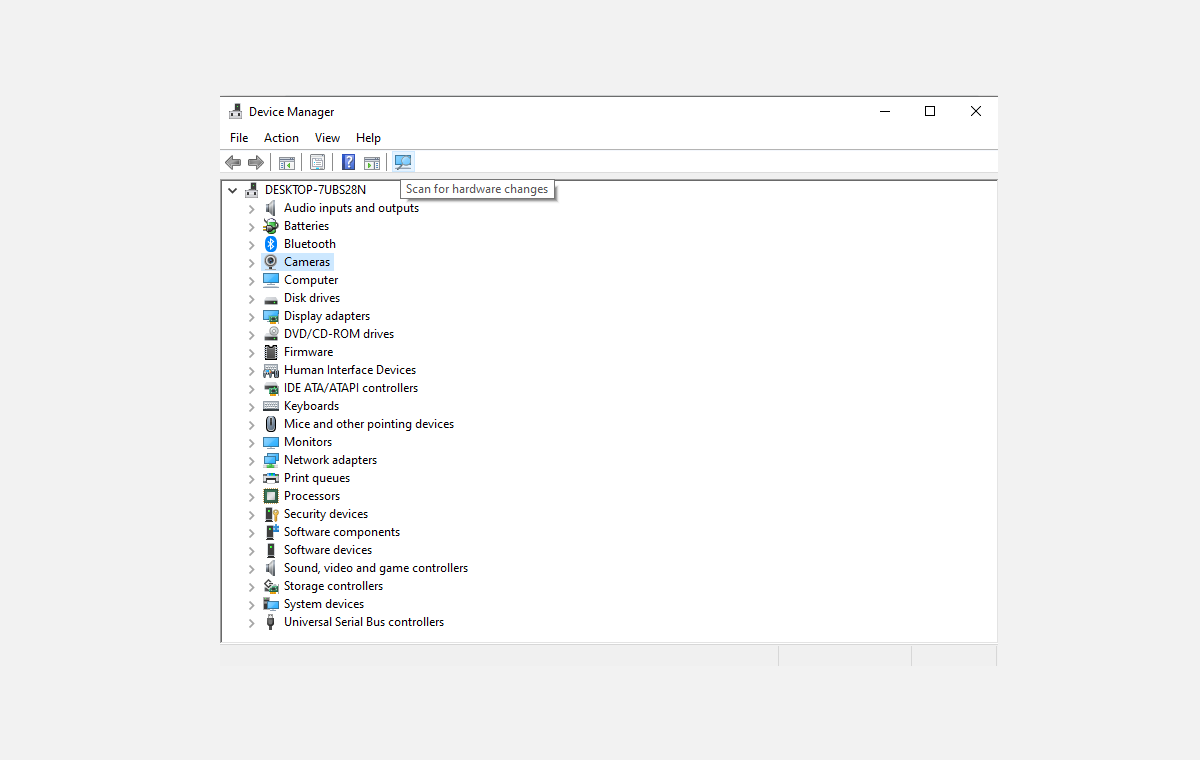
If the corruption of your camera driver was indeed the cause of the 0xa00f4244 nocamerasareattached error faced by your PC, then this method will do the trick.
7. Reset Your PC
If you’ve tried all the above tricks to get around the 0xa00f4244 nocamerasareattached error, and all of them have failed, then you can throw the last ace in the hole for every Windows problem: a Windows reset.
With the Windows 10 reset, you can either decide to keep all your files or delete them for a fresh start. To get started, go to the Windows search bar and type reset this PC.
Then, click on the Reset this PC option. In the next window, click on Get Started.
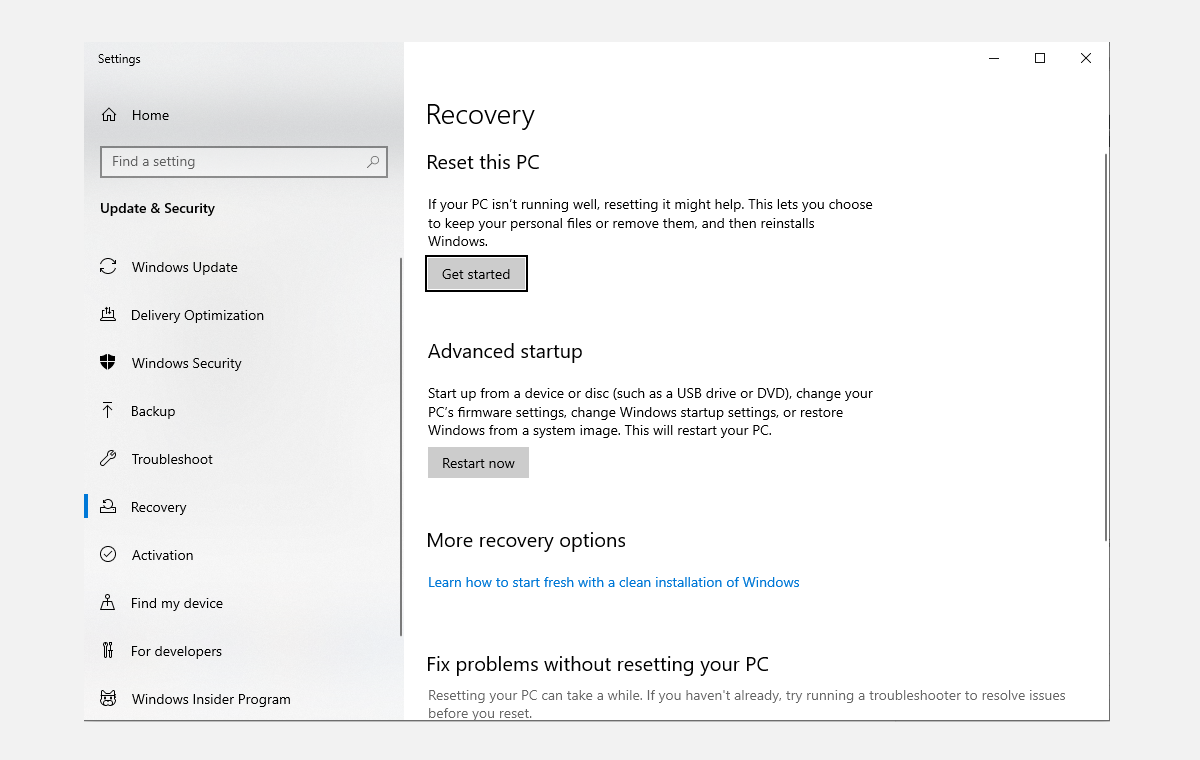
You’ll then get two options to choose from. You can either select Keep my files or go for Remove Everything if you are looking for a fresh start.
In the next screen, you’ll have to choose how you want to reinstall your Windows: through the Cloud or by a Local Reinstall. The Cloud option downloads a new version of Windows 10, while the Local version uses a Windows 10 image already stored on your device.
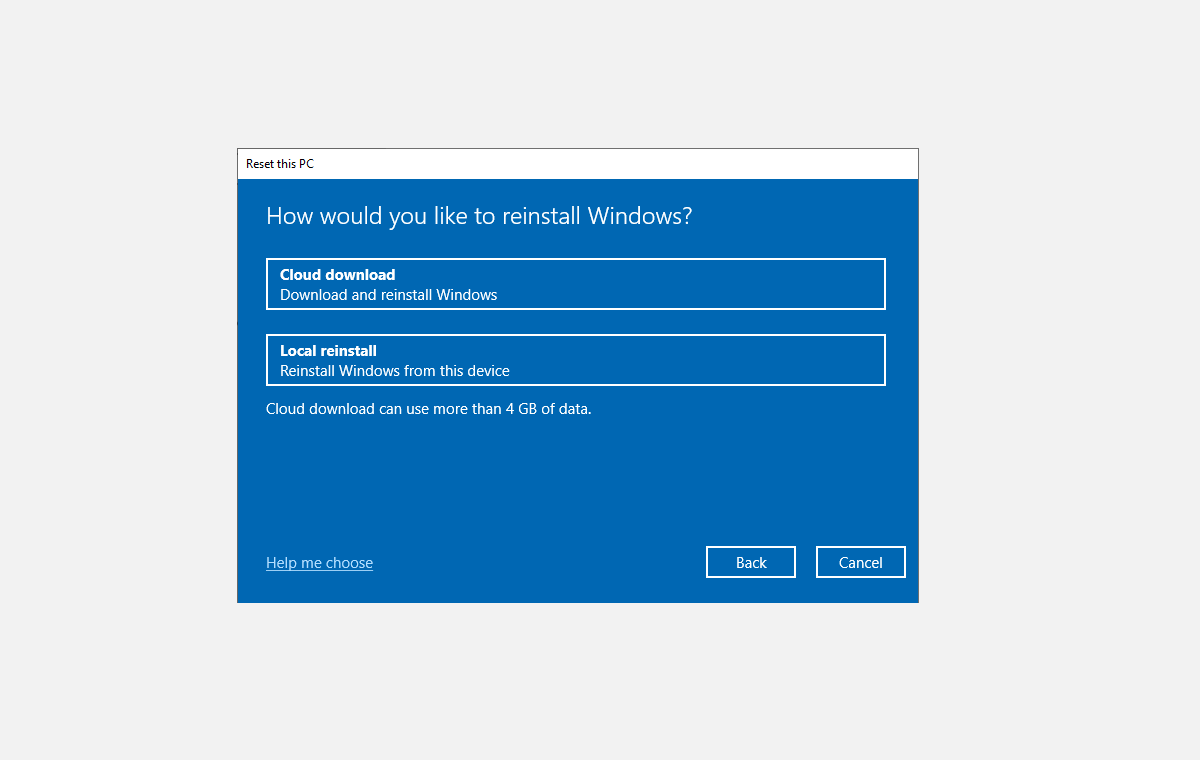
Please note that if you are using a laptop, make sure it’s connected to a charger. Otherwise, you will be unable to go ahead with the reset.
Choose one, and click on Next to go ahead with the reset. It may take a while to set up your PC for reset. After that, click on Reset to finally begin the process.
Windows 10 0xa00f4244 nocamerasareattached Error Solved
The Windows 10 Camera app is an essential utility for communication, especially in the post-Covid world, which has made working from home a norm instead of a once-in-a-while affair.