Содержание
- 1 Введение
- 2 Подготовка системы
- 2.1 Установка VirtualBox
- 2.2 Установка Debian
- 3 Установка и настройка MySQL
- 4 Установка PHP и настройка apache
- 5 Установка Nextcloud
- 6 Создание самоподписанного сертификата и настройка SSL соединения
- 7 После установки
- 7.1 WebDAV
- 7.2 Запуск виртуальной машины как службы
Введение
Итак Nextcloud. Локальное облако. Я заинтересовался этим проектом для замены у клиентов бесконечных «общих папок», которые в смысле безопасности и распределения прав доступа вообще никак. Плюс возможность отправлять вместо собственно файла во вложении к письму, ссылку на него. Данное описание не претендует на полноту. В любом случае, в интернете достаточно описаний. Скорее это заметки о моментах, которые обычно опускают.
Подготовка системы
Установка VirtualBox
Все попытки установить Nextcloud на IIS закончились ничем :(. Установка запускалась, но при завершении настроек не создавались таблицы в базе данных. Тестовая установка на Debian показала, что это именно проблема Windows сервера. Было решено устанавливать на виртуальную машину apache, php, а SQL сервер и папку с данными оставить на host машине. Это вопрос удобства миграции. На виртуальной машине достаточно перенести папку web сервера, а все данные сохраняются на host машине.
В качестве виртуальной машины был выбран VirtualBox. QEMU работает очень медленно, а поддержки KVM в Windows понятно нет.
Скачиваем установщик по ссылке. Сначала я установил 6-ю версию, но при запуске виртуальной машины мне выдало ошибку. Поиск по коду свелся к советам типа «протрите фары и похлопайте дверцами». Удалил 6-ю версию и скачал 5.2, все заработало.
Установка и создание виртуальной машины в VirtualBox достаточно тривиально и здесь я это описывать не буду. Диск я выбрал размером 16Gb, памяти 1Gb и два виртуальных процессора.
Установка Debian
Образ Debian берем отсюда. Запускаем VM. При установке следуем инструкциям. При выборе пакетов указываем web-server, чтобы apache не устанавливать потом. После завершения добавляем необходимые пакеты. Сначала sudo.
   # apt install sudo
   # usermod -a -G sudo sergiy
Последней командой добавляем пользователя в группу wheel.
Далее необходимо установить пакеты, необходимые для сборки модулей ядра. Все это понадобиться для дополнений гостевой системы.
# sudo apt install linux-headers-$(uname -r) cpp gcc make
После того, как все это хозяйство настроится установим дополнения гостевой системы. В меню виртуальной машины выбираем «Устройства» — «Подключить образ диска Дополнений гостевой ОС…». Монтируем виртуальный CD-ROM командой
# sudo mount /media/cdrom -o exec
Запускаем установку дополнений
   # cd /media/cdrom
   # sudo ./VBoxLinuxAdditions.run
Установка займет некоторое время необходимое для сборки модулей.
В файл /etc/fstab добавляем следующую строку
имя_общей_папки точка_монтирования vboxsf auto,uid=33,gid=33,umask=0007 0 0
,где
- имя_общей_папки имя общей папки его указали в диалоге создания VirtualBox,
- точка_монтирования — куда монтируем общую папку,
- vboxsf — тип файловой системы,
- auto,uid=33,gid=33,umask=0007 — параметры монтирования, uid и gid указываем для пользователя и папки www-data, umask — для прав доступа к папке монтирования равным 770, это требования nextcloud.
Настройки сети я в данном описании пропускаю, так как это вещь достаточно индивидуальная.
По окончании перезагружаем виртуальную машину.
Установка и настройка MySQL
Установка MySQL на WIndows описана в этой статье, так что остается только создать базу данных для Nextcloud. Запускаем командную строку от имени Администратора и переходим в папку bin каталога с MySQL. Запускаем MySQL командой
mysql -u root -p
и выполняем следующие команды:
   CREATE DATABASE nextcloud;
   CREATE USER 'nextclouduser'@'localhost' IDENTIFIED BY 'new_password_here';
   GRANT ALL ON nextcloud.* TO 'nextclouduser'@'localhost' IDENTIFIED BY 'user_password_here' WITH GRANT OPTION;
   FLUSH PRIVILEGES;
   EXIT;
Естественно имена имена бызы данных, пользователя, пароль указываете собственные. И не забудьте заменить localhost на адрес вашего сервера в виртуальной машине.
Установка PHP и настройка apache
Далее нам потребуется установить php и необходимые дополнения. Выполняем команду
   # sudo apt install php php-mysql php-zip php-dom php-xml php-soap php-apcu
   > php-smbclient php-ldap php-redis php-xmlrpc php-mbstring php-gd php-curl
   > php-intl php-json php-imagick
После установки php необходимо в файле php.ini отредактировать следующие параметры
memory_limit = 512M ; рекомендуемый для Nextcloud объем памяти
Перезапускаем сервер apache
# sudo service apache2 restart
Установка Nextcloud
Скачиваем Nextcloud отсюда. В простейшем варианте просто распаковываем в папку /var/www/html на виртуальной машине. И меняем права на папку
   # sudo chown -R www-data:www-data /var/www/html/nextcloud/
   # sudo chmod -R 755 /var/www/html/nextcloud/
Можно пробовать. В адресной строке браузера вводим http://адрес_сервера/nextcloud и переходим к настройке.
Создание самоподписанного сертификата и настройка SSL соединения
Nextcloud настоятельно рекомендует настроить SSL для работы с файловым архивом. В принципе рекомендация логичная, но тут возникают некоторые проблемы. Выпуск нормального сертификата обойдется в сумму более 10000 руб. в год, что для простенького локального облака как-то чересчур! Вариант с Let’s Encrypt великолепный, но, внезапно, ни один из виденных мной регистраторов доменных имен в зоне ru не дает возможности вставить DNS запись. Увы, но если нет желания платить внушительную сумму приходится мериться с самоподписанным сертификатом, игнорируя ругательства браузеров.
Для выпуска сертификата необходимо ввести команду:
# sudo openssl req -x509 -nodes -days 3650 -newkey rsa:2048 -keyout /etc/ssl/private/apache.key -out /etc/ssl/certs/apache.crt
Где:
- -days — срок действия сертификата (берем 10 лет или на ваше усмотрение);
- -keyout — папка для ключа (может быть любой);
- -out — папка для сертификата.
После запуска команды отвечаем на вопросы. Аккуратнее с полем «Common name», туда требуется ввести корректное доменное имя сайта. Все, сертификат готов.
Далее нам необходимо подготовить конфигурационный файл apache. Идем в папку /etc/apache2/sites-available и ищем там файл default-ssl.conf. В этом файла нужно отредактировать (или добавить если их нет) следующие строки:
   ServerAdmin admin@example.com
   ServerName адрес_сервера
   <IfModule mod_headers.c>
     Header always set Strict-Transport-Security "max-age=15552000; includeSubDomains"
   </IfModule>
   DocumentRoot /var/www/html/nextcloud
   ...
   SSLCertificateFile /etc/ssl/certs/apache.crt
   SSLCertificateKeyFile /etc/ssl/private/apache.key
Далее разблокируем поддержку ssl в apache:
   # sudo a2enmod ssl
   # sudo a2enmod headers
Включаем виртуальный хост:
# sudo a2ensite default-ssl.conf
И перезапускаем apache:
# sudo service apache2 restart
Можно поверить зайдя на
https://адрес_сервера
После установки
WebDAV
При монтировании папки Nextcloud как сетевого диска в Windows возникают проблемы. Запрашивает пароль и выдает ошибку 67 — «Сетевой путь не найден». Для исправления ошибке необходимо в реестре по пути
HKEY_LOCAL_MACHINE\SYSTEM\CurrentControlSet\Services\WebClient\Parameters в параметре BasicAuthLevel проставить значение 2 и перезапустить службу Веб-клиент.
Запуск виртуальной машины как службы
Для этих целей можно использовать VirtualboxVmService. Скачайте программу соответственно свой версии VirtualBox, запустите установку. Собственно все, остается только отредактировать файл VBoxVmService.ini (по умолчанию он находится в папке C:\vms).
   [Settings]
   # Путь к дирректории .VirtualBox для вашего профиля. Она обычно располагается
   # в персональной папке пользователя.
   VBOX_USER_HOME=C:\Users\Администратор\.VirtualBox
   # Стартовать или нет VBoxWebSrv.exe, VirtualBox HTTP веб сервер автоматически.
   # Может быть «yes» или «no». Оставьте ее в «no» если вы не знаете что это.
   RunWebService=no
   # Параметр используется для замедления выключения компьютера чтобы предотвратить
   # крах виртуальной машины при выключении или перезагрузке. (5000=5 секунд).
   # Заметьте что Windows имеет ограниченя как долго контроллер сервиса будет ждать
   # когда система перезагрузится. Лимит времени определен в переменной
   # WaitToKillServiceTimeout в следующей ветке реестра
   # HKEY_LOCAL_MACHINE\SYSTEM\CurrentControlSet\Control. Ваше значение PauseShutdown
   # не должно превышать это значение в реестре.
   PauseShutdown=5000
   # Далее следуют секции виртуальных машин. Их может быть несколько, сответственно
   # Vm0, Vm1 и т. д.
   [Vm0]
   # Имя для запуска VM (Чуствительно к регистру!)
   VmName=nextcloud
   # Метод выключения («savestate», или «acpipowerbutton»). Когда используется
   # «savestate», состояние машины сохраняется и может быть возобновлено когда
   # она старует в следующий раз. Когда используется «acpipowerbutton» , VM просто
   # выключится. Если ваша VM долго выключается рекомендуется использовать
   # savestate, который завершает намного быстрее.
   ShutdownMethod=acpipowerbutton
   # Будет или нет VM стартовать автоматически когда VBoxVmService работает.
   # По умолчанию установлено в «yes».
   AutoStart=yes
После редактирования ini-файла требуется запустить службу VBoxVmService.
If you intend to use unlimited and more private space instead of using storage spaces such as Dropbox or OneDrive after purchasing your own Windows virtual server, you will most likely go to Nextcloud.
Nextcloud is an open-source, private cloud space for storing files and information. You have complete control over the information stored on this platform, and no third party has control over it. If you plan to use this program on Windows, you can install Nextcloud on the Windows server in two ways: through Docker Desktop or a Linux distribution and Apache web server.
In addition to storing files and information, Nextcloud is a platform and workspace where you can share files with others, organize meetings, and manage tasks.
Nextcloud is basically a client-side application through which the user connects to the server. This program is also used as a database to respond to millions of users.
This program can be used on all platforms, i.e. Linux, Windows, Mac, Android, and iOS. By reading this article, you will learn 2 methods of installing Nextcloud on a Windows server.
Prerequisites for installing Nextcloud on a Windows server
To install Nextcloud on Windows with both methods, we must have a number of prerequisites, which are:
- 64-bit system
- At least 8 GB of RAM
- Quad-core CPU
- No network restrictions by CGNAT
- Public domain with the port opening capability
- Windows 10 or 11 or Windows Server
In general, we need a Linux kernel to install Nextcloud. If you can’t install Nextcloud on Linux, you can install one of its distributions on Windows.
There are two ways to install Nextcloud on Windows Server: installing Nextcloud All-in-One or using Apache web root and a Linux distribution. For the first method, we will need Docker Desktop, and for the second method, we will need some programming knowledge.
If you are not familiar with the Linux environment and programming, it is better to use the first method; If the second method is the most suitable method for programmers.
Installing Nextcloud on Windows via Docker Desktop
This method installs Nextcloud on the Windows server by installing Nextcloud All-in-One, a Docker, with the help of Docker Desktop.
In this method, we are going to complete the process of installing Nextcloud on Windows and the domain of the site without the need for the Apache web server. Just follow the steps below carefully.
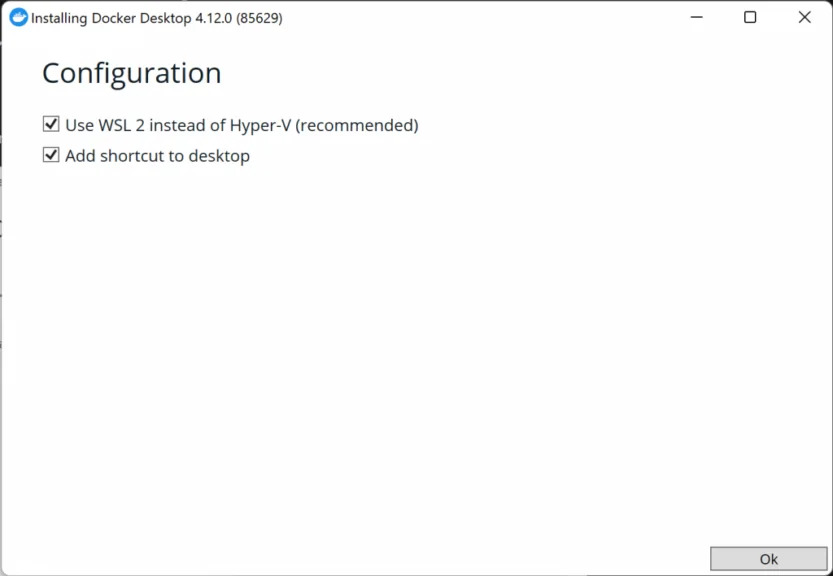
Step 1: Install Docker Desktop
Download and install Docker Desktop. Check both options at this stage of installation.
Open the app.
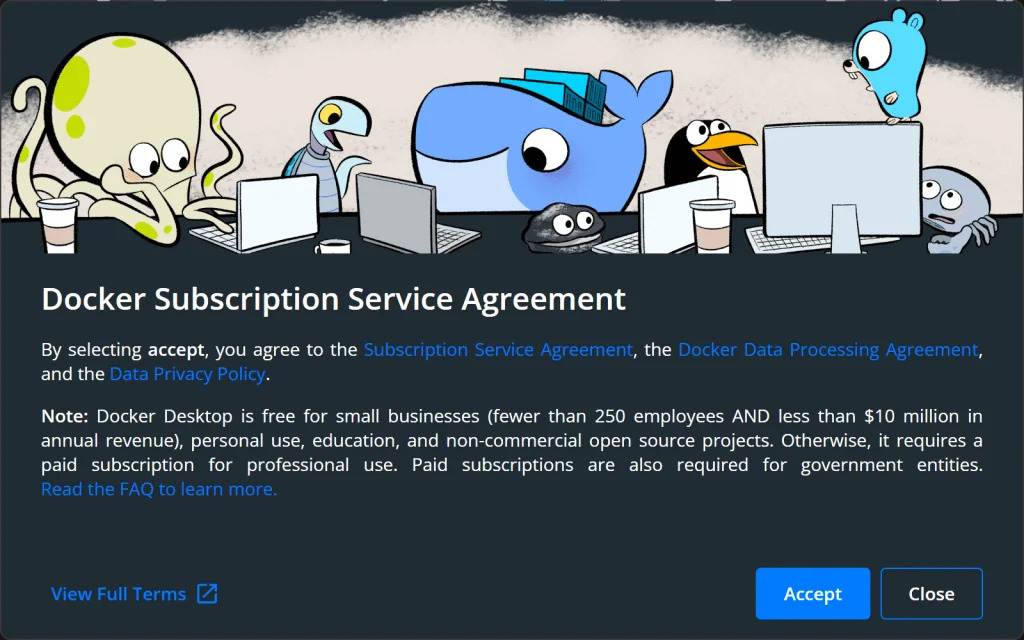
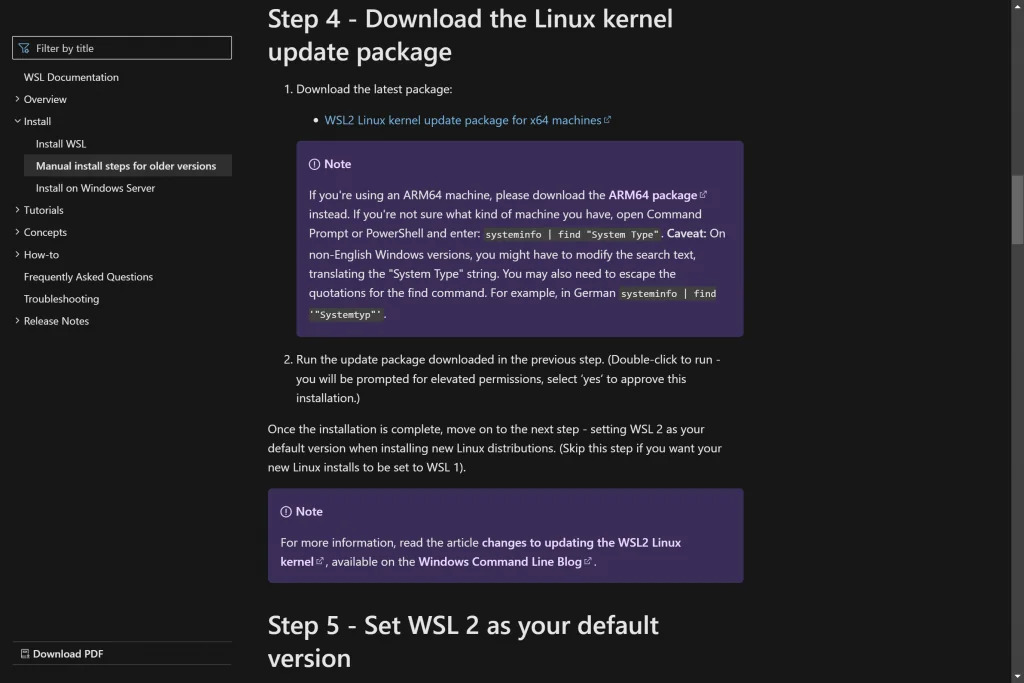
Second step: Download the WSL2 Linux kernel package update
After clicking the Accept button, you will see the following screen. Click on the link you see on the page.

On the page you see, click on the first link to download the latest WSL2 Linux kernel package update.
WSL stands for Windows Subsystem for Linux and means Windows Linux Subsystem.
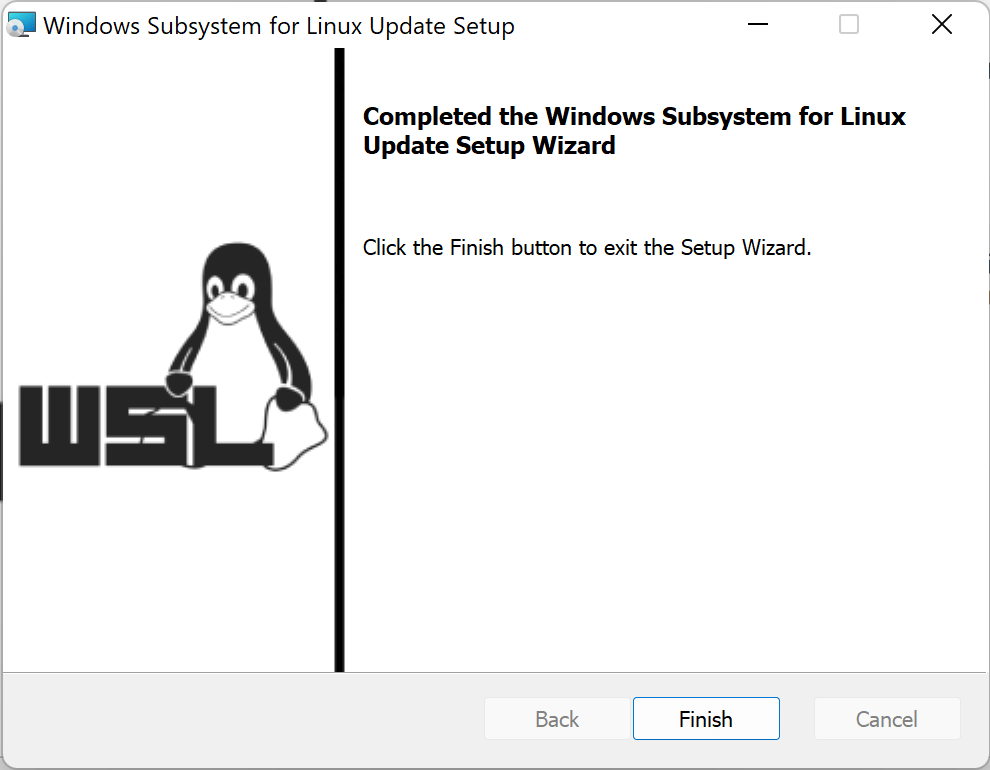
After downloading the ‘wsl_update msi’ file, install it.
Now click Restart on the following page to restart the Docker desktop.

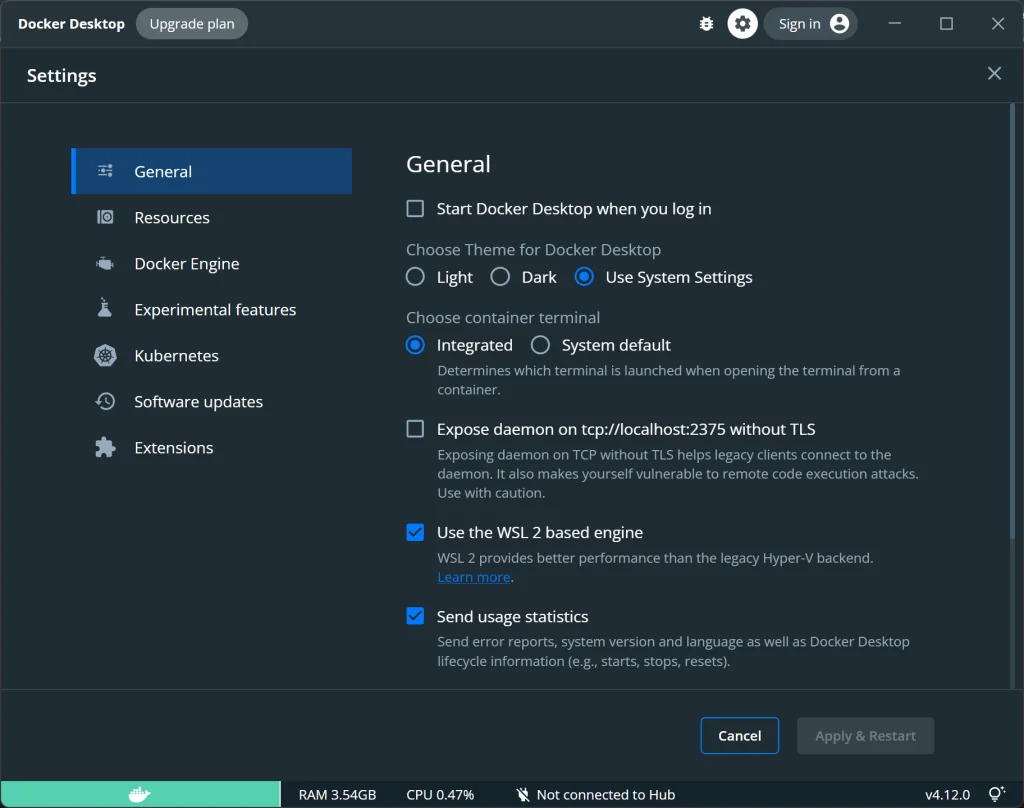
Third step: Docker Desktop settings in Windows
At this stage, after entering the Docker Desktop environment, go to the settings section and check the first square on the right so that the program will run when you log in to the system.
Step 4: Install Nextcloud AIO
After successfully installing Docker Desktop, you can install Nextcloud AIO on a Windows server. To do so, enter the terminal and run Nextcloud with the following command.
Note: Replace /run/desktop/mnt/host/c/ncdata, which is equivalent to C:\ncdata in your Windows host, with the actual path.
docker run ^
--sig-proxy=false ^
--name nextcloud-aio-mastercontainer ^
--restart always ^
--publish 80:80 ^
--publish 8080:8080 ^
--publish 8443:8443 ^
--volume nextcloud_aio_mastercontainer:/mnt/docker-aio-config ^
--volume //var/run/docker.sock:/var/run/docker.sock:ro ^
-e NEXTCLOUD_DATADIR="/run/desktop/mnt/host/c/ncdata" ^
nextcloud/all-in-one:latest
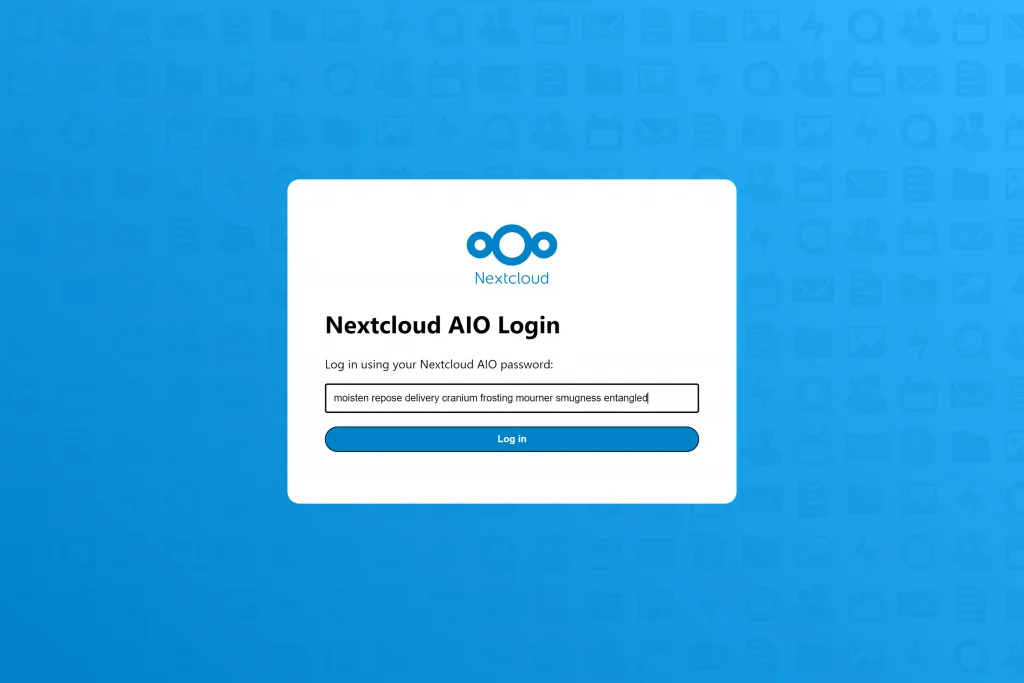
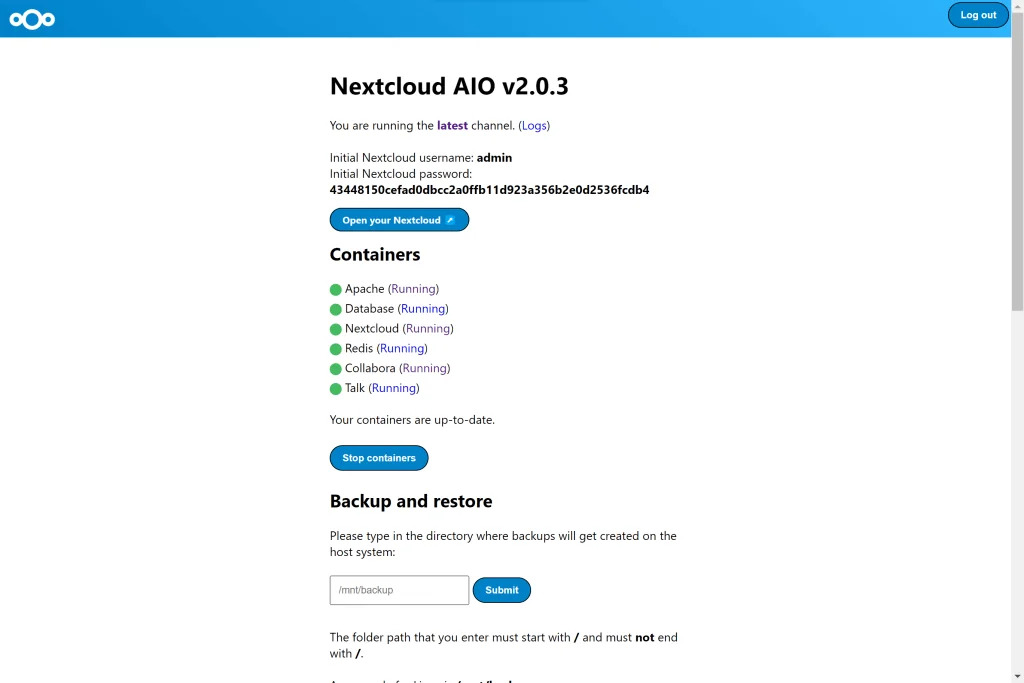
Now enter the system browser and go to the link https://localhost:8080. After accepting the certificate, you will go to the following page.
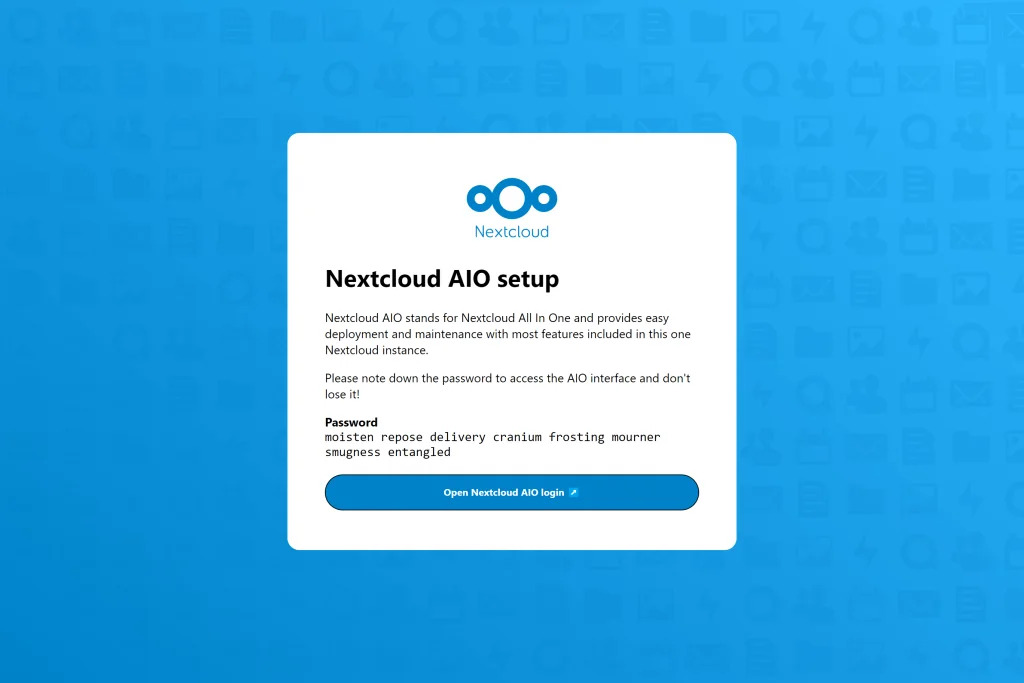
Click on Open Nextcloud AIO login and login with your Nextcloud password.
Now you can see the Nextcloud dashboard.
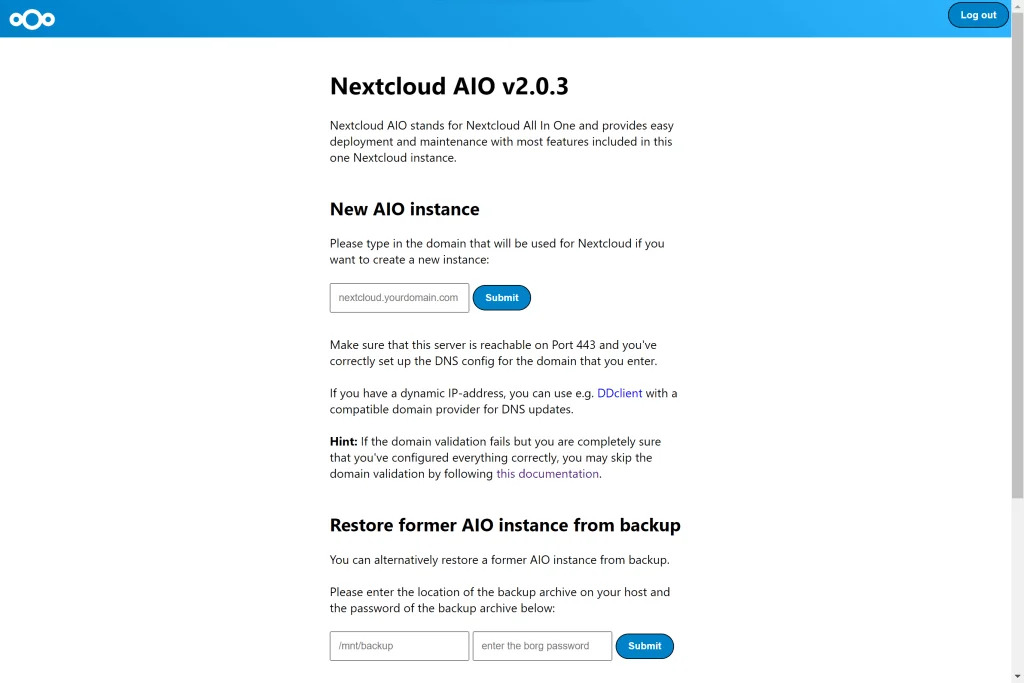
Step five: Setting Nextcloud on the site
Enter your site’s domain address in the empty field. Then, set DNS to display the site’s public IP. Finally, connect ports 433/TCP, 3478/udp, and 3478/TCP to Windows.
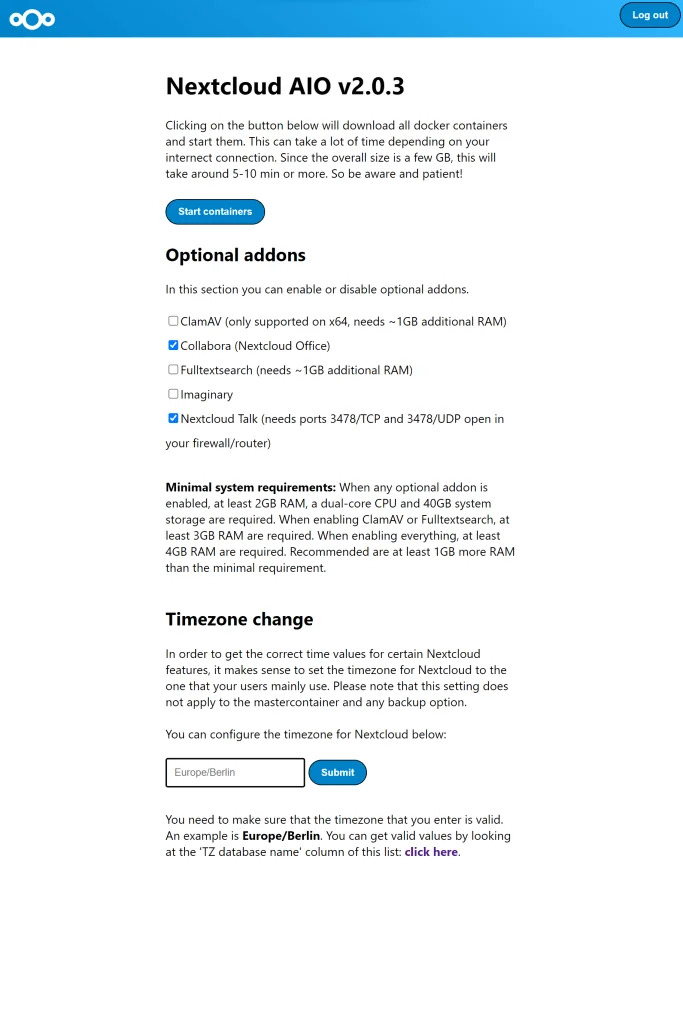
After setting these things correctly, you can proceed to the next step. In this step, you can set optional add-ons and a time zone. Then click on Start containers to download and run containers.
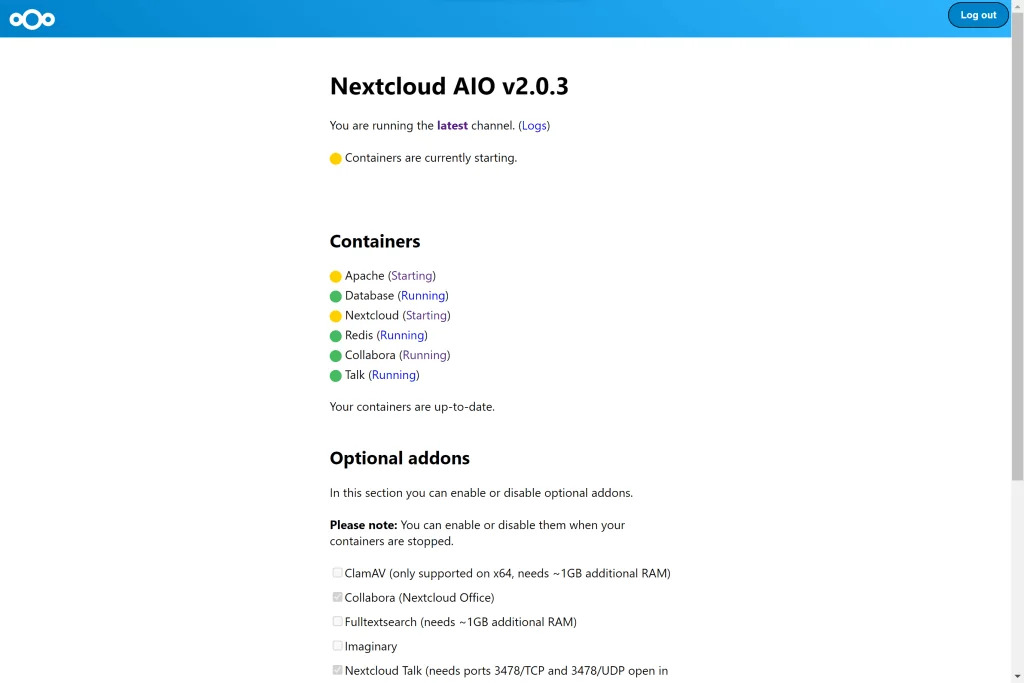
After the containers are completely downloaded, you will see the following image, which shows them starting to install and run.
After installing and running Containers, you will see the following image.
Now you can enter Nextcloud with your username and password through the link below.
http://localhost/nextcloud
Installing Nextcloud on Windows via WSL and Apache web server
WSL stands for Windows Subsystem for Linux and means Windows Linux Subsystem. By installing WSL on Windows, you can use the command line and other Linux privileges.
In this method, we want to install Nextcloud on the Windows server using WSL2 and Apache web root.
Step 1: Run Powershell
Run Powershell or Windows terminal in administrator mode.
Second step: activation of WSL and virtual machine
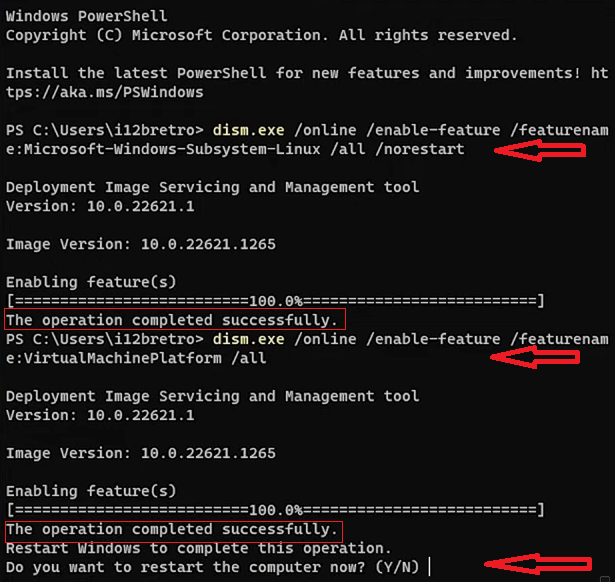
We activate the WSL and virtual machine by running the following commands in the terminal:
dism.exe /online /enable-feature /featurename:Microsoft-Windows-Subsystem-Linux /all /norestart

dism.exe /online /enable-feature /featurename:VirtualMachinePlatform /all
After both features are enabled and the question appears, type y and press enter to reboot the system.
Third step: Use WSL2
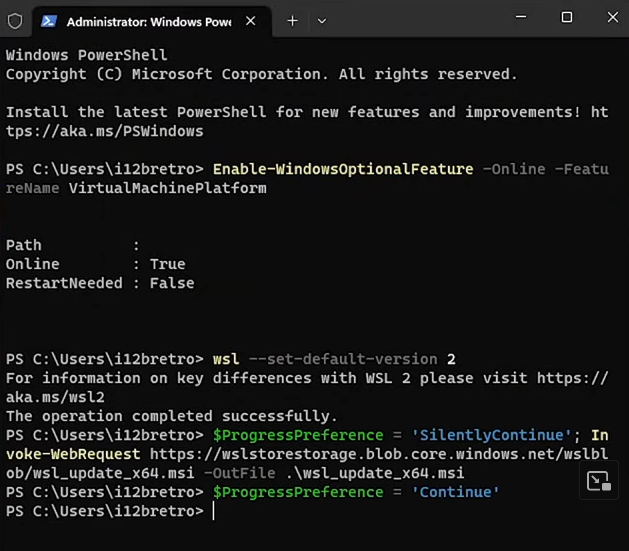
After restarting the system, enter the terminal in administrator mode and run the following commands in order to upgrade the WSL version to WSL2 and use it:
Enable-WindowsOptionalFeature -Online -FeatureName VirtualMachinePlatform
wsl --set-default-version 2
ProgressPreference
= 'SilentlyContinue'; Invoke-WebRequest
https://wslstorestorage.blob.core.windows.net/wslblob/wsl_update_x64.msi
-OutFile .\wsl_update_x64.msi
ProgressPreference = 'Continue'
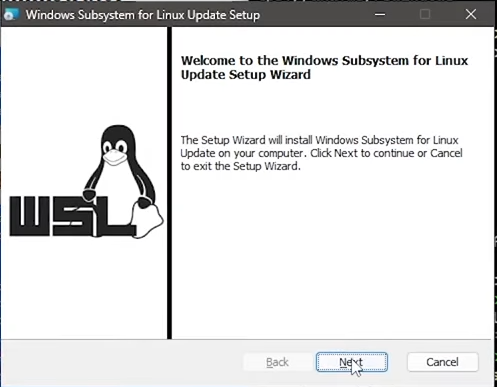
After running the last code, you will enter the WSL update installation environment. Follow the steps until the installation is complete.
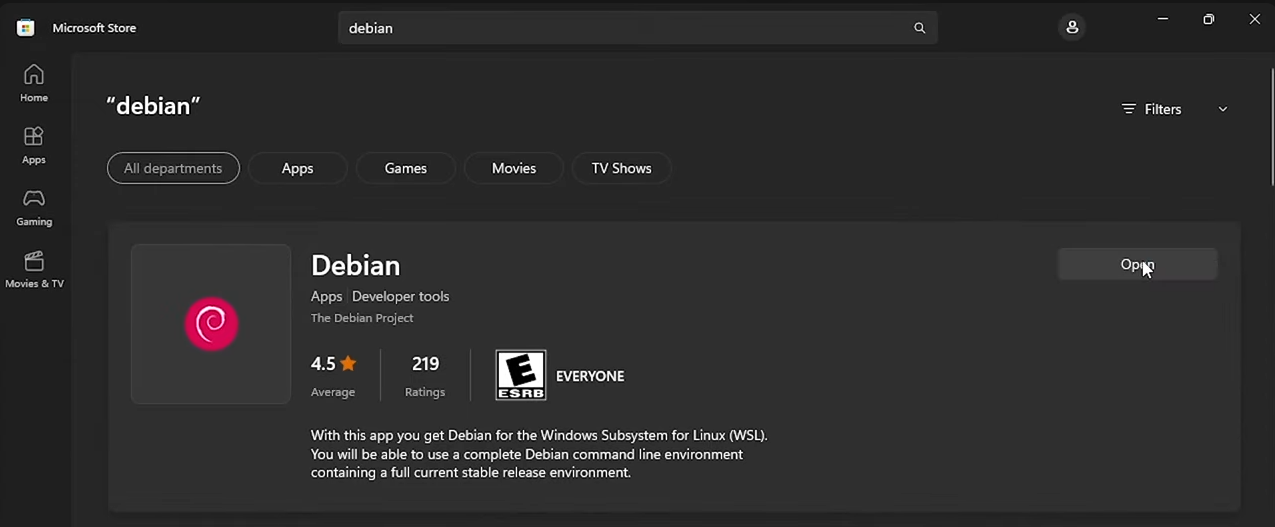
Step 4: Install the Linux distribution
Now exit the terminal and enter the Microsoft StoreDNS . Search and install one of the Linux distributions in the Search section. In this tutorial, we will install the Debian distribution.
Run Debian after installation is complete. After fully loading, Debian will ask you to create a user account in the Linux environment with a name and password. Enter the username and password of your choice.

Step 5: Install Nextcloud
This step consists of several parts that you need to do to install Nextcloud:
Installing the required updates and packages
Run the following commands in the Debian environment:
sudo apt install unzip wget -y
sudo apt install apache2 mariadb-server mariadb-client -y
sudo
apt install php7.4 libapache2-mod-php7.4 php7.4-mysql php-common
php7.4-cli php7.4-common php7.4-json php7.4-opcache php7.4-readline
php7.4-intl php7.4-json php7.4-gd php7.4-mbstring php7.4-mysql
php7.4-xml php7.4-zip php7.4-curl -y
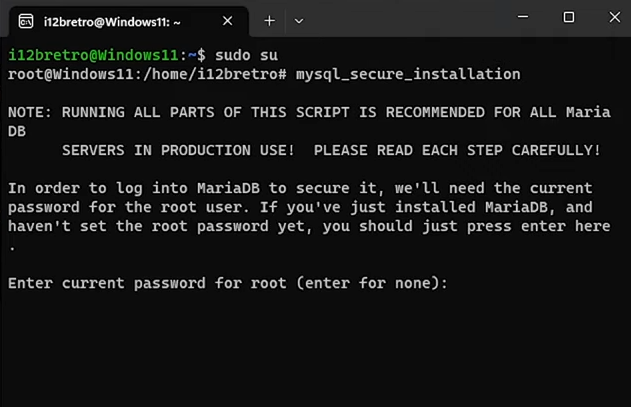
sudo service mariadb start
mysql_secure_installation
Database settings and root account
After executing the last command, press Enter to log in as the root user. In this section, we will set the access of other users and topics.
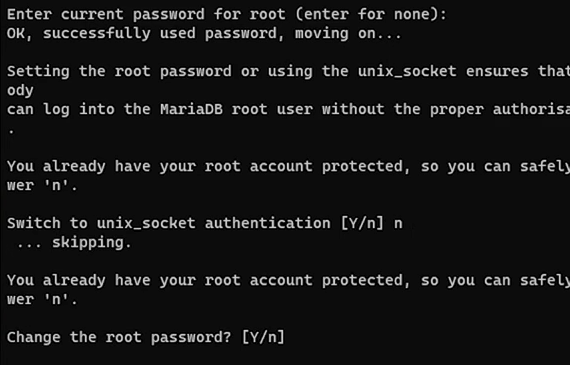
In this step, enter N so that the process does not switch to socket authentication mode:

Type Y and press Enter to set a root password. Enter the password twice to set it.
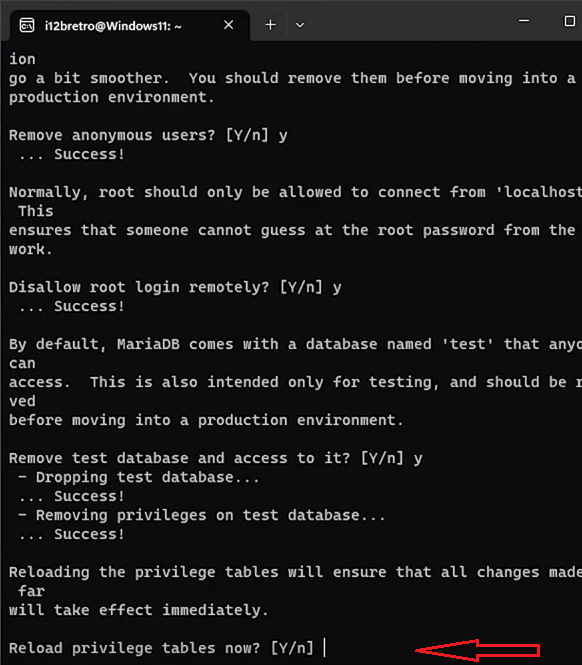
At this point, enter Y and press Enter to block other users’ access. Then enter Y and run to disable the root user’s remote login. Continue to enter Y to delete the test database.
At the end, enter the letter Y and press enter to reload the privilege tables:
Login to MySQL
Log in to MySQL using the following command and the password you set:
Create Nextcloud database and database user
Now run the following commands in order to create the Nextcloud database and the database user:
CREATE DATABASE nextclouddb;
GRANT ALL ON nextclouddb.* to 'nextcloud_rw'@'localhost' IDENTIFIED BY 'N3xtCl0ud!';
Download Nextcloud on Apache webroot
We download and extract Nextcloud in Apache web root through the following commands:
wget -O /tmp/nextcloud.zip https://download.nextcloud.com/server/releases/latest.zip
sudo unzip -q /tmp/nextcloud.zip -d /var/www
sudo chown -R www-data:www-data /var/www/nextcloud
sudo nano /etc/apache2/sites-available/nextcloud.conf
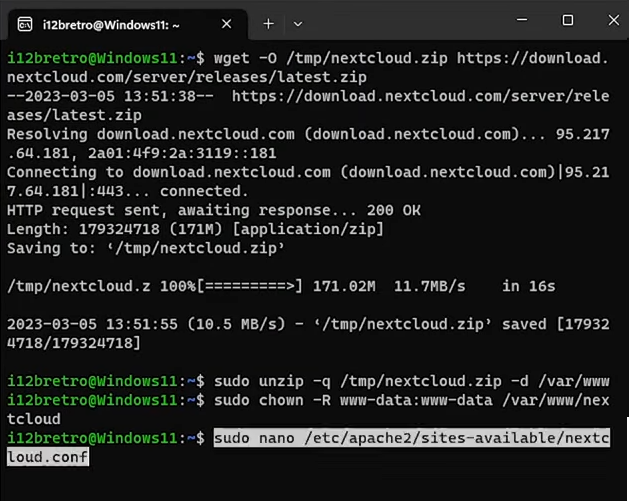
After entering the last command, you will enter the nextcloud.conf file editor, which is the new site settings file.
Setting nextcloud.conf
Enter the following codes inside it:
Alias /nextcloud "/var/www/nextcloud/"
<directory /var/www/html/nextcloud/>
Options +FollowSymlinks
AllowOverride All
Require all granted

Dav off

SetEnv HOME /var/www/nextcloud
SetEnv HTTP_HOME /var/www/nextcloud
</directory>
Press CTRL+O, then Enter and finally CTRL+X to write the codes to the file.
Site activation
After going to the terminal, enter the following codes to activate the site and reload Apache 2 to apply the changes.
sudo a2enmod rewrite headers env dir mime dav
sudo service apache2 restart
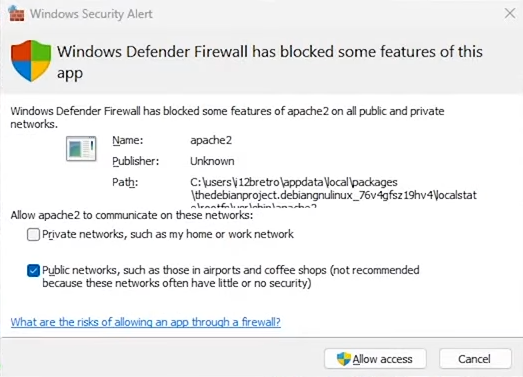
If you encounter a firewall warning, select the allow access option.
Completing the installation of nextcloud on Windows
To complete the installation of Nextcloud on the Windows server, enter the following address in your browser:
http://DNSorIP/nextcloud
You will see the nextcloud installation page at this address.
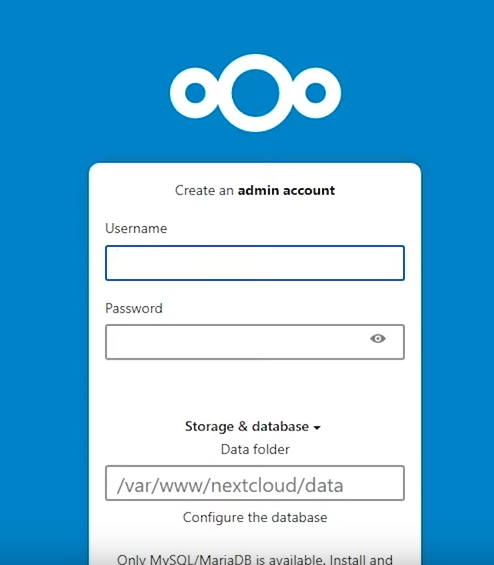
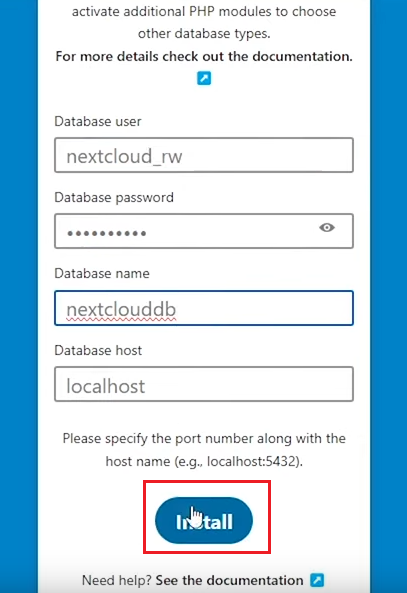
Enter the selected username and password. Click on the storage & database link to view the rest of the page. Then fill in the blanks with the following information:
username: nextcloud_rw
password: N3xtCl0ud!
database name: nextclouddb
database host: localhost
Click Install to install nextcloud. Then enter its environment.
In this section, you can install the recommended programs.
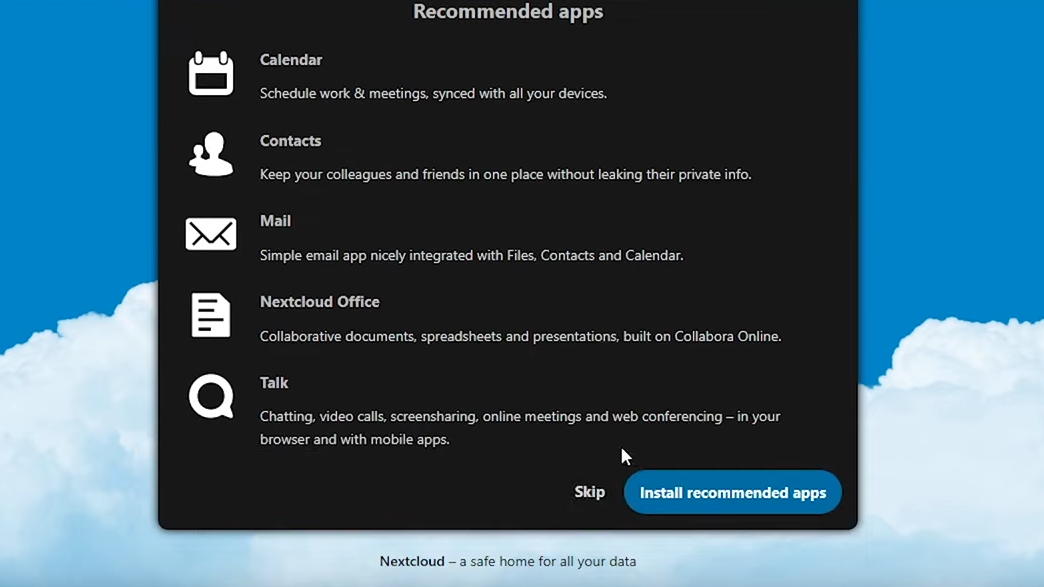
Welcome to the Nextcloud environment in WSL!
Conclusion
Nextcloud is an information storage space that has both a paid version and a free version, and its features go beyond just a storage space. Unlike other storage spaces, this platform has no volume limitations.
Depending on your preference, you can choose either Docker Desktop or the Apache web server to install Nextcloud on a Windows server.
We have thoroughly reviewed both methods of installing Nextcloud on a Windows server. By writing your questions in the comments section, you help our experts to provide answers as quickly as possible.
Latest release: 31.0.4 on April 17, 2025
Download for desktop
Connect to your Nextcloud from Windows, macOS or Linux.
Nextcloud Files
Use the desktop clients to keep your files synchronized between your Nextcloud server and your desktop. Select one or more directories on your local machine and always have access to your latest files wherever you are.
Nextcloud Talk
Use our Talk desktop client to quickly access your Nextcloud conversations without using the web browser. With the easy access to notifications, calls, screensharing and all your chats from the system tray, you’re always one step ahead.
Integrations apps
Looking for integration apps like browser add-ins for Passwords, a feedreader and more? Check our app store for integrations!
Documentation and source code
You can already find Nextcloud Desktop client packages included in openSUSE Tumbleweed, Arch Linux, Fedora, Debian and Ubuntu. Packages for Alpine Linux over here. See the latest state and more packages in this post on our forums. Can’t find packages? Ask your distribution or contribute to creating them! Note that all of those packages are community-developed and maintained, Nextcloud currently only provides the Appimage you can download above.
Nextcloud Files is using WebDAV, so you can also try out any other client you want!
Download for mobile
The Nextcloud mobile apps are available in various app stores.
Nextcloud Files
The apps allow you to access, sync and upload your data and feature instant upload for photos and videos, upload management and more features.

Other mobile apps
Looking for mobile apps for Deck, News, Passwords and more? Check our app store!
Nextcloud is using open standards like CalDAV, WebDAV and IMAP so many independent third party clients can connect to it.
Download server
Stay in control of your data! Choose a hosting provider or download the Nextcloud server software for hosting on your own server.
One click signup
Find a Nextcloud provider you can trust! Nextcloud providers from all over the world provide you 2 or more GB of storage on a 100% free single user account, with all the basic Nextcloud apps. Through Simple Signup, we help you get started! Take the default provider (based on your location) or choose another.
Enterprise solutions
For businesses, Nextcloud GmbH offers an enterprise-ready version of Nextcloud.
All-in-one
Docker image
Nextcloud GmbH maintains an all-in-one Docker image that is easy to install and maintain. You can get further information about this project on its Github page.
VM image
If you do not want to install the AIO docker image manually and want to run it inside Virtualbox, you can use the AIO-VM. However installing the docker image manually is much more flexible.
E.g. if you want to run AIO behind a reverse proxy, you need to use the docker image as this VM image is not suitable for this use case.
Read the documentation
Here you can find our manuals:
Need further help?
Discuss using, installing or maintaining Nextcloud in our support channels.
These consist of users helping each other. Consider helping out others, too!
Browse dozens of free apps and services you could use with your Nextcloud on the Nextcloud app store.
Contribute to Nextcloud server or apps

Help test our clients:
NextCloud is an excellent self-hosted syncing tool. Trouble is, it only runs on Linux, so if you don’t have a Linux server, you won’t be able to deploy it without virtualization or containerization. Thankfully, the NextCloud project makes an “all in one” virtual machine you can download and deploy on any OS, including Windows Server. Here’s how to set it up on your system.
How to install VirtualBox on Windows Server
NextCloud is a Linux application, and the developers aim to keep it that way. However, they provide an “all in one” virtual machine OVA for VirtualBox, that Windows admins can quickly deploy. However, you’ll first need to install the VirtualBox hypervisor.
To start, head over to the official VirtualBox website. Once there, click on “Downloads,” and click on the “Windows hosts” link to download the installation EXE. When downloaded, open up Windows Explorer, select the “Downloads” folder, and launch the installation EXE.
Go through the installer and set up VirtualBox on Windows Server. Once it is fully installed, launch it and move to the next section to get your hands on the NextCloud AIO VM.
How to download the NextCloud AIO VM
The NextCloud AIO VM is available for download on the official NextCloud website. Head to the official download page. Once there, download “Nextcloud-AIO.ova” to Windows Server. The OVA file is about 2 GB in size, so the download is not instantaneous.
When the download is complete, look at the “readme” file on the download page. While it’s not a requirement, you’ll want to check it out to see what the NextCloud developers have to say. To read the “readme.md” file, open it in Notepad.
How to import the NextCloud AIO VM
The Nextcloud AIO VM is pre-configured with a Linux distribution, and everything you need to deploy NextCloud on a Windows Server host. However, it needs to be imported first. To import the OVA file, do the following.
First, open up the Windows Explorer app, and select the “Downloads” folder. Then, right-click on the “Nextcloud-AIO.ova” file, and select the “Open with” menu. Finally, locate the “VirtualBox Manager” option.
When you select the “Open with” VirtualBox option, you’ll see the “Import Virtual Appliance” window. The “Import Virtual Appliance” page will show you everything there is to know about the Nextcloud VM, including the guest OS, RAM usage, CPU usage, etc. Click the “Finish” button to import it into your system.
With the OVA imported to VirtualBox, right-click on it and select “Settings.” Once inside of the “Settings” window, locate the “Network” section. By default, they set the VM to NAT. Change it to “Bridged Adapter,” so that it can interact with other devices on your network.
Once the AIO VM is open, access the terminal prompt inside of it, and run the following command to reveal its LAN IP address.
hostname -I
After executing the command above, take the IP address and load up a web browser to the following URL. Then, follow the next section of the guide to get going with NextCloud on your Windows Server.
https://ip-of-vm:8080/setup
How to set up your NextCloud sync server
Once you’ve loaded up the setup page, you’ll see a message. This message says “Nextcloud AIO stands for Nextcloud All In One and provides easy deployment and maintenance with most features included in this one Nextcloud instance.” Copy the password it provides, and click on the “Open Nextcloud AIO login.”
After clicking on the “Open NextCloud AIO login” button, enter the password you’ve previously entered. This will give you access to the NextCloud Admin UI. When you log in, you’ll see “Mastercontainer update.” Click on the update button to update the NextCloud instance.
Now that it is up to date, type in the domain for your AIO instance. After adding it, click on the “submit” button. Ensure you have this domain’s DNS configured. For more information on DNS settings, check the official instructions.
Once you’ve configured your domain, you’ll be on the next page. On this next page, you’ll see “Optional addons.” These addons are “ClamAV” “Collabora,” “Fulltextsearch,” “Imaginary,” and “Nextcloud Talk.” Check the boxes you wish to add to your NextCloud instance. Then, select the “Start containers” button.
When you click on the “Start containers” button, Nextcloud AIO will download and launch the containers. Then, you’ll be taken to the next page in the installer. On this page, you’ll see “Containers are currently starting”. When they’re all started, you’ll see an “Open your Nextcloud” button.
Note: save the initial NextCloud password, as you’ll need it to log into the interface.
Click on the “Open your Nextcloud” button and use the “initial Nextcloud” password provided to log in. From here, you can create users, change the initial password, and start uploading files to your Nextcloud.

Обращаем ваше внимание, что клиент Nextcloud работает исключительно по HTTPS. Поэтому, если вы используете HTTP, рекомендуем написать запрос в техподдержку о подключении HTTPS на ваш сервер. Предварительно вам необходимо будет создать A-запись на вашем DNS сервере:
https://mclouds.ru/articles/cloud-disk/func/add-domain/
Создать запрос вы можете, воспользовавшись следующей статьёй: Создание запроса в техподдержку
Перейдите по ссылке, чтобы скачать клиент Nextcloud для загрузки файлов с ПК или мобильных устройств.
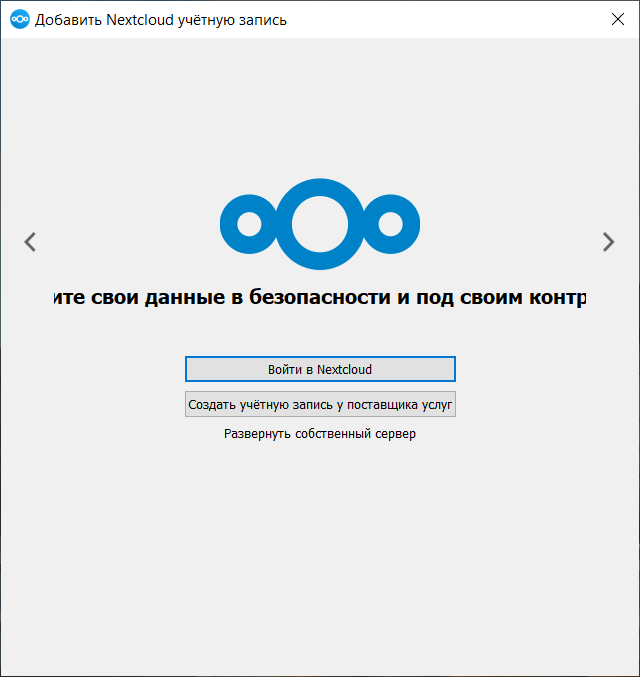
Скачем клиент для Windows 10 и выполним установку. После установки откроется подключение к вашему облачному диску, нажмите «Войти в Nextcloud»
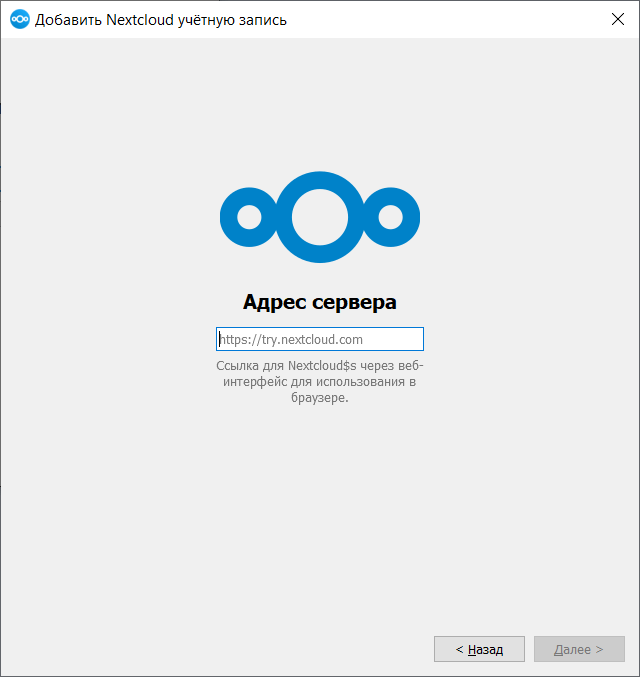
Далее укажите адрес сервера. Это может быть IP-адрес из инструкции или ваш домен, к которому подключили ваш облачный диск
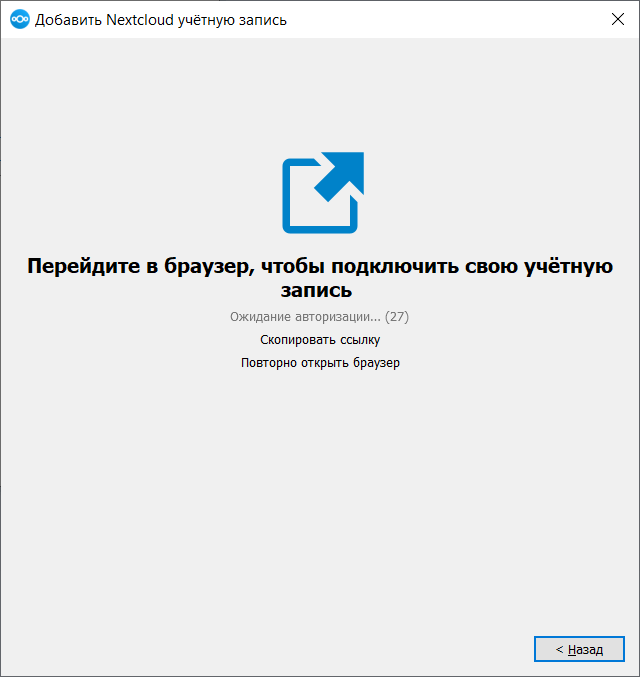
Далее скопируйте ссылку и перейдите по ней в браузере для синхронизации вашего аккаунта с клиентом на вашем ПК
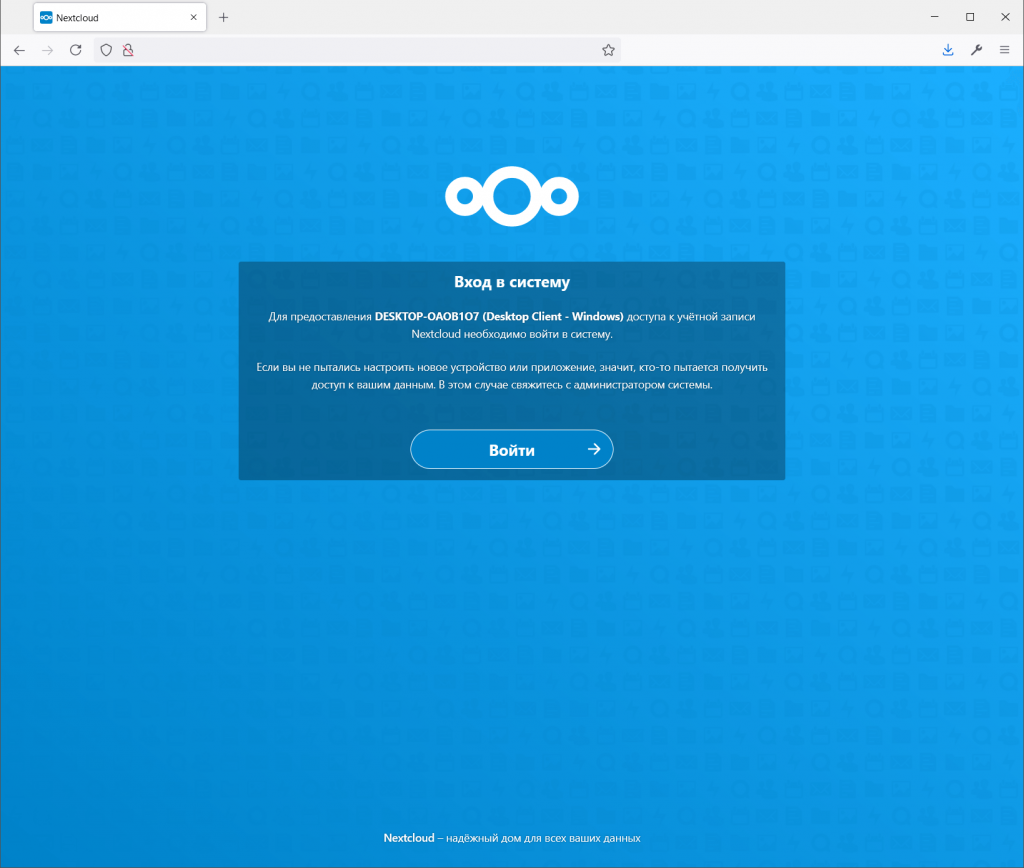
Проверьте название вашего ПК и нажмите “Войти”
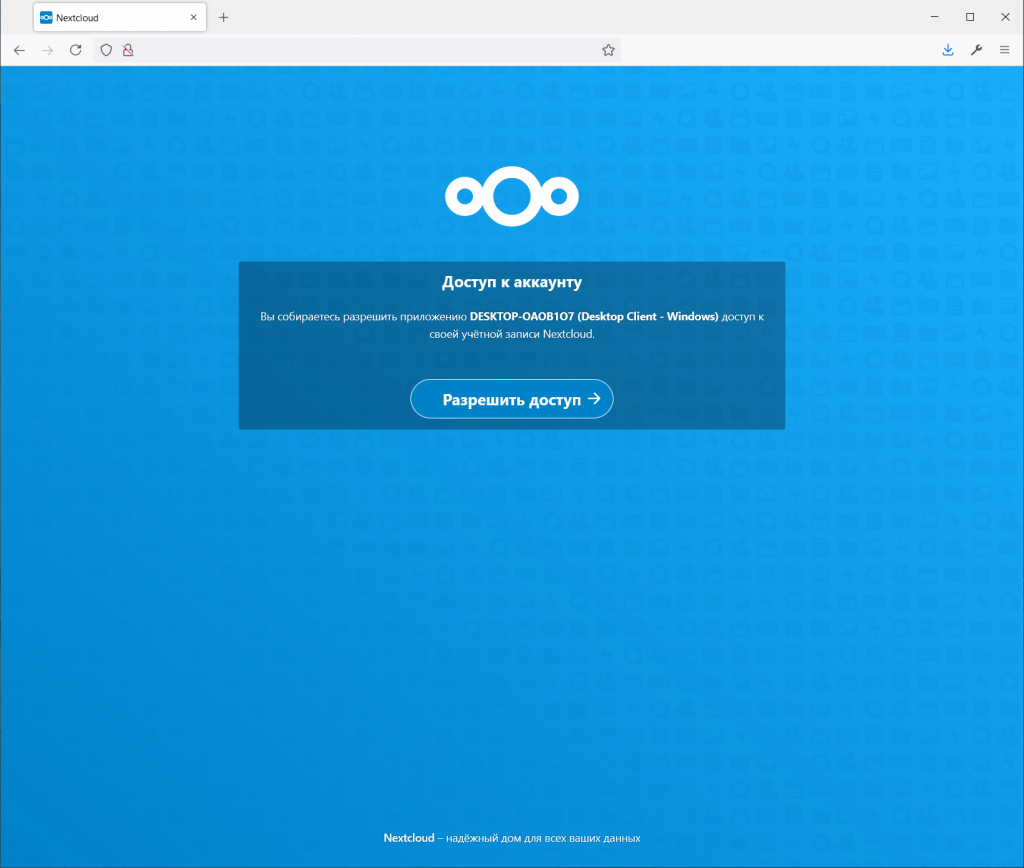
Далее нажмите “Разрешить доступ”
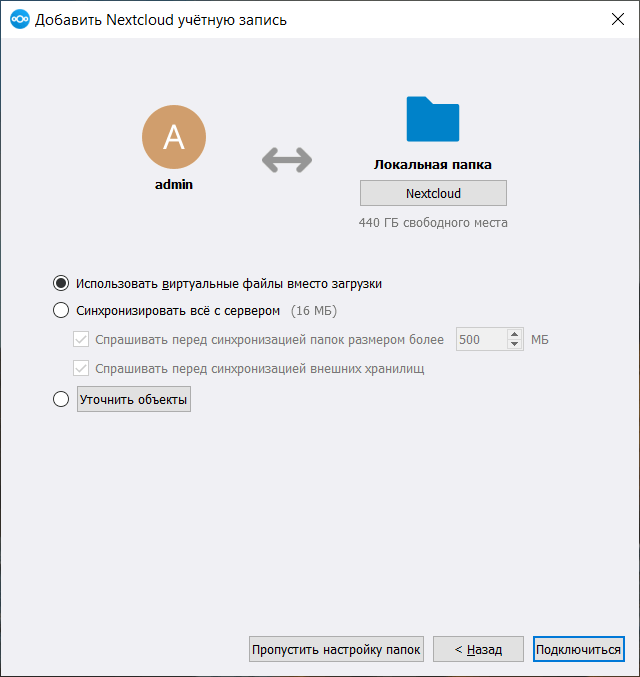
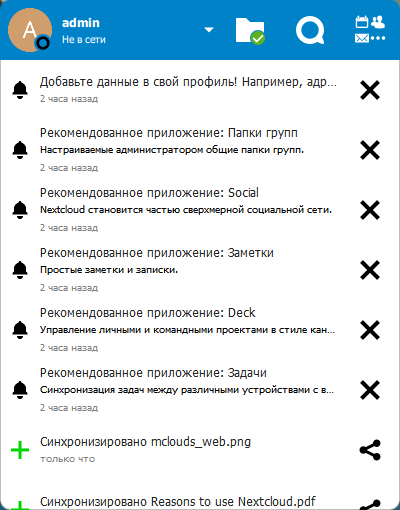
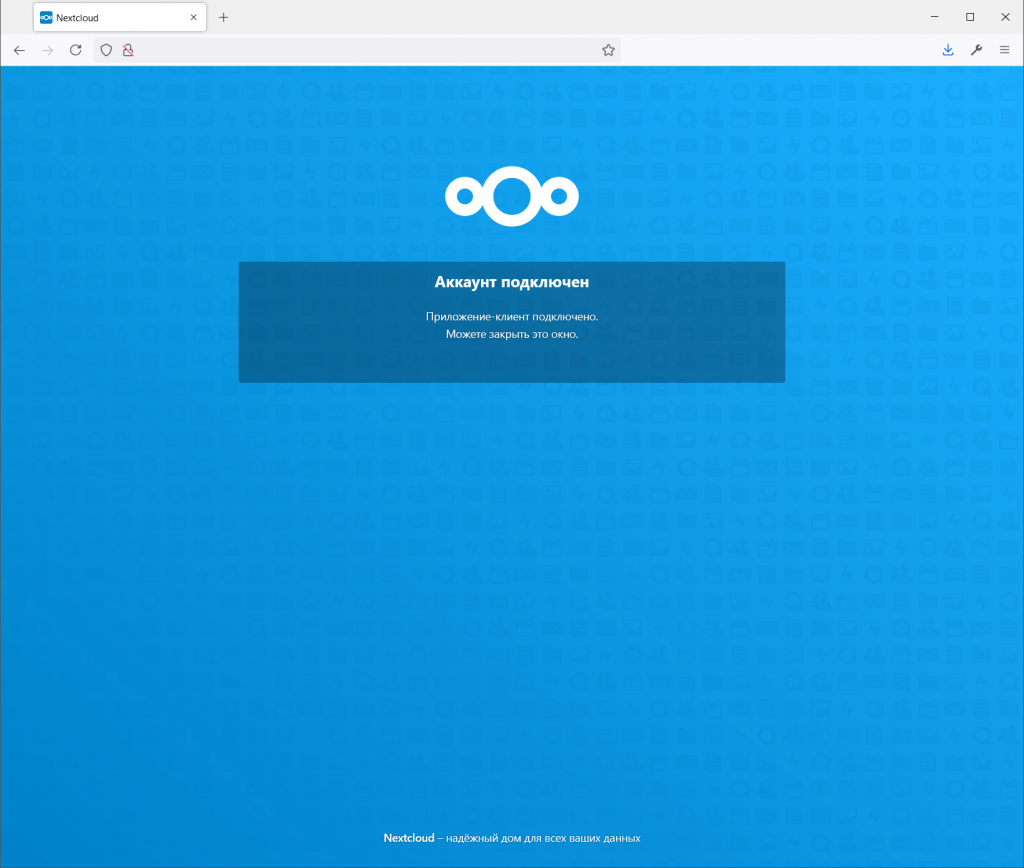
После успешного подключения вы увидите такую страницу
В клиенте для вашего ПК будут предложены к выбору параметры синхронизации файлов