
- To disable, enable, and restart a network adapter on Windows 11, go to Settings > Network & internet > Advanced network settings.
- You can also disable, enable, or restart a network adapter from the Command Prompt, PowerShell, Device Manager, and the Control Panel on Windows 10 and 11.
All modern computers come with network adapters today so you can connect to the internet and communicate with other devices. However, even the most sophisticated network adapters, whether wired (ethernet) or wireless (wi-fi), can run into issues and not perform as they are supposed to. At this point, a simple restart of the network adapter usually fixes the issues.
By restarting the network adapter, you avoid rebooting the complete computer, and the basic connectivity issues are also resolved.
You may want to restart your network adapter if your computer hasn’t had downtime in quite some time and the internet speed isn’t optimized when you are having trouble connecting to the wireless SSID, or if you are experiencing any sort of issues with network connectivity. Restarting the network adapter should be the first of many steps for troubleshooting.
On Windows 11, restarting the ethernet, wi-fi, or virtual network adapter involves turning it off and then on again. Therefore, the methods discussed in this post to restart any network adapter first let you disable the adapter, and then re-enable it. In case you want to simply disable or enable a network adapter on your Windows PC, you can use the same methods discussed below.
Note: Restarting and resetting the network adapter are two different things. When you reset the network settings, all configurations are lost and need to be redone.
Table of Contents
Restart the network adapter from Settings in Windows 11
Microsoft has introduced the ability to disable and enable any network adapter on your computer directly from the Settings app. You no longer have to open the Control Panel to do it.
Unfortunately, this option is not available in Windows 10.
Use the following steps to restart the ethernet or the Wi-Fi network adapter from the Windows 11 Settings app:
-
Press the Windows Key + i to open the Settings app.
-
Switch to the “Network & internet” tab from the left.
-
Scroll down and click “Advanced network settings.”
 1")
Open advanced network settings -
Click Disable in front of the network adapter that you want to disable or restart.
Disable the network adapter from Settings -
In case you want to restart the adapter, click Enable in front of it.
Enable the network adapter from Settings
 1")
 2")
 3")
If you re-enable the network adapter, you have successfully restarted it. If you were encountering issues with the adapter, check to see if they have been resolved.
Restart the network adapter from Control Panel
Traditionally, you can also restart the network adapter from the Control Panel. This method (and the methods below) also works for Windows 10.
-
Press the Windows Key + R to open the Run Command box.
-
Type in “ncpa.cpl” and press Enter to open the Network Connections applet.
-
Right-click on the adapter that you want to disable/restart and click Disable.
 4")
Disable network adapter from the Control Panel -
To re-enable the adapter, right-click the adapter again and click Enable.
Re-enable the network adapter from the Control Panel
 4")
 5")
Restart the network adapter from Device Manager
To enable, disable, or restart any network adapter of your computer from the Device Manager, use these steps:
-
Press the Windows Key + R to open the Run Command box.
-
Type in “devmgmt.msc” and press Enter to open the Device Manager.
-
Click on “Network adapters” to expand it.
 6")
Expand Network Adapters in the Device Manager -
Right-click on the adapter that you want to disable/restart and click “Disable device.”
Disable network adapter from the Device Manager -
If asked for a confirmation, click Yes.
Confirm action -
To re-enable the adapter, right-click the adapter again and click “Enable device.”
Enable the network adapter from the Device Manager
 6")
 7")
 8")
 9")
After performing the steps above, the selected network adapter will be restarted and should perform optimally now.
Restart the network adapter from PowerShell
If you prefer using the Windows command line instead, then you can use the steps below to disable, enable, or restart the ethernet or the wireless network adapter using Windows PowerShell:
-
Open an elevated PowerShell instance.
-
Run the following command to list all the network adapters:
Get-NetAdapter | format-table 10")
List all network adapter details in PowerShell -
Note down the name of the network adapter that you want to restart/disable.
-
Now use this command while entering your adapter’s name in place of [NetworkAdapterName] to disable it:
Disable-NetAdapter -Name “[NetworkAdapterName]” -Confirm:$false
Disable network adapter from PowerShell -
To re-enable the adapter, use this command:
Enable-NetAdapter -Name “[NetworkAdapterName]” -Confirm:$false
Enable/restart network adapter from PowerShell
 10")
 11")
 12")
Restart the network adapter from Command Prompt
You can also use the Command Prompt to restart any connected network adapter. Here is how:
-
Run the Command Prompt with administrative privileges.
-
List all the network adapter details with this command:
netsh interface show interface
List all network adapter details in Command Prompt -
Note down the name of the network adapter that you want to restart/disable.
-
Now use this command while entering your adapter’s name in place of [NetworkAdapterName] to disable it:
netsh interface set interface “[NetworkAdapterName]” disable
Disable network adapter from Command Prompt -
To re-enable the adapter, use this command:
netsh interface set interface “[NetworkAdapterName]” enable
Enable/restart network adapter from Command Prompt
 13")
 14")
 15")
Ending words
Restarting the network adapters on Windows was already an easy task. However, Windows 11 has made it even more convenient.
Although the Settings app was supposed to replace the Control Panel, Microsoft still hasn’t entirely accomplished the task. They are gradually shifting the controls from the Control Panel over to the Settings app, and the addition of the ability to disable and enable the network adapters from the Settings app is part of that ongoing agenda.
Once you make changes in the server network configuration file, then require to restart the server networking service in order to reflect the changes.
This guide will describe the steps to restart the network interface or network adapter in the Linux and Windows servers.
Restarting Network interface/adapter in Linux OS
Ubuntu / Debian
-
Use the following command to restart the server networking service.
# sudo /etc/init.d/networking restart
or
# sudo /etc/init.d/networking stop
# sudo /etc/init.d/networking start
else
# sudo systemctl restart networking
-
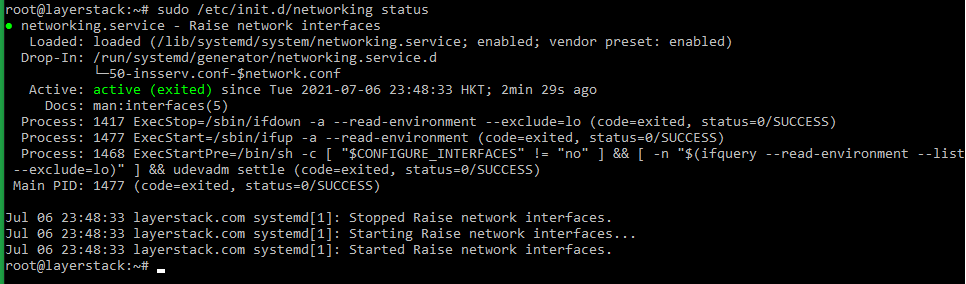
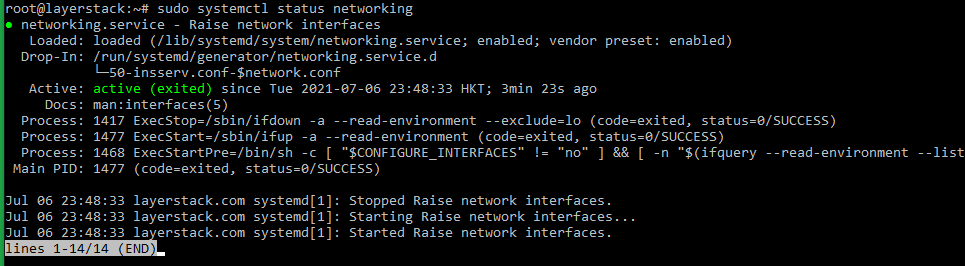
Once this is done, use the following command to check the server network status.
# sudo /etc/init.d/networking status
or
# sudo systemctl status networking


Ubuntu 17.10 and higher versions use NetPlan as the default network management tool and its configuration files are written in YAML syntax with a .yaml file extension.
Run the below command to update networking and then any changes that have been made to the network will take effect:
# netplan apply

AlmaLinux
-
Use the following command to restart the server networking service.
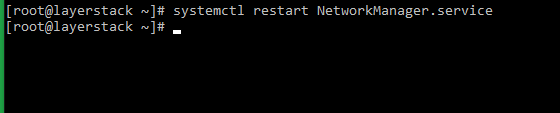
# nmcli networking off
# nmcli networking on
or
# systemctl restart NetworkManager
-
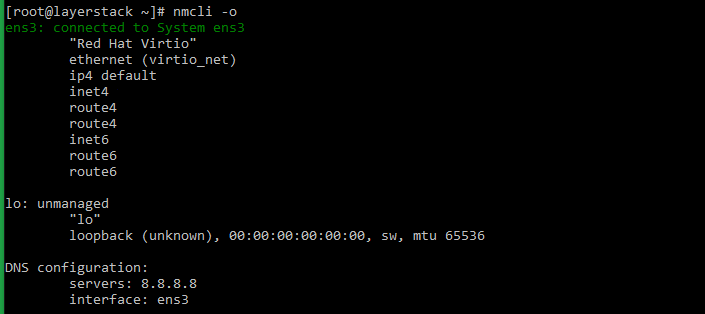
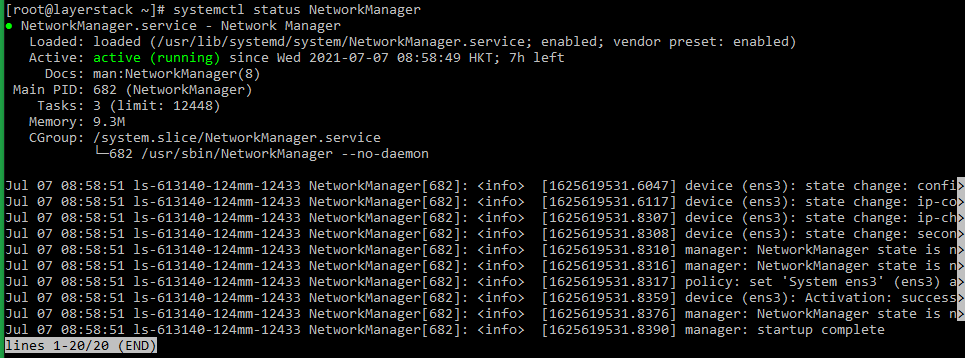
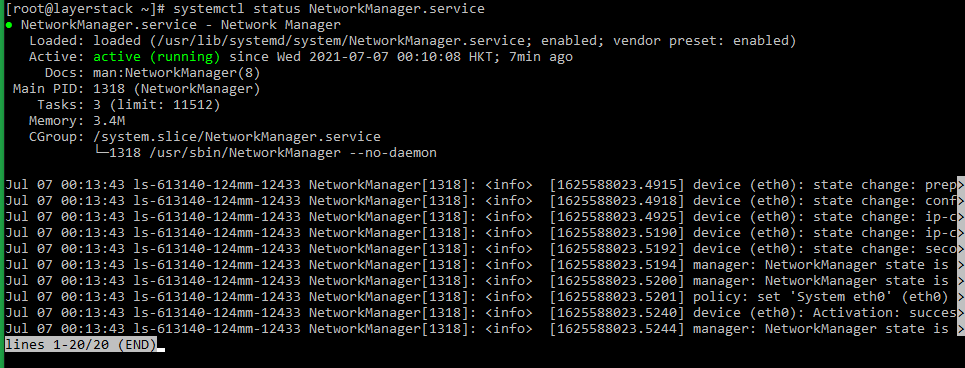
Once this is done, use the following command to check the server network status.
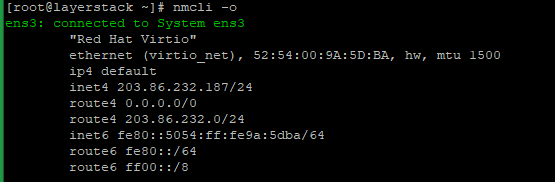
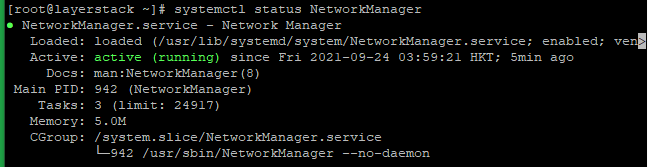
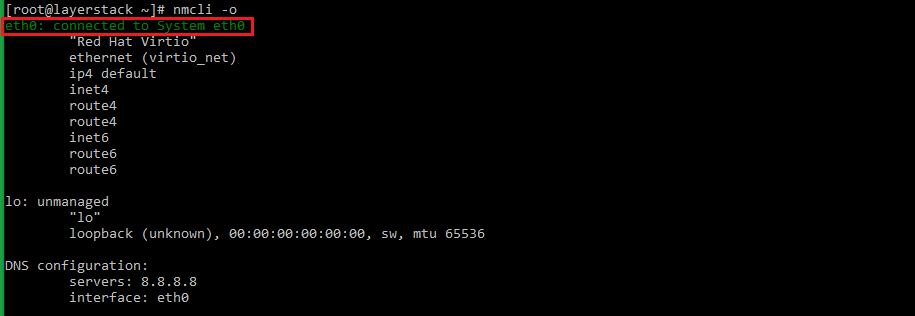
# nmcli -o
or
# systemctl status NetworkManager


Rocky Linux
-
Use the following command to restart the server networking service.
# nmcli networking off
# nmcli networking on
or
# systemctl restart NetworkManager
-
Either of the below commands can be executed to check the status of the networking service.
# nmcli -o
or
# systemctl status NetworkManager


CentOS 8
-
Use the following command to restart the server networking service.
# nmcli networking off
# nmcli networking on
or
# systemctl restart NetworkManager.service
-
Either of the below commands can be executed to check the status of the networking service.
# systemctl status NetworkManager.service
or
# nmcli -o

CentOS 7
-
Use the following command to restart the server networking service.
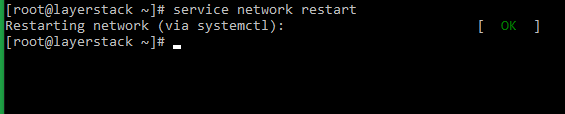
# systemctl restart network.service
or
# service network restart
or
# /etc/init.d/network restart
-
The status of the networking service can be checked by making use of any of the below commands.
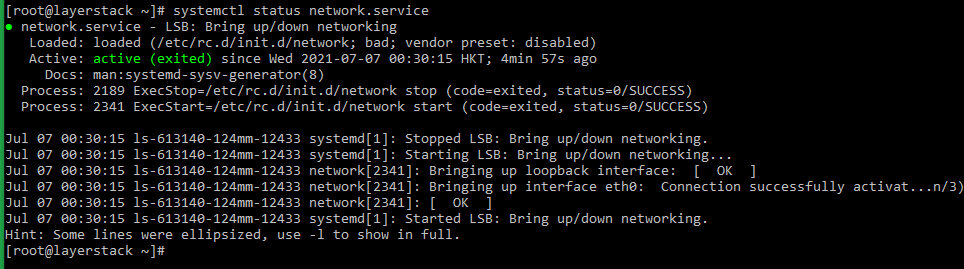
# systemctl status network.service
or
# service network status
or
# /etc/init.d/network status


CentOS 6
-
Use the following command to restart the server networking service.
# service network restart
or
# /etc/init.d/network restart
-
Once this is done, use the following command to check the server network status.
# service network status
or
# /etc/init.d/network status


Windows OS
Using the Enable/Disable mode of network adapter
-
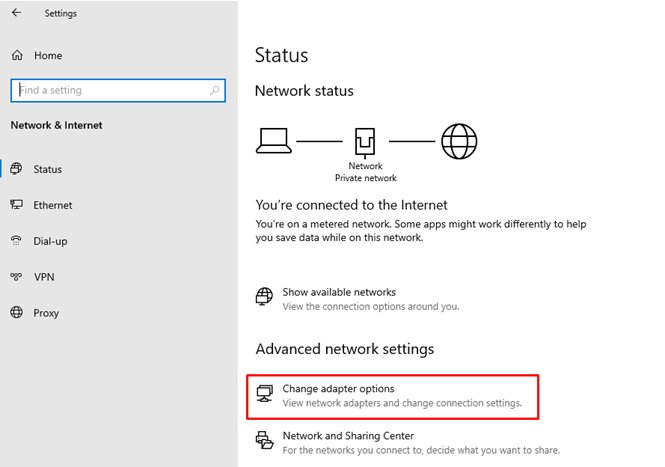
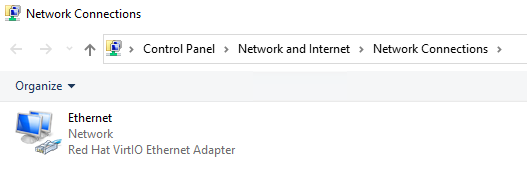
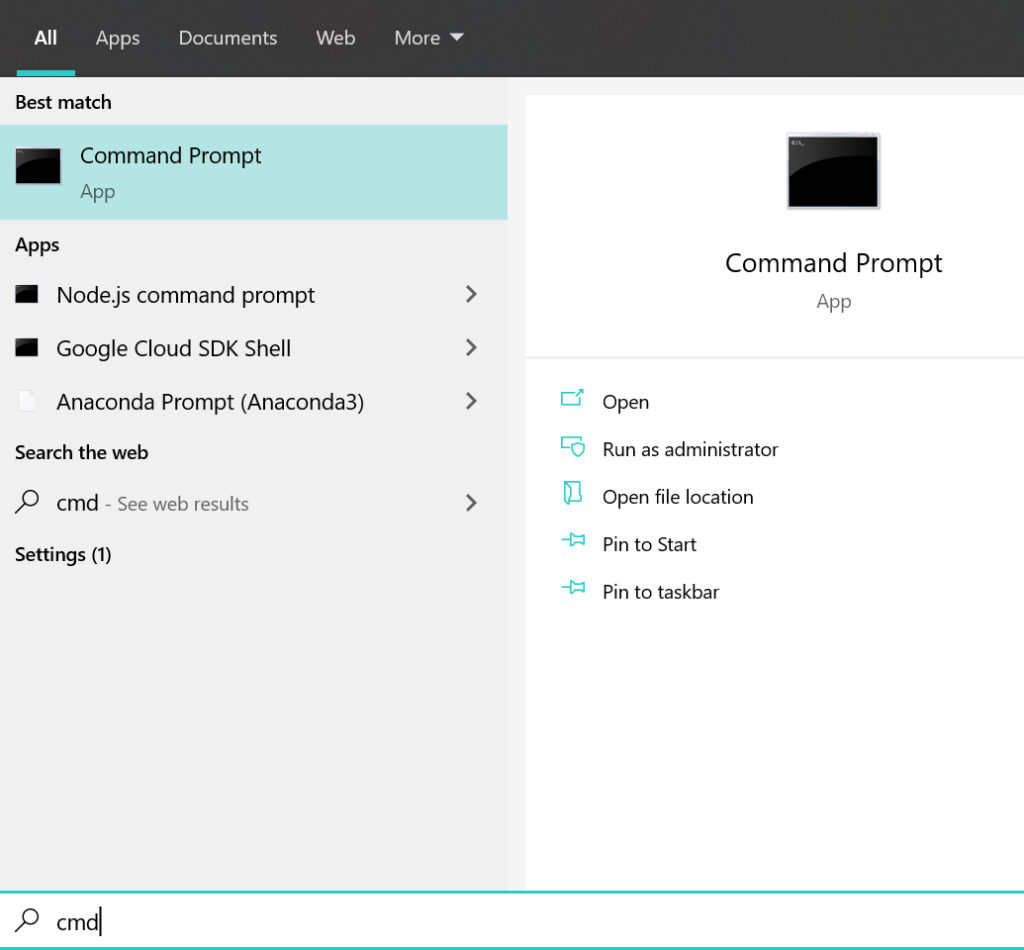
Click on the Windows key to open start and search
Settingsand go to theNetwork and Internetthen click onChange adapter optionwhich is shown in the below image.
Then will get the below page:
-
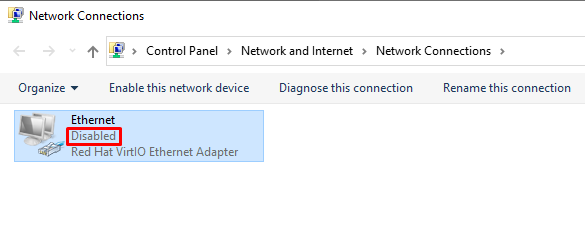
Right-click the
Ethernet deviceand click onDisableoption.
-
Again, Right-click the
Ethernet deviceand click onenableoption. -
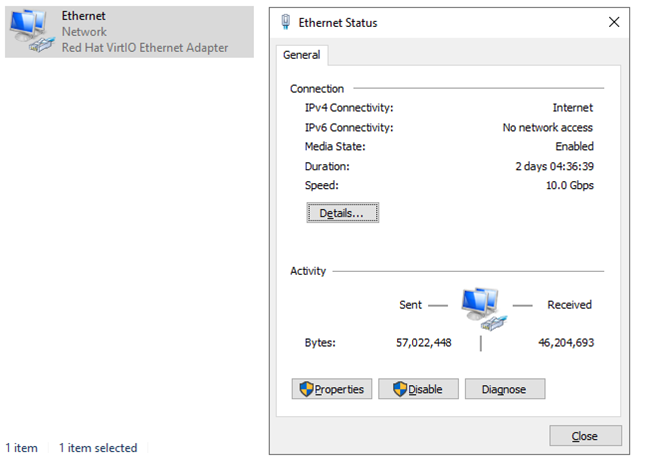
Once this is done, Right-click the
Ethernet deviceand click onstatus.


Using the netsh command
In Windows OS, the command line method involves using the netsh command for resetting the network and TCP/IP stack.
-
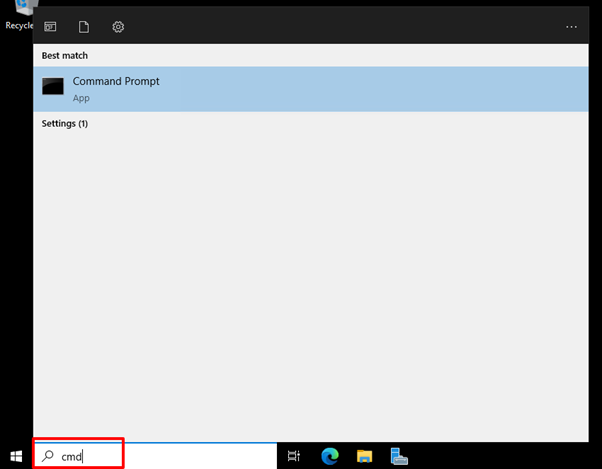
Go to
Startand typeCMDin the search window.
-
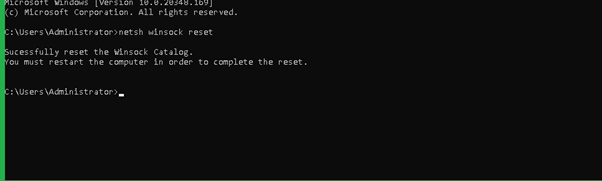
Once opened the
Command Prompt, the command for restarting the network interface, as provided below, can be executed.> netsh winsock reset
-
Regularize the networking process as indicated in the message after restarting the server.
-
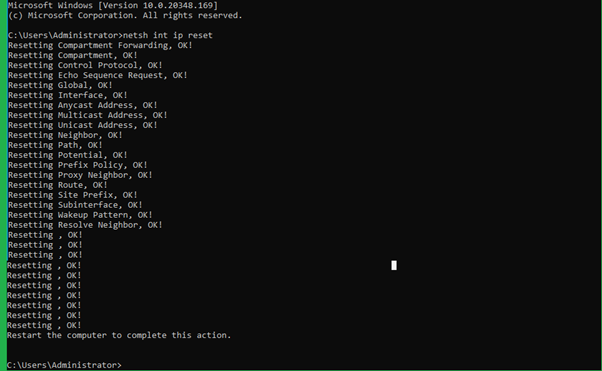
In addition to the above command, may also use the command which resets the TCP/IP stack. The command is as follows.
> netsh int ip resetThe output will be as follows:
Using the Network Reset option (Windows 10/11)
The reset button method can be used in Windows 10 & 11 versions by which the user can restart the Network interface. The steps for this are given below.
-
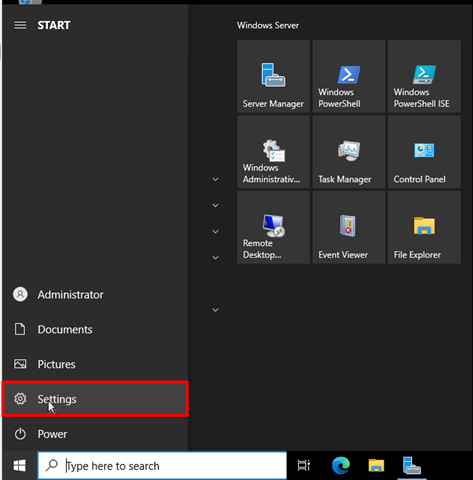
Click on Windows
Start Menubutton and then selectSettings.
-
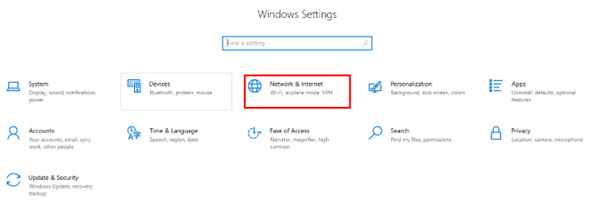
From the
Settingsoption, selectNetwork & Internetoption.
-
Here you would be able to see the adapter options i.e
Advanced Network Settings, from which you can click onNetwork Resetoption. -
Click on the
Reset Nowbutton on the right side ofNetwork resetoption and you will be prompted for the confirmation. ChooseYesfor proceeding with resetting the network settings.Once clicked on
Yes, the network adapter will start to reset and you will be able to restart the network interface.
Related Tutorials
-
How to check if TCP / UDP port is open on Linux & Windows Cloud Servers
-
Installing telnet client on Linux and Windows Cloud Servers
-
How to check TCP/IP configuration with ipconfig on Windows Cloud Servers
-
How to check TCP/IP configuration with ifconfig on Linux Cloud Servers
-
How to configure the Static IP Address & Network Card for Linux & Windows Cloud Servers
Очень часто при работе по удаленке надо передернуть сетевой кабель или отключить и включить сетевой адаптер. Но раз мы не можем это сделать физически, приходится просить кого-то это сделать или изощряться такими способами. В Linux это происходит легко, через ssh вбиваем ifdown eth0 & ifup eth0 и всё норм. В Windows приходится провернуть следующее…
Создаём bat-ник, вписываем туда следующий скрипт обязательно в кодировке ANSI
netsh interface set interface name="Подключение по локальной сети" admin=DISABLED

ping 127.0.0.1 -n 6 > nul

netsh interface set interface name="Подключение по локальной сети" admin=ENABLED
и запускаем от имени администратора.
где «Подключение по локальной сети» — это название сетевого адаптера в вашей Windows. Оно может называться «Подключение по локальной сети 2» или «Подключение по локальной сети 3«. Я для удобства переименовал подключения в LAN, WiFi, Internet, Router или Bluetooth.
Замечания: работает не только в Windows 7, но также и в Windows 8 и Windows 10.
P.S. один раз скрипт не заработал, пришлось рано утром ехать на объект, так что применяем на свой страх и риск
Отблагдарить автора статьи также можно переводом, +100 вам в карму!
bat windows скрипт
- Заметки
- Windows
03.06.2021
Перезапуск сетевого интерфейса через команую строку поможет вам в том случае, если вы подключаетесь к рабочей машине удалённо. В этом случае через графический интерфейс этого вам просто не сделать, так как вы просто напросто потеряете соединение.
Как перезапустить сетефой интерфейс через CMD
Создаём Bat файл с следующим содержанием, где указываем имя вашего подключения.
netsh interface set interface name="Подключение по локальной сети" admin=DISABLED
ping 127.0.0.1 -n 6 > nul
netsh interface set interface name="Подключение по локальной сети" admin=ENABLED
Теперь для переподключения сетевого интерфейса вам необходимо просто запустить этот батник от имени администратора.
Автору на кофе ☕ или просто поднять мотивацию писать больше статей для вас 😉 !
Отдельное спасибо всем, кто отправляет донатики 😀! Очень приятно и неожиданно. Благодаря вам сайт может и в дальнейшем обходиться без рекламных баннеров.
Windows 10 often creates problem with network
adapters connection issues with your laptop or computer like, cant connect this
network when you are trying to connect to wifi and we can easily reset network
adapter in windows 10 using cmd (command prompt) by running commands in cmd
shell. Lets see how to reset network adaptor in windows 10 using cmd.
Reset network adapter windows 10 cmd:
Step 1: In windows
search bar type cmd, Right click and Run as Administrator.
Note: You can also open PowerShell and run as
administrator also.
Step 2: Once command prompt is open, check with the
list of adaptors.
Step 3: In command prompt Type: netsh interface show
interface and press enter.
Note: This will list all the lists of network adaptor
on your laptot. Find your wifi network adaptor name here.
Step 4: Now type: netsh interface set interface name= “networkadaptorname” admin=disabled
Note: Once you run the above command in cmd, it will
disable your network adaptor
Step 5: Now run this command in cmd to enable: type: netsh interface set interface name= “networkadaptorname” admin=enabled.
Note: Once you run above command it will automatically
identify the network and connect to your available wifi network without fail.
Creating batch file to reset network adapter in windows
10 using cmd:
Step 6: Now create a batch file to automate this
process.
Step 7: Create a new txt file on your desktop and
copy and paste this command in txt file
- netsh interface set interface name= “networkadaptorname”
admin=disabled - netsh interface set interface name= “networkadaptorname”
admin=enabled
Step 8: Now save txt file as reset-network-adaptor-wifi
with extension .bat on your desktop.
Step 9: Now right click on created .bat file and click
run as administrator, now it will reset network adaptor in windows 10 ( enable
and disable) automatically for you.
Why to create dat file to reset network Adaptor in
windows 10?
Creating dat file to reset network adaptor will work as magic
settings/cmds in windows 10 is very useful in many ways, it consumes time and
it is also very difficult to remember all cmd commands and perform steps to reset
network adapter in windows 10. If you create
dat file with simple clicks your network adaptor issues in windows 10 will be
resovled.
What is the command prompt to reset network settings?
To reset network settings in windows 10 using cmd ;
Type ipconfig /flushdns
Type ipconfig /registerdns” and
press Enter.
Type “ipconfig /release” and press Enter.
Type “ipconfig /renew” and press Enter.
Type “netsh winsock reset” and press Enter.
After performing
all commands restart your computer.
How to enable network adapter using command prompt windows 10?
Open CMD as administrator and type: netsh interface set interface name= “networkadaptorname” admin=enabled.
How to Disable network adapter using command prompt windows 10?
Open CMD and run as administrator and Type: netsh interface set interface name= “networkadaptorname” admin=disabled
Why is my wireless adapter not working?
If wireless network drivers are not updated on your computer then you may see wireless adapter not working or disconnecting when connected all most all times.
Ramanahttps://www.asavvyweb.com
Ramana Tula is a — Technical Content Writer and he is a Full stack Web and Android Developer also — SEO Manager and also manages Digital Marketing.