
При запуске новых сервисов в Windows, вы можете обнаружить что нужный порт уже занят (слушается) другой программой (процессом). Разберемся, как определить какая программ прослушивает определенный TCP или UDP порт в Windows.
Например, вы не можете запустить сайт IIS на стандартном 80 порту в Windows, т.к. этот порт сейчас занят (при запуске нескольких сайтов в IIS вы можете запускать их на одном или на разных портах). Как найти службу или процесс, который занял этот порт и завершить его?
Чтобы вывести полный список TCP и UDP портов, которые прослушиваются вашим компьютером, выполните команду:
netstat -aon| find "LIST"
Или вы можете сразу указать искомый номер порта:
netstat -aon | findstr ":80" | findstr "LISTENING"
Используемые параметры команды netstat:
- a – показывать сетевые подключения и открытые порты
- o – выводить идентфикатор професса (PID) для каждого подключения
- n – показывать адреса и номера портов в числовом форматер
По выводу данной команды вы можете определить, что 80 порт TCP прослушивается (статус
LISTENING
) процессом с PID 16124.

Вы можете определить исполняемый exe файл процесса с этим PID с помощью Task Manager или с помощью команды:
tasklist /FI "PID eq 16124"
Можно заменить все указанные выше команды одной:
for /f "tokens=5" %a in ('netstat -aon ^| findstr :80') do tasklist /FI "PID eq %a"
С помощью однострочной PowerShell команды можно сразу получить имя процесса, который прослушивает:
- TCP порт:
Get-Process -Id (Get-NetTCPConnection -LocalPort 80).OwningProcess - UDP порт:
Get-Process -Id (Get-NetUDPEndpoint -LocalPort 53).OwningProcess

Можно сразу завершить этот процесс, отправив результаты через pipe в командлет Stop-Process:
Get-Process -Id (Get-NetTCPConnection -LocalPort 80).OwningProcess| Stop-Process
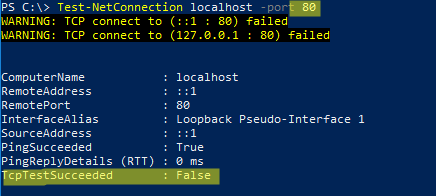
Проверьте, что порт 80 теперь свободен:
Test-NetConnection localhost -port 80
Чтобы быстрой найти путь к исполняемому файлу процесса в Windows, используйте команды:
cd /
dir tiny.exe /s /p
Или можно для поиска файла использовать встроенную команду where :
where /R C:\ tiny
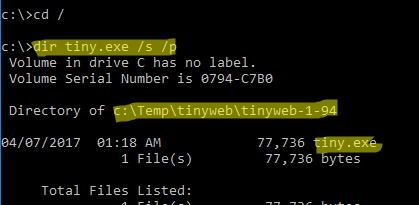
В нашем случае мы нашли, что исполняемый файл
tiny.exe
(легкий HTTP сервер), который слушает 80 порт, находится в каталоге c:\Temp\tinyweb\tinyweb-1-94
In this tutorial, we will learn how to run the netstat command to check open ports in Windows Operating System. We will also look at command options and how to use the findstr command (similar to grep) to filter the netstat output.
To check open ports, open a command prompt (or PowerShell) as administrator and run the netstat command as follows:
netstat -aonThe command displays lots of information. What you should pay attention to are Local Addresses that are in the LISTENING state.
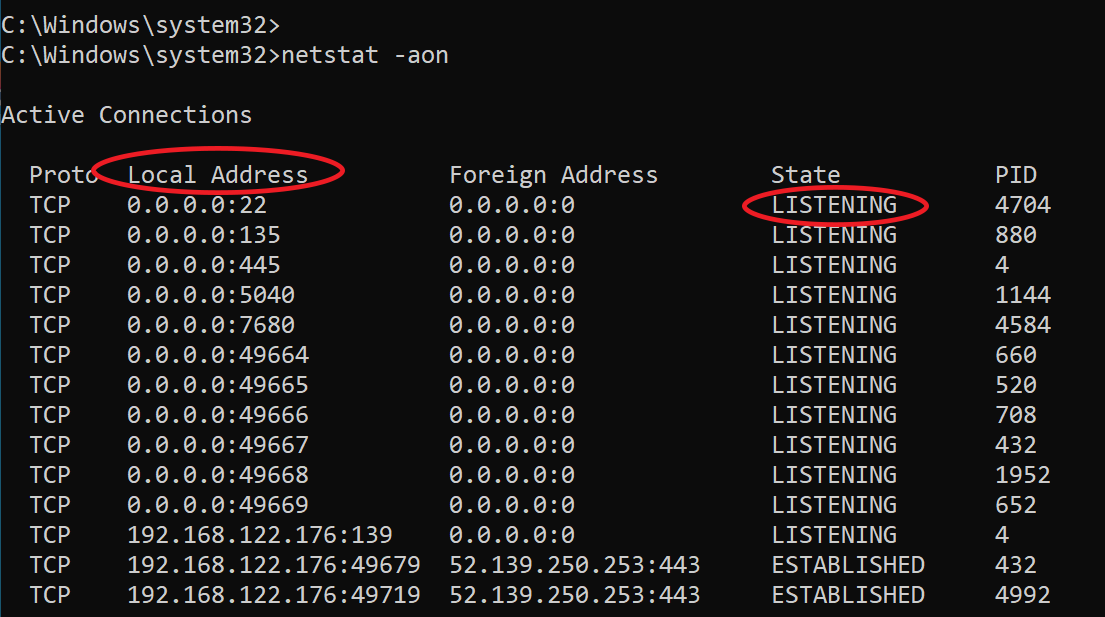
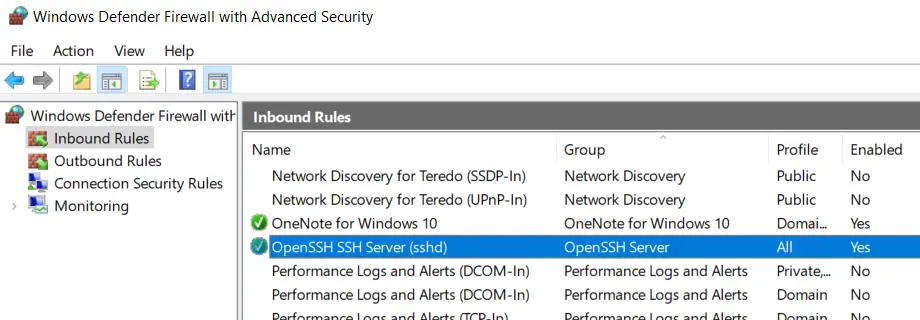
As you can see in the previous screenshot, In my Windows 10 computer, port 22 (SSH) is open.
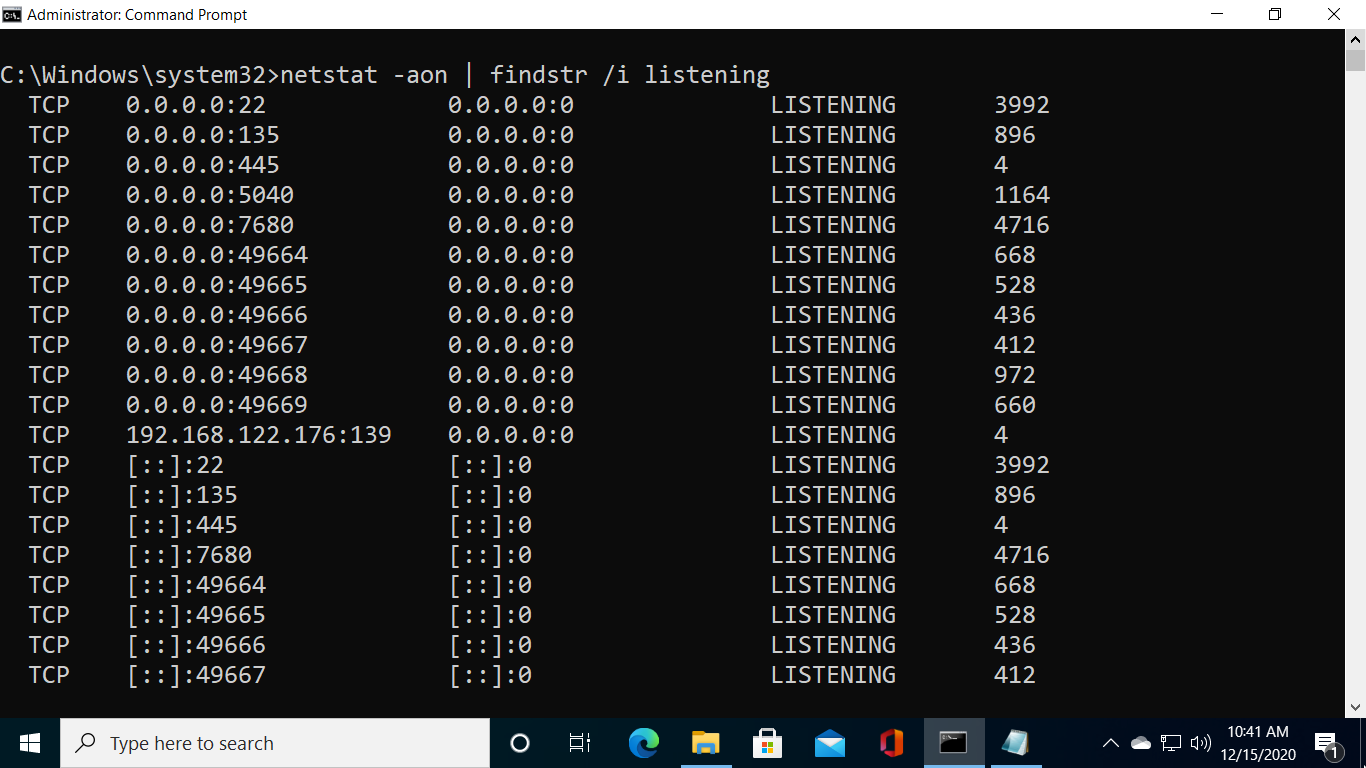
Administrators can run the following command to show opened ports only without all other details:
netstat -aon | findstr /i listeningOne important point is that the Windows Firewall may block a port even if it is in the listening state. In the Windows Defender Firewall with Advanced Security, there has to be a corresponding inbound firewall rule to match the listening port (Anything with a green checkmark is an open rule).
The Foreign Address column of the output shows the IP address and port of the computer/server at the remote end of the connection.
To check that the port is open from a remote computer, an administrator can run the telnet command from a remote computer against the IP address of the Windows computer.
For example, to check if port 22 is open, I will run the telnet command from a remote computer as follows:
telnet IP_ADDRESS 22Replace IP_ADDRESS with the actual IP Address of the Windows computer.

Filtering netstat using findstr
Administrators can use the findstr CMD command (which is similar to grep) to filter netstat command data based on string patterns.
For example, run the following command to check TCP connections in TIME_WAIT State.
netstat -a | findstr /i TIME_WAITThe /I option is for the case insensitive matching.

Command Options
Windows netstat command, without any command-line arguments, displays active TCP connections.
It also includes some useful command options to show network connections and ports in various forms, such as show connections and opened ports based on the protocol, find the process id of a connection/port, view network statics, and find the application that utilizes connections and ports.
| -a | displays all network connections and ports on which Windows is listening (include both IPv4 or IPv6 addresses). |
| -b | The output shows you which applications are using each active connection and ports (need administrative privileges). |
| -e | Displays network statistics, such as the Errors, the number of bytes, and packets sent and received. |
| -n | Displays addresses and ports in numerical format. |
| -f | When used, the output will contain Fully Qualified Domain Names (FQDNs) of IP addresses, if available. |
| -o | Displays an additional column that contains the Process ID (PID). |
| -p | Display data for a specific protocol (e.g., -p TCP). The Protocol can be one of the following: TCP, UDP, TCPv6, or UDPv6. If combined with the -s option, Protocol can be TCP, UDP, ICMP, IP, TCPv6, UDPv6, ICMPv6, or IPv6. |
| -r | Check Windows routing table. |
| -s | Displays detailed network statistics for each protocol (IPv4, IPv6, ICMPv4, ICMPv6, TCP, and UDP). |
| interval | Sets Time interval (in seconds) to automatically update the output. See examples to learn more. |
Examples: Using the netstat command
List all Active TCP connections:
netstatCheck open ports:
netstat -aon | findstr /i listeningOnly want to see information about TCP protocol:
netstat -a -p tcpShow network statistics:
netstat -sReal-time network monitoring — In the following example, we set a 5 second time interval to check active network connections in real-time. The number 5 causes the command to repeat every five seconds (Press CTRL+C to quit).
netstat -n 5If you need more information about the Windows netstat command, type netstat \? in the command prompt.
Checking open TCP/IP ports on your Windows computer is crucial for managing network security and ensuring smooth connectivity. Certain apps and processes in Windows may face issues due to closed or misconfigured ports, often caused by firewalls or private IP addresses. This guide will walk you through step-by-step methods to check whether a TCP port is open or closed using built-in tools and third-party utilities.
Why You Should Check TCP/IP Ports?
Here are some common scenarios where checking ports is necessary:
- Troubleshooting connectivity issues for applications or services.
- Configuring firewalls to ensure necessary connections are allowed.
- Detecting suspicious activity that might indicate a security breach.
Methods to Check Open TCP/IP Ports
There are several ways to check open TCP/IP ports in Windows. Here are a few options:
Method 1. Using Telnet Client
Step 1: Check whether the telnet client feature is ON or not. In order to check, open the Turn Windows feature on or off settings from the search bar. OR press the ‘window’ key and type ‘windows’ features. Then press on “Turn Windows features on or off”.
-660.png)
Windows Features Option
A new prompt will be opened. Search for “Telnet Client” and check the box in front of ‘telnet Client’.

Windows Features
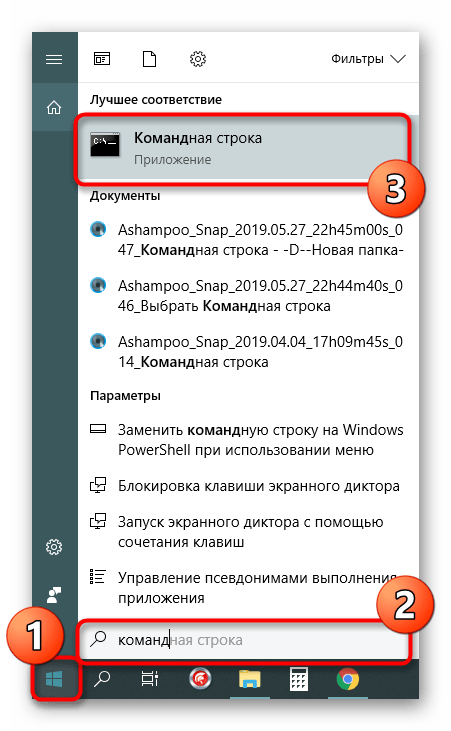
Step 2: Open the command prompt. Press the ‘windows’ key and type ‘cmd’. Press “Command Prompt”.
-660.png)
Command Prompt Option
Step 3: On the command prompt, type the command “telnet + IP address or hostname + port number” and check the status of the provided TCP port.
-660.png)
Telnet Command
Step 4: If only the blinking cursor is visible, then the port is open.
-660.png)
Port is Open
Step 5: If you get the message “connection failed” then the port is closed.
-660.png)
Port is close
Method 2: Using built-in netstat command-line utility:
Step 1: Open the command prompt.
Step 2: Run the following command:
netstat -an

Method 3. Using TcpView
Another option is to use the TcpView utility from Microsoft’s Sysinternals suite of tools. This utility provides a more user-friendly interface for viewing active TCP/IP connections, along with additional information such as the process ID and process name for each connection. Steps to be followed:
Step 1: Download the TcpView utility from the Microsoft Sysinternals website. You can find the download link on the TcpView page of the Sysinternals website.
-660.png)
Download Page
Step 2: Extract the downloaded file and run the TcpView.exe file to launch the TcpView utility. This will open the TcpView window, which shows a list of all active TCP/IP connections on your machine.

Extracted FIles
Step 3: Open the tcpview.exe (application).
By default, TcpView will display the following columns in the list of connections:
Protocol: Shows the protocol being used for the connection (TCP or UDP)
Local Address: Shows the local address and port being used for the connection
Remote Address: Shows the remote address and port being connected to
State: Shows the current state of the connection (e.g. Established, Listen, etc.)
You can use the “Local Address” and “Remote Address” columns to see which ports are being used by which applications. For example, if you see a connection with a local address of “127.0.0.1:80”, this means that the local application is using port 80 for outgoing connections.
Method 4. Using Windows PowerShell
You can also use Windows PowerShell to check open TCP/IP ports. To do this, use the Get-NetTCPConnection cmdlet, which allows you to view a list of active TCP/IP connections and the local and remote addresses and ports being used. For example, you can run the following command to view a list of all active TCP/IP connections:
Get-NetTCPConnection |
Select-Object LocalAddress,
LocalPort, RemoteAddress, RemotePort

Get-NetTCPConnection cmdlet
Method 5. Using Nmap
To install Nmap in the Windows command line, follow these steps:
Step 1: Download the latest version of Nmap from the Nmap website. You can find the download link on the Nmap download page:
https://nmap.org/download.html
Step 2: Extract the downloaded file to a location on your computer. This will create a new folder containing the Nmap files.
Step 3: Open a command prompt and navigate to the directory where you extracted the Nmap files. For example, if you extracted the files to the C:\nmap directory, you would run the following command:
cd C:\nmap
Step 4: Once you are in the Nmap directory, you can install Nmap by running the nmap.exe file. To do this, run the following command:
nmap.exe -V
This will display the version number of Nmap, indicating that it has been installed successfully.
Step 5: To use nmap to scan for open TCP/IP ports, run the “nmap -sT” command, followed by the IP address or hostname of the machine you want to scan.
nmap -sT localhost

This will scan the specified host or IP address and display the results. You can also use the -h option to view a list of available options and arguments for the nmap command. Overall, installing Nmap in the Windows command line is a straightforward process. You can download the latest version of Nmap from the Nmap website, extract the files, and then run the nmap.exe file to install it. Once it is installed, you can use the nmap command to scan hosts and IP addresses and view the results.
Common Issues That Close Ports
- Applications not functioning as expected.
- Misconfigured firewall rules blocking connections.
- IP addresses improperly set as private.
Troubleshooting Common Issues
Here are some common issues that may occur during opening TCP/IP Ports in Windows:
- Telnet Not Listed in Features: Ensure your system version supports Telnet or enable it via PowerShell.
- Firewall Blocking Ports: Temporarily disable the firewall to test port connectivity.
- Command Not Recognized: Verify tool installation and environment variables.
Conclusion
Checking open TCP/IP ports on your Windows computer is an important step for maintaining your system’s security and efficiency. By regularly monitoring these ports, you can identify any unwanted or suspicious connections that might put your computer at risk. Windows provides several simple tools, like Command Prompt and PowerShell, which make it easy to see which ports are open and what applications are using them. Taking the time to check your open ports helps ensure that your computer runs smoothly and stays protected from potential threats. Staying proactive about monitoring your network connections is a key part of keeping your digital environment safe and reliable.
Все способы:
- Используем команду netstat для просмотра открытых портов
- Отображение всех подключений и ожидающих портов
- Постраничное отображение открытых портов
- Запись результатов в текстовый файл
- Поиск по содержимому
- Вопросы и ответы: 2
Netstat — одна из встроенных команд операционной системы Windows. В ее функциональность входит отображение состояния сети со всеми требуемыми деталями. Пользователь задействует встроенный синтаксис, чтобы отфильтровать результаты или задать дополнительные действия для этой утилиты. В рамках сегодняшнего материала мы бы хотели рассказать о доступных методах просмотра открытых портов с помощью этого стандартного инструмента.
Используем команду netstat для просмотра открытых портов
Портами называют натуральные числа, которые записываются в заголовках протоколов передачи данных (TCP, UDP и так далее). Они определяют процесс получения и передачи информации в рамках одного хоста и в большинстве случаев используются онлайн-программами для установки соединения. Просмотр открытых портов может понадобиться в случае определения работоспособности приложений или при стандартном мониторинге сети. Лучше всего с этим справится команда netstat, а ее активация доступна с применением разных аргументов.
Отображение всех подключений и ожидающих портов
Самый простой аргумент, применяемый к утилите netstat, имеет обозначение -a, и отвечает за вывод сведений обо всех активных подключениях их портов, которые ожидают соединения. Такая информация доступна к просмотру без применения прав администратора и выводится на экран следующим образом:
- Поскольку рассматриваемая команда является консольной, потребуется запустить приложение, чтобы ее выполнить. Откройте меню «Пуск», найдите там «Командную строку» и запустите ее. О других методах перехода в консоль читайте в другом нашем материале по следующей ссылке.
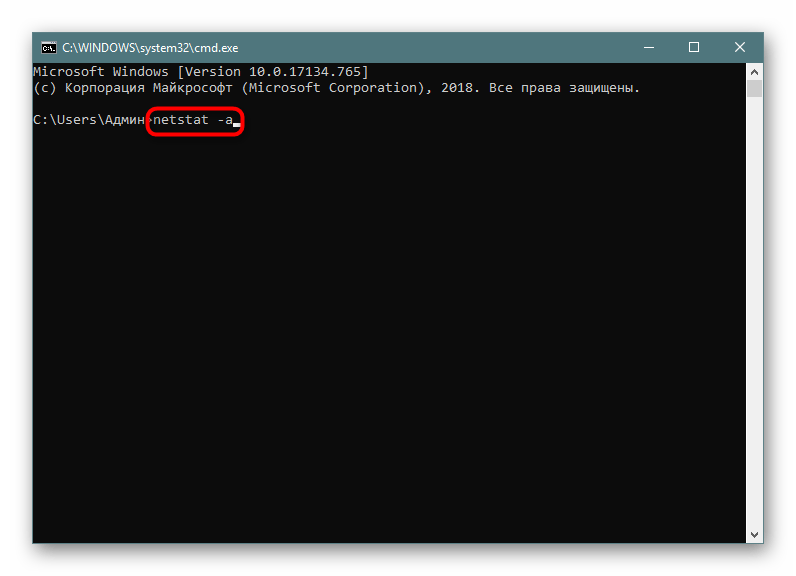
- В поле ввода напечатайте
netstat -a, а затем нажмите на клавишу Enter. - На экране тут же начнет появляться список с доступными адресами.
Подробнее: Открытие командной строки в Windows 10
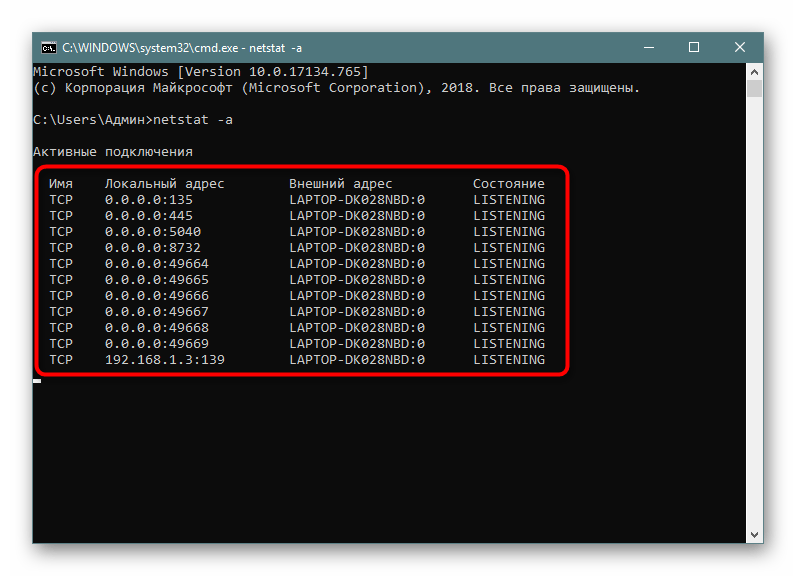
Мониторинг производится в режиме реального времени, поэтому не все результаты будут доступны к просмотру сразу. Придется подождать немного времени, чтобы все они могли прогрузиться. Во время этого не закрывайте консоль, если не хотите прервать процесс, ведь при повторном запуске команды все начнется заново.
Постраничное отображение открытых портов
К сожалению, приведенный выше вариант отображает не все необходимые данные об открытых портах, поскольку выводит он только те параметры, которые на текущий момент находятся в состоянии LISTENING. К тому же там не указывались уникальные идентификаторы процессов (PID), что тоже играет важную роль во время определенного мониторинга. Потому советуем обратить внимание немного на другие аргументы.
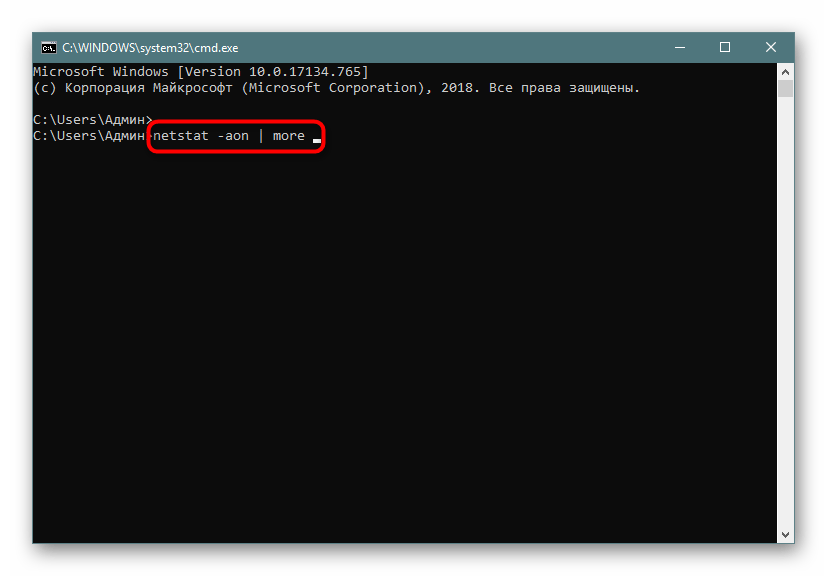
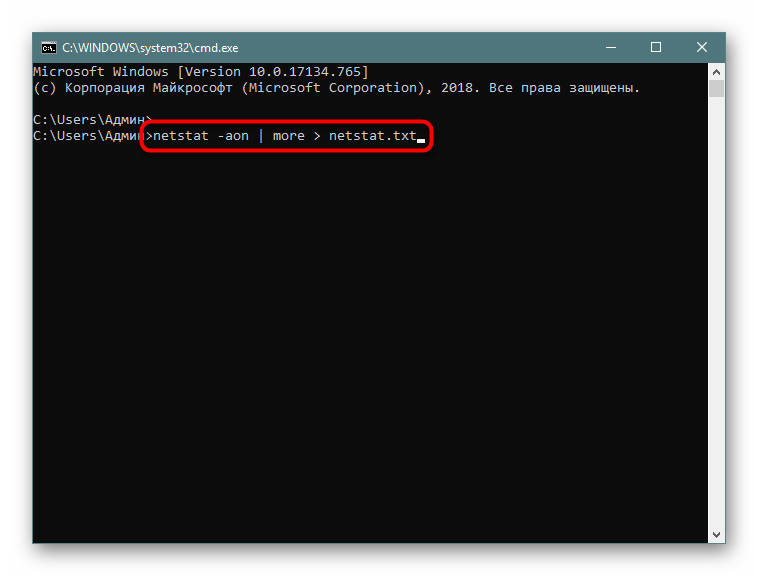
- В консоли пропишите
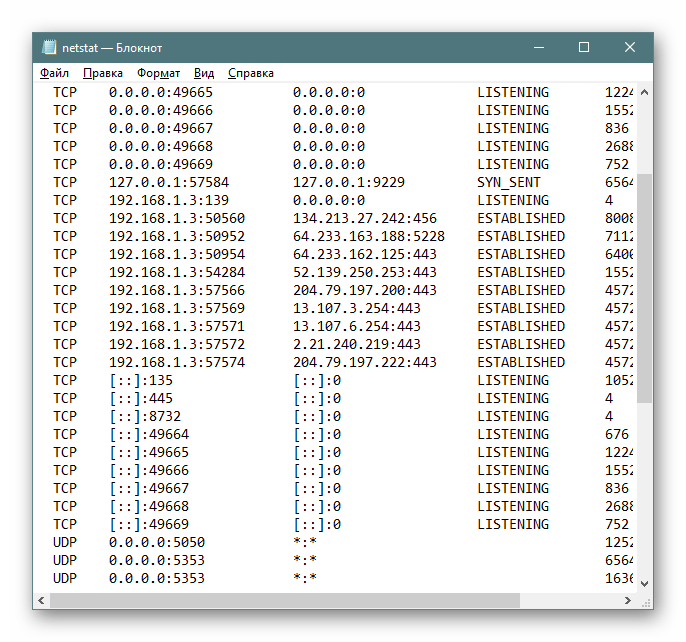
netstat -aon | moreи нажмите на Enter. - Здесь сразу же появится вся важная информация о портах, которые находятся в разных состояниях. В пятой колонке обозначаются идентификаторы.
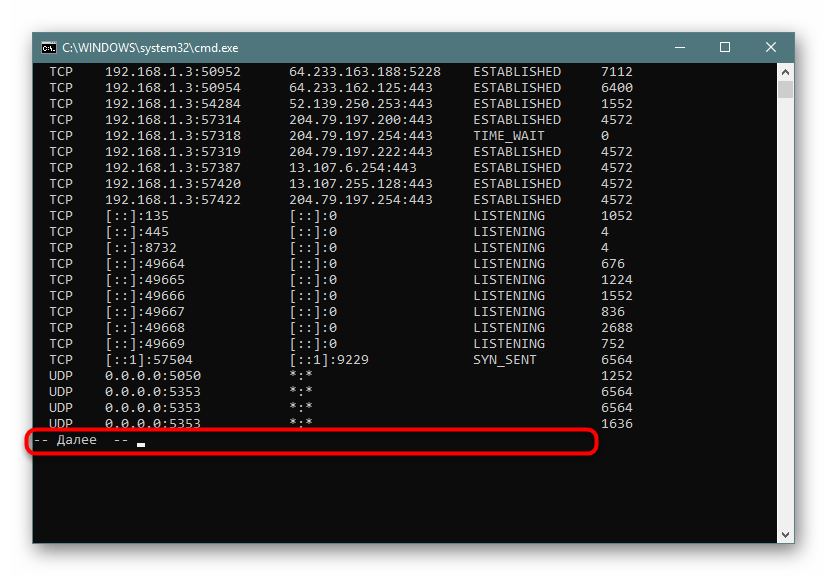
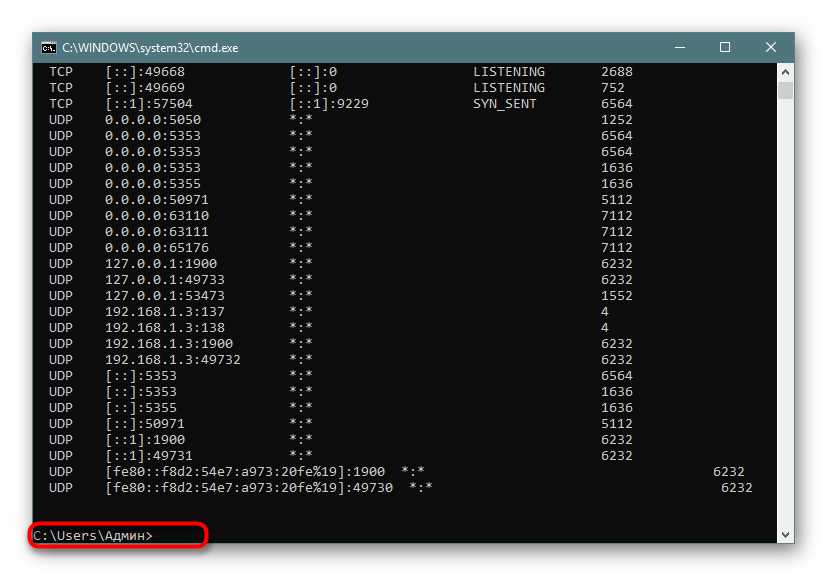
- Не все порты выводятся сразу, поэтому нужно жать на Enter, чтобы каждый раз отображать еще по одной строке.
- Если вы увидите поле ввода, значит все страницы были успешно выведены на экран.
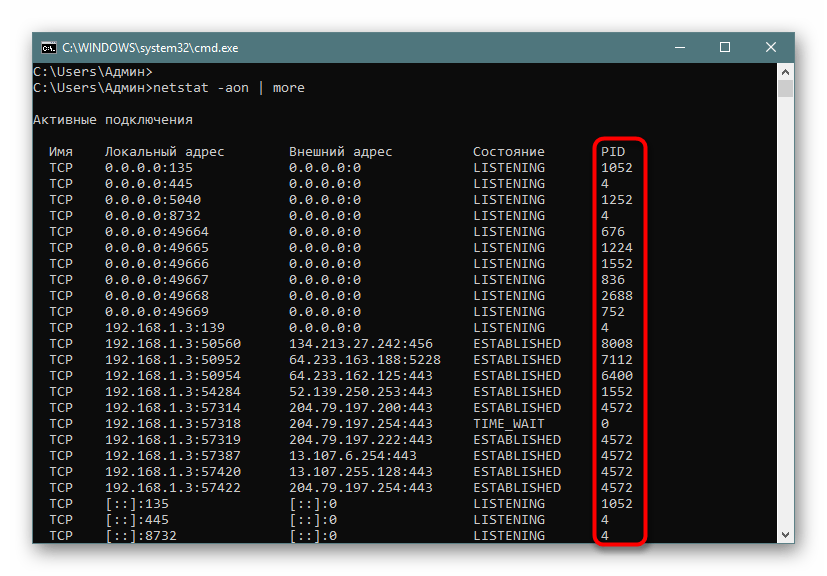
Теперь хотелось бы поговорить про используемые аргументы и значение увиденных параметров. Давайте сначала затронем знакомые буквы синтаксиса:
| Аргумент | Описание |
|---|---|
| -a | Отображает сведения обо всех подключениях |
| -o | Отвечает за включение колонки с идентификатором каждого адреса |
| -n | Переводит адреса портов и их номера в числовой формат |
| more | Постраничный вывод элементов |
Важно также уточнить и состояние портов, поскольку они могут являться открытыми, но на этот момент не использоваться или ожидать своего подключения. В колонке «Состояние» могут отображаться такие показатели:
| Показатель | Описание |
|---|---|
| CLOSE_WAIT | Подключение ожидает своего закрытия |
| CLOSED | Подключение было успешно закрыто |
| ESTABLISHED | Активная работа соединения |
| LISTENING | Ожидается соединение или еще говорят: «Слушается порт» |
| TIME_WAIT | Время ответа было превышено |
Эти объяснения должны разобраться помочь не только с составлением запросов для netstat, но и без проблем разобраться с полученной информацией.
Запись результатов в текстовый файл
Иногда требуется сохранить готовые результаты мониторинга в текстовый файл, чтобы выполнить дальнейшие действия, ведь копировать информацию прямо из консоли не всегда удобно, да и займет это намного больше времени, нежели просто указать дополнительный аргумент при вводе команды.
- Напишите, например,
netstat -aon | moreилиnetstat - a, а затем добавьте> netstat.txt, что означает запись результатов в указанный файл (он будет создан в пользовательской папке). После ввода нажмите на Enter. - Запустите файл, введя его название и формат в консоли.
- Теперь вы можете управлять содержимым и сохранить его в любом другом удобном месте.

Поиск по содержимому
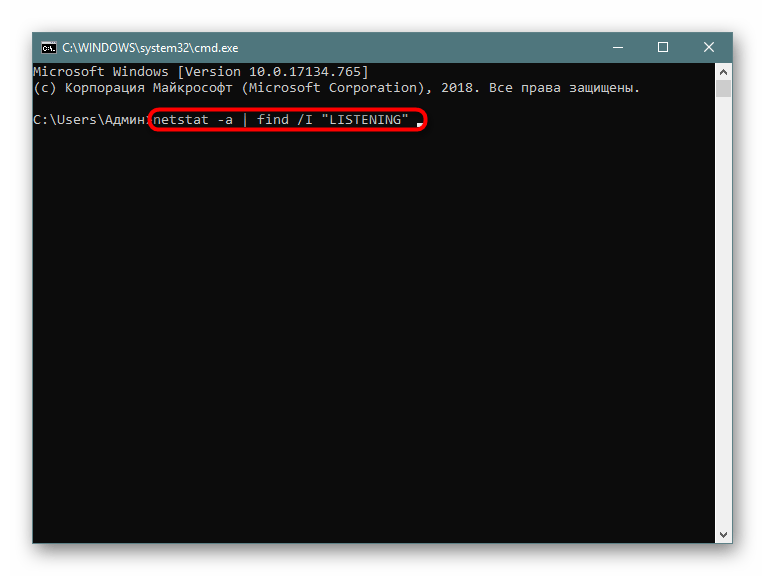
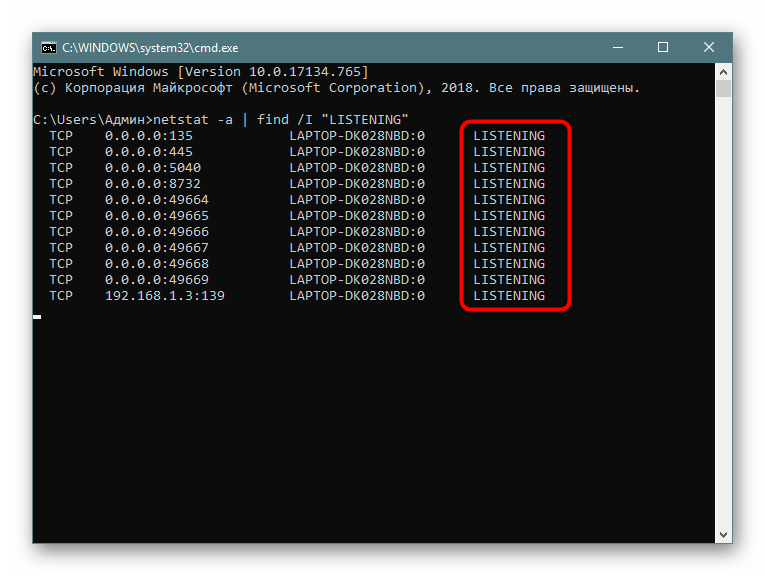
В случае необходимости отображения только подключений с определенными параметрами или адресами лучше всего использовать дополнительную команду find, которая перед выводом сведений произведет фильтрацию данных, и это освободит вас от надобности вручную искать каждый соответствующий пункт. Тогда полная консольная команда приобретает следующий вид:
- Введите
netstat -a | find /I "LISTENING", что задаст параметр отображения только портов с состоянием LISTENING, аргумент /I при этом используется для отмены учета регистра символов. - В результатах отобразится только подходящая информация.
Выше вы узнали о методах определения открытых портов через встроенную команду netstat. После этого можете приступить к работе с программами или пробросу других портов в случае необходимости. К слову, этой теме посвящен отдельный материал на нашем сайте. Перейдите по указанным ниже ссылкам, чтобы ознакомиться с подробными инструкциями.
Читайте также:
Открываем порты на роутере
Открываем порты в брандмауэре Windows 10
Команда netstat всегда показывает правильные результаты, однако если хотите убедиться в открытости порта другим путем, рекомендуем задействовать специальные онлайн-сервисы, позволяющие справиться с поставленной задачей.
Читайте также: Сканирование портов онлайн
Наша группа в TelegramПолезные советы и помощь
Connections between applications work much like conversations between humans. The conversation is started by someone speaking. If no one is listening, then the conversation doesn’t get far. How do you know who’s listening on a Windows PC? The Netstat command-line utility and the PowerShell Get-NetTCPConnection cmdlet.
Not a reader? Watch this related video tutorial!
Not seeing the video? Make sure your ad blocker is disabled.
In this tutorial, you will learn how to inspect listening ports and established TCP connections on your Windows computer with Netstat and the native PowerShell command Get-NetTCPConnection.
Prerequisites
If you’d like to follow along with examples in this tutorial, be sure you have:
- A Windows PC. Any version will do. This tutorial is using Windows 10 Build 21343.1
- PowerShell. Both Windows PowerShell and PowerShell 6+ should work. This tutorial us using PowerShell v7.2.0-preview.2
Using Netstat to Find Active and Listening Ports
Netstat is one of those command-line utilities that seems like it’s been around forever. It’s been a reliable command-line utility to inspect local network connections for a long time. Let’s check out how to use it to find listening and established network connections.
Netstat has many different parameters. This tutorial will only use three of them. To learn more about what netstat can do, run
netstat /?.
Assuming you’re on a Windows PC:
1. Open up an elevated command prompt (cmd.exe).
2. Run netstat -a to find all of the listening and established connections on the PC. By default, netstat only returns listening ports. Using the -a parameter tells netstat to return listening and established connections.
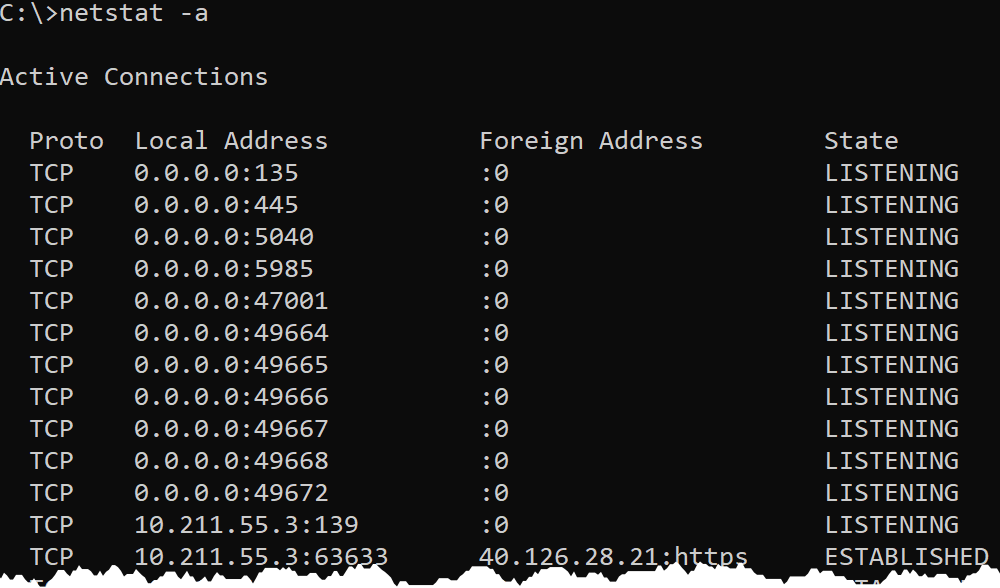
The output above is broken out into four columns:
Proto– shows either UDP or TCP to indicate the type of protocol used.Local Address– shows the local IP address and port that is listening. For many services, this will be 0.0.0.0 for the IP part, meaning it is listening on all network interfaces. In some cases, a service will only listen on a single Network Interface (NIC). In that case, netstat will show the IP address of the NIC. A colon separates the IP address from the port that it is listening on.Foreign Address– shows the remote IP address the local connection is communicating with. If theForeign Addressis0.0.0.0:0, the connection is listening for all IPs and all ports. For established connections, the IP of the client machine will be shown.State– shows the state the port is in, usually this will beLISTENINGorESTABLISHED.
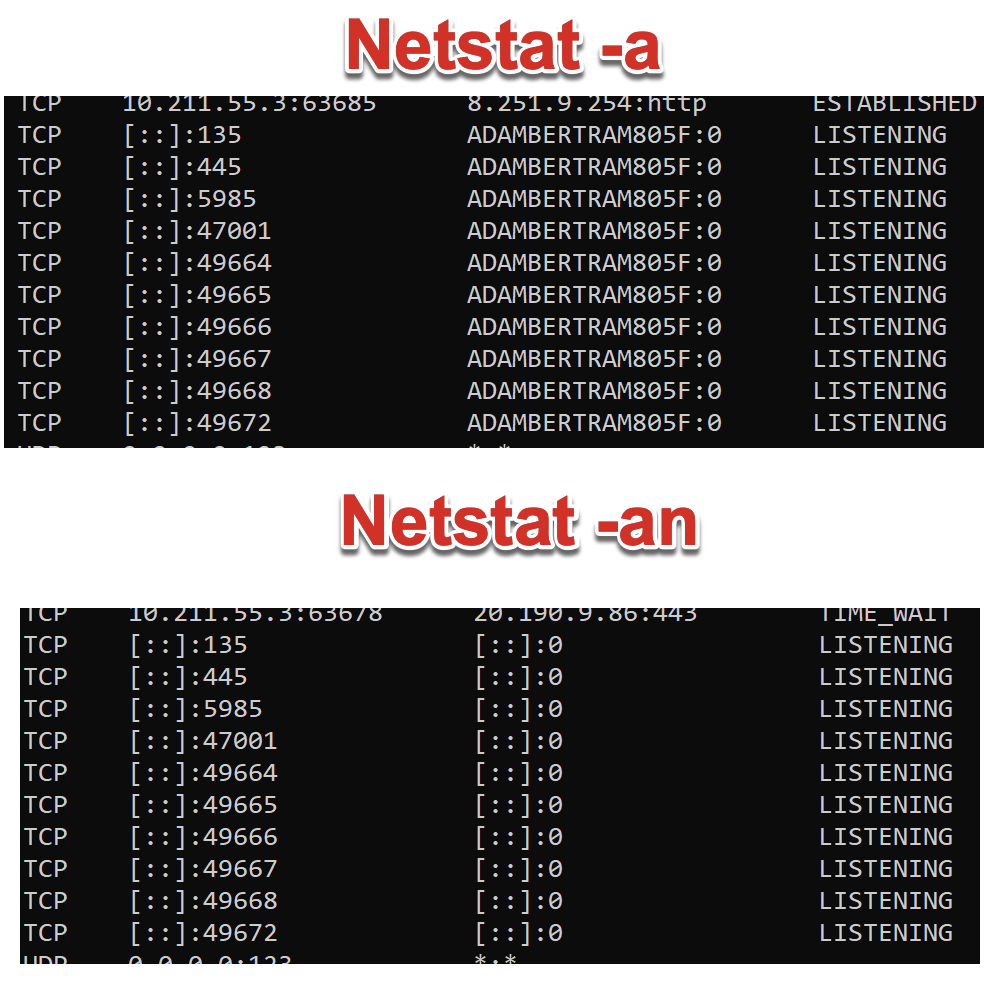
3. Now run netstat -an. You should now see that any names in the output have been turned into IP addresses. By default, netstat attempts to resolve many IP addresses to names.
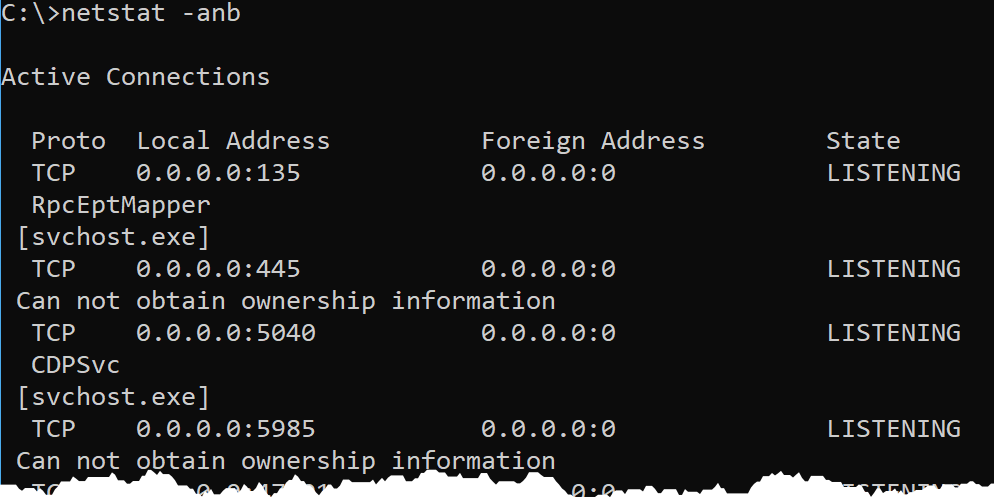
4. Finally, perhaps you’d like to know the Windows processes that are listening or have these connections open. To find that, use the -b switch.
Using the
-bswitch requires an elevated command prompt or PowerShell prompt. You will get the errorThe requested operation requires elevationif you use the-bswitch in a non-elevated prompt.
Using PowerShell to Find Active and Listening Ports
Now that you’ve got a chance to see how the old-school netstat utility shows active and listening ports, let’s see how to do it in PowerShell.
Using PowerShell gives you a lot more control to see just what you want, rather than having to scroll through long lists of output. The Get-NetTCPConnection cmdlet is much more specific than netstat about what you want to see.
This tutorial isn’t going to cover all of the parameters that come with the
Get-NetTCPConnectioncmdlet. If you’re curious, runGet-Help Get-NetTCPConnection -Detailedto discover more examples.
On your Windows PC:
1. Open up a PowerShell console as administrator.
The only reason you need to elevate a PowerShell console is to see the program that owns the connection (like the netstat
-bparameter).
2. Run Get-NetTcpConnection. You’ll see output similar to what netstat provided. Instead of just a big string of output, Get-NetTcpConnection returns a list of PowerShell objects.
You can now see the same general information that netstat provided you by now; by default, you have information on the OwningProcess (the -b switch on netstat) and the AppliedSetting field, which relates to the network profile the connection is a part of.
Unlike netstat, the
Get-NetTCPConnectioncmdlet will now show listening UDP connections.

3. Pipe the output to Select-Object showing all properties. You’ll see PowerShell returns a lot more information that netstat did.
Get-NetTCPConnection | Select-Object -Property *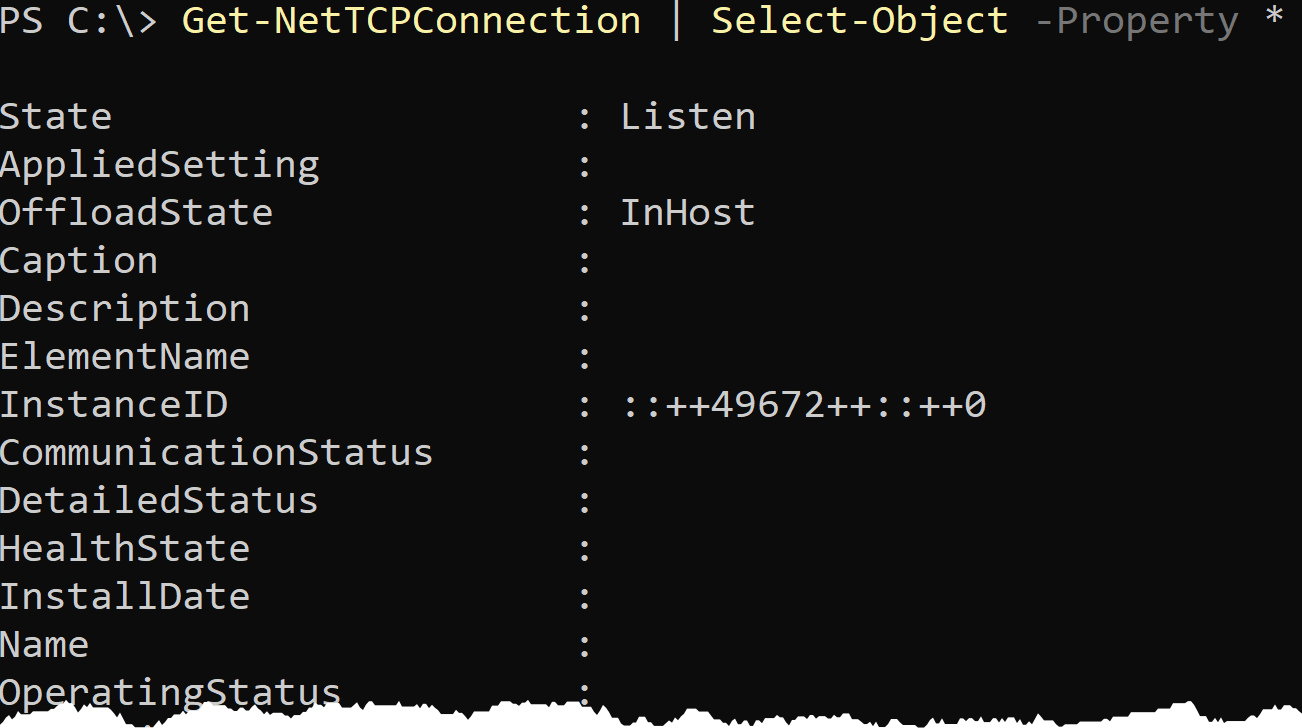
4. Now, narrow down the output to just listening ports.
Get-NetTCPConnection -State Listen
5. Now, find the process names for the OwningProcess fields. To do that, run the Get-Process cmdlet and provide the process ID as shown below.

If you’d like to create another property for the process name, you could optionally use a Select-Object calculated field.
Get-NetTCPConnection | Select-Object -Property *,@{'Name' = 'ProcessName';'Expression'={(Get-Process -Id $_.OwningProcess).Name}}6. Narrow down the states to a bit more by finding Listening and Established states by defining the State parameter value as a comma-delimited list.
Get-NetTCPConnection -State Listen,Established7. Finally, limit the connections down by the port the connection is connected to with the RemotePort parameter.
Use the
LocalPortparameter to filter connections by local port.Get-NetTCPConnection -RemotePort 443
Get-NetTCPConnection -RemotePort 443
Conclusion
You have now seen how the Netstat utility and the Get-NetTCPConnection PowerShell cmdlet help you find local network connections.
Now that you can show the processes running on a server combine this with the Test-NetConnection PowerShell cmdlet to get an end-to-end view of connectivity between a client and server.