
39105
После успешного подключения беспроводных Bluetooth наушников или колонки к Windows 11 иногда возникает проблема, когда нет звука. Наушники подключены, но звук через них не воспроизводится. Такая проблема может быть как на ноутбуках, так и на стационарных компьютерах. Причина, как правило, в самой Windows 11. В настройках звука, службах, или в драйвере Bluetooth адаптера. Что делать в этой ситуации и как исправить отсутствие звука в беспроводных наушниках, я расскажу в этой статье.
Для начала, я хотел бы показать, как выглядит эта проблема. Чтобы вы смогли понять, это ваш случай, или нет, и не тратить время на неподходящие вам решения.
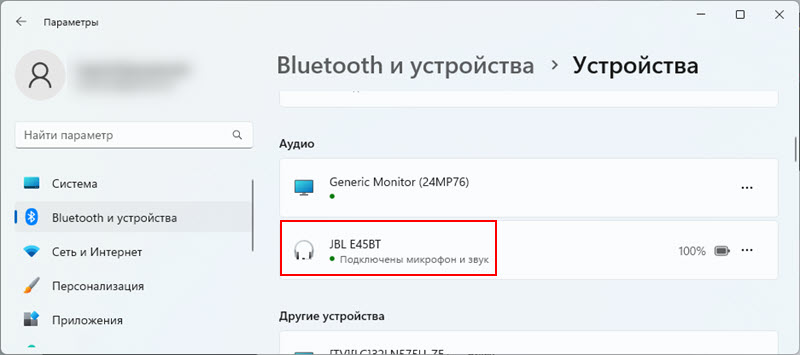
- После включения Bluetooth и подключения Bluetooth наушников к Windows 11 они должны отображаться в параметрах «Bluetooth и устройства» – «Устройства» в разделе «Аудио». Если у вас проблемы с подключением, смотрите эту статью: не работает Bluetooth в Windows 11.
Под названием наушников должно быть написано: «Подключенный голос, музыка» или «Подключены микрофон и звук». Слово «музыка» (звук) в этом случае означает, что наушники можно использовать для вывода звука в стерео режиме, а слово «голос» (микрофон) – что наушники можно использовать как устройство ввода. То есть, как гарнитуру (будет работать микрофон).
В последних версиях Windows 11 написано «Подключены микрофон и звук».

- Но часто после подключения, наушников или колонки нет в разделе «Аудио». Они там просто не отображаются. Но подключение проходит успешно. Они определяются как «Другие устройства» и отображаются в том же окне только ниже. Возле них может быть статус «Связано», «Сопряжено», или «Подключено».

При этом наушники не будут отображаться в звуковых устройствах и Windows 11 не сможет выводить на них звук. Так как система не понимает, что это за устройство и как с ним работать.
- И еще может быть такое, что возле подключенных беспроводных наушников в разделе «Аудио» написано только «Подключенный голос» (Подключен микрофон). Нет слова «Музыка» (Звук). Это значит, что система не может использовать их как устройство вывода и выводить на них звук. Они могут работать только как микрофон (устройство ввода). Наушники не будут отображаться в устройствах воспроизведения Windows 11.

Бывает, что статус «Подключенная музыка (Подключен звук)» . Тогда у вас скорее всего не работает микрофон через Bluetooth наушники.


Быстрое и простое решение, которое стоит попробовать: удалите наушник в параметрах на компьютере, перезагрузите его и попробуйте подключить их повторно.
Возле наушников «Подключенный голос, музыка» но звука нет
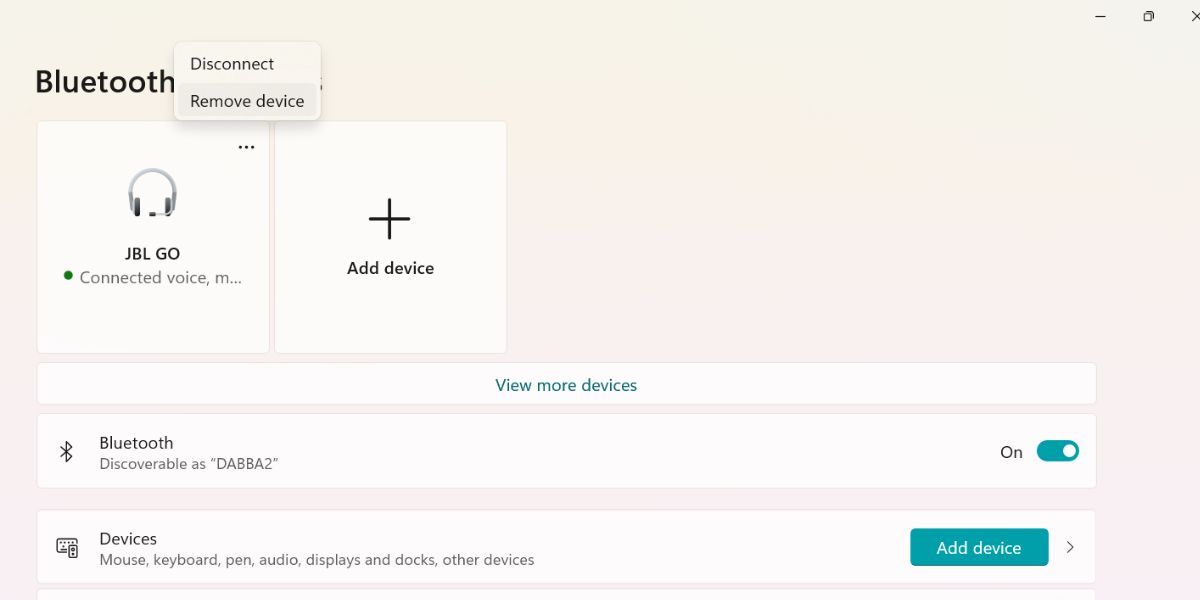
Если на первый взгляд вроде бы все как и должно быть, Windows 11 определяет Bluetooth наушники или колонку как аудио устройство и возле них написано «Подключенный голос, музыка» (Подключены микрофон и звук) (как на первом скриншоте в этой статье), но звука нет или он идет из динамиков компьютера, то нужно проверить настройки вывода звука. Возможно, там неправильно выбрано устройство для воспроизведения звука.
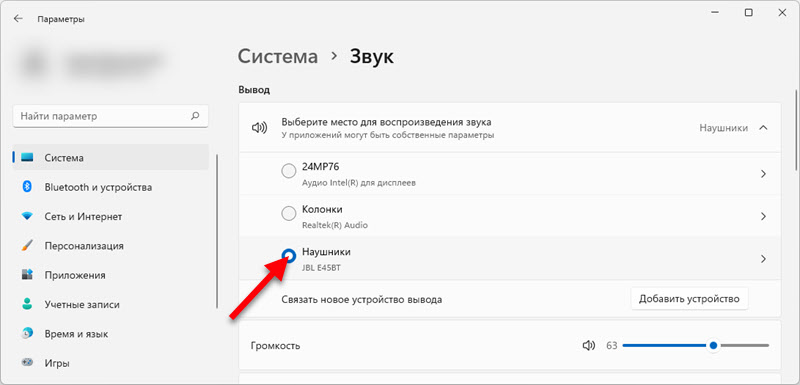
Нажмите правой кнопкой мыши на значок звука возле часов и выберите «Параметры звука». Или зайдите в параметры и перейдите в раздел «Система» – «Звук».
Там будет список устройств доступных для вывода звука. Если он скрыт, нажмите на пункт «Выберите место для воспроизведения звука». Посмотрите, есть ли там наушники или ваша Bluetooth колонка. Если есть – выберите их (установите переключатель возле нужного устройства).
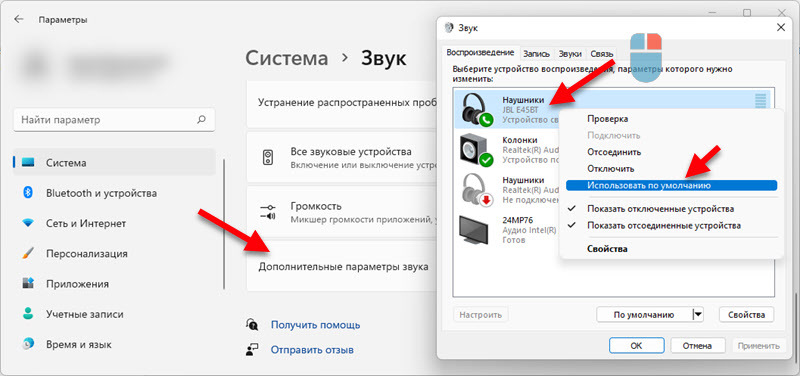
В этом же окне ниже можно нажать на пункт «Дополнительные параметры звука», чтобы открыть старое (и для многих привычное) окно управления звуком. Там нужно наушники установить в качестве устройства по умолчанию.
Если проблема с отсутствием звука в Блютуз наушниках только в некоторых приложениях, то в параметрах, в разделе «Звук» перейдите в раздел «Громкость» и сделайте там сброс настроек.

Или проверьте настройки устройства ввода/вывода для необходимого приложения.
Windows 11 определяет Bluetooth наушники как «Другие устройства» или только «Подключен микрофон» и нет звука
Дальше мы рассмотрим решения двух проблем, о которых я так же писал в начале статьи. Когда наушники не появляются в разделе «Аудио», а отображаются в разделе «Другие устройства» и когда возле них нет слова «музыка» (звук), только «Подключенный голос» (Подключен микрофон) (как это выглядит, можно посмотреть на скриншотах в начале статьи). Соответственно в настройках звука их нет и звука тоже нет.
Проверяем службы (приемник аудио)
По своему опыту могу сказать, что часто причина бывает в службах. Возможно, необходимые службы отключены, поэтому Windows 11 не может использовать наушники или колонку для вывода звука, или для работы с микрофоном.
- Нажмите правой кнопкой мыши на меню «Пуск» и запустите «Параметры».
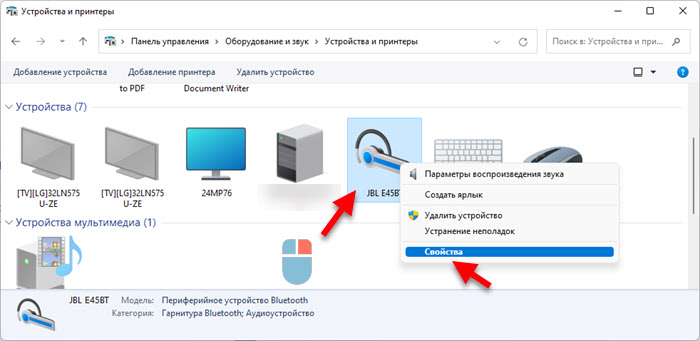
- Перейдите слева в раздел «Bluetooth и устройства». Дальше откройте «Устройства» – «Дополнительные параметры устройств и принтеров».

- Найдите там свои Bluetooth наушники или колонку, нажмите на них правой кнопкой мыши и выберите «Свойства».

- Перейдите на вкладку «Службы», установите там галочки возле всех служб и нажмите на кнопку «Применить».
Служба «Приемник аудио» в свойствах наушников отвечает за вывод звука через эти самые наушники. Если ее нет, или она отключена, то Windows 11 не будет видеть наушники как устройство для воспроизведения звука. А служба «Беспроводная телефонная связь» отвечает за работу микрофона.

Если у вас эти службы были отключены, то после включения все должно заработать. Если их нет – смотрите статью дальше. Если они есть и были включены, то попробуйте их отключить, применить настройки, а затем включить обратно.
Исключаем проблемы с драйвером
Работа Bluetooth наушников, или колонки зависит от драйвера Bluetooth адаптера. Я не раз видел случаи, когда система не определяла наушники как устройство для вывода или ввода звука из-за проблем с драйвером самого адаптера, через который происходит сопряжение. Поэтому, я рекомендую выполнить обновление, и/или откат драйвера.
Bluetooth адаптер можно найти в диспетчере устройств (правой кнопкой на меню Пуск – «Диспетчер устройств «) на вкладке Bluetooth. У меня он выглядит вот так:

Что можно сделать:
- Просто удалить Bluetooth адаптер в диспетчере устройств и перезагрузить ноутбук.
- Найти на вкладке Bluetooth устройства в имени которых есть название наушников с которыми возникла проблема, удалить их, перезагрузить компьютер и подключить наушники повторно.
- Обновить драйвер Bluetooth адаптера. Лучше всего скачать его с сайта производителя адаптера или ноутбука и установить вручную, так как Windows 11 скорее всего будет говорить, что драйвер самый новый и обновлять его не нужно.
- Обновите аудио драйвер (на звук). Обычно это Realtek High Definition Audio Driver. Он должен быть на сайте производителя ноутбука.
- Выполнить откат и/или замену драйвера. Как это сделать, я подробно показывал в конце этой статьи.
Общаемся по этой теме в комментариях. Задавайте вопросы, делитесь полезной информацией.
Bluetooth audio devices have been a great alternative to their wired counterparts for quite some time now. Wireless audio accessories embedded with Bluetooth are now more affordable than ever. But some Windows 11 users frequently face audio not working while using their Bluetooth devices.
If you share the problem, then this post will elaborate on the methods to fix the Bluetooth audio not working issue on Windows 11. We will list out all the prospective fixes that you can try, to get the audio working again on your Windows 11 PC.
How to Fix Bluetooth Audio Not Working Issue on Windows 11
If your Bluetooth audio device isn’t working on Windows 11, try these tricks to get it working again.
1. Restart Your System
Restarting can fix a lot of unintentional problems with your system. It is the oldest trick in the book which may sound unappealing but works most of the time. It is common for a process or a service to encounter a glitch.
Restarting will clear them from the memory and start all the services and processes again. Moreover, it will reload all the drivers including the Bluetooth adapter drivers. Try connecting the Bluetooth device and playing audio using it.
2. Restart Bluetooth on Your System
If you are unable to play audio via your Bluetooth device, try turning off the Bluetooth connection on your system. Go to the system tray icons and click on the Speakers icon. Then, click on the Bluetooth quick setting to turn off the feature. Wait for a few seconds and then click the quick setting again to enable Bluetooth on your Windows PC. Check if your Bluetooth device can play audio now.
3. Inspect the Bluetooth Device for Damage
Bluetooth devices, especially earphones and wireless earbuds are fragile pieces of equipment. An accidental drop, power surge, or unintentional contact with moisture can break them. So, properly inspect your Bluetooth device for signs of damage. Check if it turns on (usually indicated by a LED light).
Another way to check if it’s working is by connecting it to another device. You can try pairing the device with your smartphone and check if it plays audio without any issues.
4. Ensure That the Bluetooth Device Is in Range
Bluetooth has a specific connection range. If you position the device too far from your laptop or PC, it won’t be able to maintain connectivity. The standard range is 10 meters, but devices with newer versions can have a greater range. So, keep the Bluetooth device in range, reconnect, and try playing audio again.
5. Remove and Re-Pair the Bluetooth Device
If the Bluetooth device is working fine on another system, try removing it and re-pairing it with your Windows 11 system. Repeat the following steps:
- Go to the system tray icons area on the taskbar and click on the Wi-Fi icon. Then click on the arrow next to the Bluetooth quick settings.
- Click on the More Bluetooth settings option located at the bottom of the quick setting pane.
- You will see all the paired devices at the top of the page. Remember that you will have to enable Bluetooth on your system before you can remove the device via the Settings app.
-
Click on three dots (…) present in the top right corner of the Bluetooth device you want to remove.

- Then select the remove option and click on the Yes button to remove the Bluetooth device.
- Now, click on Add a device tile and then select the Bluetooth option. Once your Bluetooth device shows up, add it and then click on the Done button to exit the window.
6. Enable the Bluetooth Adapter in Device Manager
Bluetooth devices won’t work if the Bluetooth adapter embedded in the system is inactive. So, you need to enable it using the device manager.
- Press Win + X to launch the Power menu. Locate the Device manager option and click on it.
- Scroll down and find the Bluetooth device. Click on the arrow button to expand the device list.
-
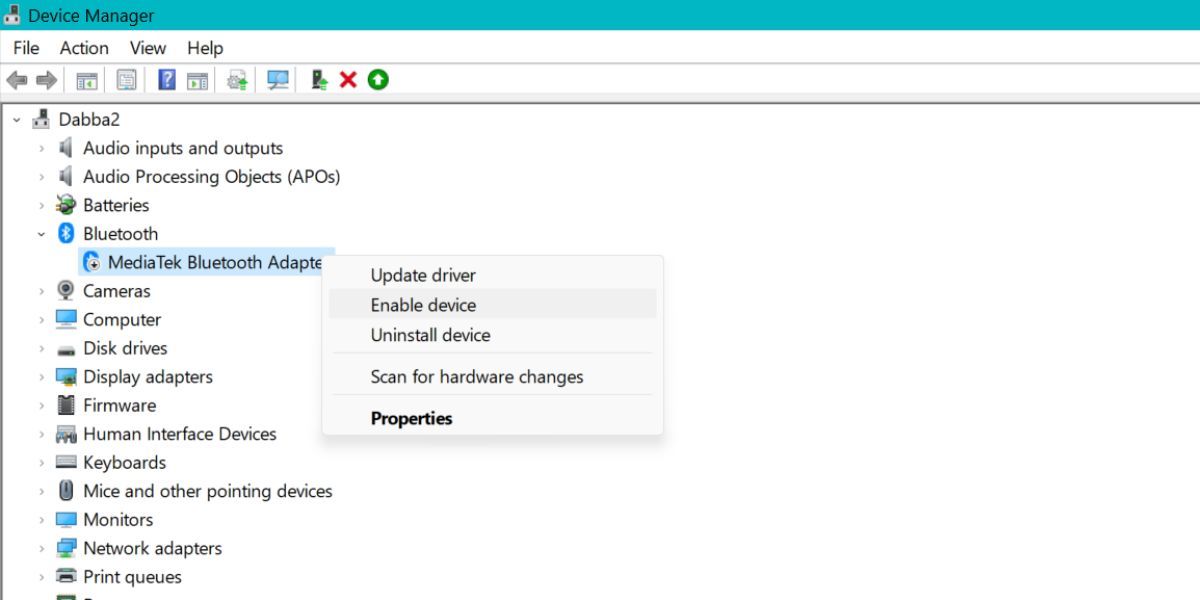
You will notice a downward arrow icon on the device which indicates that the adapter is in the disabled state.
- Right-click on the device and select Enable device option. Now, the Bluetooth adapter will be active on your system.
7. Restart Bluetooth Services
You can consider restarting Bluetooth services to fix the audio playback issue with your Bluetooth device. Sometimes, services can stop automatically due to a glitch and need a restart. Your system won’t be able to connect with other devices if the related services aren’t running.
To restart Bluetooth services, do as follows:
- Press Win + R to launch the Run command box. Type services.msc and hit the Enter key.
- Scroll down and find all the Bluetooth services in the Services panel.
-
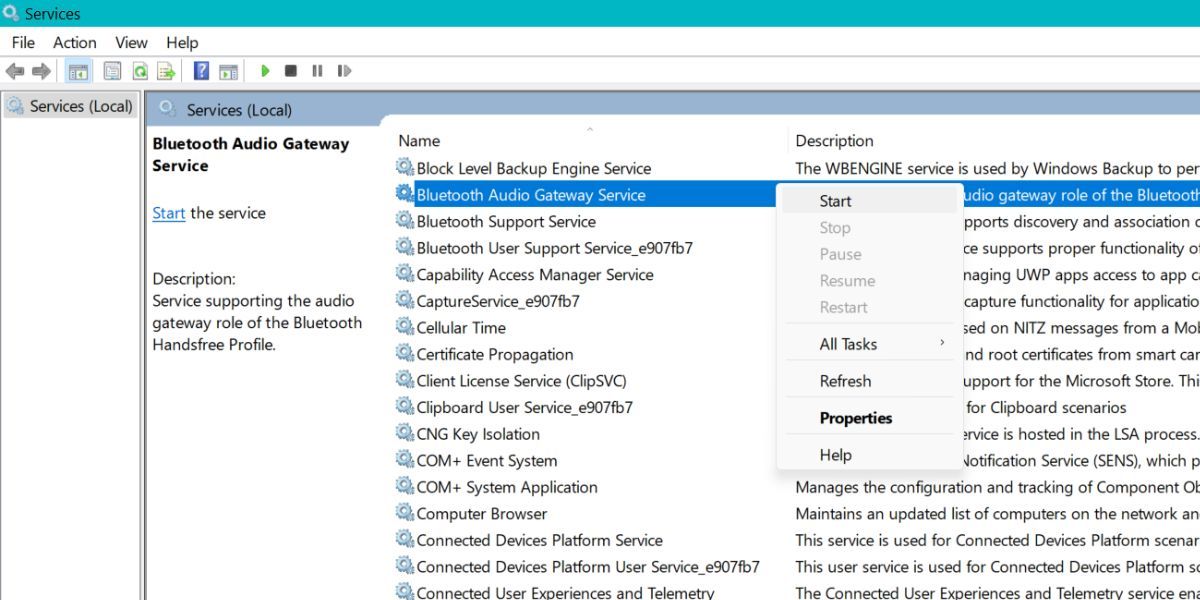
If they are not running, right-click on the service and select the start option from the context menu.
- Repeat the above step for all services containing the word «Bluetooth» in them. Exit the services panel.
8. Update Your Bluetooth Drivers
Drivers become outdated with time. An outdated driver can pose problems and thus impact the nominal working of the device. So, it is best to update your Bluetooth drivers to the latest version.
To update the Bluetooth drivers, do as follows:
- Press Win + X to launch the Power menu and click on the Device Manager option from the list.
-
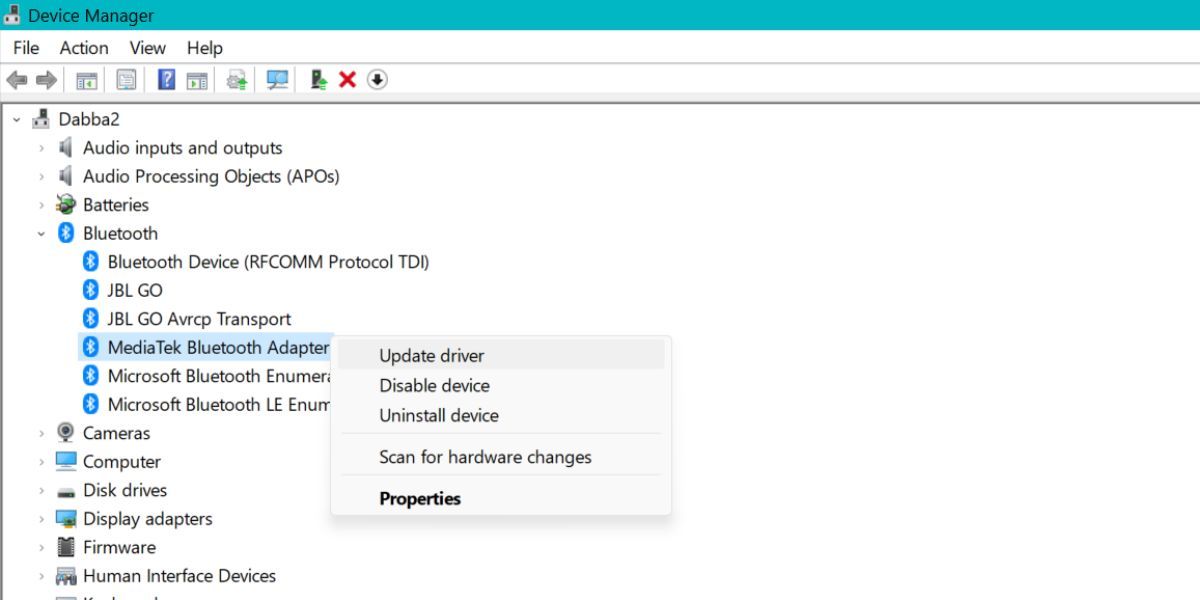
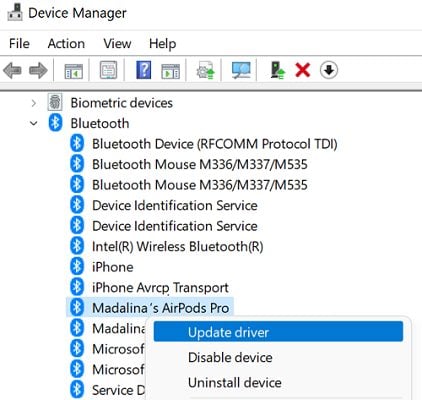
Scroll down and expand the Bluetooth devices section. Right-click on the Bluetooth adapter and select the Update Driver option.
- Then, click on search automatically find my drivers option. Wait for the utility to find and install the latest driver on your system.
- Restart your PC and try connecting to the Bluetooth device again.
If Windows fails to find any drivers, search on your Bluetooth adapter manufacturer’s website for a new driver.
9. Reinstall Bluetooth Drivers
If updating the Bluetooth driver didn’t fix the problem, you will have to reinstall the drivers. The benefit of this method is that you can remove corrupt drivers from your system. After that, Windows will auto-download and install the befitting drivers.
Here’s how to reinstall the Bluetooth drivers using Device Manager.
- Press Win + X to launch the Power menu and click on the Device Manager option from the list.
- Scroll down and right-click on the Bluetooth adapter. Select the Uninstall Device option.
- Click on the Uninstall button to remove the device and its drivers.
- Now, restart your system. Windows will auto-download the device drivers.
- You can also visit the website of the Bluetooth adapter manufacturer and download and install the latest drivers from there.
10. Configure Bluetooth Audio Device Services
Bluetooth devices offer a number of services ranging from simple playback controls to remote control features and more. Audio sink is one such crucial service that is responsible for audio playback on the device. If it is inactive, your device won’t play audio even if it’s connected to your system.
To enable the Audio Sink service, do as follows:
- Press the Win key and type «Control Panel.» Click on the first search result and launch the app.
- Navigate to Hardware and Sound > Devices and Printers.
- Right-click on the Bluetooth device and click on Properties.
-
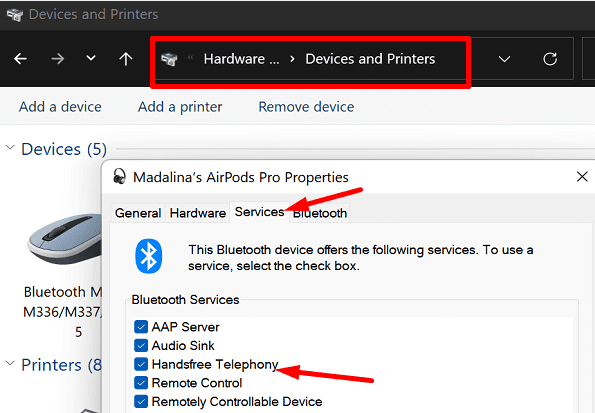
Switch to the Services tab and check whether Audio Sink is active or not. If not, click on the checkbox and then click on the Apply button.
- Then click on the OK button and exit the Properties window.

11. Set the Bluetooth Device as Default for Playing Audio
Bluetooth device may not play audio because it isn’t set as the default device to play audio. So, you need to make it the default choice for playing sound.
- Press Win + I to launch the Settings app. Then navigate to System > Sound.
-
Scroll down and click on the More sound settings option. Then select the Bluetooth device from the list and click on the Set Default button.
- Click on the OK button and exit the window. Now, try playing audio via the Bluetooth device.

Windows Audio Playback Issue: Fixed
These were the methods you can use to fix the audio playback issues on Windows 11. Restarting the system and Bluetooth feature usually resolves the trick. But if it doesn’t, then you can try troubleshooting the drivers, modifying services, and setting it as the default audio device.
Many Windows 11 users have experienced various Bluetooth audio issues shortly after upgrading their computers to the latest OS version. For example, people complained there was no sound coming from their Bluetooth earphones, or their audio devices dropped out unexpectedly when using Teams, Zoom, or other video conference apps. Use the troubleshooting methods below to fix Bluetooth audio issues on Windows 11.
Contents
- 1 Fix: Bluetooth Audio Not Working on Windows 11
- 1.1 Run the Bluetooth and Audio Troubleshooters
- 1.2 Run the Hardware and Devices Troubleshooter
- 1.3 Unplug Unnecessary Peripherals and Check for Updates
- 1.4 Turn 0ff Handsfree Telephony
- 1.5 Conclusion
Run the Bluetooth and Audio Troubleshooters
Check if Windows 11’s built-in troubleshooters can solve the problem.
- Navigate to Settings, select System, and click on Troubleshooter.
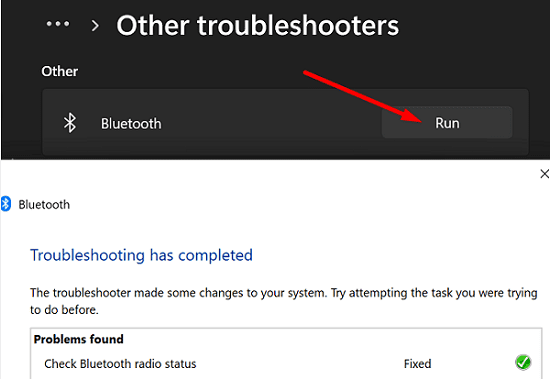
- Then, click on Other troubleshooters and run the Bluetooth troubleshooter.

- After that, run the Playing Audio troubleshooter as well.
Run the Hardware and Devices Troubleshooter
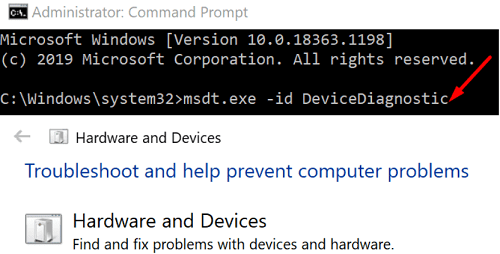
If the issue persists, launch Command Prompt with admin rights. Then, run the msdt.exe -id DeviceDiagnostic command to launch the Hardware and Devices troubleshooter. Wait until the troubleshooter scans your devices and check the results.
If you’re experiencing the same problem after running the three troubleshooters, turn on Airplane Mode and wait 30 seconds. Then, turn Airplane Mode off, and check if Bluetooth audio is working properly.
Unplug Unnecessary Peripherals and Check for Updates
Disconnect all the peripherals connected to your machine to ensure they’re not interfering with your Bluetooth audio devices. Then, update your OS, apps, and drivers to the latest version. Check if you notice any changes.
Navigate Settings and click on Windows Update to check for OS updates. To update your drivers, launch the Device Manager, and check if there are any exclamation marks next to your drivers. Right-click on them and select Update Driver.
To ensure you’re running the latest Bluetooth driver version, follow the steps below.
- Launch the Device Manager.
- Expand the list of Bluetooth devices.
- Right-click on your built-in Bluetooth driver.
- Select Update Driver.
- Select the option that says Search automatically for drivers.
- Then, right-click on your Bluetooth audio device.
- Select Update Driver.

- Restart your computer, and check if the problem persists.
If you can’t use your Bluetooth earbuds or headphones with Microsoft Teams, Zoom, or other specific apps, don’t forget to update your apps to the latest version as well.
Turn 0ff Handsfree Telephony
To resolve Bluetooth audio quality issues, disable Hands-Free technology.
- Open Control Panel.
- Navigate to Hardware and Sound.
- Then, select Devices and Printers.
- Right-click on your Bluetooth audio device.
- Select Properties.
- Go to the Services tab.
- Turn off Handsfree Telephony (untick the checkbox).

- Save the new settings.
Conclusion
To fix Bluetooth audio issues on Windows 11, run the Bluetooth, Playing Audio, and Hardware and Devices troubleshooters. Then, disconnect unnecessary peripherals and update your OS, drivers, and apps to the latest version. If the issue persists, go to advanced settings, and disable Handsfree Telephony.
Did you manage to solve the problem? Which of the solutions listed in this guide worked for you? Let us know in the comments below.
Table of contents
- How to Fix Bluetooth Connected but No Sound Issue
- Method 1: Check if your Windows computer supports Bluetooth
- Method 2: Run troubleshooters on Windows 10 and 11
- Method 3: Updating your drivers
- Method 4: Resetting your default playback device
- Method 5: Check the audio level of your Bluetooth device
- Method 6: Try pairing your Bluetooth speakers again
- Conclusion
- FAQ
Gone are the days of tangled cables connecting our music players to speakers. Bluetooth technology has made it possible to enjoy our favorite songs wirelessly. However, some users still face audio issues when using Bluetooth connections in Windows 10 and 11.
If you’re experiencing the frustration of a ‘Bluetooth connected but no sound’ issue, don’t worry.
In this article, we’ll provide updated methods to fix Bluetooth audio problems on Windows 10 and 11. We’ve included a quick fix to get you up and running in no time.
If you prefer a visual guide, watch a short video demonstrating the quick fix here.
How to Fix Bluetooth Connected but No Sound Issue
Method 1: Check if your Windows computer supports Bluetooth
Perhaps you have an old desktop computer or laptop, and you recently decided to upgrade your system to Windows 10.
It is possible that the device itself does not support a Bluetooth connection. It would also be ideal to check if your system is Bluetooth-compatible.
On the other hand, if you discover that your computer does not support Bluetooth, you can still connect it to wireless speakers. You can connect your PC to the speakers using a USB Bluetooth dongle.
When you search online, you will find various USB dongles compatible with specific Windows platforms.
So, even if your laptop or desktop computer does not support Bluetooth connection, you can still resolve the issue using this nifty device.
Also Read: Bluetooth’s not Working in Windows 10/11: How to Fix?
Method 2: Run troubleshooters on Windows 10 and 11
One of the best things about using the latest versions of Windows is that Windows 10 and Windows 11 come with a number of troubleshooting services. These are designed to solve common system glitches — like the one discussed in this article.
Let’s go over your troubleshooting options for Windows 10 and Windows 11.
Check the Bluetooth support service.
If you notice your Bluetooth speaker pairing but no sound, the necessary service may be disabled. Consequently, your Bluetooth speakers will not function properly.
That said, you can activate the Bluetooth support service in Windows 10 by following the instructions below:
- On your keyboard, press
Windows Key + R. This should open the Run dialog box. - Type
services.msc, then hit Enter. - Once you’ve got the Services window up, look for the Bluetooth support service and double-click it.
- From the drop-down menu, select Automatic.
- You can now launch the Bluetooth support service by clicking the Start button.
- Confirm the changes you’ve made by clicking Apply and OK.
Use the audio playing troubleshooter.
If you are having trouble with sound playback on Windows 10 or Windows 11, you can use the troubleshooter for Playing Audio.
To access this, follow these instructions:
- Go to the taskbar and click the Search icon.
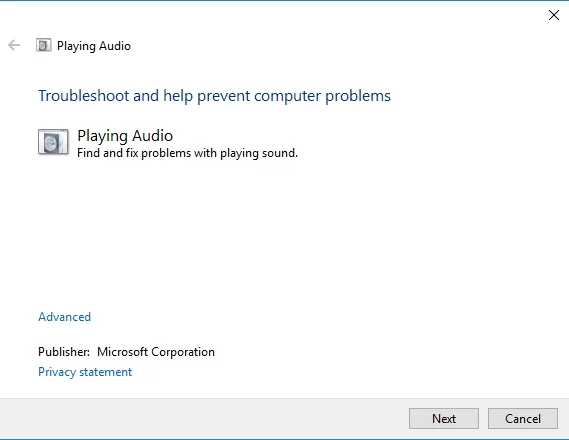
- Type audio playback inside the box, then select Find and fix audio playback. This should open the Audio Playback troubleshooter.
- Click Next. The troubleshooter will now find and repair audio playback issues.
Use the troubleshooter for Bluetooth devices.
You can also try resolving the issue by using the Bluetooth troubleshooter on Windows 10 or Windows 11. Here are the steps to follow:
- Click the Search icon on the taskbar.
- Type troubleshoot, then hit Enter.
- The right pane contains a list of troubleshooters. Scroll down until you find the Bluetooth troubleshooter.
- Click Bluetooth, then press Run the Troubleshooter. The program will detect issues and start repairing them. If it is unable to fix the error, it will provide additional suggestions on how to resolve it.
Run the Hardware and Devices Troubleshooter
If the above solutions haven’t worked, try running the Hardware and Devices Troubleshooter on Windows 11. Here’s how:
- Start Command Prompt with admin rights.
- Next, run the exe -id DeviceDiagnostic command to launch the Hardware and Devices troubleshooter.
- The Troubleshooter will scan your devices and let you know if something isn’t working.
Fix this issue quickly
You can try using a safe and totally free tool developed by the Auslogics team of experts.
A few simple steps to troubleshoot the issue:
Download the tiny Auslogics TroubleShooter tool.
Run the application (no installation is needed).
The app will check for the issue mentioned in the article. When the scan is done, check that this is the issue you were looking to solve and click ‘Apply now’ to apply the recommended fix.
You can use the app to troubleshoot other malfunctions for free by simply typing in a brief description of the issue your PC is experiencing. Or you can scan your PC for performance issues using the My Scanner tab.
Method 3: Updating your drivers
In some cases, Bluetooth issues are caused by outdated drivers. If yours are antiquated, they can prevent your wireless speakers from functioning properly.
That said, you can update your drivers manually or automatically using Auslogics Driver Updater.
If you want to try the former, you have to know that the process can be time-consuming, tedious, and complicated. Moreover, if you install incompatible drivers, you might encounter more problems.
Here are the steps:
- Get the manual for the speakers and write down the product title and serial number.
- You also have to check the Windows platform details. Check whether you have a 32- or 64-bit system.
- Go to the speaker manufacturer’s website, then locate the driver download section.
- Look for the latest drivers compatible with your system and download them.
- Install the drivers and check if the audio issues have been fixed.
Like we’ve said, this process can take a lot of your time. As such, we highly recommend using a one-click solution like Auslogics Driver Updater.
Once you run this tool, it will automatically detect your system and find the latest and compatible drivers for it.
The best part is Auslogics Driver Updater fixes and updates all problematic drivers. So, once the process is done, you can enjoy faster speed and better performance from your computer.
Method 4: Resetting your default playback device
Some users tried adjusting the settings for their default playback device and got their wireless speakers working. You can also try this method by following the steps below:
- Right-click the Sound icon on the taskbar, then choose Sounds from the list.
- Once the Sound window is up, go to the Playback tab.
- You will see a list of audio devices. Click the Bluetooth speakers you paired with your computer.
- After that, set the Bluetooth speakers as your default playback device. You can do this by pressing the Set Default button.
- Save the changes you’ve made by clicking Apply, then pressing OK.
By the way, some of the issues causing audio errors have much in common with those provoking video issues, such as ‘You are not currently using a display attached to an NVIDIA GPU‘.
But we know how to fix almost any of them. So, let’s get back to fixing sound errors after a Bluetooth connection has been established in Windows 10.
Method 5: Check the audio level of your Bluetooth device
It is also possible that the audio level of the Bluetooth device is too low.
This may be why you see your Bluetooth speaker pairing, but no sound is coming from your wireless speakers. So, it would be advisable to try adjusting the audio level.
Simply follow the instructions below:
- Go to the taskbar and right-click the Sound icon.
- Select Sounds from the menu.
- Once the Sound window is up, go to the Playback tab.
- Right-click the Bluetooth speakers, then select Properties.
- Go to the Levels tab.
- Go to the audio output bar, then drag it to the far right.
- Click Apply, then press OK to close the window.
Method 6: Try pairing your Bluetooth speakers again
It is possible that an issue occurred when you tried to pair your Bluetooth speakers to your computer. You can try pairing them again to resolve the audio problems. Here are the steps:
- Click the Search icon on the taskbar.
- Type Bluetooth inside the search box.
- Select Bluetooth and other device settings.
- Disconnect the wireless speakers by pressing the Remove Device button.
- Confirm the changes by pressing the Yes button.
- Now, select the available Bluetooth speakers.
- Connect them once more by pressing the Pair button.
Fix this issue quickly
You can try using a safe and totally free tool developed by the Auslogics team of experts.
A few simple steps to troubleshoot the issue:
Download the tiny Auslogics TroubleShooter tool.
Run the application (no installation is needed).
The app will check for the issue mentioned in the article. When the scan is done, check that this is the issue you were looking to solve and click ‘Apply now’ to apply the recommended fix.
You can use the app to troubleshoot other malfunctions for free by simply typing in a brief description of the issue your PC is experiencing. Or you can scan your PC for performance issues using the My Scanner tab.
Conclusion
We hope this article has helped you resolve the Bluetooth audio problems you’ve been experiencing on Windows 10 and 11.
The methods provided include checking compatibility, running troubleshooters, resetting default playback devices, adjusting audio levels, re-pairing Bluetooth speakers, and updating drivers.
Remember to double-check that your device supports Bluetooth connectivity, as you may need a USB Bluetooth dongle if it doesn’t.
If you’re still encountering audio issues after trying the methods mentioned in this article, it might be worth reaching out to the manufacturer of your Bluetooth device or seeking assistance from a technical professional.
With the steps provided, you can now enjoy your favorite music and audio wirelessly without any hassle.
FAQ
Why is my Bluetooth speaker connected but not producing any sound on Windows 10/11?
Several factors could contribute to this issue, such as outdated drivers, incompatible Bluetooth devices, incorrect default playback settings, or system glitches.
Following the troubleshooting methods outlined in this article should help you resolve the problem.
How can I check if my device supports Bluetooth connectivity?
To check if your device supports Bluetooth, look for the Bluetooth icon in the system tray or search for “Bluetooth” in the settings menu.
If you don’t find any Bluetooth options, your device may not have built-in Bluetooth support. In such cases, you can use a USB Bluetooth dongle to enable Bluetooth connectivity.
Why does my Bluetooth audio keep disconnecting or stuttering?
Bluetooth audio disconnections or stuttering can be caused by various factors, such as signal interference, outdated drivers, low battery levels, or system issues.
Trying methods like re-pairing your Bluetooth device, updating drivers, or adjusting audio levels can help resolve these problems.
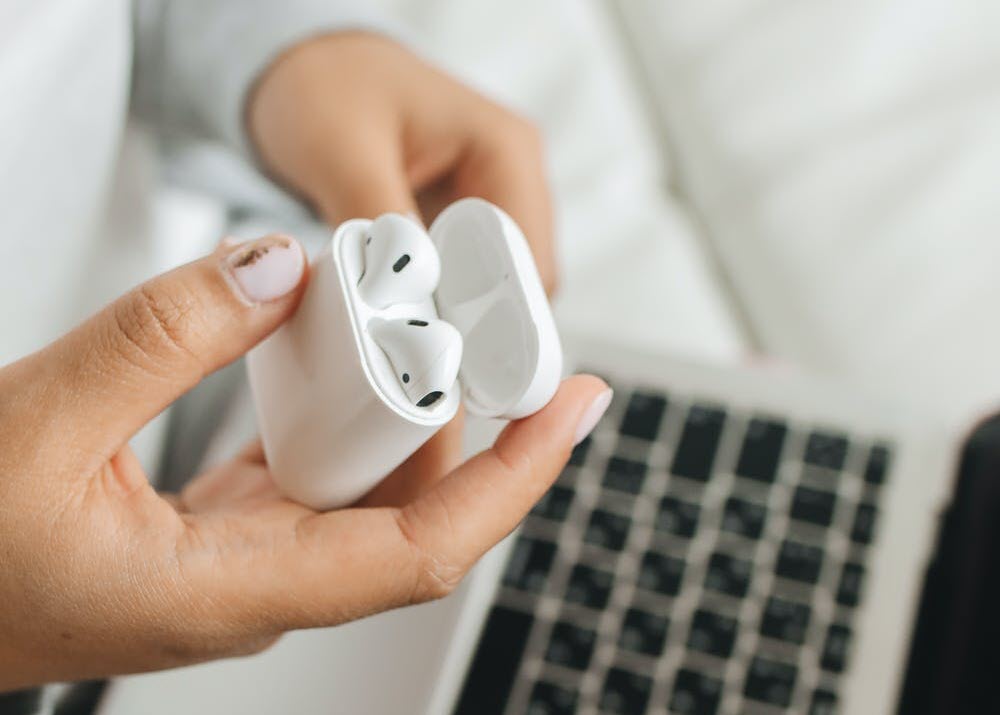
If you’re encountering the AirPods connected but no sound issue, you’re not alone. Many Windows 10 & 11 users complained that when they connected the AirPods to a computer, the sound comes from the speakers or there’s no sound at all. Don’t worry. We’ve put together several fixes for you to bring your earbuds back to normal.
Before getting started:
Before trying anything more complicated, you can go through the steps below to rule out some common causes.
- First, make sure your AirPods are not physically damaged and fully charged. You can simply test the hardware with a mobile phone or another Windows computer.
- Remove AirPods and pair them again.
- Restart your computer to resolve the temporary system glitch.
- Disconnect other audio devices from your PC to avoid potential interference.
Try these fixes:
If the basic troubleshooting doesn’t help, you may need to work on more advanced methods. You don’t have to try them all. Just work your way down the list until you find the one that does the trick.
- Check for Windows updates
- Set your AirPods as the default device
- Restart the Bluetooth Support service
- Update your Bluetooth driver
Fix 1 – Check for Windows updates
When your devices start to malfunction on PC all of a sudden, there may be something wrong with your operating system. Windows regularly push patches for new features and bug fixes. To keep your computer in a tip-top condition, it’s a good idea to install the latest updates.
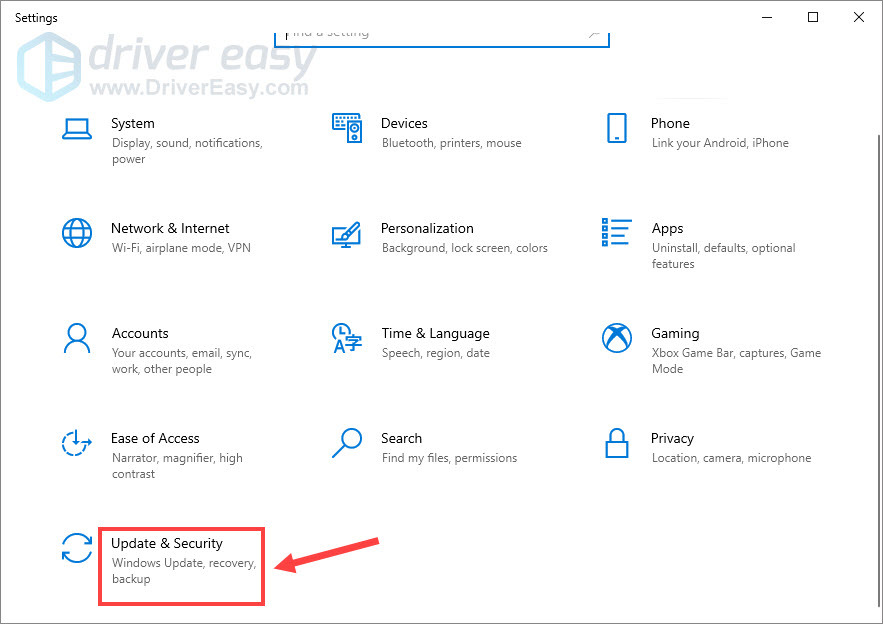
On Windows 10
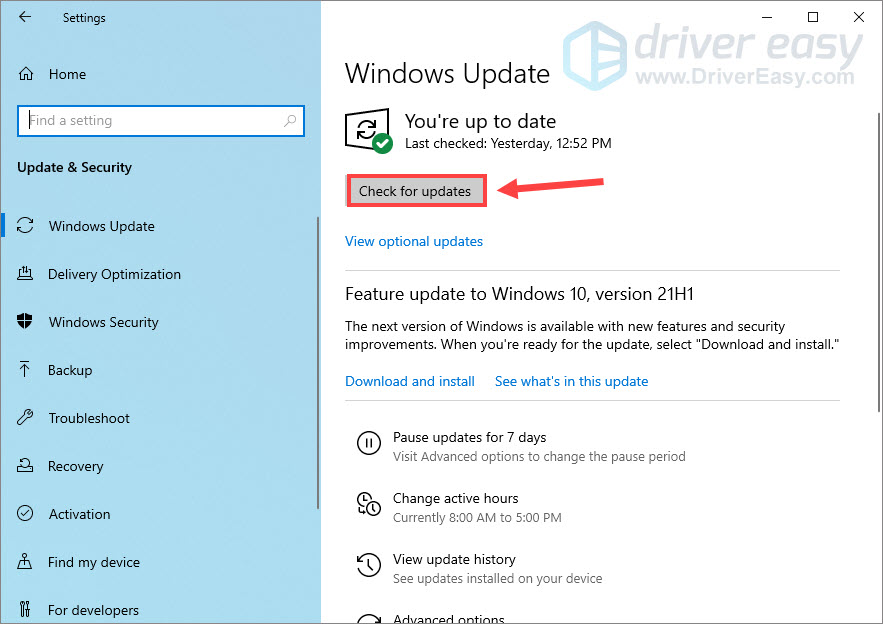
- On your keyboard, press the Windows logo key and I at the same time to open the Settings menu. Then click Update & Security.

- Click Check for updates.
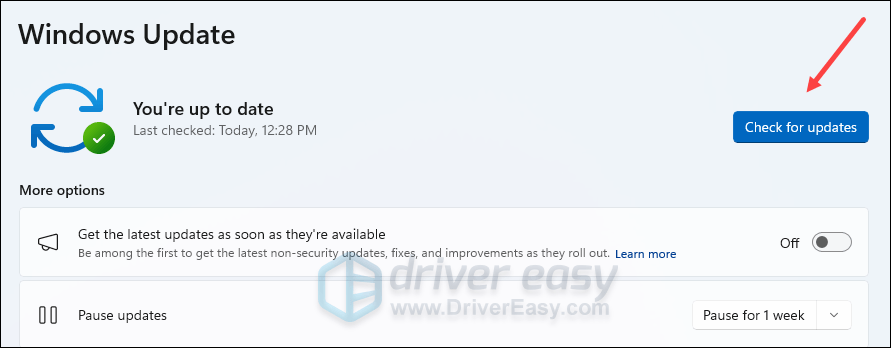
On Windows 11
- On your keyboard, hit the Windows key, then type check for updates, then click Check for updates.

- Click Check for updates, and Windows will scan for any available updates.

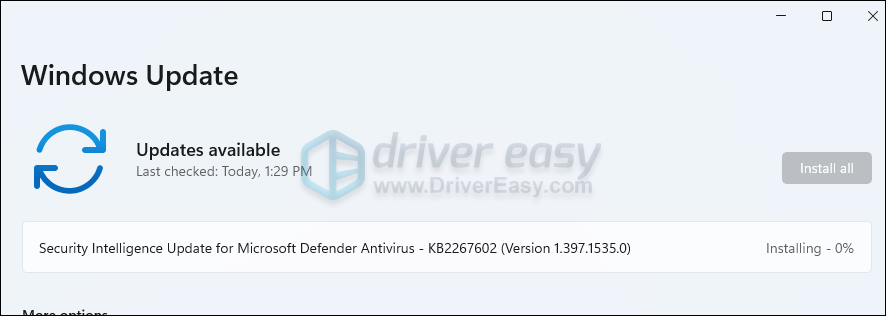
- If there are available updates, Windows will automatically download them for you. Restart your computer for the update to take effect if needed.

- If there are no available updates, you’ll see You’re up to date like this.


If there are available updates, the download and installation will automatically initiate. After the process completes, restart your computer to test the issue. If it persists, move on to the second solution.
Fix 2 – Set your AirPods as the default device
To make sure your AirPods work properly on Windows, you should set them as the default device. Follow the instructions to configure the settings correctly.
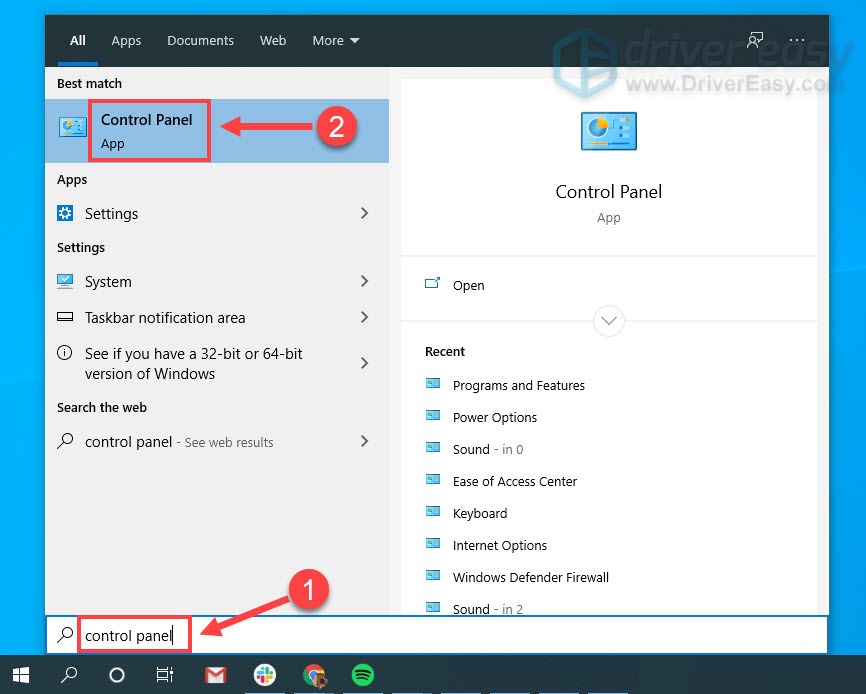
- Type control panel in the Windows search box and select Control Panel.

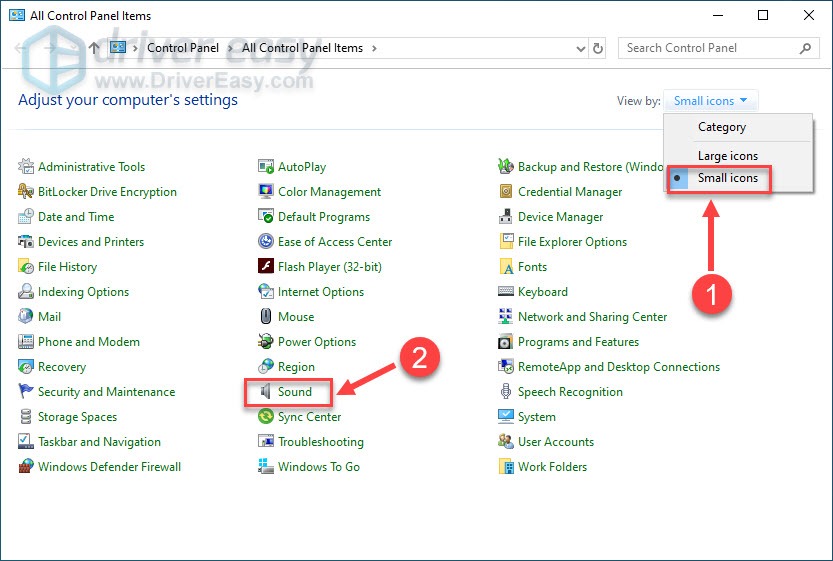
- Select Small icons next to View by, and click Sound.

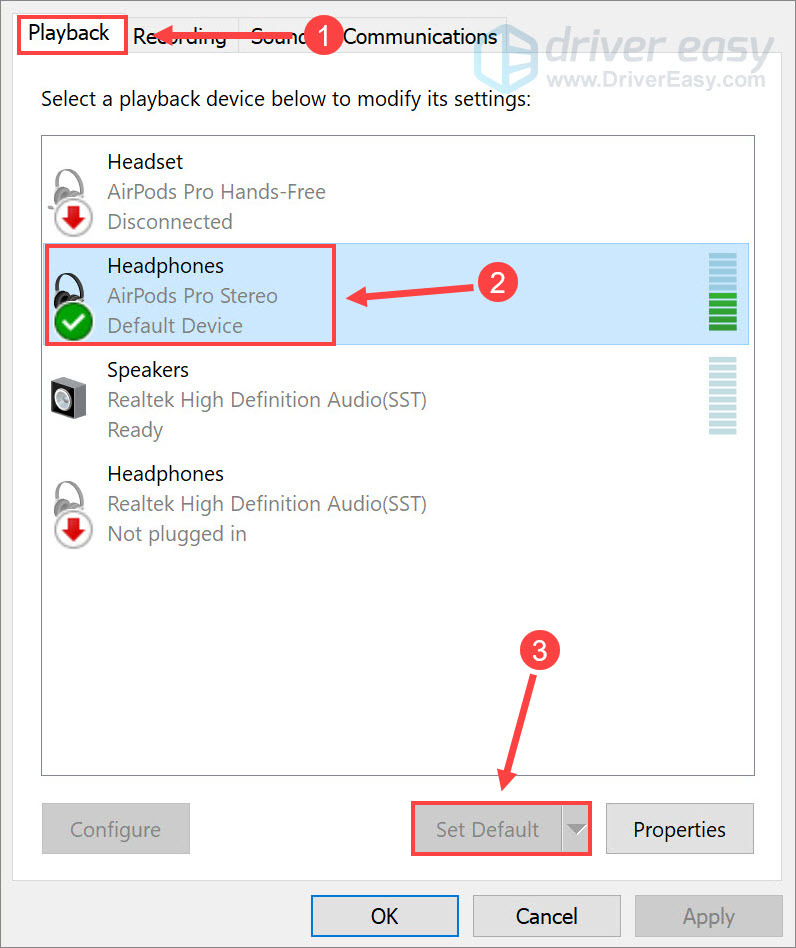
- Under the Playback tab, make sure your AirPods are enabled (there should be a green checkmark). Then click the AirPods and click Set as default.

- Navigate to the Recording tab and set your AirPods headset as the default device as well.
- Click OK to save the changes.
If the AirPods no sound issue only occurs in specific programs, you should check the in-app settings and ensure your earbuds are chosen as the primary device for both audio input and output.
Fix 3 – Restart the Bluetooth Support service
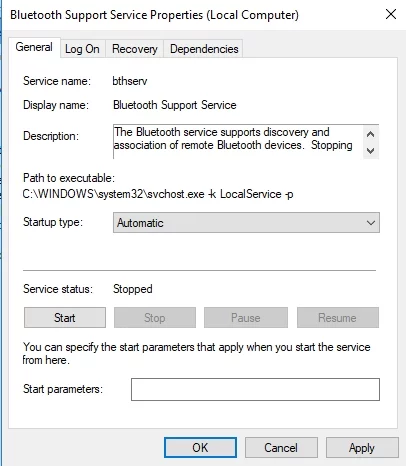
A Bluetooth headphone like AirPods will require certain services to work on your Windows PC. If the service isn’t started or running properly, there will be various problems when you’re using it.
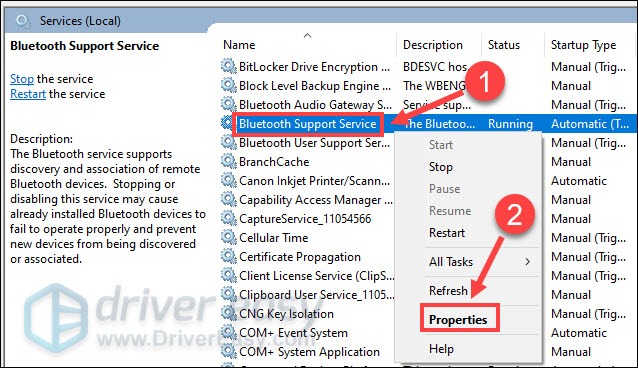
- On your keyboard, press the Windows logo key and R at the same time to invoke the Run box. Then, type services.msc, and click OK.
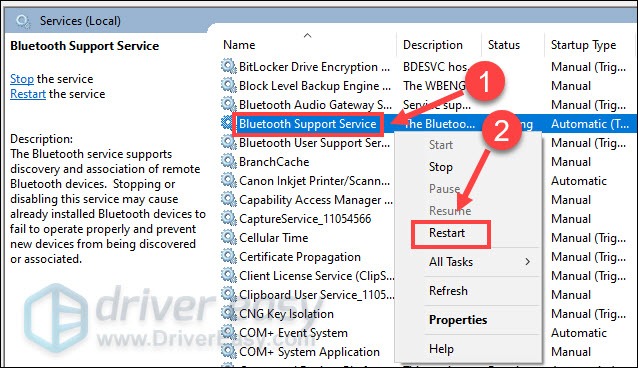
- Right-click Bluetooth Support Service. If it isn’t running, click Start; if it’s already running, click Restart.

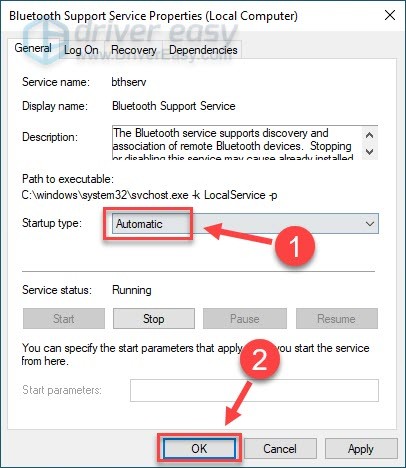
- After the service restarts, right-click it again and click Properties.
- Set the Startup type to Automatic, and click OK.

See if your AirPods play sound as normal now. If no, the problem may be caused by the device drivers.
Fix 4 – Update your Bluetooth driver
Most device glitches indicate the driver issue. If you’re using an outdated or faulty Bluetooth driver, the AirPods may not produce sound and act up randomly. You can install the latest Bluetooth driver to see if that helps your case.
There are two ways you can update the Bluetooth driver: manually or automatically.
If you’re familiar with computer hardware, first identify the manufacturer of the Bluetooth adapter, such as Intel, Qualcomm or Realtek, and visit their official websites. Then find the latest Bluetooth driver corresponding with your specific flavor of Windows version, download and install it manually.
If you don’t have the time, patience or computer skills to update your Bluetooth driver manually, you can, instead, do it automatically with Driver Easy. Driver Easy will automatically recognize your system and find the correct driver for your exact Bluetooth adapter, and your Windows version, and it will download and install it correctly.
You can update your drivers automatically with either the 7 days free trial or the Pro version of Driver Easy. It takes just 2 clicks, and you get full support and a 30-day money-back guarantee with the Pro version:
- Download and install Driver Easy.
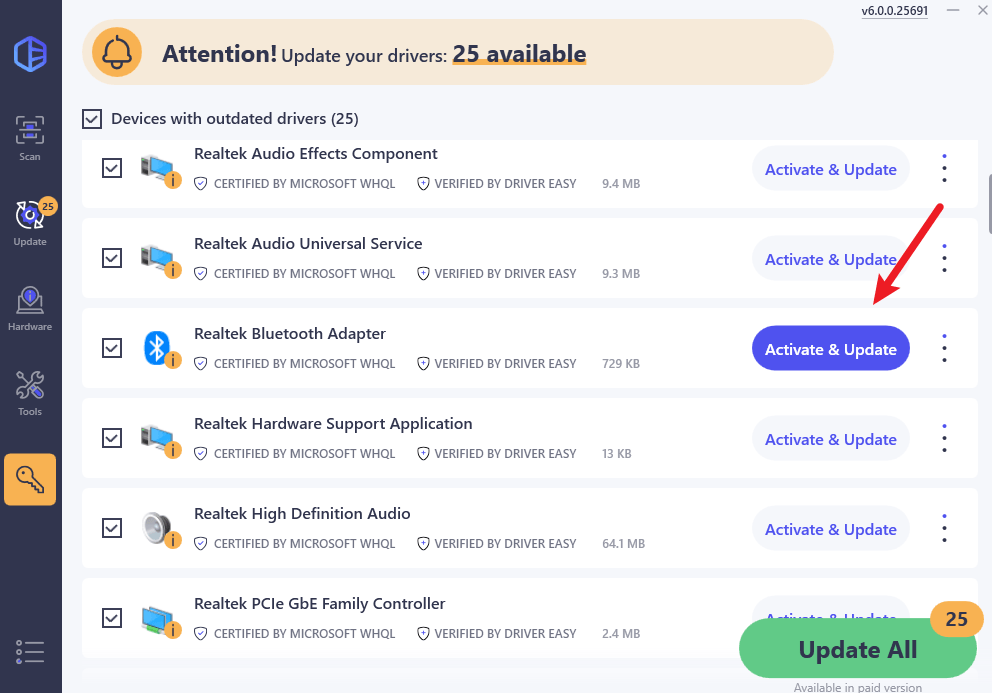
- Run Driver Easy and click the Scan Now button. Driver Easy will then scan your computer and detect any problem drivers.

- Click the Activate & Update button next to the flagged device to automatically download and install the correct version of this driver.
Or click Update All to automatically download and install the correct version of all the drivers that are missing or out of date on your system (You’ll need the Pro version for this – when you select Update All, you’ll get a prompt to upgrade. If you’re not prepared to purchase the Pro version yet, Driver Easy provides a 7-day trial at no cost, granting access to all Pro features like fast downloads and easy installation. No charges will occur until after your 7-day trial period ends.)

- After updating, restart your computer to take effect.

The Pro version of Driver Easy comes with full technical support.
If you need assistance, please contact Driver Easy’s support team at support@drivereasy.com.
Test your AirPods again. A driver update should recover the sound for your headphones and keep your devices in the best status.
So these are all the simple fixes for AirPods connected but no sound issue. Hopefully you’ll find them useful. If you have further questions or suggestions, please feel free to leave a comment below.
29
29 people found this helpful