
Первое приложение с .NET CLI
Последнее обновление: 25.11.2023
Для создания графических интерфейсов с помощью платформы .NET применяются разные технологии — Window Forms, WPF, UWP.
Однако наиболее простой и удобной платформой до сих пор остается Window Forms или сокращенно WinForms. Данное руководство ставит своей целью дать понимание принципов создания графических интерфейсов с помощью технологии WinForms
и работы основных элементов управления.
Создадим первое приложение на C# и Windows Forms. Что нам для этого потребуется? Прежде всего необходим текстовый редактор для написания кода программы.
Можно взять любой понравившийся текстовый редактор, например, Visual Studio Code
Также для компиляции и запуска программы нам потребуется .NET SDK. Для его установки перейдем на официальный сайт по ссылке
.NET SDK
После установки .NET SDK для первого проекта определим какую-нибудь папку. Например, в моем случае это будет папка C:\dotnet\winforms\helloapp.
Откроем терминал/командную строку и перейдем к созданной папке проекта с помощью команды cd
cd C:\dotnet\winforms\helloapp
В данном случае мы для создания и запуска проекта мы будем использовать встроенную инфраструктуру .NET CLI, которая устанавливается вместе с .NET SDK.
Для создания проекта в .NET CLI применяется команда dotnet new, после которой указывается тип проWindows Formsекта. Для создания проекта
Windows Forms применяется шаблон — winforms. Поэтому введем в терминале команду dotnet new winforms
C:\Users\eugen>cd C:\dotnet\winforms\helloapp

C:\dotnet\winforms\helloapp>dotnet new winforms
Шаблон "Приложение Windows Forms" успешно создан.

Идет обработка действий после создания...
Восстановление C:\dotnet\winforms\helloapp\helloapp.csproj:
  Определение проектов для восстановления...
  Восстановлен C:\dotnet\winforms\helloapp\helloapp.csproj (за 1,04 sec).
Восстановление выполнено.


C:\dotnet\winforms\helloapp>
После выполнения этой команды у нас будет создан следующий проект:
Структура проекта Windows Forms
Рассмотрим базовую структуру простейшего стандартного проекта Windows Forms:
-
helloapp.csproj: стандартный файл проекта C#, который соответствует назанию проекта (по умолчанию названию каталога) и описывает все его настройки.
-
helloapp.csproj.user: дополнительный файл проекта C#, который хранит специфичные для текущего пользователя настройки.
-
Form1.cs: содержит класс формы, которая по умолчанию запускается при старте приложения
-
Form1.Designer.cs: он содержит определение компонентов формы, добавленных
на форму в графическом дизайнере (графический дизайнер Windows Forms на данный момент официально доступен только в Visual Studio) -
Program.cs: определяет класс Program, который запускается при старте приложения и запускает форму Form1
Например, посмотрим на содержимое файла helloapp.csproj
<Project Sdk="Microsoft.NET.Sdk">

  <PropertyGroup>
    <OutputType>WinExe</OutputType>
    <TargetFramework>net8.0-windows</TargetFramework>
    <Nullable>enable</Nullable>
    <UseWindowsForms>true</UseWindowsForms>
    <ImplicitUsings>enable</ImplicitUsings>
  </PropertyGroup>

</Project>
Для компиляции приложения Windows Forms указаны следующие настройки:
-
OutputType: определяет выходной тип проекта. Должен иметь значение WinExe — то есть выполняемое приложение с
расширением exe под Windows -
TargetFramework: определяет применяемую для компиляции версию фреймворка .NET. Поскольку при создании проекта
была выбрана версия .NET 8, а сам проект зависит от компонентов Windows, то здесь должно быть значение net7.0-windows -
Nullable: подключает в проект функционалность ссылочных nullable-типов
-
UseWindowsForms: указывает, будет ли проект использовать Windows Forms (для этого устанавливается значение
true) -
ImplicitUsings: подключает в проект функциональность неявно подключаемых глобальных пространств имен
Запуск проекта
Проект по умолчанию не представляет какой-то грандиозной функциональности, тем не менее этот проект мы уже можем запустить. Итак, запустим проект. Для этого выполним команду
dotnet run
C:\dotnet\winforms\helloapp>dotnet run
При запуске запускается графическая форма, код которой определяет класс Form1:
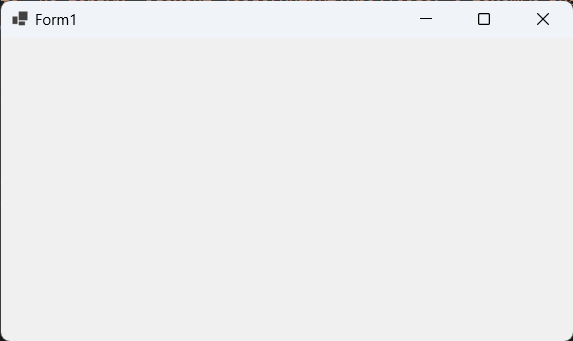
Запуск приложения
Файл Program.cs определяет точку входа в приложение:
namespace helloapp;

static class Program
{
    [STAThread]
    static void Main()
    {
        ApplicationConfiguration.Initialize();
        Application.Run(new Form1());
    }
}
Метод Main снабжен атрибутом [STAThread]. Этот атрибут, грубого говоря,
необходим для корректной работы компонентов Windows. В самом методе сначала вызывается метод
ApplicationConfiguration.Initialize()
который устанавливает некоторую базовую конфигурацию приложения
Затем вызывается метод
Application.Run(new Form1());
в который передается объект отображаемой по умолчанию на экране формы.
То есть, когда мы запустим приложение, сработает метод Main, в котором будет вызван метод Application.Run(new Form1()),
благодаря чему мы увидим форму Form1 на экране.
Определение формы
Теперь посмотрим на определение формы и немного изменим его. Для этого откроем файл Form1.cs в текстовом редакторе. По умолчанию он выглядит следующим образом:
namespace helloapp;

public partial class Form1 : Form
{
    public Form1()
    {
        InitializeComponent();
    }
}
Класс формы — Form1 представляет графическую форму — фактически то окно, которое мы увидим на экране при запуске проекта.
Этот класс определяется как частичный (с модификатором partial) и наследуется от встроенного класса Form,
который содержит базовую функциональность форм.
В самом классе Form1 определен по умолчанию только конструктор, где вызывается метод InitializeComponent(), который выполняет инициализацию компонентов формы из файла дизайнера
Form1.Designer.cs. По сути именно код этого файла передается выше через вызов InitializeComponent()
Теперь изменим его код следующим образом:
namespace helloapp;
public partial class Form1 : Form
{
public Form1()
{
InitializeComponent();
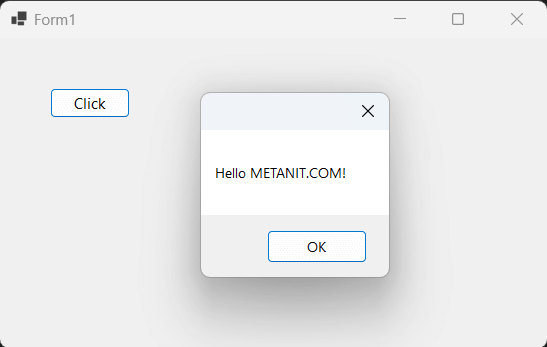
// определяем кнопку
Button button = new Button();
// текст кнопки
button.Text ="Click";
// положение кнопки
button.Location = new Point(50, 50);
// размер кнопки
button.Size = new Size { Width = 80, Height = 30 };
// обработчик нажатия кнопки
button.Click += (o, e) => MessageBox.Show("Hello METANIT.COM!");
// добавление кнопки на форму
this.Controls.Add(button);
}
}
В данном случае на форму добавляется кнопка, и у нее настраиваются различные свойства, как текст, положение на форме, размер, а также обработчик нажатия.
Заново запустим проект, и нам отобразится та же форма, которая теперь будет содержать кнопку. И по нажатию на кнопку появится маленькое окно с сообщением.
Prerequisites
- Visual Studio 2022
- TX Text Control .NET for Windows Forms
Step 1: Create a New Project
- Open Visual Studio 2022.
- Click on «Create a new project».
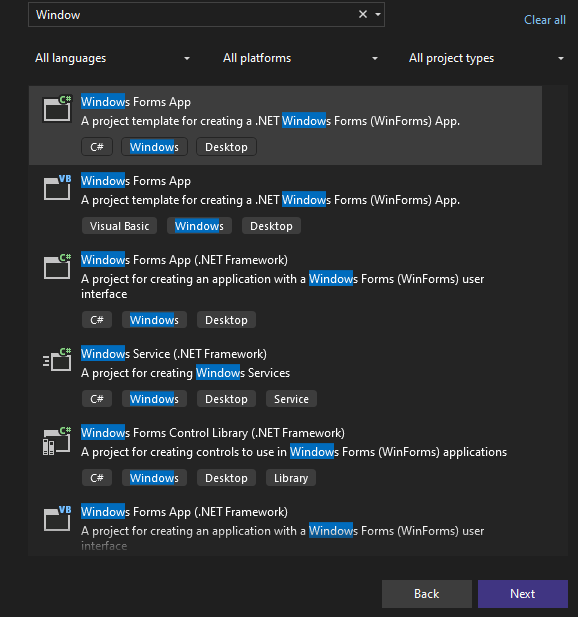
- From the options, select C# under Languages, Windows under Platform, and Desktop under Project Type.
- Scroll to find the Windows Forms App template.
- Select it and click Next.

Step 2: Name Your Project and Choose the Framework
- Enter a project name and click Next.
- Select your Framework version as .NET 6 (Long-term support) and click Create.

Step 3: Install the Required NuGet Package
- Right-click the project in Solution Explorer.
- Select Manage NuGet Packages from the context menu.
- Choose Text Control Offline Packages as the package source, then click Browse.
- Find TXTextControl.TextControl.WinForms.SDK and click Install.

Step 4: Add the Text Control to Your Form
- In Solution Explorer, open Form1.
- In the Toolbox, find the TX Text Control 32.0 tab.
- Select the TextControl icon and draw it onto the Windows form.

Step 5: Customize the Text Control
- Click the Smart Tag in the upper right corner of TextControl.
- In the Wizards group, click on:
- Add a Button Bar
- Add a Status Bar
- Add a Ruler
- Add a Vertical Ruler
- Finally, click Arrange Controls Automatically.

The controls will now be connected and docked to fill the container.

Step 6: Build and Compile
- Click the Start button to build and compile the project.
- The application will start and the Text Control will be displayed on the form.
Conclusion
In this tutorial, you learned how to create a new Windows Forms application in Visual Studio 2022 and how to add a Text Control to the form. You also learned how to customize the Text Control by adding a Button Bar, Status Bar, Ruler, and Vertical Ruler. Finally, you built and compiled the project to see the Text Control in action.
Windows Forms
Text Control combines the power of a reporting tool and an easy-to-use WYSIWYG word processor — fully programmable and embeddable in your Windows Forms application. TX Text Control .NET for Windows Forms is a royalty-free, fully programmable rich edit control that offers developers a broad range of word processing features in a reusable component for Visual Studio.
See Windows Forms products
Related Posts
Getting Started with Windows Forms (.NET Framework)
by Bjoern Meyer| September 1, 2022
This article shows how to use the TX Text Control .NET for Windows Forms TextControl class within a .NET Framework (4.8) application in Visual Studio 2022.
Getting Started with Windows Forms (.NET 5 and better)
by Bjoern Meyer| September 1, 2022
This article shows how to use the TX Text Control .NET for Windows Forms TextControl class within a .NET 6 application in Visual Studio 2022.
New Getting Started Article Hub Launched
by Bjoern Meyer| July 11, 2022
We just launched a new getting started article hub that helps to find articles, samples, and tutorials by filtering by types, technologies and Text Control components.
Creating Your First Windows Forms Application with C#
by Bjoern Meyer| January 1, 2020
This Windows Forms tutorial shows how to create your first desktop application with C# using TX Text Control .NET for Windows Forms.
Windows Forms
Windows Forms (WinForms) is a UI framework for building Windows desktop applications. It is a .NET wrapper over Windows user interface libraries, such as User32 and GDI+. It also offers controls and other functionality that is unique to Windows Forms.
Windows Forms also provides one of the most productive ways to create desktop applications based on the visual designer provided in Visual Studio. It enables drag-and-drop of visual controls and other similar functionality that make it easy to build desktop applications.
Windows Forms Out-Of-Process Designer
For information about the WinForms Designer supporting the .NET runtime and the changes between the .NET Framework Designer (supporting .NET Framework up to version 4.8.1) vs. the .NET Designer (supporting .NET 6, 7, 8, 9+), please see Windows Forms Designer Documentation.
Important: As a Third Party Control Vendor, when you migrate controls from .NET Framework to .NET, your control libraries at runtime are expected to work as before in the context of the respective new TFM (special modernization or security changes in the TFM kept aside, but those are rare breaking changes). Depending on the richness of your control’s design-time support, the migration of control designers from .NET Framework to .NET might need to take a series of areas with breaking changes into account. The provided link points out additional resources which help in that migration process.
Relationship to .NET Framework
This codebase is a fork of the Windows Forms code in the .NET Framework 4.8.
We started the migration process by targeting .NET Core 3.0, when we’ve strived to bring the two runtimes to a parity. Since then, we’ve done a number of changes, including breaking changes, which diverged the two. For more information about breaking changes, see the Porting guide.
The bar for innovation and new features
WinForms is a technology which was originally introduced as a part of .NET Framework 1.0 on February 13th, 2002. It’s primary focus was and is to be a Rapid Application Tool for Windows based Apps, and that principal sentiment has not changed over the years. WinForms at the time addressed developer’s requests for
- A framework for stable, monolithic Line of Business Apps, even with extremely complicated and complex domain-specific workflows
- The ability to easily provide rich user interfaces
- A safe and — over the first 3 versions of .NET Framework — increasingly performant way to communicate across process boundaries via various Windows Communication Services, or access on-site databases via ADO.NET providers.
- A very easy to use, visual what-you-see-is-what-you-get designer, which requires little ramp-up time, and was primarily focused to support 96 DPI resolution-based, pixel-coordinated drag & drop design strategies.
- A flexible, .NET reflection-based Designer extensibility model, utilizing the .NET Component Model.
- Visual Controls and Components, which provide their own design-time functionality through Control Designers
Over time, and with a growing need to address working scenarios with multi-monitor, high resolution monitors, significantly more powerful hardware, and much more, WinForms has continued to be modernized.
And then there is the evolution of Windows: When new versions of Windows introduce new or change existing APIs or technologies — WinForms needs to keep up and adjust their APIs accordingly.
And exactly that is still the primary motivation for once to modernize and innovate, but also the bar to reach for potential innovation areas we either need or want to consider:
- Areas, where for example for security concerns, the Windows team needed to take an depending area out-of-proc, and we see and extreme performance hit in WinForms Apps running under a new Service Pack or a new Windows Version
- New features to comply with updated industry standards for accessibility.
- HighDPI and per Monitor V2-Scenarios.
- Picking up changed or extended Win32 Control functionality, to keep controls in WinForms working the way the Windows team wants them to be used.
- Addressing Performance and Security issues
- Introducing ways to support asynchronous calls interatively, to enable apps to pick up migration paths via Windows APIs projection/Windows Desktop Bridge, enable scenarios for async WebAPI, SignalR, Azure Function, etc. calls, so WinForms backends can modernized and even migrated to the cloud.
What would not make the bar:
- New functionality which modern Desktop UIs like WPF or WinUI clearly have already
- Functionality, which would «stretch» a Windows Desktop App to be a mobile, Multi-Media or IoT app.
- Domain-specific custom controls, which are already provided by the vast variety of third party control vendors
A note about Visual Basic: Visual Basic .NET developers make up about 20% of WinForms developers. We welcome changes that are specific to VB if they address a bug in a customer-facing scenario. Issues and PRs should describe the customer-facing scenario and, if possible, include images showing the problem before and after the proposed changes. Due to limited bandwidth, we cannot prioritize VB-specific changes that are solely for correctness or code cleanliness. However, VB remains important to us, and we aim to fix any critical issues that arise.
Please note
⚠️ This repository contains only implementations for Windows Forms for .NET platform.
It does not contain either:
- The .NET Framework variant of Windows Forms. Issues with .NET Framework, including Windows Forms, should be filed on the Developer Community or Product Support websites. They should not be filed on this repository.
- The Windows Forms Designer implementations. Issues with the Designer can be filed via VS Feedback tool (top right-hand side icon in Visual Studio) or be filed in this repo using the Windows Forms out-of-process designer issue template.
How can I contribute?
We welcome contributions! Many people all over the world have helped make this project better.
- Contributing explains what kinds of changes we welcome
- Developer Guide explains how to build and test
- Get Up and Running with Windows Forms .NET explains how to get started building Windows Forms applications.
How to Engage, Contribute, and Provide Feedback
Some of the best ways to contribute are to try things out, file bugs, join in design conversations, and fix issues.
- The contributing guidelines and the more general .NET contributing guide define contributing rules.
- The Developer Guide defines the setup and workflow for working on this repository.
- If you have a question or have found a bug, file an issue.
- Use daily builds if you want to contribute and stay up to date with the team.
Reporting security issues
Security issues and bugs should be reported privately via email to the Microsoft Security Response Center (MSRC) secure@microsoft.com. You should receive a response within 24 hours. If for some reason you do not, please follow up via email to ensure we received your original message. Further information, including the MSRC PGP key, can be found in the Security TechCenter. Also see info about related Microsoft .NET Core and ASP.NET Core Bug Bounty Program.
Code of Conduct
This project uses the .NET Foundation Code of Conduct to define expected conduct in our community. Instances of abusive, harassing, or otherwise unacceptable behavior may be reported by contacting a project maintainer at conduct@dotnetfoundation.org.
License
.NET (including the Windows Forms repository) is licensed under the MIT license.
.NET Foundation
.NET Windows Forms is a .NET Foundation project.
See the .NET home repository to find other .NET-related projects.
July 25, 2023
1 min read
views 8059
Arthur C. Codex
chats: 7
Engineering
.Net
In this tutorial, we will walk through the process of creating a Windows Forms Application using .NET. This is a step-by-step guide aimed at helping both novice and experienced developers understand the process.

Prerequisites
- .NET SDK installed on your machine.
- Visual Studio IDE.
Step 1: Create a New Windows Forms Application
Open Visual Studio, and select ‘Create a new project’. In the project template selection screen, choose ‘Windows Forms App (.NET)’.
Step 2: Name Your Project
Give your project a meaningful name and location on your machine to save it. Click ‘Create’ to proceed.
Step 3: The Project Structure
Visual Studio will generate a project structure for you, with ‘Program.cs’ as the entry point of the application.
Step 4: Adding Controls to the Form
Open ‘Form1.cs’ and design your form by dragging and dropping controls from the Toolbox onto the form.
Step 5: Writing Code
Double-click on a button control to enter the code view. We will add a simple code snippet to display a message box when the button is clicked.
  private void button1_Click(object sender, EventArgs e)
  {
    MessageBox.Show("Hello, World!");
  }
Step 6: Running the Application
Press F5 or click on ‘Start Debugging’ to run the application. When you click the button, a message box should be displayed.
Conclusion
That’s it! You’ve created a simple Windows Forms Application with .NET. With this fundamental knowledge, you can start building more complex applications. If you need to hire .NET remote developers, don’t hesitate to contact Reintech!
If you’re interested in enhancing this article or becoming a contributing author, we’d love to hear from you.
Please contact Sasha at [email protected] to discuss the opportunity further or to inquire about adding a direct link to your resource. We welcome your collaboration and contributions!
Glossary
Visual Studio IDE
Visual Studio IDE is a powerful development environment created by Microsoft. It supports multiple programming languages like C#, C++, and Visual Basic. It’s widely used for creating web applications, mobile apps, and games. It offers features such as IntelliSense (code completion), debugging tools, and Git integration. Learn more on the official Visual Studio website.
Windows Forms App
Windows Forms (WinForms) is a free and open-source graphical (GUI) class library included as a part of Microsoft’s .NET Framework or Mono Framework, providing a platform to write rich client applications for desktop, laptop, and tablet PCs.
For more information, check out the official Microsoft documentation.
.NET SDK
The .NET SDK, or Software Development Kit, is a set of tools, libraries, and documentation that developers use to create applications for the .NET platform. It includes the .NET runtime for running applications, an application host for launching apps, and the dotnet command-line interface (CLI) for creating, building, testing, and managing .NET apps. For more information, visit the official .NET download page.
Last Updated :
25 Mar, 2025
Windows Forms (WinForms) is a GUI class library for building Windows desktop applications. Originally part of the .NET Framework, it is now supported in .NET Core, .NET 5+, .NET 8 (LTS), and .NET 9. Its main purpose is to provide an easier interface to develop applications for desktops, tablets, and PCs. It is also termed as the WinForms.
The applications developed using Windows Forms or WinForms are known as the Windows Forms Applications that run on the desktop computer. WinForms can be used only to develop Windows Forms Applications.
Creating First Windows Form
Let’s create the first Windows form here we are using Visual Studio Community 2022. Refer to this article which has a complete process on how to download Visual Studio.
Firstly we create a simple form that has a button and when we click on that button it shows a message let’s create it. These are the important steps to create a Windows form follow these steps as mentioned below:
Note: At the time of writing, Visual Studio Community 2022 is the latest stable version. However, check for newer versions like Visual Studio 2025 for updated features.
Step 1: Now open Visual Studio and different options are available there as of now.
Step 2: Now choose the Windows Forms App with C# and click on the next button.
Step 3: Now locate the project with the name here we are using the default name which is Form1 and it will open a form in the editor which we can further modify.
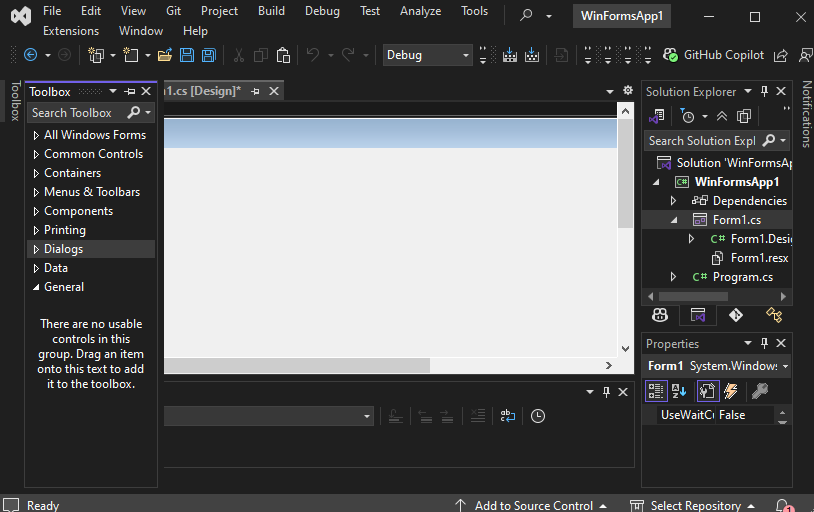
Let’s understand the interface of Visual Studio Community 2022 for Windows forms
- Editor Window (Main Window): Here, We will work with forms and code editing. Notice the layout of the form which is now blank. If we double-click the form then it will open the code for that.
- Solution Explorer: A file manager for your project where you can navigate between forms, resources, and settings. For example, if we will select a file from this window then particular information will be displayed in the property window.
- Properties Window: Allows you to modify UI elements such as colors, text alignment, and visibility. Also, we can change the properties of components or controls that will add to the forms.
In the image, we have two files that are open one Design and there is Form1.cs these two play a major role. We use the Form 1.cs file for the custom logic.
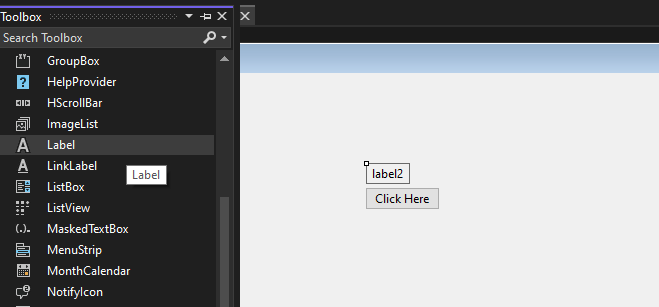
Step 4: Now open a Toolbox go to the view > Toolbox or ctrl + alt + x.
Toolbox: Provides drag-and-drop controls like buttons, text boxes, and labels to design the UI.
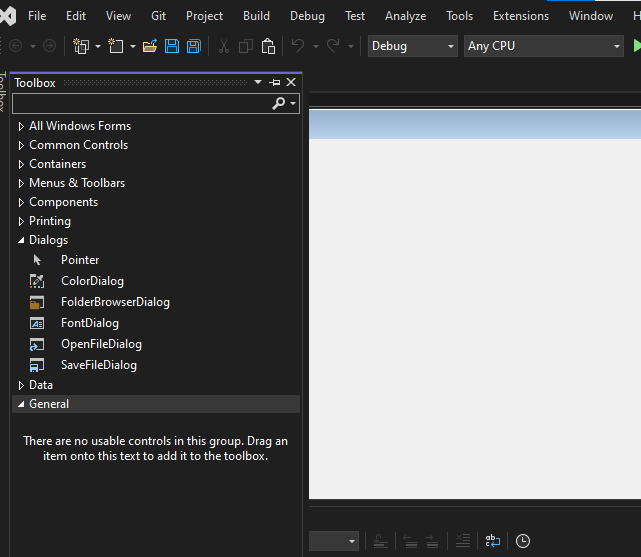
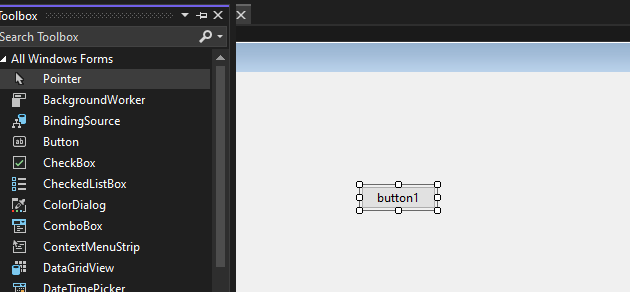
Step 5. Now open the common controls and drag and drop the button on the form where we want it to be placed.
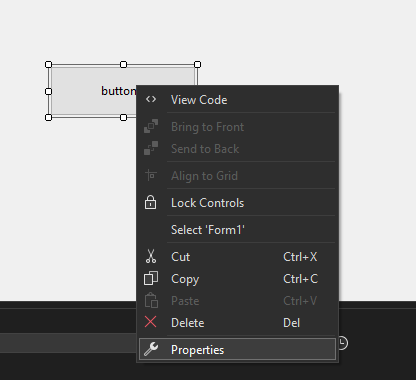
Step 6. Now open the properties of the button press right-click on the button and it will open the properties solution explorer now we can change the button name to Click here.
Step 7: Now again open the Toolbox and then click on the label and place where we want to show the message.
Note: The Form1.Designer.cs file automatically generates UI code for Windows Forms. You should not manually edit this file, as changes may be lost. Instead, add event-handling logic in Form1.cs
Note: To handle user interactions, double-click a button to generate a Click event in Form1.cs. Here, you can define actions when the button is clicked.
Step 8. Now again double click on the button and it will open Form1.cs file and add the text when the button1 click action is triggered.
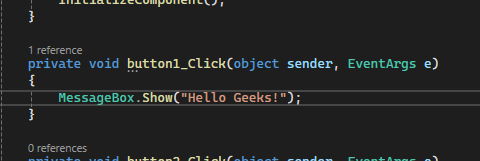
Form1.cs file:
C#
namespace WinFormsApp2
{
    public partial class Form1 : Form
    {
        public Form1()
        {
            InitializeComponent();
        }

        private void button1_Click(object sender, EventArgs e)
        {
            label1.Text = "Hello Geeks!";
        }

    }
}
Step 9: Now click on the start button or press F5 to execute the program.
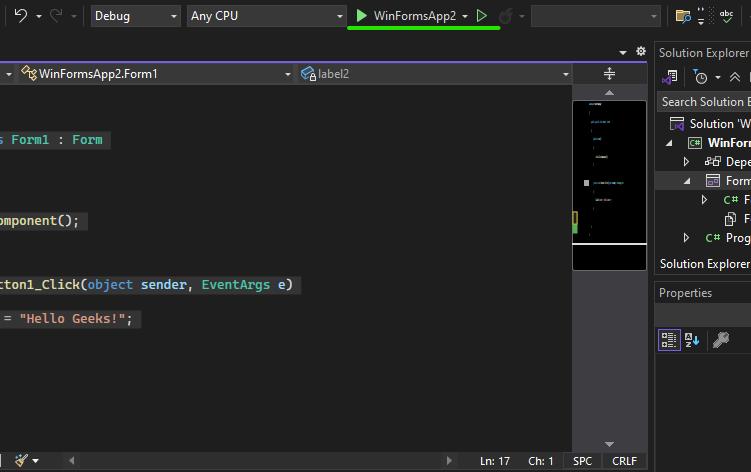
It will open a Windows form now to interact with the program.
Advantages
- Comprehensive Controls: It comes up with a rich set of customizable controls (buttons, text boxes labels etc.) that makes it easier to use and allows more control through properties and event handling
- Visual Designer: It comes up with the visual design helps to see the changes of form design and comes up with features like drag-and-drop for easy UI design.
- Code Integration: A specially designed code editor for forms design helps to write application logic, handling events and data validation.
- Use-cases: It is used in a variety of applications including the data entry tools, management system and business purposes.
- Easy and optimal: Always become a first choice to make a lightweight desktop application for rapid development and come up with .NET support.