
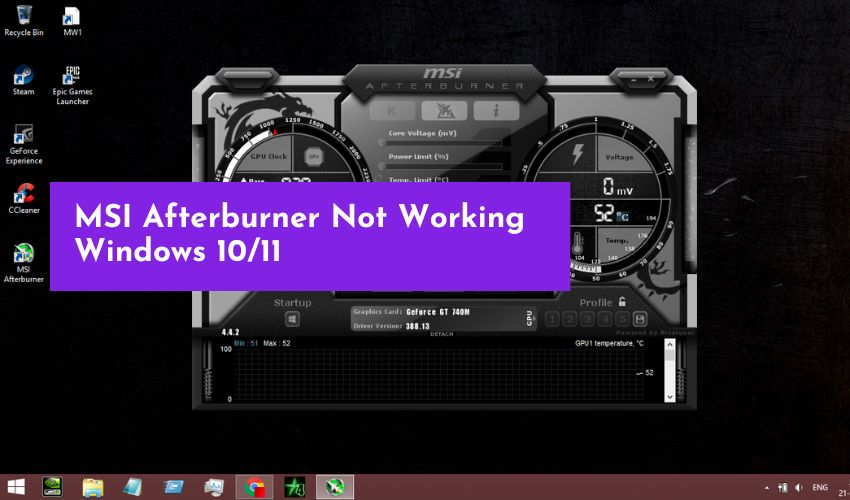
Many users have been complaining about the issue of MSI Afterburner not working in game. If you are also encountering the case on your Windows 10/11 PC, how can you get rid of it? It is easy to solve this issue if you follow the solutions mentioned by MiniTool Solution in this post.
MSI Afterburner Not Working Windows 10/11
MSI Afterburner is one of the most used graphics card software that is designed to monitor your hardware in real-time, overclock your GPU, set custom fan curves, modify a GPU’s core clock & memory clock speeds, control the GPU’s fan speed, and more. For most gamers who prefer to monitor the performance stats during games, MSI Afterburner is a must-have.
However, sometimes MSI Afterburner doesn’t work on your Windows 10/11 PC, for example, MSI Afterburner doesn’t apply overclock on startup. This is mainly due to game overlays, integrated graphics cards, general misconfigurations, and others. Now, let’s move on towards fixing this issue.
Fixes for MSI Afterburner Not Working on PC
Disable NVIDIA Overlay
If you use NVIDIA Overlay on your PC, MSI Afterburner may be not working – the overlay offered by MSI Afterburner cannot run properly. To fix this issue, disable NVIDIA Overlay by following the steps below.
Related article: How to Disable NVIDIA Overlay in GeForce Experience?
Step 1: Type GeForce Experience in the search box and click the result.
Step 2: Click the gear icon at the top-right corner to open the Settings menu.
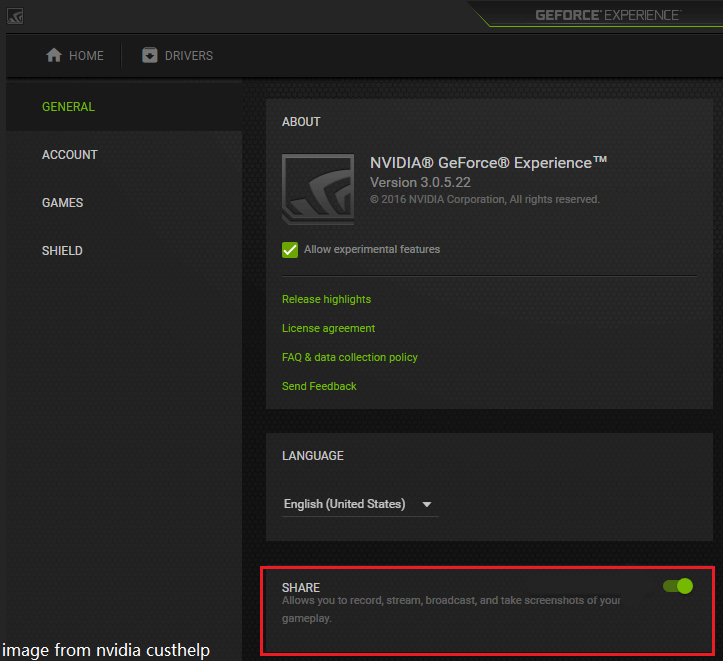
Step 3: Go to the General tab, locate the Share option with Allows you to record, stream, broadcast, and take screenshots of your gameplay, and move the slider to the left to disable it.
Step 4: Save the change and see if MSI Afterburner can work properly.
Disable Steam Overlay
Steam Overlay is yet another overlay that can lead to MSI Afterburner not working in game. To fix your issue, disable it.
Step 1: Go to the desktop, locate the Steam shortcut, right-click on it to open it on your Windows 10/11 PC.
Step 2: Navigate to the Library tab, locate the problematic game, right-click on it and choose Properties.
Step 3: Under the General tab, clear the box of Enable the Steam Overlay while in-game.
Step 4: Apply the change.
Run MSI Afterburner in Compatibility Mode
If you are using an old version of Windows 10, MSI Afterburner may not work on your PC. You can run this app in compatibility mode for old systems.
Step 1: Right-click on MSI Afterburner and choose Properties.
Step 2: Navigate to the Compatibility tab, check the box of Run this program in compatibility mode for and choose a Windows version based on your situation.
Add a Game Manually and Set Its Detection Level to High
If MSI Afterburner doesn’t work in a specific game, you can manually add this game and set the detection level to high.
Here’s what you should do:
Step 1: Launch RivaTuner on your PC. (RivaTuner is a free overclocking and hardware monitoring program. Rivatuner Statistics Server (RTSS), initially a companion software to RivaTuner, is bundled with MSI Afterburner.)
Step 2: Click the Add button at the bottom-left corner in the main window, locate the game’s installation folder and add the .exe file.
Step 3: Locate Application detection level and set it to High.
Disable the Integrated Graphics Card
Using the external and integrated graphics card at the same time can cause MSI Afterburner not working. Besides, if your onboard graphics card is enabled even you are using an external one, the issue still appears. So, you can choose to disable the integrated graphics card to fix the issue.
Step 1: Reboot your PC and press F2, Del, or another key (the key varies depending on different PC vendors) to enter BIOS.
Step 2: Go to the Security tab to find Onboard Devices Configuration or a similar one.
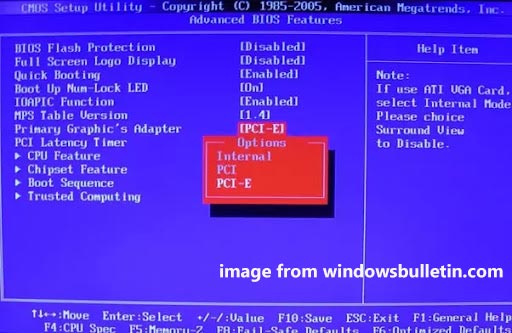
Step 3: Locate Primary Graphics Adapter and press Enter. Choose PCI-E using the arrow keys.
Step 4: Exit, save the change and reboot your computer.
Uninstall and Reinstall MSI Afterburner
If these solutions above cannot work to fix MSI Afterburner not working, you can choose to uninstall this program for your Windows 10/11 PC via Control Panel. Then, go to download the latest version of MSI Afterburner online and install it on the computer.
Further Reading: Some Cases of MSI Afterburner Not Working
- MSI Afterburner Not Showing Readings: If nothing is shown, go to uninstall MSI Afterburner from your PC, remove junk files and clean up your system. Besides, upgrade your GPU driver to the latest version and reinstall MSI Afterburner.
- MSI Afterburner Not Downloading: If you cannot install the latest version of this app, you can install an old version and then upgrade it.
- MSI Afterburner Sliders Not Working: You can uninstall this app completely including deleting its settings and then reinstall it.
- MSI Afterburner not applying overclock: Disabling the integrated graphics card is useful to fix this issue. Besides, set the external graphics card to a default one.
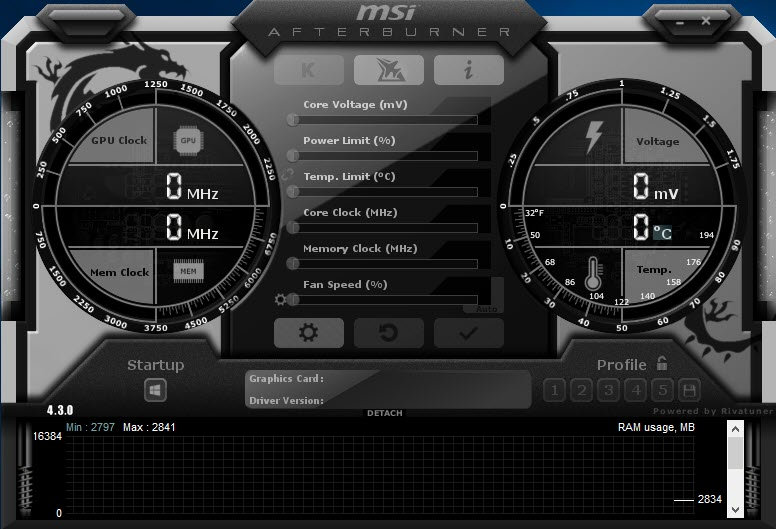
Not seeing your graphics card in MSI Afterburner? Everything on it greys out? You’re surely not alone—many players are reporting the same issue.
But don’t worry, it’s usually not that hard to fix.
Try these fixes:
You might not need to try them all. Simply work your way down until you find the one that does the trick.
- Check your cable connection
- Change properties of MSI Afterburner
- Check if you have Vanguard
- Update all your drivers
- Check for Windows updates
- Perform a clean boot
- Try another version of Afterburner
Fix 1: Check your cable connection
First you need to be sure that you have the right display port. If you’re using the wrong port, say you have your monitor hooked up with the integrated graphics, your GPU might not show up in Afterburner since you’re not using it for display.

You should also rule out the possibility of faulty cables.
If you’re sure you got the right port, you can continue to the troubleshooting below.
Fix 2: Change properties of MSI Afterburner
According to some players, a possible fix of the issue lies in the compatibility settings of Afterburner. You can follow suit and see if it works in your case.
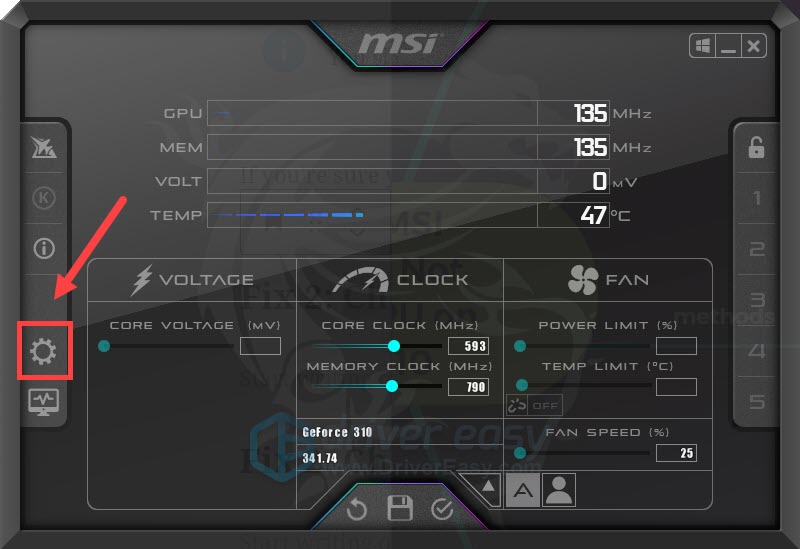
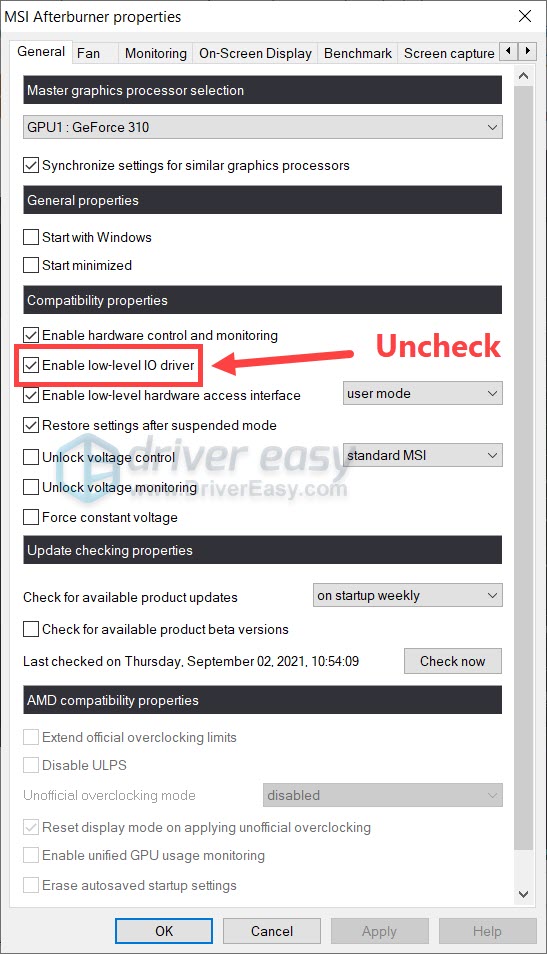
- Open MSI Afterburner. In the left pane, click the gear icon to open properties.

- In the Compatibility settings section, uncheck the box next to Enable low-level IO driver.

- Restart your PC and check the results in MSI Afterburner.
If this trick doesn’t help you. take a look at the next one below.
Fix 3: Check if you have Vanguard
If you’re into Valorant, you might be familiar with Vanguard, the anti-cheat program. Records show that Vanguard is a big time trouble maker that is responsible for many game issues. And many players reported that it has something to do with Afterburner not detecting GPU. So if you have Vanguard on your system, you can try to disable/uninstall it and see if Afterburner works properly.
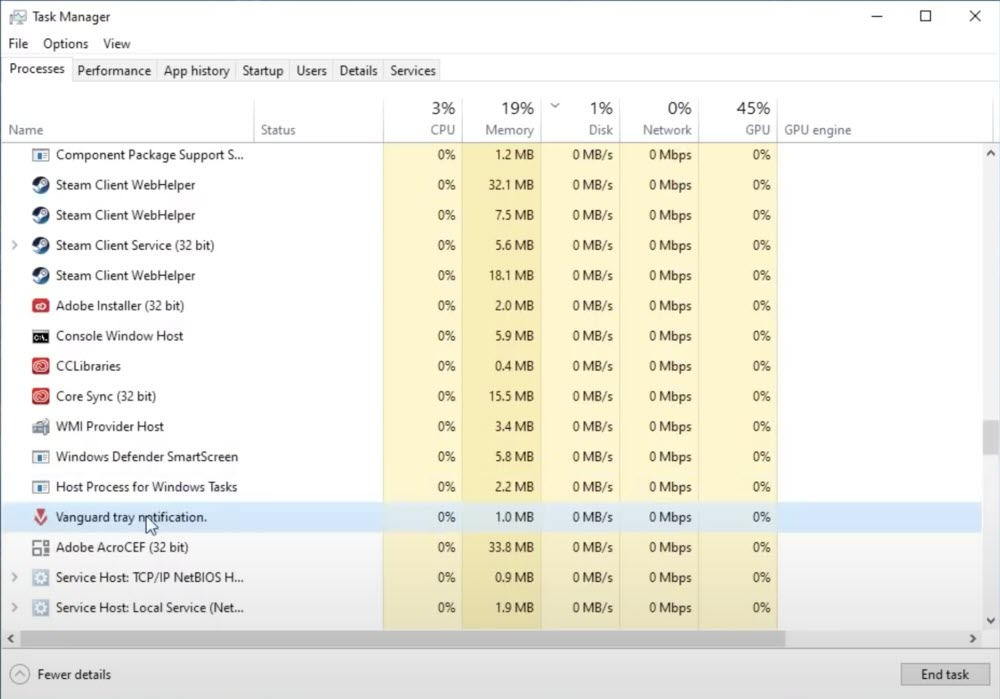
If you don’t have Vanguard, simply move on to the next fix.
Fix 4: Update all your drivers
If you’re not seeing your GPU in MSI Afterburner, chances are you might be using a buggy or outdated graphics driver. In fact, for your rig to function properly, you should always make sure you have all the drivers up to date.
You can update drivers manually, by visiting the graphics, motherboard manufacturers one by one, finding the latest correct installers and installing step by step. But if you don’t have the time or patience to update manually, you can do it automatically with Driver Easy.
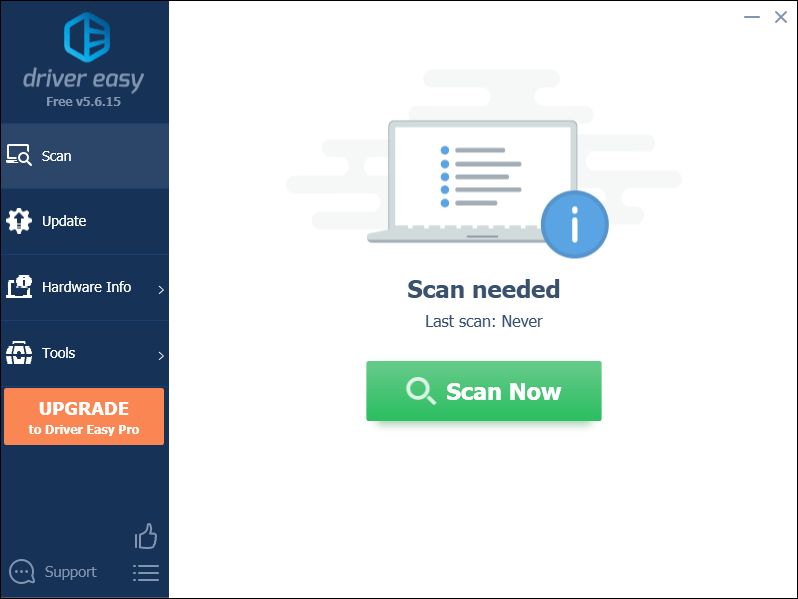
- Download and install Driver Easy.
- Run Driver Easy and click the Scan Now button. Driver Easy will then scan your computer and detect any problem drivers.

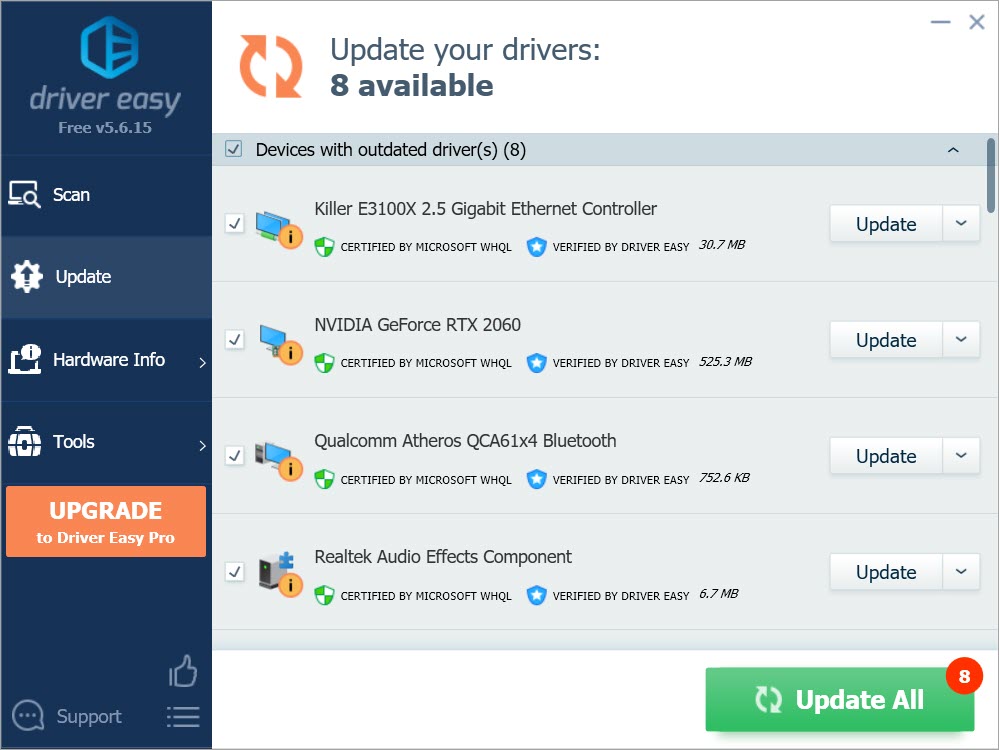
- Click Update All to automatically download and install the correct version of all the drivers that are missing or out of date on your system.
(This requires the Pro version – you’ll be prompted to upgrade when you click Update All. If you don’t want to pay for the Pro version, you can still download and install all the drivers you need with the free version; you just have to download them one at a time, and manually install them, the normal Windows way.)
If you need assistance, please contact Driver Easy’s support team at support@drivereasy.com.
After updating all your drivers, restart your PC and check if Afterburner is working properly.
If the latest drivers don’t give you luck, you can continue to the next method.
Fix 5: Check for Windows updates
Windows updates help you avoid most of the software compatibility issues. You should always make sure you’re on the latest system.
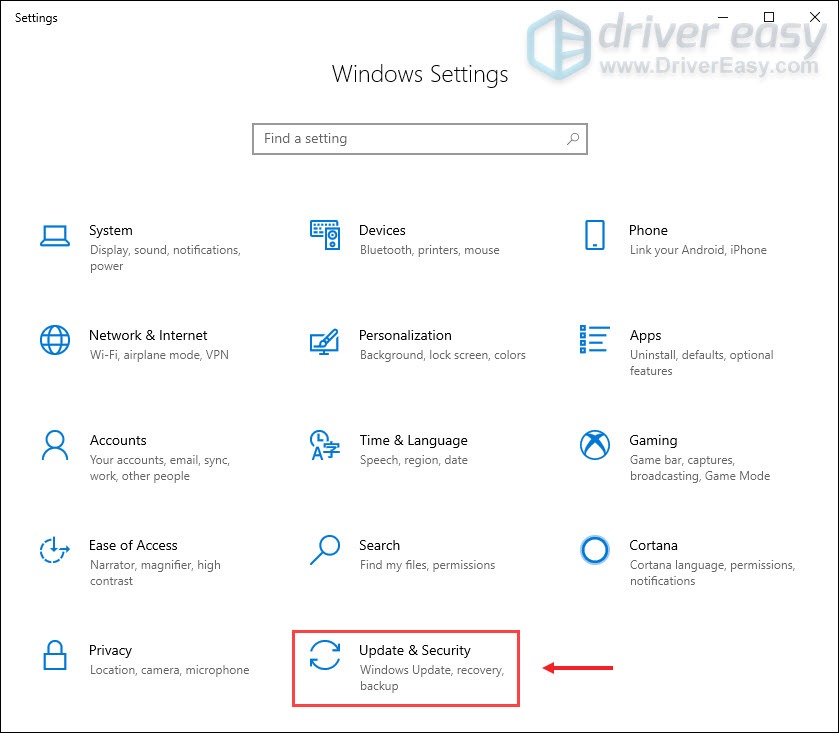
- On your keyboard, press Win+I (the Windows logo key and the i key) to open the Windows Settings app. Click Update & Security.

- Click Check for updates. Windows will then download and install the available patches. It might take some time (up to 30 mins).

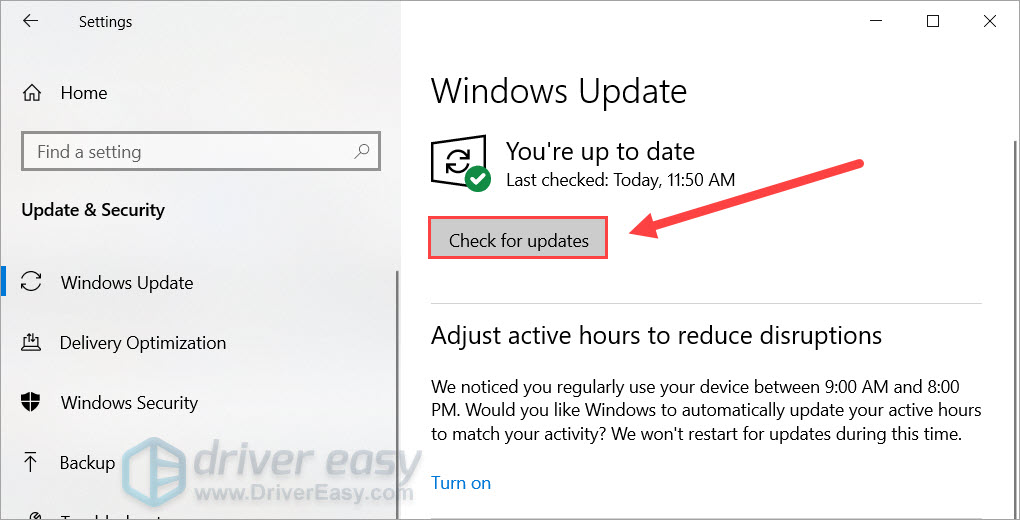
To confirm you’ve installed all the system updates, repeat these steps until it prompts “You’re up to date” when you click Check for updates.
Once done, restart your computer and check if MSI Afterburner is running correctly.
If the issue lingers on, you can continue to the next fix.
Fix 6: Perform a clean boot
In addition to Vanguard, you should check if there’re other interferences in your system. You can start by doing a clean boot, which only starts the PC with the minimum set of services and programs.
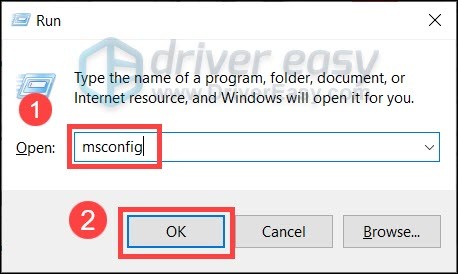
- On your keyboard, press Win+R (the Windows logo key and the r key) at the same time to invoke the Run box. Type or paste msconfig and click OK.

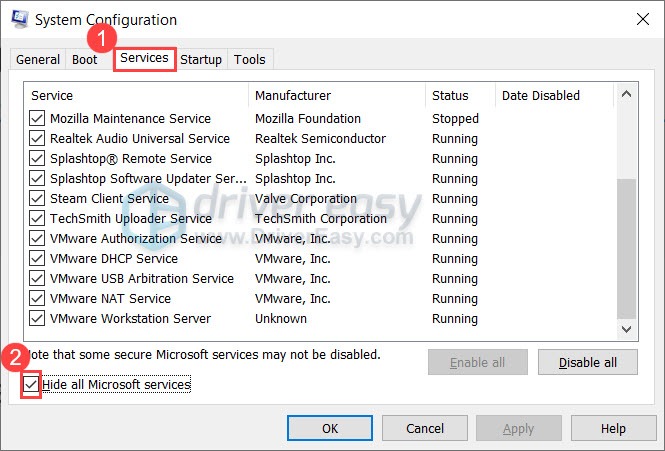
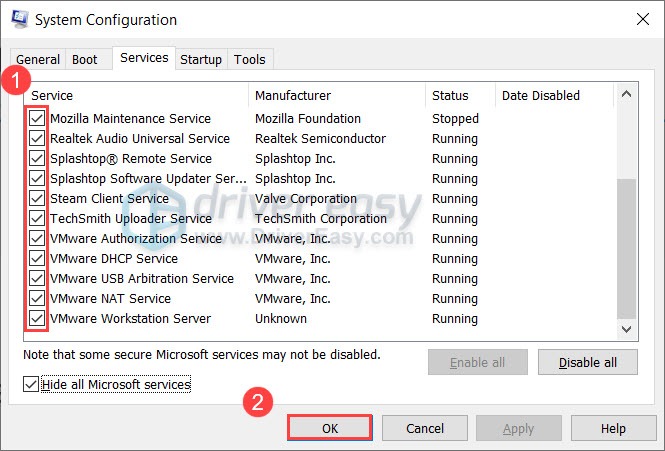
- In the pop-up window, navigate to the Services tab and check the box next to Hide all Microsoft services.
- Uncheck all the services EXCEPT those belong to your hardware manufacturers, such as Realtek, AMD, NVIDIA, Logitech and Intel. Then click OK to apply the changes.
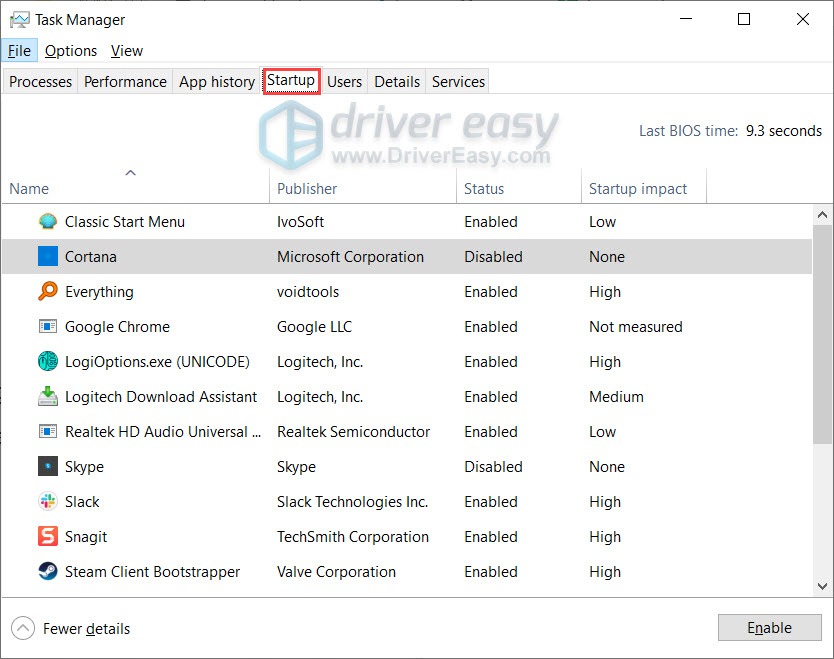
- On your keyboard, press Ctrl, Shift and Esc at the same time to open Task Manager, then navigate to the Startup tab.
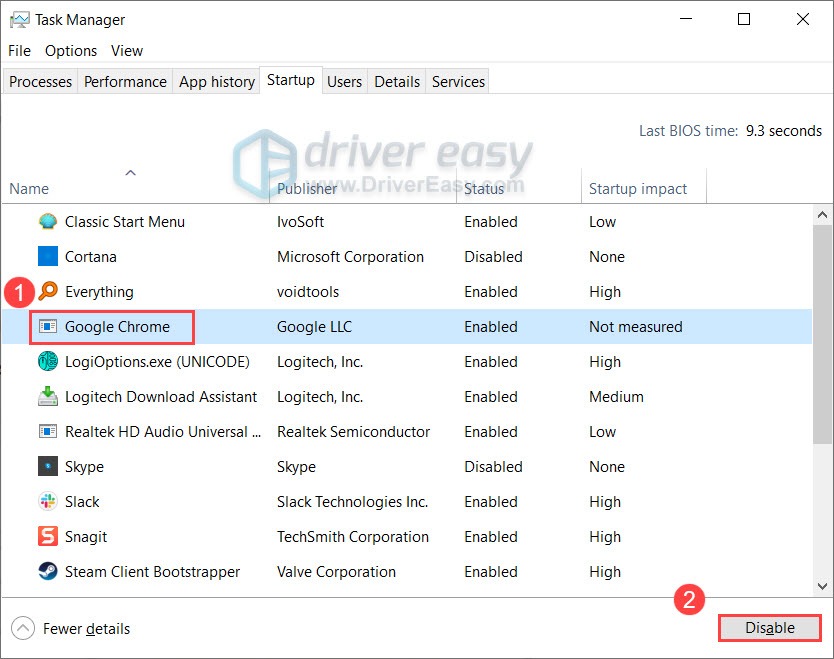
- One at a time, select any programs you suspect might be interfering, and click Disable.
- Restart your PC.
If Afterburner works after the clean boot, you can root out the offenders by repeating the steps and disabling only half of the services and programs.
If the issue persists, you can try the next solution below.
Fix 7: Try another version of Afterburner
If none of the fixes can help you, you can try to reinstall MSI Afterburner. This should reset profiles and fix possible issues during installation. Instead of installing the same version, this time you can try the previous and beta ones, which can be easily found on Guru3D.com.
Hopefully this post helps you get MSI Afterburner working again. If you have any questions or ideas, feel free to drop a line in the comments below.
12
12 people found this helpful
Все способы:
- Способ 1: Использование средства устранения неполадок
- Способ 2: Перезагрузка компонента
- Способ 3: Установка драйверов для Bluetooth
- Способ 4: Проверка связанной службы
- Способ 5: Проверка управления электропитанием
- Способ 6: Настройка режима питания
- Способ 7: Изменение используемого USB-порта
- Способ 8: Обновление драйверов Windows
- Вопросы и ответы: 0
Способ 1: Использование средства устранения неполадок
В Windows 10 есть удобное средство устранения неполадок, позволяющее в автоматическом режиме найти и исправить разные проблемы, в том числе и с работой Bluetooth. Рекомендуем использовать его в первую очередь, поскольку вам понадобится лишь запустить средство и дождаться появления сообщений на экране.
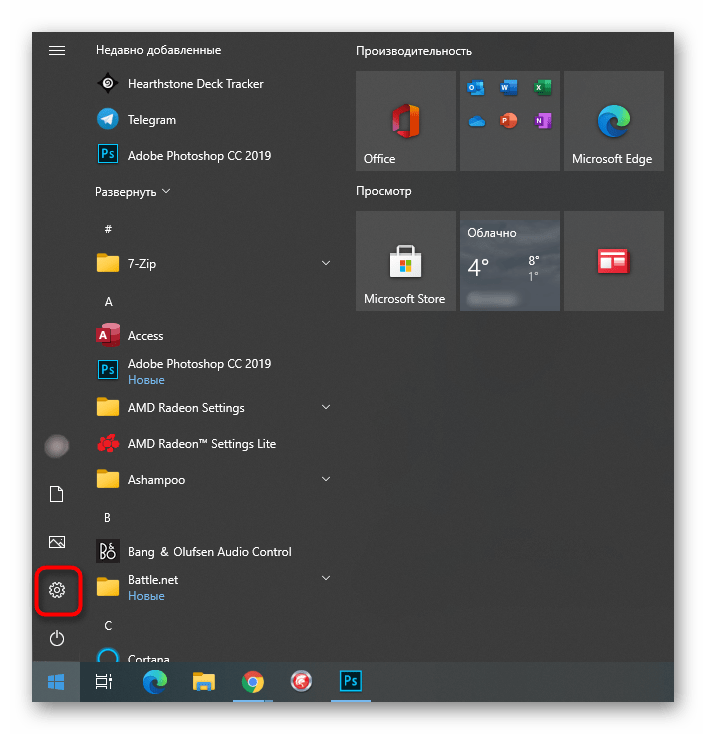
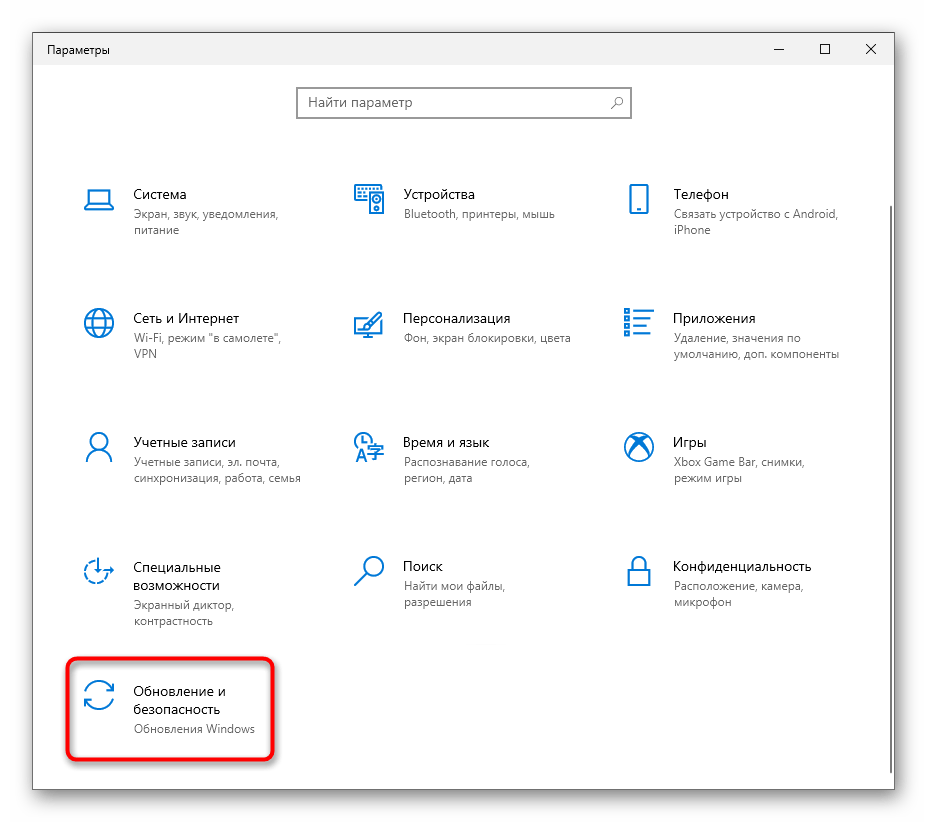
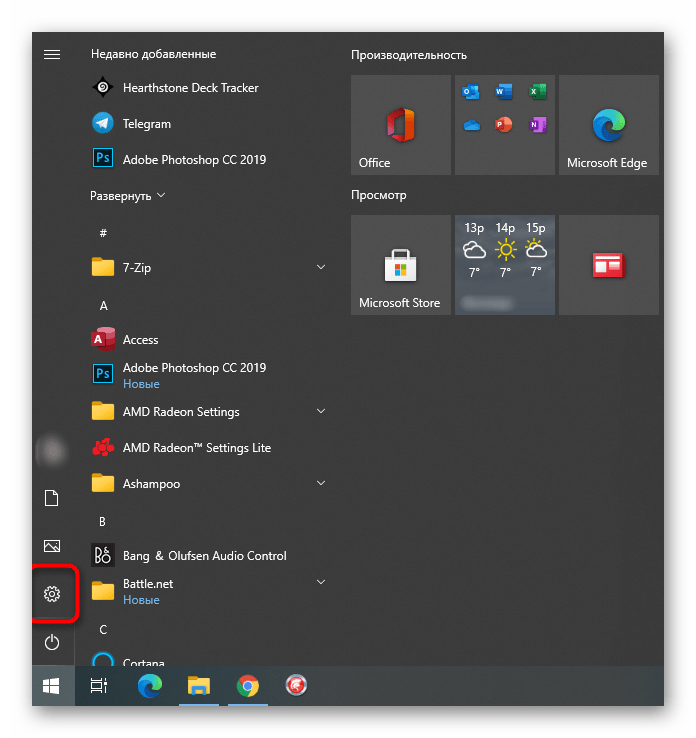
- Откройте меню «Пуск» и вызовите в «Параметры».
- Среди всех доступных плиток выберите последнюю — «Обновление и безопасность».
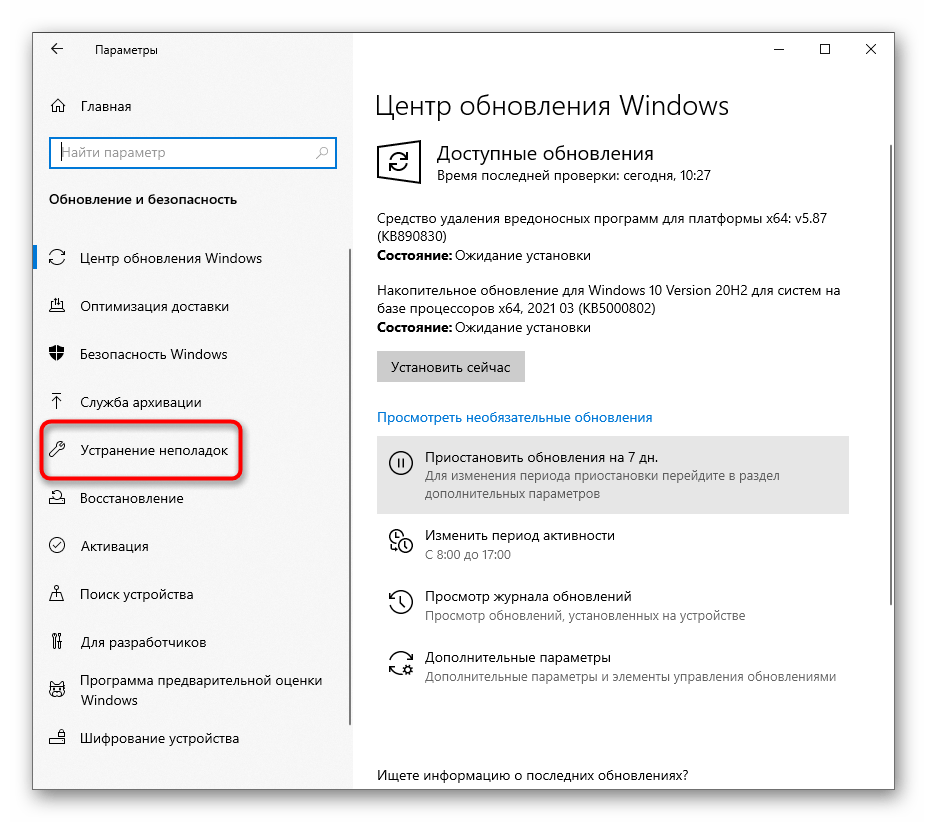
- На панели слева найдите категорию «Устранение неполадок».
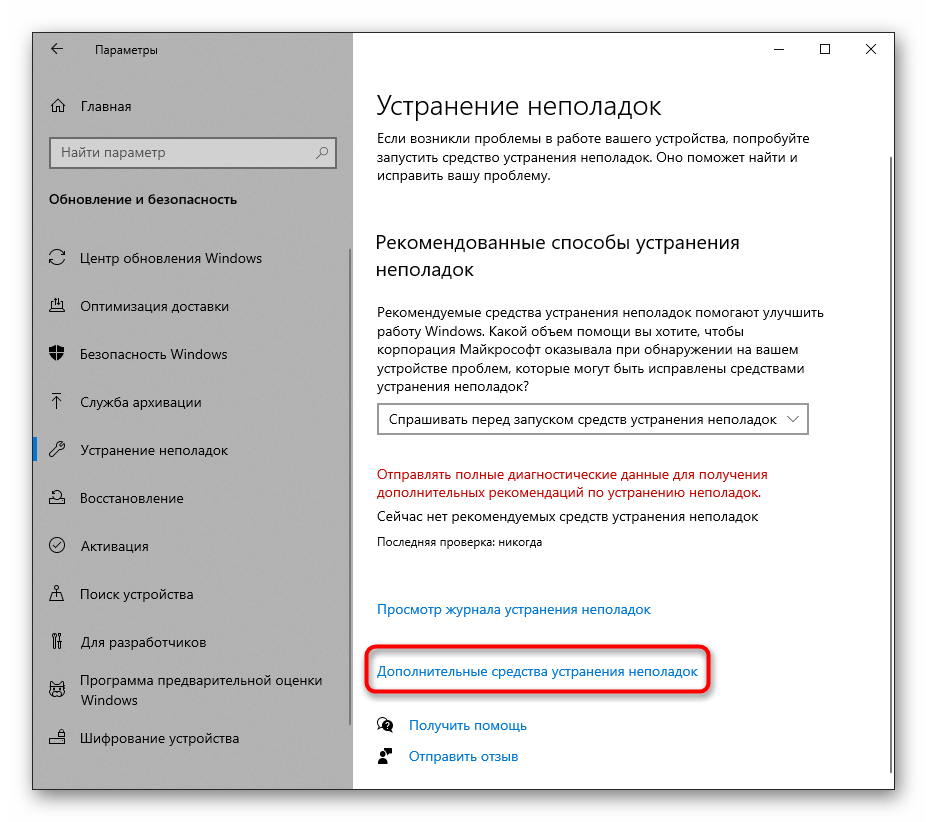
- Щелкните по надписи «Дополнительные средства устранения неполадок».
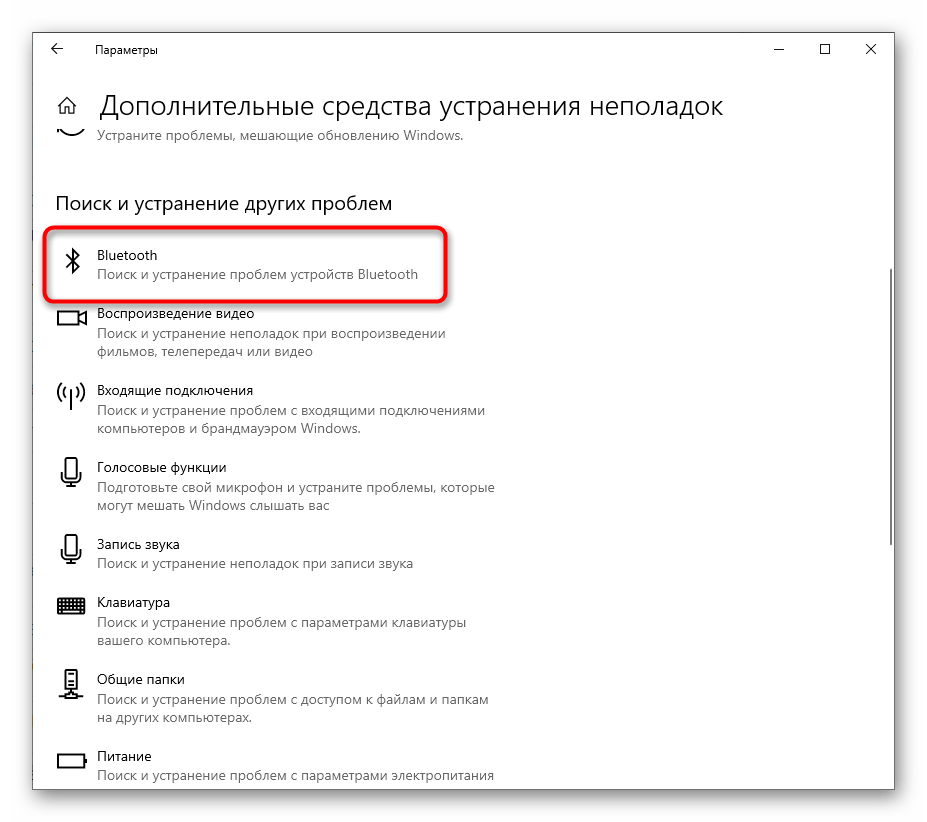
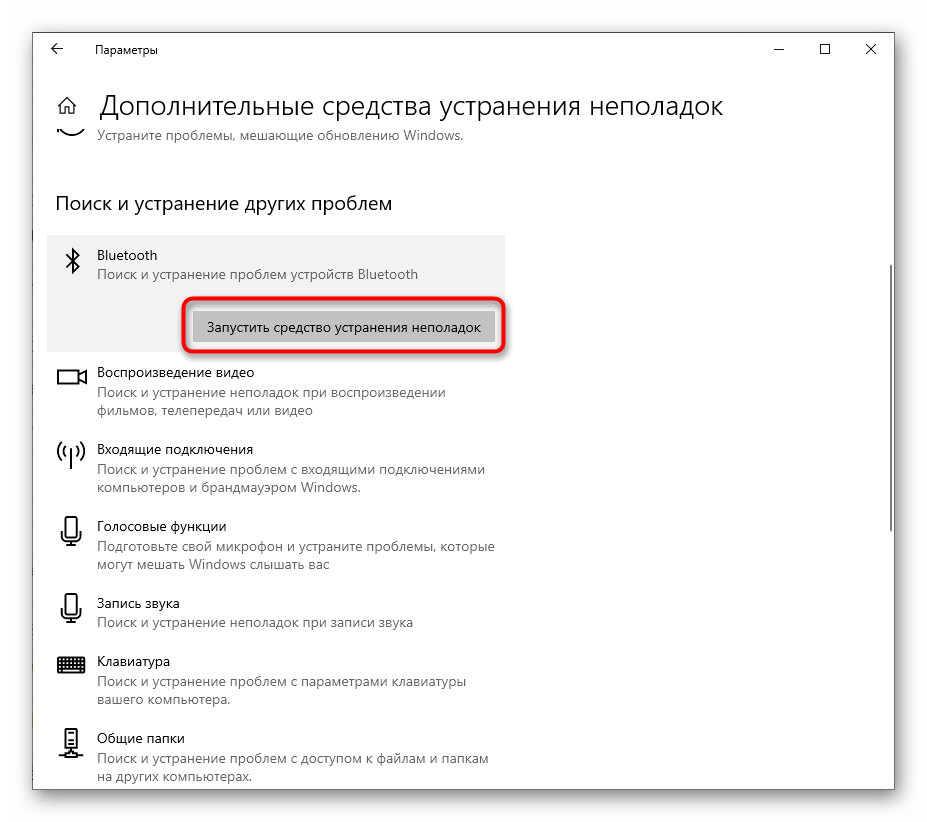
- В списке «Поиск и устранение других проблем» вас интересует категория «Bluetooth». Если она отсутствует, сразу же переходите к Способу 3, где говорится о загрузке драйверов оборудования.
- После клика по строке появится кнопка «Запустить средство устранения неполадок», активирующая сканирование неисправностей.
- Процесс займет несколько минут, а по завершении появится уведомление о том, какие проблемы были найдены и удалось ли их решить в автоматическом режиме. Возможно, придется выполнить отобразившуюся инструкцию вручную, поэтому внимательно читайте сообщение.

Если средство сканирования не выявило проблем, воспользуйтесь следующими методами, где все действия придется осуществлять вручную.
Способ 2: Перезагрузка компонента
Иногда простая перезагрузка Bluetooth и повторный поиск устройств для подключения сразу же решает все вопросы, связанные с работоспособностью комплектующего. Сделайте это и проверьте, поможет ли такой банальный метод быстро исправить сложившуюся ситуацию.
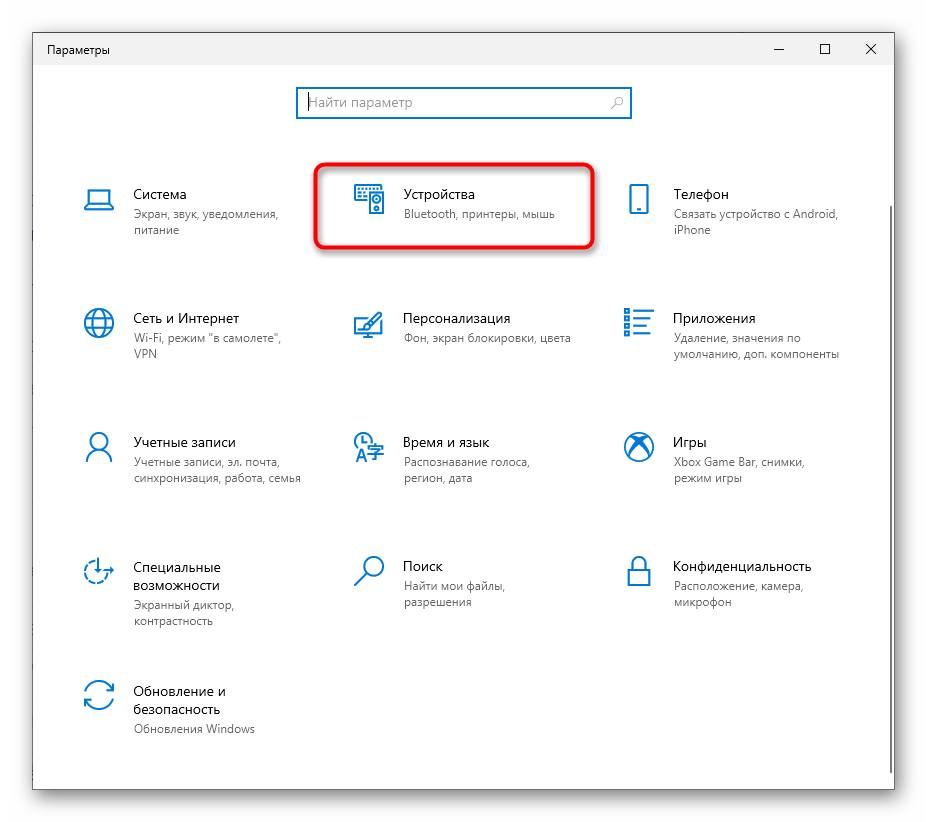
- В том же меню «Параметры» на этот раз выберите плитку «Устройства».
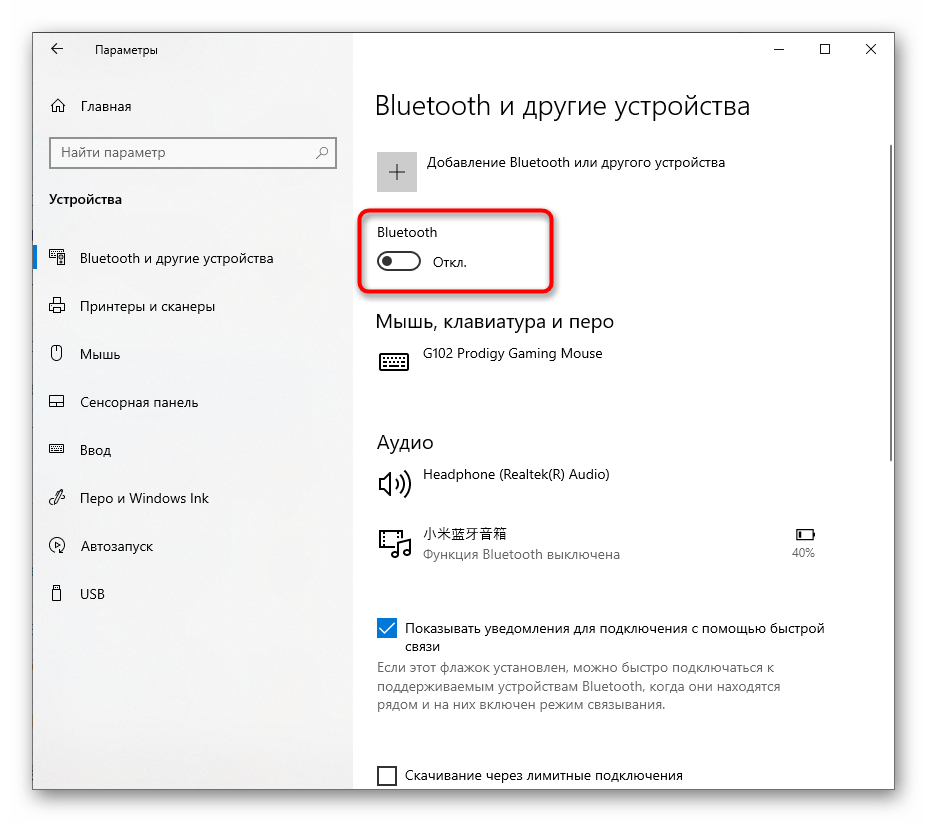
- Отключите «Bluetooth», если сейчас он активен, а затем повторно включите.
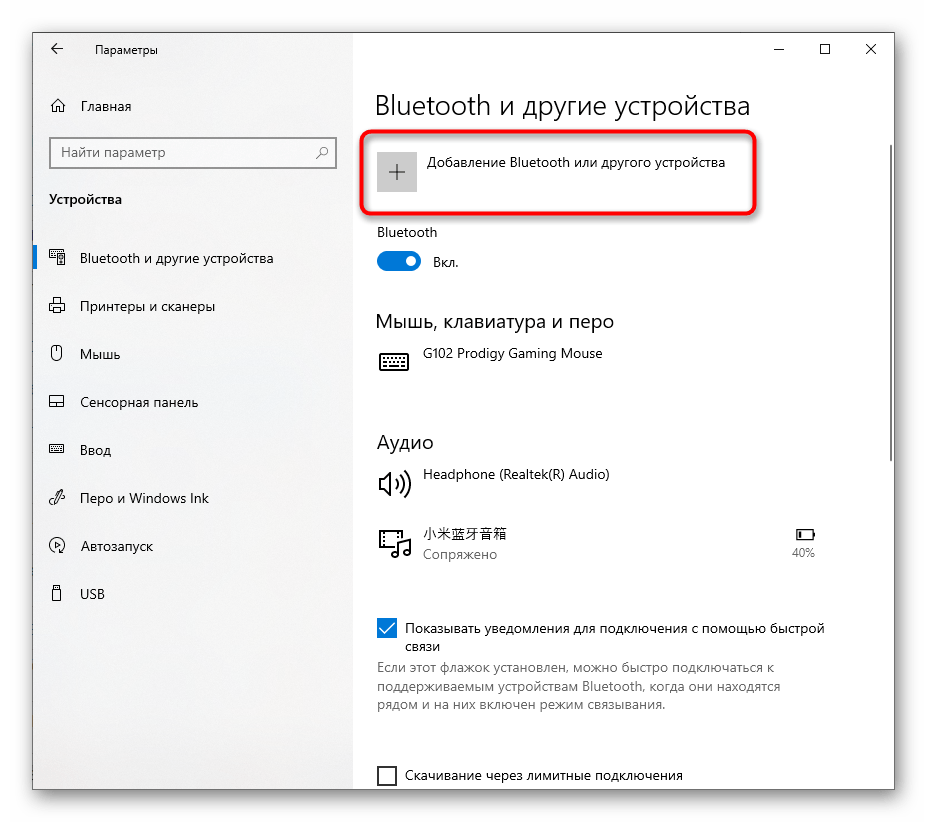
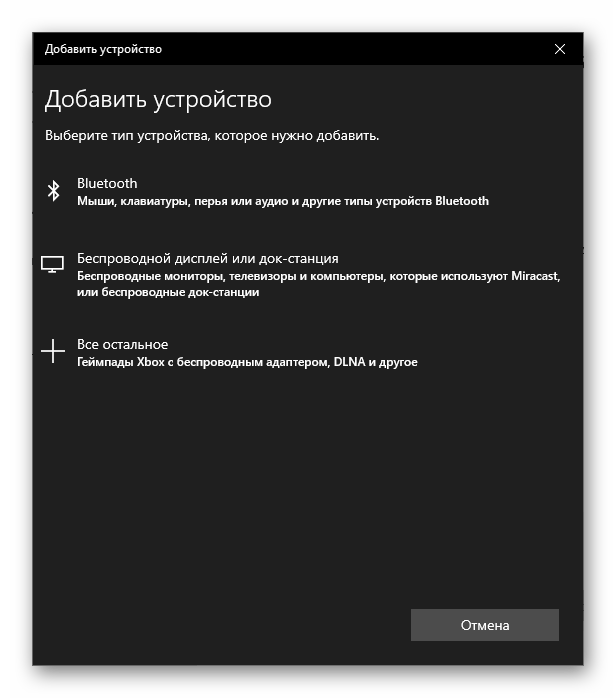
- После этого добавьте девайс, использующий данную технологию для подключения, если он не отобразился в списке найденных. Предварительно убедитесь, что само блютус-устройство включено и готово к работе.
- В окне «Добавить устройство» выберите вариант с подключением через Bluetooth и ознакомьтесь со списком найденного оборудования.
Способ 3: Установка драйверов для Bluetooth
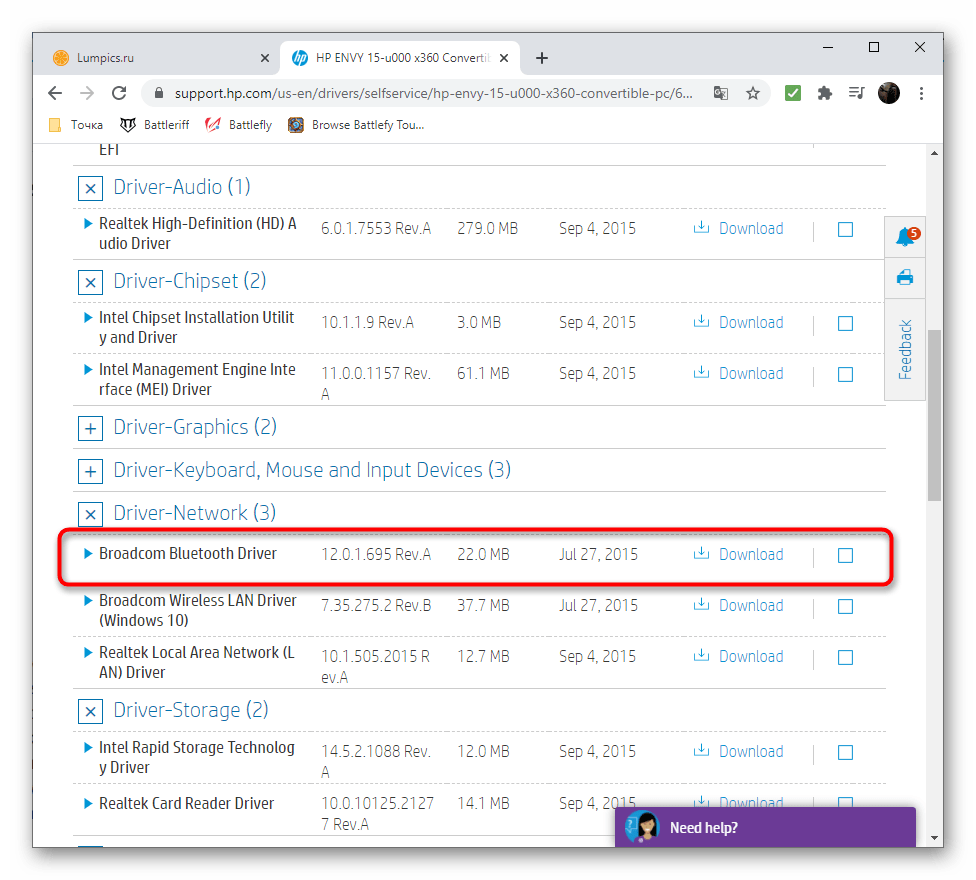
Обычно после установки операционной системы Windows 10 на ноутбук большинство драйверов подхватываются автоматически. Однако происходит это не всегда, а отсутствие соответствующего драйвера негативно сказывается на работоспособности компонента вплоть до того, что он вообще не будет отображаться в списке доступных. Проще всего использовать официальный сайт производителя ноутбука, отыскав там страницу поддержки для вашей модели.
Если такой вариант кажется для вас слишком сложным или недоступен, воспользуйтесь специальной программой или другими методами поиска драйверов, о которых рассказывается в отдельной статье на нашем сайте по ссылке ниже.
Подробнее: Поиск и инсталляция драйверов для Bluetooth-адаптера в Windows 10
Способ 4: Проверка связанной службы
За работу Bluetooth, как и многих других компонентов в операционной системе, отвечает специально выделенная служба. Если она деактивирована, у вас не получится подключиться к оборудованию по беспроводной связи. Средству устранения неполадок не всегда удается запустить эту службу, поэтому необходимо проверить ее статус вручную.
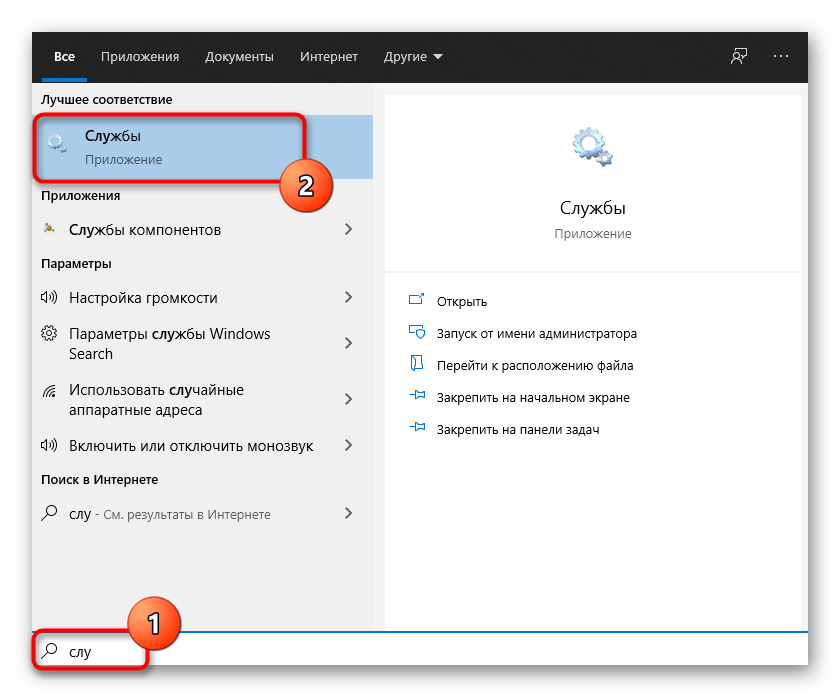
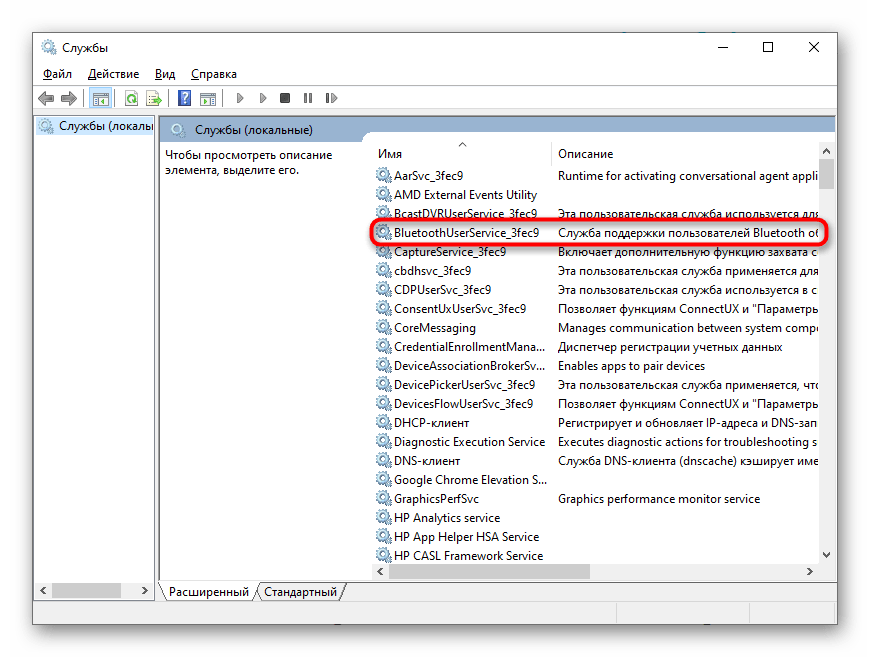
- Откройте «Пуск» и через поиск отыщите приложение «Службы».
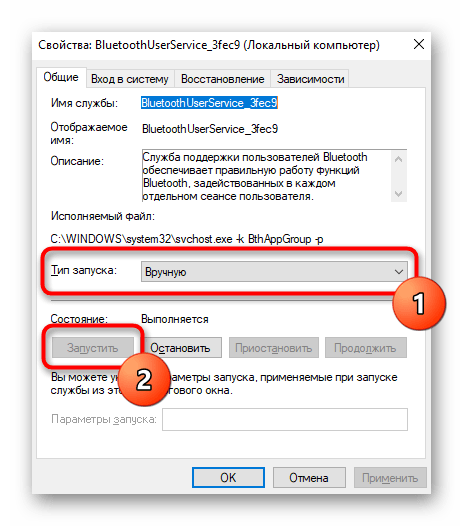
- В списке найдите «BluetoothUserService…» и дважды нажмите по этой службе для перехода к ее свойствам.
- Установите «Тип запуска» в состояние «Вручную» и запустите службу, если сейчас она отключена. После этого служба всегда должна активироваться, когда к ноутбуку пытается подключиться беспроводное устройство.
Способ 5: Проверка управления электропитанием
Некоторое оборудование в Windows 10 оснащено функцией, отвечающей за управление электропитанием. Его действие подразумевает, что ОС может самостоятельно выключить устройство в целях экономии потребления мощностей. Если такая настройка поддерживается используемым Bluetooth, ее необходимо отключить, чтобы избежать возникновения ситуаций с автоматической деактивацией беспроводного подключения.
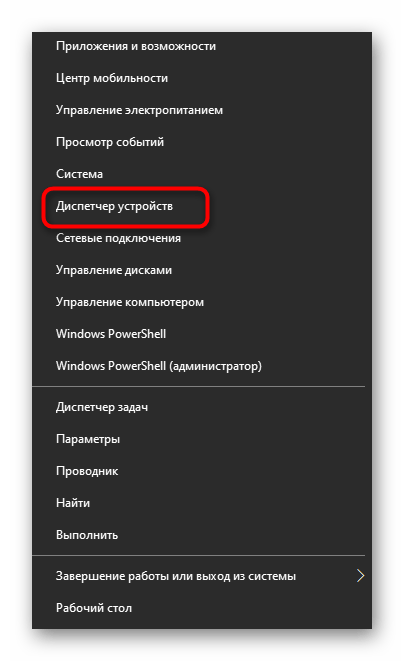
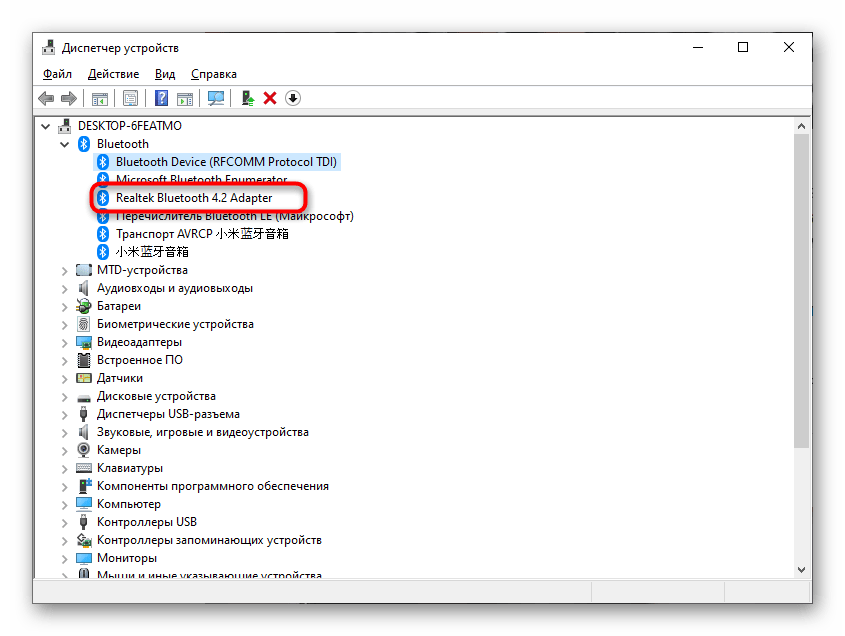
- Для этого щелкните правой кнопкой мыши по «Пуску» и из появившегося меню выберите пункт «Диспетчер устройств».
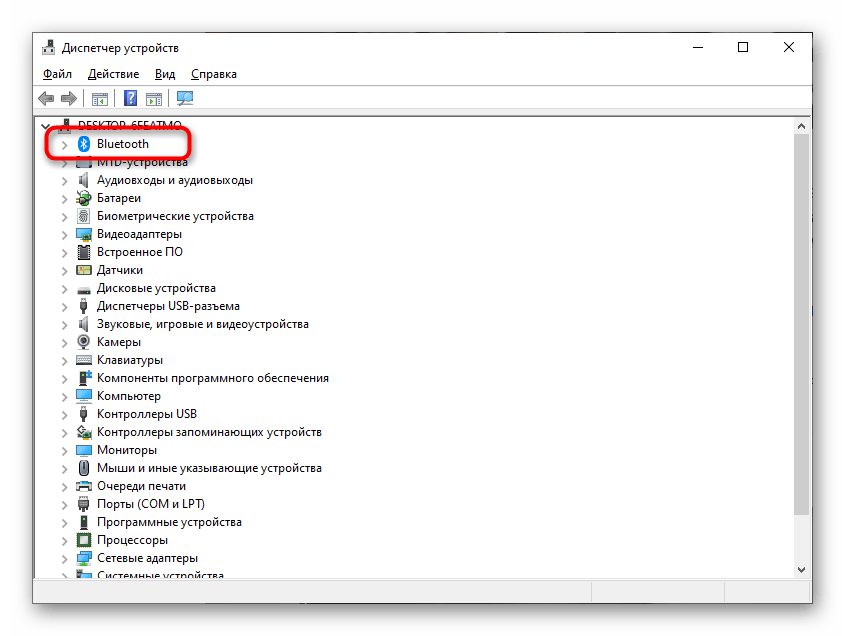
- Разверните список с названием «Bluetooth».
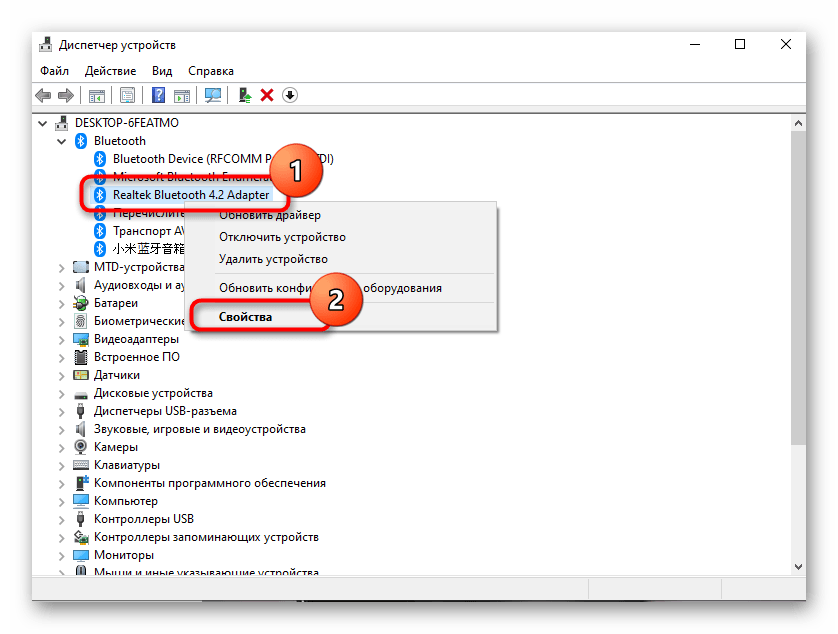
- Найдите там название используемого адаптера (вы могли видеть его при установке драйверов), и щелкните по нему правой кнопкой мыши.
- Из появившегося контекстного меню выберите пункт «Свойства».
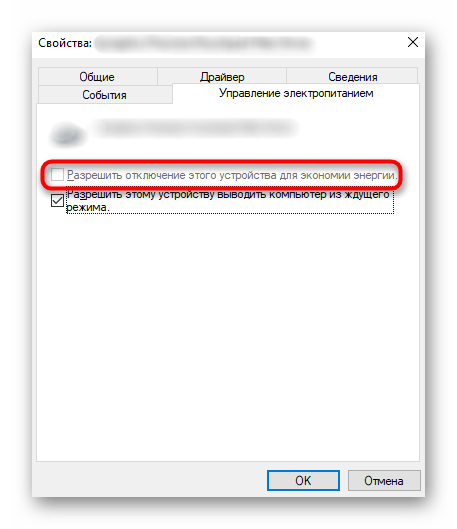
- Найдите вкладку «Управление электропитанием», откройте ее и снимите галочку с пункта «Разрешить отключение этого устройства для экономии энергии».
Способ 6: Настройка режима питания
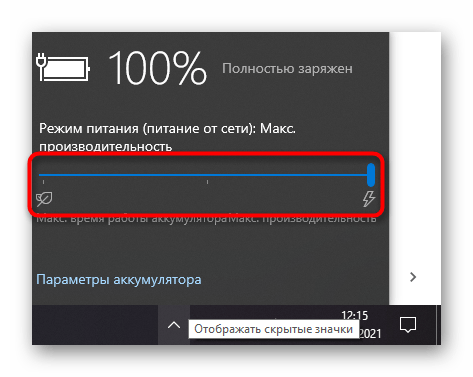
Встроенное программное обеспечение в некоторых ноутбуках подразумевает гибкую настройку плана электропитания. Иногда при выбранном режиме экономии заряда блютус может автоматически отключаться, даже если это запрещено через «Диспетчер устройств». Вы можете нажать по значку с батареей на панели задач и выбрать режим максимальной производительности.
Обратите внимание и на настройки плана электропитания в фирменном ПО от производителя ноутбука, если такое установлено автоматически. Поищите там пункт, который может влиять на блютус. Отключите его и проверьте, исправило ли это проблемы с работой беспроводного модуля.
Способ 7: Изменение используемого USB-порта
Этот метод подойдет только тем юзерам, кто использует Bluetooth-адаптер, подключаемый при помощи USB-разъема. Попробуйте сменить порт или обойтись без удлинителей, если такие присутствуют. Возможно, проблема заключается в неправильно выбранном типе порта, что относится к адаптерам, которые плохо работают с USB 2.0 и были сделаны специально для подключения к третьей версии.
Способ 8: Обновление драйверов Windows
Отсутствие последних обновлений для операционной системы редко негативно сказывается на работе рассматриваемой в этой статье технологии, однако определенные накопительные или глобальные апдейты могут влиять на функционирование. Поэтому не помешает проверить наличие обновлений и установить их, если они будут найдены.
- Для этого откройте меню «Пуск» и перейдите в «Параметры».
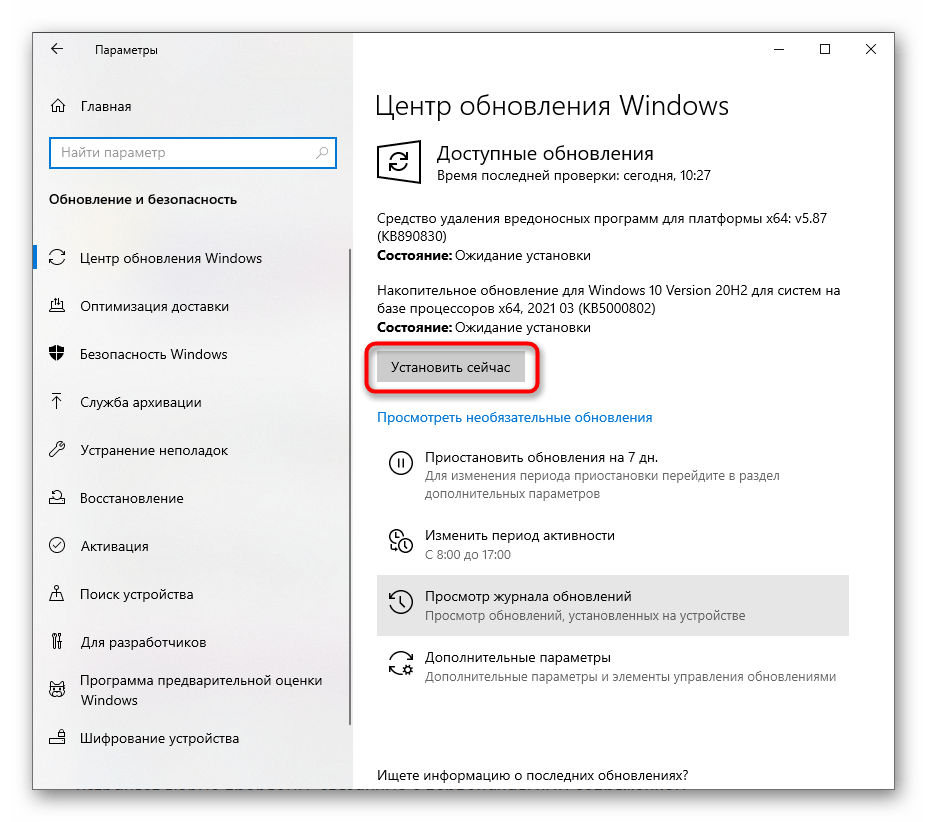
- Выберите там плитку «Обновление и безопасность».
- Запустите проверку обновлений и установите их, если те будут найдены.

Если что-то пошло не так или у вас возникли трудности с самостоятельной установкой обновлений в Windows 10, воспользуйтесь инструкциями из других наших статей по данной теме. Кликните по необходимому заголовку ниже, чтобы приступить к чтению материала.
Подробнее:
Обновление Windows 10 до последней версии
Решение проблем с работоспособностью Центра обновлений Windows 10
Устанавливаем обновления для Windows 10 вручную
Наша группа в TelegramПолезные советы и помощь
Introduction
If you are a PC gamer, you know how important it is to have the right tools to get the most out of your gaming experience. One of the most popular tools for PC gamers is MSI Afterburner, which allows you to customize and monitor your gaming performance. Unfortunately, some users have reported that MSI Afterburner is not working on their Windows 10 computers. In this article, we will provide you with 14 ways to fix MSI Afterburner not working on Windows 10. We will discuss how to update your drivers, reinstall MSI Afterburner, and more. With these tips, you should be able to get your MSI Afterburner working again in no time.
14 Ways to Fix MSI Afterburner Not Working on Windows 10
1. Update MSI Afterburner
2. Reinstall MSI Afterburner
3. Check for Windows Updates
4. Check for BIOS Updates
5. Check for GPU Driver Updates
6. Disable Overclocking
7. Disable Unnecessary Background Applications
8. Disable Antivirus Software
9. Disable Firewall
10. Disable User Account Control
11. Check for Conflicting Software
12. Check for System File Corruption
13. Perform a Clean Boot
14. Reset Windows 10

MSI Afterburner is a popular graphics card software. It helps in enhancing the performance of monitoring the device information. The application is useful in overlocking and changing the default settings in the graphics card. Amid all these pros, people using the application have been facing MSI Afterburner not working Windows 10 issue. Sometimes, it resists opening and at other times it is unable to change the clock speed of the device. If you are also facing the same issue then you would be delighted to know that we have brought an insightful guide for you that will help you with ways to fix MSI Afterburner not working on your system.

Ways to Fix MSI Afterburner Not Working on Windows 10
Whether there is a single feature that you are unable to use or the whole application you are struggling with, there are a few reasons that cause this issue and you should be aware of these. So, let us discuss these reasons in brief:
- Multiple overlays running on your system at the same time can be the reason behind MSI Afterburner not working side by side. These overlays usually include that of Steam and NVIDIA and disabling them is the best possible solution.
- A built-in graphics card is the second reason causing the MSI Afterburner installation failed issue which can be resolved by disabling the integrated graphics card in BIOS and providing permission to an external graphics card for handling all graphics-related functions on your system.
Many methods help to fix MSI Afterburner not overclocking or not opening problem. Before jumping onto the methods, check if your cable connection is correct. Using the wrong port, for instance, GPU port for display might not work in Afterburner, therefore, make sure that the right cable is connected to the right one.
We have listed easy to complex methods in an ordered list to help you with fixing this issue. So, without waiting any further, let us start with the first one:
Method 1: Perform Clean Boot
The last resort for all your problems related to MSI Afterburner is to perform a clean boot on your system. Clean boot will restart the system with only important programs, leaving out all the buggy and corrupt applications. Read our guide on How to Perform Clean boot in Windows 10 to do the same.

Also Read: Fix AMD Radeon WattMan Crash on Windows 10
Method 2: Modify Compatibility Settings
Another method to help you with overcoming the MSI Afterburner not working side by side on your desktop is if the app is not set for compatible mode. So, try running it in compatibility mode and see if the issue resolves then:
1. Right-click on the MSI Afterburner app and select the Properties option.
2. Navigate to the Compatibility tab and check the box for Run this program in compatibility mode for.

3. Then, check the Run this program as an administrator option under the Settings section. Finally, select Apply and then click OK to save the changes made.

Method 3: Update Windows
You can also eradicate MSI Afterburner not working by updating your Operating System. Always ensure if you have updated your Windows Operating System and if any updates are pending in action, use our guide How to Download and Install Windows 10 Latest Update

Also Read: Fix AMD Error Windows Cannot Find Bin64 –Installmanagerapp.exe
Method 4: Update Graphics Driver
If the graphics driver of your system is outdated or is corrupt with bugs, then it may lead to interruption in MSI Afterburner overlocking. Therefore, updating them regularly is a must, you can know more about them with the help of our guide on 4 Ways to Update Graphics Driver in Windows 10.

Method 5: Disable IO driver
In case a low-level IO driver is enabled for the application, it might cause MSI Afterburner not working Windows 10 issue. Therefore, make sure that it is disabled. To do so, open the properties of MSI Afterburner and follow the steps mentioned below:
1. Double-click on the MSI Afterburner shortcut.
2. Click on the Settings icon.

3. Click on the box for Enable low-level IO driver to disable it.

4. Now that the IO driver is disabled, restart your system and run the MSI Afterburner application and see if the error is resolved.
Also Read: Fix AMD Catalyst Control Center Missing
Method 6: Tweak On-Screen Display Settings
If CPU temperature has been disabled for your system, that may be what is causing the MSI Afterburner to not open. So, disable it in Active hardware monitoring graphs in MSI Afterburner settings.
1. Launch the MSI Afterburner app.
2. Click on the settings of the MSI Afterburner app.

3. Click on the Monitoring tab, enable CPU temperature, and then click OK.

Method 7: Set Detection Level to High
If the issue of MSI Afterburn not being able to work is due to a particular game then tweaking executable settings of the game can be of help. So, try it out using the given steps:
1. Press the Windows key, type RivaTuner Statistics Server, and click on Open.

2. Click on the plus button at the bottom left of the window after the main window opens.
3. Navigate to C:\Program Files location path to browse for the game’s executable.
4. After adding the game executable to the program. Set the detection level to high.
Also Read: Fix NVIDIA Control Panel Missing in Windows 10
Method 8: Disable NVIDIA Overlay
As discussed earlier, multiple overlay tools running in the background can be causing MSI Afterburner not working side by side. Therefore, disabling them can be of help and you can take the following steps to perform the method on your system:
1. Hit the Windows key, type GeForce Experience, and click on Open.

2. Click on the settings icon.

3. Then, click on General.
4. Disable Allows you to record, stream, broadcast, and take screenshots of your gameplay.
5. Finally, click on Apply.
Method 9: Disable Steam overlay
NVIDIA overlay is not the only one to disable to get rid of the MSI Afterburner not working Windows 10 issue. You also need to disable Steam overlay which can interrupt the working of MSI Afterburner.
1. Press the Windows key, type steam and click on Open.

2. Click on LIBRARY.

3. Right-click on the game to open Properties.

4. In the GENERAL tab, clear the box for Enable the Steam Overlay while in-game.

5. Now that the Steam overlay is disabled, check if MSI Afterburner installation failed issue is resolved.
Also Read: Fix Graphics Card Not Detected on Windows 10
Method 10: Disable Graphics Card
Disabling the onboard graphics card and enabling an external graphics card to carry out display functions of the system helps in resolving the MSI Afterburner not opening issue. To open the BIOS settings read our guide on How to enter BIOS on Windows 10 and then follow the stated steps to disable the graphics card:
1. Navigate to the Advanced tab and select Onboard Devices Configuration.

2. Now, select Primary Graphics Adapter and press the Enter key.
3. Next, select Exit and click on Exit Saving Changes.

Once your system has rebooted, check if the problem is resolved.
Method 11: Disable ULPS Setup
In AMD crossfire setups, disabling ULPS saves voltage which assists in the smooth and uninterrupted working of MSI Afterburner. Here is how you can disable the ULPS setup:
1. Hit the Windows + R keys simultaneously to open the Run dialog box.
2. Type regedit and press Enter key to launch the Registry Editor.

3. Click on the Edit tab and select Find.
4. Type EnableULPS in the box and click on Find Next.

5. Double click on EnableULPS.
6. Set the value from 1 to 0.
7. Now, search for the next EnableULPS value for cards by pressing F3.
Method 12: Hardware Modification
Another method to resolve MSI Afterburner overlocking issue is by enabling hardware modification, which has been proven to be effective in many cases. Below are the steps on how to allow the device for modifications:
1. Open the MSI Afterburner app by double-clicking on the shortcut.
2. Here, tweak FAN settings.

Also Read: How to Disable or Uninstall NVIDIA GeForce Experience
Method 13: Reinstall Afterburn Application
If for some reason MSI Afterburner installation failed on your device then try reinstalling the app. To do this, delete the pre-installed MSI Afterburner file, and follow the steps mentioned below for the same:
1. Hit the Windows key, type Control Panel, and click on Open.

2. Set View by > Large icons, then click on Programs and Features setting.

3. Right-click on the MSI Afterburner app and click on Uninstall.

4. Then, restart the PC after clicking on Finish when the uninstaller completes the process.
5. Visit the Afterburner official site and click on the Download Afterburner button.

6. Follow the on-screen instructions to complete the installation on your PC.
7. Finally, after reinstalling the Afterburner on your computer. Check whether Afterburner not working Windows 10 issues is fixed.
Also Read: Fix Hearthstone Lagging in Windows 10
Frequently Asked Questions (FAQs)
Q1. What will happen if I uninstall MSI Afterburner?
Ans. Uninstalling MSI Afterburner will lead to the graphics card on your system running on the stock. Also, data stored in the app will be lost on uninstalling.
Q2. Does MSI Afterburner impact the performance in any way?
Ans. Yes, MSI Afterburner helps in enhancing the performance of your system by resolving the lagging issues, if any. Also, it improves performance by overlocking and optimization of the PC.
Q3. Can MSI Afterburner show CPU temperature?
Ans. Yes, MSI Afterburner can monitor CPU temperature by providing accurate data. Also, it helps in monitoring other temperature changes in your system too.
Q4. Does MSI work with every brand of graphics card?
Ans. Yes, MSI Afterburner works with every graphics card on your system. It is free of charge and works for all brands.
Q5. Why am I unable to overclock in MSI Afterburner?
Ans. If you are facing any issue with MSI Afterburner overclocking not working then it can be due to the enabled onboard graphics card, try to disable it to resolve the issue.
Recommended:
MSI Afterburner is a great application for peak performance of the system and to monitor the operating services. But, at times the application might act up and stop working. We hope that our guide helped resolve this issue and you were able to fix MSI Afterburner not working on Windows 10. Let us know which one of these 14 methods was the most helpful for you. If you have any further queries or suggestions to give, please leave them below in the comments section.
14 Ways to Fix MSI Afterburner Not Working on Windows 10
MSI Afterburner is a popular overclocking software for Windows 10 that allows users to overclock their graphics cards. Unfortunately, some users have reported that MSI Afterburner is not working on their Windows 10 computers. If you’re having this issue, don’t worry. Here are 14 ways to fix MSI Afterburner not working on Windows 10.
1. Update MSI Afterburner
The first thing you should do is make sure that you have the latest version of MSI Afterburner installed. To do this, open the MSI Afterburner application and click on the “Check for Updates” button. If there is an update available, it will be downloaded and installed automatically.
2. Reinstall MSI Afterburner
If updating MSI Afterburner doesn’t work, you should try reinstalling it. To do this, open the Control Panel and go to “Programs and Features”. Find MSI Afterburner in the list of installed programs and click on “Uninstall”. Once it’s uninstalled, download the latest version of MSI Afterburner from the official website and install it.
3. Disable Antivirus Software
Sometimes, antivirus software can interfere with MSI Afterburner and cause it to not work properly. To fix this, you should try disabling your antivirus software temporarily and then try running MSI Afterburner again. If it works, you should add MSI Afterburner to the list of exceptions in your antivirus software.
4. Disable Firewall
Your firewall can also interfere with MSI Afterburner and cause it to not work properly. To fix this, you should try disabling your firewall temporarily and then try running MSI Afterburner again. If it works, you should add MSI Afterburner to the list of exceptions in your firewall.
5. Run MSI Afterburner as Administrator
Sometimes, running MSI Afterburner as an administrator can help fix the issue. To do this, right-click on the MSI Afterburner shortcut and select “Run as Administrator”. If this works, you should make sure that MSI Afterburner is always run as an administrator.
6. Disable Overclocking
If you’re having issues with MSI Afterburner, you should try disabling any overclocking settings you have enabled. To do this, open MSI Afterburner and click on the “Settings” button. Then, go to the “General” tab and uncheck the “Enable hardware overclocking” option.
7. Disable On-Screen Display
The On-Screen Display (OSD) feature of MSI Afterburner can sometimes cause issues. To fix this, open MSI Afterburner and click on the “Settings” button. Then, go to the “General” tab and uncheck the “Enable On-Screen Display” option.
8. Disable Unnecessary Services
Sometimes, certain services can interfere with MSI Afterburner and cause it to not work properly. To fix this, open the Run dialog box (Windows + R) and type “services.msc”. Then, find the services related to MSI Afterburner and disable them.
9. Disable Unnecessary Programs
Certain programs can also interfere with MSI Afterburner and cause it to not work properly. To fix this, open the Task Manager (Ctrl + Shift + Esc) and go to the “Startup” tab. Then, find the programs related to MSI Afterburner and disable them.
10. Update Graphics Drivers
Outdated graphics drivers can also cause MSI Afterburner to not work properly. To fix this, open the Device Manager (Windows + X) and go to the “Display Adapters” section. Then, right-click on your graphics card and select “Update Driver”. Follow the on-screen instructions to update your graphics drivers.
11. Disable Windows Update
Sometimes, Windows Update can interfere with MSI Afterburner and cause it to not work properly. To fix this, open the Run dialog box (Windows + R) and type “services.msc”. Then, find the “Windows Update” service and set it to “Disabled”.
12. Disable Windows Defender
Windows Defender can also interfere with MSI Afterburner and cause it to not work properly. To fix this, open the Settings app (Windows + I) and go to “Update & Security”. Then, go to the “Windows Security” section and click on “Virus & threat protection”. Finally, click on “Manage settings” and turn off “Real-time protection”.
13. Reset MSI Afterburner Settings
If none of the above methods work, you should try resetting MSI Afterburner to its default settings. To do this, open MSI Afterburner and click on the “Settings” button. Then, go to the “General” tab and click on the “Reset” button.
14. Perform a Clean Boot
If all else fails, you should try performing a clean boot. To do this, open the Run dialog box (Windows + R) and type “msconfig”. Then, go to the “Services” tab and check the “Hide all Microsoft services” option. Finally, click on “Disable all” and restart your computer.
One of the most common issues that users face when using MSI Afterburner on Windows 10 is that it isn’t working. If you need help with this problem. Then follow the steps you can take to try and fix MSI Afterburner not working on Windows 10/11:
- Disable any existing graphics card overlays, such as third-party applications.
- Uninstall and reinstall the MSI Afterburner app from the official website. This will ensure that all its components are up-to-date and functioning if you still have issues with your MSI Afterburner installation after uninstalling. It would help if you considered downloading an older version and installing it instead.
- Ensure your graphics card drivers update to their latest version, which can cause issues with MSI Afterburner not working on Windows.
MSI Afterburner is one of the most popular GC software available. It lets users overclock and change their GPU’s clock speed and performance. Some users have reported that MSI Afterburner isn’t working on Windows 10 or 11.
If you are experiencing this issue, then there are a few things that you can do to fix it. Try restarting your computer and checking if MSI Afterburner is still not working.
If the issue persists, then make sure to check the startup list and remove them if necessary. Make sure that all the drivers associated with your graphics card are up-to-date.
You must have the latest version of MSI Afterburner installed on your system. Finally, you should contact MSI customer service to help with these solutions.
What usually makes people uninstall MSI Afterburner at a startup?
Many people uninstall MSI Afterburner for many reasons. It’s possible the software is not compatible with the user’s computer. Or it’s causing instability, glitches, or issues with the system.
It could also be the user’s lack of features offered by MSI Afterburner. I would prefer to free up resources.
Additionally, users may find that they don’t need MSI Afterburner anymore. Due to changes in their gaming setup or hardware configuration.
It comes down to personal preference and what works best for each user.
Related Reading
- What Is an MSI File? How to Create, Edit, or Open a file?
- EVGA Precision x1 Vs MSI Afterburner
- What is Passive Cooling?
- Do Graphics Cards Come with Power Cables?
What happens if I uninstall MSI Afterburner?
If you decide to uninstall MSI Afterburner, there are several things to consider. First, removing the software deletes all settings and profiles. This covers fan control, overclocking, and other performance tweaks.
If you have been using the software for some time and have fine-tuned it to your needs. Then uninstalling MSI Afterburner could mean you’ll need to start from scratch if any system changes were made due to using MSI Afterburner.
Those will be undone when the application remove. Uninstalling MSI Afterburner might damage other apps that need it. Such as monitoring tools or game overlays.
Removing this software should not cause any damage to your computer. It may cause other programs that rely on its features to malfunction or not work at all.
Steps To Fix MSI Afterburner Not Working or Issues with MSI afterburner:
If you are facing the issue of MSI Afterburner not working. Then there are several steps you can take to try and fix the problem.
Try disabling any enabling overlays, such as Steam Overlay or NVIDIA Overlay. If this does not work, try running MSI Afterburner in Compatibility Mode.
Additionally, you can also adjust the detection level. And disable the NVIDIA overlay if it enables it.
If this does not resolve the problem, you may need to reinstall MSI Afterburner. To do this, open your Start Menu and search for ‘MSI Afterburner.’ Once found, select Uninstall and then run a reinstall by downloading it.
This should get your MSI Afterburner working. But if none of these steps work in fixing your issue with MSI Afterburner not working. Then please get in touch with customer support to help resolve this problem.
Ways to Fix MSI Afterburner Not Working on Windows:
If you’re having trouble with MSI Afterburner not working on Windows 10. There are several steps you can take to try and fix it.
First, ensure that your graphics card is compatible with the MSI Afterburner app. If it is, ensure that any overlays from other applications like Steam are off.
Once that’s done, reinstall the MSI Afterburner installation. If that doesn’t work, try updating your graphic card drivers or running a system file check to make sure everything is in order.
If none of these solutions work, try disabling and enabling your GPU through Device Manager. One of these steps will help get MSI Afterburner working on Windows 10 again so you can enjoy all its features.
What usually makes people uninstall MSI Afterburner?
MSI Afterburner uninstalls for two reasons:
- The user no longer needs the application.
- They are experiencing technical issues that can not resolve.
MSI Afterburner is a popular software tool designed to give users control of GC. It helps users overclock their systems by checking temperatures and fan speeds.
Some users may run into issues. They may need to uninstall MSI Afterburner to ensure the best performance from their system.
Can I close MSI Afterburner after overclocking?
When overclocking, MSI Afterburner is an excellent tool to achieve the desired performance. It’s free software that improves graphics card performance and stability.
MSI Afterburner may shut after attaining the necessary overclock. This will help ensure that your system is stable and running at its best levels without any negative impact from having MSI Afterburner open.
It’s important to remember that even though overclocking can improve performance. It can also damage hardware if not done. Be sure that you comprehend MSI Afterburner before overclocking.