
Windows Registry Editor Version 5.00

; Text Document

[-HKEY_CLASSES_ROOT\.txt\ShellNew]

[HKEY_CLASSES_ROOT\.txt\ShellNew]

"ItemName"=hex(2):40,00,25,00,53,00,79,00,73,00,74,00,65,00,6d,00,52,00,6f,00,\

  6f,00,74,00,25,00,5c,00,73,00,79,00,73,00,74,00,65,00,6d,00,33,00,32,00,5c,\

  00,6e,00,6f,00,74,00,65,00,70,00,61,00,64,00,2e,00,65,00,78,00,65,00,2c,00,\

  2d,00,34,00,37,00,30,00,00,00

"NullFile"=""

[-HKEY_CLASSES_ROOT\.txt]

[HKEY_CLASSES_ROOT\.txt]

@="txtfile"

"Content Type"="text/plain"

"PerceivedType"="text"

[HKEY_CLASSES_ROOT\.txt\PersistentHandler]

@="{5e941d80-bf96-11cd-b579-08002b30bfeb}"

[HKEY_CLASSES_ROOT\.txt\ShellNew]

"ItemName"=hex(2):40,00,25,00,53,00,79,00,73,00,74,00,65,00,6d,00,52,00,6f,00,\

  6f,00,74,00,25,00,5c,00,73,00,79,00,73,00,74,00,65,00,6d,00,33,00,32,00,5c,\

  00,6e,00,6f,00,74,00,65,00,70,00,61,00,64,00,2e,00,65,00,78,00,65,00,2c,00,\

  2d,00,34,00,37,00,30,00,00,00

"NullFile"=""

[-HKEY_CLASSES_ROOT\SystemFileAssociations\.txt]

[HKEY_CLASSES_ROOT\SystemFileAssociations\.txt]

"PerceivedType"="document"

[-HKEY_CLASSES_ROOT\txtfile]

[HKEY_CLASSES_ROOT\txtfile]

@="Text Document"

"EditFlags"=dword:00210000

"FriendlyTypeName"=hex(2):40,00,25,00,53,00,79,00,73,00,74,00,65,00,6d,00,52,\

  00,6f,00,6f,00,74,00,25,00,5c,00,73,00,79,00,73,00,74,00,65,00,6d,00,33,00,\

  32,00,5c,00,6e,00,6f,00,74,00,65,00,70,00,61,00,64,00,2e,00,65,00,78,00,65,\

  00,2c,00,2d,00,34,00,36,00,39,00,00,00

[HKEY_CLASSES_ROOT\txtfile\DefaultIcon]

@=hex(2):25,00,53,00,79,00,73,00,74,00,65,00,6d,00,52,00,6f,00,6f,00,74,00,25,\

  00,5c,00,73,00,79,00,73,00,74,00,65,00,6d,00,33,00,32,00,5c,00,69,00,6d,00,\

  61,00,67,00,65,00,72,00,65,00,73,00,2e,00,64,00,6c,00,6c,00,2c,00,2d,00,31,\

  00,30,00,32,00,00,00

[HKEY_CLASSES_ROOT\txtfile\shell\open\command]

@=hex(2):25,00,53,00,79,00,73,00,74,00,65,00,6d,00,52,00,6f,00,6f,00,74,00,25,\

  00,5c,00,73,00,79,00,73,00,74,00,65,00,6d,00,33,00,32,00,5c,00,4e,00,4f,00,\

  54,00,45,00,50,00,41,00,44,00,2e,00,45,00,58,00,45,00,20,00,25,00,31,00,00,\

  00

[HKEY_CLASSES_ROOT\txtfile\shell\print\command]

@=hex(2):25,00,53,00,79,00,73,00,74,00,65,00,6d,00,52,00,6f,00,6f,00,74,00,25,\

  00,5c,00,73,00,79,00,73,00,74,00,65,00,6d,00,33,00,32,00,5c,00,4e,00,4f,00,\

  54,00,45,00,50,00,41,00,44,00,2e,00,45,00,58,00,45,00,20,00,2f,00,70,00,20,\

  00,25,00,31,00,00,00

[HKEY_CLASSES_ROOT\txtfile\shell\printto\command]

@=hex(2):25,00,53,00,79,00,73,00,74,00,65,00,6d,00,52,00,6f,00,6f,00,74,00,25,\

  00,5c,00,73,00,79,00,73,00,74,00,65,00,6d,00,33,00,32,00,5c,00,6e,00,6f,00,\

  74,00,65,00,70,00,61,00,64,00,2e,00,65,00,78,00,65,00,20,00,2f,00,70,00,74,\

  00,20,00,22,00,25,00,31,00,22,00,20,00,22,00,25,00,32,00,22,00,20,00,22,00,\

  25,00,33,00,22,00,20,00,22,00,25,00,34,00,22,00,00,00

[-HKEY_CURRENT_USER\SOFTWARE\Microsoft\Windows\CurrentVersion\Explorer\FileExts\.txt]

[HKEY_CURRENT_USER\SOFTWARE\Microsoft\Windows\CurrentVersion\Explorer\FileExts\.txt\OpenWithList]

[HKEY_CURRENT_USER\SOFTWARE\Microsoft\Windows\CurrentVersion\Explorer\FileExts\.txt\OpenWithProgids]

"txtfile"=hex(0):

[HKEY_CURRENT_USER\SOFTWARE\Microsoft\Windows\CurrentVersion\Explorer\FileExts\.txt\UserChoice]

"Hash"="hyXk/CpboWw="

"ProgId"="txtfile"

[-HKEY_CURRENT_USER\SOFTWARE\Microsoft\Windows\Roaming\OpenWith\FileExts\.txt]

[HKEY_CURRENT_USER\SOFTWARE\Microsoft\Windows\Roaming\OpenWith\FileExts\.txt\UserChoice]

"Hash"="FvJcqeZpmOE="

"ProgId"="txtfile"
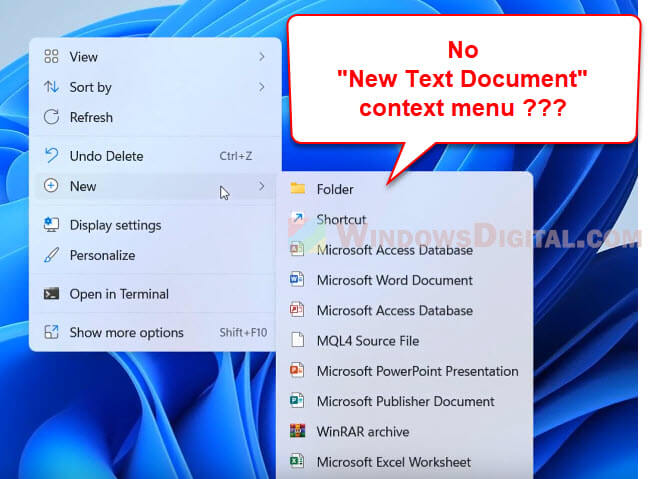
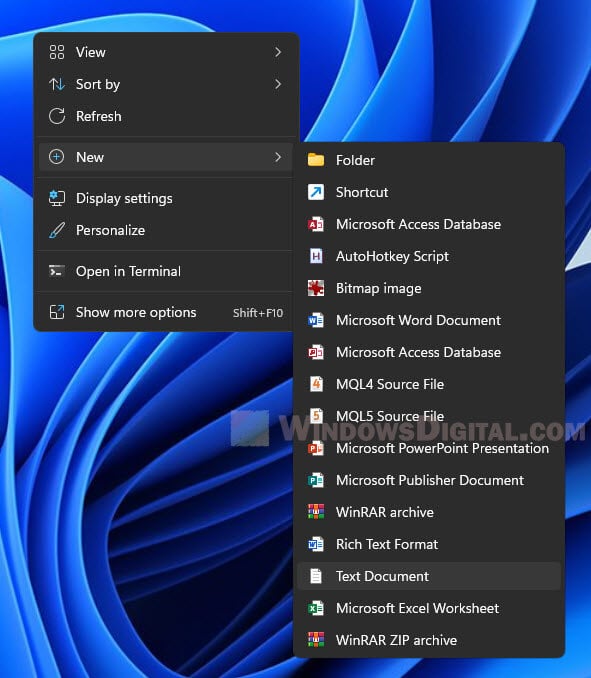
In Windows 11, when you right-click the desktop and select the New option in the context menu, you will normally see an option called “New Text Document” which allows you to create a new text file right away.
If you can’t make a new text file (TXT extension file) because the new text document option is missing from the right-click context menu, this guide will show you how to fix the issue and restore the new text document option in Windows 11.
Also see: How to Customize Right-Click Menu in Windows 11
Fix: Cannot create new text file in Windows 11
Use registry fix to restore new text document option
You can use the registry file below to add the “New Text Document” item back to the context menu in Windows 11 or Windows 10. This particular registry file will restore the “text document” option in the context menu if it was removed. To do so, follow the steps below.
- Before you use the registry file, it is recommended that you create a system restore point, which will back up your registry. In case something goes wrong, you will be able to restore your Windows to the system restore point you created.
- Download the registry file here: Restore New Text Document.
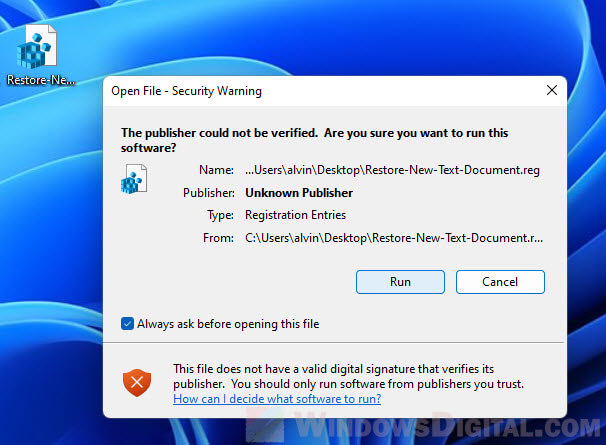
- Once the file is downloaded, open the Restore-New-Text-Document.reg file. When prompted with a security warning, click Run to continue.

- Next, click Yes when UAC asks for confirmation.

- In the next warning by Registry Editor regarding adding the reg file to the registry, click Yes to proceed.

- That’s it! The “Text Document” should now be added to the “New” context menu.
After you’ve completed all the steps above, retry right-clicking the desktop and see if you can see the “Text document” option when you hover your mouse cursor over the “New” option in the context menu.
If there are other items missing under the “New” option in the Windows 11 context menu, you can use the following registry file to restore all default items in the “New” option menu: Restore default context menu items under New.
Related: How to Remove Items from Right-Click Menu in Windows 11
Bring back the Windows 10 context menu
An alternative solution to the missing new text file option is to change the Windows 11 context menu back to what it looks like in Windows 10. There is a very popular tool called ExplorerPatcher that allows you to restore not only the old context menu, but also many other features such as old taskbar (ungroup taskbar items), old classic Start menu, etc.
By bringing back the old context menu, it might also restore the missing new text file option in the “New” option menu. In addition, since it’ll be the same as Windows 10 context menu, you no longer need to click the “Show more options” to view all context menu items.
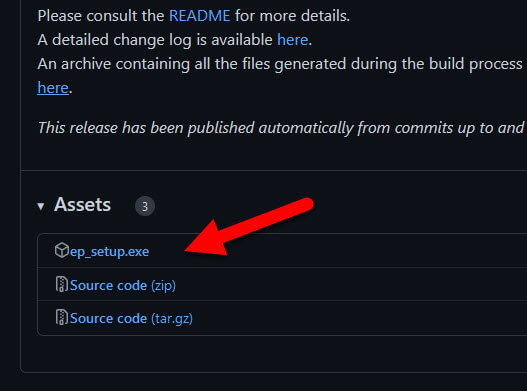
- First, download and install ExplorerPatcher (from GitHub).

- When you run the installer, Windows will prompt you with a security warning that says the installer is from an unknown source. This tool is still in the early stages of its release (read the GitHub page for more info), but it has been tested to work well in Windows 11. However, please proceed at your own risk. To continue, click Run anyway to proceed installing the app.
- The installer does not have a wizard or any window that indicates the process and completion of the installation. Once you run the installer, it should be installed right away.
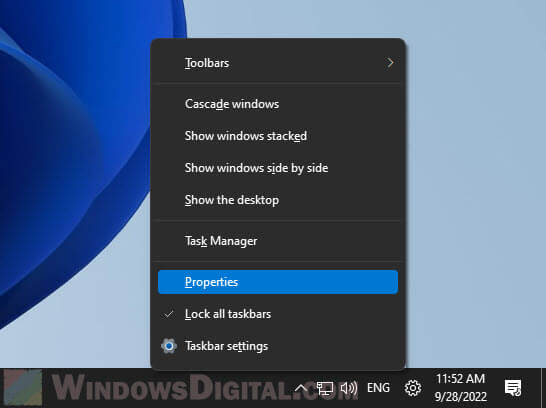
- Next, right-click the taskbar and select Properties.

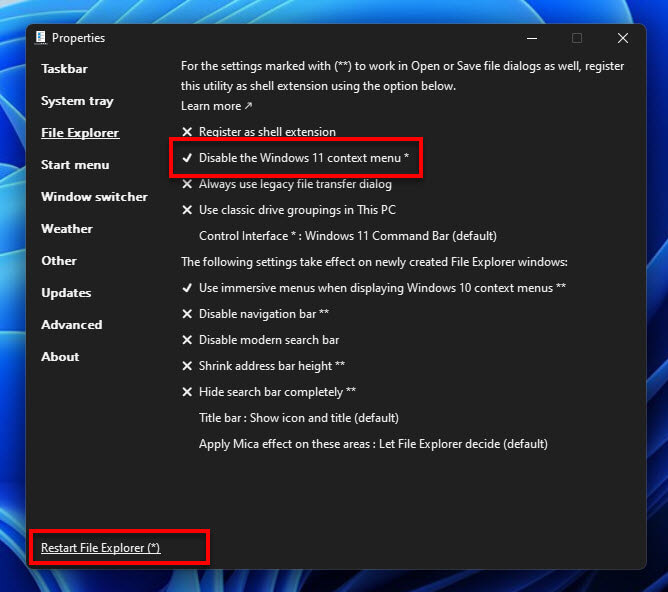
- From the left pane, select File Explorer.
- Then, click the “Disable the Windows 11 context menu” option to enable it. A tick next to the option indicates the option is enabled.
- Finally, click the “Restart File Explorer” at the bottom of the properties window for the changes to take effect immediately.

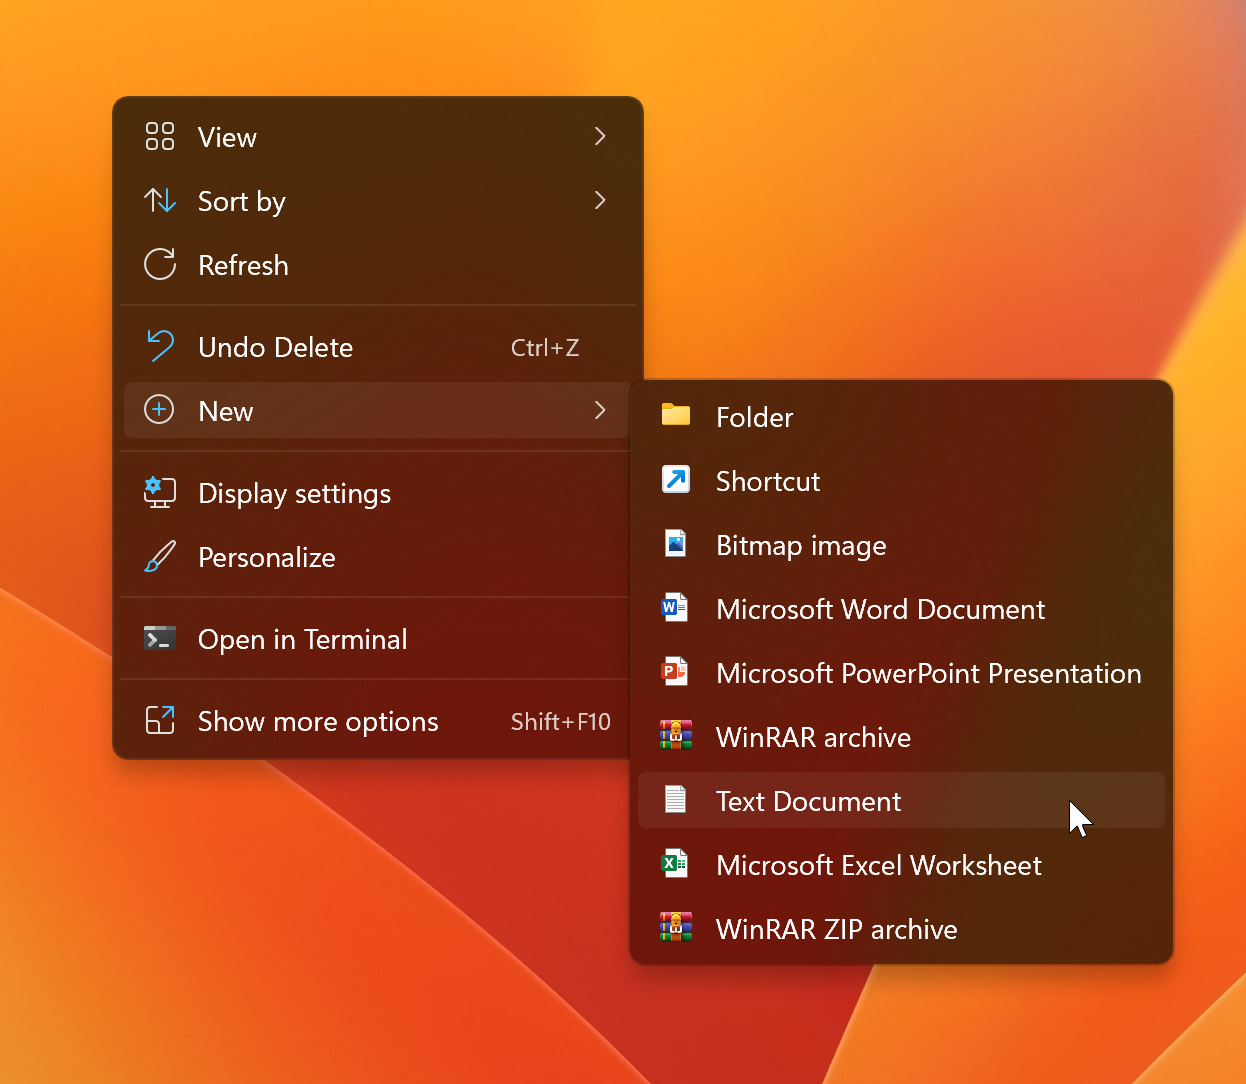
Once the explorer is restarted, when you right-click on the desktop, you should see the classic context menu. Hover the mouse cursor over the “New” option and see if the new text document option exists in the menu.
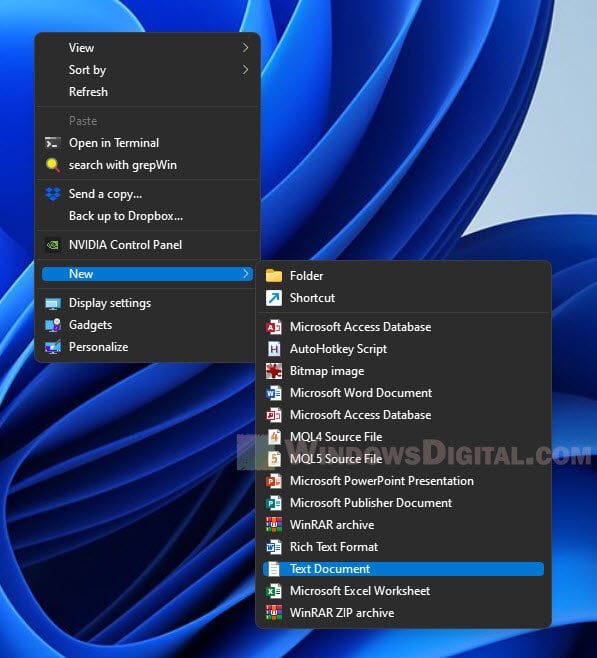
When you right-click on a free space on Windows 11 or 10, you see a “New” context menu item with various choices that lets you quickly create several types of new files such as Text Document, Bitmap image, etc. If you have installed Microsoft Office programs on your computer, you will find even more options, including Microsoft Word Document, Microsoft PowerPoint Presentation, etc.
The New context menu is worthwhile and lets you create new documents, including a folder, a text document, Microsoft Office file types, and even archives.
Some programs automatically add themselves to the New context menu after installation. However, sometimes things get messed up, and you notice some programs are missing from the New context menu, such as Text Document.
In this gearupwindows article, we will guide you on restoring the missing new text document context menu in Windows 11 and 10.
How to Restore Missing New > Text Document in Context Menu on Windows 11 or 10?
Since this method involves editing the Registry, we recommend you create a full backup of the registry and then proceed with the steps. You can restore your computer to its previous working state if something goes wrong.
To restore the missing New Text Document in the Context menu on Windows 11 or 10, use these steps:-
Step 1. Open Registry Editor.
To do that, click the Start button and type Registry Editor. In the available search results, select the Registry Editor app to open the same.
Step 2. Then, copy and paste the following path into the address bar and hit Enter key on the keyboard:-
Computer\HKEY_CLASSES_ROOT\Directory\Background\shellex\ContextMenuHandlers\New

Step 3. On the right sidebar, you will find a (Default) REG_SZ. Double-click on this REG_SZ and set its “Value data” to the following:-
{D969A300-E7FF-11d0-A93B-00A0C90F2719}
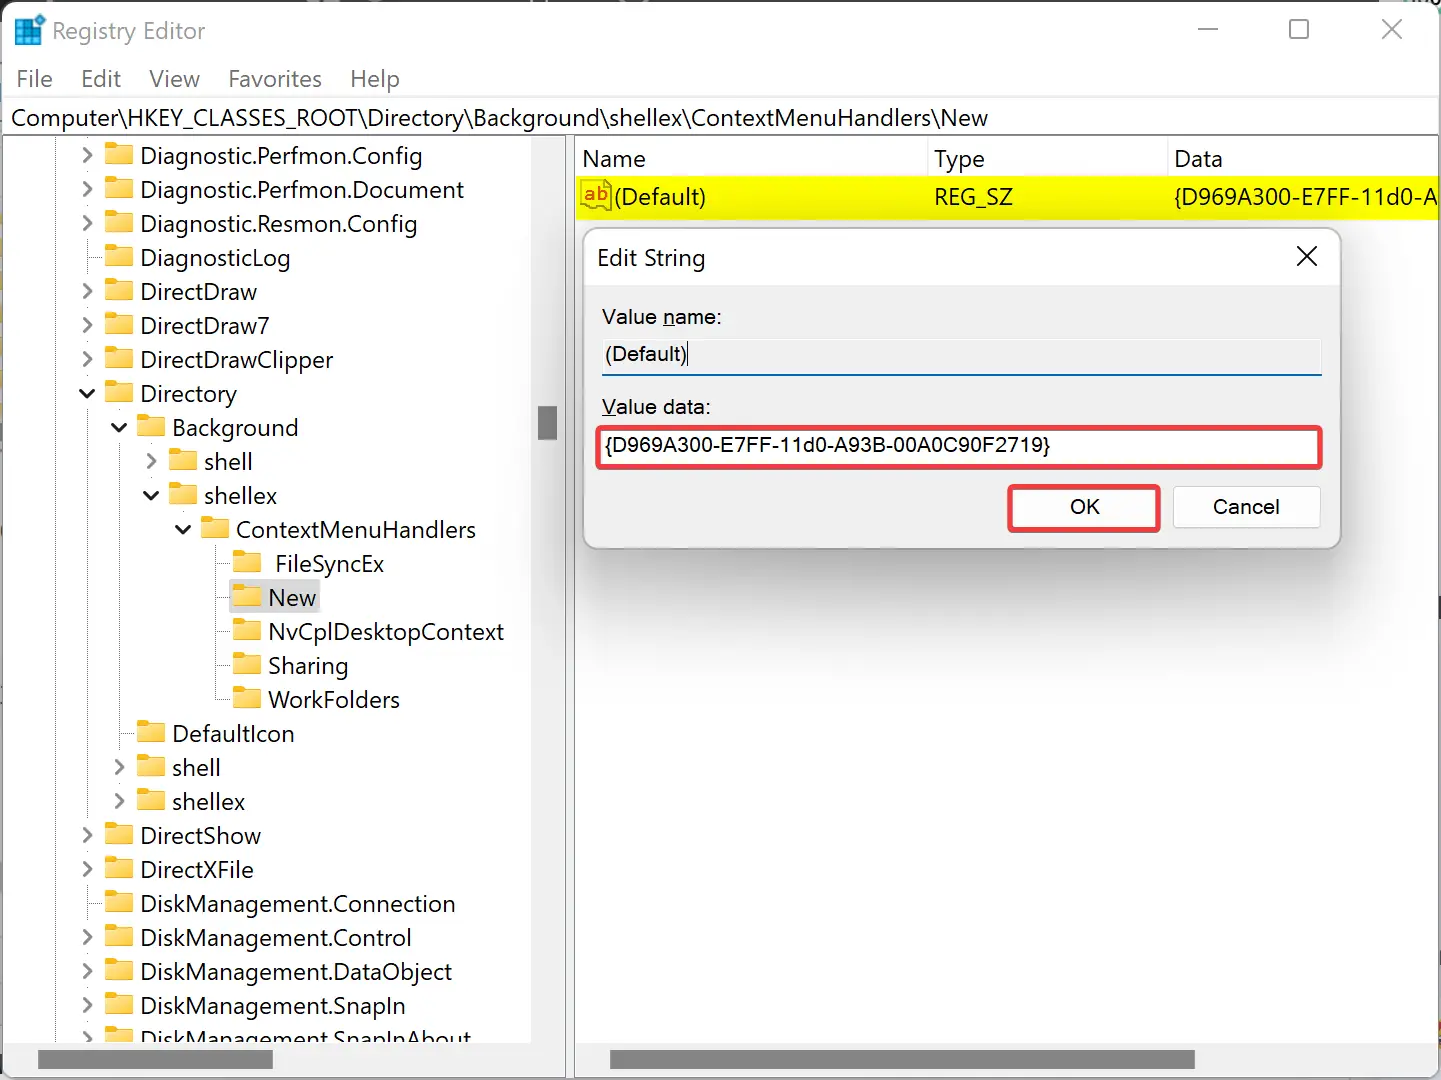
Step 4. Click OK.
Step 5. Finally, reboot your PC to apply the changes.
Once you complete the above steps, the New > Text Document context menu should appear on Windows 11 or 10.
Conclusion
In conclusion, the New Context menu is a handy feature on Windows 11 and 10 that allows users to create different types of files quickly. However, sometimes programs can go missing from the menu, which can be frustrating. Fortunately, with the steps provided in this gearupwindows article, users can easily restore the missing “New Text Document” option in the context menu. By editing the registry, users can ensure that this option is available, along with other programs that may have been missing. Remember to always backup your registry before making any changes to ensure that your computer can be restored to its previous state if anything goes wrong. With these steps, users can continue to enjoy the convenience of the New Context menu on their Windows 11 or 10 operating system.

Иногда пользователи замечают, что из контекстного меню, которое появляется при нажатии правой кнопки мыши на свободном месте рабочего стола или внутри открытой папки, пропадает пункт «Создать -> Текстовый документ». Это вызывает сложности, если Вы часто пользуетесь блокнотом Windows или другим текстовым редактором для написания заметок, статей и прочей полезности.
Причина пропажи пункта создания текстового документа обычно связано с установкой и удалением каких-либо программ, чаще текстовых редакторов. При удалении они тянут за собой реестр, в котором были прописаны атрибуты для HKEY_CLASSES_ROOT\…
Эта проблема легко решается внесением в реестр необходимых параметров. Для этого скачайте файл recovery_point_text.rar в конце статьи, распакуйте его, внутри найдёте файл recovery_point_text.reg. При нажатии на него ваша операционная система спросит что-то типа: «Внести изменения в реестр?», смело соглашайтесь и проблема будет решена. Возможно придётся перезагрузить компьютер. Этот приём проверялся и работает на всех Windows, включая Windows 10.
При проведении этой операции компьютер предупредит о возможной неправильной работе компонентов — не обращайте внимание, в этом файле только команды связанные с корректной работой блокнота (текстового редактора).
Для перестраховки можете создать резервную копию реестра Вашего компьютера. Но это не обязательно. Сам не раз пользовался этим способом восстановления — всегда удачно. Файл, который Вы скачаете имеет расширение .reg. Можете открыть его с помощью блокнота и убедится, что он не несёт в себе вредных команд.
Восстановление пункта контекстного меню Windows «Создать Текстовый документ»
— Находим строку поиска:
Для Windows 7,8 — меню ПУСК правой кнопкой — пункт «НАЙТИ»;
Для Windows 10 такие же действия, если не выведен в трее;
— В строке поиска пишем regedit и нажимаем Enter;
— Нажимаем первый пункт верхнего меню «Файл»;
— Жмём «Экспорт»;
— В появившемся окне, в самом нижней части в поле «Диапазон экспорта», выбрать (стоит по умолчанию) «Весь реестр»;

— Указываем место расположения скаченного файла (кликаем по нему) и Нажимаем «Сохранить».
При скачивании файла не забудьте место его сохранения на своём компьютере.


Простой способ открыть реестр:
— комбинация клавиш Windows + R
— в открывшееся окно ввести regedit
— нажать ENTER согласиться с входом в реестр.
В любой момент реестр можно восстановить, выполнив эти же действия, но только используя «Импорт» в меню «Файл». При импорте файла указать его место хранения.
Скачать файл для восстановления в контекстном меню пункта «Создать -> Текстовый документ»:
recovery_point_text.rar [759 b] (Скачали: 12745)
Скачав файл, можно выполнить всё проще:
— распаковываем его;
— запускаем и соглашаемся со всеми действиями в выпадающих окнах.
Если Вам приходится часто создавать шаблоны HTML страниц, читайте: «Добавление нового пункта в контекстное меню: Создать HTML документ». Это поможет создавать за один клик заранее подготовленный шаблон страницы сайта.
Там же можно скачать пример готовой адаптивной страницы с подключенной по CDN библиотекой jQuery 3.5.1 и фреймворком Bootstrap 5.