
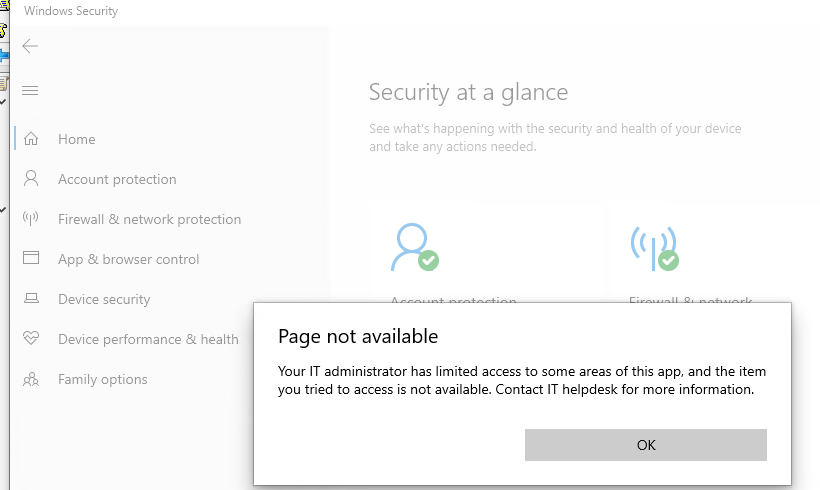
На одном из компьютеров в настройках встроенного антивируса Windows Defender (Защитник Windows) пропала вкладка «Защита от вирусов и угроз», а при попытке открыть окно с настройками появилось сообщение:
Страница недоступна. Ваш системный администратор ограничил доступ к некоторым областям этого приложения, в том числе к элементу, к которому вы пытаетесь получить доступ. Чтобы узнать больше, свяжитесь со службой технической поддержки вашего ИТ-отдела.
Page not available. Your IT administrator has limited access to some areas of this app, and the item you tried to access is not available. Contact IT helpdesk for more information.
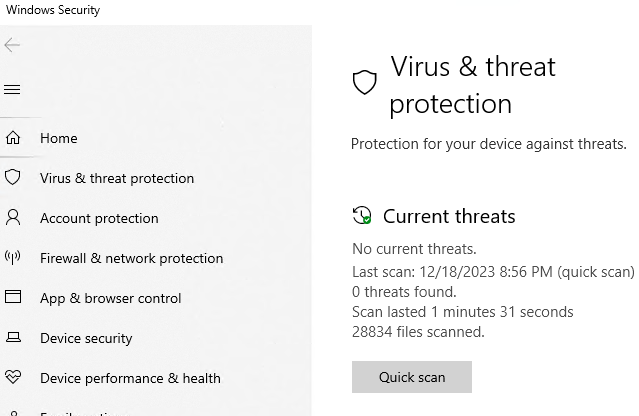
В моем случае в приложении Windows Security отсутствовала вкладка Virus and Threat Protection. Эта проблема встречается в версиях Windows 10 и 11 начиная с билда 22H2.
Это может произойти:
- Если на компьютере установлен сторонний сертифицированный антивирус. В этом случае некоторые функции панели управления Security отключаются;
- Параметры защитника Windows заданы администратором через групповые политики (выполните команду
rsop.msc
или
GPResult /h GPResult.html & GPResult.html
чтобы посмотреть примененные настройки GPO); - Включена блокировка графического интерфейса Защитника Windows
Чтобы проверить включена ли блокировка Windows Defender UI, выполните команду:
Get-MpPreference|select UILockdown
Чтобы разблокировать UI защитника выполните команду:
Set-MpPreference -UILockdown $false

После этого вкладка Virus and Thread у меня отобразилась в интерфейсе Windows Security.
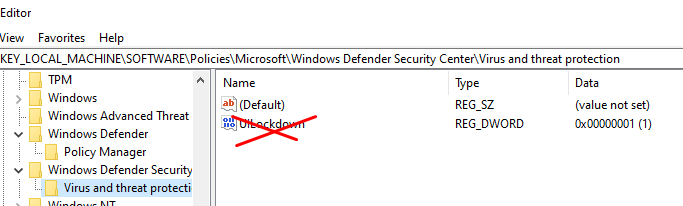
Также можно заблокировать/разблокировать UI в Windows Defender через реестр. Если команда выше не помогла, проверьте следующее:
- Откройте
regedit.exe
; - Перейдите в HKLM\SOFTWARE\Policies\Microsoft\Windows Defender\
- Проверьте, что во вложенных ветках отсутствует параметра реестра UILockdown со значением 1;
- Если этот параметр присутствует, удалите его;
- Аналогично проверьте ветку HKLM\SOFTWARE\Policies\Microsoft\Windows Defender Security Center\Virus and threat protection и удалите параметр UILockdown, если имеется.

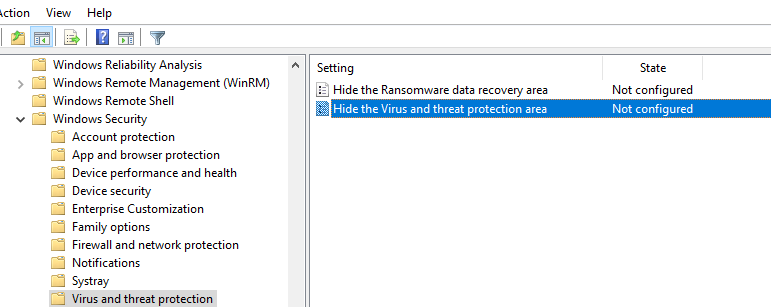
Этот параметр реестра может включаться политикой Hide the Virus and threat protection area in Windows Security в разделе редактора GPO (
gpedit.msc
) Computer Configuration -> Administrative Templates -> Windows Components -> Windows Security -> Virus and Thread Protection. Проверьте, что этот парамтер GPO не настроен или отключен.
Если эта команда не помогла, попробуйте сбросить настройки приложения Безопасность Windows:
Get-AppxPackage Microsoft.SecHealthUI -AllUsers | Reset-AppxPackage
Если ни один из способов не помог попробуйте сбросить настройки Windows Defender в реестре, сбросить настройки локальной GPO, и перезагрузить компьютер:
reg delete "HKLM\SOFTWARE\Policies\Microsoft\Windows Defender" /v
reg delete "HKLM\SOFTWARE\Policies\Microsoft\Windows Defender Security Center" /v
 RMDIR /S /Q "%WinDir%\System32\GroupPolicyUsers"
RMDIR /S /Q "%WinDir%\System32\GroupPolicy"
Getting the “Your IT administrator has limited access” error when accessing the Windows Security program in Windows 11 is pretty common. It could appear for various reasons. But despite that, it could also be easily fixed. And, this is what this guide will show you.
If you’re getting the same error when using Windows Security on the PC, read this in-depth fixes guide to know how to fix “Your IT administrator has limited access” error in Windows 11.
Why Does “Your IT Administrator Has Limited Access” Appear in Windows 11?
Your user account may not have administrative privileges, because of which the “Your IT administrator has limited access” error message is appearing. But besides this, there could be several more reasons for it. Below, we’ve listed all other potential reasons for this issue:
- Interruptions by Third-Party Antivirus
- Unnecessary School Accounts on the PC
- Enabled Turn Off Microsoft Defender Antivirus Policy
- Buggy Windows Security App
- Interference From Microsoft Defender Firewall
- Bugs and Glitches in the PC
- Viruses and Malware
- Outdated Windows 11
- Limitations From the IT Desk
Fix “Your IT Administrator Has Limited Access” Error in Windows 11
In this section, we’ll share some working fixes to fix this error in Windows 11. You can follow the mentioned ways to fix “Your IT administrator has limited access” in Windows 11:
1. Change Your User Account to an Admin Account
One of the most common reasons for the “Your IT administrator has limited access” error in Windows 11 is the lack of admin rights. Thus, we suggest you change your current user account to an admin account. Follow the below-mentioned steps to know how to do this:
1. Open the Settings app and move to the Accounts section from the left navigation menu.
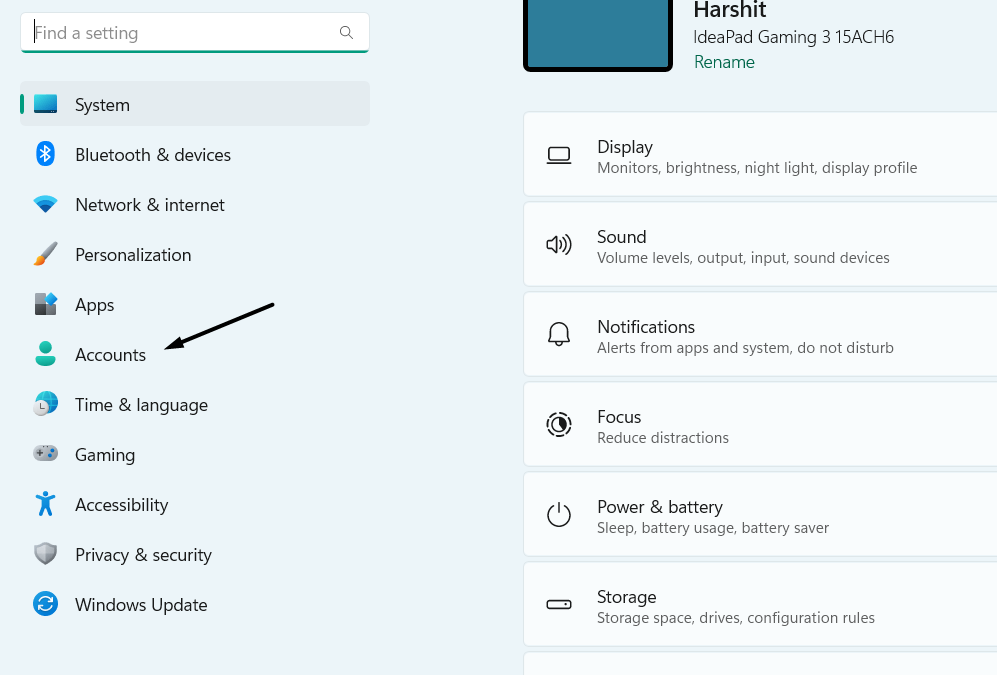
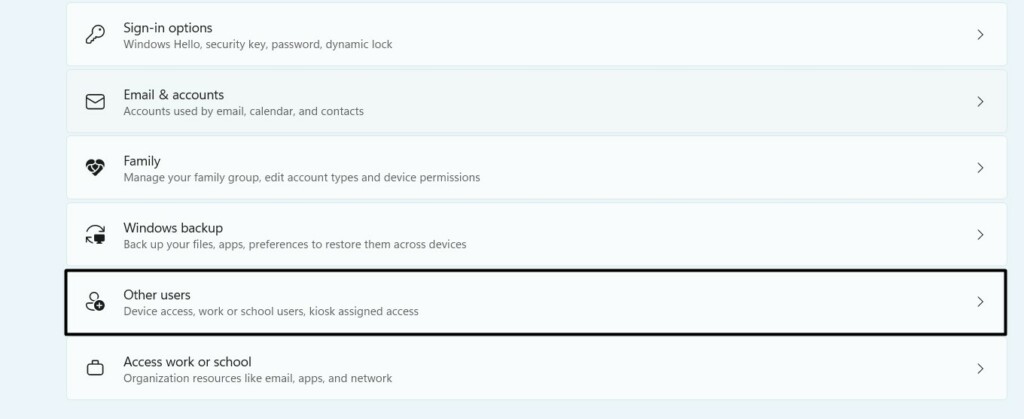
2. In the Accounts section, choose Other users under Account settings to view the active accounts.
3. On the next screen, select your user account, and check if Administrator is added under it.
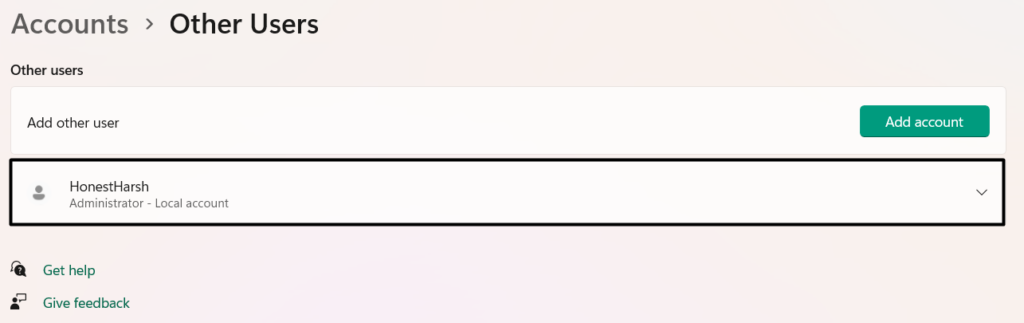
4. If not, click the Change account type button, and choose Administrator from the dropdown.
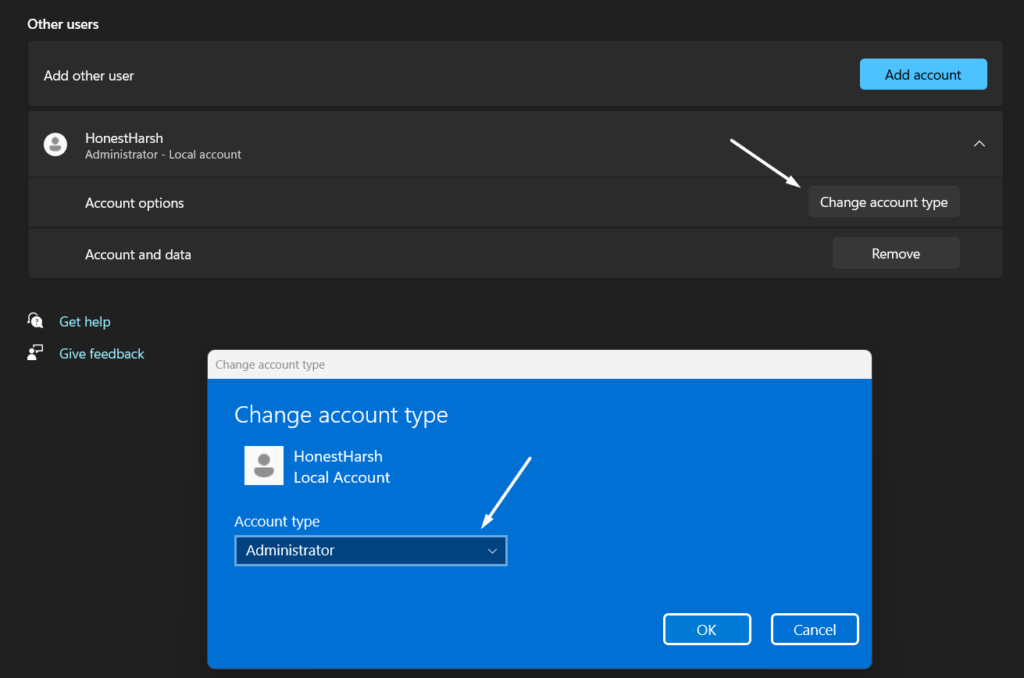
5. Once done, click OK to apply this change, and then simply restart your Windows 11 PC.
2. Create Another Administrator Account
If the issue is still there, create a new administrator account on your PC, as it could be possible that the current account has some issues. So try the same on your PC. You can check the below-mentioned steps to learn how to create another administrator account on your PC:
1. To create a new admin account on your Windows 11 system, go to the Accounts section of it.
2. In the Accounts window, choose Other users, and then click Add account to get a new prompt.
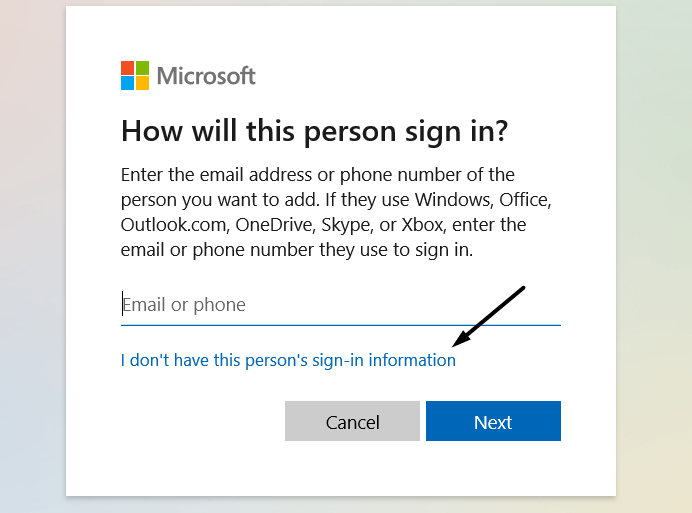
3. In the Microsoft account window, select the I don’t have this person’s sign-in information text.
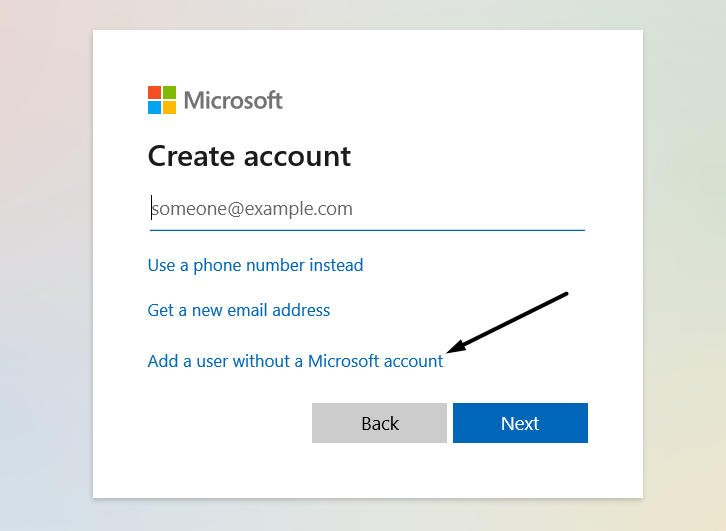
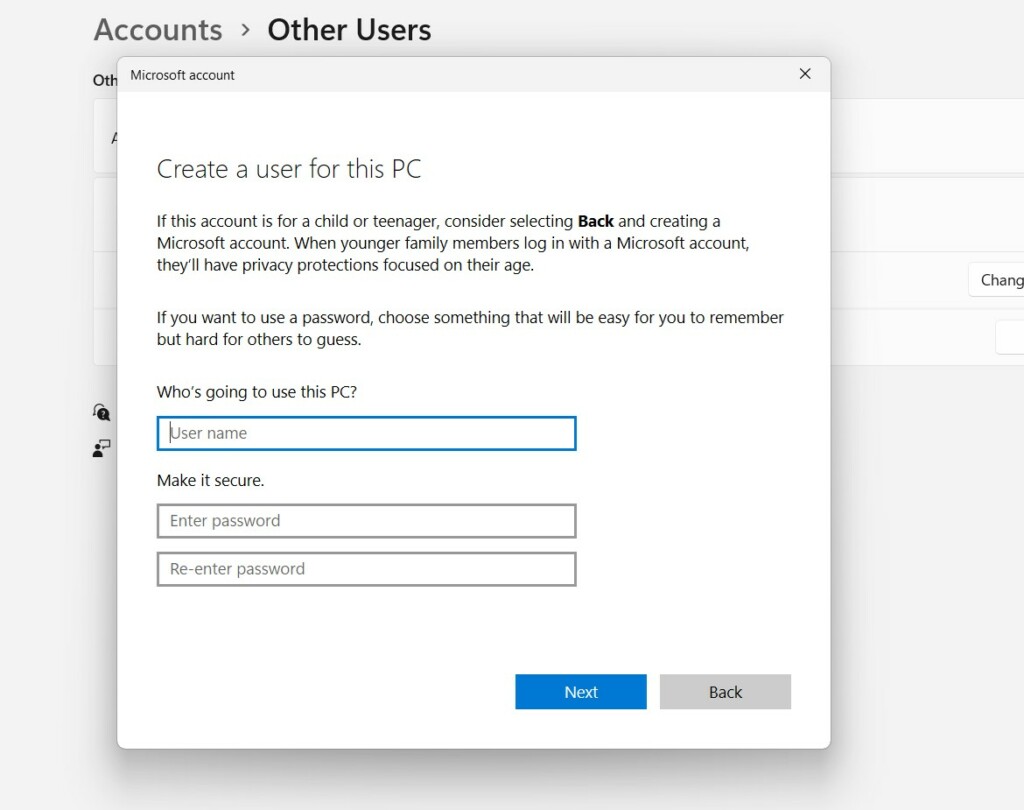
4. On the next screen, select Add a user without a Microsoft account and then enter the required details.
5. Follow the on-screen instructions to create a new admin account on your Windows 11 PC.
6. Finally, log in with the new account on your PC and check whether the issue is gone now.
3. Turn On the Hidden Administrator Account
Even if creating a new admin account doesn’t fix the issue on the PC, consider enabling the hidden admin account on it. You can easily enable it by running a few simple commands in Command Prompt. Check the mentioned prompts to know how to easily turn it on:
1. To enable the hidden admin account, boot your Windows 11 PC into Safe mode using any method.
2. Once you’re in Safe mode, open Command Prompt and copy-paste the below command in it:
net user administrator /active:yes
3. Once done, hit the Enter key to immediately ON the hidden administrator user account.
4. Reboot your Windows PC and choose the hidden admin account when logging into the PC.
4. Remove Any Work or School Accounts
Before trying other fixes, we want to give you a small suggestion, which is deleting any work or school accounts from the PC. It could be possible that your PC is connected to any other account, which doesn’t have rights to access Windows Security. Follow the below steps to do so:
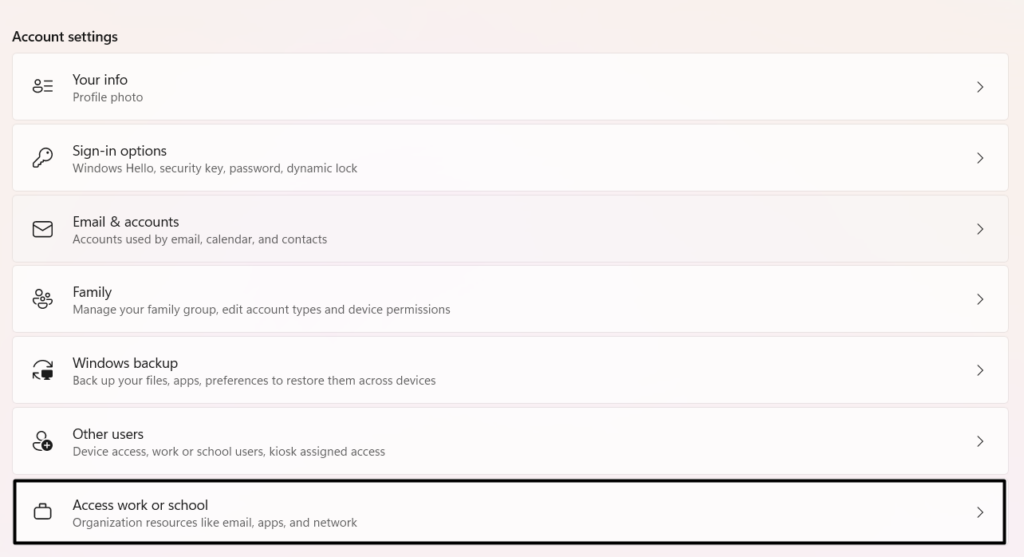
1. Go to the Accounts category of Settings and then scroll to Access work or school navigation.
2. Under Access work or school navigation, look for the connected work or school account, and select it.
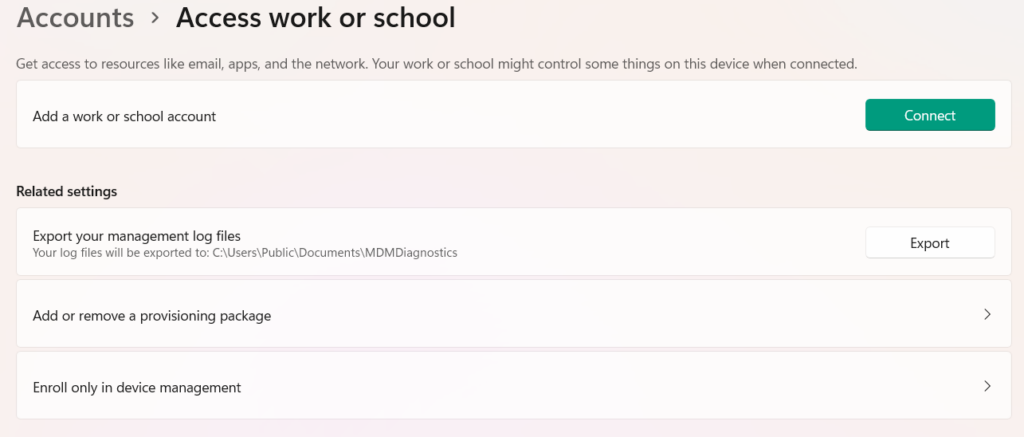
3. Hit Disconnect next to the account to disconnect it and once done, reboot your system.
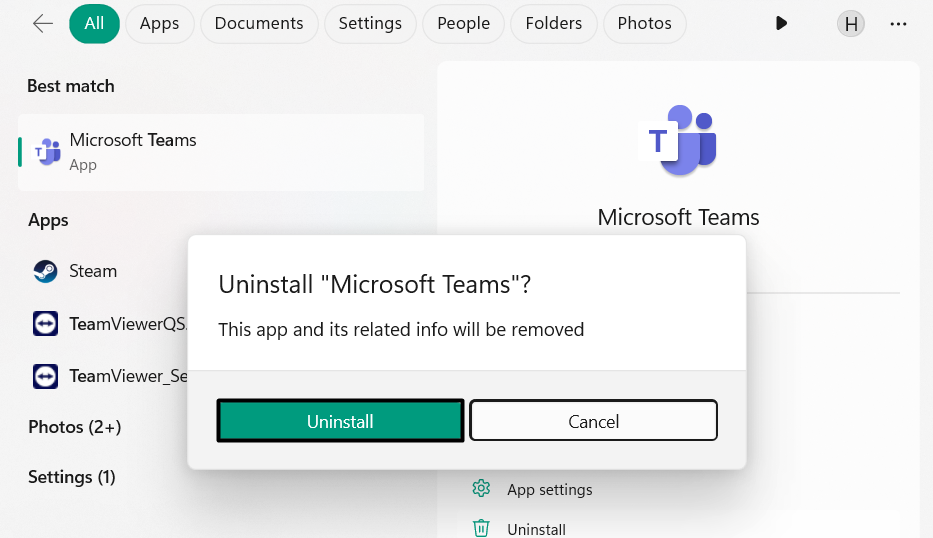
5. Uninstall Other Security Apps
If you’ve recently installed a third-party security app on your PC, consider uninstalling it, as it could be possible that it’s interrupting the Windows Security app’s working and causing this issue. To know how to uninstall apps and programs in Windows 11, check the below steps:
1. Type the security app in the Windows Search Box, and choose Uninstall from the search results.
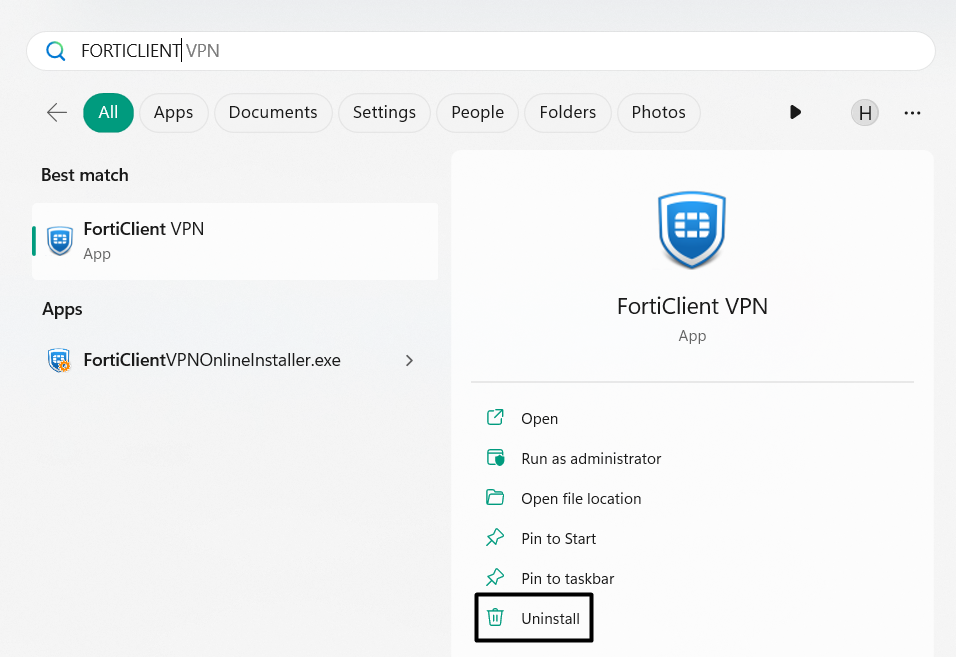
If you don’t see the Uninstall option in the search results, go to the below path in the Settings app:
Settings App > Apps > Installed Apps > Search for the App > Click Three-Dots (…) > Uninstall

2. Choose the Uninstall button in the next prompt that appears after following any above methods.
3. After uninstalling the app, restart your Windows 11 PC and check whether the issue is still there.
6. Disable the Turn Off Microsoft Defender Antivirus Policy
Some Windows Pro and Enterprise users in the Microsoft forum mentioned that they’re getting the “Page not available” error. If you’re also one of them, you need to disable the Turn Off Microsoft Defender Antivirus Policy in the Group Policy Editor on your PC. You can do this on your Windows 11 PC by taking the help of the below-mentioned steps:
1. Open the Group Policy Editor app and double-click the Computer Configuration option.
2. Select Administrative Templates in the app’s side menu and expand Windows Components.
3. Click Microsoft Defender Antivirus and open Turn off Microsoft Defender Antivirus on the left.
4. In the Turn off Microsoft Defender Antivirus window, choose the Disabled radio button and then select OK.
5. Open the Allow antimalware to startup with normal priority policy and then disable that too.
6. Choose the Client Interface policy in the same folder, and then double-click Enable headless UI mode.
7. Choose the Disable option to turn off this policy, and then click Apply to apply this change.
8. Lastly, close the opened window, and then restart your PC to check if the issue is fixed.
7. Run this PowerShell Command
One easy way to fix the “Your IT administrator has limited access” error is to run some commands in PowerShell. If you also get this error or “Page not available” error when trying to open Windows Security, do the same and check if it helps. Follow the added steps:
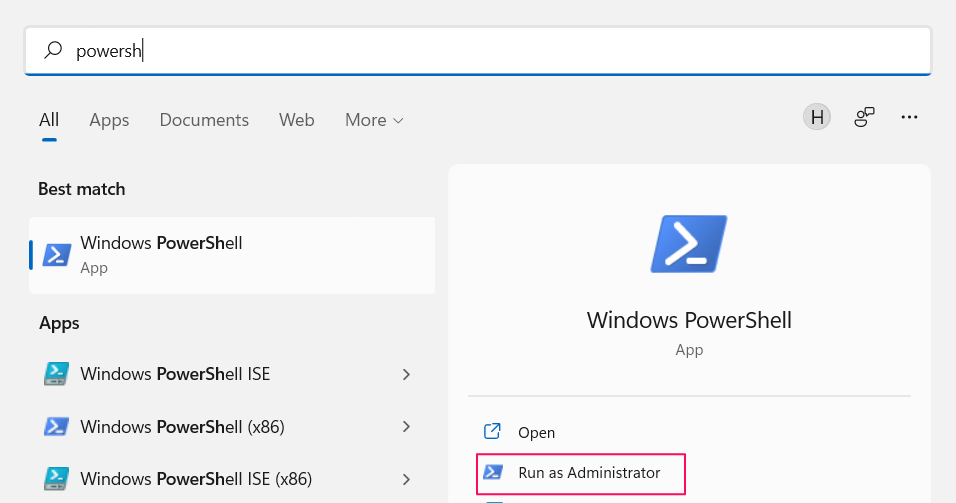
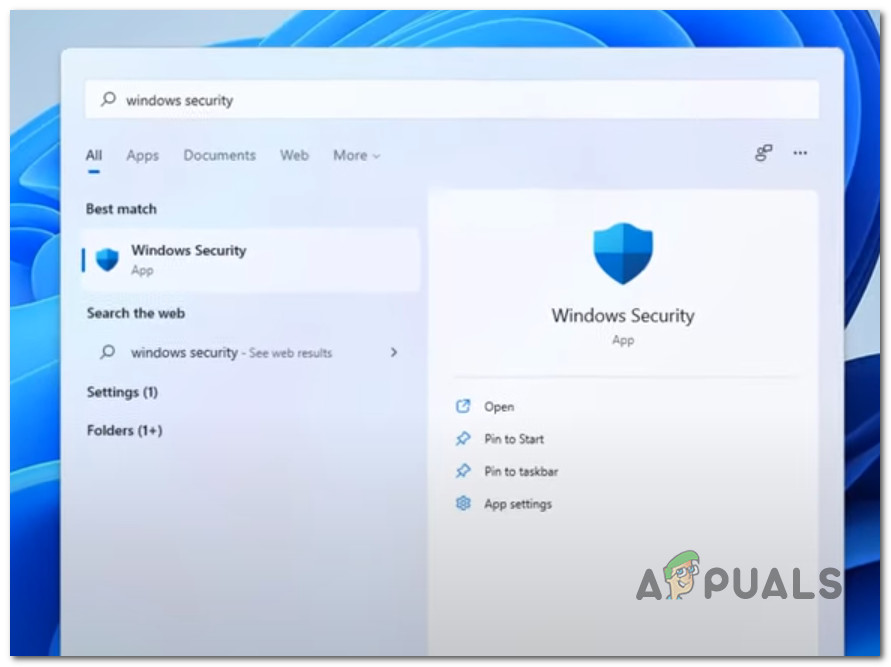
1. Open the Windows Search Box on your PC and then type Windows PowerShell in it.
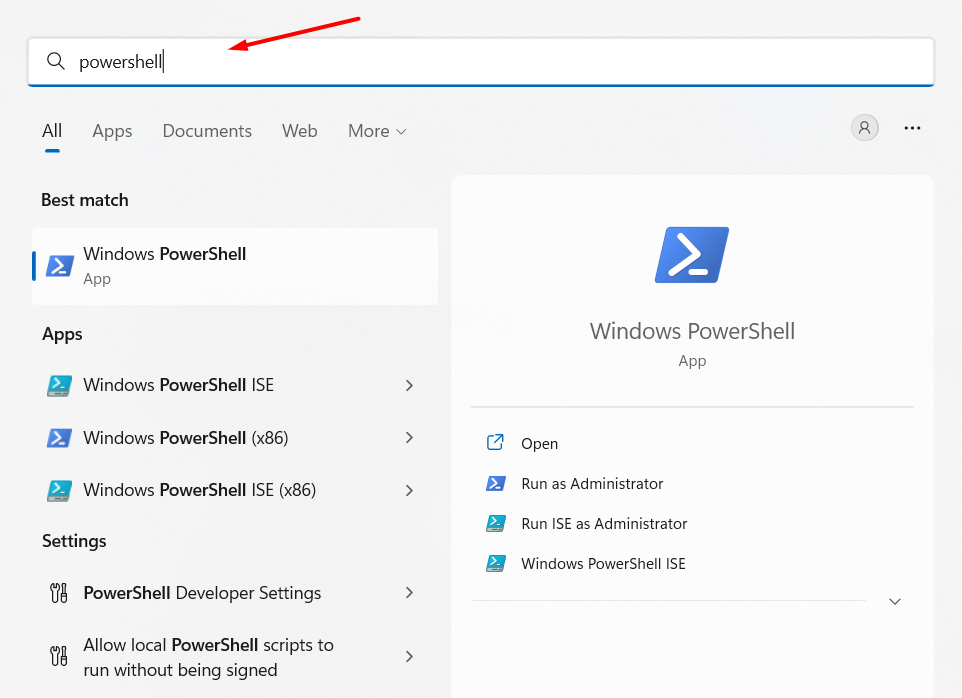
2. Choose Windows PowerShell from the search results under Best match to open the console.
3. In the PowerShell window, copy-paste the following command, and then press enter to run MpPreference:
set-MpPreference -UILockdown4. Finally, exit Windows PowerShell and then reboot your PC to get rid of this error message.
8. Repair or Reset the Windows Security App
Another way to get rid of the “Your IT administrator has limited access” error in Windows 11 is to repair and reset the Windows Security app. This will fix all the temporary bugs and glitches with it, and, also eliminate the error. So check the below steps to know the process:
1. Open the Settings app on your Windows 11 PC and from the left navigation pane, choose Apps.

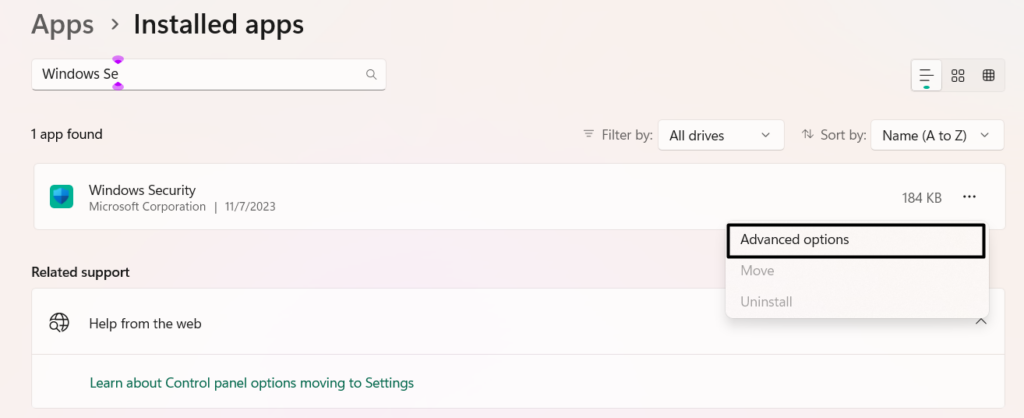
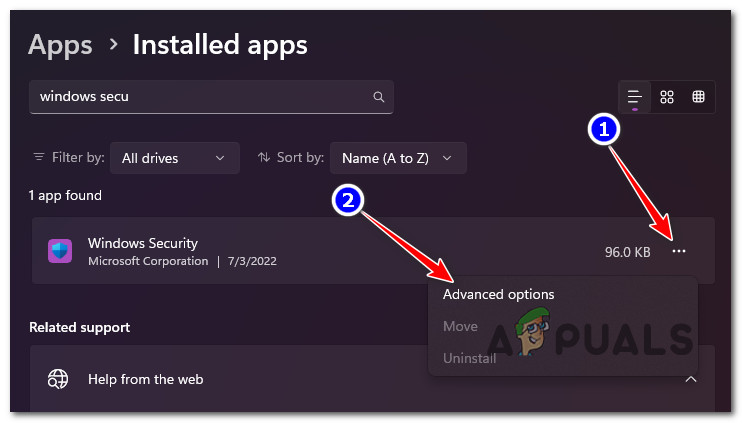
2. Choose Installed apps and on the next screen, find Windows Security and click three dots (…) next to it.
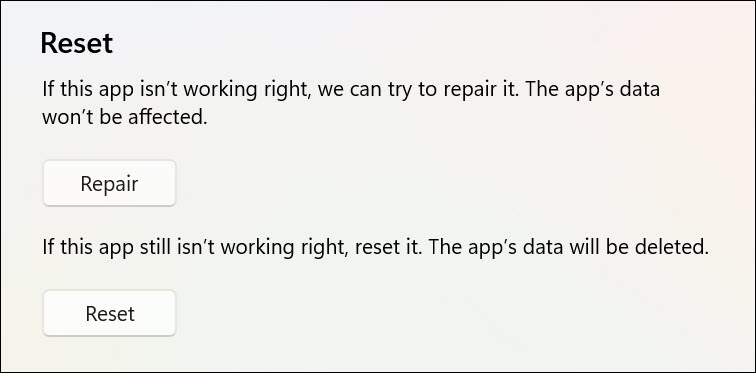
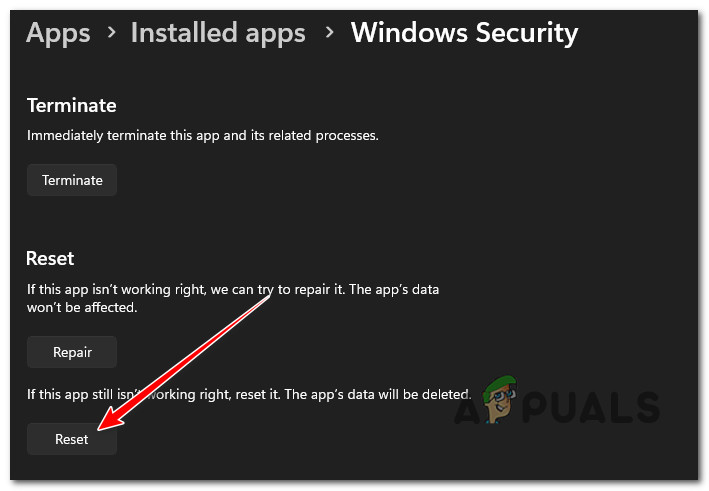
3. From the dropdown, choose Advanced options, go to the Reset section, and click Reset.
4. Once done, click Repair in the same section to begin repairing the Windows Security app now.
5. Exit the Settings app, and then check if the “Your IT administrator has limited access” error still appears.
9. Modify the Registry via Command Prompt
Some users in the online forums mentioned that they eliminated the “Your IT administrator has limited access” error by running some simple commands in Command Prompt. We suggest you implement the same by following the mentioned steps:
1. Type Command Prompt in the search box, and choose Run as administrator from the results.

2. In the Command Prompt window, execute the following commands one by one to make the changes:
reg delete "HKLM\Software\Microsoft\Windows\CurrentVersion\Policies" /freg delete "HKLM\Software \Microsoft\WindowsSelfHost" /freg delete "HKLM\Software\Policies" /freg delete "HKLM\Software\WOW6432Node\Microsoft\Policies" /freg delete "HKLM\Software\WOW6432Node\Microsoft\Windows\CurrentVersion\Policies" /freg delete "HKLM\SOFTWARE\Policies\Microsoft\Windows Defender" /v DisableAntiSpywarereg delete "HKCU\Software\Microsoft\Windows\CurrentVersion\Policies" /freg delete "HKCU\Software\Microsoft\WindowsSelfHost" /freg delete "HKCU\Software\Policies" /freg delete "HKLM\Software\Microsoft\Policies" /f3. Once done, type exit in the same window to close the console and get rid of this error message.
10. Search for Viruses and Malware
Malware and viruses in the PC could also be the reason for the “Your IT administrator has limited” access error in Windows 11. This could be the same in your case. Thus, we suggest you make sure that your PC is malware-free. Follow the below steps to ensure this:
1. As Windows Security isn’t working well, you need to use another method to run the antivirus scan on it. So, open Command Prompt with admin rights on your PC to do the same.
2. In the Command Prompt window, type in the below-mentioned command to open the antivirus tool:
cd C:\ProgramData\Microsoft\Windows Defender\Platform\4.18*3. Type in the below command in it and then hit the Enter key to run the antivirus scan right now:
MpCmdRun -SignatureUpdate4. Lastly, wait for the antivirus scan to complete on the PC, and once done, check the issue’s status.
11. Erase Windows Defender Records
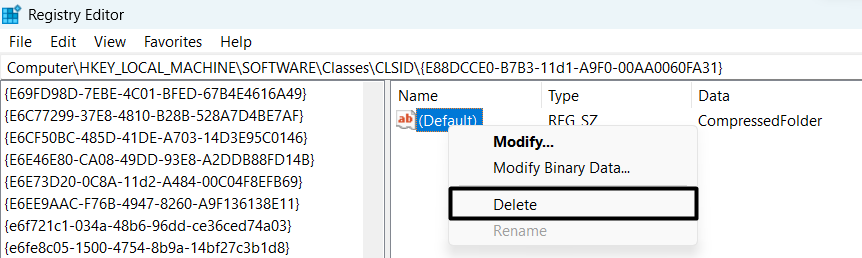
An easy solution to fix “Your IT administrator has limited access” is to erase the Windows Defender records. You need to delete them in Registry Editor. Try the steps to do so:
1. To delete the Windows Defender records from your Windows 11 PC, open Registry Editor on it.
2. In the Registry Editor program, navigate to the below-mentioned location using the address bar at the top:
HKEY_LOCAL_MACHINE\SOFTWARE\Policies\Microsoft\WindowsDefender\Policy Manager
3. Once you’re there, delete all the files in it, and then restart your PC to check the issue’s status.
12. Turn Off Microsoft Defender Temporarily
It may be possible that the Microsoft Defender Firewall is constantly interrupting the Windows Security app’s working, which is why the “Your IT administrator has limited access” error is appearing.
In that case, we suggest you turn off the firewall temporarily to check if it’s the cause of this error on the PC. You can simply follow the below-mentioned steps to know how to disable Windows Defender Firewall in Windows 11:
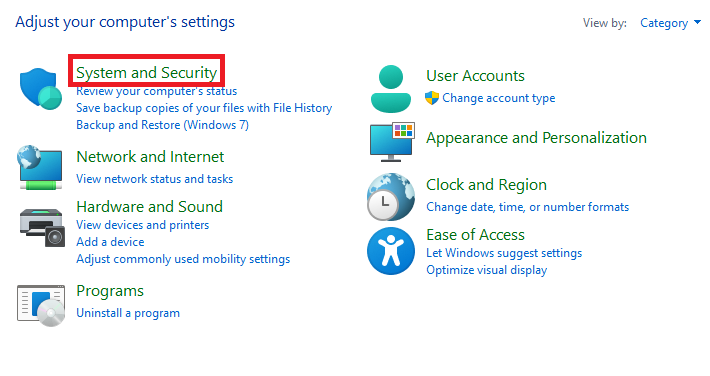
1. As we’re unable to launch the Windows Security app, we’ll use the Control Panel app to turn it off. So open Control Panel on your computer and go to System and Security.
2. In the System and Security window, choose Windows Defender Firewall and then select Turn Windows Defender Firewall on or off on the left navigation menu of the utility.
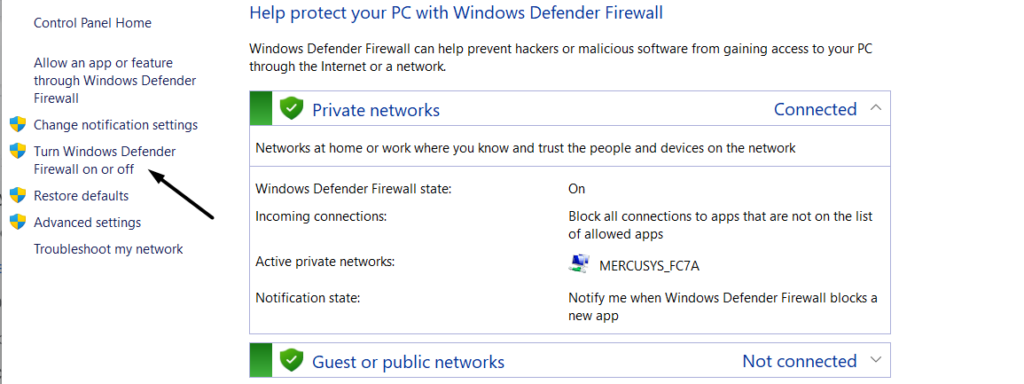
3. On the next screen, under both sections, choose Turn off Windows Defender Firewall (recommended).
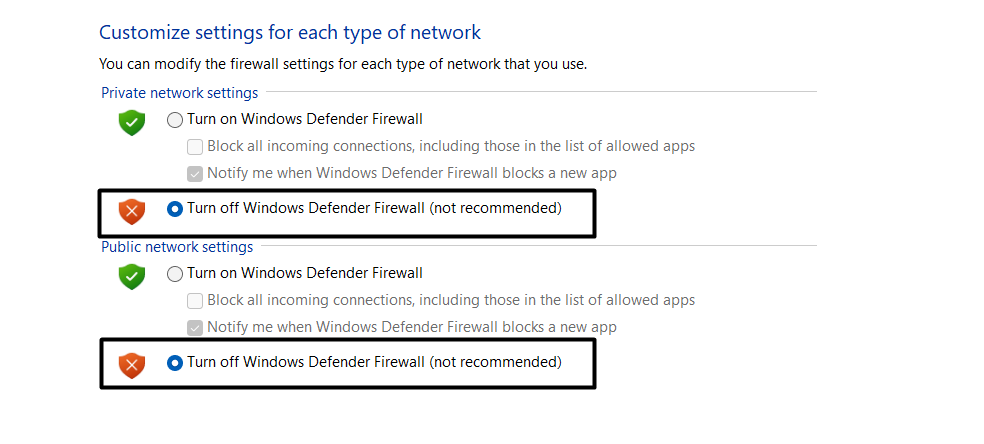
4. In the end, click OK to apply all the changes and then restart your Windows 11 PC or laptop.
13. Contact Your IT Helpdesk
It may be possible that your IT administrator has put restrictions on your user account, which is why the “Your IT administrator has limited access” error is appearing when accessing the Windows Security app on your PC.
In that case, you need to contact your IT helpdesk and ask them if that’s true. If yes, then ask them to give you the right permissions to use the Windows Security app on your Windows 11 PC without any issues.
14. Reset the PC
If none of the mentioned solutions help you get rid of the “Your IT administrator has limited access” error, then you’ve no other option left than resetting the Windows 11 PC back to default. Also, you don’t need to sacrifice your valuable data in this process. If you’re ready to reset your Windows 11 PC, follow the below-mentioned steps to do the same:
1. To reset your Windows 11 PC, open the Settings app and go to Recovery section of it.

2. In the Recovery section of the Settings app, hit the Reset PC button next to Reset this PC.

3. In the next window, choose the Keep my files option and then the Cloud install option.
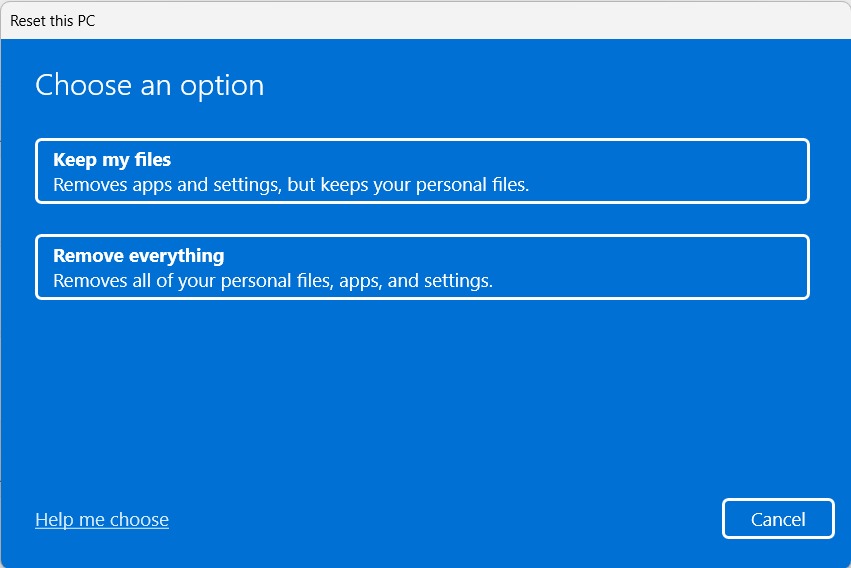
4. In the end, follow the on-screen instructions to reset your Windows 11 PC back to default.
FAQs
How Do You Fix Your IT Administrator Has Limited Access to Some Areas of This App?
It could be possible that your user account doesn’t have admin rights, which is why “Your IT administrator has limited access to some areas of this app” is appearing when trying to open it.
How Do I Fix Page Not Available in Windows 11?
If you’re getting an error when trying to open a page in Windows 11, consider restarting your Windows 11 PC. In case this doesn’t resolve the issue, update the particular app on your PC.
How Do I Enable Headless UI Mode?
You need to enable the Headless UI mode on your Windows 11 PC in the Registry Editor app.
How Do I Disable Antivirus on Windows 11?
Follow the below path to enable the integrated antivirus utility on your Windows 11 PC or laptop:
Open the Windows Security App > Choose Virus & Threat Protection App > Manage Settings > Toggle off Real Time Protection.
How Do I Allow Administrator Permission in Windows 11?
You can assign your user account admin rights in the Accounts section of the Settings program on your PC.
Final Words
So, these are some good solutions (at least, according to us) that can quickly and easily fix the “Your IT administrator has limited access” error message in Windows 11. Here in this guide, we mentioned some great fixes to get rid of the “Your IT administrator has limited access” error.
We hope the fixes we shared in this guide helped you get rid of it with ease. If yes, do let us know which mentioned workarounds helped you resolve this issue.
Большинство пользовательских настроек Windows 10 и 11 доступны в приложении «Параметры», оттуда же можно получить доступ к настройкам безопасности, которые разработчики объединили в особую группу, открывающуюся в отдельном окне. За исключением UAC, настройки безопасности не требуют каких-то особых прав доступа, но как тогда объяснить появление у некоторых пользователей сообщения «Ваш системный администратор ограничил доступ к некоторым областям этого приложения» при попытке открыть тот или иной раздел настроек?
Если проблема возникла на вашем личном компьютере, скорее всего, произошло одно из двух: либо настройки доступа к функционалу Защитника изменила сторонняя программа, либо вы сами по ошибке ограничили доступ, изменив соответствующие политики в редакторе локальных групповых политик или редакторе реестра. Если конкретнее, причины появления указанного выше сообщения могут быть следующие:
- Отключение Защитника с помощью сторонних твикеров, намеренное или непреднамеренное.
- Установка на компьютер стороннего антивируса. Как правило, во избежание конфликта стороннее антивирусное программное обеспечение полностью или частично отключает встроенный Защитник.
- Изменение системных политик, отвечающих за работу встроенных средств безопасности.
- Отключение на корпоративном компьютере Защитника Windows администратором или другим пользователем, имеющим администраторские права.
В большинстве случаев решить эту проблему можно самостоятельно, единственное, что вам для этого понадобится – это права администратора.
Если вы решили отключить Защитник, используя для этого твикеры, то предпринимать ничего не нужно, равно как и не нужно обращать внимание на сообщение «Ваш системный администратор ограничил доступ к некоторым областям этого приложения». То же самое касается установки на компьютер сторонних антивирусов. Если же никаких действий вы не предпринимали, то, пожалуй, есть смысл на всякий случай проверить систему сторонним антивирусным сканером, тем же Dr.Web CureIt!.
Если у вас Windows 10 или 11 Pro и выше, откройте командой gpedit.msc редактор локальных групповых политик и перейдите в раздел «Конфигурация компьютера» → «Административные шаблоны» → «Компоненты Windows». Интерес представляют подразделы «Антивирусная программа Microsoft Defender», «Безопасность Windows» и «Центр обеспечения безопасности», – они содержат политики, управляющие встроенными средствами безопасности.

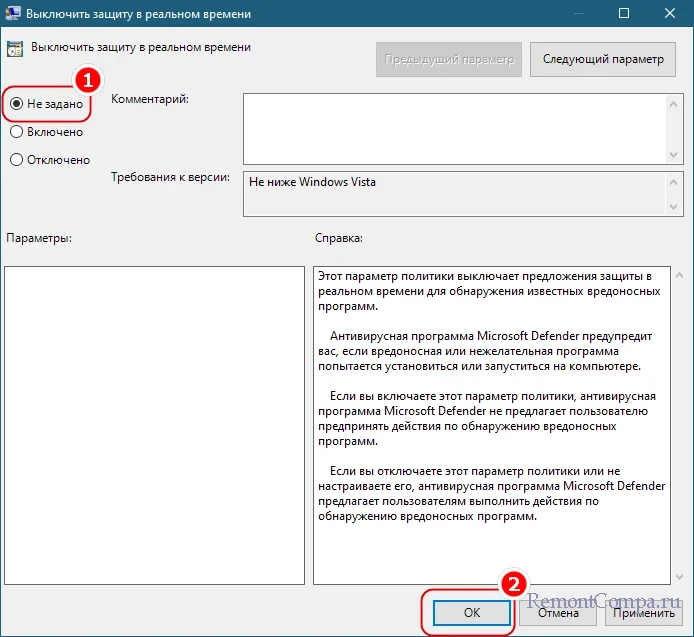
По умолчанию все политики имеют статус «Не задана», если вы найдете какую-то из эти политик включенной или отключенной, откройте ее свойства двойным кликом, включите радиокнопку «Не задана», сохраните настройки и перезагрузите компьютер.
В Windows 10 и 11 редакции «Домашняя» редактор политик заблокирован, вместо него для доступа к измененным политикам можно использовать редактор реестра. Откройте его командой regedit и разверните ветку:
HKLM\SOFTWARE\Policies\Microsoft\Windows Defender
Она должна содержать только один пустой подраздел — Policy Manager, если в ней обнаружатся другие подразделы, удалите их.

Проверьте также содержимое подраздела Policy Manager. Кроме параметра по умолчанию с пустым значением, он не должен содержать ничего, в противном случае очищаем его содержимое.

Заодно проверьте ключ:
HKLM\SOFTWARE\Policies\Microsoft\Windows Defender Security Center
Если он не существует или он пуст, всё в порядке. Если существует и содержит подразделы или параметры, очистите его.

Всё готово, можете закрыть редактор реестра и перезагрузить компьютер: доступ к настройкам безопасности должен быть восстановлен.
Some Windows 11 users are reporting that they can’t access the Windows Security app anymore. Most users are experiencing this issue when attempting to change Windows Defender settings. When clicking or (double-clicking) on the Windows Security app, nothing happens. In most cases. this problem was reported to occur after a pending Windows Update was installed.
After we investigated this issue, we realized that there are actually several different underlying instances that will ultimately cause this error code. Here’s a short list of scenarios that might prevent Windows Security from opening up:
- Corrupted Windows Store certification – As it turns out, one common scenario that will cause this problem is when a critical dependency (Windows Store certification) is actually plagued by corruption. If this particular case is applicable, you should be able to get the issue fixed by reinstalling Microsoft.SecHealthUI component.
- Corrupted Windows Security component – If you recently upgraded to Windows 11 from an older Windows version, there’s a chance you’re dealing with a partially corrupted component brought about by the upgrade process. To resolve this issue, you need to reinstall the Windows Security component.
- Interfering 3rd party AV suite – Several 3rd party antivirus suites including Kasperky are known to effectively block Windows users from accessing the native AV component (Windows Security) while the 3rd party AV is enabled. To resolve this problem, you can fix the issue by disabling or uninstalling the 3rd party component.
- System file corruption – As it turns out, there is a scenario where you can no longer access the Windows Security component due to system file corruption that affects Windows security directly or an associated dependency. To fix this issue, you can start by doing an SFC and DISM scan. If this fails, you should also consider going for a clean install or repair install.
- Badly cached data – Depending on your particular scenario, you could also face an issue brought about by cached data that is being stored by Windows Security. In this case, the first thing you should do is reset the Windows Security app from the App section.
- Windows Security is Disabled – If you previously made some changes to the default behavior of Windows Security, there’s a chance Windows Security is actually disabled by a Registry key and this is the reason why you can’t access it. In this case, you can fix the problem by accessing Registry Editor and modifying the DisableAntiSpyware.
Now that we went over every potential scenario that might cause this behavior on Windows 11, let’s go over every known fix that other affected users have successfully used to restore the normal functionality of Windows Security.
1. Reset the Windows Store certification
It turns out that one typical situation that will result in this issue is when a crucial dependence (Windows Store certification) is genuinely afflicted by corruption. Reinstalling the Microsoft.SecHealthUI component should resolve the problem if this specific scenario applies.
To do this, you will need to open PowerShell with administrator access and run a command that will effectively reset the Windows Store certification. This method has been confirmed to work by a lot of affected users.
Here’s what you need to do:
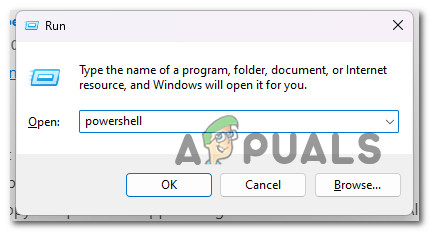
- Press Windows key + R to open up a Run dialog box.
- Next, type ‘powershell’ inside the text box, then press Ctrl + Shift + Enter to open up an elevated Powershell window with admin access.

Access the Powershell window - At the User Account Control (UAC), click Yes to grant admin access.
- Once you’re inside the elevated Powershell window, paste the following command and press Enter to reset the Windows Store certification:
Get-AppxPackage Microsoft.SecHealthUI -AllUsers | Reset-AppxPackage
- After the command is run successfully, reboot your PC and see if the problem is fixed once the next startup is complete.
If the problem is still not resolved, move down to the next potential fix below.
2. Disable or Uninstall 3rd party antivirus
While the 3rd party AV is enabled, it is well known that a number of 3rd party antivirus suites, like Kasperky, effectively prevent Windows users from accessing the native AV component (Windows Security). You can address this issue by turning off or removing the third-party component.
It turns out that a conflict between a third-party security suite and a Kernel process used by the Windows 11 install agent may be the cause of this Windows Security issue. Numerous user complaints attribute this problem to Kaspersky, but other security suites can be responsible for the same symptoms.
If that’s the case and you’re using a third-party security suite, you should turn off your antivirus real-time protection and see if the problem goes away.
However, you’ll need to uninstall the security program and get rid of any leftover files if you want to be absolutely certain that your third-party AV suite—especially if it contains a firewall component—had nothing to do with this problem.
Do the simple stuff first: turn off real-time protection. Although the specifics of this procedure vary amongst the various third-party AV suites, you can usually access it through a taskbar menu.
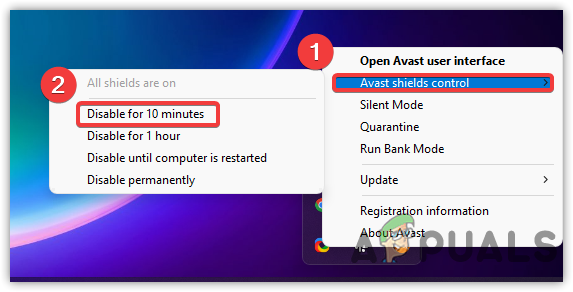
For a period, try disabling real-time protection, then check to see if Windows Security is now accessible.
If you’re still having trouble, consider completely uninstalling the security program and getting rid of any leftover files that might still be causing this issue.
If you choose to take this path, follow these instructions to thoroughly remove a third-party security suite and all leftover files.
If this approach wasn’t appropriate for your situation, scroll down to the next possible solution below.
3. Reset the Windows Security app
You might also run into a problem because Windows Security is storing cached data, depending on your specific situation. Resetting the Windows Security app from the App area should be your first course of action in this situation.
If you suspect that this scenario is applicable, you can fix the issue by accessing the Apps & Features tab from the Settings menu of Windows 11 and triggering a complete reset on Windows Security.
This method has been confirmed to work by a lot of Windows 11 users that were not previously unable to access Windows Security.
Follow the instructions below to reset the Windows Security app from the Apps & Features menu:
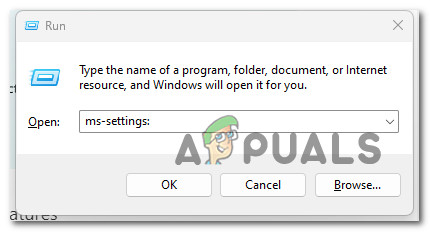
- Press Windows key + R to open up a Run dialog box.
- Inside the Run dialog box, type ‘ms-settings:’ inside the text box, then press Ctrl + Shift + Enter to open up the Settings menu of your Windows computer.
Access the Settings menu of Windows 11 - At the User Account Control (UAC), click Yes to grant admin access.
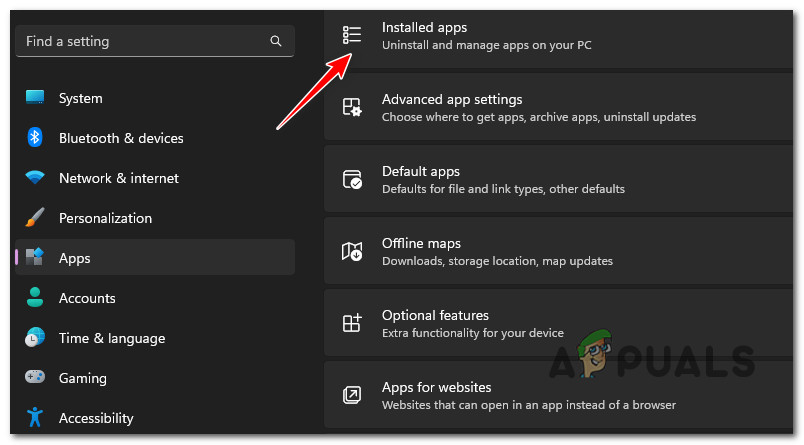
- Once you’re inside the Settings menu, click on the Apps icon from the menu on the left.
- Next, move to the right section and click on Installed apps.

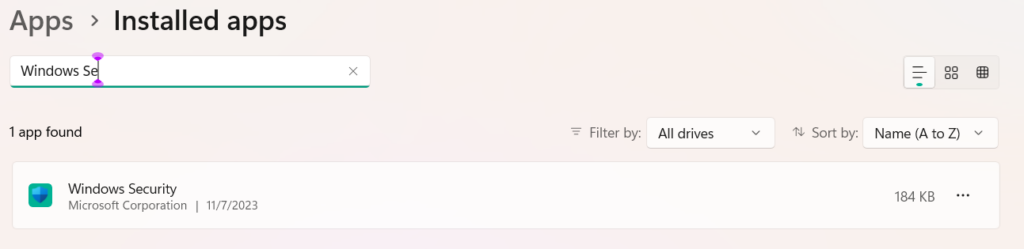
Access the Installed Apps - Once you’re inside the Installed Apps menu, scroll down through the list and locate Windows Security.
Note: You can use the search functionality at the top to make your job easier. - Once you locate Windows Security, click on the action icon (three-dot), then click on Advanced options.

Access the Advanced Options menu of Windows Security - Inside the Advanced Options of Windows Security, scroll down to the Reset tab, then click on the Reset button.

Resetting Windows Security - At the confirmation prompt, confirm and wait until the operation is complete.
- Reboot your computer and see if Windows Security is not accessible.
If the same kind of problem is still occurring, move down to the next method below.
4. Enable Windows Security via Registry Editor
It’s possible that Windows Security is truly disabled by a Registry key and that’s why you can’t access it if you previously modified the default behavior of Windows Security. In this situation, you can resolve the issue by opening Registry Editor and making changes to the DisableAntiSpyware value.
The system frequently suffers when changes are made to the registry file. The system’s user or third-party program may have mistakenly introduced these alterations.
The registry file is the most crucial file and should be backed up before beginning since if something goes wrong, the system could crash.
Follow the steps below to open the Registry Editor and determine whether the DisableAntiSpyware value is enabled or not if this scenario appears to be applicable to you:
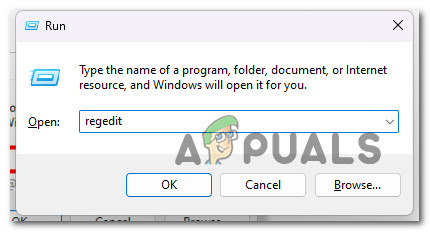
- Start by pressing Windows key + R to open up a Run dialog box.
- Next, type ‘regedit’ inside the text box, then press Ctrl + Shift + Enter to open the Registry Editor with admin access.
Open up the Registry Editor - At the User Account Control (UAC), click Yes to grant admin access.
- Once you’re inside the Registry Editor, use the menu on the left to navigate to the following location:
HKEY_LOCAL_MACHINE\SOFTWARE\Policies\Microsoft\Windows Defender
Note: You can either navigate to this location manually or you can paste the location directly into the nav bar at the top and press Enter to get there instantly.
- After you’re inside the correct location, double-click on the DisableAntiSpyware registry value and change its Base to Hexadecimal and the Value data to 0 before clicking on Ok.
- Now that you’ve made sure that Windows Security is not disabled at a registry level, restart your PC and see if the problem is now fixed.
If this method was not applicable, move down to the next method below.
5. Reinstall Windows Security
If you recently updated from a previous version of Windows to Windows 11, there’s a potential that the upgrading procedure may have partially corrupted a component. You must reinstall the Windows Security component in order to fix this problem.
The issue is not brand-new, and Windows 10 users who upgraded from a feature update have also reported it. The answer is rather straightforward.
Run a series of instructions to effectively replace your present Windows Store component with newer ones free of corruption once Windows Terminal is launched and in PowerShell mode.
To successfully reinstall the Windows Security component from an elevated Powershell component, follow these steps:
- Press Windows key + R to open up a Run dialog box.
- Next, type ‘powershell’ inside the text box, then press Ctrl + Shift + Enter to open up an elevated Powershell window with admin access.
Access the Powershell window - At the User Account Control (UAC), click Yes to grant admin access.
- Once you’re inside the elevated Powershell window, paste the following commands and press Enter to effectively reinstall the Windows Store component:
Set-ExecutionPolicy Unrestricted Get-AppXPackage -AllUsers | Foreach {Add-AppxPackage -DisableDevelopmentMode -Register "$($_.InstallLocation)\AppXManifest.xml"} - Once this component has been effectively reset, restart your PC and see if the Windows Security component starts working once the next startup is complete.
If the same kind of issue is still occurring, move down to the next methods below.
6. Run SFC and DISM scans
If you’ve come to this point without finding a solution, it’s likely that you have some sort of system file corruption that has broken the Windows Security component.
The next step should be to launch SFC (System File Checker) and DISM (Deployment Image Servicing and Management), two built-in programs that can address the most common causes of system file corruption.
Resolving the corruption issue is more likely if SFC and DISM are performed shortly after one another, despite the fact that they are quite identical.
It should be noted that while SFC collects healthy system files from a local location, DISM retrieves files from Windows Update in order to replace faulty counterparts.
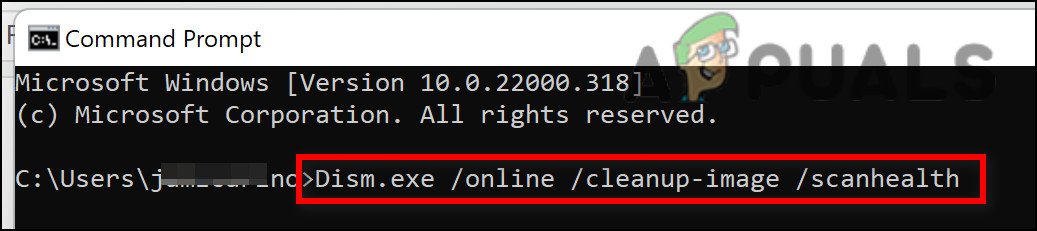
Running an SFC scan from an elevated CMD prompt can be used to check for system file corruption.
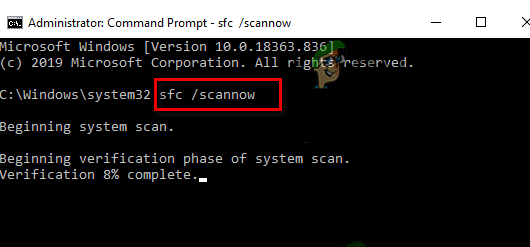
Even if the tool appears to have frozen, it is advisable not to interrupt this process midway (or prematurely quit the CMD window). You’ll eventually get the success notification after the operation is finished.
Once the DISM scan is complete, restart your computer. Once the subsequent startup has been completed, run a DISM scan.
Before starting this process, make sure your Internet connection is strong.
Restart your computer after properly executing the DISM command to see if the problem has been fixed.
Continue to the final suggested solution below if the issue is still not resolved.
7. Repair install or clean install
If none of the aforementioned approaches have worked for you, your only remaining choice is to entirely replace all of the afflicted system file dependencies with healthy replacements.
At this point, your only choices are to perform a clean install or a repair install (in-place upgrade).
If you have the option, we advise you to go for a repair installation (in-place upgrade) if you find yourself in a difficulty:
- Repair install – Only the system files will be changed during a repair install (in-place upgrade) (while keeping your personal files, user preferences apps & games).
- Clean install – If only certain kernel processes are impacted, a clean install can be the best choice, but it has the disadvantage of wiping any personal data stored on the OS disk. However, you should be aware that if you take this action, all of your personal data will be lost.
-
Home
-
News
- Two Methods to Fix Unable to Access Windows Defender Scans
Two Methods to Fix Unable to Access Windows Defender Scans
By Andrea | Follow |
Last Updated
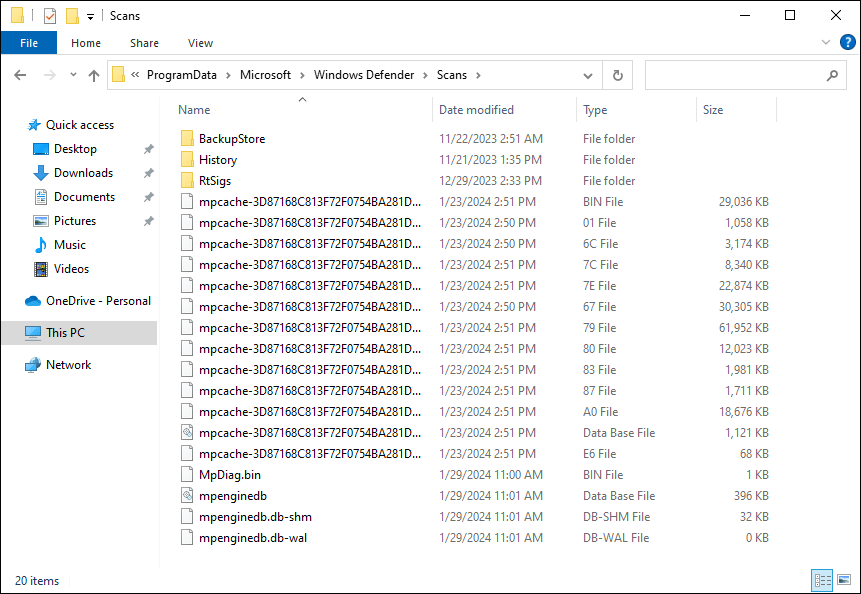
Many Windows users try to open the Windows Defender Scans folder to clear Windows Defender history. However, this can be a problem since you are probably unable to access Windows Defender Scans normally. How can you open this folder to delete scan history? This post on MiniTool will show you useful methods.
When trying to open the Windows Defender Scans folder, you may get this error message: You don’t currently have permission to access this folder even though you run in an administrator account. Why are you unable to access Windows Defender Scans? This is because Windows prevents you from running File Explorer as an administrator to protect important system files. You can try the following methods to try to open the Scans folder.
Way 1: Open the Windows Defender Scans Folder in Safe Mode
When you can’t open the Windows Defender Scans folder, try to open it in Safe Mode. Follow the steps below.
Step 1: Press Win + I to open Windows Settings.
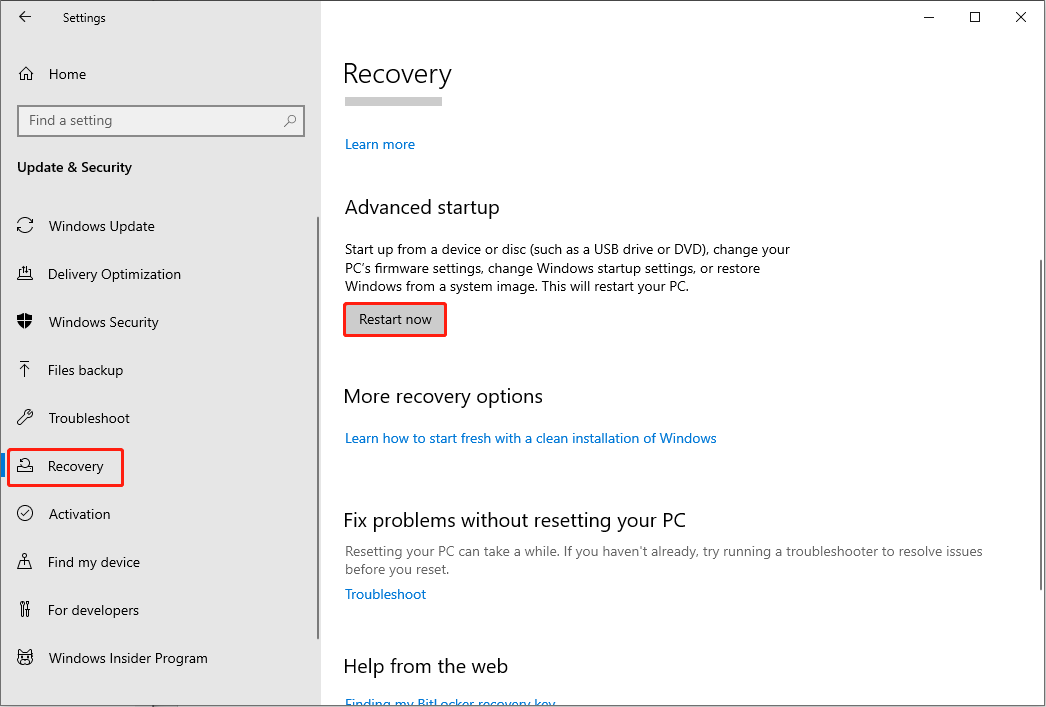
Step 2: For Windows 10 users, you should head to Update & Security > Recovery, then scroll down to click Restart now under the Advanced startup section.
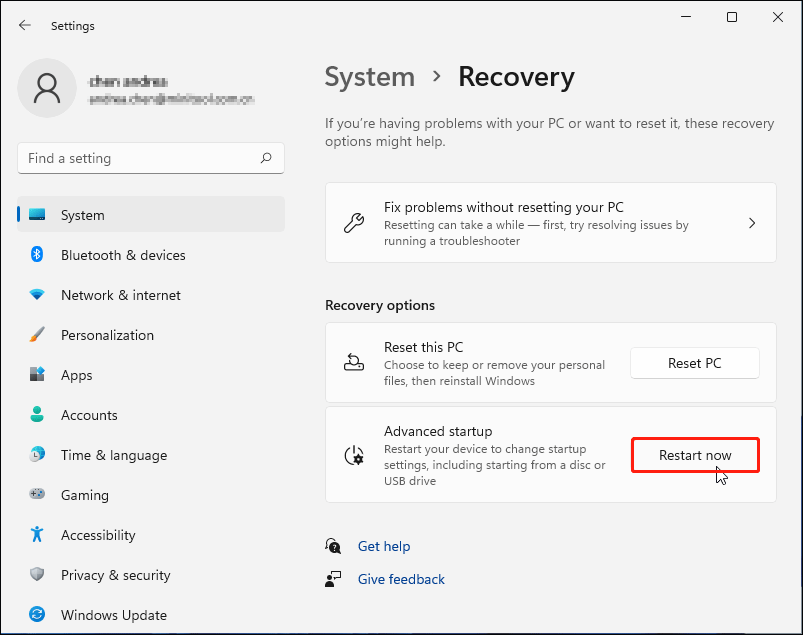
For Windows 11 users, you need to choose the System tab and select System at the right pane. In the Recovery options section, click the Restart now button next to Advanced startup.
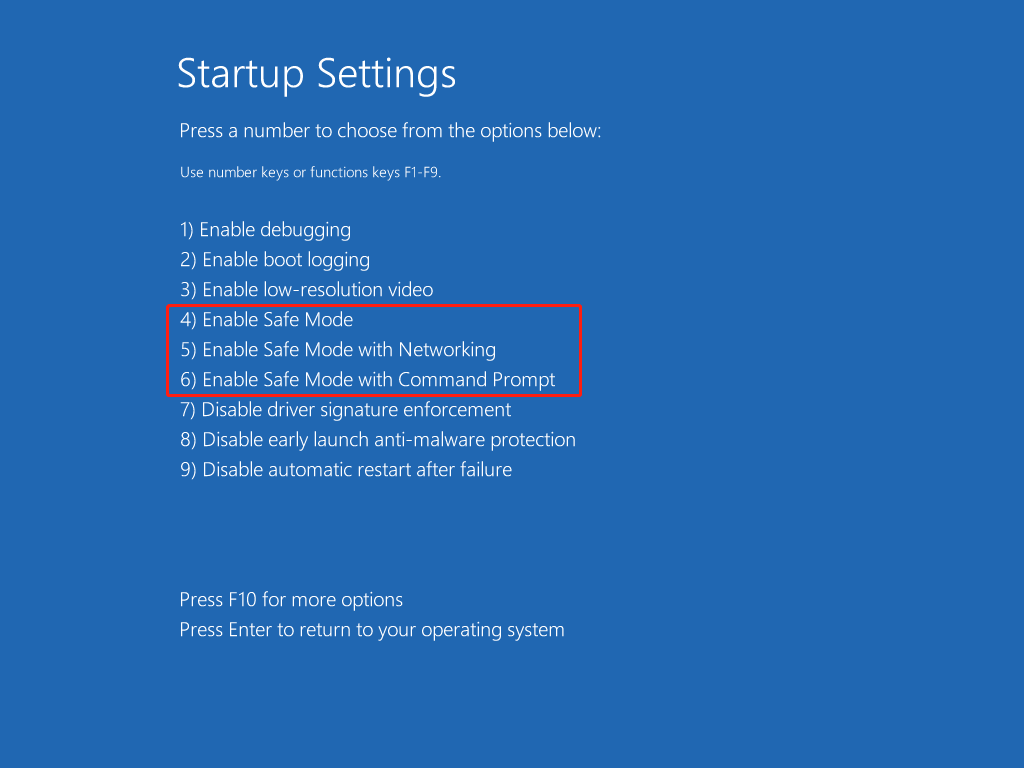
Step 3: After your computer reboots, you should choose Troubleshoot > Advanced options > Startup Settings > Restart. Press the corresponding key to boot your computer into the version of Safe Mode you need.
Step 4: Wait for your computer to enter Safe Mode. Now, press Win + E to open File Explorer and shift to ProgramData > Microsoft > Windows Defender > Scans to delete the scan history.
Tips:
The ProgramData folder is hidden by default, you can show hidden files with the instructions in this post: How to Show Hidden Files Windows 10 (CMD + 4 Ways).
To exit Safe Mode, you can restart the computer. If the computer remains in Safe Mode after restarting, try to get out of Safe Mode with the methods in this post.
As we said at the beginning, you can’t open the Windows Defender Scans folder because File Explorer can’t be run with an administrator account. Another method to fix this problem is using other file management tools.
You can get a reliable file manager and run it as an administrator to see if you can access the Windows Defender Scans folder successfully.
Recover Files Deleted by Windows Defender
Windows Defender is a Windows antivirus utility that guarantees Windows security, however, some people report that some of their execution files are deleted by Windows Defender when performing a virus scan. If you encounter this problem, how to recover deleted files?
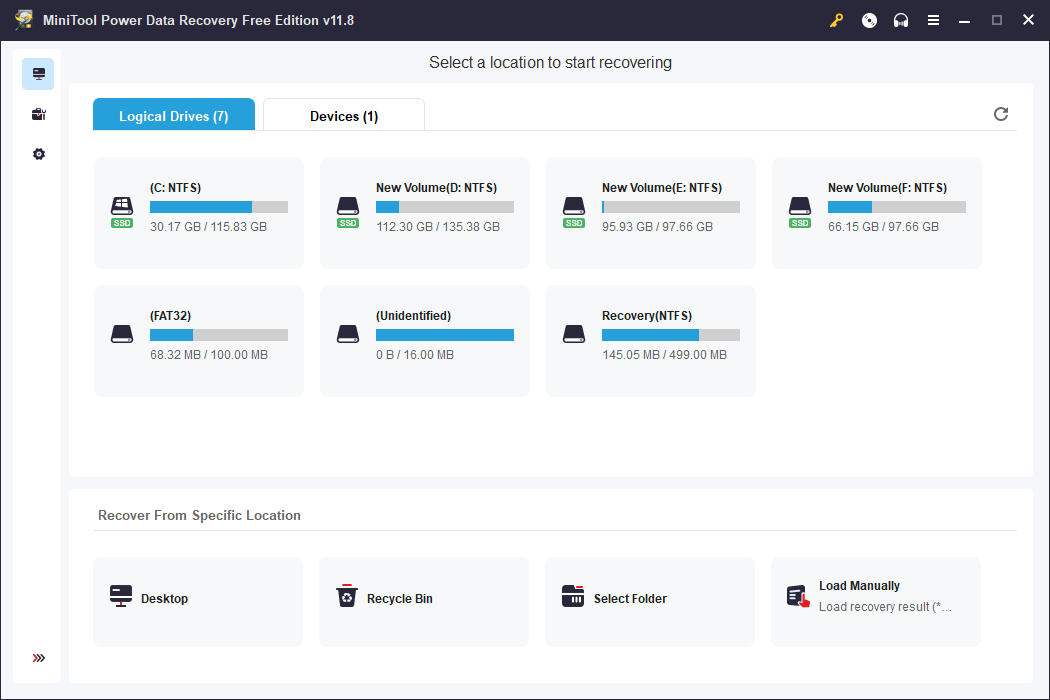
MiniTool Power Data Recovery is a fabulous file recovery software that helps you restore files lost due to mistaken deletion, accidental formatting, virus infection, or other reasons. This software is fully compatible with Windows systems and has high security with the read-only attribute. Additionally, this software contains many other practical features that can effectively improve your data recovery experience.
If you worry about whether this file recovery service can find your wanted files, MiniTool Power Data Recovery Free works. You can get the free edition of this software first to perform a deep scan and recover 1GB of files without any charge.
MiniTool Power Data Recovery FreeClick to Download100%Clean & Safe
Alt=recover files
Bottom Line
This is all about how to open Windows Defender Scans in Windows 10/11. Generally, you can access the Scans folder in Safe Mode. If other issues are preventing you open the folder in Safe Mode, you can try other file managers.
About The Author
Position: Columnist
Andrea graduated in English and has a keen interest in the IT industry and questions that arise when computers are used. She is passionate about new things and challenging things and has a wide range of interests like playing guitar, gaming, and crafting.