
This article brings to light the three most effective solutions for the COM ports missing in the Device Manager problem.
COM ports facilitate the connection between a serial device and your computer. You can find the COM ports in the Device Manager as its crucial component. However, many users have reportedly found the COM ports missing in Device Manager.
Are you also among those users? If yes, you need not fret, as this article has the best possible solutions to the issue you are experiencing.
However, before fixing the Windows 11/Windows 10/Windows 7 COM ports missing in the Device Manager issue, let us understand the factors responsible for it. If you know why the problem may have occurred, solving it becomes as simple as ABC.
Hence, the following section shares the possible reasons COM ports are not showing in the Device Manager.
Why Are COM Ports Missing in Device Manager
The following factors may be responsible for the Windows 7/Windows 10/Windows 11 COM ports missing in the Device Manager issue.
- Outdated motherboard drivers
- Recent software changes
- Outdated COM port drivers
The above were some common reasons you may find COM ports missing in Device Manager. Let us look at the tried and tested fixes for this issue.
Fixes for COM Ports Missing in Device Manager (100% Working)
Below are the solutions you can try to get rid of the COM ports missing in Device Manager issues.
Fix 1: Enable the Option to Show Hidden Devices
Windows updates and other software changes can disable the option to view the port on your device, leading to the COM ports missing in the Device Manager issue. Thus, you can follow these steps to enable it.
Also Read: How to Enable or Disable USB Ports in Windows 10/8/7
Fix 2: Update Drivers (Recommended)
Outdated motherboard or COM port drivers are among the top reasons you find COM ports missing in Device Manager. The driver is a connecting bridge between your computer and peripheral devices, enabling them to communicate with each other. Out-of-date drivers result in many annoying PC problems and updating them solves a lot of these issues.
Hence, you can update the drivers on your computer to solve the problem. You can update drivers automatically in no time with a single click using expert software like Bit Driver Updater.
The Bit Driver Updater updates all outdated drivers on your computer automatically with one click of the mouse. Moreover, it offers many other advantages like scheduled scans for out-of-date drivers, driver backup and restoration, driver download speed acceleration, ignore option for the drivers you do not wish to scan, and a lot more.
You can download and install this wonderful software from the following link to try it.
Bit Driver Updater scans your computer for two to three seconds after its installation. Once the scan is done, a list appears on your screen showing all the outdated drivers present on your computer.
You can Update All the trouble-creating drivers automatically with one click on the button given below the list of drivers.

Bit Driver Updater also boasts options to update the motherboard or COM port drivers individually. However, updating all drivers is a better choice to ensure your PC performs smoothly without any errors.
Also Read: Asus USB BT500 Drivers Download and Update for Windows 10, 11
Fix 3: Try Manual COM Port Addition
If none of the above solutions happens to solve the problem, you can add the COM ports manually to fix the COM ports missing in the Device Manager issue. Here is the step-by-step way to do it.
Also Read: Fresco Logic USB Display Driver Download & Update for Windows
COM Ports Missing in Device Manager (Fixed)
This article brought to fore the top fixes for the Windows 11/Windows 10/Windows 7 COM port missing in the Device Manager issue. However, you need not try all these solutions. You can start with the first fix and keep moving to the next solution until the problem is resolved.
However, if you do not have much time, you can directly perform driver updates using Bit Driver Updater to solve the problem. In case of any confusion or questions about this article, please contact us in the comments section.

Communication ports, commonly known as COM ports, are crucial PC components. They are responsible for maintaining and establishing external device connections using a system’s physical and emulated ports. When these ports malfunction or are not detected on a PC, error messages like Unable to open serial ports appear, which is not good news.
Some users have also shared that they cannot find the drivers on the system. These missing ports can also cause multiple problems on your PC. Hence, finding and fixing all the issues related to the COM port is crucial.
Wondering how to get rid of missing COM port errors in the Device Manager? Well, you are at the right place! check out the methods below that will allow you to fix the error instantly!
How to Fix Missing COM Ports in Device Manager Issue?
The COM ports not appearing on your PC can mean multiple things. Usually, to fix the error, you need to restore the COM ports on your PC. However, many users have shared that they are unable to find the drivers to perform troubleshooting. Check out the list of fixes below, as they will allow you to find and fix the errors easily.
Fix 1 – Enable Show Hidden Devices
Sometimes, a configuration changes the COM ports into hidden devices in the Device Manager. This is also the reason why users are unable to find these drivers. Here are some steps to reveal hidden drivers in the device manager.
Step 1 – Press Win+R to open the Run search.
Step 2 – In the Run search box, use the command devmgmt. msc to open Device Manager.

Step 3 – In the Device Manager, click on View from the top bar to find options.
Step 4 – Click on Show Hidden Devices to unveil the drivers usually hidden from the user.
With these simple steps, you can access all the hidden devices, including the COM ports on your PC.
Fix 2- Update COM Port Drivers
Sometimes, these ports are temporarily unavailable because of their outdated definition. The best way to ensure that these drivers are working properly is to keep them updated. Most of you may think, “How do you update the COM port driver when it is not visible?”. Well, you have two options here –
- Use the steps mentioned in Fix 1 to find COM ports and then update them using the Windows Driver Update utility.
– After you have found the drivers, simply select and right-click on it to find the update driver option.
– Follow the steps on the screen, and initiate the process by selecting the Search Automatically for drivers.
– Let the updates install, and restart your PC manually once the process finishes. - Use Advanced Driver Updater that finds all the drivers irrespective of their hidden nature and updates them instantly.
– Download and install the Advanced Driver Updater on Your PC.
– Click on Start Scan Now to initiate a search for all the outdated drivers on your PC.
– Check the results to see if the COM ports were detected in the result.
– Click on Update All to instantly update the drivers.
– Once the installation is over, the software will automatically restart.


Since finding the COM port driver can be challenging, let the tool handle the updates.
Please note that you can also use your motherboard driver disc to update these drivers, as they are directly connected with the same. Updating motherboard drivers is also a way to fix the missing COM port error on Windows, depending on your device.
Fix 3 – Add COM Port to Device Manager
If showing the hidden drivers or updating them does not work, you can manually add these devices to your PC. Here’s the complete process of how to add the COM port on your PC –
Step 1 – Press Win+R to open the Run search.
Step 2 – In the Run search box, use the command devmgmt. msc to open Device Manager.

Step 3 – Click Action from the top menu bar in the Device Manager.
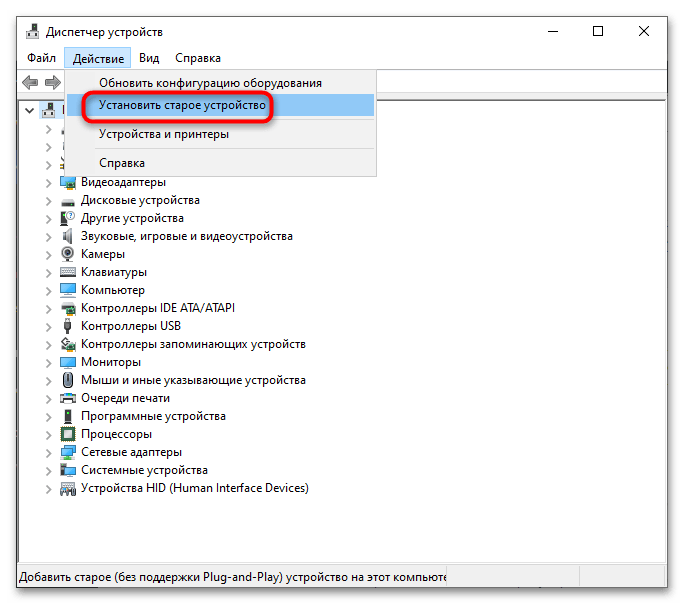
Step 4 – Click on Add Legacy Hardware from the Action menu.

Step 5 – A pop will appear asking you to choose the legacy hardware you want to add; click next to initiate the process.
Step 6 – On the next page, choose Install the Hardware that I Manually Select and click Next.

Step 7 – After clicking Next, you may find options related to the device drivers you want to install.

Step 8 – Look for COM & LPT ports from the list. Select and click on next to move ahead with the process.
Step 9 – Choose your motherboard manufacturer so the best drivers can be fetched to support the same.

Step 10 – Click on the Finish button and voila! You have successfully added the drivers to your PC.
COM Ports Missing on Your PC? NOT ANYMORE!
Simply implementing the above three fixes should do the job for you. If you are facing driver issues while using the USB ports or any other connectivity issue, updating all the drivers on your PC can be helpful. Hence, installing the Advanced Driver Updater is recommended to finish the job for you.
And with that being said, we have reached the end of this post. Hope you find the steps shared clear and helpful for any further product-related queries; you can email support@systweak.com or leave comments.
We are glad we could help you with COM ports missing errors. Good luck!
Recommended :
‘PAGE FAULT IN NONPAGED AREA’ Error On Windows – FIXED
A D3D11 Compatible GPU is Required to Run the Engine – FIXED!
Способ 1: «Диспетчер устройств»
Для просмотра оборудования на компьютерах с Windows традиционно используется оснастка «Диспетчер устройств», однако в случае с COM-портами все нет так просто. Сегодня этот интерфейс считается устаревшим, поэтому в списке оборудования «Диспетчера устройств» он может не отображаться даже при включении опции «Показать скрытые устройства».
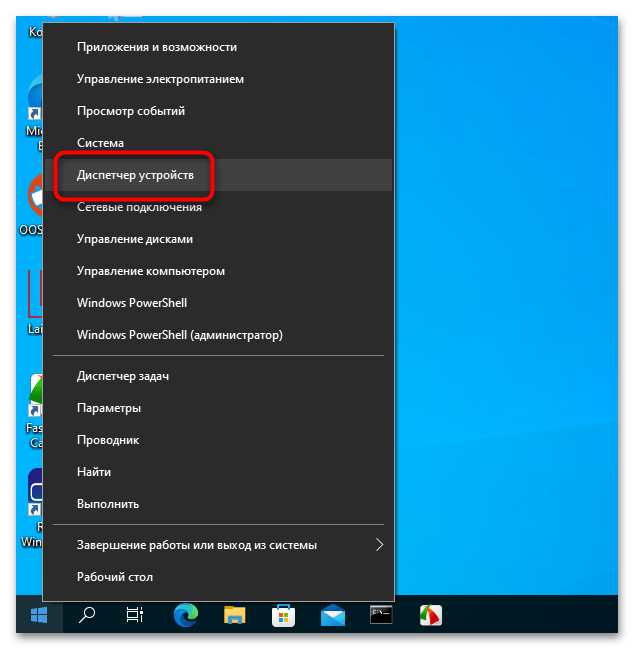
- Откройте «Диспетчер устройств» из контекстного меню кнопки «Пуск».
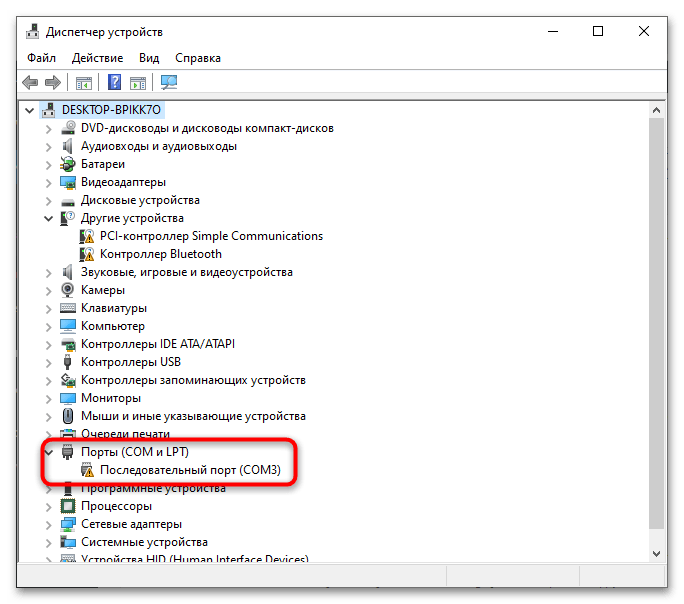
- Посмотрите, имеется ли списке оснастки раздел «Порты (COM и LPT)». Если да, раскройте его – оно будет содержать список имеющихся на компьютере портов с интерфейсами COM и LPT. Если указанный раздел отсутствует, проследуйте дальнейшим указаниям.
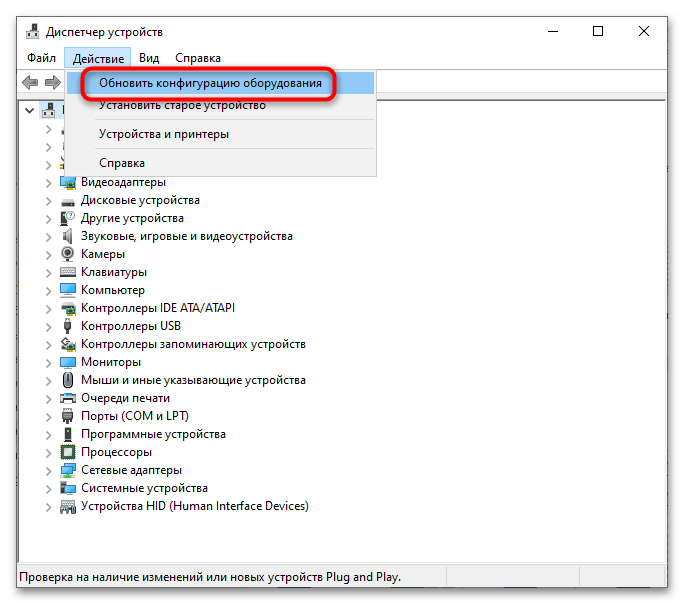
- В меню «Действие» открытого «Диспетчера устройств» выберите опцию «Установить старое устройство».

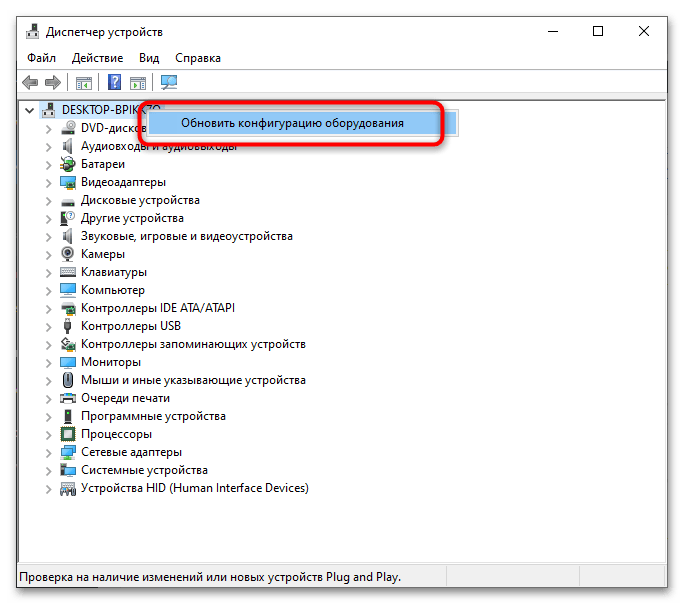
В случае отсутствия опции правой кнопкой мыши кликните тут же в окне оснастки по названию компьютера и выберите «Обновить конфигурацию оборудования». Теперь опция «Установить старое устройство» должна стать доступной. Кликните по ней.
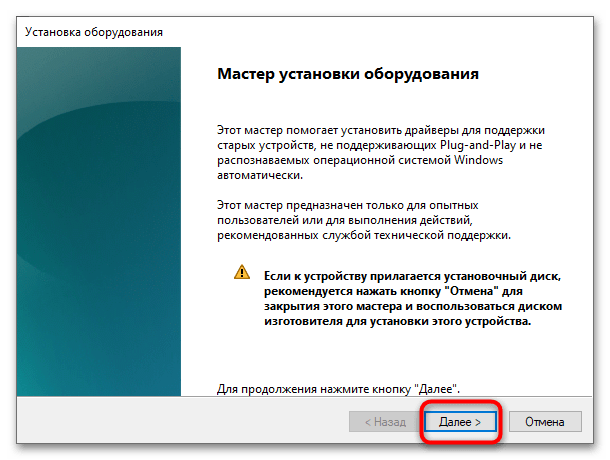
- В открывшемся окне мастера оборудования нажмите «Далее».
- В следующем окне выберите вариант «Установка оборудования, выбранного вручную» и нажмите «Далее».
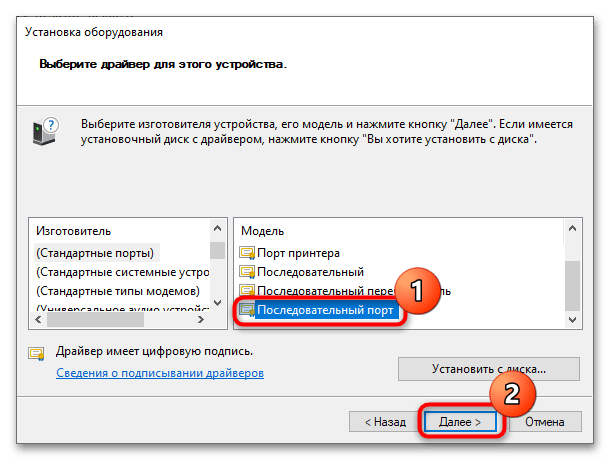
- В следующем окне в правой части выберите «Стандартные порты», а в левой – «Последовательный порт». Нажмите «Далее».

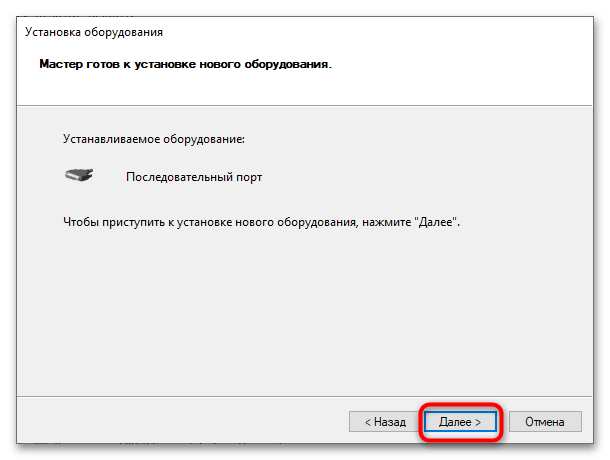
- Еще раз нажмите «Далее».
- По завершении этих действий в «Диспетчере устройств» должен появиться раздел «Порты (COM и LPT)». Если он не появится сразу, перезапустите оснастку или обновите конфигурацию оборудования, воспользовавшись одноименной опцией в меню «Действие».

Способ 2: «Редактор реестра»
Информация о доступных физических и виртуальных COM-портах хранится в системном реестре, откуда ее можно извлечь средствами самой операционной системы.
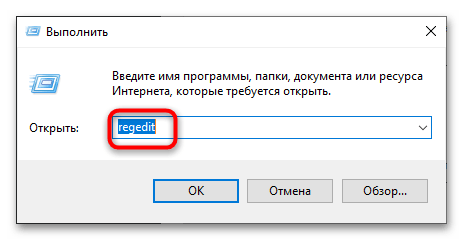
- Откройте «Редактор реестра» командой
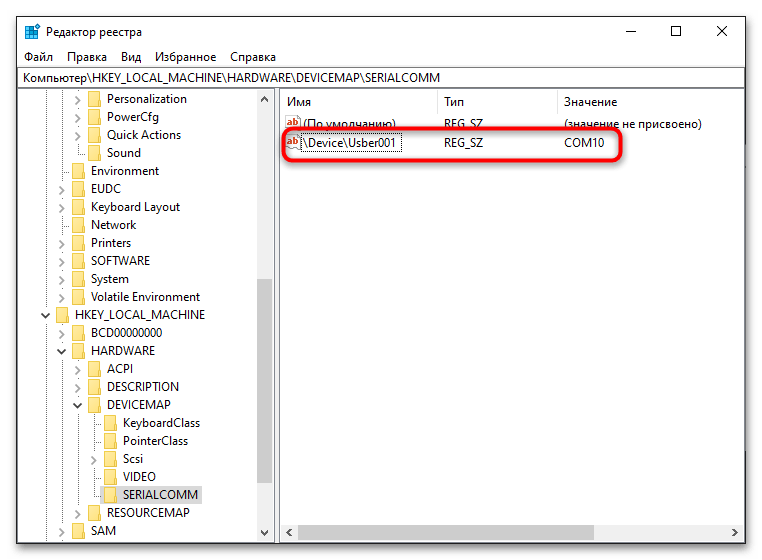
regedit, выполненной в вызванной нажатием клавиш Win + R диалоговом окошке быстрого запуска приложений. - Перейдите в раздел реестра
HKEY_LOCAL_MACHINE\HARDWARE\DEVICEMAP\SERIALCOMMи изучите содержимое правой колонки. Доступные COM-порты будут указаны в виде строковых параметров со значениями «COM1», «COM2», «COM3» и так далее.
Следует отметить, что использование COM-портов в современных версиях Windows не столь актуально, как раньше. Они могут понадобится только для подключения специального оборудования, например старых моделей промышленных контроллеров. Маловероятно, что обычному пользователю когда-либо придется иметь дело с подобной аппаратурой.
Наша группа в TelegramПолезные советы и помощь
Enabling COM Port in Windows 10 might sound technical, but it’s actually pretty straightforward. By following some simple steps, you can make sure your computer recognizes and uses COM ports effectively. Whether you’re setting up a new piece of hardware, troubleshooting a connection, or tweaking settings for an application, enabling COM ports is a critical skill to have.
In the following steps, we’ll go through the process of enabling a COM port on a Windows 10 machine. This will involve accessing the Device Manager, modifying port settings, and ensuring your system recognizes the port.
Step 1: Open the Device Manager
First, right-click on the Start button and select «Device Manager» from the context menu.
Device Manager is your go-to tool for managing hardware and drivers on your computer. It displays all the connected devices and allows you to configure them.
Step 2: Expand the Ports Section
Once in Device Manager, find the «Ports (COM & LPT)» section and click the small arrow next to it.
This section shows you all the available COM ports. If you don’t see it, it means no COM ports are currently recognized by your system.
Step 3: Right-click on a COM Port
Right-click on any of the listed COM ports and select «Properties» from the dropdown menu.
The Properties window gives you detailed information about the selected port and allows you to adjust its settings.
Step 4: Navigate to Port Settings
In the Properties window, go to the «Port Settings» tab and click on «Advanced».
Here you can change various settings related to the COM port, such as baud rate, data bits, and more.
Step 5: Change the COM Port Number
In the Advanced Settings, you can change the COM Port number if needed. Click «OK» to save the changes.
Changing the port number can help resolve conflicts with other devices and ensure smooth operation.
Step 6: Confirm and Close
After making your changes, click «OK» to close the Properties window and then close Device Manager.
Your changes will be saved, and the COM port should now be enabled and ready for use.
After completing these steps, your COM port will be enabled, and your computer should recognize it without any issues. This means you can now connect external devices that use COM ports and configure them as needed.
Tips for Enabling COM Port in Windows 10
- Check for Updates: Make sure your Windows 10 system is up-to-date to avoid compatibility issues with COM ports.
- Use the Correct Drivers: Ensure you have the right drivers installed for your hardware that uses COM ports.
- Troubleshooting: If the port doesn’t show up, try restarting your computer or checking the hardware connections.
- Port Conflicts: If you experience conflicts, try changing the COM port number in the Advanced settings.
- Backup Settings: Keep a record of your port settings before making changes, so you can revert if needed.
Frequently Asked Questions
What is a COM port?
A COM port, or communication port, is a serial port that allows for communication between the computer and external devices.
Why don’t I see any COM ports in Device Manager?
If no COM ports are visible, it could be due to a lack of relevant drivers or that no COM port hardware is currently connected.
Can I use multiple COM ports at once?
Yes, you can use multiple COM ports simultaneously, but ensure there are no conflicts in port numbers.
How do I know which COM port my device is using?
You can check the COM port assignment in Device Manager under the «Ports (COM & LPT)» section.
What do I do if my COM port isn’t working?
Check the device’s drivers, ensure no port conflicts, and verify that the hardware is properly connected and functioning.
Step-by-Step Summary
- Right-click Start button, select «Device Manager».
- Expand «Ports (COM & LPT)» section.
- Right-click on a COM port, select «Properties».
- Go to «Port Settings» tab, click «Advanced».
- Change COM Port number, click «OK».
- Confirm changes and close Device Manager.
Conclusion
Enabling a COM port in Windows 10 is easier than it seems. By following the steps outlined in this guide, you can quickly get your COM port up and running. This process involves accessing the Device Manager, tweaking settings, and ensuring the port is recognized by your system.
So, why wait? Get started right away and make the most of your hardware! For further reading, you can explore more about device management in Windows 10 or delve into troubleshooting common COM port issues. Now that you know how to enable COM port in Windows 10, you’re well-equipped to handle any related challenges that come your way.
Matt Jacobs has been working as an IT consultant for small businesses since receiving his Master’s degree in 2003. While he still does some consulting work, his primary focus now is on creating technology support content for SupportYourTech.com.
His work can be found on many websites and focuses on topics such as Microsoft Office, Apple devices, Android devices, Photoshop, and more.
Check COM Ports in the Device Manager
The Device Manager is the easiest way to see the list of your available ports. Generally, if you want to inspect your PC’s components, it’s the first place to look. There are multiple ways to open the Device Manager to see Windows 10 COM ports:
• Press Win+X, and select it from the newly opened menu.

• Press Win+R to open the Run prompt, and type in devmgmt.msc.

• Simply type “Device” into the search bar, and find it in the search results.

If you have problems with COM ports not showing in Device Manager, this could be caused by a different version of Windows that hides them by default, a technical issue with your motherboard, or a lack of drivers for a USB-to-serial adapter.
How to Find COM Ports on Windows 10
- Open the Device Manager.

- Optionally, enable “View” → “Show Hidden Devices”.
- Locate “Ports (COM and LPT)”.

You can now right-click any individual port to view their Windows 10 COM port settings, and possibly disable them or update their drivers.
List COM Ports — Windows 10 Command Line Solution
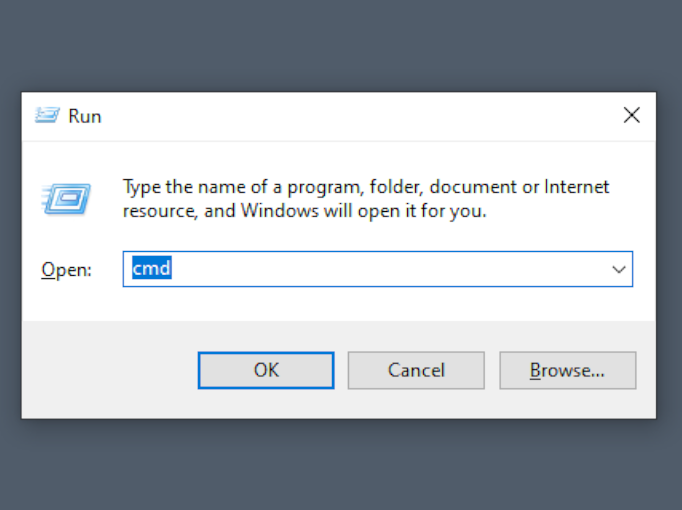
If you’d want to know how to view COM ports in Windows 10 through the Command Prompt, it’s easy, but first you need to launch CMD. This is done by entering “cmd” in the Run prompt, which is opened with Win+R.
Once the terminal is opened, type mode and confirm by pressing Enter. You will get data on the available ports and their settings.

Some details on how to check COM port in Windows 11 are different, since the addition of the Windows Terminal.
What Port Am I Using?
COM ports are simple — unlike USB, the devices won’t identify themselves. Thus, the only way to see if anything is connected to a Windows 10 COM port is to receive a message from the connected device. This can be done with PowerShell. Before trying this approach, you’ll need to find the correct settings to be used when communicating with the device, including the baud rate, parity bits, etc.
How to Find what COM Port a Device is On
- Open PowerShell by pressing Win+X and selecting “Windows PowerShell (Admin)”.

- Add the port as an object:
$port = New-Object System.IO.Ports.SerialPort [port name],[baud rate],[parity],[data bits],[stop bits] - Open the port with the
$port.Open()command.

- You can now read a single line from the port or send a message to it by running
$port.WriteLine()or$port.ReadLine().

ReadLine will keep running until it receives one line of data. If you want to read from the port continuously, this is best done with a serial terminal application.