
Nessus is an effective application that allows you to scan all network services used by your computer for vulnerabilities. The program allows you to test firewalls, network screens, filtering routers and other services responsible for system security when connecting to the network.
The toolkit has a number of tools to perform complex analysis, and two scanning methods are used at once. The first is a standard set of testing algorithms that allows you to detect outdated versions of services, any errors in configurations, as well as blank or ineffective passwords. The second method mimics the attacker’s actions by testing protection and finding the remaining unprotected areas. It is worth noting that the utility works on the principle of client-server, which allows you to expand the already good opportunities to analyze the network security of your computer. In addition, there is support for a special NASL language, with the help of which you can write your own test algorithms or view and upgrade third-party ones.
Nessus helps detect vulnerabilities in your network services, ensuring better system security through comprehensive analysis and adaptable testing methods.
— Comprehensive scanning of your computer’s network security;
— the presence of a scanning method that imitates the attacker’s actions;
— Extension of functionality with the help of plug-ins;
— the ability to write your own algorithms using the built-in language;
— Flexible adjustment of the program to the system resources;
— free distribution of the program.
Efficient detection of vulnerabilities, improving network security.
User-friendly interface for seamless navigation.
Provides high-quality, detailed reports on system weaknesses.
Expensive for small businesses with limited cybersecurity budgets.
Can be complex and difficult to use for beginners.
Lacks customer support in resolving issues.
👨💻️ USER REVIEWS AND COMMENTS 💬
image/svg+xmlBotttsPablo Stanleyhttps://bottts.com/Florian Körner
Jake
Vulnerability scanner for Windows. Multiple levels for different needs. With the free version, you can scan 16 IPs. Free support is available. It’s ideal for students, educators for cyber security. The subscription versions offer unlimited assessments, live results and more.
image/svg+xmlBotttsPablo Stanleyhttps://bottts.com/Florian Körner
Carter L*******n
Nessus is a vulnerability scanning and assessment tool used to identify security issues on computer systems. It is used to scan networks and computers for vulnerabilities, such as misconfigurations, missing patches, and insecure software. Nessus can detect a wide range of security issues, from basic misconfigurations to complex vulnerabilities. The software can also be used to audit user accounts, detect malicious software, and detect compliance issues.
image/svg+xmlBotttsPablo Stanleyhttps://bottts.com/Florian Körner
Ollie Dilan
Nessus is a powerful and comprehensive security scanning tool. It is easy to install, configure and use for scanning systems and networks. I have used Nessus to audit a large number of computers in my network and the results were comprehensive. The reporting feature is also very helpful for identifying and tracking vulnerabilities. The scan results are easy to understand and the scan runs quickly. Nessus also allows us to customize the scanning parameters according to our needs which is a great feature. I also like the fact that Nessus can be integrated with other security tools. All in all, Nessus has proved to be a reliable and useful tool for network security.
image/svg+xmlBotttsPablo Stanleyhttps://bottts.com/Florian Körner
Jude V.
Nessus has been a greta asset to our security team, providing a thorough and powerful scannig and audit capability.
image/svg+xmlBotttsPablo Stanleyhttps://bottts.com/Florian Körner
Finn Beiswanger
Nessus is a network vulnerability scanner that allows users to identify and assess potential security threats on their systems. It provides a comprehensive assessment of network devices, operating systems, databases, and applications. Key features include vulnerability scanning, compliance auditing, and web application scanning. Nessus is widely used in the cybersecurity industry to help organizations identify and mitigate potential security risks.
image/svg+xmlBotttsPablo Stanleyhttps://bottts.com/Florian Körner
Oscar Lawley
Nessus software is a comprehensive vulnerability scanner that provides detailed analysis and reporting on potential security risks within an organization’s network.
image/svg+xmlBotttsPablo Stanleyhttps://bottts.com/Florian Körner
Joseph
An incredibly robust vulnerability scanning tool with a somewhat steep learning curve.
image/svg+xmlBotttsPablo Stanleyhttps://bottts.com/Florian Körner
Joshua
Easy to configure, comprehensive vulnerability scanning.
image/svg+xmlBotttsPablo Stanleyhttps://bottts.com/Florian Körner
Oscar
Robust, comprehensive vulnerability scanning.
Nessus est un logiciel puissant conçu pour l’analyse des réseaux. Il offre une solution complète pour détecter et évaluer les vulnérabilités dans les systèmes informatiques, ce qui en fait un outil essentiel pour assurer la sécurité des réseaux.
Doté d’une interface conviviale, Nessus permet aux utilisateurs d’effectuer des scans de manière facile et rapide. Il utilise une base de données exhaustive de vulnérabilités connues et utilise des techniques avancées pour identifier les points faibles dans les réseaux.
En utilisant Nessus, les administrateurs réseau peuvent détecter les failles de sécurité potentielles, les ports ouverts, les services vulnérables, les configurations incorrectes et d’autres problèmes qui pourraient compromettre la sécurité du réseau.
Le logiciel offre également des fonctionnalités de reporting avancées,
Efficient network vulnerability analysis.
Super cool tool for finding security issues. 👍
Nessus Vulnerability Scanner
What is Nessus?
Nessus is a security vulnerability scanning program with many users around the world. Nessus Professional, Nessus Manager, Nessus Home and Nessus Cloud editions are available. It provides the detection of security vulnerabilities and malware in physical, virtual and cloud environments.
The penetration service, which includes activities such as auditing IT infrastructures in terms of security and identifying security levels and closing the gaps, ensures that institutions are prepared and resistant to cyber attacks. In this way, cybersecurity professionals who perform penetration tests ensure that the vulnerable points of the system are repaired and security tightened when a real attack is encountered, by thinking like a hacker and applying infiltration and hijacking scenarios to the system and trying all the methods that the attackers can try.
Nessus provides comprehensive reporting on the vulnerabilities of the target devices according to criteria such as which operating system is running on the devices, which services are running on which ports, the vulnerabilities of the operating system and services, the vulnerabilities of software components and network protocols, and the compliance requirements. Nessus provides the ability to sort and filter the vulnerabilities it detects in the system according to many different criteria, allowing to better understand the vulnerabilities.
How Nessus Works?
Each computer has thousands of ports, all of which may or may not have services (ie: a server for a specific high-level protocol) listening on them. Nessus works by testing each port on a computer, determining what service it is running, and then testing this service to make sure there are no vulnerabilities in it that could be used by a hacker to carry out a malicious attack. Nessus is called a «remote scanner» because it does not need to be installed on a computer for it to test that computer. Instead, you can install it on only one computer and test as many computers as you would like.
Nessus Installation
1- Firstly, register by going to «https://www.tenable.com/products/nessus/nessus-essentials». After the registration is completed, an activation code will be sent to your e-mail address. We will use this code during the installation phase.
2- You go to «https://www.tenable.com/downloads/nessus?loginAttempted=true» and download the Nessus version suitable for your operating system.
3- In the next step, we go to the terminal and install the version we downloaded.
sudo dpkg -i "Nessus-8.14.0-debian6_amd64.deb"

4- Then, write the command to the terminal that allows to start the Nessus service.
/bin/systemctl start nessusd.service
5- In the next step, open a new web browser and write the connection port given at the end of the installation «https://kali:8834/» in the browser opened and log in to Nessus. Then, choose Nessus Essentials, the free version, and continue.

6- Now, you enter the activation code given when you registered with Nessus. Then, you are creating your user account.
7- In this step, Nessus downloads some required plugins and the installation is complete.


Metasploitable-2
What is Metasploitable-2?
Metasploitable-2 is a test environment created for use in hands-on penetration testing training and security research. A vulnerable test environment is needed in cyber security trainings, Metasploitable-2 application can be used for this.
Downloading and Setting up Metasploitable-2
1- First of all, go to «https://sourceforge.net/projects/metasploitable/files/Metasploitable2/» and perform the download process. The compressed file is about 800 MB and can take a while to download over a slow connection. After you have downloaded the Metasploitable-2 file, you will need to unzip the file to see its contents.
2- Next, open your virtualization platform and click Open a Virtual Machine to install Metasploitable2 that you downloaded. Then, run it with VMWare Player.


3- The user name and password are entered to log in on the screen that appears after the installation.
- -User Name:
msfadmin - -Password:
msfadmin

4- In the next step, type "ifconfig" command on the command line to find out the IP address assigned to the machine and other details about the virtual machine. That is all. Now we can start hacking 

Sample Work
Scan for Vulnerabilities on Metasploitable-2 using Nessus
1- Firstly, I open Nessus and select the «Basic Network Scan» option.

2- Then, I specify the name for the scanning process and write the IP of the target machine. After these steps, I launch the scanning process.


3- In this step, we see that the scanning process is finished and the vulnerabilities are listed according to their degree. I choose VNC Server ‘password’ Password from the vulnerabilities listed. The definition of the vulnerability and the degree of risk are given on the screen by Nessus. In the next step, I will try to infiltrate the machine using this vulnerability.


4- I open the command line. To run the VNC viewer client, I type the command "vncviewer" and then enter the destination IP address. I press enter and in the password query I type the password («password») that Nessus found.


5- As you can see, VNC viewer worked and I reached the opposite machine. Here, I ask "who am i" and see that I have access to the machine as root. So, now I can do whatever I want in the system.


References
Çolak, F. (September, 2019). Nessus Nedir ve Ne Amaçla Kullanılır? Fatih Çolak Bilişim Blog.
Retrieved June 9, 2021, from https://www.fatihcolak.com.tr/nessus-nedir-ve-ne-amacla-kullanilir.html
Nessus. Tenable. Retrieved June 9, 2021, from https://www.tenable.com/products/nessus
Wendlandt, D. Nessus: A security vulnerability scanning tool. Carnegie Mellon University.
Retrieved June 9, 2021, from https://www.cs.cmu.edu/~dwendlan/personal/nessus.html
To find vulnerabilities in systems or networks using the Nessus vulnerability scanner, you first need to understand how to install it.
In this step-by-step tutorial, we’ll briefly discuss Nessus and then show you how to download, install, and start it on both Kali and Windows. This allows you to choose the platform that best suits your needs.
We’ll also briefly show you how to run Nessus on Kali, set up a scan, and interpret the results.
Finally, we’ll show you how to create a report enabling you to analyze and present the results of your vulnerability scans in an organized format.
If you’re ready to learn how to install Nessus, let’s begin.
What Is Nessus?
Nessus is a robust tool by Tenable that can scan for vulnerabilities in networks, operating systems, databases, and applications.
It provides detailed reports on security weaknesses and prioritizes them based on severity.
It scans and looks for misconfiguration, missing patches, and CVEs (Common Vulnerabilities and Exposures) and is often used in security assessments and penetration testing.
Nessus is compatible with numerous platforms and operating systems, such as:
- Amazon Linux 2
- Debian
- Fedora
- FreeBSD
- MacOS
- Red Hat
- SUSE
- Windows and Windows Server
Nessus has two paid tiers, professional and expert, which have extra features and capabilities, and a free essentials edition.
Nessus Essentials: This free Nessus offering is geared towards educators, students, and individuals. You can use this tool to scan up to 16 private IPs.
Nessus Professional: This Nessus version is geared towards consultants, penetration testers, and small-to-medium businesses. Nessus Professional provides unlimited vulnerability scanning across IT infrastructure without any caps on the number of IPs you can assess. The current cost for a one-year license is $3990 USD.
Nessus Expert: This Nessus offering for web application security is also recommended for consultants, pen testers, and developers. Nessus Expert allows you to extend your IT assets by protecting your web applications and cloud infrastructure and allowing you to clearly see your attack surface. The cost for a one-year license is currently $5990 USD.
Nessus by the numbers:
- Over 40,000 paid clients, including 60% of the Fortune 500 and over 30% of the Global 2000
- The industry’s lowest false positive rate, with 0.32 defects per one million scans
- Coverage of over 82,000 CVEs
- Includes more than 203,000 plugins
- More than two million downloads
(Source: Nessus)
This section will walk you through downloading, installing, and starting Nessus Essentials in Kali Linux. Nessus doesn’t come pre-installed with Kali and needs to be downloaded from the Nessus website.
Nessus Download
To download Nessus, visit the download page and select the Linux-Debian-amd64 file.
Then, select “Download” to download the file to Kali. Alternatively, you can use curl to download the file or download and install Nessus as a Docker image.

Nessus Installation
To install Nessus, simply enter the following command in the terminal, ensuring you’re in the same folder as the downloaded file.
sudo dpkg -i <File>

To begin installing the plugins needed before you can use Nessus, enter sudo systemctl start nessusd.service in the command line.

After starting the service, go to https://kali:8834/ in your web browser to access and configure Nessus.
When you try to access the URL, you’ll see a warning message. Click on “Advanced…” and select “Accept the Risk and Continue.”

Next, you’ll be presented with a Nessus welcome screen. Click on “Continue” to move forward.

Select “Register for Nessus Essentials” on the following screen and click on “Continue.”

On the next screen, provide your name and email address and click on “Register” to continue.

On the next screen, you’ll be presented with an activation code. Copy and save this code somewhere for future reference. Click on “Continue.”

On the next screen, you must create a Nessus administrator user account, which will be used to login to Nessus.

Nessus will now begin downloading the plugins.

Once finished, you’ll be taken to the Nessus dashboard.
From here, Nessus will start configuring the plugins, which will take a while to complete. So grab a cup of coffee and relax while it works its magic.

Once finished, you’re ready to use Nessus.
Starting Nessus
To start Nessus, use the command sudo systemctl start nessusd.service and then open https://kali:8834/ in your browser.
You’ll need to log in with the credentials you set earlier.

Once you’re logged in, you can begin to use Nessus.

Once you are finished working with Nessus, you can stop the service with the command sudo systemctl stop nessusd.service.
Later in this tutorial, we’ll show you how to use Nessus in Kali.
How to Install Nessus on Windows
The next section will show you how to download, install, and start Nessus Essentials on Windows.
Nessus Download
First, go to the Nessus download page and choose the installer for your Windows version to download Nessus. For 64-bit Windows, select the 64-bit installer. For 32-bit Windows, select the 32-bit installer instead.
We’ll be installing the 64-bit version.

Nessus Installation
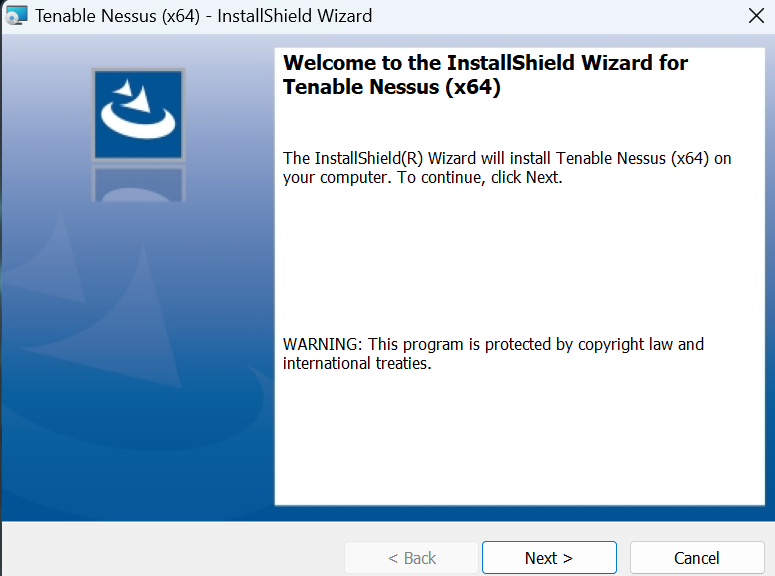
After the download is complete, we can begin the installation. To do so, simply double-click on the Nessus installer file from wherever you saved it.

The installation wizard will begin guiding you through the installation process. Click on “Next” to continue.

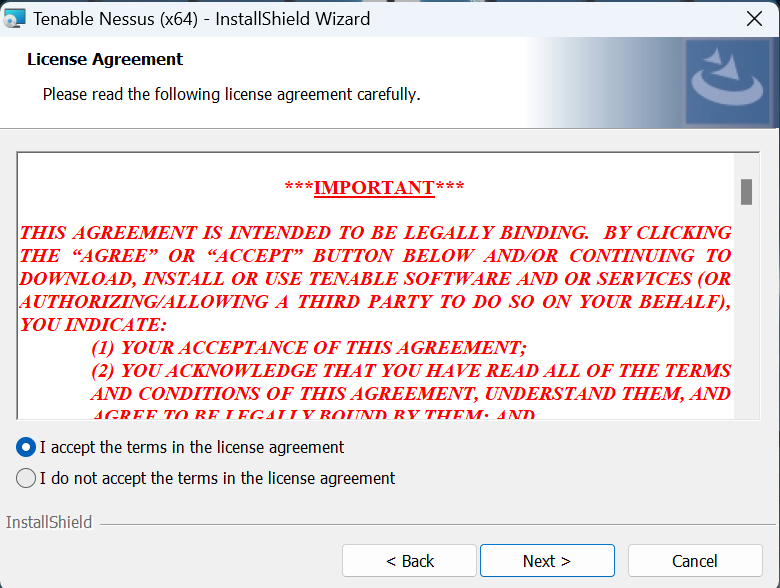
Read and accept the license agreement terms and click on “Next.”

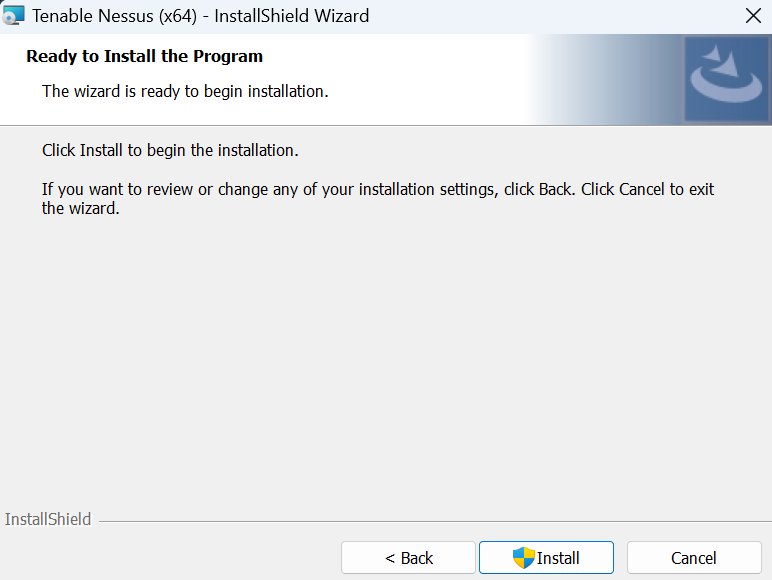
Choose where you want to install Tenable Nessus and click on “Next.”

If you need to make any changes, click on “Back”; otherwise, click on “Install” to begin the installation process.

The Nessus package will now begin the installation process.

Once the wizard is finished, click on “Finish” to complete the installation.

After the installation is completed, Nessus will automatically launch your default browser to complete the initial configuration at http://localhost:8834/WelcomeToNessus-Install/welcome.
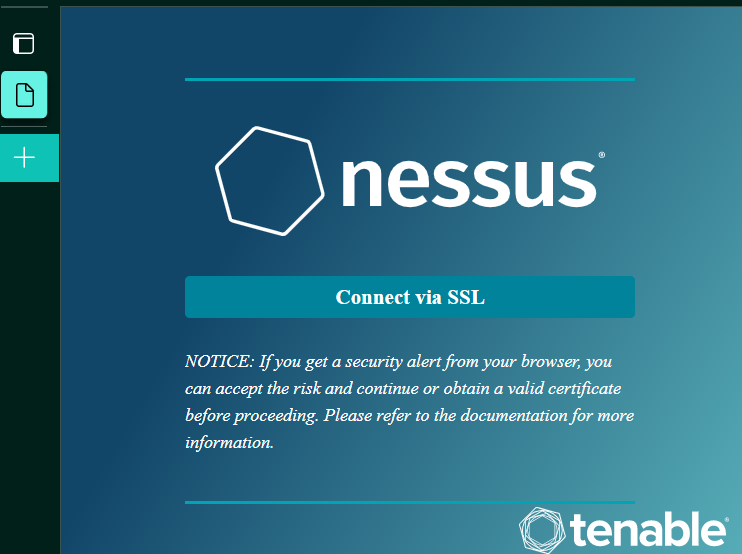
This configuration must be finished before you can start using Nessus. To begin, click on “Connect via SSL.”

You will be presented with a message about the connection not being secure; simply ignore it and continue.
On the following screen, click on “Continue” to begin the configuration.

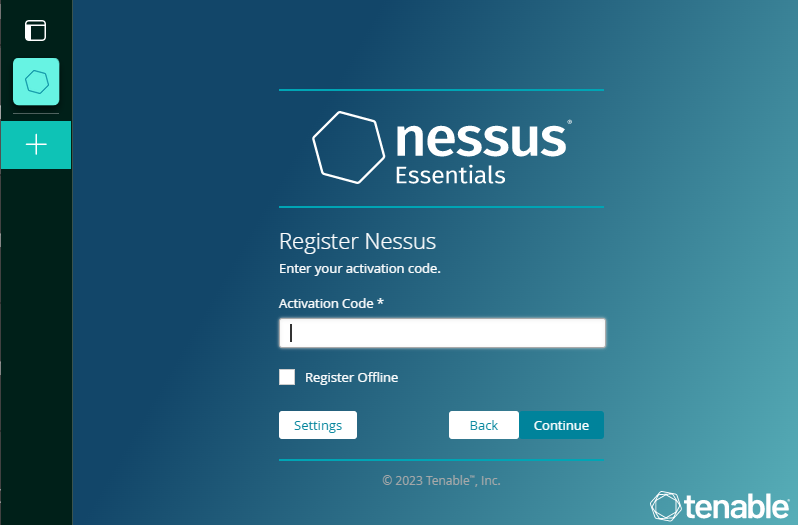
Select “Register for Nessus Essentials” and click on “Continue.”
On the following screen, enter your name and email address and click on “Register” to receive an activation code.
Your activation code will appear on the next screen. Copy and save this code somewhere safe. Then click on “Continue.”

Next, you’ll need to create an account to use with Nessus. Enter a username and password and click on “Submit.”

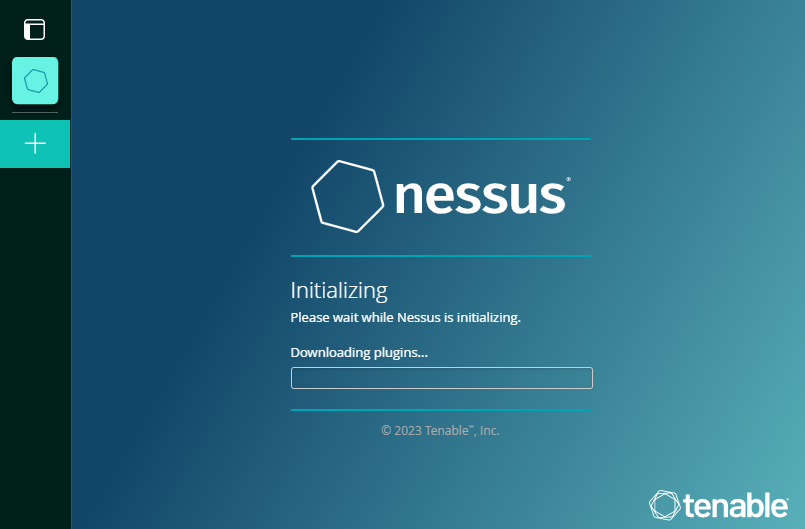
Nessus will now start downloading the necessary plugins, which will take a few minutes to complete.

You’ll then be taken to the Nessus interface, where the plugins will begin to be configured. This will take a while to complete, so be patient and do not close the window or interrupt the process.
Once the configuration is finished, you’ll be able to start scanning.

Starting Nessus
There are two ways to manage the Nessus service on Windows. You can use the Services application or the command line. You can easily find the Services application by typing “services” into the search bar in your Windows Start Menu.

Find «Tenable Nessus» in the Services application’s Name column. To stop Nessus, right-click «Tenable Nessus» and click on «Stop.» To restart the service, right-click it and click on «Start.»

You can also manage the service from an administrative command prompt. Type net start «Tenable Nessus» and press Enter to start Nessus, or type net stop «Tenable Nessus» and press Enter to stop it.
Note that administrative permissions are required to run the «net start» and «net stop» commands.

After starting the Nessus service, go to your web browser and enter https://localhost:8834. Enter the credential you created earlier and click on “Sign In.”

Once you’re logged in, you can start scanning.
Running Nessus
We’ll now show you how to use Nessus in Kali to perform a scan against a target host within your network. But first, let’s briefly describe some of the main sections of the Nessus Essentials interface.

- My Scans: View and manage scheduled and launched scans. You can import results, create scan folders, or launch scans.
- Settings: Check Nessus version details and plugin information, configure plugin updates, licenses, proxies, SMTP servers, and more.
- Policies: Build custom templates that control scan actions and plugin behaviors.
- Plugin Rules: Customize how plugins work during scans.
- Terrascan: Terrascan checks infrastructure code for security issues.
- Notifications and Account: Manage account settings and scan notifications.
Nessus Scan
Let’s begin scanning our target. The first thing we need to do is click on “Create a new scan.”

From here, we’re given the option to choose a scan template. These are predefined templates for host discovery, basic network scans, web app tests, malware detection, and more.
We’ll choose the “Basic Network Scan” for our demo.

After selecting the Basic Network Scan, you must configure some key settings before launching the scan. We won’t cover every available setting here, but we’ll highlight the most important ones to get you started.
The first setting you’ll need to update is under Basic-General. You’ll set the information for the target you want to scan here, setting the name, description, and IP address.

The next important setting is Discovery, where you configure the port scanning behavior. You can choose to scan common ports only, all ports, or create a custom port specification.
We’ll be choosing “Port scan (all ports).”

The next setting you’ll set is under Assessment, where you’ll set the scan type you want.
Options include “default,” “scan for known web vulnerabilities,” “scan for all web vulnerabilities (quick),” “scan for all web vulnerabilities (complex),” or “custom.”
We’ll be setting this to “Scan for known web vulnerabilities.”

You can explore additional settings, such as report options and advanced configurations.
The Credentials tab allows you to enter login credentials like SSH keys or Windows accounts to perform credentialed scans.
The settings we’ve covered will get you started running a basic vulnerability scan. You can customize it further as you get familiar with its capabilities.
Save all configured scan settings before launching the vulnerability scan by clicking on “Save.”

Once you’ve saved your settings, you can begin the scan by going to “My Scans” and clicking the play button.

The scan will take some time to complete. Once finished, you’ll see a checkmark next to the “Last Scanned” column.
Click on your scan to be taken to the scan details page.

Now, we can examine the vulnerabilities detected in the scan results.

Here’s a breakdown of the different sections of the results page.
- Hosts: Indicates the number of hosts scanned, which is one in our case.
- Vulnerabilities: The total number of vulnerabilities found.
- Remediations: Suggests the number of recommended remediation actions.
- Notes: A note providing additional information on the scan.
- History: Indicates there is one historical record of this scan.
- Host IP Address (192.168.37.144): The specific IP address of the scanned host.
- Vulnerability Severity Bars: Represents the count of vulnerabilities by severity—Critical (39), High (35), Medium (52), Low (7), and Info (211).
- Scan Details Section: Provides details on the scan policy used, status of the scan, severity base (CVSS v3.0), type of scanner (Local Scanner), start and end time, and total duration of the scan (25 minutes).
- Vulnerabilities Pie Chart: Representation of vulnerabilities categorized by severity—Critical, High, Medium, Low, and Info.
To view the vulnerabilities in detail, click the «Vulnerabilities» tab. This lists all detected vulnerabilities, which can be filtered by severity, CVSS score, VPR rating, name, family, or count.
We’ve filtered ours by CVSS.

Let’s quickly look at the “NFS Exported Share Name Disclosure” to see the information provided by Nessus.

The vulnerability details provided by Nessus include a description of the issue, recommended solutions to remediate it, proof of the vulnerability found, and the specific port where it was detected.
Nessus Report
Finally, we’ll show you how to create and export a Nessus report in a format easily shareable with stakeholders or other team members.
This report will provide an overview of the vulnerabilities identified during the scan and recommendations for remediation.
Click on the “Report” button from within the scan results to configure your report. You can choose whether you want the report in HTML, PDF, or CSV.
You can also select the report template. Once finished, click on “Generate Report.”

The report will be generated and downloaded to your system.

Conclusion
After following this tutorial, you’ll know how to install Nessus on both Kali and Windows.
We’ve also shown you some of its capabilities, including performing a basic scan and creating a report you can share with your team or clients.
Nessus is a powerful scanner, and we encourage you to test its capabilities on your network to identify any potential vulnerabilities.
Are you looking to strengthen your cyber security knowledge? Elevate your skills with the StationX Accelerator program, offering comprehensive courses, hands-on labs, personalized roadmaps, and access to mastermind groups, and more.
Frequently Asked Questions
Can I use Nessus for free?
Yes, Nessus has a free version called Essentials. However, you’re limited to scanning 16 private IPs.
How much does Nessus cost?
Nessus comes in three different tiers. The Essential version is free to use, the Professional version costs $3990 USD, and the Expert version costs $5990 USD per year.
Is Nessus available for Windows?
Yes, Nessus is available for various Windows operating systems, including Windows 10 and 11, and Server 2012, 2016, 2019, and 2022.
-
Richard is a cyber security enthusiast, eJPT, and ICCA who loves discovering new topics and never stops learning. In his home lab, he’s always working on sharpening his offensive cyber security skills. He shares helpful advice through easy-to-understand blog posts that offer practical support for everyone. Additionally, Richard is dedicated to raising awareness for mental health. You can find Richard on LinkedIn, or to see his other projects, visit his Linktree.
Last Updated :
01 Feb, 2023
Nessus is a security scanner tool, provided by Tenable Incorporation. Nessus is among the best tools for remote vulnerability scanning, presently available. It provides many features such as port scanning, vulnerability scanning, visualization of scan results, etc. Before understanding how to install Nessus on Windows, let’s take a look at the prerequisites for the installation of Nessus.
Prerequisites
- A computer with Windows operating system installed and running.
- 4 GB of RAM (minimum). Recommended 8 GB RAM.
- At least four 2 GHz CPU cores.
- 30 GB of disk space.
Steps to Install Nessus in Windows
Step 1: Downloading Nessus Installer.
Firstly, download the Nessus windows installer from its official website. On the download page, select the Nessus version you want to install and your Windows architecture; for most users, it will be ‘Windows – x86_64’. You will be prompted to accept the user agreement. Read it, accept it, and continue. It would look like this after downloading.
Step 2: Installing the Nessus Tool.
- After the downloading is done, go to your download folder and run the installer file as administrator. Doing this will take you to the installation wizard.
- Click Next and continue to the user agreement widget.
- Agree to the license agreement and click Next.

- Now, the installation wizard will install it in C drive by default. If you want to change the installation location, click Next else you can change it to your desired location.
- Now, you will be asked to install it. Click on install and also allow the wizard when a UAC permission is prompted.

Once the installation is done, click Finish.
Step 3: Setting Up Nessus in Browser.
When you click on Finish in the installation wizard, it will open the Nessus interface in your default browser on the URL: http://localhost:8834/WelcomeToNessus-Install/welcome. It would look like this:
Now we shall proceed to set up Nessus in Browser. Click on ‘Connect via SSL’ in your browser window. After this, you’ll be prompted that the connection is not safe. Ignore it and continue. A page like this will open.

Click on Nessus Essentials as it is the only free version of Nessus, and it is best suited for beginners. Then, continue.

Here, you will be asked for an activation code; Enter your name and E-mail address, and the code will be sent to that E-mail address. If you are an existing Nessus user, you can skip this step and continue to log in.
Enter the activation code received in your E-mail. Keep in mind that this is a one-time activation code, if you uninstall Nessus or your browser, you’ll need to verify it again with a new code. After entering the code, you will be asked to create a new Administration account. Enter the new credentials and create the account.

Once the administrator account is created, Nessus will install all the required plugins and essential tools. Let the process complete; make sure that the internet connection is not interrupted.
After the installation of the plugins is completed, you will be taken to your dashboard. However, the functionality of Nessus will be limited until all the plugins are compiled.

Now Nessus’s Essentials version is completely installed on your computer. You can perform various scans after the plugins are compiled.
Conclusion
This article presented a step-by-step guide on how to install Nessus on Windows and set up the Nessus in your browser with detailed steps and images.
Nessus is a vulnerability scanner that can search for different types of vulnerabilities on any device. This scanner can detect a wide range of vulnerabilities in the fastest time, with reliability and accuracy. Nessus is currently one of the most popular and advanced vulnerability scanners in the world. In this article, we try to teach you to step by step How to Install and Configure Nessus on Windows. You can see the packages available in Eldernode if you want to buy a Windows VPS server.
Table of Contents
Introduction to Nessus
When it comes to network security, most security testing tools are very sophisticated. Nessus is nothing new, but it certainly simplifies the process. It is very easy to use, works quickly, and can quickly provide you with network security reports.
If someone wants to hack your local network, the first thing they do is do a vulnerability scan. It then performs a penetration test. It scans for vulnerabilities on various devices on your network and looks for potential holes such as open ports, outdated software with known vulnerabilities, or default passwords on devices. If they find something, a hacker tests these vulnerabilities and then finds a way to exploit them. Testing for these vulnerabilities is a two-step process because the scan only shows the possibility of problems. A penetration test confirms that this is actually exploitable.
Nessus is a proprietary software built to explore vulnerabilities, but the free home version also offers many tools to help you discover and strengthen your network. This vulnerability scanner is developed and supported by Tenable Network Security. From its inception to date, Tenable Network Security offers Nessus tools for free only for personal and non-corporate environments.
Nessus Features
Some of the most important features of Nessus are:
1. High-speed asset discovery
2. Configuration auditing
3. Target profiling
4. Malware detection
5. Sensitive data discovery
6. Vulnerability analysis
Examples of vulnerabilities and exposures that Nessus can scan for include the following:
– Vulnerabilities that could have unauthorized control or access to sensitive data on a system.
– Wrong configuration
– Default passwords, some common passwords, and blank/absent passwords on some system accounts. Nessus can also contact Hydra (an external tool) to attack the dictionary.
– Deny service vulnerabilities!
– Nessus scans cover a wide range of technologies, including operating systems, network devices, applications, databases, web servers, and critical infrastructure.
Install Nessus on Windows
In this section, we are going to discuss how to Install Nessus on Windows. To do this, just follow the steps below.
First, you have to open one of your favorite browsers and go to the Nessus website to download Nessus:
Click I Agree in the window that opens to confirm the license agreement. Doing so will start downloading the installation file.
Now you need to go to the place where you downloaded the file and double-click on it to start the installation process. To start the installation in the window that opens, click on Run:
Click Next to start the installation:
In the next step, check the I accept the terms… option and click on Next:
Here you can click on Chang… to determine the installation location of Nessus. After doing this, click on Next:
Now you need to click on Install:
*
Finally, click on Finish to complete the Nessus installation process:
After clicking on the finish, you will see the following image in your browser:
Note: If you have not already installed WinPcap on your system, you should follow the steps below to install WinPcap.
How to Install WinPcap on Windows
In this section, we want to teach you how to install WinPcap on Windows to use Nessus. To download WinPcap, first, open one of the browsers you want and go to the WinPcap website. Click on the Download as shown below:
Then click on Installer for Windows:
Now go to the place where you downloaded the installation file and double-click on it in the window that opens and click on Run:
Click Next to start the installation process:
In the next step, click on I Agree:
Now click on Install:
*
Finally, click on Finish:
How to Configure Nessus on Windows
After you have successfully installed Nessus in the previous sections, we are now going to teach you how to configure it.
1_ The first step is to select how to install Nessus on the Welcome to Nessus page. (Nessus Essentials, Nessus Professional and Nessus Manager)
2_ In the next step, you must click Continue.
Note that if you selected Nessus Professional or Nessus Manager in the previous section, the Register Nessus page will appear.
Also, if you select Nessus Essentials, the activation code download screen will appear.
3_ Now if you have selected Nessus Essentials, do one of the following:
If you need an activation code, type your name and email address on the activation code download page. Then click on the Email. You can now check your email for your free activation code.
Note that if you already have the activation code, click Skip.
4_ After completing the above steps, you must now type your activation code on the Register Nessus page.
5_ Click on Continue to create an account page.
6_ You can now create a Nessus Admin account that you use to log in to Nessus. Here you have to click on Submit after entering a username and password.
Nessus completes the configuration process by doing the above.
Conclusion
Scan results can be reported in a variety of formats including plain text, XML, HTML, and LaTeX. Results can also be stored in a knowledge base for debugging. In UNIX, scanning can be automated using the command line client. There are various commercial, free, and open-source tools for both Unix and Windows to manage Nessus personal or distributed scanners. In this article, we tried to teach you How to Install and Configure Nessus on Windows. You can refer to the article Tutorial Setup And Configure Nessus On Ubuntu 20.10 if you wish.