
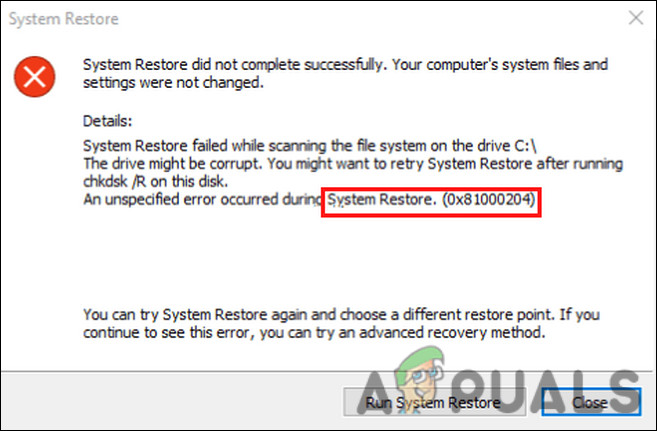
The System Restore error 0x81000204 occurs when the users attempt to restore a previous working state of the system using the Restore utility of Windows. The error is often accompanied by a message stating ‘System Restore did not complete successfully. Your computer’s system files and settings were not changed’.
We had a look into the issue and discovered that it can be caused due to a system inconsistency, issues within the hard drive, and problematic Restore settings. Regardless of what might be causing this issue for you, we have mentioned effective troubleshooting methods in detail that will help you fix this problem and restore your system in no time.
Scan Your System Using the Built-in Utilities
If your attempt to restore the system fails, then the first thing that you should do is make use of the built-in troubleshooting utilities that come with every Windows version. Microsoft has developed these utilities to scan different components of your operating system for inconsistencies and potential issues that might be resulting in errors like the one at hand.
In this method, we will demonstrate how to use CHKDSK, SFC, and DISM tools one by one. Running all these scans using Command Prompt is likely going to be a bit time-consuming, so we recommend starting working on these when you have some time on your hands.
CHKDSK Scan
The first scan that we will run is the CHKDSK scan. CHKDSK (check disk) is a system tool that helps check and repair hard drive errors and keeps your system data organized — it’s part of good computer hygiene.
In its simplest form, Chkdsk analyzes the integrity of a disk volume’s file system, as well as its metadata, and fixes the issues that it identifies. Some of these issues may include corrupt entries in a volume’s master file table (MFT), incorrect security descriptors for individual files, or even incomplete or incorrect information about the size or timestamp of a particular file.
Additionally, Chkdsk can also optionally look for bad sectors on a disk volume. A bad sector can be soft or hard, depending on which type was created. Soft sectors can be caused by incorrect data writing, while hard sectors are caused by physical damage. CHKDSK can fix these issues, as long as they are not hardware-related.
Here is how you can run a CHKDSK command on your Windows:
- Press Windows + R keys together on your keyboard to open a Run dialog.
- Inside the text field of the dialog, type cmd and press Ctrl + Shift + Enter to open Command Prompt as an administrator.
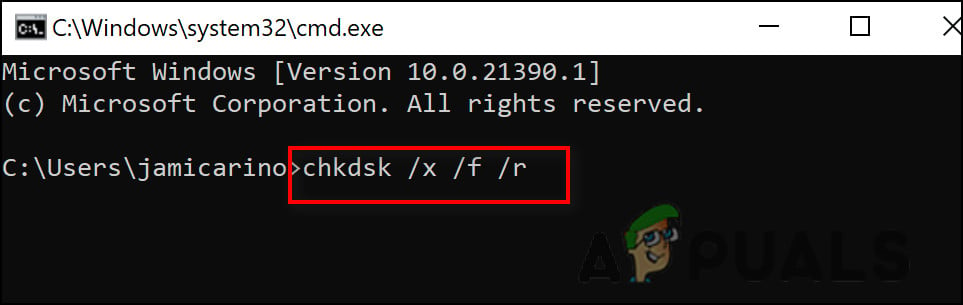
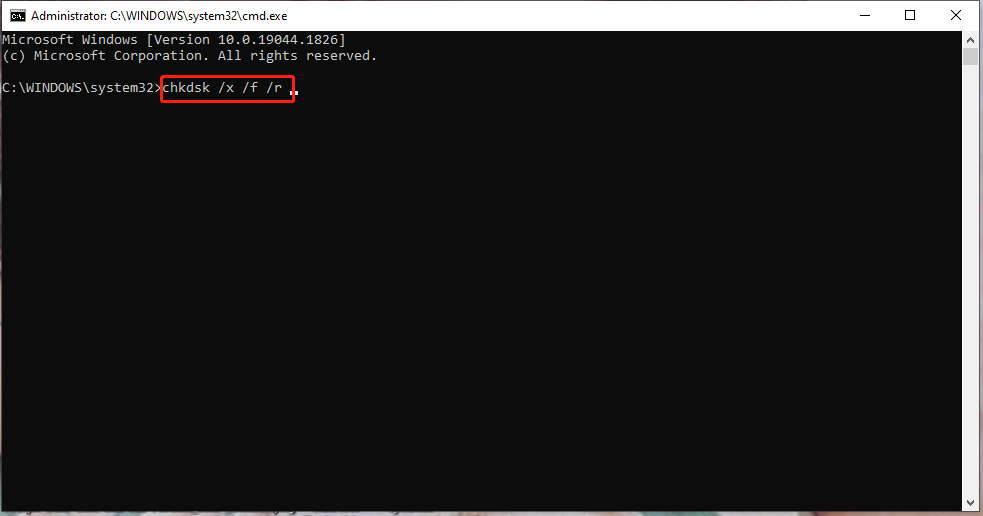
- Once you are inside the Command Prompt window, type the command below and hit Enter to execute it.
chkdsk /x /f /r

- If a confirmation appears asking if you would like to run the command when your computer boots the next time, type Y.
- Once done, reboot your PC. Upon reboot, a chkdsk scan should begin automatically.
- After Command Prompt completes this scan, repeat the action that was causing the error and check if doing so fixed error 0x81000204. If not, proceed with performing the next scan below.
SFC Scan
The next area you should look into for the potential problem is the protected system files if the chkdsk scan does not identify any bad sectors. The system files are the files that Windows depends on to function correctly. These include hardware drivers, configuration files, and DLL files, as well as the files that make up administrative tools like the Windows Registry.
If any of these essential system files become corrupt or faulty, you are likely to run into errors like the one under discussion. In cases like these, the best way to move forward is to use the System File Checker.
The System File Checker (SFC), as the name suggests will scan the system for corrupt files and replace the ones identified with their healthier counterparts.
DISM Scan
Once you are done executing the SFC command, the next thing you should do is run the DISM scan using Command Prompt as well. A Microsoft server allows DISM to obtain new copies of system files and substitute them for damaged, missing, or corrupt ones.
DISM and SFC work well hand in hand to fix issues like the one at hand, which is why they are always recommended to use together. After you have run the DISM command as well, close the Command Prompt window and try repeating the action that was previously resulting in the System Restore error.
If an inconsistency within the system files is causing the error 0x81000204, you should be able to fix it by following the methods above. However, if the error persists, move to the next method below.
Perform System Restore in Safe Mode
You might also be unable to perform a system restore if any of the installed applications or programs on your operating system are interfering with the process of the Restore utility.
If the methods mentioned above have not worked for you, then you can try performing a system restore in the Safe Mode. In Safe Mode, Windows only launches with a minimal set of drivers and programs. These are typically the only ones that Windows requires to launch and function.
Here is how you can launch your Windows in Safe Mode:
- Click on the Start menu on your taskbar and while holding the Shift key, click on Restart from the context menu.
- You should now be able to see a list of options on a blue screen. Select Troubleshoot > Advanced options.
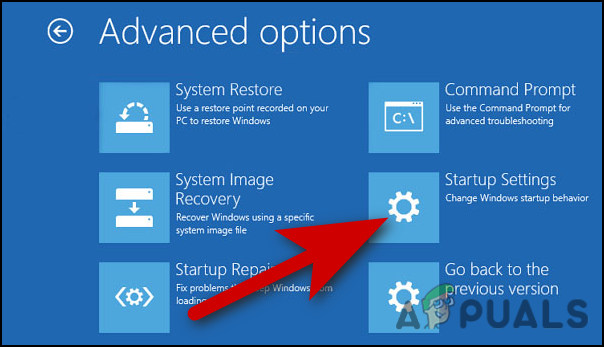
- Now, click on Startup Settings in the Advanced options window and restart your PC.

Choose startup settings - Upon reboot, press F4 to launch Windows in Safe Mode.
- Once you are inside the Safe Mode, try performing a system restore and see if that makes any difference.
If it does not, you can also try Clean booting your system while you are at it. Clean Boot mode is almost the same as Safe mode and will help you determine if a background process is the cause of the problem.
Reset System Restore Settings
Another fix for error 0x81000204 that you can try applying is resetting the system restore settings to their default state on Windows. This solution did the trick for several users, which is why we recommend you go ahead and give it a shot.
Follow these steps to proceed:
- Type cmd in the search area of the taskbar and click on Run as administrator.
- Click on Yes in the confirmation prompt.
- Inside the Command Prompt window, type the commands listed below one by one and hit Enter after each to execute them.
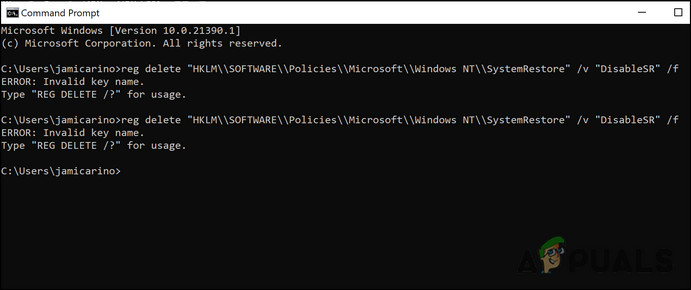
reg delete “HKLM\\SOFTWARE\\Policies\\Microsoft\\Windows NT\\SystemRestore” /v “DisableSR” /f

reg delete “HKLM\\SOFTWARE\\Policies\\Microsoft\\Windows NT\\SystemRestore” /v “DisableConfig” /f

reg delete “HKLM\\SOFTWARE\\Policies\\Microsoft\\Windows NT\\SystemRestore” /v “DisableSR” /f
schtasks /Change /TN “Microsoft\\Windows\\SystemRestore\\SR” /Enable

vssadmin Resize ShadowStorage /For=C: /On=C: /Maxsize=25GB

sc config wbengine start= demand

sc config swprv start= demand

sc config vds start= demand

sc config VSS start= demand

Run the Registry commands - Once Command Prompt executes the commands successfully, close the Command Prompt window and restart your PC.
- Upon reboot, check if the system restore utility works fine.
If you are still encountering the error, then you can also try resetting the repository and see if that makes a difference. Follow the steps below for that:
- Launch Command Prompt as an administrator again and execute the following command. This should deactivate Windows Management Instrumentation Service.
net stop winmgmt
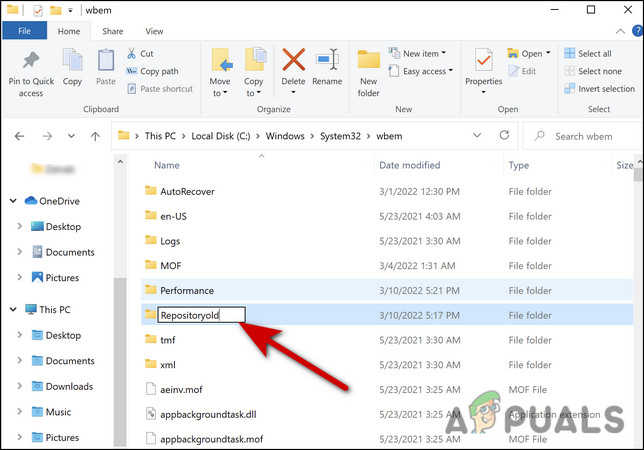
- Once done, launch File Explorer and navigate to the following location:
C:\Windows\System32\wbem
- Locate and right-click on the repository folder.
- Rename it as repositoryold.

Rename the folder to repositoryold - Then, launch Command Prompt as an administrator again and launch the following commands one by one.
net stop winmgmt

winmgmt /resetRepository
- Finally, reboot your PC and check if performing these steps fixed the problem.
Reset Your PC
If you have come this far without a solution and are still encountering the error 0x81000204, then there is a chance the conventional troubleshooting methods cannot resolve the corruption error behind all this.
If this scenario is applicable, then the only viable solution is to reset your Windows operating system to its default state. This process will remove all the data and the changes that you made to Windows (like installing programs and downloading stuff). The process is lengthy, so you will have to be patient while performing the procedure.
Errors are a part of any OS, and currently, an error in carrying out System Restore is being faced by some Windows 10 users. The error usually says, “System Restore did not complete successfully,” with error code 0x81000204, suggesting you select a different restore point than the one you chose. This can be due to several different reasons related to the hard drive or settings. Not to fret over it; you can find a credible solution to it right here. We’ve conducted thorough research into the matter and have gathered a list of different solutions and fixes for The Windows 10 System Restore Error 0x81000204. One of them is bound to work for you right away. So, without any further ado, let’s get into it.
How To Fix 0x81000204 System Restore Error
So, you are probably already facing a threat of some kind of malware that has gotten you to restore your windows to a previous version or build. It can already be a daunting thing to have your system and memory at a halt. To take your problem apart and see what went wrong, first try to use the built-in Utilities of the OS to scan it and see what inconsistencies exist that are producing the Windows 10 System Restore Error 0x81000204. The following are the fixes for Error 0x81000204.
Check Disk Scan
This, CHKDSK scan is a hard drive scan that organizes your data and looks for any kind of error that needs to be taken care of. From checking disk volume’s integrity and detecting corrupt files in MFT, to looking for bad soft sectors or hard sectors, and coming up with the information on the different issues that you might be facing. After that, once the detection of errors is complete, the CHKDSK scan fixes the ones that are related to the software.
- Press Win + R and this will open a Run dialog.
- Type CMD and press Ctrl + Shift + Enter and this will open the Command Prompt.
- As the CMD opens up, type in “chkdsk /x /f /r” and hit Enter.
- A confirmation might appear that asks you to run the command or not. Reply with “Y” and Hit Enter.
- After that, reboot the PC, and this will initiate the Check Disk scan.
This will fix the Windows 10 System Restore Error 0x81000204. If not, then read below to perform a second scan.
System File Checker
The following scan, SFC, is a scan that looks for problems in the protected system files, which are the Windows files that help it function properly. All of those drivers, DLL files, Windows Registry, and config files come under the category of protected system files.
Since the CHKDSK scan hasn’t worked, then it is only natural to look for the problem in the other pocket and to do that, we use the SFC scanner.
- Open Start and locate the shut down and restart buttons.
- While holding the Shift key, click on the buttons.
- Select Troubleshoot.
- Select Advanced options.
- Select Startup Settings.
- Click Restart.
- Press 6 and boot into safe mode with CMD.
- Open CMD
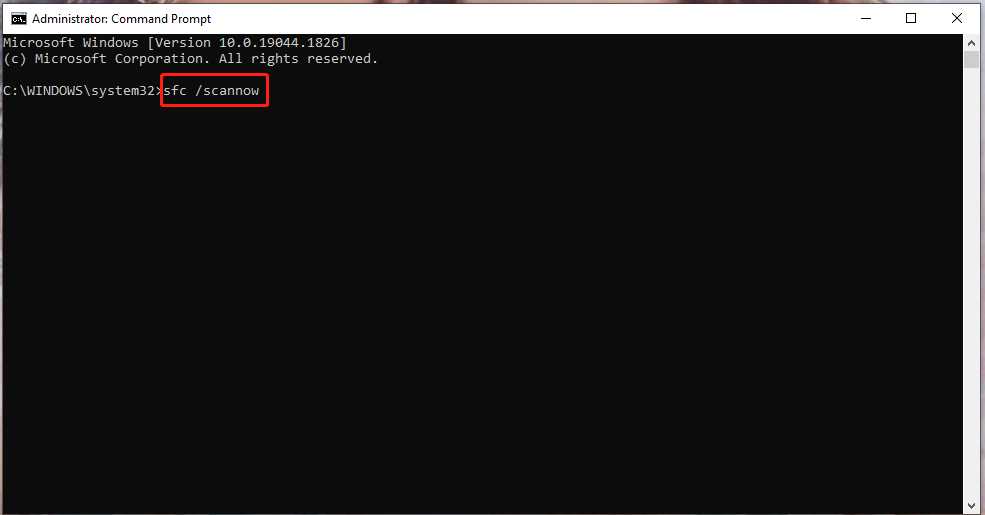
- Type in the command: “sfc /scannow” and Hit Enter.
After completing the procedure, see if the error 0x81000204 prevails, and if it still does, then read below for a third scanning technique that should fix the Windows 10 error 0x81000204.
DISM Scan
Using the CMD, you can run this scan which allows the system to replace the damaged, missing, and corrupt files. It is advisory to do your DISM scan right after the SFC, as they work one after the other quite well.
Reset Your System Restore Settings
If the previous scans haven’t worked out for you, don’t worry; there is still another fix for the Windows 10 system restore error. As far as the scans go, at least they took care of scanning other errors and fixing them, which would’ve helped you from a problem in the future. The next solution for error 0x81000204 is to reset the system restore settings, to its default mode. Many Windows users have reported that this error got resolved using the solution shown below:
- Type in CMD and run it as administrator.
- Then run the following list of commands line by line and hit enter for each command to run it:
- reg delete “HKLM\\SOFTWARE\\Policies\\Microsoft\\Windows NT\\SystemRestore” /v “DisableSR” /f
- reg delete “HKLM\\SOFTWARE\\Policies\\Microsoft\\Windows NT\\SystemRestore” /v “DisableConfig” /f
- reg delete “HKLM\\SOFTWARE\\Policies\\Microsoft\\Windows NT\\SystemRestore” /v “DisableSR” /f
- schtasks /Change /TN “Microsoft\\Windows\\SystemRestore\\SR” /Enable
- vssadmin Resize ShadowStorage /For=C: /On=C: /Maxsize=25GB
- sc config wbengine start= demand
- sc config swprv start= demand
- sc config vds start= demand
- sc config VSS start= demand
- Once it is done, close CMD and reset your PC.
After the reboot, try to restore again. The Windows 10 system restore error 0x81000204 will be fixed.
That is all for our fixes for the Windows system restore error. If they have worked for you, then congratulation! However, if you’re still facing problems, try having a look at the steps again to see if you’ve missed one of them. If you are facing errors and issues with other PC games or your PC, then also see our hub for commonly occurring PC errors and their fixes.

Jake Bishop
I report on gaming news and occasionally create the best video game guides.
,
System Restore failed with error 0x81000204 on Windows 10, while scanning the file system on drive C:\. The error 0x81000204 remains even after running the «chkdsk /R» command on the main drive, as the error message suggests.
“System Restore did not complete successfully. Your computer’s system files and settings were not changed.
Details: System Restore failed while scanning the file system on drive C:\.
The drive might be corrupt. You might want to retry system restore after running chkdsk /R on this disk.
An unspecified error occurred during System Restore. (0x81000204)”

This article contains instructions to troubleshoot the Windows 10 System Restore 0x81000204 error.
How to fix error 0x81000204 in System Restore.
System Restore problems, are commonly caused due to malware infections, damaged file system (or hard disk) or after installing a Windows update. So, before proceeding to the methods below to resolve the System Restore problem (Error: 0x81000204), try the following :
1. Scan your system for malware.
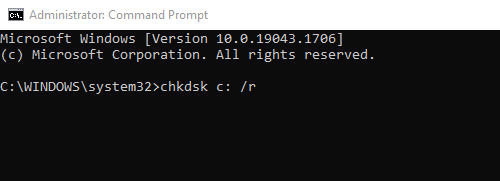
2. Run CHKDSK command to fix file system’s corruptions:
- Right click on Start menu and select Command Prompt (Admin).
- Type the following command and press Enter:
- chkdsk C: /R
3. When the checking is completed, proceed and ensure that your hard disk is healthy, by following the instructions in this article: How to Test and Diagnose Hard Drive (HDD) for hardware problems.
Method 1: FIX Windows corruption errors with DISM tool (System Update Readiness Tool).
1. Right click at Windows start button and select Command Prompt (Admin).
2. At the command prompt window, type the following command & press Enter:
- Dism.exe /Online /Cleanup-Image /Restorehealth

– Be patient until DISM repairs component store. (When the operation is completed, you should be informed that the component store corruption was repaired).
3. When DISM restore operation is completed, restart your computer.
4. After the restart, open Command Prompt as Admin again and give this command:
- SFC /SCANNOW

5. When SFC scan is completed, restart your computer.
6. Run System Restore.
Method 2. Perform a Repair Upgrade.
The other method to fix System Restore errors is to perform a repair upgrade of Windows 10.
1. Download and run the media creation tool according your OS Version.
- Download Windows 10 Media Creation Tool
- Download Windows 8.1 Media Creation Tool
2. Accept the License Terms.
3. Choose the option Upgrade this PC now and press Next.
![image_thumb[9]](https://www.wintips.org/wp-content/uploads/2017/03/image_thumb9_thumb.png "image_thumb[9]")
4. Follow the on screen prompts to upgrade Windows to the latest version.
5. After Upgrade run System Restore. *
* Note: If after an upgrade you realize that the system restore is turned off (see screenshot below), this is probably because Windows has upgraded to its latest build. A new build is like a new OS, so previous restore points cannot be used on new OS. In this case you can go back to the previous build or enable the system restore in the current state.

A. How to go back to the previous build. *
* Suggestion: If you have problems with the System Restore, I don’t suggest to go back to the previous build because the problem remains.
1. From Start menu, choose Settings > Update and security.
2. At Recovery options select the Get Started button under the Go back to an earlier build section.

B. How to enable System Restore.
– To enable System Restore on your system:
1. Press the Windows + R keys to load the Run dialog box.
2. Type the following command to open the System Restore utility and press Enter.
- rstrui
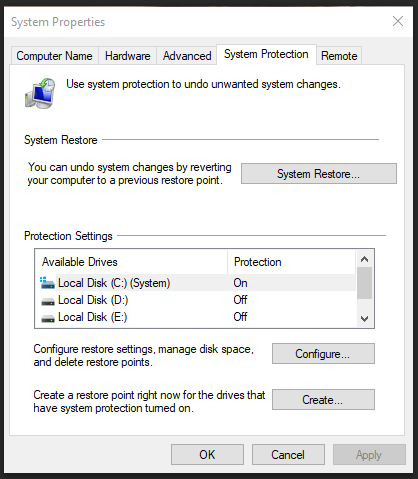
3. Click on system protection.

4. Select the Local Disk C: and then click Configure.

5. Set the system protection to ON and click OK.
6. Finally, choose Create to create a restore point.

Good luck! Let me know if this guide has helped you by leaving your comment about your experience. Please like and share this guide to help others.
If this article was useful for you, please consider supporting us by making a donation. Even $1 can a make a huge difference for us in our effort to continue to help others while keeping this site free:
- Author
- Recent Posts
Konstantinos is the founder and administrator of Wintips.org. Since 1995 he works and provides IT support as a computer and network expert to individuals and large companies. He is specialized in solving problems related to Windows or other Microsoft products (Windows Server, Office, Microsoft 365, etc.).
The System Restore error 0x81000204 may crop up when you are making a system restore or creating a system restore point in Windows 10. This article on MiniTool Website will illustrate possible reasons and solutions for you. With the help of these methods, you will deal with this issue easily.
System Restore Failure 0x81000204 Windows 10
When you are trying to restore a previous working state of the system with System Restore in Windows 10, chances are that you receive a message with the error code 0x81000204, saying “System Restore did not complete successfully. Your computer’s system files and settings were not changed”.
According to the search, this error code can be caused due to a system inconsistency, problematic Restore settings, interference of non-Microsoft apps & programs and so on. Therefore, we have presented several solutions to help you fix Windows 10 System Restore error 0x81000204 effectively according to your conditions.
Tips:
What to do if System Restore deletes files on your PC? It is possible to get them back? Follow the instructions in this guide — Quick Recover Files After System Restore Windows 10/8/7 to know answers.
How to Fix System Restore Failure 0x81000204 in Windows 10/11?
Fix 1: Run CHKDSK Scan
CHKDSK is an inbuilt system tool which analyzes the integrity of a disk volume’s file system and fixes the issues that it finds. At the same time, it also helps to check and repair hard drive errors and keep your system data organized. Here’s how it works:
Step 1. Type Run in the search bar and hit Enter to launch the Run dialog.
Step 2. Type cmd and hit Ctrl + Shift + Enter to open Command Prompt with administrative rights.
Step 3. Copy & paste chkdsk /x /f /r and then hit Enter.
Step 4. If a confirmation message appears, type Y to confirm this action.
Step 5. After the scanning process is complete, reboot your device to see if error code 0x81000204 is gone. If CHKDSK scan doesn’t find any problems for you, you can try the next method.
Fix 2: Run SFC Scan
The system files matter a lot for the normal function of Windows and they mainly contain DLL files, configuration files, hardware drivers and the files that consist of administrative tools in Windows. If any of those contents are corrupted or missing, some severe damages might occur such as error code 0x81000204.
In this condition, you can make use of System File Checker to scan the corrupted system files and replace them with the intact counterparts.
Step 1. Type cmd in the search bar to locate Command Prompt and right-click on it to choose Run as administrator.
Step 2. When the UAC window appears, type sfc /scannow and hit Enter.
Step 3. Reboot your computer to see if error code 0x81000204 is removed.
Tips:
If it is stuck during performing sfc /scannow, see this guide – Windows 10 SFC /Scannow Stuck at 4/5/30/40/73, etc.? Try 7 Ways to get possible solutions.
Fix 3: Run DISM Scan
DISM (Deployment Image Servicing and Management) works the same way as SFC because it can also check and restore corrupted or missing system files in Windows. Therefore, running the DISM commands is also a good choice to fix System Restore failure 0x81000204.
Step 1. Right-click on the Windows icon, highlight PowerShell and right-click on it to choose Run as administrator.
Step 2. Insert the following command in the PowerShell window and don’t forget to hit Enter.
Dism /Online /Cleanup-Image /CheckHealth
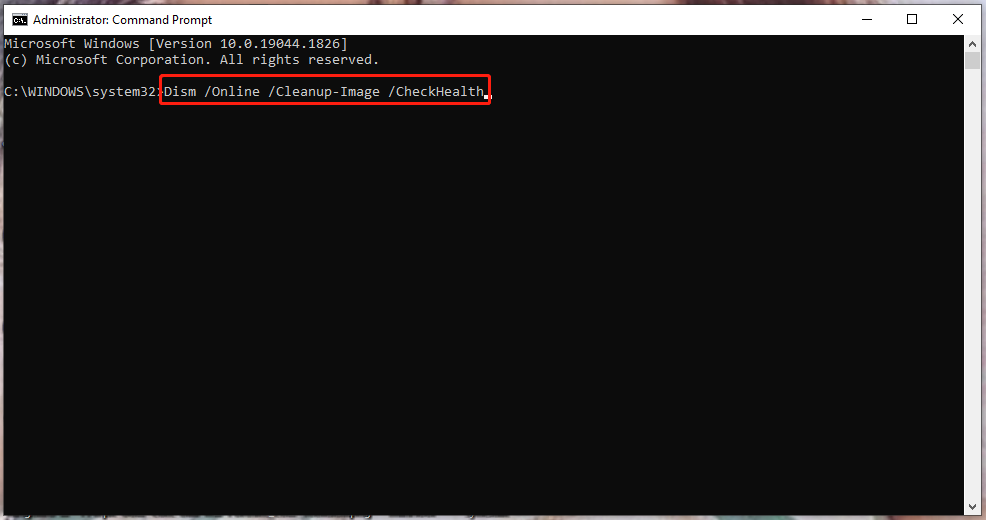
Tips:
This command can just scan whether corruption exists in your system and it doesn’t fix anything. If it shows some corrupted system files after scanning, you can carry on next step. If it informs you that there is nothing wrong with your system files, you can try the solutions below.
Step 3. Run the following commands and hit Enter after each command. The scanning process will take quite a few moments, please wait patiently.
Dism /Online /Cleanup-Image /ScanHealth
Dism /Online /Cleanup-Image /RestoreHealth
Tips:
Do you know what the differences among the four system scanning tools — CHKDSK, SFC, DISM or ScanDisk are? Get more information in this guide — CHKDSK vs ScanDisk vs SFC vs DISM Windows 10 [Differences].
Fix 4: Reset System Restore Settings
Resetting the System Restore settings to the default state is also proven workable to get rid of System Restore error 0x81000204.
Step 1. Run Command Prompt as administrator. Type Y if there is a confirmation message.
Step 2. Copy & paste the following commands one by one and hit Enter after each of them.
- reg delete “HKLM\\SOFTWARE\\Policies\\Microsoft\\Windows NT\\SystemRestore” /v “DisableSR” /f
- reg delete “HKLM\\SOFTWARE\\Policies\\Microsoft\\Windows NT\\SystemRestore” /v “DisableConfig” /f
- reg delete “HKLM\\SOFTWARE\\Policies\\Microsoft\\Windows NT\\SystemRestore” /v “DisableSR” /f
- schtasks /Change /TN “Microsoft\\Windows\\SystemRestore\\SR” /Enable
- vssadmin Resize ShadowStorage /For=C: /On=C: /Maxsize=25GB
- sc config wbengine start= demand
- sc config swprv start= demand
- sc config vds start= demand
- sc config VSS start= demand
Step 3. As soon as all the commands are executed successfully, exit the command window and reboot your device to see if the error code 0x81000204 is gone.
If this error code is still there, follow the guidelines below:
Step 1. Run Command Prompt with administrative rights, type net stop winmgmt and tap on Enter to deactivate Windows Management Instrumentation Service.
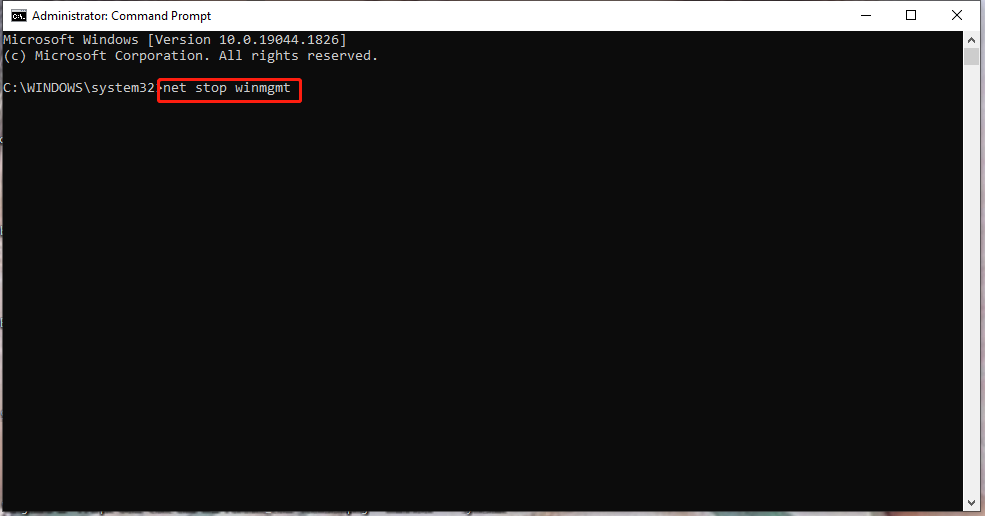
Step 2. After the process is done, press Win + E at the same time to open File Explorer and copy & paste the following path into the navigation bar and then hit Enter to locate the repository folder.
C:\Windows\System32\wbem
Step 3. Right-click on the folder to choose to rename it as repositoryold.
Step 4. Launch Command Prompt as an administrative again and run the following two commands one by one.
net stop winmgmt
winmgmt /resetRepository
Step 5. Reboot your computer to examine if it fixes your issue.
Fix 5: Run System Restore in Safe Mode
Many times, if any non-Microsoft applications or programs are installed on your system, it will interfere with the proper functioning of System Restore. Booting into Safe Mode will allow Windows to launch with a minimal set of drivers and programs and help to perform System Restore successfully.
Move 1: Boot into Safe Mode
Step 1. Go to Windows Settings > Update & Security > Recovery > Restart now under Advanced startup.
Step 2. Click on Troubleshoot > Advanced options > Startup Settings > Restart.

Step 3. Hit F4 to enter Safe Mode.
Move 2: Perform System Restore in Safe Mode
Tips:
Before performing System Restore in Safe Mode, you must make sure that you have turned on system protection and created at least one restore point.
Step 1. Type create a restore point in the search bar and hit Enter.
Step 2. Click on System Restore and hit Next to continue.
Step 3. Choose a restore point and hit Next.
Step 4. Press Finish until the restore process is complete.
Fix 6: Reset Your PC
If none of these methods above helps you out, you can consider resetting your PC to the default. This process is lengthy because it will remove all the data and changes that you made on your PC, please wait patiently.
Step 1. Click on the gear icon to open Windows Settings and scroll down in the settings menu to choose Update & Security.
Step 2. In the Recovery tab, choose Get started under Reset this PC.
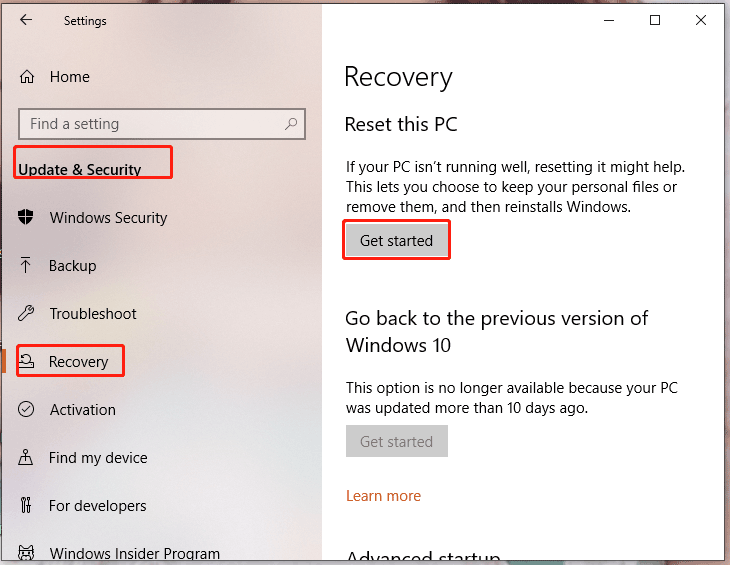
Step 3. Choose Keep my files or Remove everything. The former one will remove apps and settings but keep your personal files. The latter one will erase all the data including your personal files, apps and settings.
Guys! I was bothered by System Restore failure 0x81000204 recently and successfully solve it on my own with the detailed guidelines in this article. Hope they also will be useful to those people in need. Click to Tweet
Suggestion: Back up Your PC with Third-Party Backup Software
You must get rid of the error code 0x81000204 with your efforts now, and you feel a sense of achievement. However, instead of thinking hard about how to solve System Restore error 0x81000204 and try the fixes one by one, it is more important that you should pay attention to how to avoid such misery of System Restore failure.
As a matter of fact, backing up your PC with third-party backup software in advance is a necessity. MiniTool ShadowMaker, the free backup software is your top choice which enables you to back up and restore your system in a few clicks. Now, let me show you how to do it step by step.
Move 1: Back up Your PC
Step 1. Download & install this professional backup tool and launch it.
MiniTool ShadowMaker TrialClick to Download100%Clean & Safe
Step 2. Click on Keep Trial to enjoy its services for free.
Step 3. Go to the Backup interface, you can see the system required partitions are chosen in Source and a default destination path is also created in Destination. Just hit Back up Now to back up your OS at once.
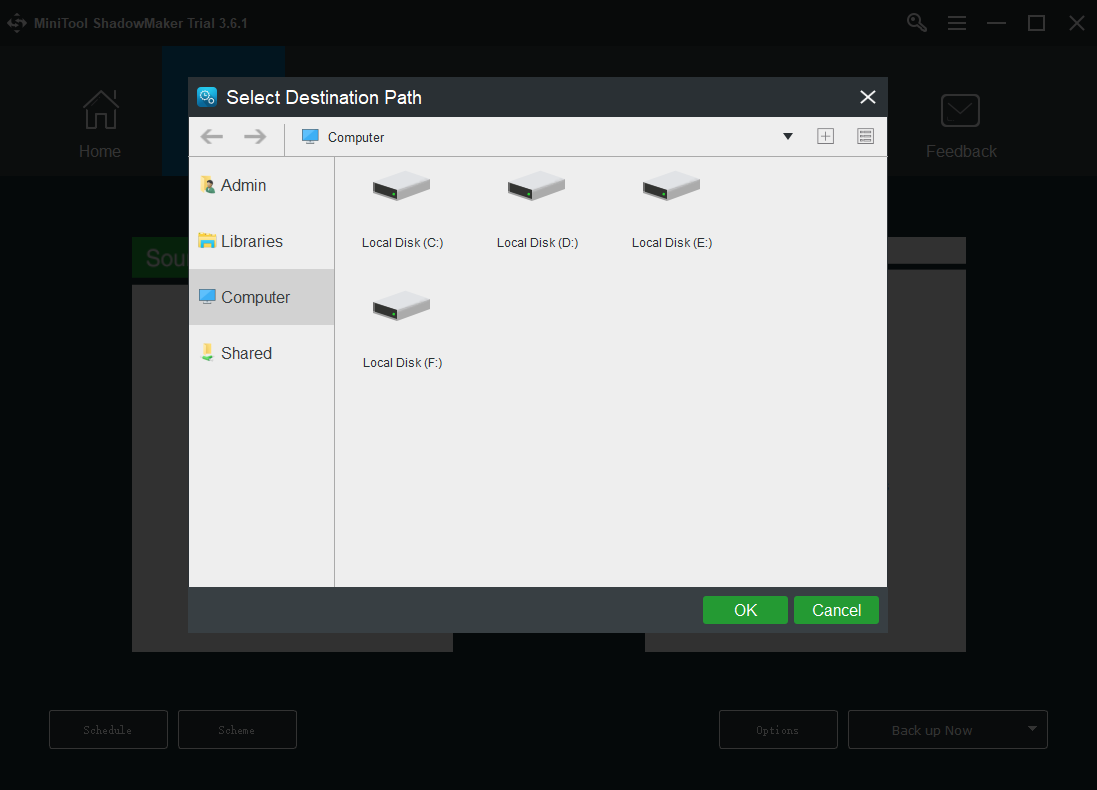
Tips:
Changing the default destination path is also permitted. Just press Destination to choose the one you like.
Move 2: Restore Your System
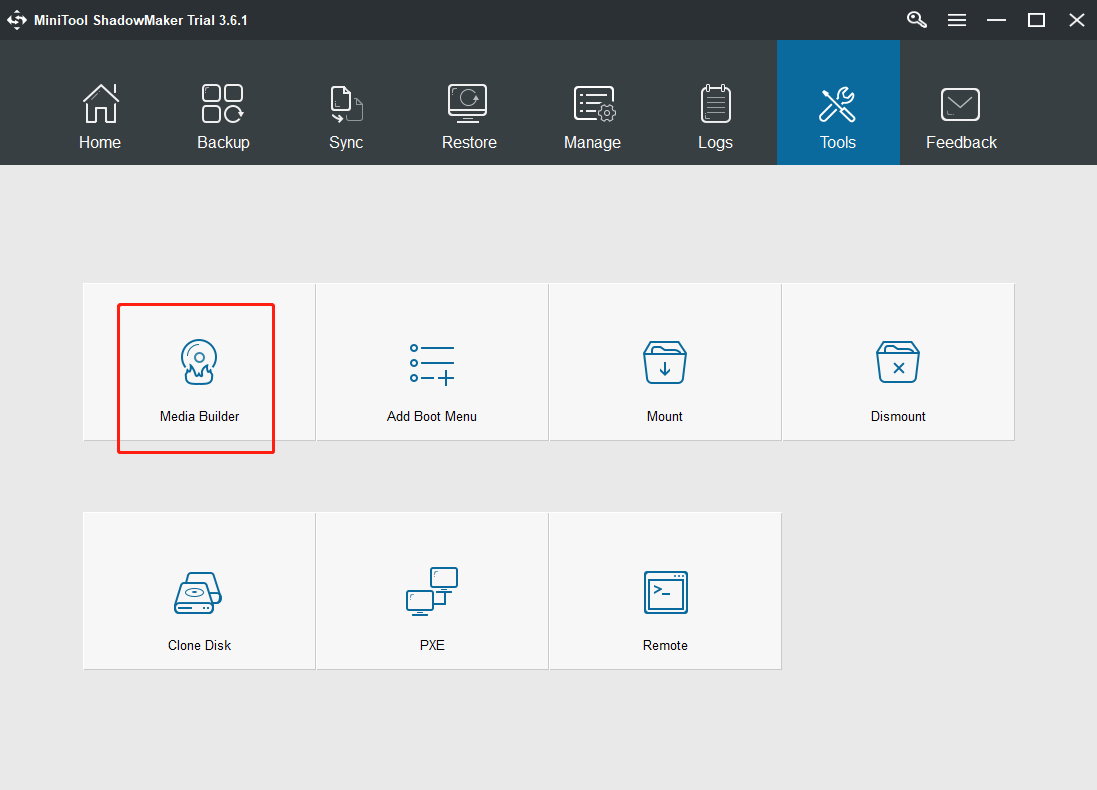
Step 1. Build a bootable USB flash drive/DVD/CD with the Media Builder feature in Tools.
Step 2. Boot from the drive/DVD/CD and launch MiniTool ShadowMaker.
Step 3. Go to Restore and hit the green Restore button beside the desired backup image.
Step 4. Choose the backup version you want and hit Next. Choose the volumes to restore from the selected backup file, tick MBR and Track 0 and press Next.
Step 5. Choose a disk that you want to restore the system and press Next. Hit OK if a warning appears. Hit Finish when the restoration process is done.
Tips:
You are not allowed to restore the image to the disk that includes the system image.
I used MiniTool ShadowMaker to create a system backup image successfully and restore it easily. Come and try this useful tool, I bet that you will be surprised!Click to Tweet
Apart from backing up and restoring system, MiniTool ShadowMaker also supports file & folder backup/restore, partition backup/restore and disk backup/restore. Also, you can comment on your backup task to clearly distinguish it and enable email notification to get the final result in time in Options. In Scheme, you can also choose to back up your OS on a regular basis to prevent any unexpected data loss in the future.
MiniTool ShadowMaker TrialClick to Download100%Clean & Safe
Final Words
In conclusion, we have discussed what error code 0x81000204 is and provided you with 6 effective solutions to remove this error. You can follow up to the end of this article to find suitable solutions in your case.
Most importantly, we have recommended MiniTool ShadowMaker, a powerful backup and restore tool for you which allows you to back up your OS in advance hence preventing any data loss caused by accidents occurring in the process of operations.
If you have any queries about our service or you handle System Restore failure 0x81000204 with other methods, welcome to comment below or send an email to us via [email protected].
Восстановление системы завершилось с ошибкой 0x81000204 в Windows 10 при сканировании файловой системы на диске C: \. Ошибка 0x81000204 сохраняется даже после запуска команды «chkdsk / R» на главном диске, как следует из сообщения об ошибке.
«Восстановление системы не завершилось успешно. Системные файлы и настройки вашего компьютера не были изменены.
Подробности: сбой восстановления системы при сканировании файловой системы на диске C: \.
Возможно, диск поврежден. Возможно, вы захотите повторить восстановление системы после запуска chkdsk / R на этом диске.
Во время восстановления системы произошла неопределенная ошибка. (0x81000204)»

В этой статье содержатся инструкции по устранению ошибки восстановления системы Windows 10 0x81000204.
Как исправить ошибку 0x81000204 в Восстановление системы.
Проблемы с восстановлением системы, как правило, возникают из-за заражения вредоносным ПО, повреждения файловой системы (или жесткого диска) или после установки обновления Windows. Итак, прежде чем перейти к методам, приведенным ниже, для решения проблемы восстановления системы (ошибка: 0x81000204), попробуйте следующее:
1. Сканирование вашей системы на наличие вредоносных программ.
2. Запустите команду CHKDSK, чтобы исправить повреждения файловой системы:
- Щелкните правой кнопкой мыши на Начало меню и выберите Командная строка (Admin).
- Введите следующую команду и нажмите Войти:
- чкдск / ф / р

3. Когда проверка завершена, продолжите и убедитесь, что ваш жесткий диск исправен, следуя инструкциям в этой статье: Как проверить и диагностировать жесткий диск (HDD) на наличие аппаратных проблем.
Способ 1: исправление ошибок повреждения Windows с помощью инструмента DISM (средство готовности к обновлению системы).
1. Щелкните правой кнопкой мыши на кнопке запуска Windows и выберите Командная строка (Admin).
2. В окне командной строки введите следующую команду Нажмите Войти:
- Dism.exe / Online / Cleanup-Image / Восстановление здоровья

— Будьте терпеливы, пока DISM не отремонтирует магазин компонентов. (Когда операция будет завершена, вы должны быть проинформированы о том, что повреждено хранилище компонентов).
3. Когда операция восстановления DISM завершена, перезапуск твой компьютер.
4. После перезагрузки откройте Командная строка как Администратор еще раз и дайте эту команду:
- SFC / SCANNOW

5. Когда сканирование SFC завершено, перезапуск твой компьютер.
6. Запустите восстановление системы.
Способ 2. Выполните ремонт обновления.
Другой способ исправить ошибки восстановления системы — выполнить обновление для восстановления Windows 10.
1. Скачайте и запустите инструмент для создания медиа в соответствии с вашей версией ОС.
- Загрузить Windows 10 Media Creation Tool
- Загрузить Windows 8.1 Media Creation Tool
2. принимать Условия лицензии.
3. Выберите опцию Обновите этот компьютер сейчас и нажмите Следующий.
![image_thumb [9]](https://komputer03.ru/wp-content/uploads/2019/9/fix-system-restore-failed-0x81000204-oshibka_3_1.png "image_thumb [9]")
4. Следуйте инструкциям на экране, чтобы обновить Windows до последней версии.
5. После обновления запустите восстановление системы. *
* Заметка: Если после обновления вы понимаете, что восстановление системы отключено (см. Скриншот ниже), возможно, это связано с тем, что Windows обновилась до последней версии. Новая сборка похожа на новую ОС, поэтому предыдущие точки восстановления нельзя использовать на новой ОС. В этом случае вы можете вернуться к предыдущей сборке или включить восстановление системы в текущем состоянии.

А. Как вернуться к предыдущей сборке. *
* Предложение: Если у вас есть проблемы с восстановлением системы, я не предлагаю возвращаться к предыдущей сборке, потому что проблема остается.
1. От Начало меню, выберите настройки > Обновление и безопасность.
2. В восстановление варианты выберите Начать кнопка под Вернуться к предыдущей сборке раздел.

Б. Как включить восстановление системы.
— Чтобы включить восстановление системы в вашей системе:
1. Нажмите Windows + р ключи для загрузки Бег чат.
2. Введите следующую команду, чтобы открыть утилиту восстановления системы, и нажмите Войти.
- rstrui
3. Нажмите на защита системы.

4. Выберите Локальный диск C: а затем нажмите Настройка.

5. Установите защиту системы на ON и нажмите OK.
6. Наконец, выберите Создайте создать точку восстановления.

Удачи! Дайте мне знать, если это руководство помогло вам, оставив свой комментарий о вашем опыте. Пожалуйста, любите и делитесь этим руководством, чтобы помочь другим.