
Windows server 2012 r2
После ручного выполнения бэкапа, статус имел complete, но диалоговое окно все равно «крутило» ползунок что процесс еще выполняется. Оставил его на ночь.
С утра это окно все равно не исчезало, закрыть его невозможно.
Если кильнуть через процессы, windows server backup закрывается, но при повторном запуске я вижу что статус бэкапа все еще в процессе, хотя все 13ГБ данных успешно скопированы на отдельный сервер для бэкапов в расшаренную папку.
убил процесс по PID’у, рестартанул службу he «WBENGINE service is used by Windows Backup to perform backup and recovery operations. If this service is stopped by a user, it may cause the currently running backup or recovery operation to fail. Disabling this service may disable backup and recovery operations using Windows Backup on this computer.»
Теперь при запуске WBS выдает это —
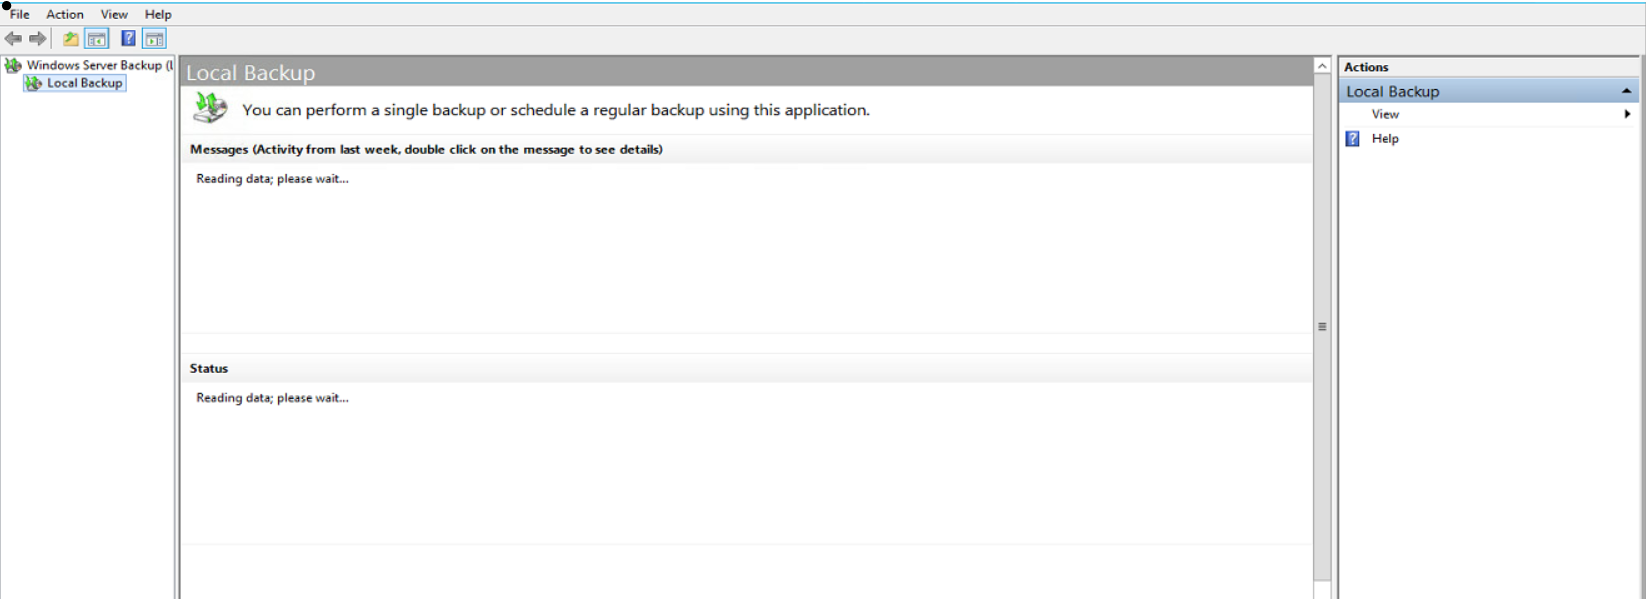
Далее ничего не происходит висит «reading data, please wait» и все.
Подскажите как можно это исправить, через консоль такие команды как wbadmin get versions не запускает, так же висит.
При удалении WSUS или иных действий перестает работать Система архивации данных Windows server.
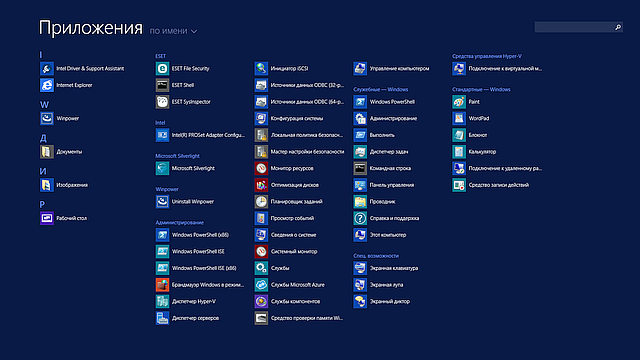
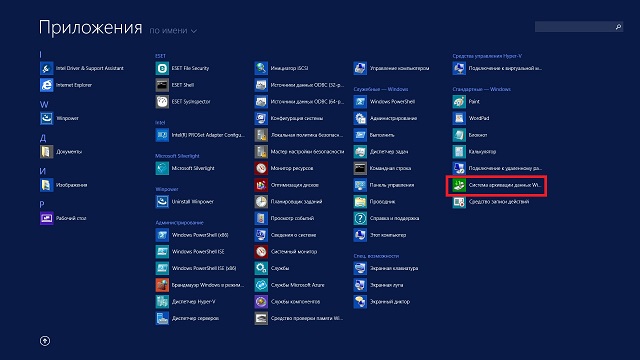
Не отбражается значок со ссылкой, хотя в списке установленных компонентов она присутствует.
Даже если создать папку Administrative Tools в C:\ProgramData\Microsoft\Windows\Start Menu\Programs\ с ярлыком Windows Server Backup по пути %windir%\system32\wbadmin.msc, то при запуске выходит ошибка.
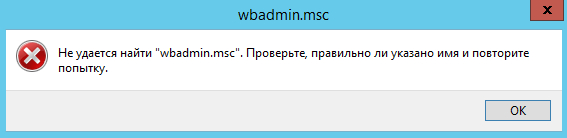
Или ошибка создания оснастки, при подключении к компоненту.
Помогает команда: Dism /online /Enable-Feature /FeatureName:WindowsServerBackupSnapin /All
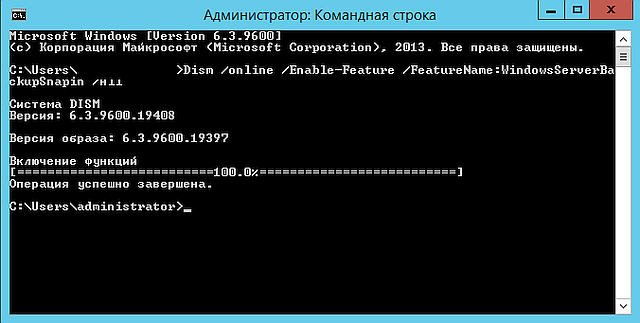
Значок в панели появляется.
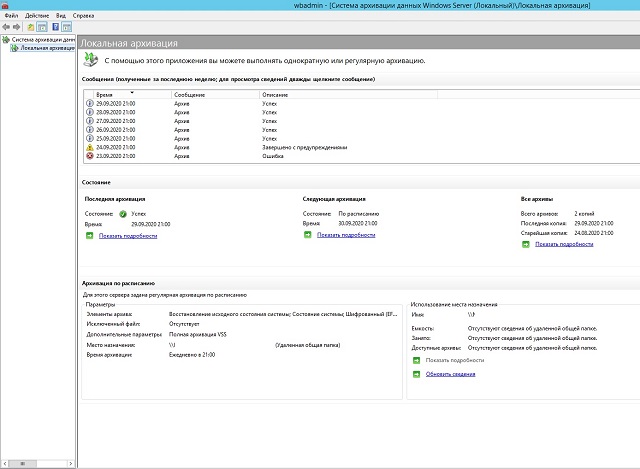
Служба работает.
Аналогичным способом можно реанимировать и другие службы, а не переустанавливать Windows, как это советуют в рунете.
При особо тяжелых случаях помогает команда: wbadmin delete catalog
I’ve encountered this a couple times now with new Server 2016 installations. Some time after configuring backups, I try to start the Server Backup UI and get this:
A fatal error occurred during a Windows Server Backup snap-in (Wbadmin.msc) operation.
Error details: The server threw an exception.
Close Wbadmin.msc and then restart it.

This is accompanied by this message in the Application event log:
Log Name: Application
Source: Application Error
Event ID: 1000
Task Category: (100)
Level: Error
Description: Faulting application name: wbengine.exe, version: 10.0.14393.2608, time stamp: 0x5bd13686
Faulting module name: wbengine.exe, version: 10.0.14393.2608, time stamp: 0x5bd13686
Exception code: 0xc0000005
Fault offset: 0x00000000001004f2
Faulting process id: 0x124
Faulting application start time: 0x01d4b4e717563e3e
Faulting application path: C:\Windows\system32\wbengine.exe
Faulting module path: C:\Windows\system32\wbengine.exe
Report Id: 4f99d060-8364-47b1-b336-9ce216e02717
This thread has an extensive discussion, but I’ve been able to solve this with a few simple steps:
1. Open Task Scheduler and navigate to Microsoft > Windows > Backup. Note the start time(s) of your backup job.
2. From an administrative command prompt, issue this command:
wbadmin delete catalog
3. Refresh the Task Scheduler view. The scheduled task should be gone.
4. Updated June 28, 2023 You may be able to use wbadmin restore catalog at this point to reset the catalog. See the documentation here, but note that as of this writing, the first example is missing a colon after the drive letter. The command, if your backups are on drive D:, would be wbadmin restore catalog -backupTarget:D:.
5. Open the UI (wbadmin.msc). If you just restored a catalog and the UI still won’t work, close the UI, run wbadmin delete catalog again, and re-open the UI. You should see the restored catalog entries. Create a new Backup Schedule. CAUTION If you use the same backup destination as before, this will probably overwrite your previous backups. Consider backing up to a new destination until you have sufficient history.
6. Confirm in Task Scheduler that the new job is there.
Microsoft documentation:
wbadmin delete catalog
wbadmin restore catalog
Windows Server backup is a useful tool for Windows Server users. However, some users report that they encounter the “Windows Server backup service missing” issue on Windows Server 2008/2012/2016. This post from MiniTool tells you how to fix the issue.
For many Windows Server users, Windows Server Backup (WSB) is a useful tool for their data protection, as WSB provides backup and recovery options for Windows Server environments. You can use this feature to backup the full server, specific files, system state, etc. in Windows Server 2008, 2012, or 2016.
However, this feature can sometimes be so annoying that you receive the “Windows Server backup service missing” or “Windows Server backup service not showing” error messages. Next, let’s see how to get rid of the issue.
How to Fix “Windows Server Backup Service Missing”
There are 2 ways for you to fix the “Windows Server backup service missing” issue.
Way 1: Install Windows Server Backup manually
First, you can try to install Windows Server backup manually. Here is how to do that:
Step 1. Click the taskbar to open Server Manager. Then, go to Manage > Add roles and functionalities in the right Menu.
Step 2. In the Add Roles and Features Wizard, you will be asked to select installation type, server, roles, and features.
Step 3. Select them and check Windows Server Backup and click Next in the Features tab.
Step 4. Click the Yes and Install button to start installing Windows Server Backup.
Then you can close this window to do other things when Windows Server Backup is being installed in the background. You can check if the installation is complete by clicking the Notifications Center icon.
Way 2. Install Windows Server Backup service – Network Load Balancing (NLB)
Before installing the Windows Server Backup service – Network Load Balancing (NLB), you need to remove Windows Server Backup first. Then, install both features in the Server Manager. You can follow the steps below.
Step 1. In the Server Manager, select Manage and Remove Roles and Features.
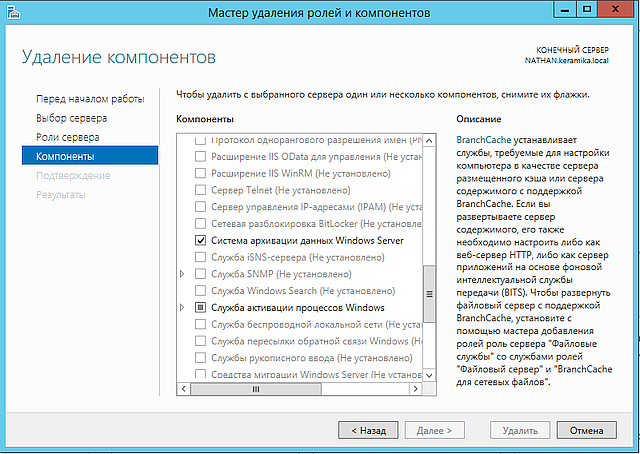
Step 2. Then, it will open Remove Roles and Features Wizard. Click Next until you see the Features tab, uncheck Windows Server Backup, and click Remove.
Step 3. Wait for the installation process to complete.
Step 4. After you successfully remove Windows Server Backup, open the Add Roles and Features Wizard again and check both Windows Server Backup and Network Load Balancing in the Features tab.
Step 5. Click Next and Install to start the installation process.
How to install WSB and NLB using Powershell:
If you want to install Windows Server Backup service and NLB in Powershell, you can follow the steps below:
1. Search Powershell in the Start menu and select Run as administrator.
2. In the Windows Powershell window, type the following commands and hit Enter to run them.
- Uninstall – WindowsFeature Windows-Server-Backup – Remove
- Install – WindowsFeature NLB
- Install – Windows Feature Windows-Server-Backup
After that, you should be able to use Windows Server Backup to create a custom backup or full server backup.
How to Stop Windows Server Backup Service
You can also try to stop the Windows Server backup service. There are also 2 ways for you.
Solution 1. Stop Windows Server Backup via Server Manager
Step 1. Click Start in the lower-left corner of the computer. Type Server Manager in the search box and then open it.
Step 2. Click Manage and Remove Roles and Features subsequently.
Step 3. Click Next to select a server you want to remove roles and features.
Step 4. Uncheck the Windows Server Backup option box. Then press Next.
Step 5. Click Remove to turn off the Windows Server Backup service.
Solution 2. Stop Windows Server Backup service via Command Prompt
If you prefer to use the command line to stop any backups that have already started, you can follow these steps:
Step 1. Sign in to the computer as an administrator. Press Windows Key + X. Then choose Command Prompt (Admin).
Step 2. Type the command: wbadmin stop job and then press Enter.
Step 3. If there is a backup running, select Y to stop it.
Now, you may successfully stop the Windows backup service in server 2012, you don’t need to worry that the backup software will affect the use of your computer or it backs up when you don’t need it.
Windows Server Backup Alternative
After stopping the Windows Server backup service, you can try the Windows Server backup alternative. As to back up Windows Server, the free Windows Server Backup alternative – MiniTool ShadowMaker is competent. It is a piece of user-friendly and professional backup software, providing an all-in-one backup and recovery solution. It supports Windows Server 2008/2012/2016/2019/2022.
MiniTool ShadowMaker provides data protection services and disaster recovery solutions for PCs, Servers, and Workstations. It is designed to back up the operating system, disks, partitions, files, and folders.
Besides the Backup feature, it is a clone tool, allowing you to clone OS to SSD without data loss, and is a piece of file sync software.
Now, we will show you how to use the Windows Server Backup alternative – MiniTool ShadowMaker to back up Windows Server.
Step 1. Download it from the following button.
MiniTool ShadowMaker TrialClick to Download100%Clean & Safe
Step 2. Install and launch it.
Step 3. Then click Keep Trial.
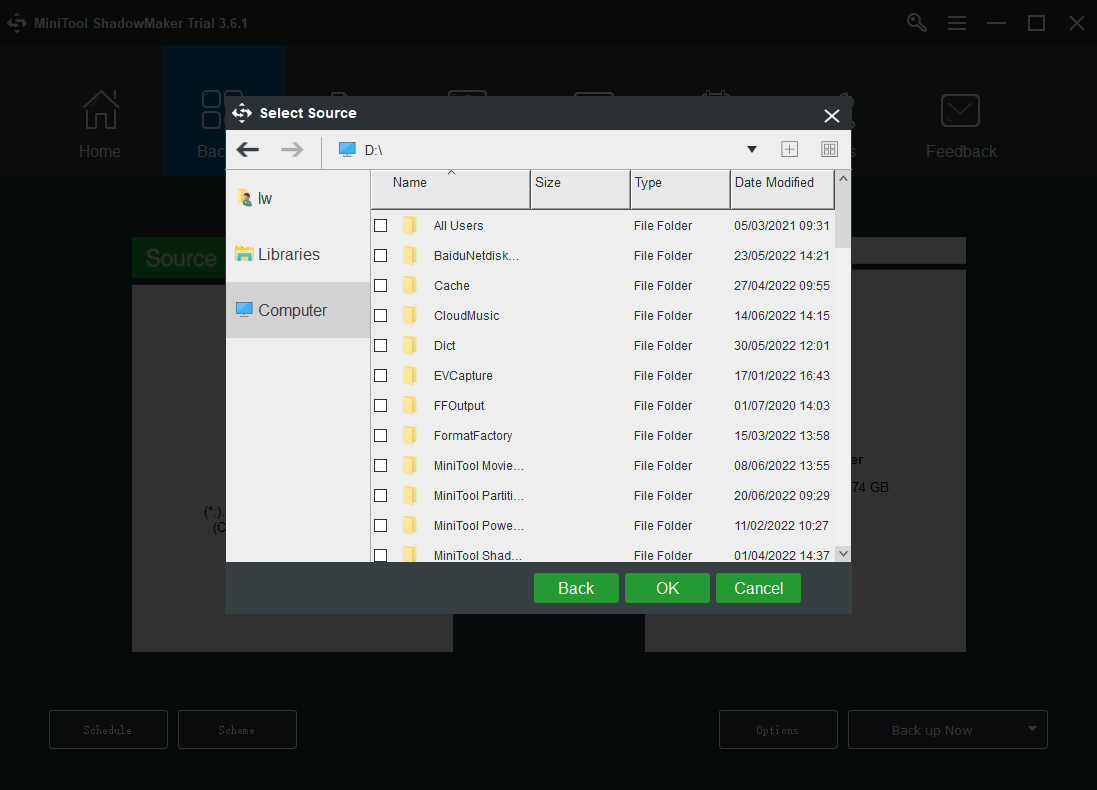
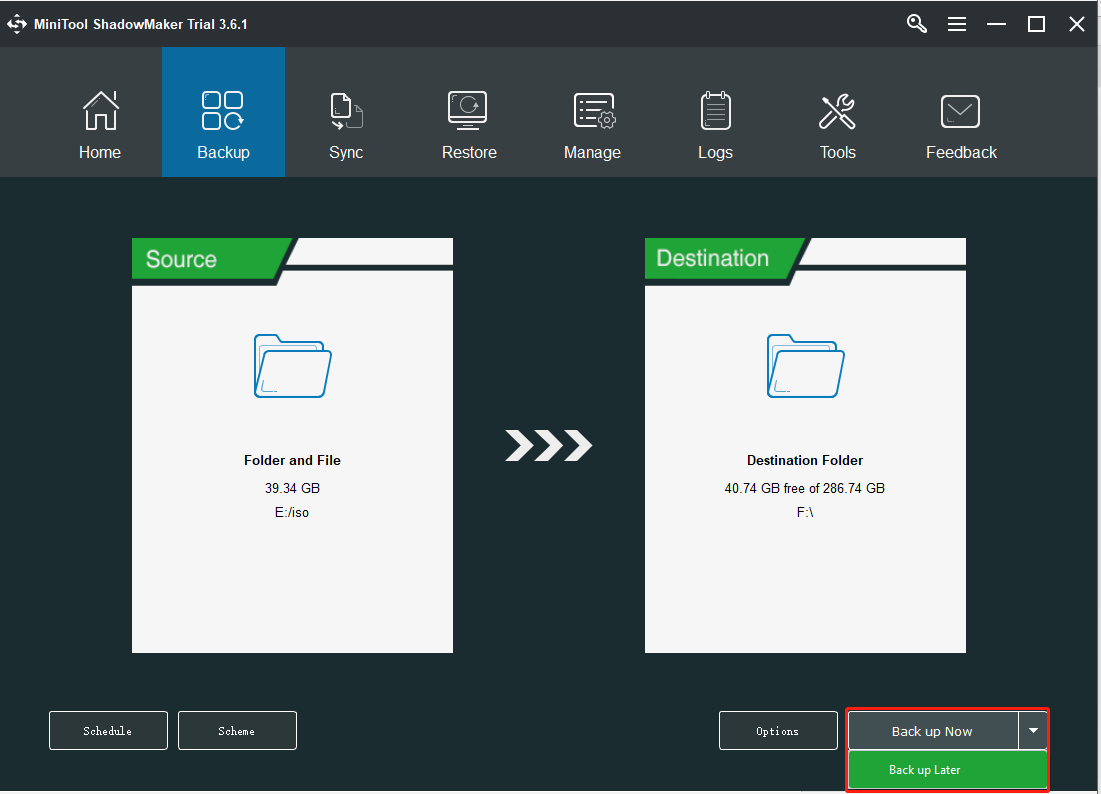
Step 4. After entering its main interface, go to the Backup page. MiniTool ShadowMaker chooses the operating system as the backup source by default. If you want to change it, click the Sourcemodule to continue.
Step 5. Then click Destination to choose a target disk to save the backup image.
Step 6. Then click Back up Now to start the Windows Server backup process. Or, you can click Back up Later to delay the backup task. Then, you can find the task on the Manage page.
After that, you have performed a Windows Server backup. If you want to restore the system image, you can go to the Restore page and follow the on-screen wizard to continue. To get more details, refer to this post – Restore System Image from External Hard Drive in Windows 10/8/7.
In addition, MiniTool ShadowMaker also enables you to create an Automatic Backup and it offers three different backup schemes.
How to Perform Server Backup with Windows Server Backup?
Here, we will show you the step-by-step guide on using Windows Server Backup.
Step 1. Press the Windows + R keys together to open the Run dialogue box.
Step 2. Type wbadmin.msc in the box and click OK to continue.
Step 3. In the pop-up window, choose Backup Once Wizard on the right panel to continue.
Step 4. Then choose Backup options. Here, you need to choose Different Options and click Next.
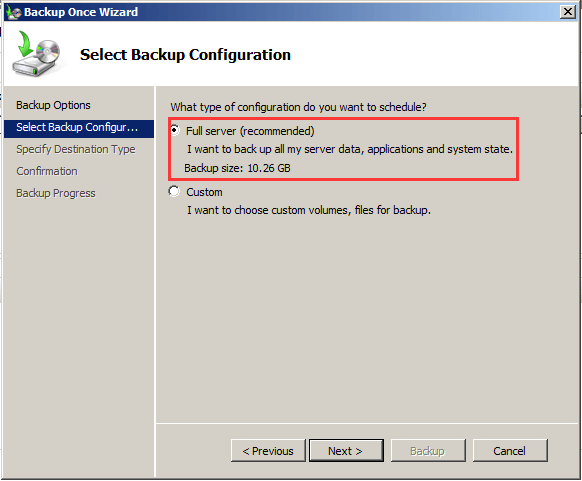
Step 5. Select Backup Configuration. The options include Full Server: back up all Server data, applications and system state and Custom: choose custom volumes, files for backup. It is recommended to choose Full Server backup. Then click Next.
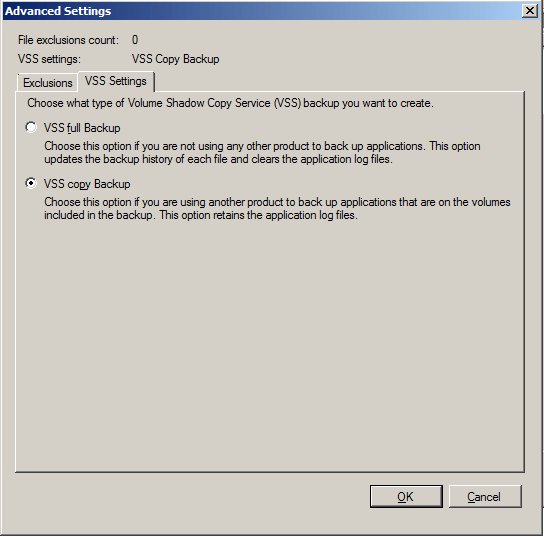
Please note if you choose Custom, you can choose what type of Volume Shadow Copy Service backup you want to create.
Step 6. Then choose a destination type to save the backups. You can save it to a local disk or a remote shared drive. Then click Next. If you choose a remote shared folder, you need to enter the shared folder address.
Step 7. If you choose a local drive to save the backup, next, you need to specify which volume to choose. Then click Next.
Step 8. After selecting the backup source and destination, you need to confirm the backup settings. Then click Backup to start Windows Server backup.
Once all steps are finished, Windows Server Backup software will start to back up the system and you may need to wait for a while for the process to be completed.
In the above part, we have shown how to back up Windows Server with these two pieces of Windows Server backup software. There is no doubt that there are some differences between them. So, in the following section, we will show some of the differences.
Similarities:
- Windows Server Backup and MiniTool ShadowMaker can backup the Server, restore backup images, and create a scheduled backup.
- Both of them can save image files to shared folders.
Differences:
- MiniTool ShadowMaker enables you to back up images to a USB flash drive. Windows Server Backup can’t do that.
- Windows Server Backup only can create a full backup, while MiniTool ShadowMaker provides three backup schemes, including full backup, incremental backup, and differential backup.
- Windows Server Backup can’t encrypt backup images, yet MiniTool ShadowMaker does that.
- MiniTool ShadowMaker provides more features, such as Sync, Media Builder, Disk Clone, Universal Restore, Backup Compression, etc.
So, MiniTool ShadowMaker would provide you with more powerful features. Download it and have a try.
Bottom Line
Have you encountered the error – Windows Server backup service missing? How to fix the issue on your PC? After reading this post, you know what you should do – try some ways to get rid of the error and try the Windows Server backup alternative – MiniTool ShadowMaker. Besides, some related information is introduced here.
If you have any other solutions that are proven to be useful to fix the issue on your computer, let us know by leaving a comment below. Thanks a lot.
Many users complain about the Windows Server Backup schedule not running on Server 2012/2016/2019/2022. Why is Windows Server Backup not running as schedule task? How do we fix the problem? Let’s explore the answers together with MiniTool Partition Wizard.
Windows Server Backup is a built-in backup tool that allows users to back up and restore the Windows Server system to an earlier date with the system image backup. It can schedule backups for system states, selected volumes, and specific files/folders. However, lots of users encounter the Windows Server Backup schedule not working issue.
Windows Server Backup not running as schedule task. Hello Spice Members, we have Windows Server 2019, which also has a couple of shared folders. I am using Windows Server Backup to backup those folders to an external drive. I can run the backup manually with no issues. I have scheduled the backup to run every night, but the schedule does not start.https://community.spiceworks.com/topic/1156142-windows-backup-not-running-as-schedule-task
Possible Causes of Windows Server Backup Schedule Not Running
Why is Windows Server Backup not running on schedule? After analyzing extensive user reports, we find the issue can be triggered by different possible reasons. The main reason is that the destination backup drive/folder doesn’t have enough permission to write data.
Besides, if relevant services like Windows Server Backup service or Volume Shadow Copy services are not running, you will encounter the Windows Server Backup schedule not working issue too.
How to Fix Windows Server Backup Schedule Not Running
So, how to fix it if Windows Server Backup failed to schedule tasks? There are 4 simple methods to fix the problem.
# 1. Use a Better Alternative to Windows Server Backup
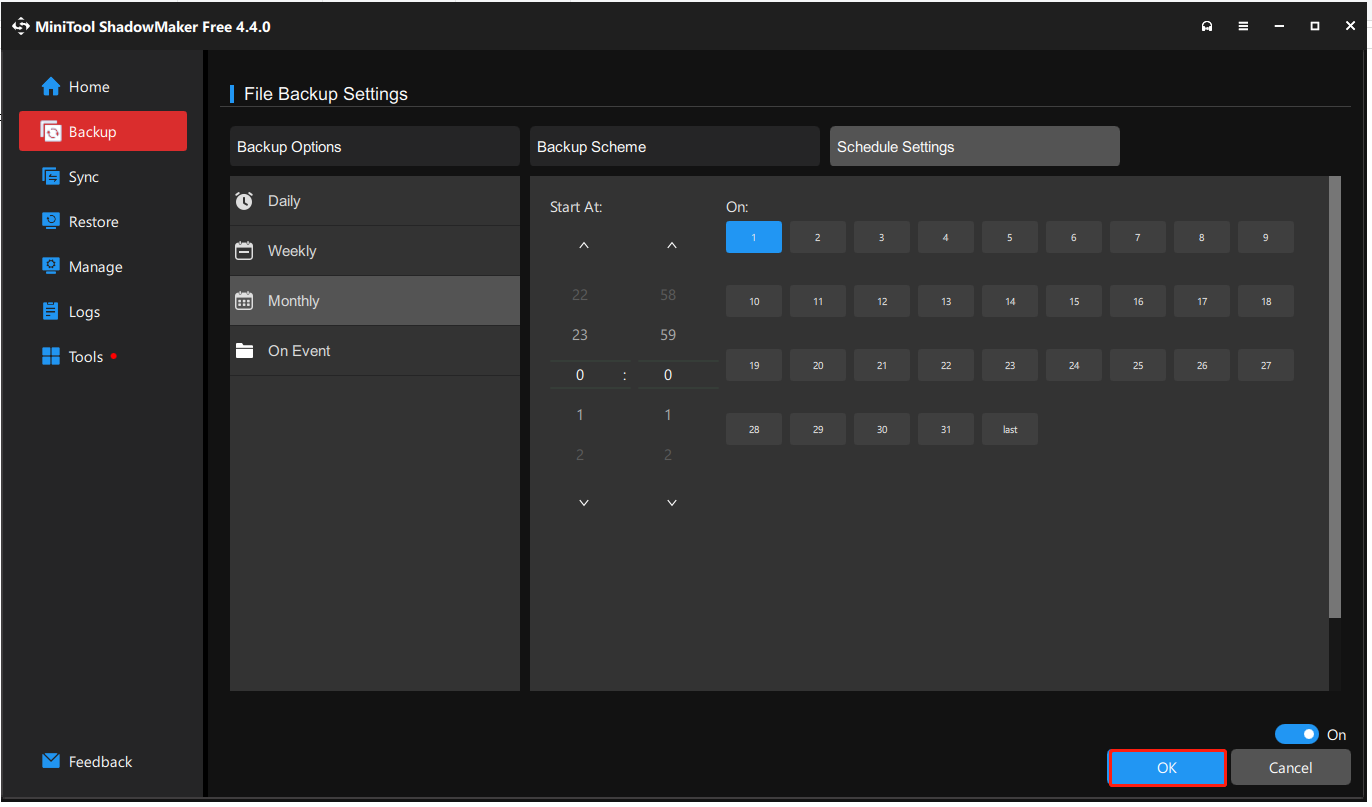
If it’s urgent for you to schedule a backup on Server 2012/2016/2019/2022, we highly recommend you use a better alternative to Windows Server Backup – MiniTool ShadowMaker. It’s a professional backup utility that can back up systems, hard disks, partitions, files/folders, and shared folders to your desired location. With this tool, you can schedule each backup to take place daily, weekly, monthly, or when you log out.
MiniTool ShadowMaker TrialClick to Download100%Clean & Safe
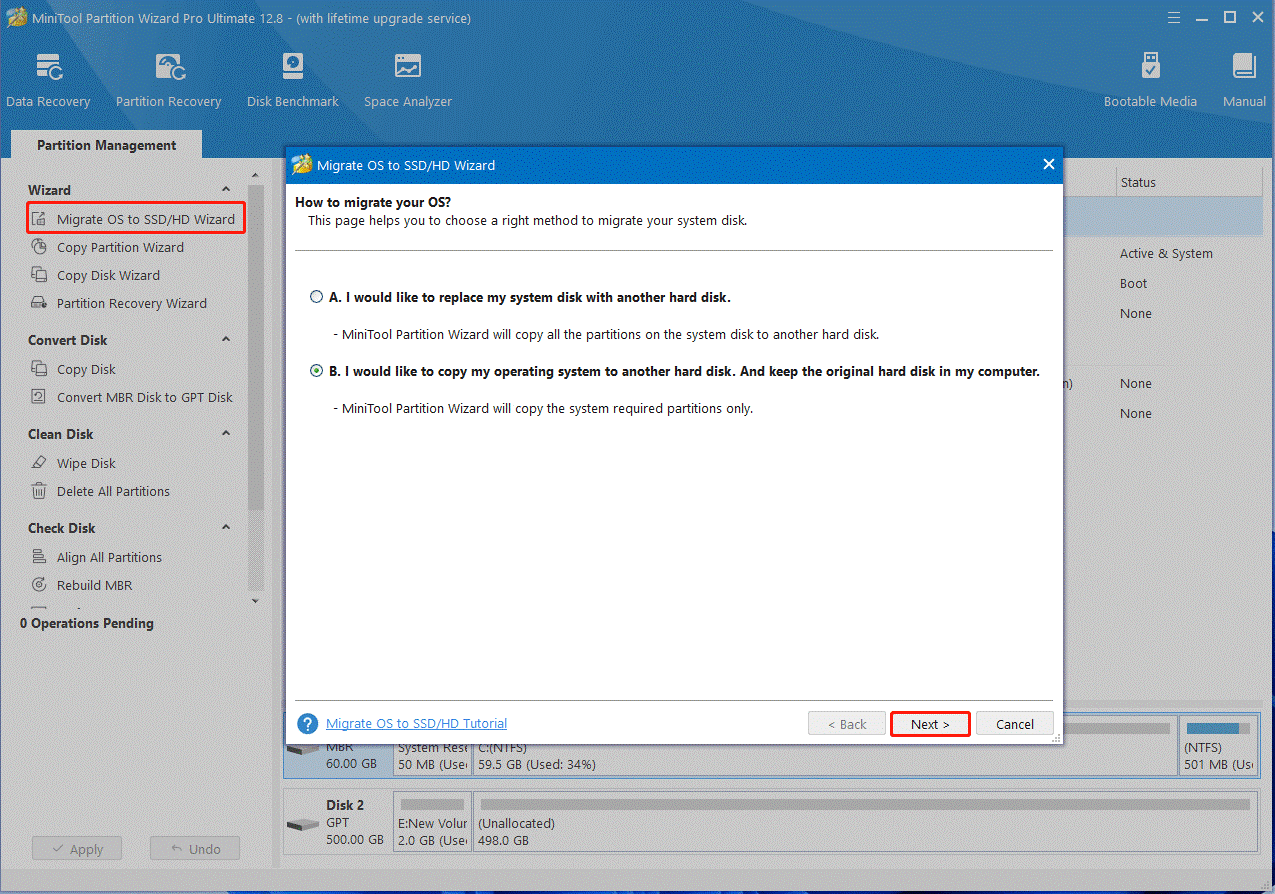
In addition, you can use MiniTool Partition Wizard. It’s also a disk backup program that can clone hard drive, migrate Windows OS to SSD/HDD, and copy partitions on Windows. Moreover, it can recover lost data, convert MBR to GPT without data loss, extend/resize partitions, rebuild MBR, etc. If you have these needs, MiniTool Partition Wizard is worth using.
MiniTool Partition Wizard DemoClick to Download100%Clean & Safe
# 2. Restart the Volume Shadow Copy Service
You need to make sure related services are running properly, such as the Windows Server Backup service and Volume Shadow Copy service. Otherwise, you may encounter the Windows Server Backup not running on schedule issue. Follow the guide below to restart the services.
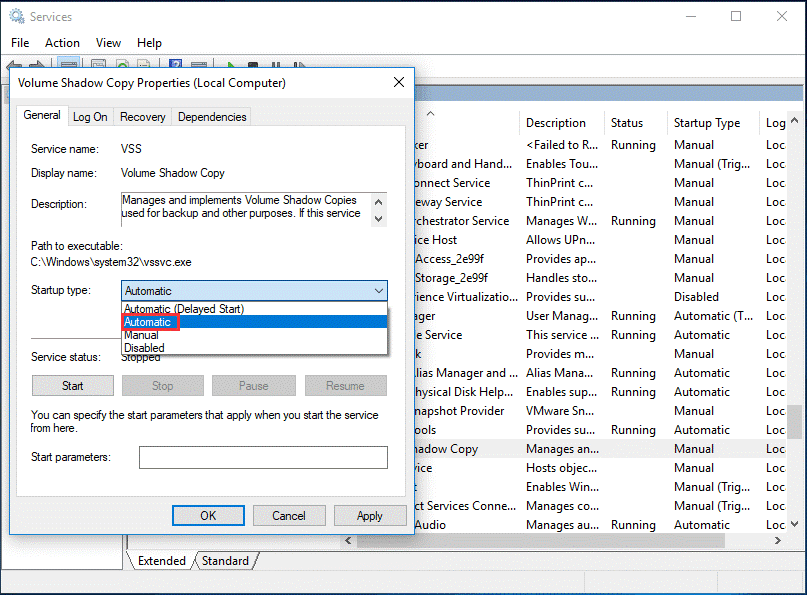
Step 1. Press the Win + R keys to open the Run dialog box, and then type services.msc in it and press Enter.
Step 2. Scroll down the list of services to the Volume Shadow Copy service, right-click it, and select Properties.
Step 3. Select Automatic from the Startup type menu and click on Start.
Step 4. Click on Apply > OK to save the change. Then you can repeat the same procedure for the Windows Server Backup service.
# 3. Grant Enough Access Permission for the Target Location
If there is not enough permission to write data on the target location, you may encounter the Windows Server Backup not visible in schedule task issue. Here you can try granting full control of the target folder.
Step 1. Right-click the destination drive or folder and select Properties.
Step 2. Navigate to the Security tab and click on Edit.
Step 3. Select your user name under Group or user names, and select the Full Control checkbox under Allow.
Step 4. Click on Apply > OK to save the change.
# 4. Schedule Backups Using the WBAdmin Command
WBAdmin is a command line tool that can back up and restart systems, volumes, files, and folders on Windows Server 2012/2016/2019/2022. If you are still vexed by the Windows Server Backup failed to schedule tasks issue, you can try using this command.
Step 1. Type cmd in the Search box, and then right-click the Command Prompt window and select Run as administrator. Then click on Yes in the UAC window.
Step 2. Type “Wbadmin/?” in the pop-up window and press Enter to list all the WBAdmin commands.
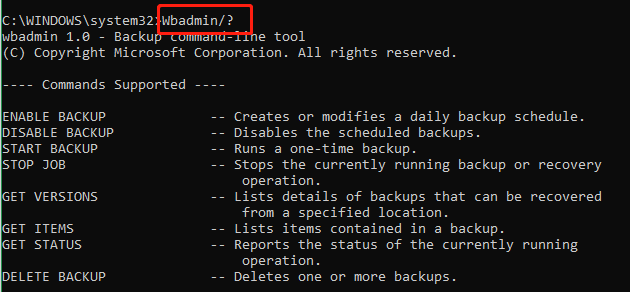
Step 3. If you want to create a schedule daily backup, you can try running the WBAdmin command below. Here you need to replace E with the target drive.
wbadmin enable backup -addtarget:E: -schedule:01:30 -allcritical -systemstate -vssfull
If you want to create a system state backup, use the “Wbadmin start systemstatebackup –backuptarget:[backup location] [-quiet]” command. For example, if you want to create a system backup to E drive, run WBAdmin start systemstatebackup –backuptarget: E: -quiet.
Now, here comes the end of this post. Have you other fixes to Windows Server Backup not visible in schedule task? Please share them with us in the following comment area.