
Не удается войти в OneDrive
Если вы не можете войти в приложение синхронизации OneDrive или приложение синхронизации сообщает, OneDrive не подключено, выполните следующие действия, чтобы снова войти в систему.
Не удается войти в OneDrive
Если вы видите серый значок OneDrive со строкой, это означает, что вы не вошли в систему.
-
Выберите значок OneDrive, который неактивен или содержит строку через него.
-
На экране «Настройка OneDrive» введите адрес электронной почты и пароль.
Примечания:
-
Если вы забыли имя пользователя или пароль или не можете войти в microsoft личная учетная запись, используйте вспомогательное средство входа в учетную запись Майкрософт. Вспомогательное средство входа
-
Если вам не удается войти в рабочую или учебную учетную запись OneDrive, попробуйте сбросить пароль или обратитесь в ИТ-Администратор своей организации.
-
-
Если вы можете выполнить вход, но по-прежнему не можете подключиться к OneDrive, проверка, что брандмауэр вашего интернет-поставщика не блокирует OneDrive. Это можно сделать, используя мобильное устройство в качестве хот-точки. Кроме того, обратитесь к поставщику услуг Интернета и проверка они поддерживают доступ к продуктам и службам Microsoft 365.
OneDrive не подключен
Если отображается сообщение об ошибке о том, что OneDrive не подключен, может потребоваться перезапустить OneDrive.
-
Выберите Windows Start или macOS Finder и найдите OneDrive.
Совет: Если приложение OneDrive не установлено или его не удается найти, скачайте последнюю версию.Загружать
Дополнительные сведения
Проверьте состояние службы OneDrive.
Нужна дополнительная помощь?
Нужны дополнительные параметры?
Изучите преимущества подписки, просмотрите учебные курсы, узнайте, как защитить свое устройство и т. д.
Table of contents
- There was a problem connecting to OneDrive
- How to fix “There was a problem connecting to OneDrive” in Windows 10
- Fix 1: Disable your VPN or firewall
- Fix 2: Use your computer without a proxy
- Fix 3: Change the Internet properties settings
- Fix 4: Reset the network
- Fix 5: Use another cloud service
- Fix 6: Use a different user profile
- Fix 7: Reset the OneDrive app
- Fix 8: Reinstall OneDrive
- Conclusion
The cloud storage service market is very competitive right now. Different players are trying to outwit and outbid one another for users’ attention by releasing enticing packages, promotions and offers.
The traditional big players, such as Amazon, Google, and Microsoft, dominate the industry, which is no surprise given their huge infrastructure.
They also have the advantage of integrating their cloud solutions into popular software already used by billions of people around the globe.
Google Drive is the native option to sync users’ data across Android devices, while Microsoft OneDrive performs the same role on Windows 10.
By and large, Windows users who don’t want to use OneDrive simply ignore it or find a way to suppress the annoying prompts to use the service.
Recently, many who use OneDrive have been reporting the “There was a problem connecting to OneDrive” issue. This problem interrupts saving and syncing between the PC and the cloud.
In case you’re affected, this guide explains how to get rid of the annoying error and restore connectivity to OneDrive.
There was a problem connecting to OneDrive
This error may be encountered when accessing personal files saved to OneDrive. When you try to view your backed-up photos, videos, music, and other files, the error shows up with one of the following error messages:
- There was a problem connecting to OneDrive. Check your Internet connection, and then try again.
- There was a problem signing you in. There’s a problem with your account. To learn how to fix this problem, go to OneDrive.com and sign in. After you fix the problem, try again.
Many users follow the instructions and try to sign into OneDrive from a browser, but this doesn’t always help.
And since the point of cloud storage is seamless and integrated synchronization, sticking with the web version of OneDrive isn’t really a solution.
Some users reported that the error had started appearing after a system upgrade. This might be related to incompatible drivers.
However, if your network drivers are up to date and compatible with your current OS, you can try the solutions below. You should be able to find one that works for you.
How to fix “There was a problem connecting to OneDrive” in Windows 10
You can either work your way down the guide or jump to the fix you believe has the best chance of helping you.
However, before you start troubleshooting the issue, you should eliminate the possibility of malware causing the problem.
If other apps, and not just OneDrive, are also having issues, we recommend running a full system scan with Auslogics Anti-Malware.
After doing that, go ahead and try out these methods to solve the Windows 10 OneDrive error.
Fix 1: Disable your VPN or firewall
A firewall is an application that monitors inbound and outbound connections. It screens everything coming in or going out over the net to protect your computer against malware and online attacks.
If your firewall starts indiscriminately blocking legitimate connections, it can lead to connectivity issues.
When OneDrive gets blocked, it can cause the “There was a problem connecting to OneDrive” error to show up.
Your next steps depend on the type of firewall you’re using. If you use a standalone firewall, you can disable it temporarily and see if OneDrive starts working normally.
You may refer to the manufacturer’s instructions if you’re unsure how to turn your firewall off.
Some antivirus tools include an inbuilt firewall that restricts suspicious connections.
If the function is embedded in the primary anti-malware feature, you may have to turn off the entire AV and turn off its firewall component.
Finally, if you’re making do with the native Windows Defender Firewall tool in Windows 10, follow the steps below to turn it off temporarily.
Remember that switching off the firewall is only a short-term measure to allow troubleshooting. In all other instances, you should have at least one firewall active on your computer.
Here is what you should do:
- Open the Control Panel. To access it, type control into the Search menu and hit the Enter key.
- Select System & Security. Set the View by mode in the Control Panel to Category to show this option.
- On the next screen, select Windows Defender Firewall. Depending on your Windows edition, this option might be called Windows Firewall instead.
- Click the Turn Windows Defender Firewall on or off link on the left side of the next screen.
- Click Turn off Windows Defender Firewall (not recommended) under Private Network Settings.
- Click OK.
When you’ve disabled your firewall, try using OneDrive again and watch for error messages.
If you’re no longer getting interrupted by connectivity errors, you may want to switch to a firewall that doesn’t interfere with OneDrive connections.
Another tactic you can use is to whitelist OneDrive in your firewall. This way, OneDrive connections won’t be monitored, which will prevent possible restrictions.
Sometimes, you might fix the problem by turning off your VPN. Some VPNs conflict with native Microsoft apps on PCs; so, it might be better to do without them.
Research what VPN offers the best compatibility experience before you splash out the cash.
Related: Ultimate Guide: How to Fix WiFi Not Working With a VPN?
Fix 2: Use your computer without a proxy
Just like a VPN, your proxy settings can also interfere with your OneDrive connections.
Even though a proxy offers some important benefits, it might not be worth the hassle of always firefighting connection problems on your PC.
As a matter of fact, a proxy that amplifies rather than mitigates connection issues is probably not worth using.
If you’ve manually set up a proxy service, turn it off in Settings and check what effect it has on OneDrive:
- Open Settings and select Network & Internet.
- Click Proxy in the left-hand pane.
- Under Manual Proxy Setup, switch the Use a proxy server toggle to Off.
Are you able to sync your documents and photos to OneDrive now? You might want to discontinue using the proxy if this fixes your problem.
Otherwise, consult your proxy service provider for a permanent fix or use another proxy service that doesn’t conflict with OneDrive.
Related: How to Fix “There Is Something Wrong With the Proxy Server” Issue?
Fix 3: Change the Internet properties settings
Incorrect internet settings can also affect OneDrive. In particular, the Transport Layer Protocol (TLS) settings can be the difference between normal and impeded OneDrive connections.
You can try enabling to check if this is the case, you can try enabling TLS. First, open the Control Panel by searching for it using the Search menu and clicking the app in the results.
Once in the Control Panel, make sure the viewing mode is set to Category and select Network and Internet. On the next screen, select Internet Options.
This will open the Internet Properties window. You can jump to this point by typing “inetcpl.cpl” into the Run box and clicking OK.
In the Internet Properties window, switch to the Advanced tab to view various connection settings. Scroll down and check that the following options have ticks beside them:
- Use TLS 1.0
- Use TLS 1.1
- Use TLS 1.2
Click Apply and then OK to save the changes. Next, restart OneDrive and check whether it can now back up your stuff without any problems.
PRO TIP
Using outdated drivers can lead to various performance issues and even hardware failures. Auslogics Driver Updater provides a reliable solution by identifying and updating all your outdated drivers with just a few clicks. Ensure your device operates smoothly and efficiently with this essential tool.
Fix 4: Reset the network
The TLS and proxy settings are just two aspects of your PC’s network infrastructure.
If the “There was a problem connecting to OneDrive” error persists despite your troubleshooting efforts, a wider connection issue might be the problem, with the OneDrive error being just a symptom.
Here is one thing about Windows 10: When something works, it usually works pretty well. When something doesn’t work, it’s usually a lot of bother isolating the precise cause.
This applies in particular to network issues like this one. It can be so hard to pinpoint the exact origin of the problem.
That’s why resetting the network is a pretty good solution. By doing this, you restore all your connection settings to their default values.
This way, even if you can’t find the origin of the OneDrive issue, you’re likely to solve it anyway, especially if it’s related to a network glitch or the wrong setting, or if some connection settings have been changed by malware.
There are several steps involved in the network resetting process. The first step is to open an elevated Command Prompt window. The fastest way is by pressing the Windows Key + X keyboard combination and selecting Command Prompt (Admin).
If that option isn’t available there, simply type cmd into the Start menu and click Run as administrator under the app in the results. Don’t forget to click Yes if or when prompted by User Account Control.
Next, run a command to reset TCP/IP on your computer. Running the command below rebuilds two registry keys associated with your PC’s TCP/IP, and this way, the internal protocol is restored to its default settings:
int ip reset c:resetlog.txt
Don’t forget to press Enter after typing or pasting the command.
After this, run the winsock reset command below to reset the network adapter:
netsh winsock reset
You can reboot the network now, or you can go the whole way and also reset your hosts file.
The hosts file contains frequently used IP addresses and host names. It stores them for the system to use in converting host names to IP addresses and vice versa.
If your PC is having connection issues, and not just with OneDrive, resetting the hosts file can help resolve this. This is especially useful if the problem is triggered by malware changing certain network settings.
To restore the hosts file back to its default state, first, open a Notepad document. Type “notepad” into the Search menu and click Notepad in the results.
Next, paste the text below into the empty Notepad document:
# Copyright (c) 1993-2006 Microsoft Corp. # # This is a sample HOSTS file used by Microsoft TCP/IP for Windows. # # This file contains the mappings of IP addresses to host names. Each # entry should be kept on an individual line. The IP address should # be placed in the first column followed by the corresponding host name. # The IP address and the host name should be separated by at least one # space. # # Additionally, comments (such as these) may be inserted on individual # lines or following the machine name denoted by a ‘#’ symbol. # # For example: # # 102.54.94.97 rhino.acme.com # source server # 38.25.63.10 x.acme.com # x client host # localhost name resolution is handled within DNS itself. # 127.0.0.1 localhost # ::1 localhost
The text above is the contents of the default hosts file for Windows 10 and officially created by Microsoft.
Save the file. Click File in the top left corner and select “Save as”. In the File Name box, type “hosts” (without the quotes). Select Desktop as the save location and then click Save.
Next, navigate to C:\Windows\system32\drivers\etc using File Explorer. Alternatively, open Run with the Windows Key + R shortcut, type WinDir%\System32\Drivers\Etc and click OK to quickly jump to the location.
You’ll find the current hosts file there. Select the hosts file and either delete it or rename it to something else (such as “hosts.old”).
Switch to the desktop and copy the new hosts file you created. Paste it into the etc folder (i.e. C:\Windows\system32\drivers\etc).
You may be prompted to enter an administrator password to make changes to the folder. Click Continue.
Now reboot the machine and retry syncing your files to OneDrive.
Fix 5: Use another cloud service
Microsoft wants everyone to use its products. This is why the company installs many of them on Windows as default/native apps. OneDrive isn’t an exception.
Although there are a large number of popular cloud storage services around, many people are naturally drawn to OneDrive because of the way it is integrated with the Windows platform.
However, nothing stops you from giving another cloud storage service a try, be it a popular choice provided by Google or Amazon or something niche.
Either way, finding one that syncs your files seamlessly and doesn’t give you any headaches when backing up your data is important.
Related: Basic Principles of Cloud Data Storage Security
Fix 6: Use a different user profile
“There was a problem connecting to OneDrive” has become a ubiquitous problem affecting many users. One discovered workaround is creating a new user profile and using it instead of the old one:
- Right-click the Start menu and select Settings.
- Select Accounts.
- Choose Family & other users on the left-hand side.
- On the Your family screen, select Add someone else to this PC.
- Add a username under Who is going to use this PC? and then add a strong password and a password hint.
- Click Next to finish the process.
Unlike some other Microsoft apps, like Microsoft Store, OneDrive allows you to use a non-Microsoft account if you want to be on a paid subscription.
However, the new account needs administrator permissions. Follow the steps below to make it an admin account:
- Repeat steps 1-3 and select the newly added account.
- Click Change account type and select Administrator.
Now exit Settings and sign out of your current account. Log in with the new account and check whether OneDrive is working now.
Fix 7: Reset the OneDrive app
When a native Windows app, like Microsoft Store, Photos, Maps, or OneDrive, isn’t working, resetting the app may prove to be the best option.
In the case of OneDrive, doing this can help resolve the “There was a problem connecting to OneDrive” error in Windows 10.
Here’s how to reset the OneDrive app:
- Open Run with
Windows Key + R. - Paste localappdata%\Microsoft\OneDrive\onedrive.exe /reset into the Run box and click OK. This will reset the app.
- To restart the app, search for it using the Search menu and launch it. Another way is to run localappdata%\Microsoft\OneDrive\onedrive.exe in Run.
After the reset, OneDrive starts afresh, and this hopefully means the error won’t appear again. If OneDrive still isn’t functioning correctly, try the final fix below.
Fix 8: Reinstall OneDrive
Reinstalling OneDrive is the final fix for the “There was a problem connecting to OneDrive” error. Here’s how to do it:
- Open the Control Panel and go to Programs & Features.
- Under Uninstall a program, locate OneDrive.
- Click OneDrive and select Uninstall. Follow the uninstallation wizard to remove the app.
- Now open your browser and go to the official OneDrive page.
- Install the app and launch it on your computer.
Sign in with your OneDrive account and try backing up or downloading your data. Hopefully, the connection error is gone.
Conclusion
We’re hopeful that the fixes in this guide have helped you to fix the “There was a problem connecting to OneDrive” error on Windows 10 and you have regained access to your OneDrive data.
You can always use OneDrive on the web if the Windows integration isn’t working properly. This is a good workaround to solve the Windows 10 OneDrive error when logging in.
Additionally, don’t forget to update your network drivers since an outdated driver will contribute to connection issues.
You can use Auslogics Driver Updater for your quick and automatic driver updates.
Download Auslogics Driver Updater
Prevent hardware errors and ensure problem-free device operation with this advanced tool that detects outdated drivers and safely gets them updated.
| Workable Solutions | Step-by-step Troubleshooting |
|---|---|
| 1. Why OneDrive Unable to Connect? | OneDrive (owned by Microsoft) is among the best cloud storage services…Full steps |
| 2. How to Fix the «One Drive Isn’t Connected» Issue |
We provide 6 effective methods for you to solve this issue, click here to have a try…Full steps |
| 3. Try a Best Alternative- EaseUS Todo Backup | We have an easier alternative for you to avoid the common errors associated with OneDrive data backup….Full steps |
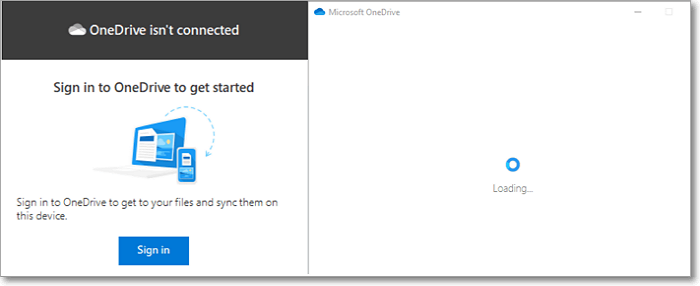
You’ve recently noticed something strange with your OneDrive desktop client when you try to log into your local profile. Although the OneDrive icon still looks grey and unsynced, you encounter the «OneDrive Isn’t Connected» warning message when you attempt to sign in.
Moreover, the application doesn’t display any prompt to sign in! This problem is prevalent and can affect almost anyone. What’s the best way to fix such a problem if you encounter it? This article outlines some of the quickest ways to fix the «OneDrive Isn’t Connected» problem and sign in. Read on!
Why OneDrive Unable to Connect?
OneDrive (owned by Microsoft) is among the best cloud storage services. It enables us to safely store all our important files on the cloud and retrieve them anywhere. Despite its superior usability and excellent service provision, you may sometimes encounter errors when signing into your account.
Instead, you may fail to sign in and receive the message: «OneDrive Isn’t Connected.» This happens because of many reasons. Some of the common reasons that may hinder you from accessing your OneDrive account include:
- Using an outdated version of the OneDrive program.
- Poor network connection.
- An update error in your operating system.
- A connection error between your Microsoft account and the operating system.
Although common, it’s straightforward to fix these errors and conveniently access your OneDrive account on Microsoft. We’ll discuss ways to fix these errors shortly.
Start a live chat with an EaseUS Expert to tailor an enterprise backup solution specific to your requirements. We are here to assist you with the following as well:
- Commence a free trial
- Obtain a quotation
- Arrange a free demonstration
How to Fix the «One Drive Isn’t Connected» Issue
Failing to sign in to your OneDrive account is very annoying, especially if you want to access some files urgently. Some of the quickest ways to fix OneDrive issues include the following.
1. Check the internet connection
2. Restart OneDrive client
3. Update OneDrive manually
4. Disable security features
5. Disable proxy settings
6. Reset OneDrive application
Method 1. Check the internet connection
You may fail to access your OneDrive account because of a poor network connection on your device. This could range from an unstable network to a lack of any connection. You can solve the network connection issue through the following steps:
1. Confirm whether there’s any disconnection with your power supply. If using a wireless connection, ensure your router is working well. You can also try restarting your router to establish a reconnection.
2. Open a few web pages to test if your network works for other sites. If other web pages load without problems, your network connection is okay.
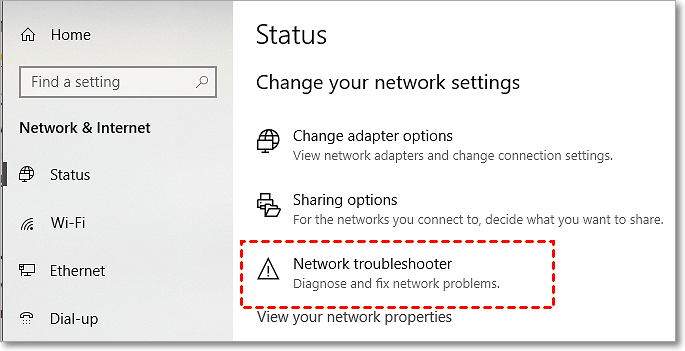
3. If you detect a problem on your network, go to Settings > Network & Internet > Network troubleshooter. This helps you diagnose and fix the network issue.
Method 2. Restart OneDrive client
An error in the OneDrive boot process could prevent you from properly signing in. The best way to address this error in the boot process is to restart your OneDrive client. You can achieve this in two basic steps:
1. Click on the OneDrive icon to the lower right of your screen. More > Close OneDrive.
2. Click on the Start menu and type «OneDrive» on the search bar. This enables you to restart the OneDrive program on your computer.
Method 3. Update OneDrive manually
OneDrive always updates automatically alongside other Microsoft programs. However, you might be using an outdated version of the program because you disabled automatic updates on your device. To address this issue, you’ll need to update OneDrive manually.
Apply the steps below to manual update this program:
1. Visit the OneDrive website. Click on the «Download» link to get the latest software version for your computer.
2. Once the download process is complete, go to the Start menu and type «OneDrive» on the search bar. Click on the result that displays first to install the newer version.
Method 4. Disable security features
Windows security features such as firewalls and antivirus could prevent the OneDrive program from functioning correctly (in some cases). To address this issue, you’ll need to temporarily disable these features and note if there’s any change.
# Steps to Disable Antivirus
1. Go to Windows Security > Virus and threat protection>Manage settings.
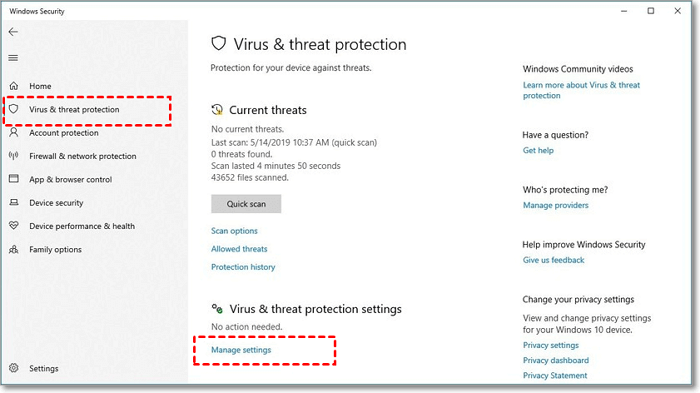
2. Turn off the switch under «Real-time protection.» This disables the antivirus software.

# Steps to Disable Firewall
1. Go to Windows Security > Firewall and network protection > Private network.
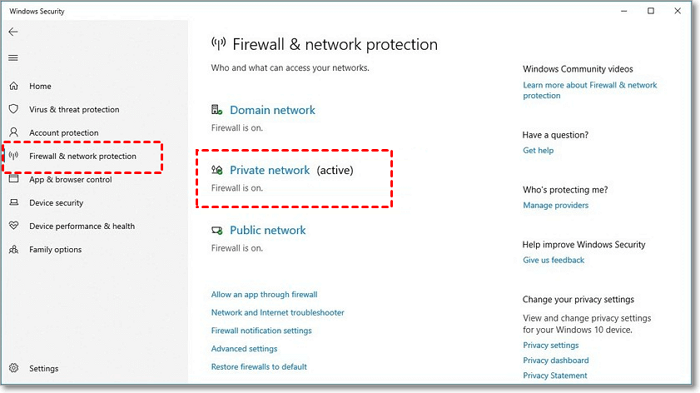
2. Turn off the switch under «Windows Defender Firewall.»
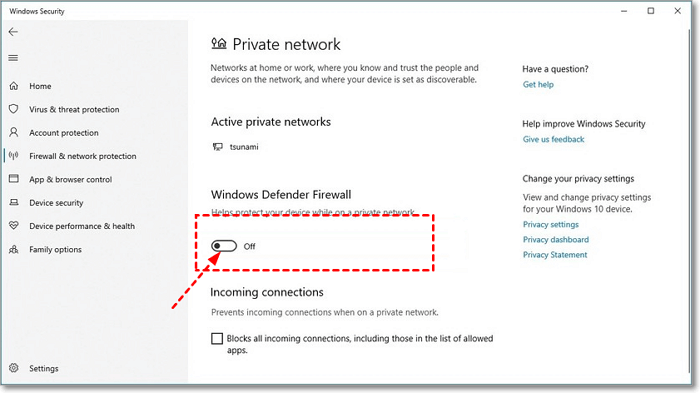
Having disabled the two security features, you can restart the OneDrive program to check if it works properly.
Method 5. Disable proxy settings
Another reason you could be failing to access your OneDrive account is that you’ve enabled proxy authentication. OneDrive doesn’t support this feature. To check whether this could be the problem, you can temporarily disable proxy settings. You can achieve this in the following steps.
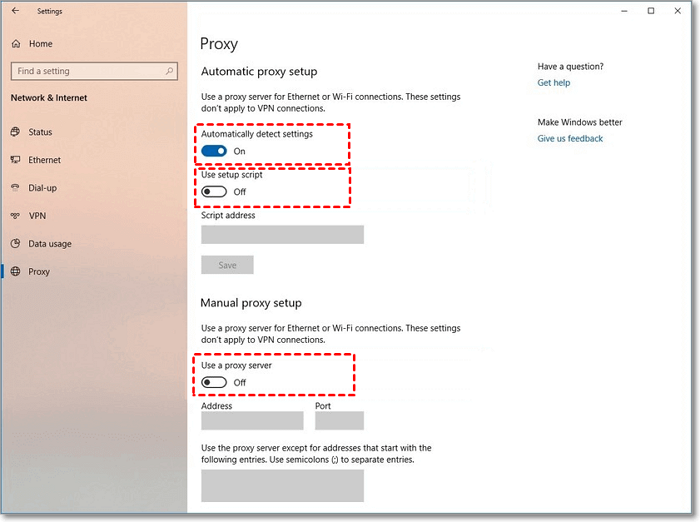
1. Go to Settings > Network & Internet> Proxy
2. Under «Automatic proxy setup,» make the following settings:
- Turn on «Automatically detect settings.»
- Turn off «Use setup script.»
3. Under «Manual proxy setup,» turn off «Use proxy server switch.»
Method 6. Reset OneDrive application
Resetting your OneDrive application helps fix multiple drive errors (including the «OneDrive Isn’t Connected» issue). You can apply this method in the following steps:
1. Click on the Start menu and search for «Command prompt.»
2. Right-click on the application in the search result and select «Run as administrator.»
3. Paste the command below and press the Enter key.
%localappdata%\Microsoft\OneDrive\onedrive.exe /reset

4. Restart OneDrive to reconnect your account.
Try a Best Alternative- EaseUS Todo Backup
We have an easier alternative for you to avoid the common errors associated with OneDrive data backup! You should try out EaseUS Todo Backup to store your important data in the cloud.
This third-party software tool is more convenient and secure than Microsoft’s OneDrive. EaseUS Todo Backup tool has powerful abilities to create backups of the disk, partition, OS, and files. The software tool allows you to save backups to local drives, Cloud and NAS.
EaseUS Todo Backup is future-proof since it allows you to save and retrieve large chunks of data from cloud storage. First, it’s very secure, ensuring data safety from malware attacks. Second, cloud backup is quite flexible since it allows you to retrieve data backups anytime. Third, the cloud storage feature is cost-effective since it offers up to 250GB of free storage. This is unlike OneDrive, which offers only 15GB.
Other Features of EaseUS Todo Backup Software
- Simple backup management
EaseUS Todo Backup allows you to merge, split, delete, or compress backups to save on disk space. And it allows you to schedule daily, weekly, or monthly backup plans.
- Enhanced backup efficiency
You’ll only need to back up changed data during differential and incremental backups during differential and incremental backups.
- Bootable backup feature
Bootable backup creates the system backup on a device to boot your system and restore the data. With the bootable backup feature, you can recover lost data in the wake of disasters like a malware attack, system crash or hardware corruption.
- Disk and partition clone
EaseUS Todo Backup allows you to create a new identical hard drive to the original disk.
- Secured password-protect backups
This backup tool doubles data protection by encrypting all backup files and preventing illegal access.
If you don’t know how to backup to the Cloud, you can follow the tutorial below:
Step 1. To initiate a backup, click the Select backup contents option.

Step 2. There are four data backup categories, File, Disk, OS, and Mail, click File.

Step 3. On the left, both local and network files will be shown. You may extend the directory to pick the backup files.

Step 4. Follow the on-screen instructions and choose a location to store the backup.

Click Options to encrypt the backup with a password in Backup Options, then click Backup Scheme to specify the backup schedule and start the backup at a certain event. There are also other additional choices you may choose to tailor the backup process to your requirements.

Step 5. The backup may be stored on a local disk, EaseUS’ online service, or NAS.

Step 6. EaseUS Todo Backup enables customers to back up data to a third-party cloud drive as well as its own cloud drive.
If you want to back up data to a cloud drive provided by a third party, choose Local Drive, scroll down to add Cloud Device, and then add and log in to your account.

You can also choose the EaseUS cloud drive. Sign up for an EaseUS Account, then click EaseUS Cloud and log in.

Step 7. Click Backup Now to begin the backup process. The backup job will be presented as a card on the left side of the panel after it has been finished. Right-click the backup job to handle it further.

People Also Ask
1. How do I fix OneDrive sync problems?
- Reestablish the sync.
- Compress files and folders.
- Choose the folders you want to sync.
- Manually connect your OneDrive account to Windows.
- Update Windows.
- Switch off the “Office upload” feature.
- Manage your storage.
- Unlink OneDrive from your system.
- Manually reset the OneDrive program.
2. Will I lose files if I uninstall OneDrive?
No. You won’t lose any files by uninstalling OneDrive on your computer. Since OneDrive saves these files on the cloud, you can easily access them by signing into your OneDrive account from any other device.
Conclusion
Most OneDrive errors are easy to solve. To sign into this backup tool following a failed attempt, you can methods listed above. Any of these solutions can help address your OneDrive issue. To avoid the common errors associated with OneDrive, we recommend using a third-party tool known as EaseUS Todo Backup. Primarily, it grants you access to a 250GB free cloud storage space for your data. To get started EaseUS Todo Backup today.
,
This troubleshooting guide contains instructions to resolve the following problem in Windows 10: OneDrive won’t start in any way and without displaying any error. The issue can occur with OneDrive for personal use, as well as OneDrive for Business, for no apparent reason, and it usually can’t be fixed by uninstalling and reinstalling the OneDrive app.
This tutorial contains instructions to solve the following problems with OneDrive:
- OneDrive Doesn’t Start (OneDrive Doesn’t Open)
- OneDrive Doesn’t Synchronize Files.
- You Cannot Add your Account in OneDrive.
How to FIX: OneDrive Doesn’t Open or Doesn’t Synchronize files in Windows 10.
Method 1. Enable the OneDrive App through Registry or Policy.
A. Enable OneDrive through Registry.
1. Open the Registry Editor and navigate to this key: *
- HKEY_LOCAL_MACHINE\Software\Policies\Microsoft\Windows\OneDrive
* Note: If the key doesn’t exit, try to enable OneDrive through policy (if you own Windows 10 Pro), or skip to next method.
2. At the left pane, delete the DisableFileSyncNGSC value. or set the value data to 0.

3. Restart your PC and try to open OneDrive.
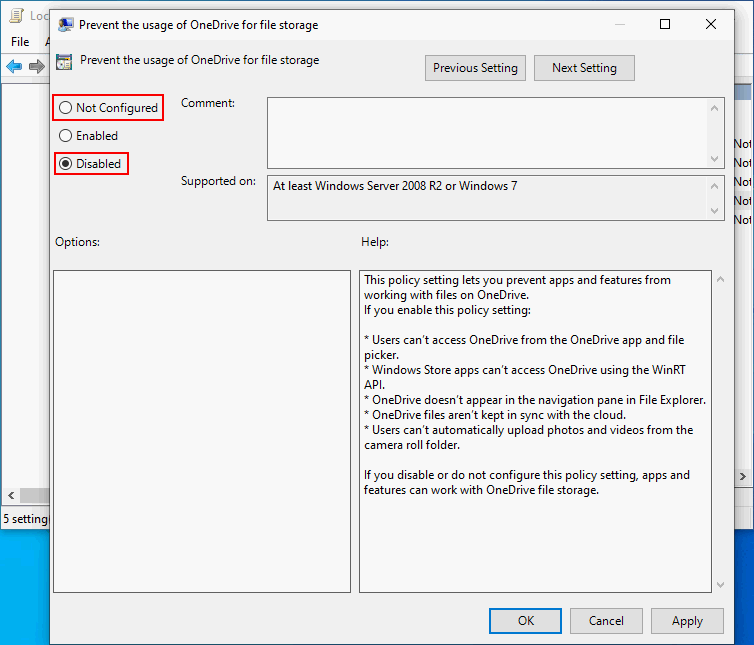
B. Enable OneDrive through Policy in Windows Pro & Server versions.
1. Open the Local Group Policy Editor. (gpedit.msc)
2. Navigate to:
Local Computer Policy > Computer Configuration > Administrative Templates > Windows Components > OneDrive
3. Open the Prevent the usage of OneDrive for file storage policy and set it to «Disabled».
4. Restart the computer and try to launch OneDrive.
Method 2. Reset OneDrive App.
1. Press Windows + R keys to open the run command box.
2. In the «Open» box, type the following command & click OK: *
- %localappdata%\Microsoft\OneDrive\onedrive.exe /reset
* Note: If you see a «Windows cannot find…» message, copy and paste this command instead:
- C:\Program Files (x86)\Microsoft OneDrive\onedrive.exe /reset
Method 3. Uninstall and Re-Install OneDrive
Step 1. Uninstall OneDrive from Windows.
1. Open Command Prompt as Administrator. To do that:
- At the search box type: command prompt or cmd
- Right-click at Command Prompt result and select Run As Administrator.
2. At command prompt give the following command to close OneDrive:
- taskkill /f /im OneDrive.exe

3. Proceed and remove the OneDrive app from your system, by using the below command, according your OS version (32 or 64bit):
- For Windows 64-bit:
- %Systemroot%\SysWOW64\OneDriveSetup.exe /uninstall
- For Windows 32-bit:
- %Systemroot%\System32\OneDriveSetup.exe /uninstall
Step 2. Download and Re-Install OneDrive from Microsoft.
1. Download the latest version of OneDrive.
2. Open the downloaded file (OneDriveSetip.exe) and install OneDrive to your computer.
3. Finally, sign-in to your account and start syncing.
That’s all folks! Did it work for you?
Please leave a comment in the comment section below or even better: like and share this blog post in the social networks to help spread the word about this solution.
If this article was useful for you, please consider supporting us by making a donation. Even $1 can a make a huge difference for us.
- Author
- Recent Posts
Konstantinos is the founder and administrator of Repairwin.com. Since 1995 he works and provides IT support as a computer and network expert to individuals and large companies. He is specialized in solving problems related to Windows or other Microsoft products (Windows Server, Office, Microsoft 365, etc.).
-
Home
-
News
- Is Your OneDrive Not Starting? Here’s How To Fix It On Windows
By Sarah |
Last Updated
OneDrive is used frequently by users to manage their data in the cloud. It makes file sharing and synchronizing across different devices an easy thing. However, users sometimes find OneDrive not opening up while they try to upload or download files. What happened? And more important, how to fix when OneDrive is not starting?
OneDrive is used widely and frequently by Windows users as a file backup and share tool since it’s a built-in tool in their systems. However, many users are bothered by the same problem – OneDrive not starting. The following content shows you different methods for fixing OneDrive not opening yourself.
Microsoft OneDrive Is Reaching End Of Support On Windows 7/8/8.1.
Tip: You may want to back up your files using another advanced backup tool or want to complete tasks like disk manage, system performance improvement, lost data recovery, video editing/converting and screen recording. There is a lot of MiniTool software provided to help you finish such tasks with ease. You should browse them and choose one or more tools you really need.
An amazing tool for recovering lost and deleted files from Windows platform:
MiniTool Power Data Recovery TrialClick to Download100%Clean & Safe
Fix 1: Restart Your Device
Please don’t worry if your OneDrive won’t start while you’re trying to open or access it from your device. There are various solutions you can try to troubleshoot the OneDrive not running issue easily.
How To Disable When Microsoft OneDrive Keeps Starting.
The first way to try when you’re running into troubles including OneDrive not starting on a Windows computer is always restarting. Please try to fix the problem by restarting your OneDrive program or the Window system.
Stop and Restart OneDrive
You should try signing out and signing in again to OneDrive, closing and re-launching the app, or ending OneDrive completely via Task Manager.
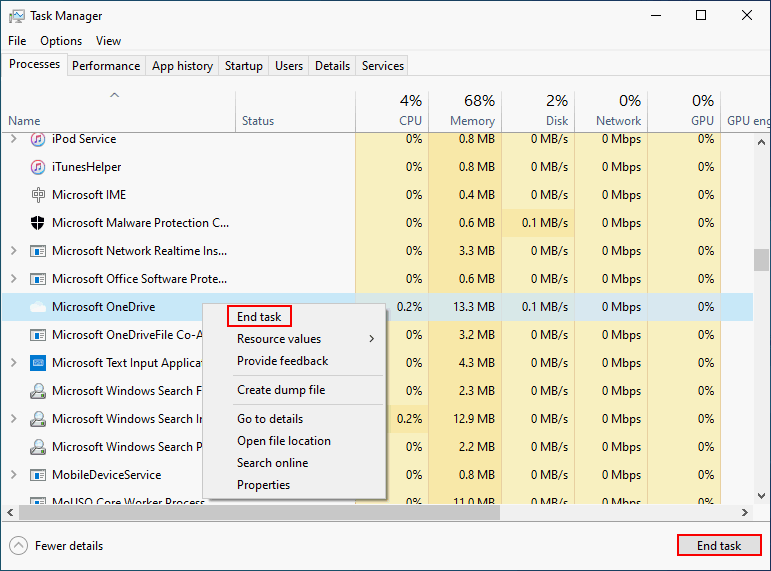
- Press Ctrl + Shift + Esc to open Task Manager.
- Look for Microsoft OneDrive under the Processes tab.
- Select Microsoft OneDrive and click on the End task button at the bottom right.
You can also right click on Microsoft OneDrive and select End task.
Restart Windows 10 Computer
If restart OneDrive didn’t work, you should also try to fix the problem by restart your PC.
- Press Ctrl + Alt + Del to access the security screen.
- Click on the Power icon in the lower right corner.
- Select Restart and wait.
You can also select Shut down and start the computer manually later.
Fix 2: Reset or Reinstall the OneDrive App
How to Reset Microsoft OneDrive
- Close OneDrive completely.
- Press Windows + R to open Run.
- Type %localappdata%\Microsoft\OneDrive\onedrive.exe /reset and press Enter.
- This will reset the OneDrive app for you.
How to Uninstall Microsoft OneDrive
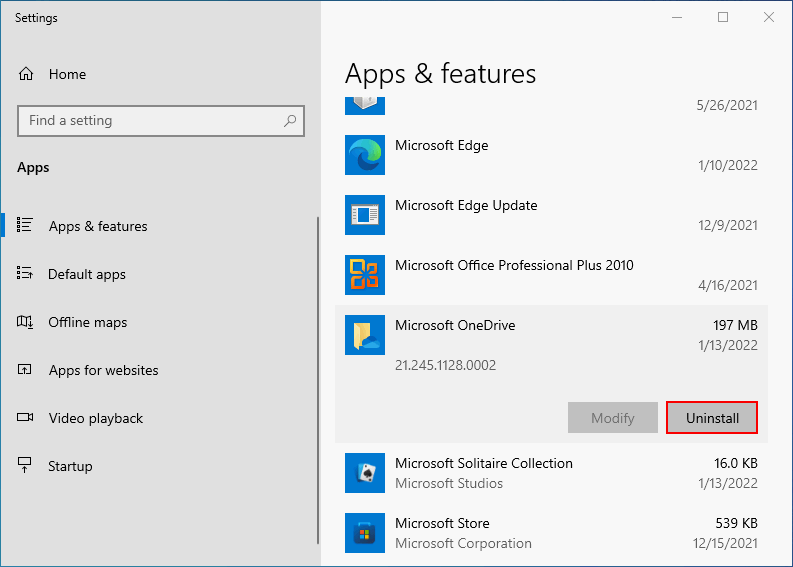
- Press Windows + S to open Windows search.
- Type Add or remove programs and press Enter.
- Scroll down in the right pane to find Microsoft OneDrive.
- Select it and click Uninstall.
- Click Uninstall again to confirm.
After that, you should download OneDrive from the official website and install it again on your PC.
Fix 3: Make Sure Microsoft OneDrive Is Enabled
There’re two ways to enable OneDrive on Windows 10.
Enable in Local Group Policy Editor
- Open the Run dialog box.
- Type gpedit.msc and click OK.
- This will open the Local Group Policy Editor.
- Go to Computer Configuration -> Administrative Templates -> Windows Components -> OneDrive from the left pane.
- Locate the Prevent the usage of OneDrive for file storage policy in the right pane and then double click on it.
- Check Not Configured or Disabled.
- Click OK.
- Restart your computer.
How To Fix Windows Cannot Find gpedit.msc Error?
Enable in Registry Editor
- Open Run.
- Type regedit and click OK.
- The Registry Editor will open.
- Go to HKEY_LOCAL_MACHINE\Software\Policies\Microsoft\Windows\OneDrive.
- Find the DisableFileSyncNGSC value in the right pane and double click on it.
- Change Value data to 0.
- Click OK.
- Reboot the PC.
5 Ways To Restart Or Shut Down Your Windows 10 Computer.
If all the above methods failed, you should also try to turn off Windows firewall and disable/remove antivirus software to fix OneDrive not starting, opening, or running.
About The Author
Position: Columnist
Sarah has been working as an editor at MiniTool since she graduated from university. Sarah aims at helping users with their computer problems such as disk errors and data loss. She feels a sense of accomplishment to see that users get their issues fixed relying on her articles. Besides, she likes to make friends and listen to music after work.