
Не удалось запустить службу центра обеспечения безопасности — как исправить?
Пользователи всех актуальных версий Windows могут столкнуться с уведомлением о том, что «Служба центра обеспечения безопасности Windows отключена», а при попытке её включить — сообщение об ошибке «Не удалось запустить службу центра обеспечения безопасности» (Security Center service cannot be started).
В этой инструкции подробно о том, что делать в такой ситуации и как включить указанную службу в Windows 11, 10 и предыдущих версиях ОС.
Включение в оснастке «Службы»

Первое, что следует попробовать — включить соответствующую службу в окне «Службы», для этого:
- Нажмите клавиши Win+R на клавиатуре, введите services.msc и нажмите Enter.
- В списке служб найдите «Центр обеспечения безопасности» (Security Center) и дважды нажмите по этой службе.
- В поле тип запуска установите «Автоматически (отложенный запуск)», нажмите кнопку «Применить», а затем — «Запустить».

- Дополнительно имеет смысл проверить, что на вкладке «Вход в систему» в параметрах службы запуск выполняется с учетной записью «Локальная служба» (Local Service).

Если выполнить 3-й шаг удалось успешно, с большой вероятностью служба центра обеспечения безопасности будет запущена.
Однако, может оказаться, что изменить тип запуска в окне «Службы» невозможно, так как поле не активно. В этом случае можно использовать следующий метод для решения проблемы.
Редактор реестра
Настроить автоматический запуск службы центра обеспечения безопасности можно в реестре. Необходимые шаги:
- Запустите редактор реестра: нажмите клавиши Win+R на клавиатуре, введите regedit и нажмите Enter
- Перейдите к разделу реестра
HKEY_LOCAL_MACHINE\SYSTEM\CurrentControlSet\services\wscsvc
- Дважды нажмите по параметру Start и установите значение 2 для него.

- Нажмите «Ок», закройте редактор реестра и перезагрузите компьютер.

Если это не сработало, вы можете создать REG-файл со следующим кодом и добавить его в реестр (путем простого запуска и подтверждения), после чего так же выполнить перезагрузку компьютера:
Windows Registry Editor Version 5.00

[HKEY_LOCAL_MACHINE\SYSTEM\CurrentControlSet\Services\wscsvc]
"DelayedAutoStart"=dword:00000001
"DependOnService"=hex(7):52,00,70,00,63,00,53,00,73,00,00,00,00,00
"Description"="@%SystemRoot%\\System32\\wscsvc.dll,-201"
"DisplayName"="@%SystemRoot%\\System32\\wscsvc.dll,-200"
"ErrorControl"=dword:00000001
"FailureActions"=hex:80,51,01,00,00,00,00,00,00,00,00,00,03,00,00,00,14,00,00,\
  00,01,00,00,00,c0,d4,01,00,01,00,00,00,e0,93,04,00,00,00,00,00,00,00,00,00
"ImagePath"=hex(2):25,00,53,00,79,00,73,00,74,00,65,00,6d,00,52,00,6f,00,6f,00,\
  74,00,25,00,5c,00,53,00,79,00,73,00,74,00,65,00,6d,00,33,00,32,00,5c,00,73,\
  00,76,00,63,00,68,00,6f,00,73,00,74,00,2e,00,65,00,78,00,65,00,20,00,2d,00,\
  6b,00,20,00,4c,00,6f,00,63,00,61,00,6c,00,53,00,65,00,72,00,76,00,69,00,63,\
  00,65,00,4e,00,65,00,74,00,77,00,6f,00,72,00,6b,00,52,00,65,00,73,00,74,00,\
  72,00,69,00,63,00,74,00,65,00,64,00,20,00,2d,00,70,00,00,00
"LaunchProtected"=dword:00000002
"ObjectName"="NT AUTHORITY\\LocalService"
"RequiredPrivileges"=hex(7):53,00,65,00,43,00,68,00,61,00,6e,00,67,00,65,00,4e,\
  00,6f,00,74,00,69,00,66,00,79,00,50,00,72,00,69,00,76,00,69,00,6c,00,65,00,\
  67,00,65,00,00,00,53,00,65,00,49,00,6d,00,70,00,65,00,72,00,73,00,6f,00,6e,\
  00,61,00,74,00,65,00,50,00,72,00,69,00,76,00,69,00,6c,00,65,00,67,00,65,00,\
  00,00,00,00
"ServiceSidType"=dword:00000001
"Start"=dword:00000002
"Type"=dword:00000020

[HKEY_LOCAL_MACHINE\SYSTEM\CurrentControlSet\Services\wscsvc\Parameters]
"ServiceDll"=hex(2):25,00,53,00,79,00,73,00,74,00,65,00,6d,00,52,00,6f,00,6f,\
  00,74,00,25,00,5c,00,53,00,79,00,73,00,74,00,65,00,6d,00,33,00,32,00,5c,00,\
  77,00,73,00,63,00,73,00,76,00,63,00,2e,00,64,00,6c,00,6c,00,00,00
"ServiceDllUnloadOnStop"=dword:00000001

[HKEY_LOCAL_MACHINE\SYSTEM\CurrentControlSet\Services\wscsvc\Security]
"Security"=hex:01,00,14,80,1c,01,00,00,28,01,00,00,14,00,00,00,30,00,00,00,02,\
  00,1c,00,01,00,00,00,02,80,14,00,ff,01,0f,00,01,01,00,00,00,00,00,01,00,00,\
  00,00,02,00,ec,00,08,00,00,00,00,00,18,00,9d,00,02,00,01,02,00,00,00,00,00,\
  05,20,00,00,00,21,02,00,00,00,00,14,00,9d,01,02,00,01,01,00,00,00,00,00,05,\
  12,00,00,00,00,00,18,00,9d,01,02,00,01,02,00,00,00,00,00,05,20,00,00,00,20,\
  02,00,00,00,00,14,00,9d,00,02,00,01,01,00,00,00,00,00,05,04,00,00,00,00,00,\
  14,00,9d,00,02,00,01,01,00,00,00,00,00,05,06,00,00,00,00,00,28,00,fd,01,02,\
  00,01,06,00,00,00,00,00,05,50,00,00,00,e5,fe,79,5f,a0,ae,0d,3b,22,fa,0a,c9,\
  01,5a,41,3a,e5,a6,4a,b7,00,00,28,00,ff,01,0f,00,01,06,00,00,00,00,00,05,50,\
  00,00,00,b5,89,fb,38,19,84,c2,cb,5c,6c,23,6d,57,00,77,6e,c0,02,64,87,00,00,\
  28,00,ff,01,0f,00,01,06,00,00,00,00,00,05,50,00,00,00,db,8c,74,0f,c2,72,73,\
  f3,2b,26,b9,44,77,1e,4f,02,76,63,b5,21,01,01,00,00,00,00,00,05,12,00,00,00,\
  01,01,00,00,00,00,00,05,12,00,00,00
Если вы столкнулись с ошибкой «Не удалось запустить службу центра обеспечения безопасности» недавно, после каких-либо действий по настройке системы, установки обновлений или аналогичных событий, могут сработать точки восстановления системы на дату, когда проблема не наблюдалась.
Если служба отключается «сама», а действия по её включению отменяются, имеет смысл проверить компьютер на наличие вирусов, например, с помощью KVRT (Kaspersky Virus Removal Tool) и различных средств удаления вредоносных программ.
Readers help support Windows Report. We may get a commission if you buy through our links.
Read our disclosure page to find out how can you help Windows Report sustain the editorial team. Read more
When you install Windows 11, Windows Security or Windows Defender becomes the default antivirus and security solution. It is one of the most excellent remedies available, and it is effective in most circumstances.
Nevertheless, one of the most frequently encountered concerns has been that the Windows 11 Windows Security is not opening or functioning as expected after an upgrade or random upgrade.
Why is my Windows Security not opening on Windows 11?
The reasons Windows Security settings are not opening or launching on Windows 11 after upgrading are close to close. Below are the popular reasons:
- Glitches with the app: One of the reasons Windows security is not loading on Windows 11 is some glitches preventing it from opening. The solution here is to reset the app.
- Faulty system files: If the system files meant to load the Windows Security apps are faulty, the app won’t open. You need to repair the system files to fix this.
How can I fix the Windows 11 Windows Security not opening issue?
1. Reset using PowerShell Command
- Right-click on the Start icon and select the Windows Terminal (Admin) option.

- Click the dropdown at the top and select the Windows PowerShell option.

- Copy and paste the command below and hit Enter:
Get-AppxPackage Microsoft.SecHealthUI -AllUsers | Reset-AppxPackage
- Restart your PC and check if the Windows Security app is now working.
- If it does not work, type the command below and hit Enter to reinstall the app:
Set-ExecutionPolicy UnrestrictedGet-AppXPackage -AllUsers | Foreach {Add-AppxPackage -DisableDevelopmentMode -Register "$($_.InstallLocation)\AppXManifest.xml"}


You need to reset the app if Windows Security is not working or Windows Defender is not opening. The command below has worked for many. You can reinstall the app using the second command if resetting does not work.
2. Repair the app
- Press the Windows key + I to open the Settings app, choose Apps in the left pane, followed by Apps & features.

- Once you are inside the Apps & features window, search for Windows Security in the search bar from the top, and click on the three-dot menu next to it, followed by Advanced options.

- Scroll down until you find the Reset section, then click on the Repair button to start the repairing process.


Allow the Repair process to finish before rebooting your computer to guarantee your changes are applied. Then, by starting Windows Security, it lets you see if its functionality has been restored.
3. Reset the app
- Press the Windows key + I, go to Apps in the left pane, followed by Apps & features.
- Once inside the Apps & features window, search for Windows Security in the search bar, and click on the three-dot menu. Now click on Advanced options.
- Scroll down until you meet the Reset section, then click on the Reset button.


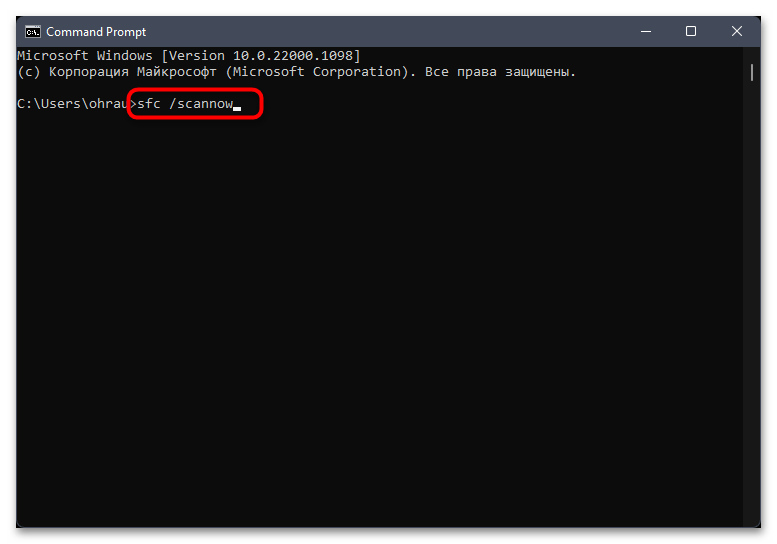
4. Run SFC
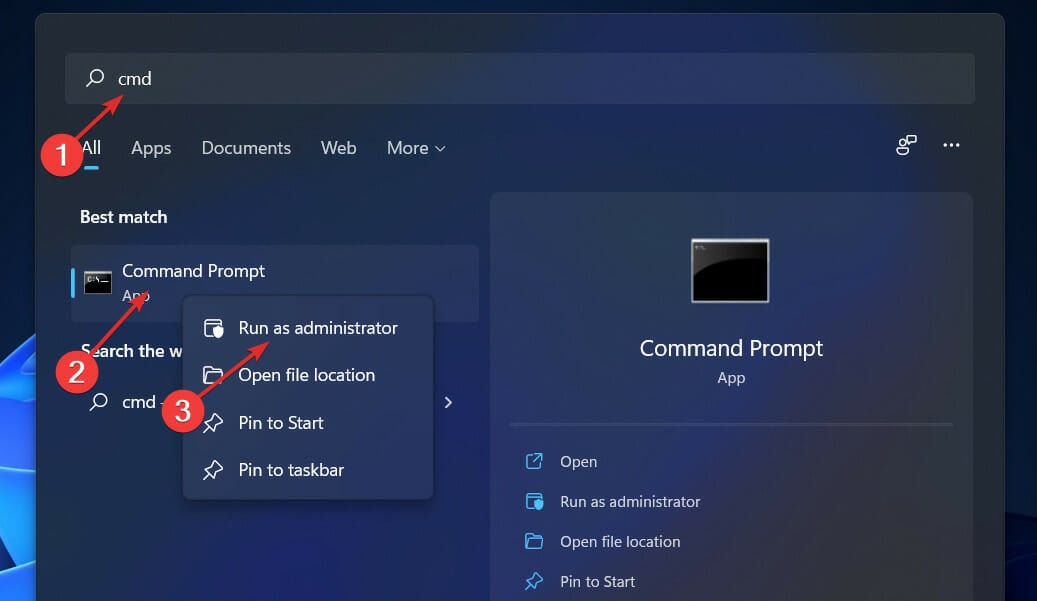
- Press the Windows + S key to open the Search bar, then type cmd, right-click on the most relevant result shown to you, and run it as an Administrator to get full privileges.

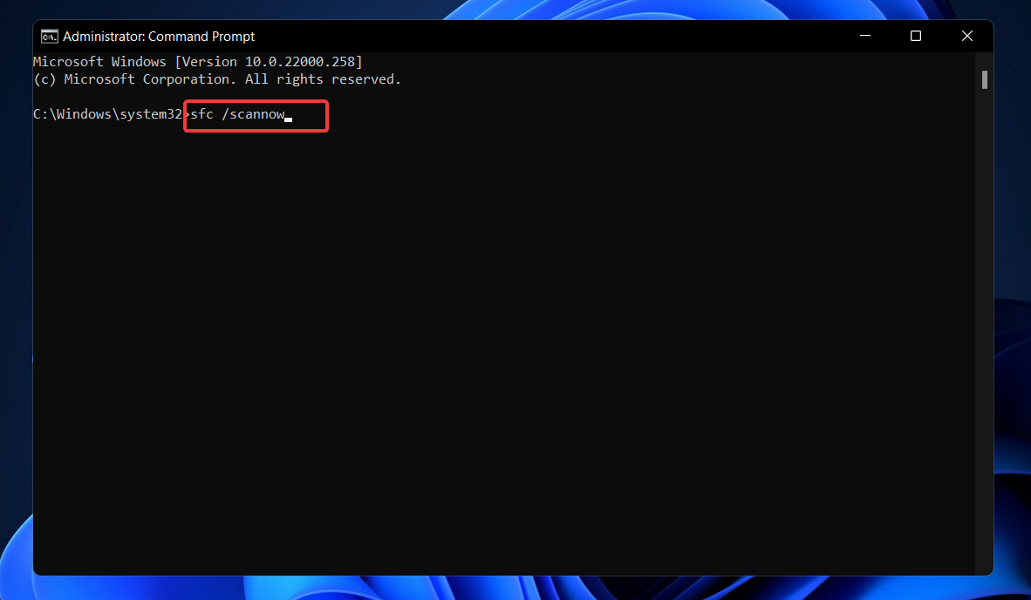
- Type in the following command and press Enter to start the process:
sfc /scannow
The process may take some time to finish, so you may need to restart your computer. SFC will automatically find and restore corrupted files and folders. If that does not help, you can try using specialized repair tools, which are much more advanced than Windows built-in tools.
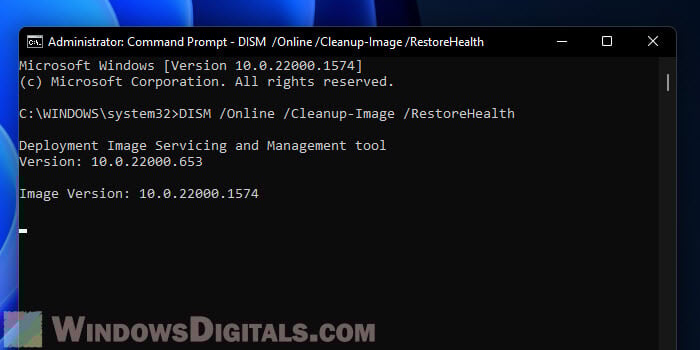
5. Run DISM
- Press the Windows + S key to open the Search bar, then type cmd, and right-click on the most relevant result to run it as an Administrator.
- Paste or type in the following commands and press Enter after each:
DISM /online /Cleanup-Image /ScanHealthDISM /Online /Cleanup-Image /RestoreHealth

Continue to be patient until the process is finished. Be advised that the process could take up to ten minutes to finish. Once you’ve completed this step, restart your computer to ensure the changes take effect.
6. Disable your antivirus
- Click the expand arrow from your taskbar and right-click on your antivirus icon. Now choose Avast shields control followed by Disable for 10 minutes to stop it from interfering.

- If you have other antivirus programs installed, you can temporarily disable the app following the same steps as above or similar ones with a few differences.

With the fixes above, you should be able to fix the Windows Security not opening on Windows 11 issue. If you want to use a third-party tool, check out our post on five of the best antiviruses for Windows 11.
Alternatively, you can look at our article on the best antiviruses with low CPU usage for Windows 11.
If you want to know how to turn on Dev Device protection on your Windows 11 computer, we have a detailed guide to help you with that.
In case you have more issues, don’t miss our guide on how to reinstall Windows Security on Windows 11 for more solutions.
Let us know in the comments section below which solution worked best for you in solving the Windows 11 Windows Defender not working issue and which antivirus software you prefer.
Loredana Harsana
Windows Software Expert
Loredana is a passionate writer with a keen interest in PC software and technology. She started off writing about mobile phones back when Samsung Galaxy S II was on top of the world and she fell in love with tech of all sorts.
Whenever she’s not at her work desk, you’ll find her enjoying refreshing tea flavors, spilling stories on paper, and listening to the radio.
,
In this article, you’ll learn what might be preventing Windows Defender from starting, and then we’ll show you step-by-step how to fix the problem: Windows Defender Security not working.
Windows Defender (aka ‘Windows Security’), the built-in antivirus software in Windows 10/11, is crucial for protecting your computer from malware and other online threats. However, there are several factors that can prevent Windows Defender to not start, leaving your system vulnerable.
What can cause Windows security not working problem?
- Conflicting third-party antivirus software: Installing another antivirus program may affect the operation of Windows Defender. In some cases, even if you have uninstalled third-party antivirus programs, the remaining registry entries may still cause Windows Defender to not start.
- Corrupted system files: Damaged or missing system files can disrupt Windows Defender’s functionality.
- Registry or Group Policy modifications: Incorrect registry or group policy changes made by the user or by a malicious program can disable Windows Defender.
How to FIX: Windows Defender Security won’t open on Windows 11/10.
If the Windows Security (aka «Windows Defender») does not start in Windows 10/11, follow these steps in order to fix the problem.
- Uninstall Third-Party Antivirus.
- Scan for Malware and Viruses.
- Perform a Clean Boot.
- Start or Restart the Security Center service.
- Repair Windows System Files.
- Reset Windows Defender from PowerShell.
- Enable Windows Defender in Registry.
- Enable Windows Defender in Group Policy.
- Repair Windows 10/11.
Method 1. Uninstall Third-Party Antivirus.
One of the main reasons that Windows Defender Security cannot start is an installed third-party antivirus program. So, if you have installed a third-party security program, uninstall it, restart your PC and check if the problem remain. *
* Note: Even if you haven’t installed a security software yourself, your computer may have it pre-installed. To see if this is happening:
1. Type «control panel» in the search and then open the Control Panel app and go to Programs > Uninstall a program.
2. Next, look for any installed third-party antivirus and if there is one, select it and click Uninstall.
3. When uninstall is completed, restart your PC and check if the problem remain. *
* Important: Restart your computer even if you haven’t uninstalled any programs. Sometimes Windows Defender-related services may be stuck and not working, but restarting the computer can force them to work properly.

Method 2. Scan for Malware/Viruses.
Before proceeding further, ensure that your computer is clean from viruses and malware. To accomplish this task you can use this Malware Scan and Removal Guide to check and remove viruses or/and malicious programs that may be running on your computer.
After scanning and cleaning your computer for malware, check if the problem persists. If not, you’re done here, otherwise continue to the next step.
Method 3. Perform a Clean Boot.
Sometimes, other applications running in the background can conflict with Windows Defender and prevent it from running. To find out if this is causing the Windows Defender startup problem, start your computer with all third-party services disabled by doing a clean boot using these steps:
Step 1. Disable Startup programs.
1. Press CTRL + SHIFT + ESC to open Task Manager.
2. In the Startup tab, disable (one by-one) all the third-party programs running at Windows Startup. Then reboot your PC.

3. After rebooting, check if the problem remains and if so, proceed to Step-2. If not, reopen the Task Manager and enable one by one the disabled programs and reboot until you find the culprit.
Step 2. Disable Third-Party Services.
1. Press the Windows + R keys to open the ‘Run’ command box.
2. Type msconfig and press Enter to open the System Configuration utility.

3. At Services tab, check the Hide all Microsoft services checkbox.

4. Then press the Disable all button, to disable all non Windows services that start with Windows. When done, click OK and restart your PC.

5. Check if Windows Defender works now. If yes, open ‘msconfig’ again and enable one by one the disabled services and reboot until you find the culprit. If the problem persists, select the the ‘General’ tab, choose Normal Startup, reboot your PC and continue to next method.

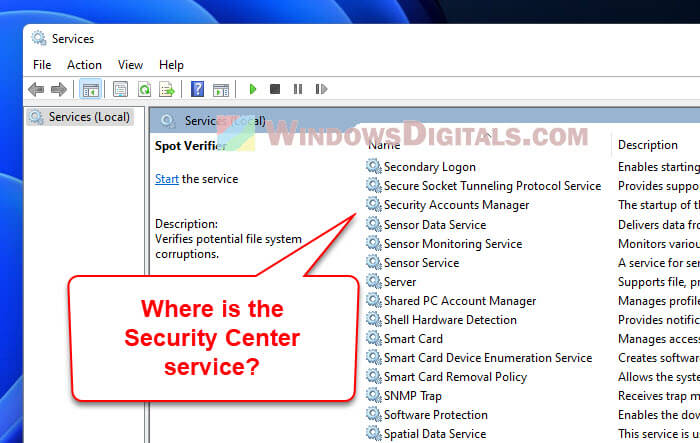
Method 4. Start or Restart the ‘Security Center’ service.
To ensure Windows Defender works well, «Security Center» Service should be running.
1. Press the Windows + R keys to open the ‘Run’ command box.
2. Type services.msc and press Enter to open the Services control panel.

3. Find the Security Center service and check if it running. According the result do the following:
- If «Security Center» service is not running, right-click on it and click Start to start the service.*
- If «Security Center» service is running, right-click on it and click Restart.*
* Note: If the «Start» & «Restart» options are inactive (greyed out), skip to next method.

Method 5. Repair Windows System Files.
Repairing Windows system files is a common but important step in solving Windows 10/11 problems like the one mentioned here.
1. Open Command Prompt as Administrator. To do that, type «cmd» or «command prompt» in the search and then click Run as administrator in Command Prompt result.

2. At the command prompt window, copy-paste the following command & press Enter:
- Dism.exe /Online /Cleanup-Image /Restorehealth

3. Be patient until DISM repairs component store. When the DISM operation is completed, copy-paste the command below and press Enter:
- SFC /SCANNOW

4. When SFC scan is completed, restart your computer and check if the problem is fixed.
Method 6. Fix Windows Defender Not Starting using PowerShell.
1. In Windows Search, type PowerShell and select Run as Administrator to open PowerShell as an Administrator.

2. In PowerShell window, copy and paste the following command and then press Enter.*
- Get-AppxPackage Microsoft.SecHealthUI -AllUsers | Reset-AppxPackage

* Note: If after giving the above command, you receive the error «package not found» or something similar, give this command instead:
- Get-AppXPackage -AllUsers | Foreach {Add-AppxPackage -DisableDevelopmentMode -Register “$($_.InstallLocation)\AppXManifest.xml”}

3. After command execution, close PowerShell, reboot your PC and try again to open Windows Defender.
Method 7. FIX Windows Defender Not Working in Registry.
1. Press the Windows + R keys to open the Run dialog box.
2. Type «regedit» and press Enter to open the Registry Editor.

2. In Registry, navigate to this location:
- HKEY_LOCAL_MACHINE\SOFTWARE\Policies\Microsoft\Windows Defender
3. At the right pane double-click to open the DisableAntiSpyware REG_DWORD value.*
* Note: If the «DisableAntiSpyware» value doesn’t exist, skip to next step or do the following:
- Right-click on empty space, and choose New > DWORD (32-bit) Value.
- Rename the «New Value #1» to «DisableAntiSpyware« and press Enter.
- Continue to next step.

3. Set the Value data to 0 to enable Windows Defender and then press OK.

4. Close the Registry Editor and reboot your PC.
Method 8. Enable Windows Defender in Group Policy.
Sometimes, Windows Defender is disabled because of a group policy that disables it, either set by the user or by malware. *
* Note: This method applies only to Windows 10/11 Professional Editions.
1. Press Windows + R keys to open the Run dialog.
2. Type gpedit.msc and press OK.

2. In the Local Group Policy Editor, navigate to:
- Computer Configuration > Administrative Templates > Windows Components > Microsoft Defender Antivirus.
3a. Double-click to open the Turn off Windows Defender Antivirus policy in the right pane.

4. In the window that appears, choose Not Configured or Disabled and then click Apply and OK.

5. Close the Group Policy Editor and restart your PC.
Method 9. Repair Windows with an In-place Upgrade.
If, after following the methods above, you’re still having problems, your last option is to repair Windows with an in-place upgrade. To do this, use the instructions in one of these tutorials, depending on your version of Windows.
- How to Repair Windows 10 with an In-Place Upgrade.
- How to Repair Windows 11 with an In-Place Upgrade.
That’s it! Which method worked for you?
Let me know if this guide has helped you by leaving your comment about your experience. Please like and share this guide to help others.
If this article was useful for you, please consider supporting us by making a donation. Even $1 can a make a huge difference for us in our effort to continue to help others while keeping this site free:
- Author
- Recent Posts
Konstantinos is the founder and administrator of Wintips.org. Since 1995 he works and provides IT support as a computer and network expert to individuals and large companies. He is specialized in solving problems related to Windows or other Microsoft products (Windows Server, Office, Microsoft 365, etc.).
Все способы:
- Способ 1: Перезапуск службы «Центр обеспечения безопасности»
- Способ 2: Отключение сторонних антивирусов
- Способ 3: Установка актуальных системных обновлений
- Способ 4: Исправление или сброс приложения «Безопасность Windows»
- Способ 5: Выполнение чистой загрузки Windows
- Способ 6: Проверка параметров реестра
- Способ 7: Проверка целостности системных файлов
- Способ 8: Возвращение Windows в исходное состояние
- Вопросы и ответы: 13
Способ 1: Перезапуск службы «Центр обеспечения безопасности»
Самое простое решение, которое может выполнить каждый пользователь, — перезапустить службу, связанную с «Безопасностью Windows» в Виндовс 11. Это поможет нормализовать работу всех компонентов и обеспечит корректное открытие необходимых окон, если возник небольшой системный сбой.
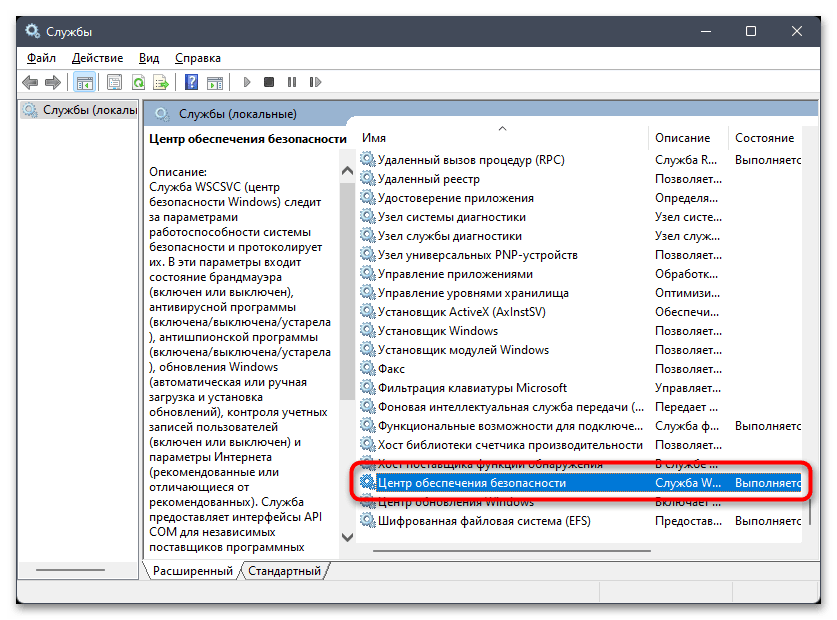
- Откройте меню «Пуск» и через поиск отыщите приложение «Службы», после чего запустите его.
- В новом окне в конце списка найдите службу с названием «Центр обеспечения безопасности» и щелкните по ней правой кнопкой мыши.
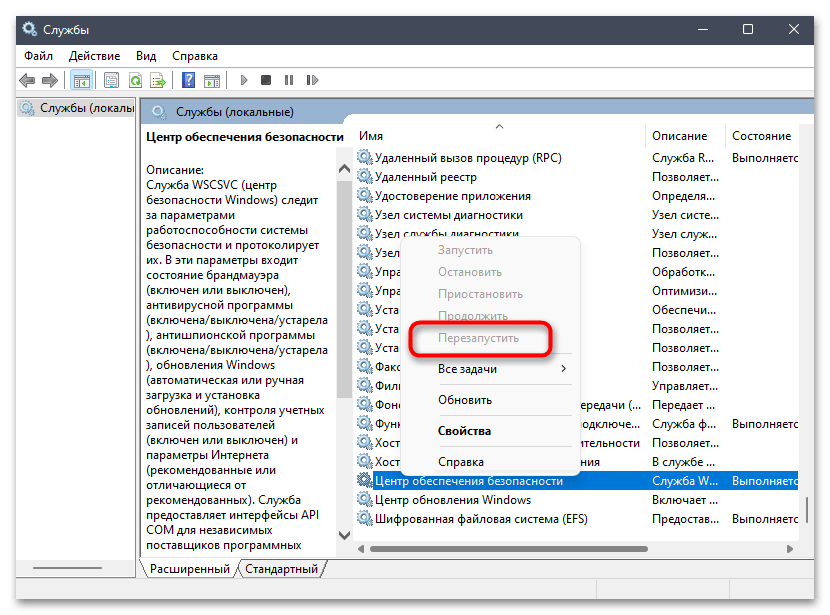
- Из появившегося контекстного меню выберите пункт «Перезапустить» и ожидайте окончания данного процесса. Как только вы получите уведомление о том, что служба успешно перезапущена, можете приступать к проверке работы «Безопасности Windows» и всех связанных с ней компонентов.

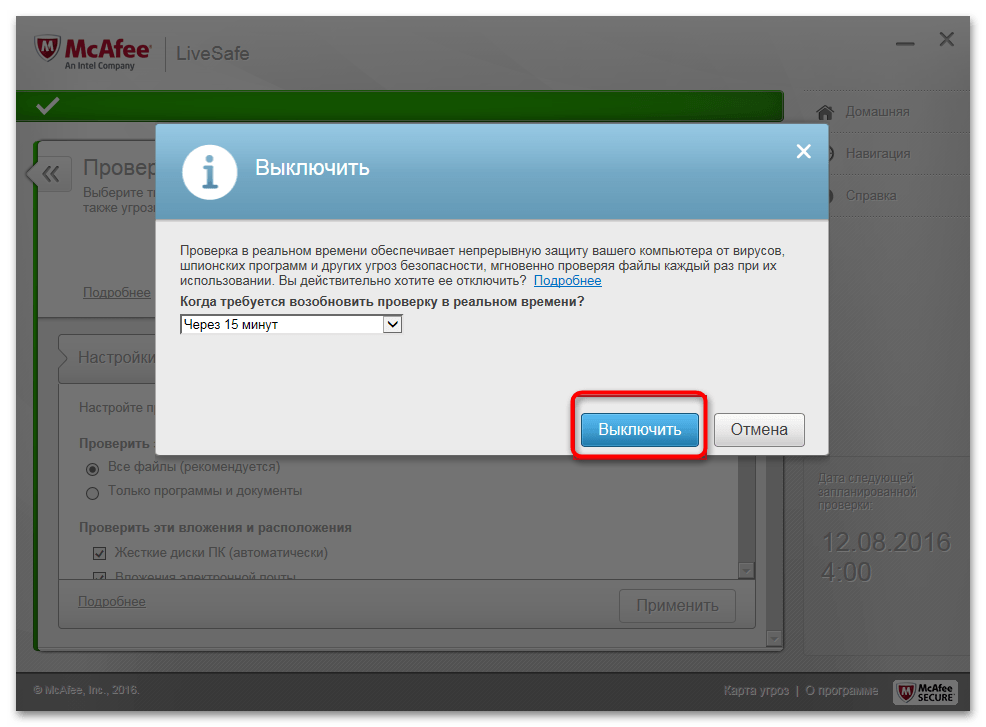
Способ 2: Отключение сторонних антивирусов
Следующий метод подразумевает установку ограничений на работу сторонних антивирусов, если такие установлены на вашем компьютере. Функционирование такого рода ПО может напрямую сказываться на штатных средствах операционной системы, вызывая проблемы с их запуском. Вы можете не удалять дополнительный антивирус, а только отключить его на время, чтобы работа всех связанных служб и процессов была завершена. Для получения универсальных инструкций по данной теме рекомендуем перейти к чтению статьи по следующей ссылке.
Подробнее: Отключение антивируса
Способ 3: Установка актуальных системных обновлений
Далее предлагаем остановиться на теме системных обновлений и проверить, есть ли что-то из не установленного в вашей сборке Windows 11. Дело в том, что последнее время Майкрософт активно выпускает различные обновления безопасности и исправления, которые автоматически решают частые проблемы пользователей. Инсталляция апдейтов может помочь вам исправить работу «Безопасности Windows», поэтому попробуйте проверить наличие обновлений.
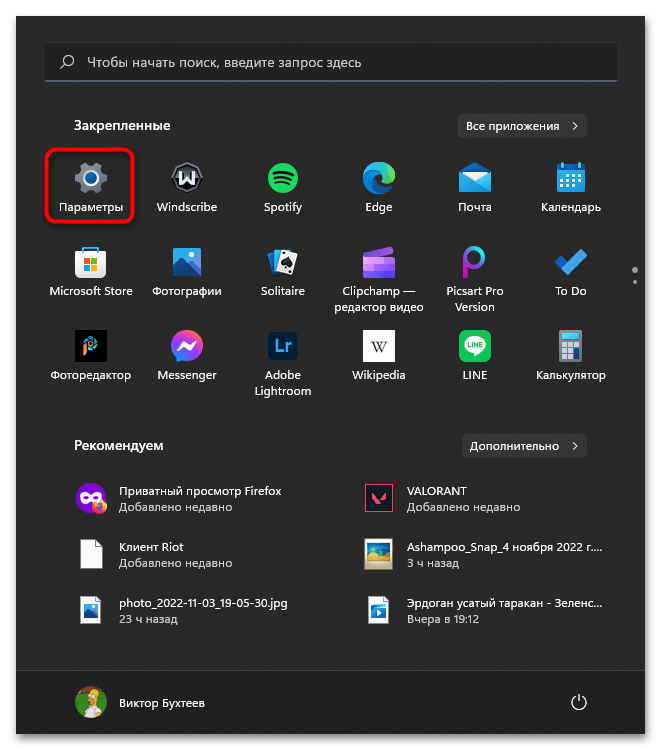
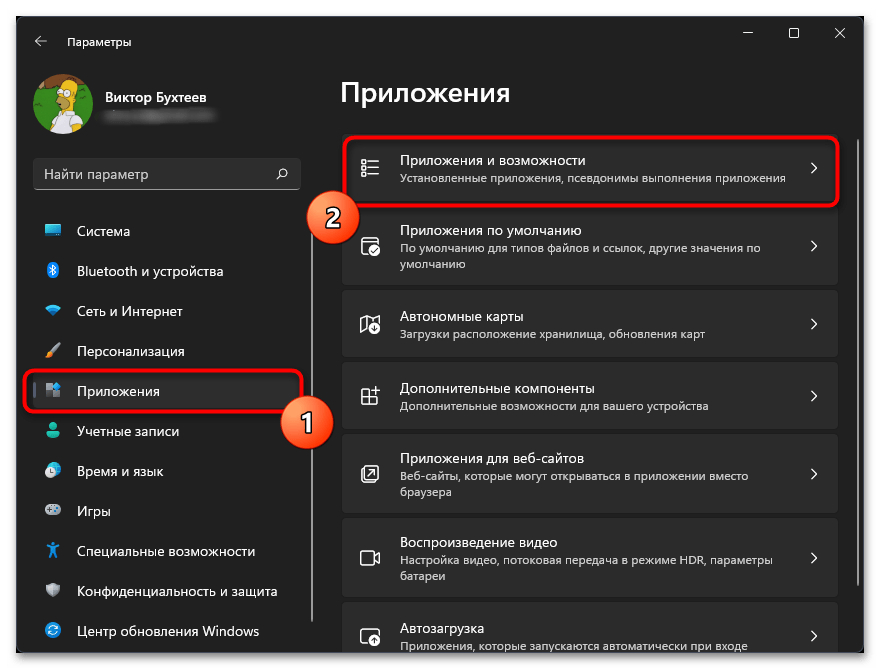
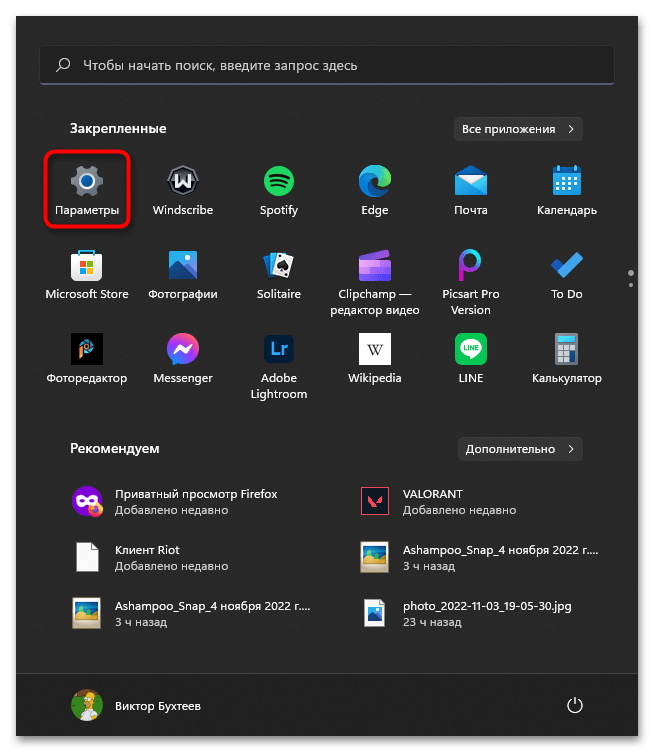
- Откройте приложение «Параметры», отыскав его значок в списке закрепленных в меню «Пуск».
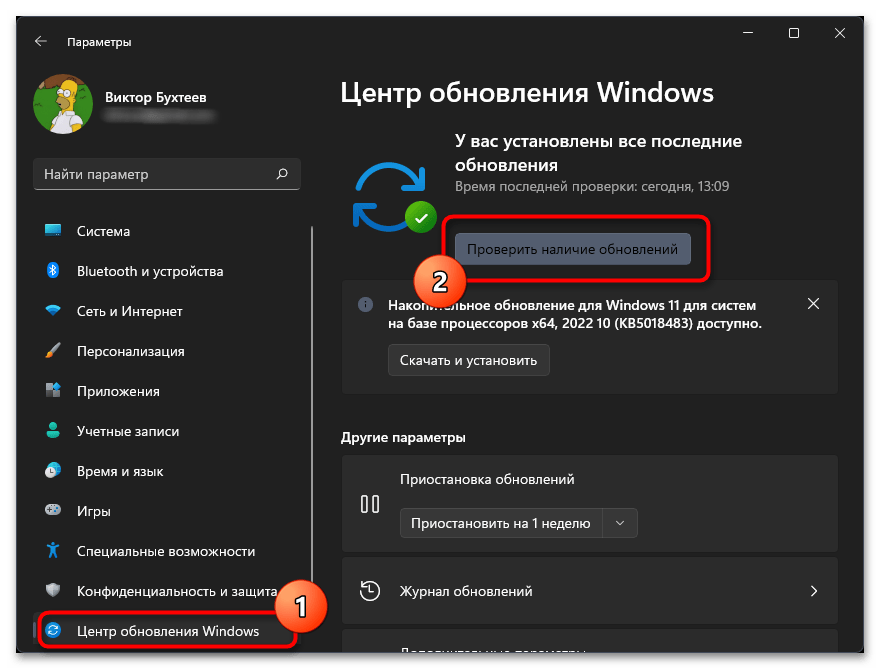
- На панели слева выберите раздел «Центр обновления Windows» и нажмите кнопку «Проверить наличие обновлений», если в данном окне еще не отображается то, что уже можно установить.
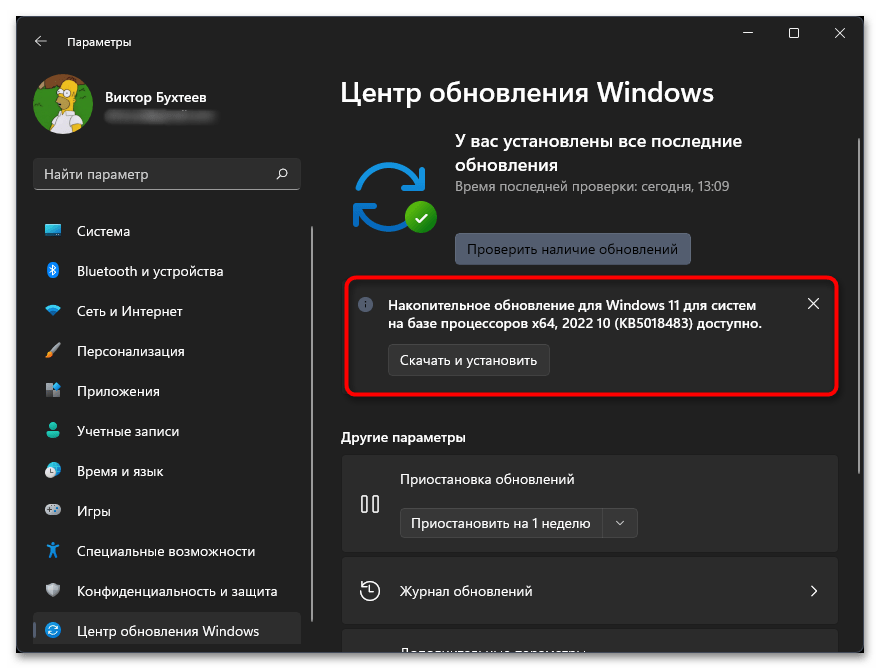
- Подождите, пока сканирование будет окончено. Если обновления найдены, запустите их скачивание и установку. По завершении перезапустите компьютер для окончательной установки оставшихся файлов, затем переходите к проверке работы антивируса или других компонентов безопасности Виндовс.
Способ 4: Исправление или сброс приложения «Безопасность Windows»
То окно, в которое вы хотите перейти для работы с брандмауэром или антивирусом, является отдельным стандартным приложением Windows 11, отображающимся в списке установленных программ. Через этот список можно переключиться в раздел для исправления или сброса приложения, что поможет исправить его сбои. Давайте детально рассмотрим, как осуществляется переход к необходимым опциям и их запуск.
- В том же приложении «Параметры» выберите раздел «Приложения» и перейдите в категорию «Приложения и возможности».
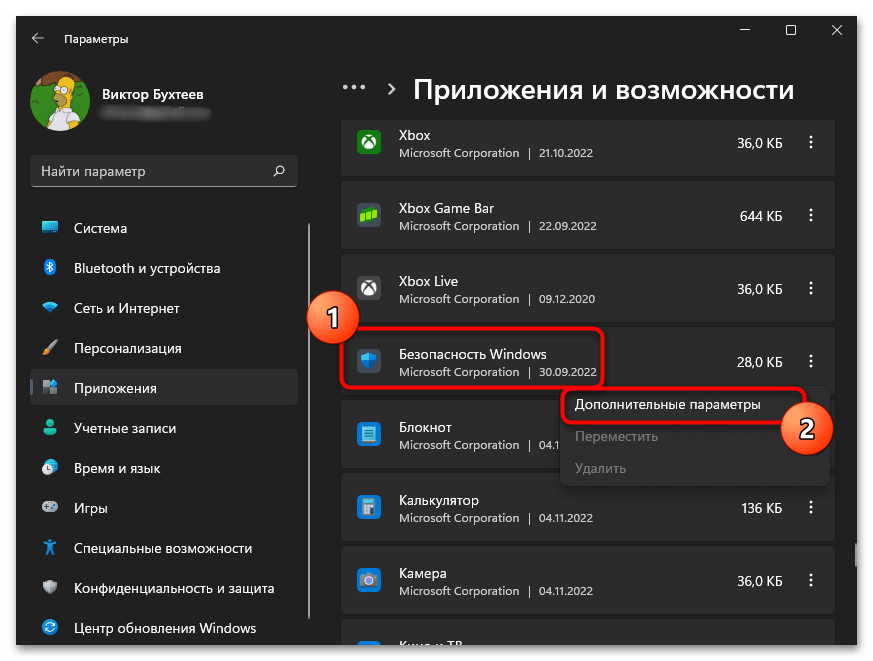
- Найдите «Безопасность Windows», щелкните по трем точкам справа в этой строке и из появившегося меню выберите пункт «Дополнительные параметры».
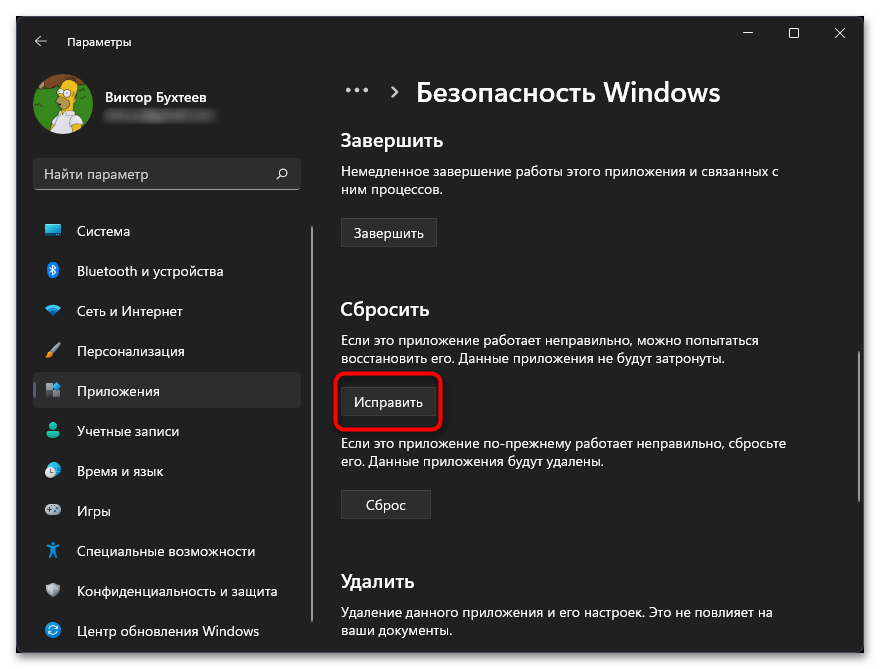
- Сперва выполните стандартное исправление для восстановления работы приложения. Используйте кнопку «Исправить» и ожидайте появления уведомления об успешном исправлении.
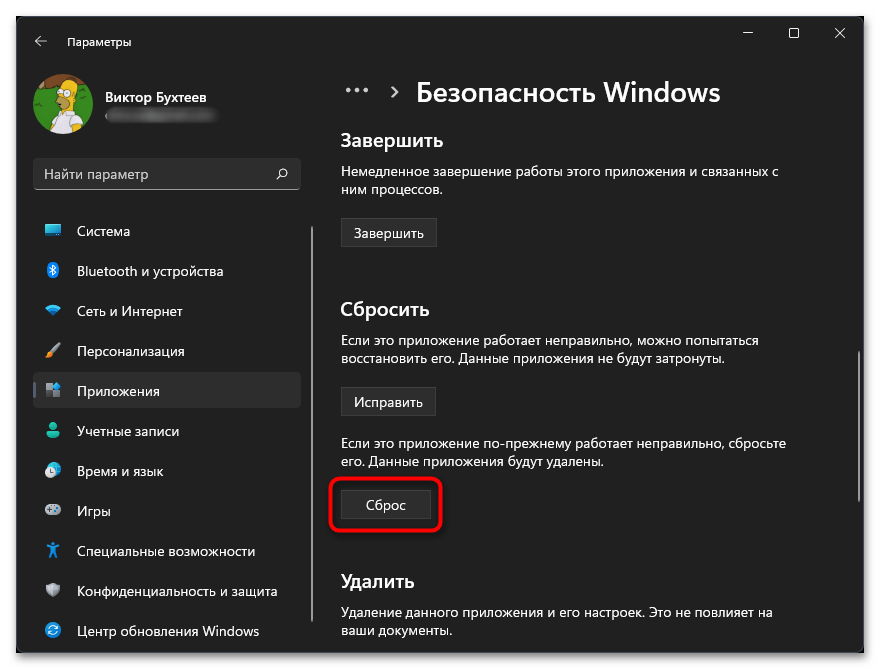
- Проверьте работу «Безопасности Windows», а в случае необходимости вернитесь к предыдущему окну и выполните «Сброс» для удаления данных приложения.
Способ 5: Выполнение чистой загрузки Windows
Существует вероятность, что в вашей операционной системе работают сторонние приложения или утилиты, которые могут влиять на функционирование стандартных средств, включая «Безопасность Windows». Самый простой метод проверки этой теории — выполнение чистой загрузки. Для этого понадобится отключить сторонние службы и программы автозагрузки, что осуществляется так:
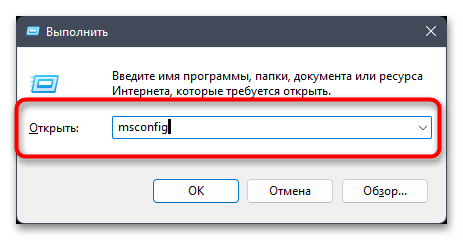
- Откройте утилиту «Выполнить», используя стандартную комбинацию клавиш Win + R. В ней введите
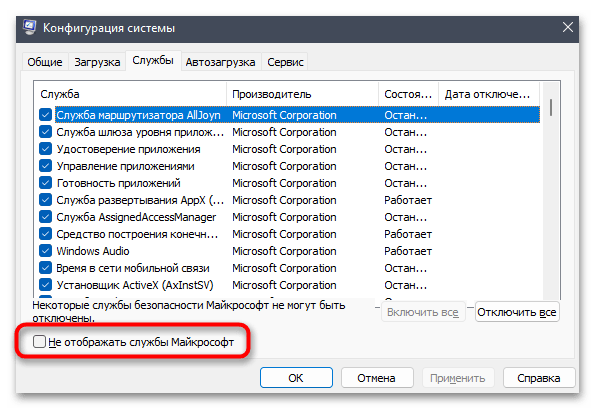
msconfigи нажмите Enter для подтверждения выполнения команды. - Данная команда открывает окно «Конфигурация системы», в котором на вкладке «Службы» сначала понадобится поставить галочку возле пункта «Не отображать службы Майкрософт».
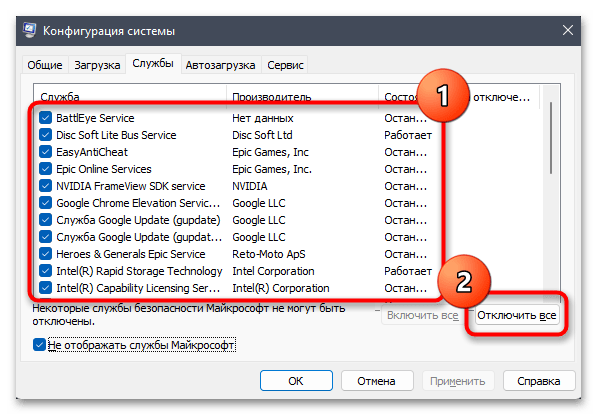
- После этого вы увидите список всех сторонних служб и сами сможете решить, какие из них отключить. Если считаете, что ни одна из них не нужна для нормального запуска ОС (за исключением службы видеокарты и процессора), можете нажать «Отключить все».
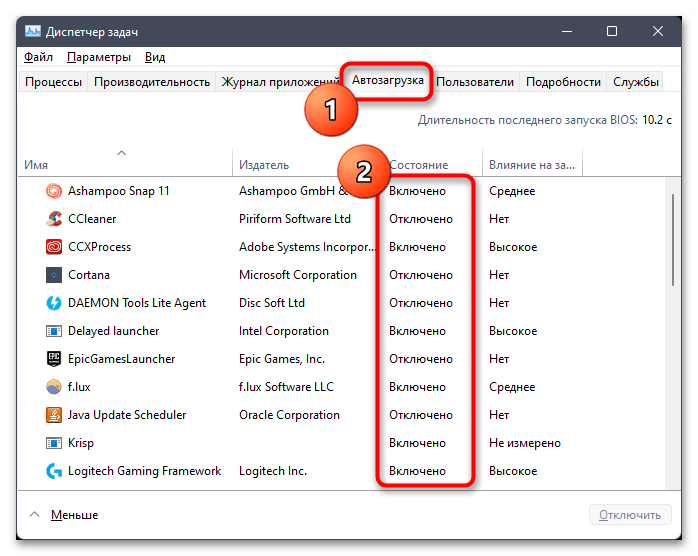
- Со службами разобрались, теперь самое время посмотреть, какие программы автоматически включаются вместе с Windows 11. Щелкните правой кнопкой мыши по «Пуску» и из меню выберите «Диспетчер задач».
- Перейдите на вкладку «Автозагрузка» и посмотрите, возле каких программ есть состояние «Включено».
- Для отключения автозагрузки конкретной программы щелкните по ней ПКМ и выберите пункт «Отключить». Сделайте то же самое со всеми остальными приложениями, старт которых вместе с ОС не нужен.

Как только вы выполнили все описанные выше действия, отправляйте компьютер на перезагрузку и смотрите, получится ли открыть «Безопасность Windows» в новом сеансе. Если проблема сохранилась, не спешите возвращать все службы и программы автозагрузки в исходное состояние, для начала осуществите рекомендации из следующих методов.
Способ 6: Проверка параметров реестра
Как известно, в реестре есть много разных параметров, связанных с компонентами «Безопасности Windows». Вместе с этим у пользователя есть возможность самостоятельно создавать разные настройки, которые управляют активностью служб безопасности. Мы рекомендуем проверить, есть ли у вас такие параметры, а также изменить их состояние для нормализации работы рассматриваемого приложения.
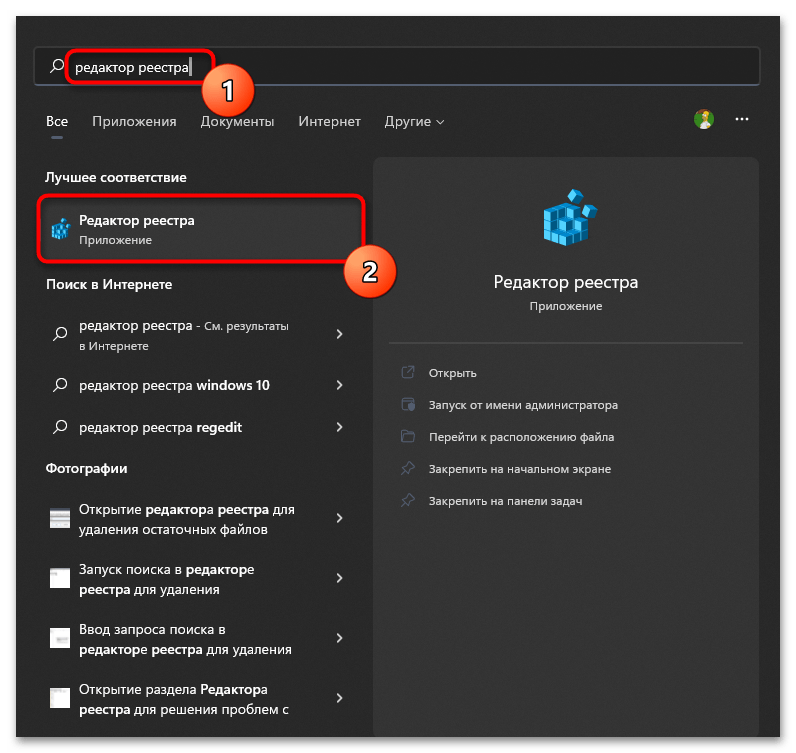
- Через поиск в «Пуске» отыщите приложение «Редактор реестра» и запустите его.
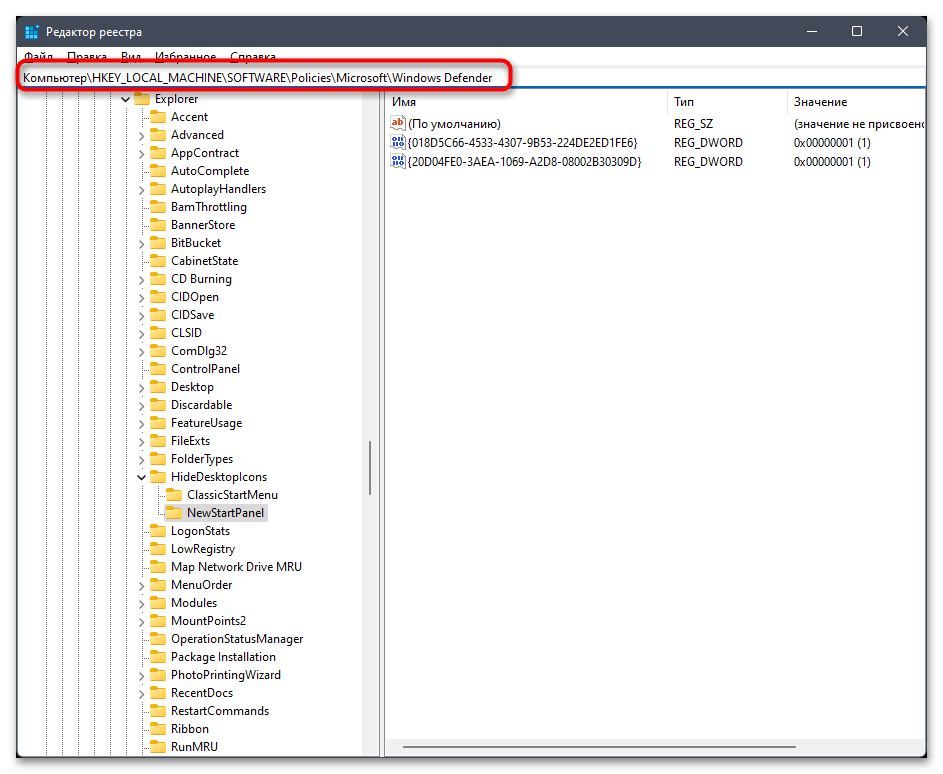
- В адресную строку вставьте ключ
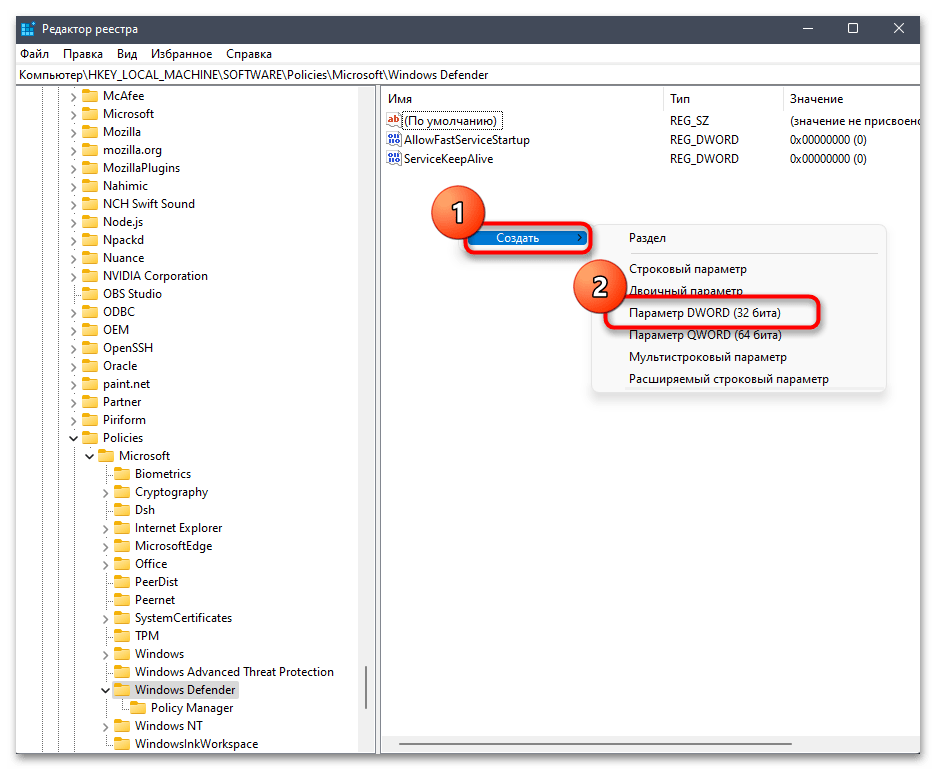
Компьютер\HKEY_LOCAL_MACHINE\SOFTWARE\Policies\Microsoft\Windows Defenderи перейдите по нему. - В конечной папке вас интересует параметр с названием «DisableAntiSpyware». Если такой отсутствует, кликните ПКМ в любом пустом месте, наведите курсор на «Создать» и выберите «Параметр DWORD (32 бита)».
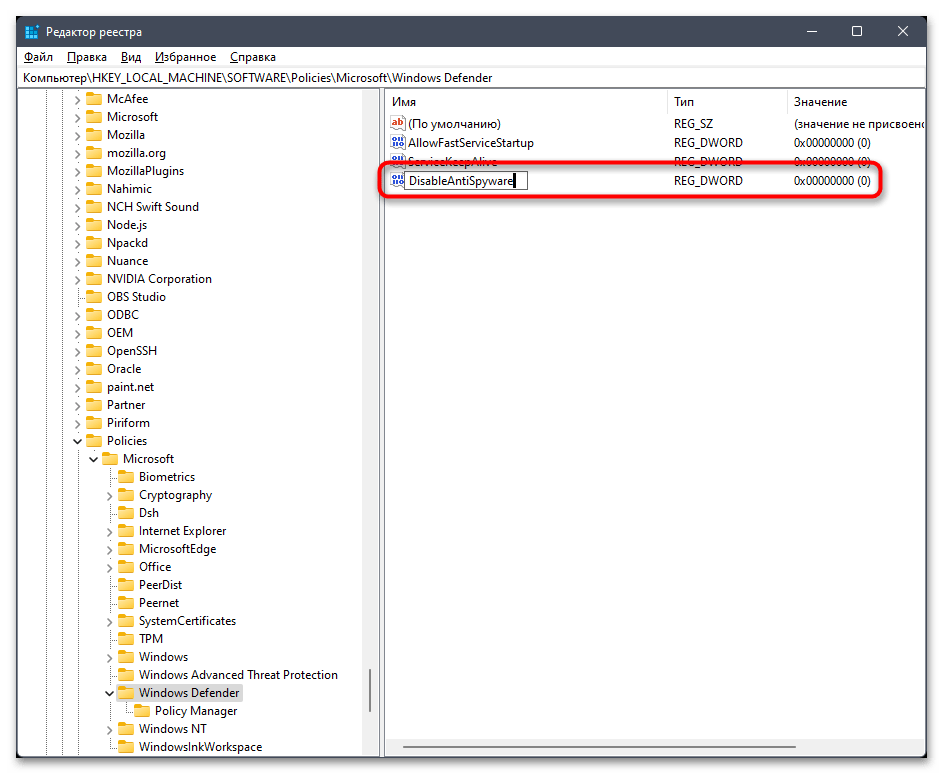
- Задайте для нового параметра название
DisableAntiSpywareи дважды кликните по нему для открытия окна изменения состояния. - В нем установите значение 0 и подтвердите внесение изменений. После этого обязательно перезагрузите ПК, чтобы новые настройки вступили в силу.
Способ 7: Проверка целостности системных файлов
Если ни один из перечисленных выше методов не помог решить проблему с доступом к «Безопасности Windows», понадобится запустить проверку целостности системных файлов при помощи стандартных утилит. Они ищут поврежденные или отсутствующие объекты, затем исправляют их и нормализуют работу проблемных компонентов. Детальные инструкции о том, как осуществляется работа с такими системными утилитами, читайте в материале от другого нашего автора далее.
Подробнее: Использование и восстановление проверки целостности системных файлов в Windows
Способ 8: Возвращение Windows в исходное состояние
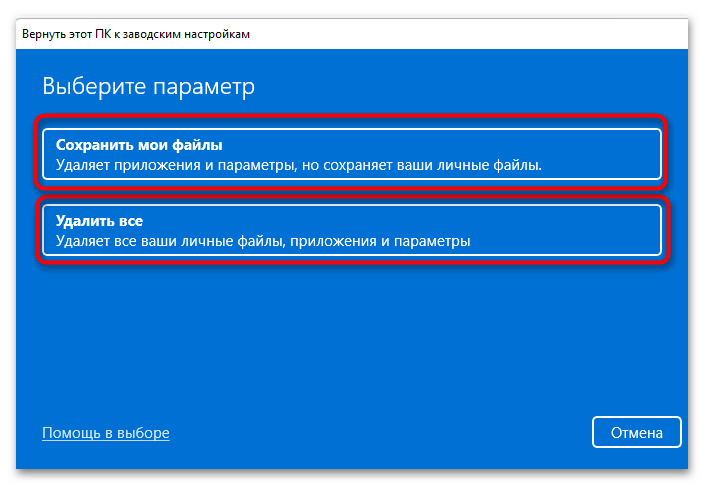
Завершим статью самым радикальным методом исправления ошибок, который подразумевает возвращение Windows 11 в исходное состояние. Будет выполнена локальная переустановка, а вы сможете решить, сохранять при этом пользовательские файлы или удалять их, чтобы получить «чистую» операционную систему.
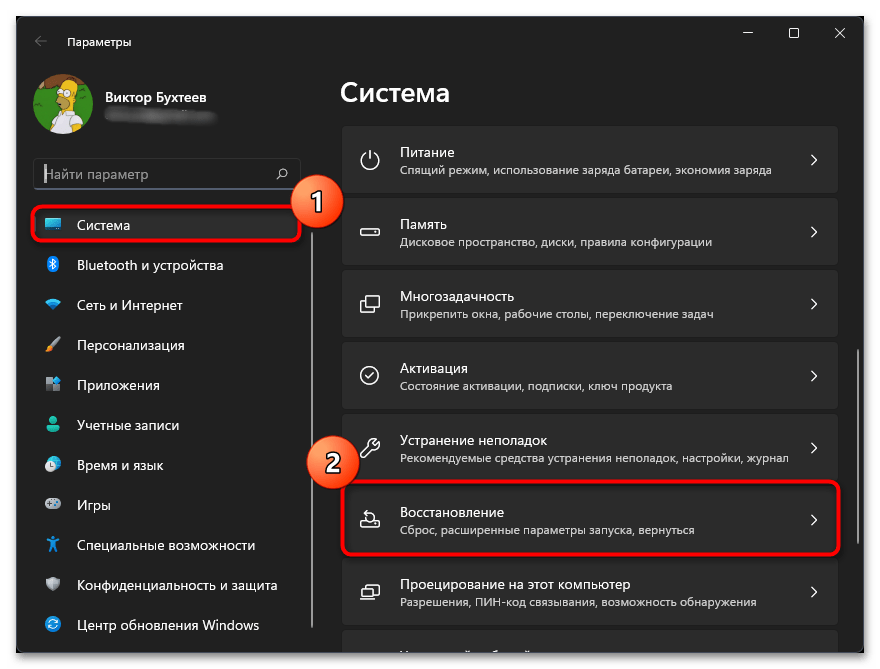
- Откройте «Пуск» и перейдите в «Параметры».
- В разделе «Система» кликните левой кнопкой мыши по плитке «Восстановление».
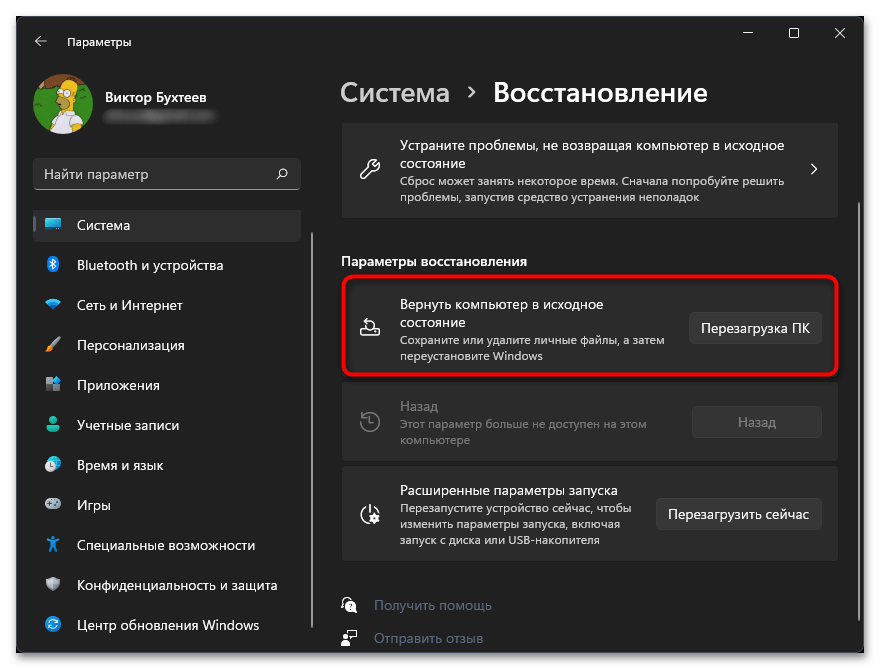
- Возле пункта «Вернуть компьютер в исходное состояние» найдите кнопку «Перезагрузка ПК» и щелкните по ней.
- После перезагрузки решите, нужно ли сохранять пользовательские файлы.
- Затем выберите режим «Локальная переустановка».
- Подтвердите начало процесса, ожидайте возвращения ОС в исходное состояние, затем приступайте к работе с ней, в первую очередь проверив доступ к «Безопасности Windows».


Наша группа в TelegramПолезные советы и помощь
If you’ve recently been hit by a virus or malware attack and notice that the Windows Defender Security Center Service is gone from the services.msc on your Windows 11 or 10 PC, it’s a pretty serious issue you’re facing right now. This means that Windows Defender is not active at the moment to protect your computer and you might be at risk for more attacks.
In this post, we’ll talk about why this happens and show you some steps to get the missing Windows Security Center Service back.
What is the problem?
Here’s the issue: you try to turn on Windows Defender after a malware mess, and get a message saying, “Security at a glance – Page not available” when you try to look at the Windows Security settings. When you peek into Services.msc, the Windows Security Center Service isn’t there, which means you can’t turn on Windows Defender.
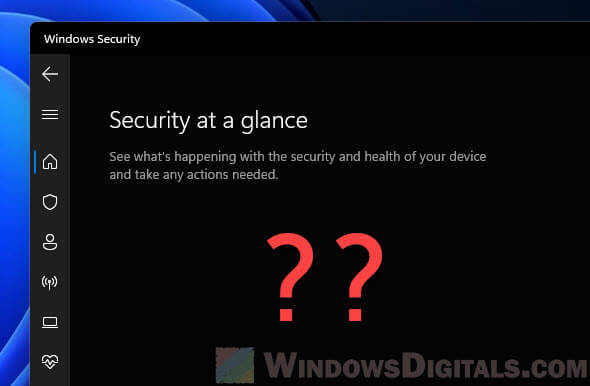
Sometimes, you might even see a pop-up saying “You’ll need a new app to open this windowsdefender link” when trying to open the Windows Security settings.
Well, there are a few things that can cause this issue. In most cases, it’s because of a very intelligent virus or malware that has messed up your Security Center service and making it disappear so you cannot turn it on. The very first thing you should try is to restart your computer and see if the service comes back. If not, proceed to the following solutions.
Related issue: Windows 11 Security Tab Missing in Properties
How to fix Windows Security Center Service not found issue
Well, there are a few workarounds to fix the missing Windows Security Center Service issue. We’ll go through the fixes below.
Reinstall Windows Defender
First off, try reinstalling Windows Defender. This can bring back all the needed services for Windows Defender and Security Center. You can do this with a few methods, like using a simple PowerShell command. Give this a shot first and see if it sorts out the problem. If not, move on to the next step.
Restore Windows Defender Service using registry
If reinstalling didn’t help, you can get the Windows Defender Service back in Windows 11 or 10 using a registry file. But, you’ll need to start regedit.exe as TrustedInstaller first.
Also see: Windows Registry Key “Access is Denied” Error
Run regedit.exe as TrustedInstaller using Advanced Run
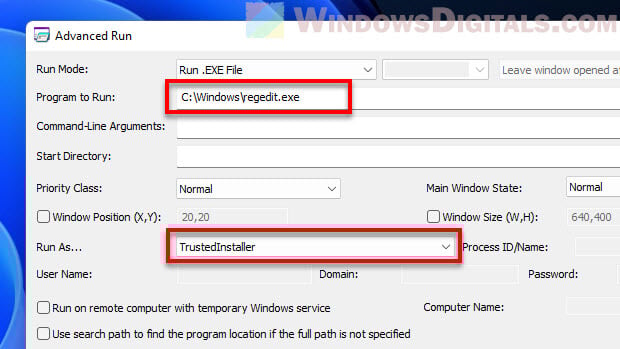
Advanced Run is a very useful tool from Nirsoft that lets you run programs with extra permissions, like as an administrator or TrustedInstaller. It’s great for when you need special access to run certain programs, such as this situation now. With Advanced Run, you can start regedit.exe as TrustedInstaller to add the registry key needed to get the Windows Defender Service back.
- Get Advanced Run from Nirsoft and unzip it somewhere on your computer.
https://www.nirsoft.net/utils/advanced_run.html
- Open the folder and double-click on the “AdvancedRun.exe” file.
- Hit the “Browse” button and find the Registry Editor executable file (regedit.exe) or type in the path: “C:\Windows\regedit.exe“.
- In the “Run As” section, pick “TrustedInstaller” from the list.
- Press the “Run” button to open regedit.exe as TrustedInstaller.

Import the Windows Defender Service restoration registry file
With regedit.exe running as TrustedInstaller, you can now add the registry file to get the Windows Defender Service back.
Warning: Messing with the registry can be risky. If you’re not sure, it might be better to ask for help from someone who knows what they’re doing. Always make a system restore point or back up the registry before changing anything, just to be safe.
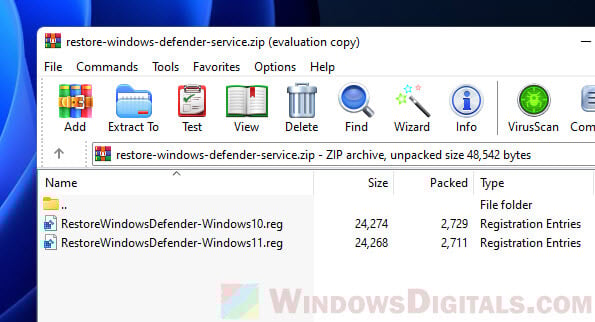
- Download our restore Windows Defender service registry fix.
- Unzip the file (better to do it on the C: drive).

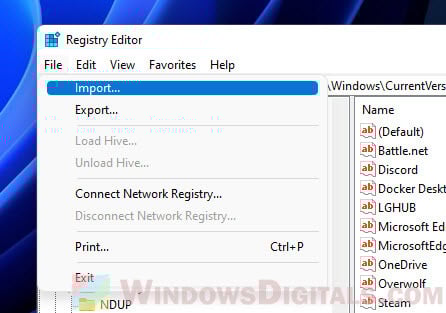
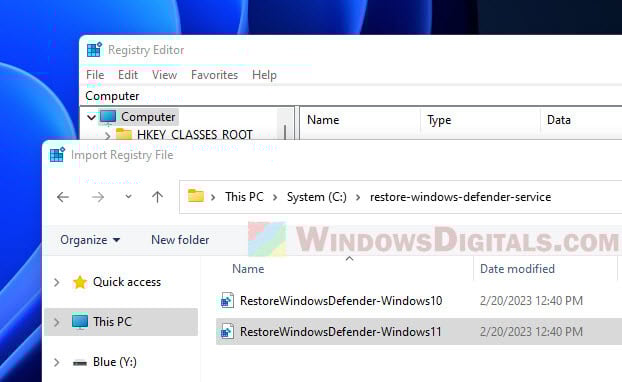
- In the Registry Editor, click File and choose Import.

- Find the registry file for your version of Windows. If you’re on Windows 11, pick the RestoreWindowsDefender-Windows11.reg file.

- Click Yes when asked for confirmation.
- Close the Registry Editor and restart your computer.
After a restart, check if the Security Center Service is back. If it is, make sure to update Windows Defender right away.
If the Security Center Service is still missing, you might have to think about resetting or doing a clean install of Windows 11/10.
Reset or clean reinstall Windows 11/10
If nothing else worked, you might need to reset or do a clean install of Windows 11 or 10. Resetting Windows lets you keep your files (not all files) but removes apps and drivers, while a clean install wipes everything and starts fresh. These steps might take some time but can help restore the missing Windows Defender or Security Center service.
But, a clean install should always only be considered as a last resort. And always back up your important files that you couldn’t afford to lose before doing so.
Repair Windows Security services with SFC and DISM
When things like this happen, it’s a common practice to try running the SFC (System File Checker) and DISM (Deployment Image Servicing and Management). This is to fix any corrupted or missing system files, which include things like the Windows Defender Security Center Service.
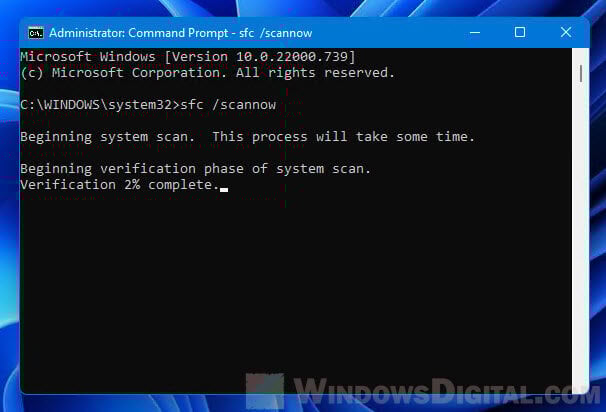
To run SFC, open Command Prompt as an admin and type “sfc /scannow” then press Enter. It might take a while, but it will tell you if it found and fixed any issues.
To run DISM, open Command Prompt as admin and type “dism /online /cleanup-image /restorehealth” then press Enter. This scan can also take a bit but can help fix system image issues.
What to do if the Windows Security Center Service disappears again
If the Windows Security Center service vanishes again, it might mean your computer is still under attack by the same or different malware. In this situation, you’ll have to react quickly and use a trusted antivirus to run a full scan on your system. Pick a well-known antivirus that’s good at finding and getting rid of malware and viruses.
If it finds anything, follow the antivirus’s advice to remove the malware. After the threats are gone, you can try to get the Windows Security Center service back again.
Some final words
To prevent similar issue from happening again, keep everything updated, use reliable antivirus software, and be careful online. Avoid sketchy websites, don’t download stuff from people you don’t trust, and watch out for scams. We hope this guide helps you fix the missing Windows Defender Security Center Service issue.