
Во время апдейта до Windows 10 через Media Creation Tool некоторые пользователи могут сталкиваться с ошибкой 0x8007001f – 0x20006. В сообщении ошибки может содержаться следующая информация:
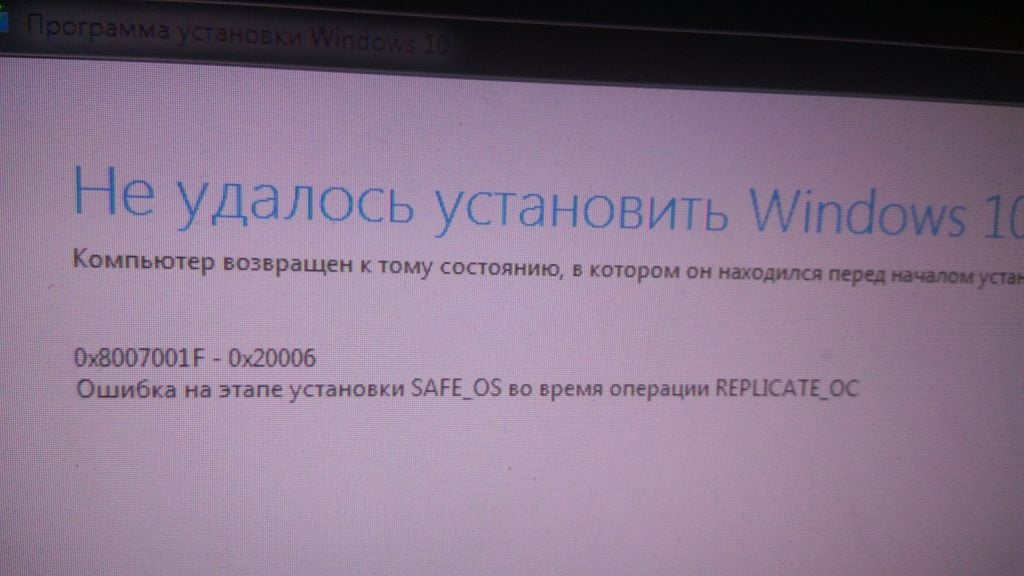
Не удалось установить Windows 10
Компьютер возвращен к тому состоянию, в котором он находился перед началом установки Windows 10.0x8007001f – 0x20006
Ошибка на этапе установки SAFE_OS во время операции REPLICATE_OC
Во время этапа SAFE_OS запускается установка всех необходимых для операционной системы обновлений, тем не менее в какой-то момент что-то идет не так и Media Creation Tool показывает пользователю ошибку 0x8007001f – 0x20006. Этим «что-то» может являться прерванная загрузка файлов апдейта, проблемы с интернет-подключением и многое другое.
Как избавиться от ошибки 0x8007001f – 0x20006?
Решение №1 Запуск средства устранения неполадок
Первым делом вы должны попробовать запустить средство устранения неполадок с Центром обновления и посмотреть, получится ли у него устранить вашу проблему. Перейдите по следующей ссылке для загрузки файла WindowsUpdate.diagcab. Запустите скачанный файл, после чего перед вами должно появиться следующее окошко:
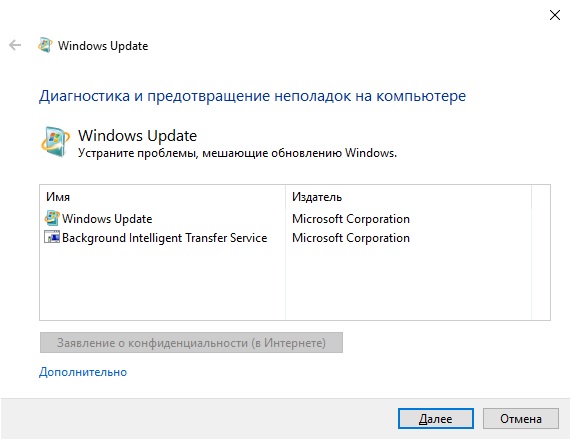
Нажмите на пункт «Дополнительно» в нижнем левом углу окна и поставьте галочку возле опции «Автоматически применять исправления». Далее нажмите на кнопку «Далее» и следуйте последующим инструкциям на экране.
Решение №2 Сброс компонентов Центра обновления
В некоторых случаях для решения ошибки 0x8007001f – 0x20006 может потребоваться сброс всех компонентов Центра обновления Windows. Благо, уже давно существуют способы автоматизации данного процесса — вам не придется с полчаса сидеть за Командной строкой, вручную прописывая каждую команду.
Предлагаем вам воспользоваться скриптом смышленного пользователя-энтузиаста, способного полностью сбросить все компоненты вашего Центра обновления. Нажмите Win+R, после чего выполните значение notepad.exe. Далее вставьте в окно Блокнота следующий скрипт:
:: Run the reset Windows Update components.
:: void components();
:: /*************************************************************************************/
:components
:: —— Stopping the Windows Update services ——
call :print Stopping the Windows Update services.
net stop bitscall :print Stopping the Windows Update services.
net stop wuauservcall :print Stopping the Windows Update services.
net stop appidsvccall :print Stopping the Windows Update services.
net stop cryptsvccall :print Canceling the Windows Update process.
taskkill /im wuauclt.exe /f
:: —— Checking the services status ——
call :print Checking the services status.sc query bits | findstr /I /C:»STOPPED»
if %errorlevel% NEQ 0 (
echo. Failed to stop the BITS service.
echo.
echo.Press any key to continue . . .
pause>nul
goto :eof
)call :print Checking the services status.sc query wuauserv | findstr /I /C:»STOPPED»
if %errorlevel% NEQ 0 (
echo. Failed to stop the Windows Update service.
echo.
echo.Press any key to continue . . .
pause>nul
goto :eof
)call :print Checking the services status.
sc query appidsvc | findstr /I /C:»STOPPED»
if %errorlevel% NEQ 0 (
sc query appidsvc | findstr /I /C:»OpenService FAILED 1060″
if %errorlevel% NEQ 0 (
echo. Failed to stop the Application Identity service.
echo.
echo.Press any key to continue . . .
pause>nul
if %family% NEQ 6 goto :eof
)
)call :print Checking the services status.
sc query cryptsvc | findstr /I /C:»STOPPED»
if %errorlevel% NEQ 0 (
echo. Failed to stop the Cryptographic Services service.
echo.
echo.Press any key to continue . . .
pause>nul
goto :eof
):: —— Delete the qmgr*.dat files ——
call :print Deleting the qmgr*.dat files.del /s /q /f «%ALLUSERSPROFILE%\Application Data\Microsoft\Network\Downloader\qmgr*.dat»
del /s /q /f «%ALLUSERSPROFILE%\Microsoft\Network\Downloader\qmgr*.dat»:: —— Renaming the softare distribution folders backup copies ——
call :print Deleting the old software distribution backup copies.cd /d %SYSTEMROOT%
if exist «%SYSTEMROOT%\winsxs\pending.xml.bak» (
del /s /q /f «%SYSTEMROOT%\winsxs\pending.xml.bak»
)
if exist «%SYSTEMROOT%\SoftwareDistribution.bak» (
rmdir /s /q «%SYSTEMROOT%\SoftwareDistribution.bak»
)
if exist «%SYSTEMROOT%\system32\Catroot2.bak» (
rmdir /s /q «%SYSTEMROOT%\system32\Catroot2.bak»
)
if exist «%SYSTEMROOT%\WindowsUpdate.log.bak» (
del /s /q /f «%SYSTEMROOT%\WindowsUpdate.log.bak»
)call :print Renaming the software distribution folders.
if exist «%SYSTEMROOT%\winsxs\pending.xml» (
takeown /f «%SYSTEMROOT%\winsxs\pending.xml»
attrib -r -s -h /s /d «%SYSTEMROOT%\winsxs\pending.xml»
ren «%SYSTEMROOT%\winsxs\pending.xml» pending.xml.bak
)
if exist «%SYSTEMROOT%\SoftwareDistribution» (
attrib -r -s -h /s /d «%SYSTEMROOT%\SoftwareDistribution»
ren «%SYSTEMROOT%\SoftwareDistribution» SoftwareDistribution.bak
if exist «%SYSTEMROOT%\SoftwareDistribution» (
echo.
echo. Failed to rename the SoftwareDistribution folder.
echo.
echo.Press any key to continue . . .
pause>nul
goto :eof
)
)
if exist «%SYSTEMROOT%\system32\Catroot2» (
attrib -r -s -h /s /d «%SYSTEMROOT%\system32\Catroot2»
ren «%SYSTEMROOT%\system32\Catroot2» Catroot2.bak
)
if exist «%SYSTEMROOT%\WindowsUpdate.log» (
attrib -r -s -h /s /d «%SYSTEMROOT%\WindowsUpdate.log»
ren «%SYSTEMROOT%\WindowsUpdate.log» WindowsUpdate.log.bak
):: —— Reset the BITS service and the Windows Update service to the default security descriptor ——
call :print Reset the BITS service and the Windows Update service to the default security descriptor.sc.exe sdset wuauserv D:(A;;CCLCSWLOCRRC;;;AU)(A;;CCDCLCSWRPWPDTLOCRSDRCWDWO;;;BA)(A;;CCDCLCSWRPWPDTLCRSDRCWDWO;;;SO)(A;;CCLCSWRPWPDTLOCRRC;;;SY)S:(AU;FA;CCDCLCSWRPWPDTLOCRSDRCWDWO;;WD)
sc.exe sdset bits D:(A;;CCLCSWLOCRRC;;;AU)(A;;CCDCLCSWRPWPDTLOCRSDRCWDWO;;;BA)(A;;CCDCLCSWRPWPDTLCRSDRCWDWO;;;SO)(A;;CCLCSWRPWPDTLOCRRC;;;SY)S:(AU;FA;CCDCLCSWRPWPDTLOCRSDRCWDWO;;WD)
sc.exe sdset cryptsvc D:(A;;CCLCSWLOCRRC;;;AU)(A;;CCDCLCSWRPWPDTLOCRSDRCWDWO;;;BA)(A;;CCDCLCSWRPWPDTLCRSDRCWDWO;;;SO)(A;;CCLCSWRPWPDTLOCRRC;;;SY)S:(AU;FA;CCDCLCSWRPWPDTLOCRSDRCWDWO;;WD)
sc.exe sdset trustedinstaller D:(A;;CCLCSWLOCRRC;;;AU)(A;;CCDCLCSWRPWPDTLOCRSDRCWDWO;;;BA)(A;;CCDCLCSWRPWPDTLCRSDRCWDWO;;;SO)(A;;CCLCSWRPWPDTLOCRRC;;;SY)S:(AU;FA;CCDCLCSWRPWPDTLOCRSDRCWDWO;;WD):: —— Reregister the BITS files and the Windows Update files ——
call :print Reregister the BITS files and the Windows Update files.cd /d %SYSTEMROOT%\system32
regsvr32.exe /s atl.dll
regsvr32.exe /s urlmon.dll
regsvr32.exe /s mshtml.dll
regsvr32.exe /s shdocvw.dll
regsvr32.exe /s browseui.dll
regsvr32.exe /s jscript.dll
regsvr32.exe /s vbscript.dll
regsvr32.exe /s scrrun.dll
regsvr32.exe /s msxml.dll
regsvr32.exe /s msxml3.dll
regsvr32.exe /s msxml6.dll
regsvr32.exe /s actxprxy.dll
regsvr32.exe /s softpub.dll
regsvr32.exe /s wintrust.dll
regsvr32.exe /s dssenh.dll
regsvr32.exe /s rsaenh.dll
regsvr32.exe /s gpkcsp.dll
regsvr32.exe /s sccbase.dll
regsvr32.exe /s slbcsp.dll
regsvr32.exe /s cryptdlg.dll
regsvr32.exe /s oleaut32.dll
regsvr32.exe /s ole32.dll
regsvr32.exe /s shell32.dll
regsvr32.exe /s initpki.dll
regsvr32.exe /s wuapi.dll
regsvr32.exe /s wuaueng.dll
regsvr32.exe /s wuaueng1.dll
regsvr32.exe /s wucltui.dll
regsvr32.exe /s wups.dll
regsvr32.exe /s wups2.dll
regsvr32.exe /s wuweb.dll
regsvr32.exe /s qmgr.dll
regsvr32.exe /s qmgrprxy.dll
regsvr32.exe /s wucltux.dll
regsvr32.exe /s muweb.dll
regsvr32.exe /s wuwebv.dll:: —— Resetting Winsock ——
call :print Resetting Winsock.
netsh winsock reset:: —— Resetting WinHTTP Proxy ——
call :print Resetting WinHTTP Proxy.if %family% EQU 5 (
proxycfg.exe -d
) else (
netsh winhttp reset proxy
):: —— Set the startup type as automatic ——
call :print Resetting the services as automatics.
sc.exe config wuauserv start= auto
sc.exe config bits start= delayed-auto
sc.exe config cryptsvc start= auto
sc.exe config TrustedInstaller start= demand
sc.exe config DcomLaunch start= auto:: —— Starting the Windows Update services ——
call :print Starting the Windows Update services.
net start bitscall :print Starting the Windows Update services.
net start wuauservcall :print Starting the Windows Update services.
net start appidsvccall :print Starting the Windows Update services.
net start cryptsvccall :print Starting the Windows Update services.
net start DcomLaunch:: —— End process ——
call :print The operation completed successfully.echo.Press any key to continue . . .
pause>nul
goto :eof
:: /*************************************************************************************/
Нажмите на пункт «Файл» в строке меню окна и выберите «Сохранить как…». Задайте файлу имя WUReset.cmd (обязательно выставьте расширение cmd!) и сохраните его в удобное для вас место на ПК, например, на рабочем столе. Создав файл, дважды кликните на него ЛКМ и наблюдайте за сбросом Центра обновления. Как только все закончится, перезагрузите компьютер и проверьте наличие ошибки 0x8007001f – 0x20006.
Решение №3 Отключение брандмауэра и антивируса
Бывают случаи, когда процессу установки Windows 10 могут мешать активный фаервол или антивирус. Чтобы отключить брандмауэр Windows, вам нужно сделать следующее:
- нажмите Win+R;
- напишите control и нажмите Enter;
- перейдите в раздел «Брандмауэр Защитника Windows»;
- кликните на ссылку «Включение и отключение брандмауэра Защитника Windows»;
- поставьте галочки возле отключения брандмауэра для каждого типа сети;
- сохраните изменения.
Для деактивации Защитника Windows, необходимо сделать следующее:
- нажмите Win+S;
- напишите запрос «Параметры Защитника Windows» и выберите найденный результат;
- далее кликните на пункты «Защита от вирусов и угроз→Управление настройками»;
- выставьте переключатель «Защита в режиме реального времени» в положение «Откл.»;
- сохраните изменения и перезагрузите компьютер.
Запустите обновление до «десятки» еще раз и посмотрите, покажется ли ошибка 0x8007001f – 0x20006.
Решение №4 Чистая загрузка системы
Возможно, какое-то программное обеспечение на вашем компьютере мешает установке Windows 10. Это легко проверить, начисто загрузив свою ОС. Делается это следующим образом:
- нажмите Win+R;
- пропишите msconfig и нажмите Enter;
- перейдите во вкладку «Службы»;
- поставьте галочку возле опции «Не отображать службы Майкрософт» и нажмите кнопку «Отключить все»;
- перейдите во вкладку «Автозагрузка»;
- кликните на ссылку «Открыть диспетчер задач»;
- деактивируйте всё ПО, которое будет находиться перед вами в списке;
- перезагрузите компьютер и запустите обновление до Windows 10 еще раз.
Надеемся, что данный материал был полезен для вас в решении ошибки 0x8007001f – 0x20006.
В этой статье я перечислю шаги, которые могут помочь справиться с нежеланием Windows 7 обновляться до ОС старшей версии и раскажу, что помогло именно мне.
Операционная система Windows может выдать такое сообщение, например, после неудачной попытки установки обновлений в Windows 10. Когда я попробовал обновить ОС Windows 7 до Windows 10 система сообщила, что она откатывается назад… После перезагрузки компьютера и входа в учётную запись, выскочило окно, в котором отображался злосчастный код и дополнительная информация:
0x8007001F 0x20006 Failed in the Safe_OS Phase with an error during Replicate_OC operation
Причина может заключаться в нестабильной работе сетевого адаптера/сбоях при подключении к сети (часто), в тяжёлом и надоедливом антивирусе, некотором ПО (например КриптоПро)… К сожалению, в списке часто встречающихся ошибок при обновлении Windows на сайте Microsoft нет информации о 0x8007001F 0x20006. Так что же нужно делать?
Если вы точно не знаете в чём причина или просто лень разбираться, то можно выполнить следующее:
1. Установите последние обновления для Windows 7. Это можно сделать через Центр обновлений Windows или с помощью PowerShell, используя модуль PSWindowsUpdate. Выбирайте на свой вкус. Если имеются какие-либо иные ошибки в центре Центр обновлений, то рекомендуется с ними разобраться. Например, можно использовать встроенный в Windows Troubleshooter обновлений.
2. Убедитесь, что в системе нет неопознанных устройств или повреждённых драйверов. Откройте диспетчер устройств: WIN+R —> devmgmt.msc —> Enter. Если есть проблемы, то диспетчер сообщит вам об этом: на значке устройства будет отображаться жёлтый восклицательный знак. В таком случае удалите драйвер и установите новый, скачав его с сайта производителя. Также на момент обновления системы лучше отключить всю периферию.
2.1. Обновите драйверы для всех устройств.
3. Отключите антивирус и Firewall.
4. Старые системные файлы (обновления), которые во время не очищаются самой ОС могут быть причиной. Поэтому для начала можно очистить кэш Центра обновлений. Удалите скрытые папки $ Windows. ~ BT & $ Windows. ~ WS. Далее остановите службу Windows Update командой net stop wuauserv , а затем перейдите в C:\Windows\SoftwareDistribution\Download и удалите все файлы в этой папке. Безболезненно этим можно заняться и в DataStore\Logs.
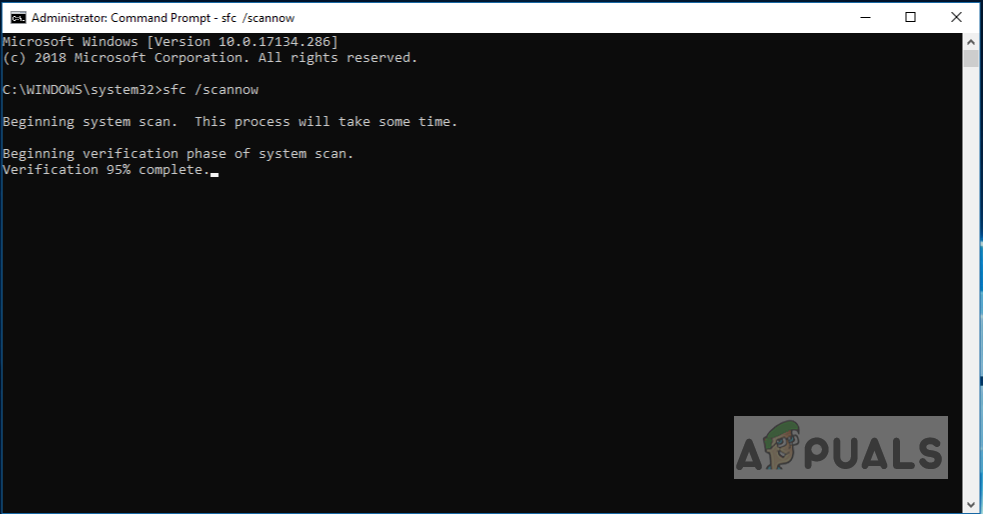
5. Проверьте целостность системных файлов. Запустите CMD от имени администратора и введите команду sfc /scannow. Если система обнаружила повреждённые файлы и не смогла их восстановить, то возможно инструкция от Microsoft сможет помочь вам.
6. Проверьте диск командой chkdsk C: /f /r. Параметр /f попытается исправить, если будут найдёны ошибки.
7. Выполните чистую загрузку ОС Windows 7. Для этого выполните следующее:
— запустите msconfig с правами администратора
- установите настройки во вкладе «Общие» как на картинке ниже:
— перейдите на вкладку «Службы» и выставите следующие настройки; нажмите кнопку «Отключить все».
Таким образом будут работать самые необходимые для системы службы, а не обязательные программы, процессы, службы не запустятся. Для усиления «эффекта» можно отключить ещё драйверы устройств, оставив нетронутыми только драйверы для сетевой карты. Перезагрузите компьютер, система запустится в чистом режиме. Выполняйте обновление.
8. Ремонтная установка Windows 7 (Repair Install). Она позволяет переустановить систему, оставив программы и директорию пользователя на своих местах. Если вы не пользуетесь OEM лицензией, то можете попробовать выполнить ремонтную установку. Скорее всего впоследствии вам удастся обновить систему до Windows 10.
9* Что помогло мне… Recovery Factory… В моём случае сложность заключалась ещё в том, что использовалась OEM лицензия. Выполнять ремонтную установку было очень опасно, всегда может что-то пойти не так, тем более нет чёткой информации как это правильно сделать. Сбросить систему до заводских настроек очень просто. Достаточно скачать средство (утилиту) с сайта изготовителя вашего ноутбука, и выполнить рекомендации мастера создания загрузочного носителя с образом операционной системы.
This error is encountered when users try to update their Windows Operating System. This is a system error that is caused due to a corrupt system file. This can lead to other problems such as Windows not being able to update or other System applications that might not update. It can also cause third-party Software Applications installed on your system to stop working.
It is important to keep the Windows updated because if you miss the security updates then you leave your system vulnerable to cyber attacks, viruses, and malware. Even if the update does not remove the security vulnerability, it still enhances the overall stability of the computer system and it also installs the latest features offered by the Windows Operating System and also patches the already installed software.
Method 1: Manually Update the Windows
In this method, we will try to update the Windows Operating System through the Command Prompt also known as the Power Shell. Windows Power Shell offers more control over the operating system and allows the user to perform tasks that are otherwise not possible to perform in the native Graphical Environment.
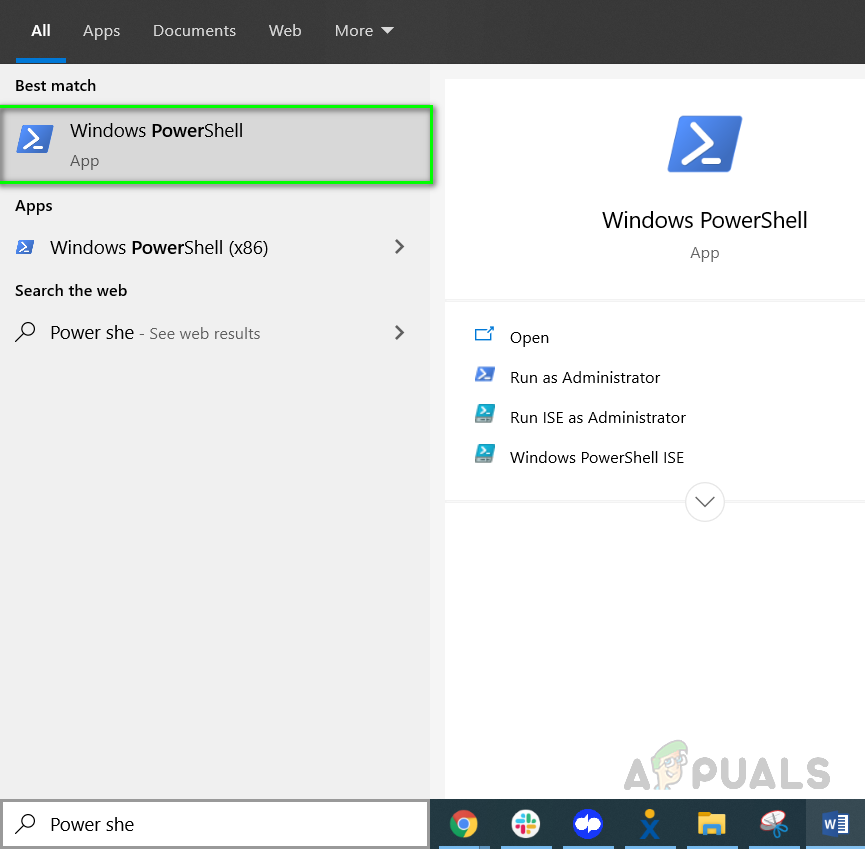
- Open Windows Power Shell by going to Windows Start > Windows Powershell, run this program as administrator.

Open Window s Power Shell as administrator - In the PowerShell type in the following commands in the sequence.
net stop wuauserv
net stop cryptSvc
net stop bits
net stop msiserver
Ren C:\Windows\SoftwareDistribution SoftwareDistribution.old
Ren C:\Windows\System32\catroot2 Catroot2.old
net start wuauserv
net start cryptSvc
net start bits
net start msiserver
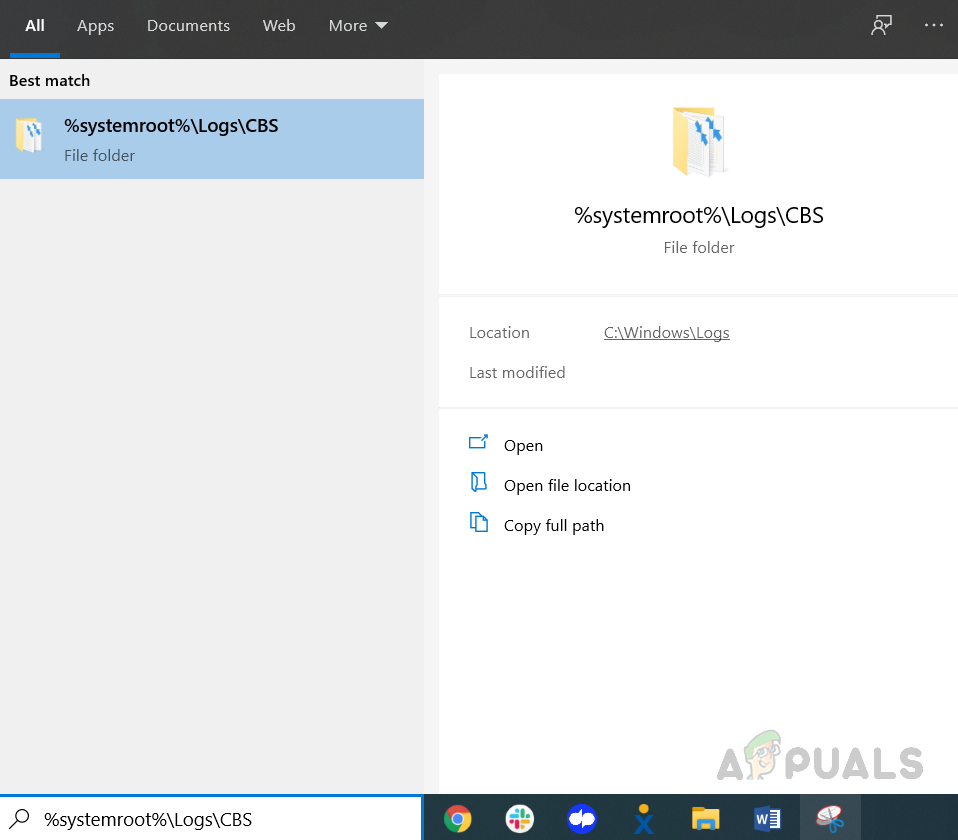
- Now to go to Windows Search Box and type the following command and press Enter.
%systemroot%\Logs\CBS

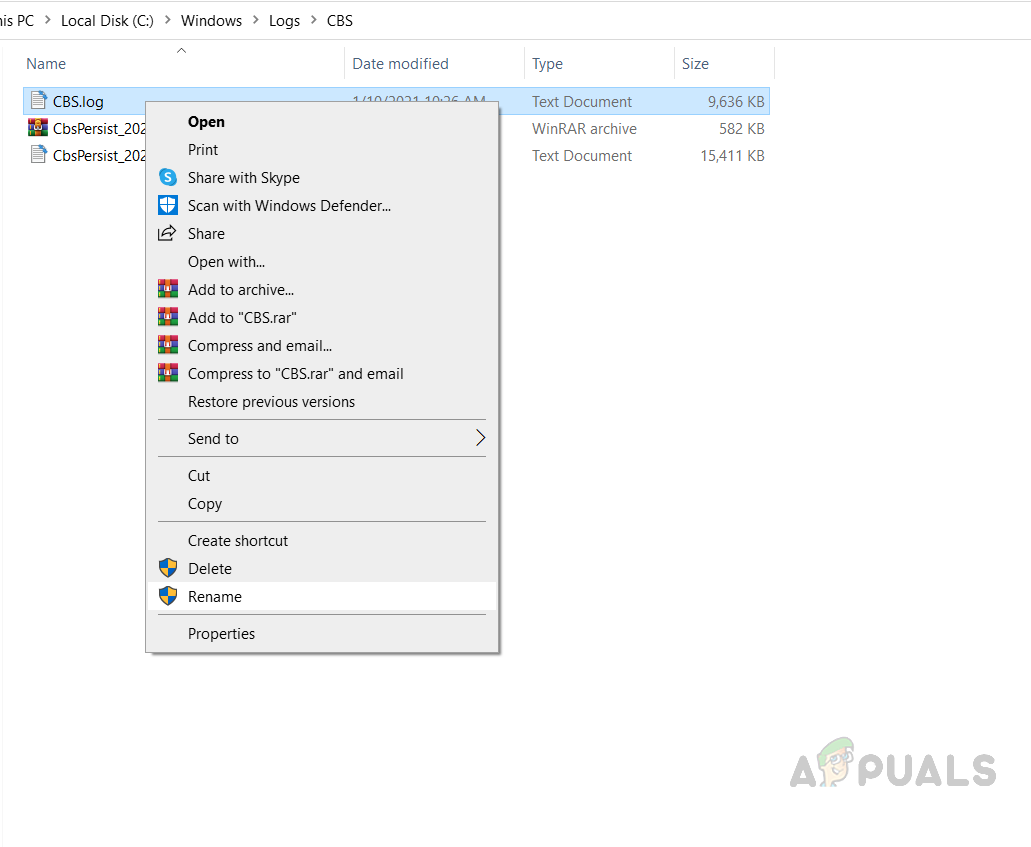
Open CBS.log file folder - You will see the file with the name CBS.Log, rename it to something else.

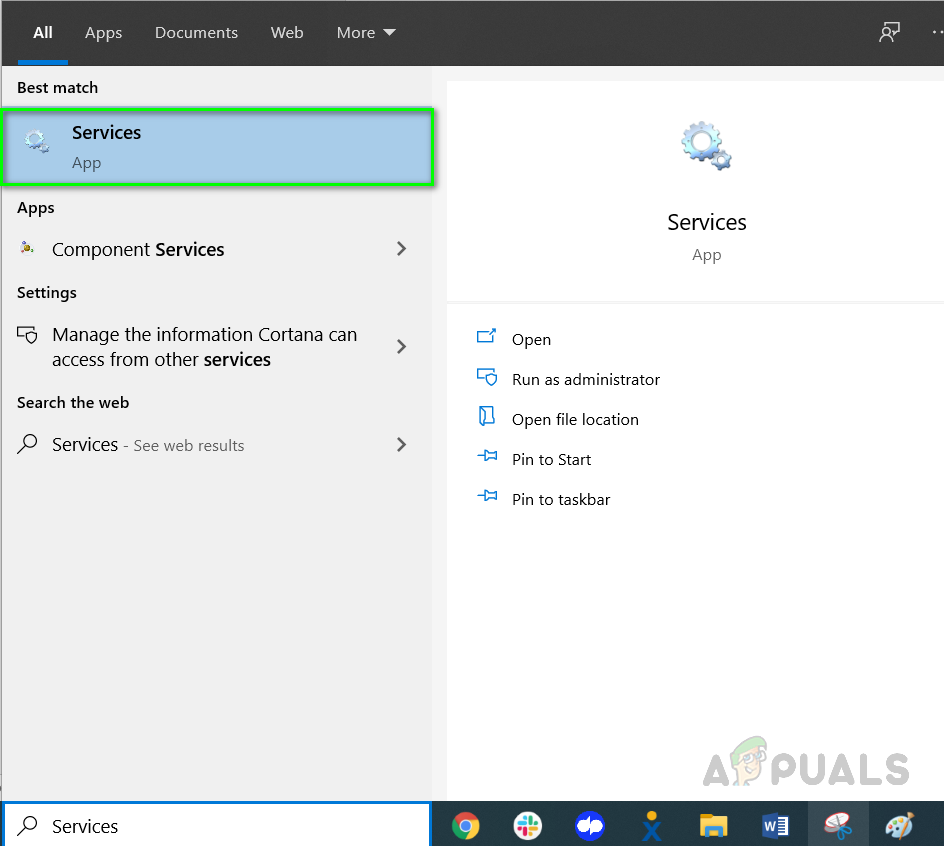
Rename CBS Log file to something else - If you are unable to rename the file then again go to the Search box and type in Services.

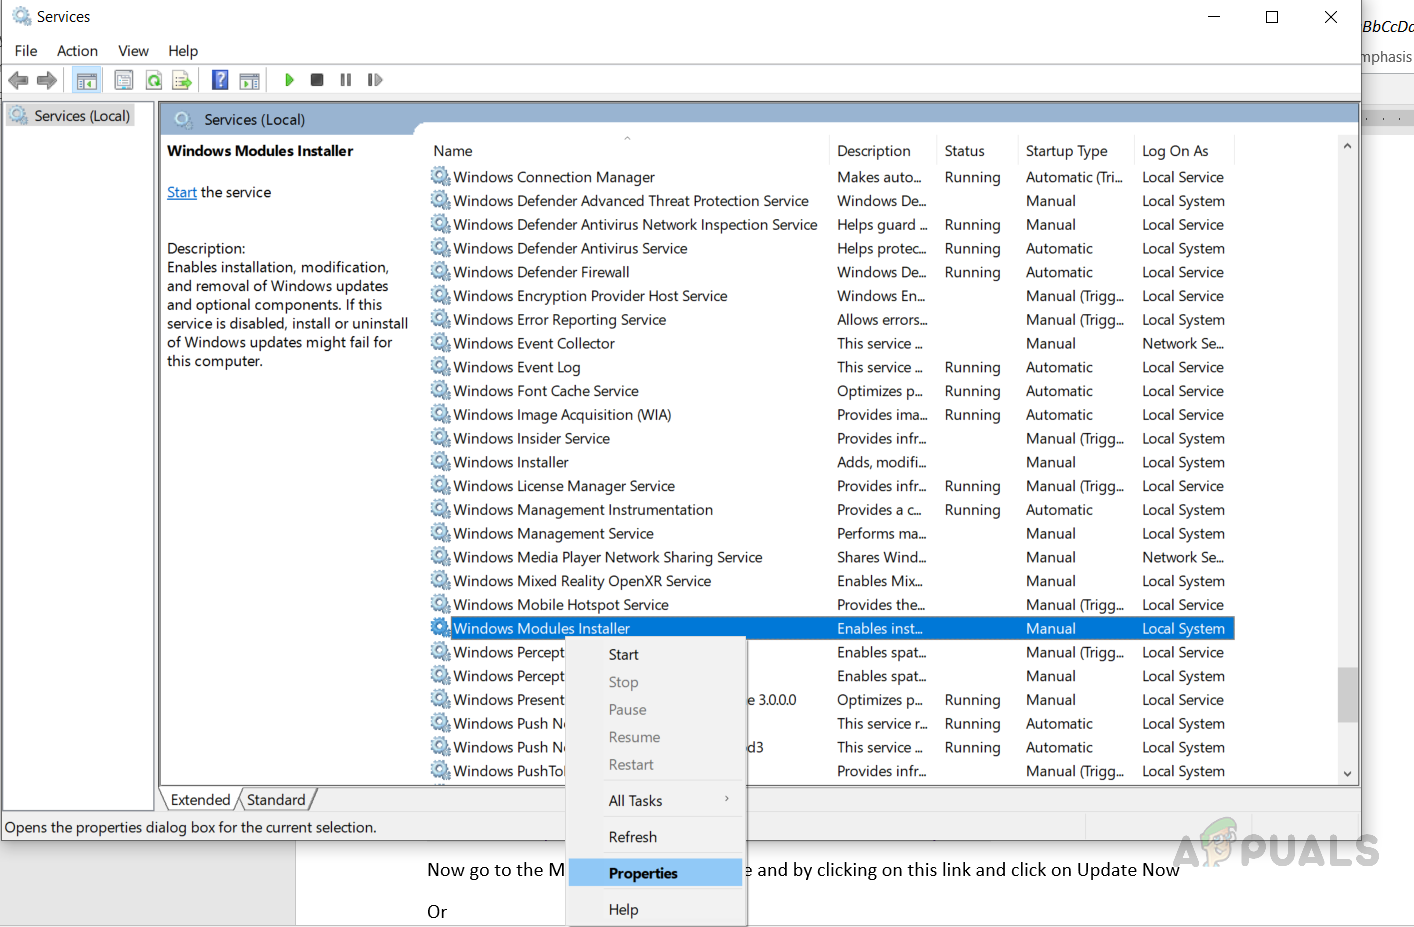
Open Windows Services - Find the Windows Module installer Service and double click on it to open the properties

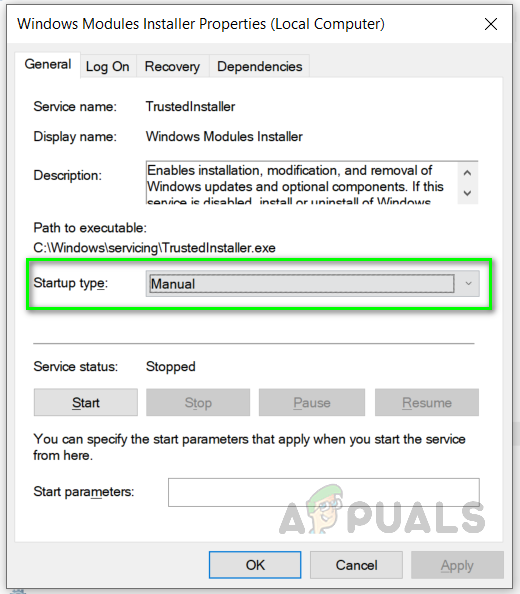
Open Windows Module Installer Properties - Change the startup type to Manual and then restart the computer.

Change the Startup type to manual - Now try to Rename the CBS.log file as instructed in step and then again restart the computer.
- Once restarted change the Windows Module Installer Startup Type to Automatic.
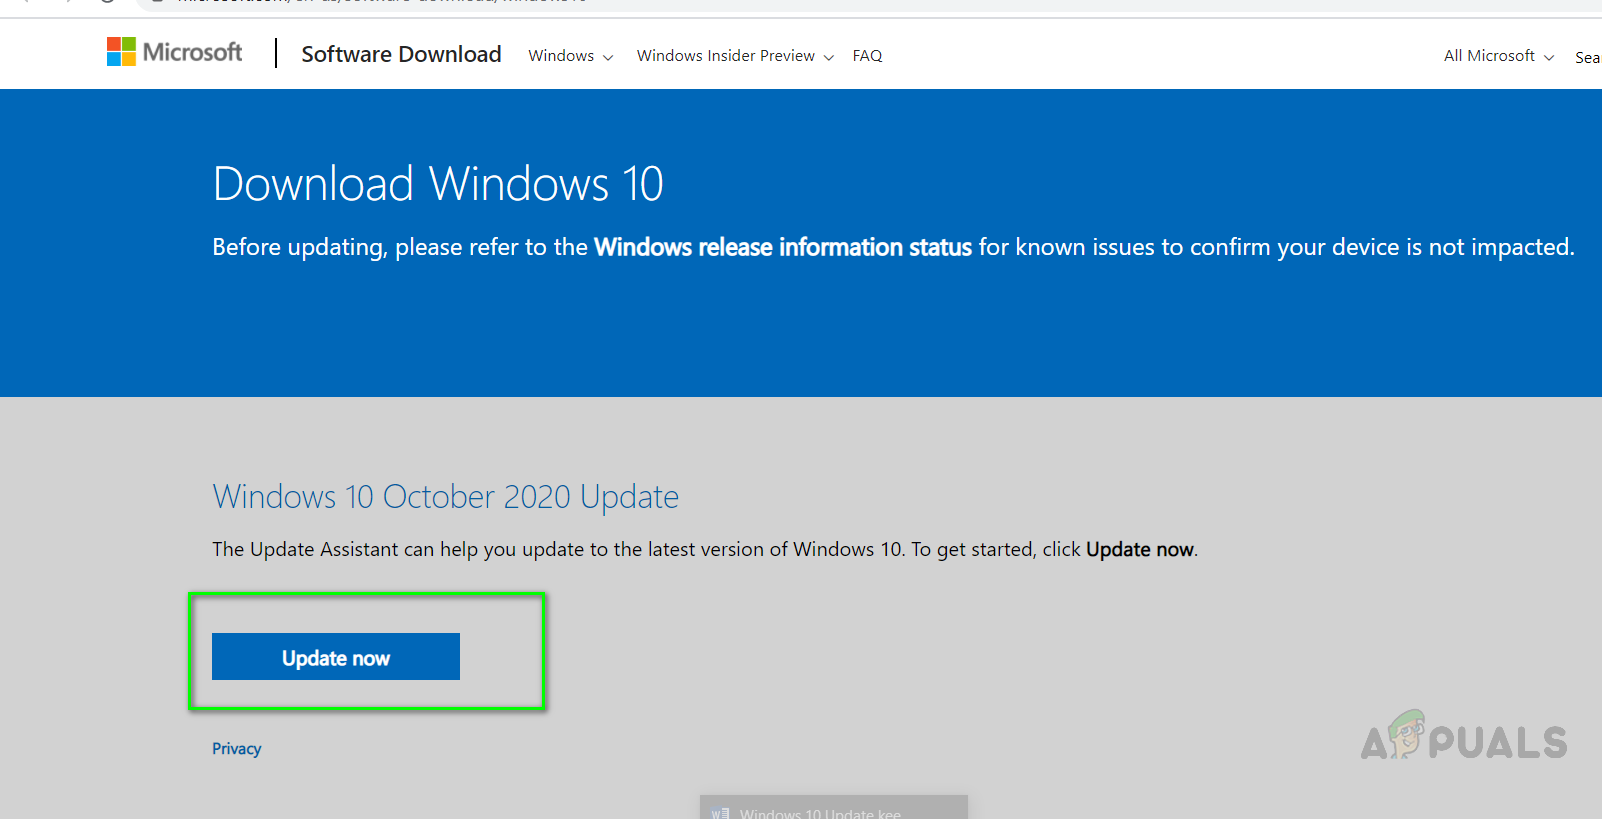
- Now go to the Microsoft Oficial website and by clicking on this link and click on the Update Now button.

Click Update now
Method 2: Perform a Repair Install of Windows 10
In this method, we will perform a repair install of Windows 10. This method allows an in-place upgrade without losing anything other than all installed Windows Updates. You will keep all the previously installed applications and programs since an in-place upgrade works the same as a normal upgrade. You do not need to go into boot or Safe Mode to perform this upgrade, it can be done directly from the Windows Environment. You will need to make sure that you have the following available:
- At least 9GB of free space on the drive where Windows is installed
- An installation media (CD or Bootable USB) which has the same .ISO image file that is already installed on your computer including the exact same edition and build
- The installation media should be in the same language as the system default language of your currently installed Windows.
- The .ISO image should be the same as your current Windows architecture, i.e. if you have 32-bit Windows installed the .ISO should be 32-bit as well and if you have the 64-bit version installed then .ISO image should also be the 64-bit version.
- You should be logged in as an Administrator account to perform this upgrade
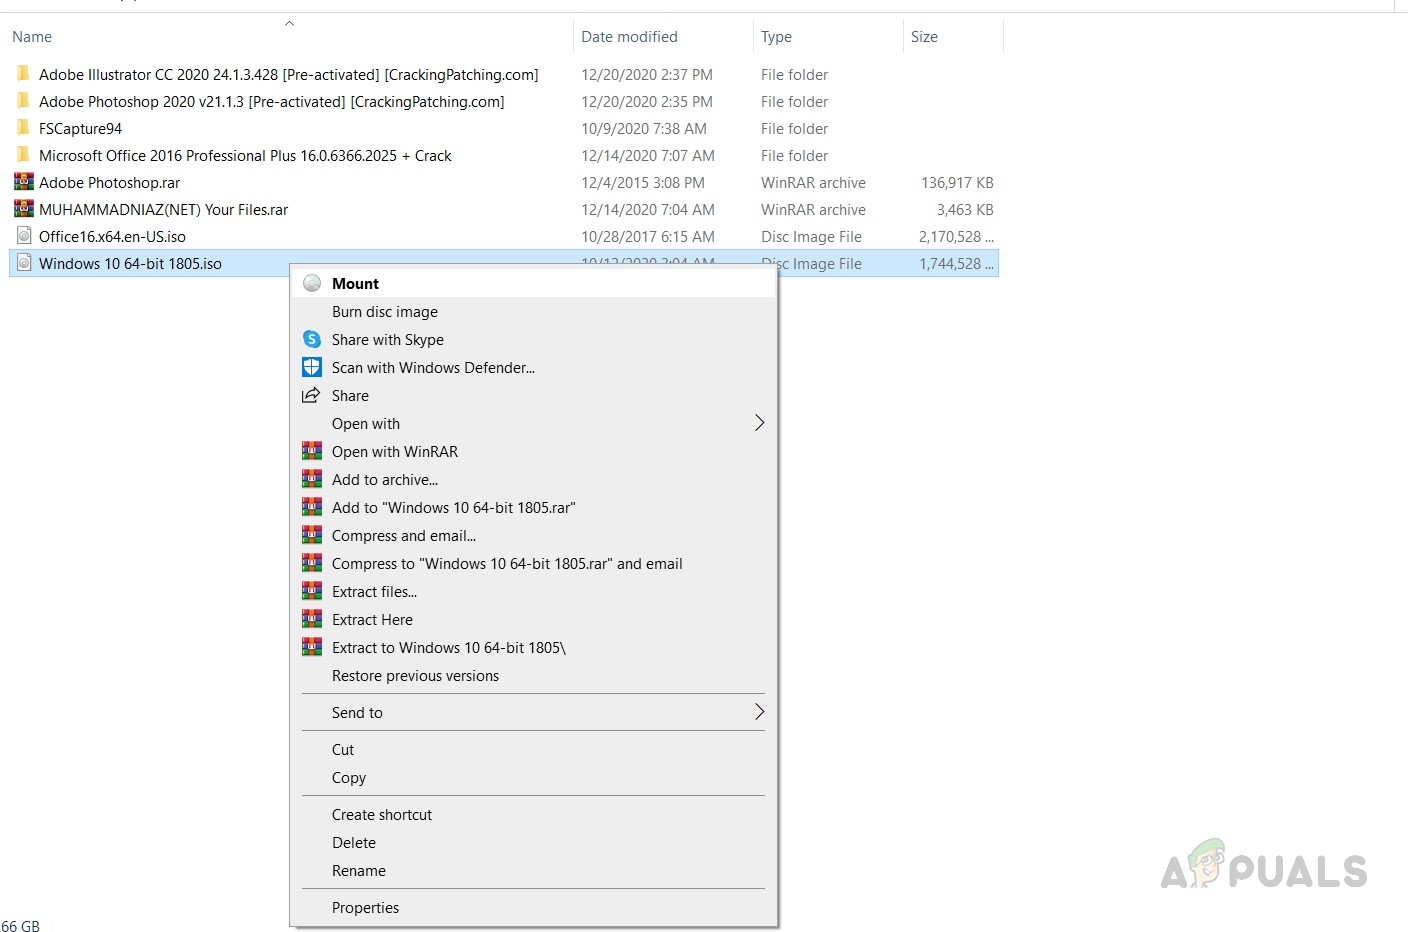
- Download the Windows .ISO file and mount it by

Right-click the ISO image file and then click Mount - If you do not see the Mount option then click the Open with option and select Windows Explorer. This will mount the .ISO file.
- Once the Image File has been mounted you will be able to see it in the My Computer

Windows 10 mounted image - Open the Drive which has the mounted .ISO file and run setup.exe to start Windows Setup.
- If a dialog box appears that prompts you to allow the program to make changes click Yes.
- You will see a message box that says Windows is preparing the setup.
- Once the preparation is done click on Change how Windows Setup downloads updates.
- Select the option not right now and click Next.
- You will see the setup Getting things ready.

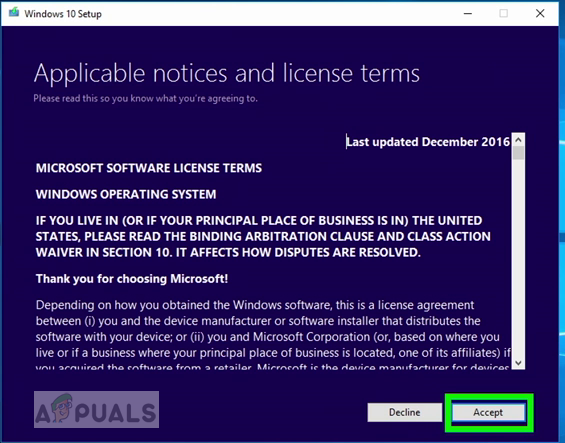
Windows In-Place upgrade getting ready to install - Accept the License Agreement and then the Windows Setup will begin to search for and install any updates

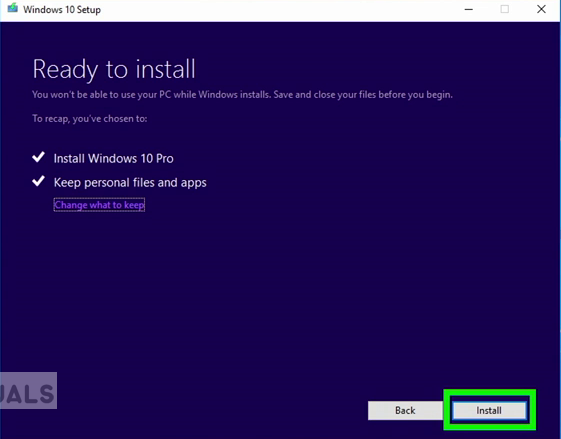
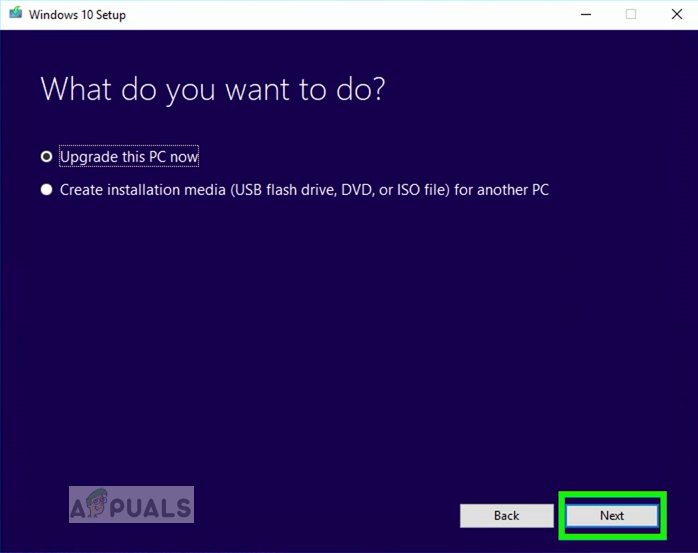
Accept Microsoft License Agreement - When updates are ready, click on the Install button but keep in mind once you click the install button you will not be able to cancel the process until updates have been installed.

Choose Upgrade this PC now - You will be prompted to choose whether you want to keep your files and apps or not, choose the appropriate option and click Next.
- Windows Setup will start the process of in place upgrade to repair the Windows.
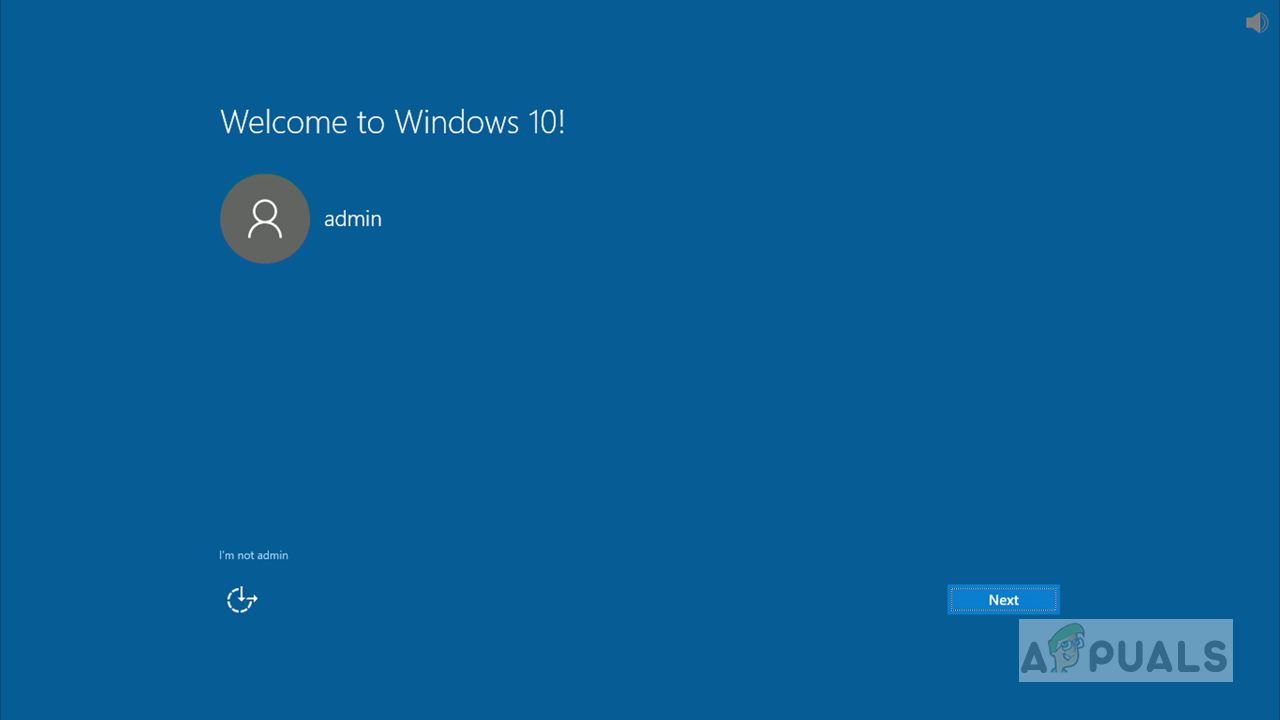
- Once the process is finished you will then be taken to the Sign-in screen.

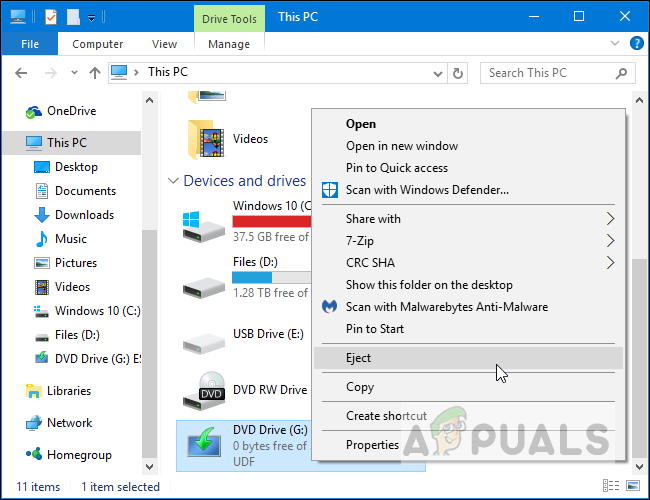
Windows Sign-In Screen - Make sure you unmount the Image file and set up the Time and Date according to your Time zone.
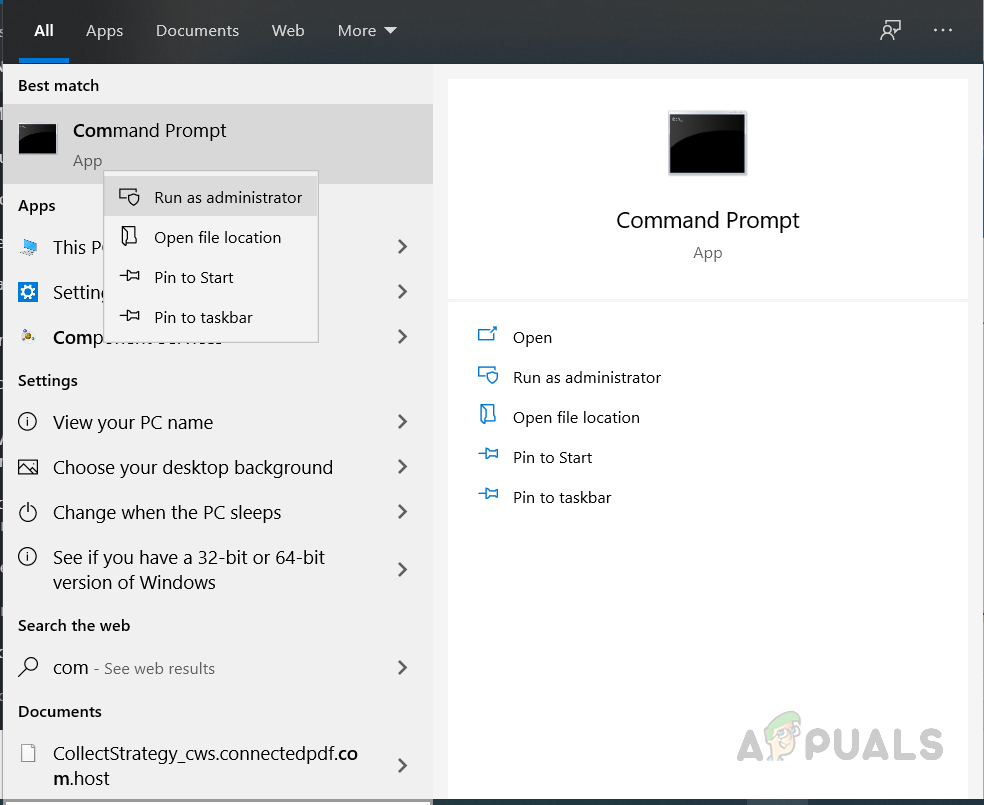
- Now go to Command Prompt and Run as Administrator.

Open Command Prompt as Administrator - Enter the command sfc /scannow to repair the missing or corrupted files

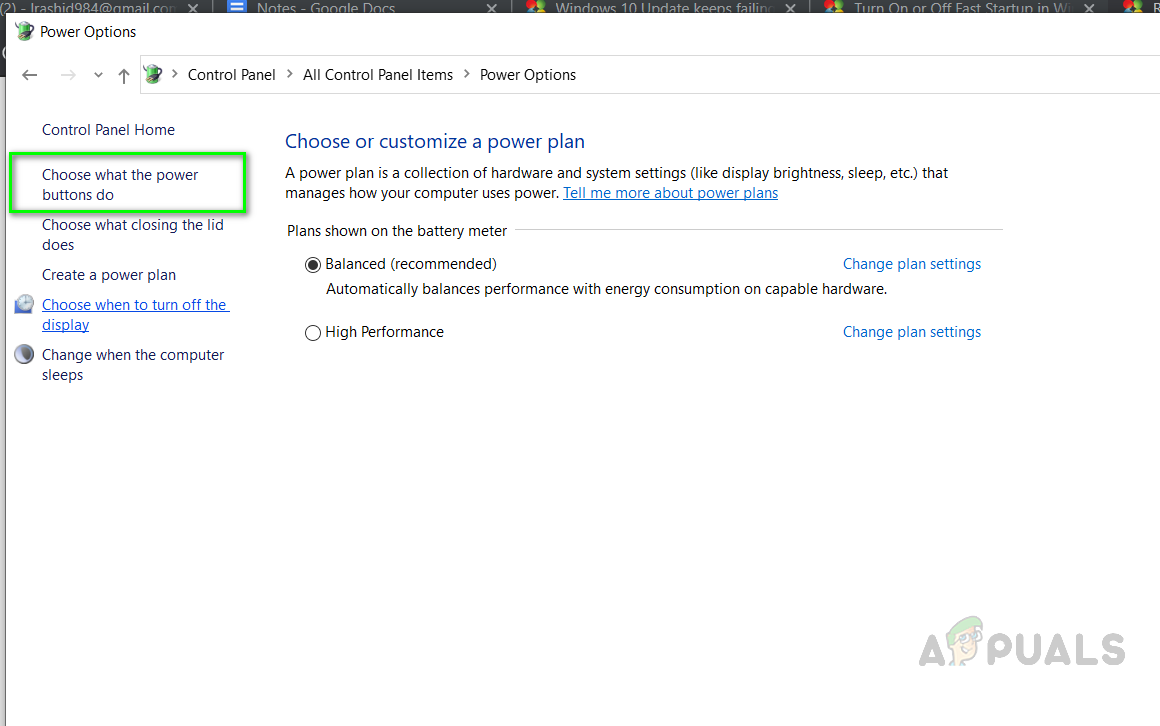
Run sfc scannow - Now Turn off the Fast Startup Option if you have it enabled, open the Control Panel in Icons view and click on Power Options

Control Panel icons view - Click the option Choose what the power buttons do.

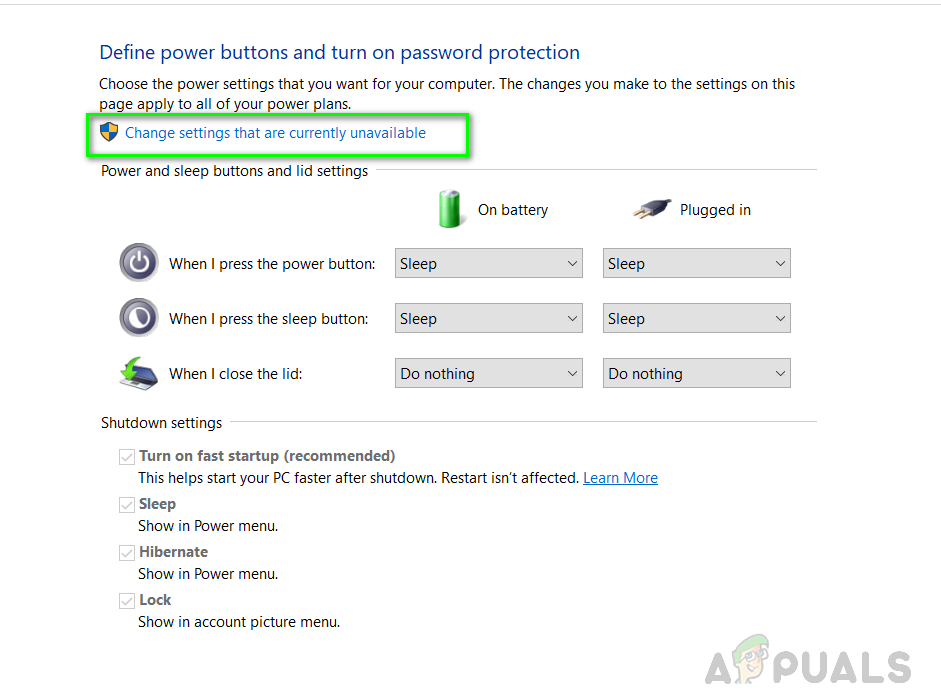
Click Choose what the power buttons do - Click on the link that says change settings that are currently unavailable

Change settings that are currently unavailable - Under the Shutdown settings, uncheck the Turn on Fast Startup box and then click the Save Changes button to apply changes

Uncheck Turn on fast start up

Kevin Arrows
Kevin Arrows is a highly experienced and knowledgeable technology specialist with over a decade of industry experience. He holds a Microsoft Certified Technology Specialist (MCTS) certification and has a deep passion for staying up-to-date on the latest tech developments. Kevin has written extensively on a wide range of tech-related topics, showcasing his expertise and knowledge in areas such as software development, cybersecurity, and cloud computing. His contributions to the tech field have been widely recognized and respected by his peers, and he is highly regarded for his ability to explain complex technical concepts in a clear and concise manner.
As you know, Microsoft’s Windows Media Creation Tool is a useful tool that helps you download and install the latest version of the Windows 10 operating system. However, there are times when it could encounter some problems during the update process. One of these programs is the following error message:
“0x8007001F-0x20006, The installation failed in the SAFE_OS phase with an error during REPLICATE_OC operation.”
The error pointed out the “Safe OS phase”. It is the phase that’s initiated to install all the required Windows Updates. Thus, the possible cause for this error could have something to do with an interrupted download, internet connection, and many more. Although this error could be caused by a lot of factors, fixing it shouldn’t be that hard. You can try to reset the Windows Update Components or delete the Windows Update cache. You could also disable both the Firewall and your antivirus program temporarily or run the Windows Update in a Clean Boot state, as well as run the Windows Update troubleshooter. To get started troubleshooting the error, follow each one of the suggestions provided below.
Option 1 – Try to reset the Windows Update components
Resetting the Windows Update components could help you resolve the Windows Update error 0x8007001f – 0x20006. How? Refer to the following steps:
- Open Command Prompt with admin privileges.
- After that, type each one of the following commands and hit Enter after you key in one after the other.
- net stop wuauserv
- net stop cryptsvc
- net stop bits
- net stop msiserver
Note: The commands you entered will stop the Windows Update components such as Windows Update service, Cryptographic services, BITS, and MSI Installer.
- After disabling WU components, you need to rename both the SoftwareDistribution and Catroot2 folders. To do that, type each one of the following commands below, and don’t forget to hit Enter after you type one command after the other.
- ren C:WindowsSoftwareDistribution SoftwareDistribution.old
- ren C:WindowsSystem32catroot2 Catroot2.old
- Now, restart the services you’ve stopped by entering another series of commands. Don’t forget to hit Enter after you key in one command after the other.
- net start wuauserv
- net start cryptsvc
- net start bits
- net start msiserver
- Exit Command Prompt and then restart your computer.
Option 2 – Try to delete the Windows Update Cache
You might also want to delete the Windows Update cache since there are times when existing corrupt or incomplete Windows Update files can cause some problems in downloading and installing Windows Updates. To achieve this, simply delete the “$Windows.~BT” & “$Windows.~WS” folders in your computer. Once you’re done, try to run Windows Update again and see if the error is now fixed.
Option 3 – Try to temporarily disable anti-virus and Windows Defender Firewall
As mentioned, the error could be due to the antivirus program or the Windows Defender Firewall installed on your computer. Thus, disabling them or any security software installed in your computer is always a good idea you can try when you’re not able to access the shared drive on your computer. There are times when you encounter problems like error 0x8007001f – 0x20006 due to interference of antivirus or security programs. Thus, you have to disable both your antivirus program and Windows Defender Firewall for the meantime and check if it fixes the error or not
Option 4 – Run the Windows Update in a Clean Boot State
It is possible that some third-party application is the one that’s causing the problem so it’s best if you put your computer in a Clean Boot state. During this state, you can start the system with a minimum number of drivers and startup programs that will surely help you in isolating the root cause of the issue.
- Log onto your PC as an administrator.
- Type in MSConfig in the Start Search to open the System Configuration utility.
- From there, go to the General tab and click “Selective startup”.
- Clear the “Load Startup items” check box and make sure that the “Load System Services” and “Use Original boot configuration” options are checked.
- Next, click the Services tab and select the “Hide All Microsoft Services” check box.
- Click Disable all.
- Click on Apply/OK and restart your PC. (This will put your PC into a Clean Boot State. And configure Windows to use the usual startup, just simply undo the changes.)
- After that, try to run Windows Update again.
Note: If you are able to install the app without any trouble at all then it means that the error is caused by some third-party application on your computer. You need to look for the culprit and uninstall it once you found it.
Option 5 – Run the Windows Update Troubleshooter
You might also want to run the Windows Update Troubleshooter as it could also help in fixing error 0x8007001f – 0x20006. To run it, go to Settings and then select Troubleshoot from the options. From there, click on Windows Update and then click the “Run the troubleshooter” button. After that, follow the next on-screen instructions and you should be good to go.
Do You Need Help with Your Device?
Our Team of Experts May Help
Troubleshoot.Tech Experts are There for You!
GET HELP
Troubleshoot.Tech experts work with all versions of Microsoft Windows including Windows 11, with Android, Mac, and more.
Share this article:
You might also like
Windows 11 has come a long way from its infant stage. Today it is incredibly good and stable operating system that also looks good and modern. Unfortunately, fancy animations and good graphics come with a price, in this case, slower performance on some little older and weaker computers.

Animations itself which include also fading effects can sometimes feel slugging and laggy and have a general overall feeling of delay. For a more old-school instant experience, you can turn off animations.
In order to turn animations inside Windows 11 follow this simple guide:
First thing is to open Settings by pressing Windows + i key combination or you could open Start and in the search box type in Settings and then click on its icon.
Once inside settings on the left side find Accessibility and click on it to select it. Once it is selected on the right side choose Visual effects. Inside the visual effects section click on the switch next to Animation effects to OFF. You can also turn off transparency effects in this section if you wish if you have an older GPU in order to speed it up a little.
That is all you need to do, settings will be automatically saved and all animations will be turned off for a quicker and more responsive feeling when working inside W11
Read More
When you get the error information, «The Software Can Not Begin Because MSVCR100.Dll Is Missing», what this implies is that the Computer will be lacking the MS Visual C++ 2010 libraries.
The malfunction is rather frequent throughout installations. It doesn’t matter the number of times you try to reinstall the program.
The malfunction can happen whether you’ve been utilizing your pc for many years, or it’s really a recent one.
Solution
Error Causes
a) Missing MSVCR100.DLL: As the problem message indicates, you get this information mainly because MSVCR100.DLL is completely missing.
b) Broken MSVCR100.DLL: When the msvcr100.dll is broken, you will also get the same error, suggesting the software won’t start.
The thing you need to understand is the fact that MSVCR100.DLL is playing an important role in the application referred to as MS Visual C++ 2010 Redistributable Package.
Without the MS Visual C++ 2010 Redistributable Package, any software that you simply make an effort to install won’t start. You could possibly complete installing it by pursuing proper installation procedures, and then end up getting the «The Software Can Not Begin Because MSVCR100.Dll Is Missing» error.
Further Information and Manual Repair
If you get the «The Software Can Not Begin Because MSVCR100.Dll Is Missing» error information on an effective setup of any software, you shouldn’t worry. You can really repair the issue and commence your recently installed software without any more hassle.
Start by checking whether you presently use 64-bit or 32-bit Windows. Visit the start button, in case you use Winxp. Type winver. On the window that appears, click Run, subsequently push enter. Head to Start, in case you use both Win7 or Vista.
Subsequently, click on the search box and type “Computer”. Right-click windows and subsequently click on Properties. Under Windows Edition, you’ll find whether your Windows is 64-bit or 32-bit.
Search for the correct variation of MS Visual C++ 2010 Redistributable Package, as soon as you discover whether your Windows is 64-bit or 32-bit. Down load the x86 variant of MS Visual C++ Redistributable Package if your version is 32-bit and you must obtain the x64 variant of MS Visual C++, for those who own a-64-bit version of Windows Operating System.
You must never obtain MS Visual C++ 2010 Redistributable Package from third-party websites.
This is because Microsoft doesn’t charge a cent for the files. The files are openly and easily available on Microsoft. These files come in many different variants. Consequently, select what’s suitable for your own Computer with regards to the version of Windows which you operate.
-
Never pick the edition of MS Visual C++ 2010 Redistributable Package that’s not compatible or appropriate to your Windows Operating System.
Make use of the release date, when installing MS Visual C++ 2010 Redistributable Package. You might also look out for Service Pack 1 and obtain it for your Windows. Service Pack 1 only ensures that you simply obtain the latest edition.
As soon as you end installing the most up-to-date version of MS Visual C++ 2010 Redistributable Package as demonstrated above, reboot your computer and you’ll not have to worry about getting the annoying»The Software Can Not Begin Because MSVCR100.Dll Is Missing» error message anymore.
Read More
EasyDocMerge Toolbar is a Browser Hijacker for Google Chrome. Usually, such browser extensions are installed without your knowledge. These types of Browser Hijackers are often the cause of many problems while surfing the Internet. The most common problems are unwanted pop-ups, underlined words, additional ads, sponsored links, to generate web traffic and earn revenue of the advertising networks by gathering the users browsing data and sending it back to the Mindspark ads network.
When installed this extension will hijack your home page setting it to MyWay.com, it will also change your new tab page to EasyDocMerge (Powered by MyWay.com Search).
About Browser Hijackers
Browser hijacking is a form of an unwanted program, commonly a web browser add-on or extension, which then causes modifications in the browser’s settings. Browser hijacker malware is developed for a variety of reasons. It redirects you to the sponsored internet sites and inserts adverts on your browser that assist its creator to generate earnings. A lot of people think that the browser hijacker is only a harmless website but that is not the case. Nearly every browser hijacker poses an existent threat to your online safety and it’s important to classify them under privacy dangers. They don’t just mess up your browsers, but browser hijackers can even modify the computer registry, leaving your computer susceptible to various other types of attacks.
Key symptoms that your web browser has been hijacked
There are various signs of web browser hijacking: the home page of the web browser is changed unexpectedly; new bookmarks pointing to porn websites are added to your favorite pages; the essential web browser settings are modified and unwanted or insecure resources are added to the trusted sites list; you’ll see many toolbars on your web browser; you see a lot of pop-up ads on your computer screen; your web browser has become unstable or starts running sluggishly; Inability to navigate to particular sites, particularly anti-malware and other computer security software sites.
How they infect computers
Browser hijackers infect computer systems by numerous means, including via a file-share, a drive-by download, or an infected e-mail attachment. They can also originate from any BHO, extension, add-on, toolbar, or plug-in with malicious intent. A browser hijacker may also come bundled up with some free software that you unintentionally download to your computer, compromising your internet security. Typical examples of browser hijackers include CoolWebSearch, Conduit, Coupon Server, OneWebSearch, RocketTab, Searchult.com, Snap.do, and Delta Search.
Browser hijackers may record user keystrokes to gather potentially important information that leads to privacy issues, cause instability on computers, drastically disrupt user’s browsing experience, and finally slow down the system to a point where it will become unusable.
Removal
Certain browser hijacking could be simply reversed by discovering and eliminating the corresponding malware software from your control panel. In some cases, it can be a difficult job to identify and eliminate the malicious component because the associated file might be running as part of the operating system process. You should consider carrying out manual fixes only if you are a tech-savvy person, as potential risks are associated with tinkering with the system registry and HOSTS file.
Installing and running antivirus programs on the affected computer could automatically erase browser hijackers and other malicious applications. Safebytes Anti-Malware contains a state-of-the-art anti-malware engine to help you prevent browser hijacking in the first place, and clean up any pre-existing issues
What you can do if Virus Prevents You From Downloading Or Installing Anything?
Practically all malware is bad, but certain kinds of malware do a lot more damage to your computer than others. Some malware sits in between your computer and the internet connection and blocks a few or all internet sites that you would like to visit. It will also prevent you from adding anything to your PC, especially antivirus software. If you’re reading this now, you might have probably recognized that a malware infection is the real cause of your blocked web connectivity. So how to proceed if you need to install an antivirus application such as Safebytes? Although this kind of problem can be difficult to get around, there are a few steps you can take.
Eliminate viruses in Safe Mode
If any virus is set to run automatically when Microsoft Windows starts, stepping into Safe Mode could block this attempt. Only minimal required programs and services are loaded when you boot your laptop or computer in Safe Mode. You will need to do the following to eliminate malware in Safe mode.
1) At power on/start-up, hit the F8 key in 1-second intervals. This should bring up the Advanced Boot Options menu.
2) Select Safe Mode with Networking using arrow keys and press ENTER.
3) When this mode loads, you should have the internet. Now, utilize your browser normally and navigate to https://safebytes.com/products/anti-malware/ to download and install Safebytes Anti-Malware.
4) Once the software is installed, allow the diagnostic scan to run to eliminate viruses and other threats automatically.
Obtain the security program using an alternate web browser
Some malware might target vulnerabilities of a specific web browser that obstruct the downloading process. The best way to avoid this problem is to pick a web browser that is renowned for its security features. Firefox has built-in Phishing and Malware Protection to help keep you secure online.
Run anti-malware from your USB drive
To effectively get rid of the malware, you need to approach the problem of running antivirus software on the infected computer from a different angle. Abide by these steps to run the anti-virus on the affected computer.
1) On a virus-free PC, download and install Safebytes Anti-Malware.
2) Plug the Flash drive into the clean computer.
3) Double-click the Setup icon of the antivirus program to run the Installation Wizard.
4) Choose the flash drive as the destination for saving the file. Follow the on-screen instructions to finish the installation process.
5) Remove the pen drive. You can now utilize this portable anti-virus on the infected computer system.
6) Double-click the antivirus program EXE file on the USB flash drive.
7) Simply click “Scan Now” to run a complete scan on the affected computer for viruses.
Protect Your Computer Against Viruses and Malware With SafeBytes Security Suite
Today an anti-malware program can protect your laptop or computer from different types of internet threats. But how to select the best one amongst countless malware protection software that is available out there? As you might be aware, there are several anti-malware companies and tools for you to consider. A few are really worth your money, but many aren’t. You need to choose one that is dependable, practical, and has a strong reputation for its malware source protection. Among few good applications, SafeBytes Anti-Malware is the strongly recommended software program for the security-conscious user.
SafeBytes anti-malware is a powerful, highly effective protection application made to help end-users of all levels of computer literacy in detecting and removing harmful threats from their computer. After you have installed this software, SafeByte’s sophisticated protection system will ensure that no viruses or malicious software can seep through your personal computer.
SafeBytes has fantastic features when compared to various other anti-malware programs. Listed below are some of the great features included in the software.
Real-time Active Protection: SafeBytes gives you round-the-clock protection for your personal computer limiting malware intrusions instantly. It will examine your PC for suspicious activity at all times and safeguards your PC from illegal access.
Antimalware Protection: Safebytes is made on the best virus engine in the industry. These engines can identify and get rid of threats even during the initial phases of a malware outbreak.
“Fast Scan” Features: SafeBytes’s high-speed malware scanning engine minimizes scanning times and extends the life of the battery. Simultaneously, it will effectively find and get rid of infected files or any internet threat.
Web Protection: SafeBytes checks and gives a unique safety rating to every website you visit and block access to webpages known to be phishing sites, thus protecting you against identity theft, or known to contain malicious software.
Low CPU Usage: SafeBytes is a lightweight application. It consumes an extremely small amount of processing power as it runs in the background so you are free to use your Windows-based computer the way you want.
24/7 Premium Support: Professional technicians are at your disposal 24/7! They will immediately fix any technical issues you may be encountering with your security software.
Simply put, SafeBytes has formulated a meaningful anti-malware solution that is aimed to protect your computer against various malware. Malware trouble will become a thing of the past once you put this software to use. For top protection and the best value for money, you can’t get better than SafeBytes Anti-Malware.
Technical Details and Manual Removal (Advanced Users)
If you want to manually remove EasyDocMerge without using an automated tool, it may be possible to do so by removing the application from the Microsoft Windows Add/Remove Programs menu, or in cases of browser plug-ins, going to the browsers AddOn/Extension manager and removing it. You’ll likely also want to totally reset your browser to its default configuration settings.
To be certain of complete removal, find the following registry entries on your computer and remove them or reset the values appropriately. However, this is a tricky task and only computer experts can perform it safely. Moreover, some malicious programs are capable to defend against its removal. It is highly recommended that you do the removal process in Windows Safe Mode.
Files:
%UserProfile%\Local Settings\Application Data\EasyDocMergeTooltab
%LOCALAPPDATA%\Google\Chrome\User Data\Default\Extensions\mabloidgodmbnmnhoenmhlcjkfelomgp
%UserProfile%\Local Settings\Application Data\Google\Chrome\User Data\Default\Extensions\mabloidgodmbnmnhoenmhlcjkfelomgp
%PROGRAMFILES(x86)%\EasyDocMerge_ex
%PROGRAMFILES%\EasyDocMerge_ex
%USERPROFILE%\Application Data\EasyDocMerge_ex
%USERPROFILE%\AppData\LocalLow\EasyDocMerge_ex
%UserProfile%\Local Settings\Application Data\EasyDocMerge_ex
Registry:
HKEY_CURRENT_USER\Software\AppDataLow\Software\EasyDocMerge_ex
HKEY_CURRENT_USER\Software\EasyDocMerge_ex
HKEY_LOCAL_MACHINE\SOFTWARE\Wow6432Node\Microsoft\Internet Explorer\Low Rights\ElevationPolicy\5e3ee57e-7d53-458f-a124-16aab06de2d6
HKEY_LOCAL_MACHINE\SOFTWARE\Wow6432Node\Microsoft\Internet Explorer\Low Rights\ElevationPolicy\64366ff9-336f-4002-a665-406a1d259cd3
HKEY_LOCAL_MACHINE\SOFTWARE\Wow6432Node\Microsoft\Internet Explorer\Low Rights\ElevationPolicy\87008eb3-6282-4075-9889-62f381451926
HKEY_LOCAL_MACHINE\SOFTWARE\Wow6432Node\Microsoft\Internet Explorer\Low Rights\ElevationPolicy\96107269-cd2e-4175-a61a-5c2e8540e8a5
HKEY_LOCAL_MACHINE\SOFTWARE\Microsoft\Internet Explorer\Low Rights\ElevationPolicy\2741d16e-6298-4345-8988-7979ffd45266
HKEY_LOCAL_MACHINE\SOFTWARE\Microsoft\Internet Explorer\Low Rights\ElevationPolicy\5e3ee57e-7d53-458f-a124-16aab06de2d6
HKEY_LOCAL_MACHINE\SOFTWARE\Microsoft\Internet Explorer\Low Rights\ElevationPolicy\64366ff9-336f-4002-a665-406a1d259cd3
HKEY_LOCAL_MACHINE\SOFTWARE\Microsoft\Internet Explorer\Low Rights\ElevationPolicy\87008eb3-6282-4075-9889-62f381451926
HKEY_CURRENT_USER\Software\Microsoft\Internet Explorer\DOMStorage\easydocmerge.dl.tb.ask.com
HKEY_CURRENT_USER\Software\Microsoft\Internet Explorer\SearchScopes\8bf0dd5e-ea06-48db-97a4-df286e054079
HKEY_CURRENT_USER\Software\Microsoft\Internet Explorer\Approved Extensions, value: 389672DB-CD13-4CF2-AED1-3170BC0DD6EC
HKEY_LOCAL_MACHINE\SOFTWARE\Wow6432Node\Microsoft\Internet Explorer\SearchScopes\8bf0dd5e-ea06-48db-97a4-df286e054079
HKEY_CURRENT_USER\Software\EasyDocMerge
HKEY_CURRENT_USER\Software\Microsoft\Internet Explorer\LowRegistry\DOMStorage\easydocmerge.dl.myway.com
Read More
Error Code 0x8000ffff — What is it?
Error Code 0x8000ffff is an error that is often experienced while attempting to install updates on a Windows machine. It has been found in Windows 10, although the error has been present in the Windows operating systems dating back to Windows Vista.
Common symptoms include:
- Inability to download updates for the operating system
- Inability to successfully run updates for the operating system through to completion
There are several basic Windows tools that can be used to attempt to resolve Error Code 0x8000ffff on your machine. While some of these tools may be familiar for basic users, others may require advanced competency in order to be used correctly. If you are unsure of your ability to complete the methods listed below in order to resolve this error code on your system, you may need to get in touch with a computer repair technician who is competent in dealing with Windows Update repairs.
Solution
Error Causes
The most common cause of Error Code 0x8000ffff is that there is a problem within one of the system files or the registry entries on the computer. There are a number of reasons why a device could have an error in these places, from conflicting software commands to updates that were not installed correctly, to bugs within the system, to viruses or malware that have corrupted the necessary files.
Further Information and Manual Repair
There are several common ways that users can attempt to resolve the appearance of Error Code 0x8000ffff on their Windows devices. If you are not sure that you can follow these steps through to completion, you would be well advised to get in touch with a qualified computer repair technician to help you to finish out the repair process.
Here are the best methods to resolve Error Code 0x8000ffff on your Windows machine:
Method One: Restart Your Computer
It may sound obvious, but one of the most effective ways to resolve Error Code 0x8000ffff on your machine is to simply reboot your computer. In some cases, the error shows up because there are processes that the system believes are still running when they really aren’t. Restarting your machine also allows your system to apply any previous changes that have been made and to mark any installations that have been undertaken as being complete.
Reattempt your update installations after you have restarted your computer to see if you are able to finish them out successfully.
Method Two: Run the Windows Registry Repair Tool
The Windows Registry Repair tool is an asset that can make it easy for your system to scan for potential problems in the registry and notify you as to their status. In many cases, the Registry Repair tool can fix the problems that it finds all on its own, although in some cases, you may receive a message that states an error was found that could not be resolved through the program.
The simplest way to access the Windows Registry Repair tool is to do a search for it within the search bar in the Start menu. Once you begin to run the Registry Repair tool, it can take a while to complete its scan, so be prepared to wait for some time once you start it.
Once the tool has completed its scan of your system, it’s always a good idea to reboot your computer so that all of the changes that have been made to the system can be applied successfully to the operating system.
Method Three: Run the Windows Fix It Tool
Another great tool to help in the resolution is the Windows Fix It tool. You can download it directly from the Microsoft website. Once you run it, it will complete a scan of your system to find any potential hang-ups and to attempt to resolve them. After you run the scan, it is a good idea to reboot your computer to allow all changes to be recognized and applied properly.
Method Four: Use An Automated Tool
If you wish to always have at your disposal a utility tool to fix these Windows 10 and other related issues when they do arise, download and install a powerful automated tool.
Read More
The microphone has become from exclusive niche hardware to everyday requirements. In today’s world when we live in a pandemic most of the work has shifted from office to home where people need working computers with microphones, working microphones.
So what do we do when the microphone stops working? Keep reading on to find out and hopefully, we will fix this as fast as possible.
Check Microphone Privacy Settings
In 2019, Microsoft introduced new privacy features to Windows that give you more granular control over which apps are accessing your microphone. The side effect of this is that certain apps may be blocked from using your microphone without you even knowing.
To find out if this is the issue, go to Settings > Privacy > Microphone.
Click Change and make sure the slider is set to On. This will broadly mean that the mic is now enabled on your PC.
Next, make sure the slider under Allow apps to access your microphone is set to On, then look through the list of Microsoft Store apps to make sure the apps you want to use are selected.
You’re likely to be using many apps, not from the Microsoft Store, so to make sure these are enabled, scroll down even further and set the Allow desktop apps … slider to On.
Check Microphone Driver
The outdated or corrupted driver could be the issue for the microphone not working in Windows 10.
To check the driver status, follow these steps:
- In your Start menu search for Device Manager
- In the device manager window search for sound and expand it.
- Once expanded, you should see your audio drivers. Note that the names of these will vary depending on the manufacturer.
- On Audio, right-click, and select properties. On the General tab, check to see if the device is working properly.
- If it is not working properly, click on the driver tab and select the update option.
- Repeat for the other audio drivers.
- Restart the computer.
Check the Sounds setting
- In the taskbar, right-click on the speaker icon at the far-right corner and select the sound option.
- On the Recording tab, click on the microphone and select the Properties option.
- Select the levels tabs and increase the volume for both microphone and microphone boost.
- Go to the Enhancement tab of the same pop-up and make sure that the immediate mode checkbox is checked.
- Click Ok and restart the computer.
The sound troubleshooter
- Right-click on the sound icon at the far-right corner of the taskbar and select troubleshoot sound problems.
- The computer will detect any fault that exists with your audio and recommend fixes for you. You just need to read through the prompts and click the options that you think will work for you.
Try microphone on another computer
If previous steps have not produced results, try the microphone on another computer, if it is not working there then it is a hardware malfunction
Read More
You left your computer to go to the bathroom or to fetch something to eat, maybe you have to answer the phone or open door to a friend and after some time you get back to your computer see the black screen, you move the mouse and it starts to come from sleep slowly.
I am the kind of person who gets annoyed by this kind of behavior, I like my PC to be ON all time when I want it to be ON and my power plan on best performance so naturally, I have turned this sleep feature OFF. If you are interested to see how you to can turn off your screen sleeping follow this easy guide.
- Press ⊞ WINDOWS to open the start menu and click on the settings

- On settings, screen click on system

- When the system dialog opens go to Power & Sleep and on the right side change all values to never.


Please note that after each update Windows tend to reset these settings so you will sadly have to return to this after each major update.
Read More
Mingwm10.dll Error Code — What is it?
Mingwm10.dll is a dynamic link library file. This file is associated with the gaming program called the Adventures of Tintin developed for Windows OS by Ubisoft.
Like all other DLL files, Mingwm10.dll file also contains small programs that are used to load and run this gaming program on your PC and several other programs developed by Ubisoft.
Mingwm10.dll error code may occur when this file fails to run and load the Adventures of Tintin, the game on your PC. This error may appear on your PC in different formats such as:
- «Mingwm10.dll not found.»
- «The file mingwm10.dll is missing.»
- «Cannot register mingwm10.dll.»
- «Cannot find C:\Windows\System32\mingwm10.dll.»
- «Mingwm10.dll Access Violation.»
- «Cannot start The Adventures of Tintin The Game. A required component is missing: mingwm10.dll.Please install The Adventures of Tintin The Game again.»
- «This application failed to start because mingwm10.dll was not found. Re-installing the application may fix this problem.»
Solution
Error Causes
Mingwm10.dll error code is triggered due to a plethora of reasons. These include causes like:
- Registry damage or corruption
- Viral infection
- Hardware failure
- Corrupt or missing Mingwm10.dll file
Though this error is not fatal nonetheless it is advisable to fix it promptly to ensure you are able to access your desired program successfully without any restriction.
Please note, this error can become a major PC threat as the underlying causes are registry corruption or viral infection.
Further Information and Manual Repair
Listed below are some of the best, proven, and easy DIY methods to help you resolve the Mingwm10.dll error code on your system. These are simple methods and require no technical expertise or know-how.
Method 1 — Restore the Missing File
As mentioned above DLL are shared files, there is a possibility that you accidentally deleted the Mingwm10.dll file on your system while uninstalling a program developed by Ubisoft.
In such an event, the best and the easiest way to fix the error is to check your recycle bin and restore the deleted Mingwm10.dll file on your system.
Method 2 — Download Mingwm10.dll File from a Reliable Website
If you are unable to locate the missing Mingwm10.dll file in the recycle bin, then another method to fix the issue can be to download the Mingwm10.dll file from a trusted website.
The reason why we say trusted is that viruses often enter computer systems when users download files from unreliable websites.
So, to avoid bigger problems first make sure the site you select to download the Mingwm10.dll file is authorized and trusted.
Method 3 — Update Outdated Drivers
Hardware failure is related to outdated drivers. If the cause of the Mingwm10.dll error code is hardware failure, simply update the outdated drivers to resolve.
Since the Mingwm10.dll file is used to run and load Adventures of Tintin, a gaming software program, then most probably the error is caused because of the outdated video card driver.
Therefore update it to fix the issue. For this, go to the start menu, type Device Manager in the search bar. Once it opens use the driver update wizard to make updates. The wizard will walk you through the entire process, making the driver update task easy.
Method 4 — Repair the Corrupt Registry
The registry is the part that stores all the information and activities performed on your system. From important files to obsolete files it saves everything.
If the obsolete files like the junk files, bad entries, invalid registry keys, and cookies are not removed from the registry frequently, these files accumulate in the registry and corrupt important system files like DLL files, popping error codes like Mingwm10.dll error.
To resolve, download Restoro. It is a PC Fixer embedded with a registry cleaner. The registry cleaner scans and removes all the obsolete files. It cleans the registry and the corrupted system files in just a few clicks, thereby fixing the problem.
Click here to download Restoro to resolve the Mingwm10.dll error code on your PC
Read More
Error 0x8000ffff prevents you from using the Microsoft store. Altho it is not a critical error that will break Windows, it is annoying enough that will require fixing so we can use the store once again and install apps when we want to. Interesting thing is that this error was present inside Windows 10 as well causing some annoyance, you think Microsoft would learn, and then you see reality. Anyway, we have not come here to bash Microsoft, we came to solve errors.

So there are several problems that can cause this error like issues with accessing the Microsoft servers, corrupt system files, settings being misconfigured, malware infections, or conflicting applications. We will cover all solutions for each scenario taking approaches from most simple solutions to more complex ones. Follow the guide and let’s fix this annoyance.
Wait for Microsoft’s servers to become accessible
Yes, just wait. If the problem is tied to Microsoft servers having heavy load or being temporarily down there is not much you can do except for their tech team to resolve the issue. Go to Twitter or Facebook and check the Microsoft page to see if anyone else has this issue, if several people are reporting the same error then it is due to server problems. In this case, the only thing you can do is to wait.
Run troubleshooter
If servers are working fine then the issue is within your system so let’s get down to fixing. Most simple and easiest solution is to let Windows try and resolve the problem by itself. We will use troubleshooter for this, Windows’s integrated fixing solution:
Press ⊞ WINDOWS + I to open the settings app
Click on System in the left panel, then on Troubleshoot on the right
Click on Other troubleshooters
In most Frequent section find Windows Update and click on the Run button
Wait for the troubleshooter to finish and follow on-screen instructions
Clear Store cache
If the troubleshooter has not found the issue or was unable to repair it, the next step is cleaning the Microsoft store cache in order to eliminate corrupted or partial cache files.
Press ⊞ WINDOWS + R to open the run dialog
In run dialog type in: wsreset and press OK or press ENTER
A black screen will appear and it will not give any kind of feedback about progress, so it might seem like Windows has frozen, but do not panic nor try to do anything, this kind of behavior is normal, just wait for the process to finish and once it is done Microsoft store will launch with the cleared cache.
Disable Proxy
Proxy setting can interfere with establishing a connection to the store servers and if previous solutions have not worked we will check proxy next.
Press ⊞ WINDOWS + R to open the run dialog
Inside run dialog type: inetcpl.cpl and hit ENTER or press OK button
Inside Internet Properties click on the Connections tab and then on LAN settings
Uncheck the box next to Use a proxy server for your LAN and click on OK
Turn off antivirus
If nothing worked so far, turn off your anti-virus software, there is a slight possibility that your antivirus is misconfigured or preventing the system from accessing the store. Turn off antivirus and firewall to make sure that this is not an issue.
Delete the software distribution folder
So, we have tried a lot of things, and the error still persists? Let’s then go to the next step and delete the software distribution folder in order to be remade new so we can eliminate corruption in the folder itself. To do this follow the guide:
Press ⊞ WINDOWS + S to open the search menu
Inside search type in Windows terminal, right-click on the terminal and click on Run as administrator.
Confirm with YES on UAC prompt pop up
Inside terminal press CTRL + SHIFT + 2 to open command prompt
inside command prompt type in: net stop wuauserv and press ENTER
Then type in: net stop bits followed with ENTER
Next press ⊞ WINDOWS + R to open the run dialog
Inside run dialog type in C:\Windows\SoftwareDistribution and press the OK button or ENTER
File Explorer will open and you will find yourself inside SoftwareDistribution folder. Press CTRL + A to select all files inside
Press on the delete icon or press DEL, confirm with YES
Once all files are deleted, the system will redownload new ones.
Enable Cryptographic service
Windows 11 has come with a cryptographic service that aims to make your computer more secure but if the service is turned off it can be the cause of 0x8000ffff error. In order to turn this service back ON, follow the guide:
Press ⊞ WINDOWS + R to open the run dialog
In run dialog type in services.msc and press ENTER or click on the OK button
In the list find Cryptographic Services and double click on it
Inside properties click on Startup type dropdown menu and select Automatic from the list
Click on the Start button to run service and then on the OK button to save the changes
Run SFC scan
SFC is an internal Windows tool for fixing corrupt system files, application will scan all system files and repair ones that are corrupted. To run an SFC scan do the following:
Press ⊞ WINDOWS + S to open the search menu
Inside search type in Windows terminal, right-click on the terminal and click on Run as administrator.
Confirm with YES on UAC prompt pop up
Inside terminal press CTRL + SHIFT + 2 to open command prompt
inside command prompt type in: SFC /scannow and press ENTER
Wait for the whole process to finish and reboot your system
Run DISM scan
Similar to SFC, DISM scan will scan your system Windows image and if required it will repair it.
Press ⊞ WINDOWS + S to open the search menu
Inside search type in Windows terminal, right-click on the terminal and click on Run as administrator.
Confirm with YES on UAC prompt pop up
Inside terminal press CTRL + SHIFT + 2 to open command prompt
inside command prompt type in: DISM /Online /Cleanup-Image /RestoreHealth and press ENTER
Wait for the whole process to finish and restart your computer
Read More

Despite popular belief, there are a lot of users running Linux OS. Linux offers great security and working environment and 96.3% of the world’s top 1 million servers run on Linux. 90% of all cloud infrastructure operates on Linux and practically all the best cloud hosts use it. But gaming on Linux is limited, enter Steam proton a Valve’s gaming solution.
What is Steam proton?
Proton is a WINE fork with some extra capabilities, to play games and run applications not native and not made to run natively under Linux OS. It is supposed to bridge the Gaming issues for PC users and let them more freedom in choosing an operating system to game on.
Find out if your game supports Proton
Although there are a lot of titles that nowadays run natively on Linux some will still need proton in order to run at all and sadly some of them will not be able to run on Linux even via proton but seeing how Valve is busy and it is trying to push its ideas and technology slowly this gap is closing.
In order to see how the game you want to play performs and behaves on Linux and proton environment visit https://www.protondb.com/ and find out. As soon as the site loads you will be greeted with statistics and a search option to find out the status of the desired game with one of the given statuses: Borked, Bronze, Silver, Gold, Platinum, and Native.
As you probably guessed native means that the game will work on Linux out of the box and borked will probably not work at all. Platinum and gold status means that game will run on proton without any input or tweaks from the user while silver and bronze means that it will work but might need some tweaks in order to make it work.
How to get Steam proton?
In order to run games under proton inside Linux, you will need firstly a Steam client which luckily works naturally on Linux. Unlocking/activating Steam Proton on your Linux-based system is easy. Just head over to Steam > Settings > Steam Play and toggle the option “Enable Steam Play for Supported Titles”.
Valve has tested and fixed some Steam titles and you will now be able to play those titles. However, if you wish to go even further beyond, and play titles that even Valve has not tested, toggle the option “Enable Steam Play for all titles”.
Conclusion
Even we are not there yet, native gaming on Linux is gaining a foothold each day. Will Steam’s OS with proton technology be one that will turn the tide from Windows or some other tech we cannot tell but one thing is for sure, more choices mean better products so I am hopeful for a bright future.
Read More

A not long time ago we had an article about the deep WEB and dark WEB here on errortools.com explaining its origins and its purpose. The article can be found here if you are interested: https://errortools.com/windows/what-is-deep-and-dark-web/
Now at this point in time, we want to present you with 15 great Deep WEB sites that could offer you some information not found anywhere else, that could offer you some privacy, or simply to have some fun and safely explore how it is like to be part of deep WEB.
Take notice that for successful visiting of given sites you will need to have installed TOR browser. More about Tor browser itself can be found here: https://errortools.com/blog/software-review-series-tor-browser/ and its official website for download here: https://www.torproject.org/download/
Make sure that you copy the onion link and paste it into your TOR browser in order to access the site. That being said, let’s begin.
Mail2Tor
http://mail2tor2zyjdctd.onion/
If you want secure and private ways of sending your emails then look no further. Mail2Tor uses a webmail client and encrypts each email received or sent, combine that for not storing IP addresses and you have a private and safe environment for your emails.
The Hidden Wiki
http://zqktlwiuavvvqqt4ybvgvi7tyo4hjl5xgfuvpdf6otjiycgwqbym2qad.onion/wiki/index.php/Main_Page
The Hidden Wiki is the go-to site if you want to explore more of deep WEB since it is the site of collected .onion sites. Think of it as a registry of onion sites that want to be accessed publicly but offer anonymity.
TorLinks
http://torlinksd6pdnihy.onion/
TorLinks is another site focusing on .onion site listings. Site themselves are divided into categories and are easy to find. Take note that .onion sites come and go so make sure to visit frequently both The Hidden Wiki and TorLinks in order to be updated.
Torch Search Engine
ttp://xmh57jrzrnw6insl.onion/
Torch is the oldest and most well-known search engine for dark web links, with its database of over a million .onion websites there is a chance that you will find what you are looking for on it.
DuckDuckGo
http://3g2upl4pq6kufc4m.onion/
Integrated into TOR itself as a default search engine DucDuckGo has proven itself to be a great competitor and challenger to Google. But unlike Google, DuckDuckGo will not track you nor store your search activities making it a great general private search engine.
https://www.facebookwkhpilnemxj7asaniu7vnjjbiltxjqhye3mhbshg7kx5tfyd.onion/
Yup, Facebook has its own .onion version of its popular platform. Now since Facebook itself is a social media platform anonymity is out of the question but with .onion routing, you can have and maintain a Facebook account from locations where you normally could not like in some countries where Facebook.com is banned.
Galaxy3
http://galaxy3bhpzxecbywoa2j4tg43muepnhfalars4cce3fcx46qlc6t3id.onion/
Galaxy3 is also a social platform, the site is mostly populated with code experts and other individuals posting all kinds of stuff.
The Dark Lair
http://vrimutd6so6a565x.onion/index.php/Board
Dark Lair was the first image exchange website that evolved into a social network. One difference from the other two mentioned is that you can engage in the website without registration as an anonymous user.
Pro Publica
https://www.propub3r6espa33w.onion/
The aim of the five-time Pulitzer Prize winner ProPublica is “To expose abuses of power and betrayals of the public trust by government, business, and other institutions, using the moral force of investigative journalism to spur reform through the sustained spotlighting of wrongdoing.”
It’s the first major online publication to have a .onion address. The non-profit newsroom is funded by organizations such as the Sandler Foundation and has made countless contributions to the fight for free speech and privacy.
Soylent News
http://7rmath4ro2of2a42.onion/
Soylent news is an onion site that well brings news. The difference from other sites of the same content is that Soylent news is community moderated without any big names involved so it is authentic in its content.
CIA
ttp://ciadotgov4sjwlzihbbgxnqg3xiyrg7so2r2o3lt5wz5ypk4sxyjstad.onion/
Tor’s history is an unlikely tale. It was created by the U.S Navy with the purpose of helping informants in foreign nations to communicate safely over the Internet. The Central Intelligence Agency (CIA), in that spirit, released a .onion site so that people from across the globe can browse their resources securely and anonymously.
Secure drop
https://secrdrop5wyphb5x.onion/
Secure drop is a platform for changing leaked information and for journalists to communicate with their leads in private. It is used by Washington Post, Pro Publica, and The Guardian.
Hidden Answers
http://answerszuvs3gg2l64e6hmnryudl5zgrmwm3vh65hzszdghblddvfiqd.onion/
Hidden Answers is Reddit or Quora of the dark web but as in the spirit of the dark web, all discussed topics and stories are in total anonymity.
SCI-HUB
http://scihub22266oqcxt.onion/
With over 50 million research papers in the domain of science shared freely, Sci-Hub eliminates all barriers of free knowledge and offers a unique approach to education and scientific information.
Smartmixer.IO
http://smrtmxdxognxhv64.onion/
Smartmixer is a bitcoin mixer. The service scrambles your bitcoin with other users making your purchases completely anonymous.
And that’s it. 15 dark WEB onion sites you need to visit. I hope that you enjoyed the list and found something useful in it. Also, note that onion links can change overnight so if any of provided links do not work just go to DuckDuckGo and search for the site with the onion at the end.
Read More
Copyright © 2023, ErrorTools. All Rights Reserved
Trademark: Microsoft Windows logos are registered trademarks of Microsoft. Disclaimer: ErrorTools.com is not affiliated with Microsoft, nor claims direct affiliation.
The information on this page is provided for information purposes only.
How Can We Help?
Created On
Last Updated On
You are here:
SAFE_OS Error
If you have upgraded to Windows 10 and have the following error:
We couldn’t install Windows 10
We’ve set your PC back to the way it was right before you started installing Windows 10.
0x8007001F – 0x20006
The installation failed in the SAFE_OS phase with an error during REPLICATE_OC operation

How to Fix the issue Windows Upgrade Error
- Download Windows 10 version 1607 and install that first.
(You won’t get the error installing this older version of Windows 10) - Once 1607 has installed, you can then upgrade to 2004 (or latest version at the time)
If this guide has helped you, please let us know! Please take a look at our other guides and tips.