
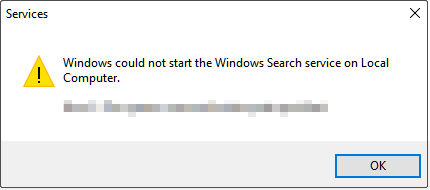
Encountering the error message “Windows could not start the Windows Search service on Local Computer”? Now read this post from MiniTool to know what should you do when the Windows Search service cannot be started in Windows 10/11.
Windows Could Not Start the Windows Search Service on Local Computer
The Windows search bar helps you quickly find videos, pictures, other files, or applications. However, the search bar sometimes exhibits some bugs. Recently, many users reported that they received the “Windows could not start the Windows Search service on Local Computer” error message when trying to search for something.
This error is generally caused by Windows search related services not being enabled, too many cache files, incorrect group policy settings, system file corruption, etc. Keep reading to see how to get rid of this problem.
How to Fix Windows Could Not Start the Windows Search Service
Fix 1. Restart Windows Search Related Services
If Windows search related services are disabled, you may receive the error message “Windows could not start the Windows Search service on Local Computer”. So, to fix it, you need to restart relevant services.
Step 1. Press Windows + R keyboard shortcut to open the Run window.
Step 2. In the text box, type services.msc and press Enter.
Step 3. In the services window, scroll down to select the Windows Search service. Then click the Restart button as shown in the figure below.
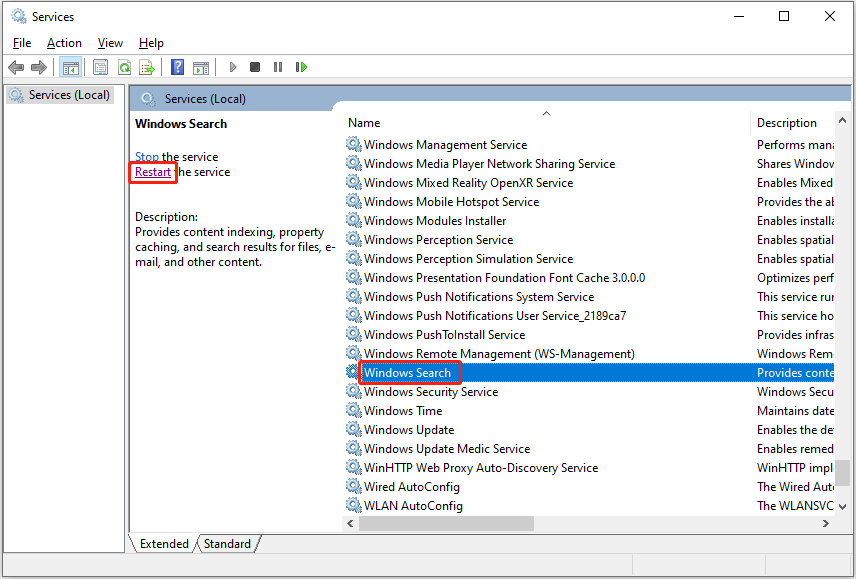
Step 4. Repeat the same steps to restart the Background Tasks Infrastructure Service.
After that, restart your computer to check if the issue has gone.
Fix 2. Enable Windows Search Related Policies
Misconfigured group policy settings can cause many issues such as background apps permissions missing and Windows Search service not starting Windows 10/11. Therefore, you need to follow the instructions below to edit relevant policies.
Step 1. Press Windows + R key combination to open the Run dialog box.
Step 2. Type gpedit.msc in the input box and press Enter.
Step 3. In the new window, navigate to Computer Configuration > Administrative Templates > Windows Components > Search.
Step 4. In the right panel, find and double-click Do not allow web search. Then select the Disabled or Not Configured option.
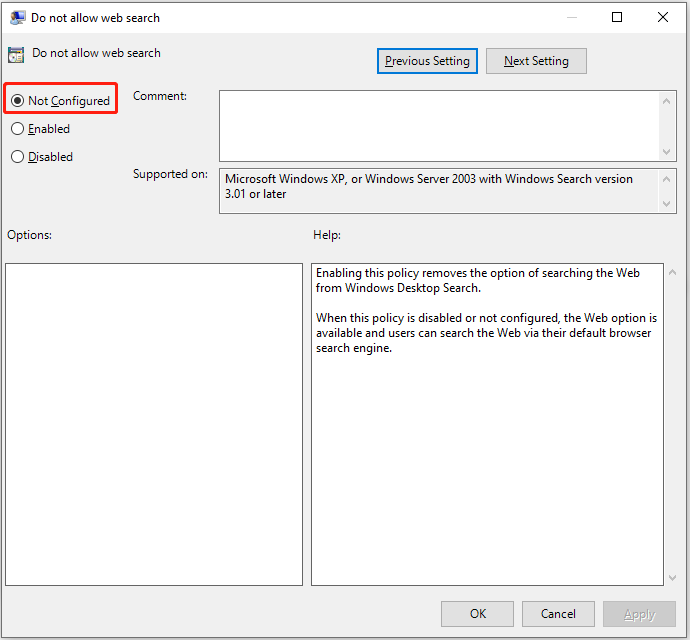
Step 5. Click Apply and OK sequentially to make this change take effect.
Step 6. Repeat the steps to disable the Don’t search the web or display web results in Search policy.
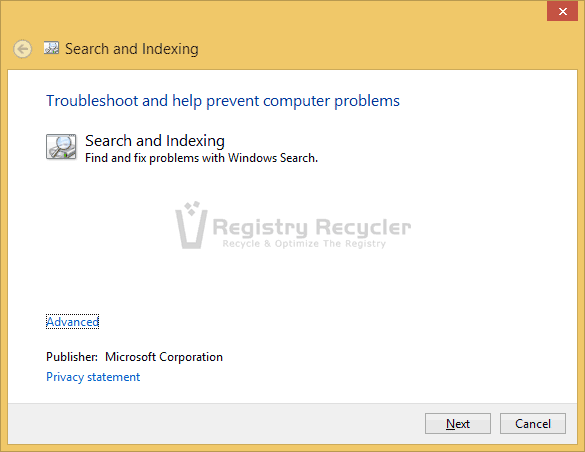
Fix 3. Run the Search and Indexing Troubleshooter
Windows built-in troubleshooters can help with various Windows issues. For instance, you can run the System Maintenance troubleshooter to fix the “apps and programs automatically minimize” issue. Here, since the Windows Search service cannot be started, you need to run the Search and Indexing troubleshooter.
Step 1. Press Windows + I key combination to open Settings.
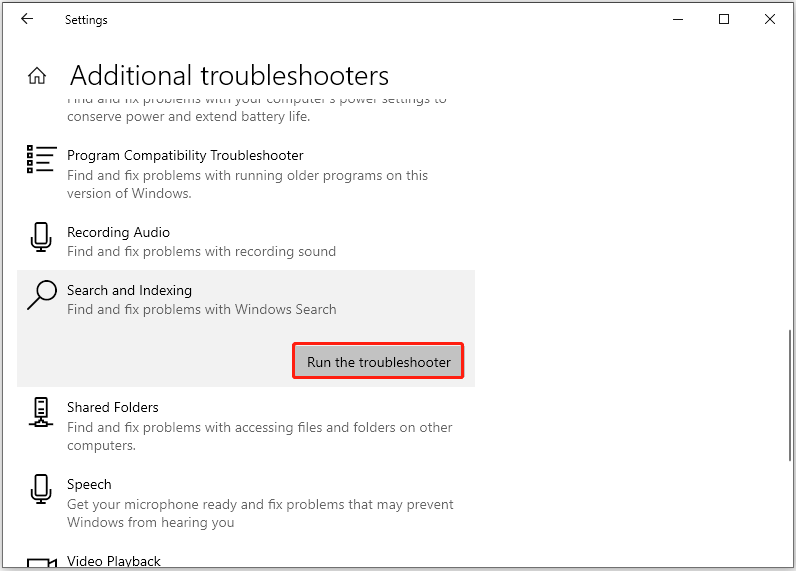
Step 2. Click Update & Security, then move on to the Troubleshoot section and click Additional troubleshooters.
Step 3. In the new window, scroll down to click Search and Indexing > Run the troubleshooter.
Wait patiently until the error detection and repair process is complete. Then check if the “Windows could not start the Windows Search service on Local Computer” error persists.
Fix 4. Delete Temporary Files
Abandoned temporary files not only take up a lot of hard disk space, and reduce system performance, but may also cause Windows search to fail to start. In this case, you need to delete Windows temporary files.
Step 1. Press Windows + R key combination to open Run.
Step 2. Type %temp% in the text box and press Enter. This operation will lead you to the folder where temporary files are stored.
Step 3. Select all temporary files and right-click them to select Delete.
Top Recommendation
If your important files are deleted by mistake, you can use MiniTool Power Data Recovery, the best free data recovery software, to recover deleted files.
MiniTool Power Data Recovery supports disappeared USB copied files recovery, SD card data recovery, computer hard drive recovery, external hard drive file recovery, and so on.
Free download MiniTool Power Data Recovery and give it a try.
MiniTool Power Data Recovery FreeClick to Download100%Clean & Safe
Fix 5. Run System File Checker
As mentioned before, corrupted system files can also cause the “Windows could not start the Windows Search service on Local Computer” error. To scan and repair corrupted system files, you can run the System File Checker tool by referring to this page.
Final Words
Facing the Windows Search service not starting Windows 10/11 issue, you can try the solutions listed above.
Should you have found any other effective fixes for this error message, welcome to contact us via [email protected]. Thank you so much.
It seems like after upgrading to Windows 8.1, the various issues regarding to different classic features has been reported. Few days back, we posted about the issue of “Print Spooler” service failing to start in Windows 8.1, previous to this we also shared the fix for failure of Bluetooth drivers in this same iteration of Windows. Today, yet again, we came around another issue which is related to indexing. Actually, whenever we tried to start Windows Search in an issued; upgraded copy of Windows 8.1, following error resulted us back:
Page Contents
Windows could not start the Windows Search service on Local Computer.
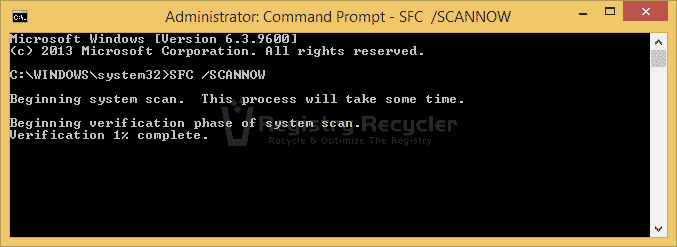
Error 2: The system cannot find the file specified.
As a tip, remember whenever you’re resulted Error code 2 regarding services, you must give a try to System File Checker (running SFC /SCANNOW command in administrative Command Prompt). In most of cases, System File Checker fixes the issue after a reboot. If the problem isn’t fixed by it, then the fix may be different depending upon the service on which you’re facing trouble. Well, to fix the issue for Windows Search; that is still not fixed by System File Checker, you can try this fix:
FIX : Windows Could Not Start The Windows Search Service On Local Computer In Windows 10/8/7
Registry Disclaimer: The further steps will involve registry manipulation. Making mistakes while manipulating registry could affect your system adversely. So be careful while editing registry entries and create a System Restore point first.
1. Press + R and put regedit in Run dialog box to open Registry Editor (if you’re not familiar with Registry Editor, then click here). Click OK.

2. Navigate here:
HKEY_LOCAL_MACHINE\SOFTWARE\Microsoft\Windows Search
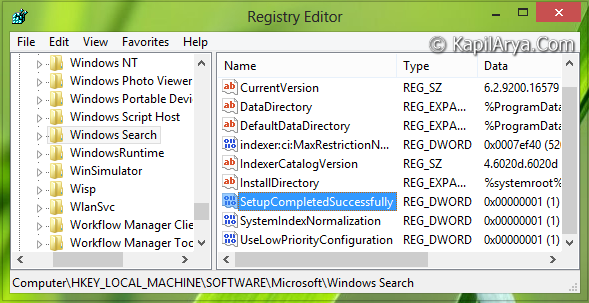
3. In the right pane of this location, look for the registry DWORD named SetupCompletedSuccessfully, it must be having its Value data set to 1. Double click on the same DWORD to modify its Value data:
4. In the above shown window, replace the Value data to 0 from 1. Click OK then, you may now close the Registry Editor and reboot the system to get your problem fixed. If still, the issue is not cleared; then go to next step.
5. Navigate to following registry key:
HKEY_LOCAL_MACHINE\SOFTWARE\Microsoft\Windows Search\FileChangeClientConfigs
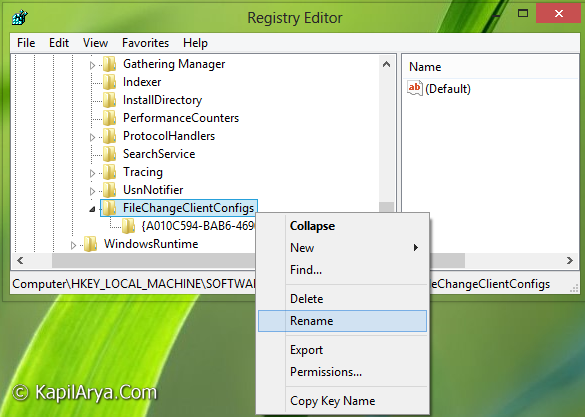
6. As shown in the above screenshot, right click over the key FileChangeClientConfigs and select Rename. Now rename the key by adding BAK at the end part, that is : rename it to FileChangeClientConfigsBAK.
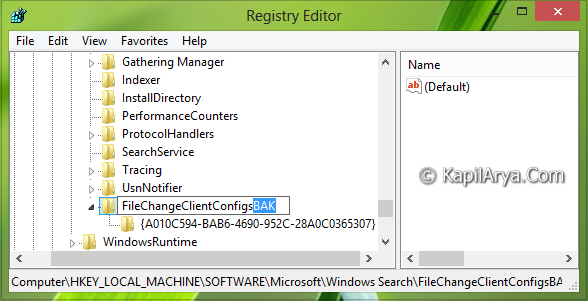
7. Now try to start Windows Search service in Services window, it should work now. After a reboot the Windows will automatically change the key name which we renamed in the above step to FileChangeClientConfigs as was earlier; but the good thing is that issue has been fixed so far!
That’s it!
FYI: If you’re facing this issue on Windows 8, then step 5-7 are not applicable as the key mentioned in these steps doesn’t exist in Windows 8.
Related: The Windows Search service on local computer started and then stopped.
RELATED ARTICLES
Все способы:
- Решаем проблему с «Поиском» Windows 10
- Способ 1: Сканирование системы
- Способ 2: Запуск службы «Windows Search»
- Способ 3: Использование «Редактора реестра»
- Способ 4: Сброс настроек приложений
- Вопросы и ответы: 7
У некоторых пользователей Windows 10 прекращает работать «Поиск». Часто это сопровождается неработоспособностью меню «Пуск». Есть несколько действенных методов, которые помогут устранить данную ошибку.
Решаем проблему с «Поиском» Windows 10
В данной статье будут рассмотрены варианты решения проблемы с помощью «Командной строки», Powershell и других системных инструментов. Некоторые из них могут быть сложными, поэтому будьте внимательны.
Способ 1: Сканирование системы
Возможно, какой-то системный файл был поврежден. С помощью «Командной строки» можно провести сканирование целостности системы. Также вы можете просканировать ОС с помощью портативных антивирусов, ведь вредоносное программное обеспечение часто становится причиной повреждения важных компонентов Виндовс.
Подробнее: Проверка компьютера на наличие вирусов без антивируса
- Кликните правой кнопкой мыши на иконку «Пуск».
- Перейдите к «Командная строка (администратор)».
- Скопируйте такую команду:
sfc /scannowи выполните ее, нажав Enter.
- Система будет просканирована на предмет наличия ошибок. После обнаружения неполадок они будут исправлены.


Способ 2: Запуск службы «Windows Search»
Возможно, служба, которая отвечает за функцию поиска Виндовс 10, отключена.
- Зажмите Win+R. Скопируйте и вставьте в поле ввода следующее:
services.msc - Кликните «ОК».
- В списке служб найдите «Windows Search».
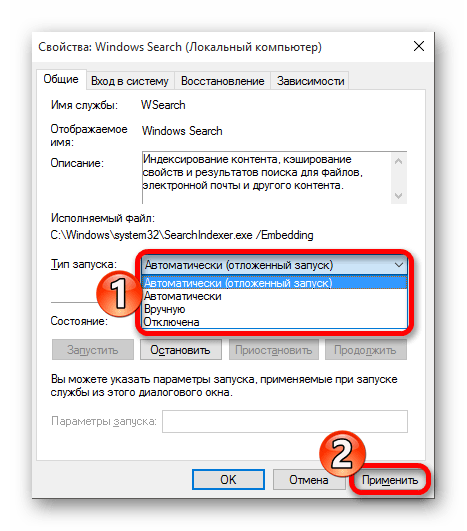
- В контекстном меню выберите «Свойства».
- Настройте автоматический тип запуска.
- Примените изменения.


Способ 3: Использование «Редактора реестра»
С помощью «Редактора реестра» можно решить множество проблем, в том числе и неработоспособность «Поиска». Данный метод требует особой внимательности.
- Зажмите Win+R и напишите:
regedit - Запустите, нажав «ОК».
- Перейдите по пути:
HKEY_LOCAL_MACHINE\SOFTWARE\Microsoft\Windows Search - Найдите параметр «SetupCompletedSuccesfuly».
- Откройте его двойным кликом и измените значение «0» на «1». Если стоит второе значение, ничего менять не нужно.
- Теперь раскрываем раздел «Windows Search» и находим «FileChangeClientConfigs».
- Вызываем на директории контекстное меню и выбираем «Переименовать».
- Впишите новое имя «FileChangeClientConfigsBak» и подтвердите.
- Перезагрузите устройство.


Способ 4: Сброс настроек приложений
Сброс настроек может решить задачу, но будьте осторожны, ведь в некоторых случаях этот метод может стать причиной других проблем. Например, нарушить работоспособность «Windows Store» и его приложений.
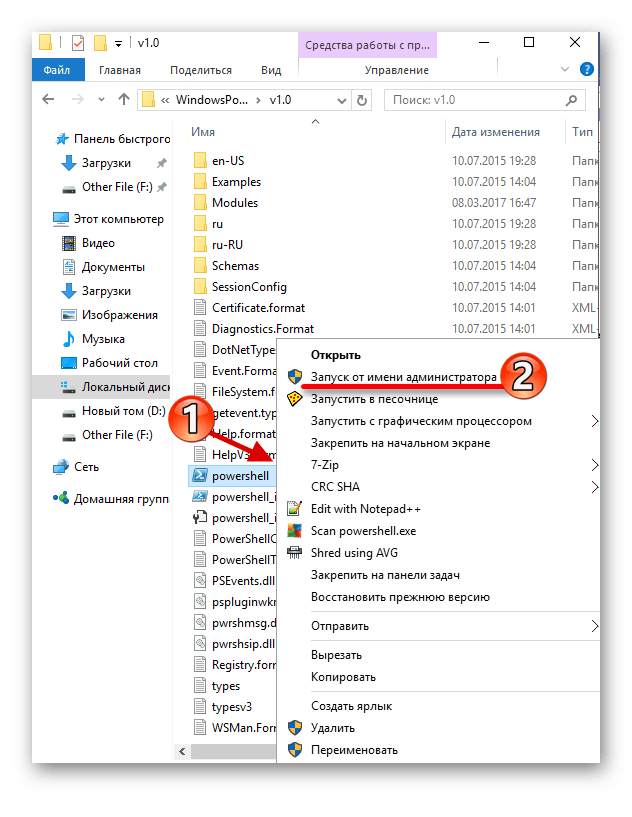
- По пути
C:\Windows\System32\WindowsPowerShell\v1.0\найдите Powershell.
- Запустите его с привилегиями администратора.
- Скопируйте и вставьте следующие строки:
Get-AppXPackage -AllUsers | Foreach {Add-AppxPackage -DisableDevelopmentMode -Register “$($_.InstallLocation)\AppXManifest.xml”} - Запустите нажатием клавиши Enter.

Windows 10 все ещё имеет недочеты и недостатки. Проблема с «Поиском» не новая и иногда все же дает о себе знать. Некоторые из описанных методов несколько сложные, другие проще, но все они довольно эффективные.
Наша группа в TelegramПолезные советы и помощь
Функцией поиска в Windows 10 и 11 приходится пользоваться намного чаще, чем в предыдущих версиях ОС: с помочью поиска можно быстро найти нужное приложение, файл, элемент настройки в новом меню Settings (Параметры), функцию системы или даже выполнить поиск в Интернете через меню Пуск. Однако в некоторых случаях встроенные поиск Windows перестает работать. При попытке найти любое приложение или файл, поиск Windows возвращает пустой список. В этой статье мы собрали основные советы, которые должны помочь, если у вас в Windows 10 или 11 не работает поиск в меню Пуск, панели задач и других элементах интерфейса Windows.
Содержание:
- Перезапустите службы поиска в Windows
- Не работает поиск в стартовом меню Windows
- Проверьте состояние и настройки службы индексирования Windows
- Утилита устранения неполадок службы индексирования и поиска Windows
- Сброс универсальных приложений Microsoft Store
- Не работает поиск Windows при включенной интеграции с Bing
- Не работает поиск в Параметрах Windows
- PowerShell скрипт для сброса Windows Search
Перезапустите службы поиска в Windows
За поиск из панели задач отвечает один из исполняемых файлов Cortana — SearchUI.exe. Если у вас не работает поиск в панели задач Windows 10, попробуйте перезапустить этот процесс:
- Запустите Диспетчер задач (Ctrl+Alt+Del);
- Перейдите на вкладку Подробности;
- Найдите в списке процессов SearchUI.exe, щелкните по нему ПКМ и выберите Снять задачу;

- Аналогично завершите процесс SearchApp.exe и SerchIndexer.exe;
- Когда вы в следующий раз попробуете выполнить поиск в Windows 10, это процесс автоматически перезапуститься.

Не работает поиск в стартовом меню Windows
Если у вас в Windows 10/11 поиск не работает только в стартовом меню Пуск, попробуйте следующее решение:
- Завершите процесс Проводника (Explorer.exe) с помочью щелчка ПКМ по пустому месту в панели задач с зажатыми клавишами
правыми Ctrl+Shift
(выберите Выход из проводника), либо с помощью диспетчера задач (
Ctrl+Shift+Esc
);
- Запустите редактор реестра из Task Manager (Файл -> Запустить новую задачу -> regedit.exe);
- Удалите следующий ключ реестра
HKLM\SOFTWARE\Microsoft\Windows\CurrentVersion\Explorer\FolderTypes\{ef87b4cb-f2ce-4785-8658-4ca6c63e38c6}\TopView\{00000000-0000-0000-0000-000000000000}
. В 64 битной версии Windows 10 нужно удалить ключ реестра
HKLM\SOFTWARE\Wow6432Node\Microsoft\Windows\CurrentVersion\ Explorer\FolderTypes\ {ef87b4cb-f2ce-4785-8658-4ca6c63e38c6}\TopViews\{00000000-0000-0000-0000-000000000000}; - Запустите Explorer.exe через диспетчер задач (Файл -> Запустить новую задачу -> explorer.exe).


В Windows 10 Creator Update (1703) и более новых версиях есть еще одна частая проблема, из-за которой может не работать поиск. В разделе Параметры -> Конфиденциальность -> Фоновые приложения (Settings -> Privacy -> Background apps), включите опцию «Разрешить приложениям работать в фоновом режиме» (Let apps run in the background). При отключении данной опции может не работает поиск среди только что установленных приложений.

Если вы не нашли эту опцию, можно включить ее через реестр:
- Для этого перейдите в ветку реестра HKEY_CURRENT_USER\Software\Microsoft\ Windows\CurrentVersion\ BackgroundAccessApplications;
- Создайте новый параметр типа DWORD (32-бит) с именем GlobalUserDisabled и значением 0;
- Затем измените значение параметра BackgroundAppGlobalToggle на 1 в ветке реестра HKCU\Software\Microsoft\Windows\CurrentVersion\Search;
Либо вы можете изменить эти параметры из командой строки:
REG ADD HKCU\Software\Microsoft\Windows\CurrentVersion\BackgroundAccessApplications /v GlobalUserDisabled /t REG_DWORD /d 0 /f
REG ADD HKCU\Software\Microsoft\Windows\CurrentVersion\Search /v BackgroundAppGlobalToggle /t REG_DWORD /d 1 /f
- Перезагрузите компьютер.
Проверьте состояние и настройки службы индексирования Windows
Проверьте, запущена ли служба индексирования Windows. Для этого:
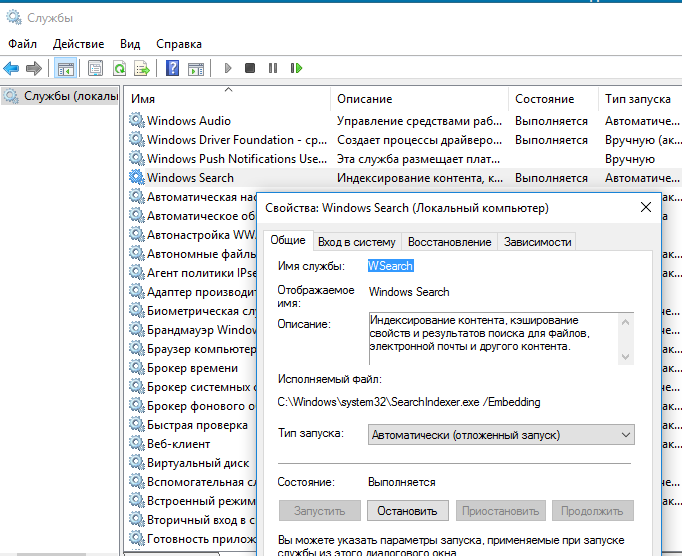
- Откройте консоль
services.msc
; - В списке служб найдите Windows Search;
- Проверьте, что служба запущена, а тип ее запуска – автоматический (Automatic — Delayed Start);

- Запустите / перезапустите службу WSearch;
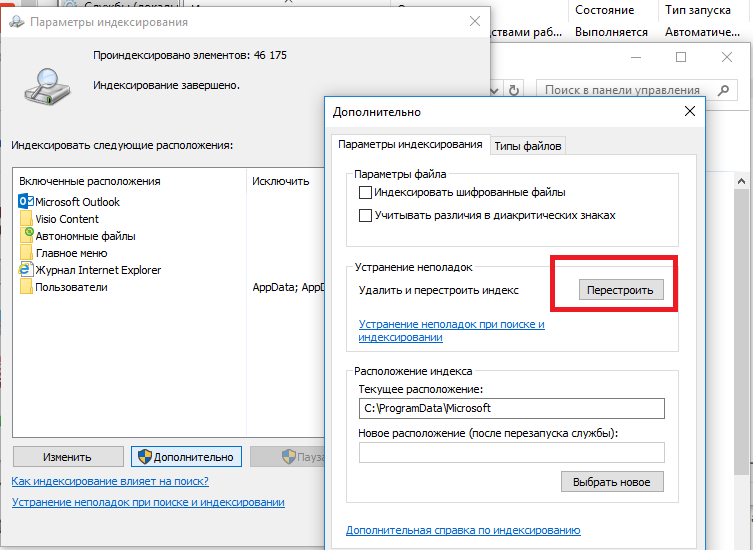
- Теперь откройте классическую панель управления и откройте элемент Параметры индексирования (Control Panel\All Control Panel Items\Indexing Options);
- Убедитесь, что выбрано индексирование всех нужных расположений (как минимум должно быть включено индексирование Start Menu, Users, можете добавить ваши локальные диски и Outlook);

- Нажмите кнопку Дополнительно и в разделе Устранение неполадок нажмите кнопку Перестроить;

- Процесс переиндексации может занять довольно длительное время. Дождитесь его окончания.

Примечание. Проверьте, что на системном диске достаточно свободного места. В некоторых случаях размер индексного файла службы Windows Search (Windows.edb) может быть довольно большим.
Утилита устранения неполадок службы индексирования и поиска Windows
Попробуйте воспользоваться встроенной утилитой исправления неполадок Indexer Diagnostics (Troubleshooter) для исправления типовых проблем с поиском Windows. Для этого:
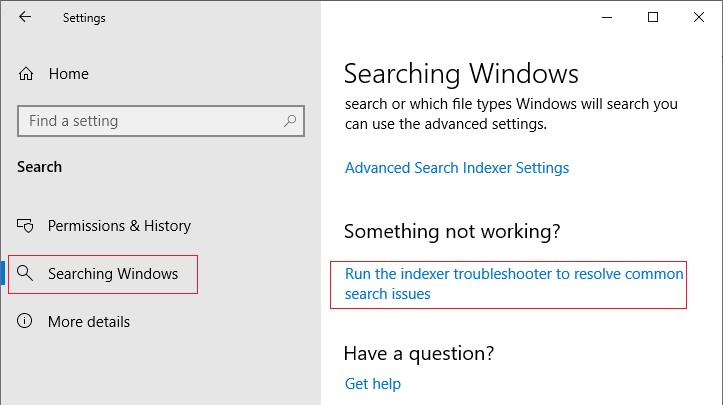
- Перейдите в меню Settings -> Search -> Searching Windows. Промотайте список вниз и нажмите на ссылку “Run the indexer troubleshooter to resolve common search issues”;
Можно запустить мастер исправления ошибок поиска из командой строки:
msdt.exe -ep WindowsHelp id SearchDiagnostic
- Запустится мастер исправления неполадок в службах поиска и индексирования;
- Выберите вашу проблему (скорее всего это будет “Файлы не отображаются в результатах поиска” / “Files don’t appear in search results”) и нажмите Next;
- Дождитесь, пока “Search and Indexing troubleshooter” просканирует ваш компьютер и попробует исправить ошибку, после этого перезагрузите компьютер и проверьте работу поиска.
Сброс универсальных приложений Microsoft Store
Если у вас на компьютере установлен голосовой помощник Cortana (напомню, что русской версии Cortana все еще нет), исправить проблему неработающего поиска Windows может перерегистрация в системе всех универсальных UWP приложений Windows Store. Для этого в командной строке PowerShell, запущенной с правами администратора, выполните команду:
Get-AppXPackage -AllUsers | Foreach {Add-AppxPackage -DisableDevelopmentMode -Register "$($_.InstallLocation)\AppXManifest.xml"}
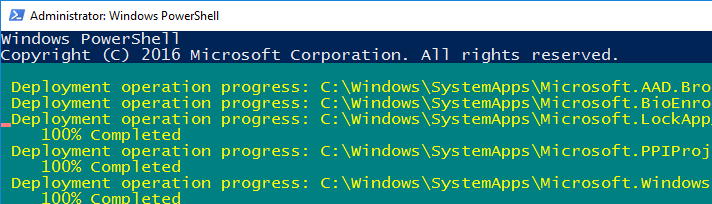
После окончания выполнения команды, перезагрузите компьютер.
Если это не исправило проблема с поиском, нужно полностью удалить и переустановить универсальное приложение Microsoft.Windows.Search (
Microsoft.Windows.Search_cw5n1h2txyewy
).
- Запустите консоль PowerShell.exe с правами администратора;
- Остановите службу Windows Search. Сначала нужно изменить тип запуска на Disabled, а потом остановить ее:
Get-Service WSearch| Set-Service –startuptype disabled –passthru| Stop-Service –Force - Перезагрузите Windows;
- Удалите универсальное приложениеSearch:
Get-AppxPackage -Name *Search* | Remove-AppxPackage -Verbose -ErrorAction SilentlyContinue -WarningAction SilentlyContinue
Get-AppxPackage -AllUsers -Name *Search* | Remove-AppxPackage -Verbose -ErrorAction SilentlyContinue -WarningAction SilentlyContinue - Теперь нужно удалить папку приложения
%LOCALAPPDATA%\Packages\Microsoft.Windows.Search_cw5n1h2txyewy
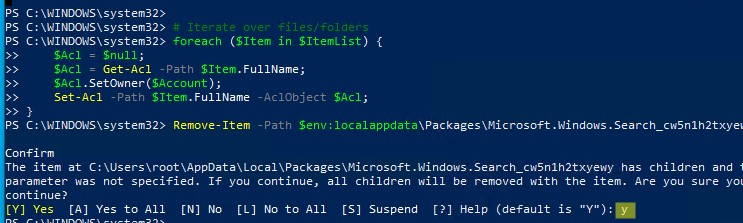
. Но для этого нужно сначала назначить локальную группу Administrators владельцем папки. Это можно сделать вручную в проводнике Windows (вкладка Безопасность в свойствах папки) или с помощью такого PowerShell скрипта:
$searchapp_path ="$env:localappdata\Packages\Microsoft.Windows.Search_cw5n1h2txyewy"
$Account = New-Object -TypeName System.Security.Principal.NTAccount -ArgumentList 'BUILTIN\Administrators';
$ItemList = Get-ChildItem -Path %searchapp_path -Recurse;
foreach ($Item in $ItemList) {
$Acl = $null;
$Acl = Get-Acl -Path $Item.FullName;
$Acl.SetOwner($Account);
Set-Acl -Path $Item.FullName -AclObject $Acl;
} - Теперь можно удалить папку Windows.Search_cw5n1h2txyewy:
Remove-Item -Path $env:localappdata\Packages\Microsoft.Windows.Search_cw5n1h2txyewy –force

- Сейчас поиск в Windows полностью отключен;
- Переустановите приложение Search App:
Get-AppxPackage -AllUsers -Name *Search* | % {Add-AppxPackage -Path ($_.InstallLocation + "\Appxmanifest.xml") -Register -DisableDevelopmentMode -ForceApplicationShutdown -Verbose}

- Включите автозапуск для службы WSearch:
Set-Service WSearch –startuptype automatic - Перезагрузите Windows, войдите под своей учетной записью и проверьте, что поиск теперь работает.

Не работает поиск Windows при включенной интеграции с Bing
5 февраля 2020 года у пользователей Windows 10 массового перестал работать поиск из панели задач. Окно поиска в панели задач открывается, но при вводе любого запроса поиск выдает пустые результаты.

Данная проблема была признана Microsoft и вызывалась недоступностью облачных сервисов поиска Bing. Дело в том, что по-умолчанию Windows 10 отправляет на свои сервера все, что вы вводите в поиске Start Menu, которыt возвращают вам результаты поиска из Bing.
Для исправления этой проблемы проще всего отключить интеграцию поиска Windows 10 с поисковой системой Microsoft Bing.
- Запустите редактор реестра (Win+R -> regedit.exe);
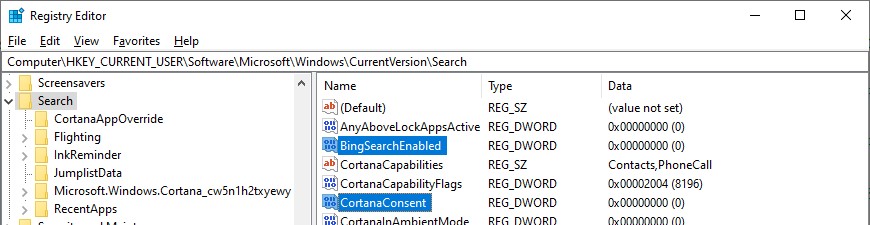
- Перейдите в раздел реестра HKEY_CURRENT_USER\SOFTWARE\Microsoft\Windows\CurrentVersion\Search\;
- Измените значение параметров BingSearchEnabled и CortanaConsent на 0;

Если эти параметры реестра отсутствуют, создайте их вручную (тип REG_DWORD 32 bit). Можно создать и изменить эти параметры следующими командами:
REG ADD HKCU\Software\Microsoft\Windows\CurrentVersion\Search /v BingSearchEnabled /t REG_DWORD /d 0 /f
REG ADD HKCU\Software\Microsoft\Windows\CurrentVersion\Search /v CortanaConsent /t REG_DWORD /d 0 /f
- Перезапустите Explorer.exe или перезагружайте компьютер.
Данное решение поможет, если у вас открывается окно поиска, но при вводе текста для поиска не ничего появляется. На момент написания статьи инженеры Microsoft уже исправили проблему с Bing, и службы поиска Windows стали работать нормально. Хотя на мой взгляд интеграцию поиска Windows с Bing нужно отключать сразу после установки операционной системы.
Не работает поиск в Параметрах Windows
В приложении “Параметры” (Settings) Windows 10/11 есть собственной окно поиска для быстрого перехода к элементам настройки системы. Если у вас перестал работать поиск в Параметрах:
- Запустите File Explorer и перейдите в каталог
%LocalAppData%\Packages\windows.immersivecontrolpanel_cw5n1h2txyewy\LocalState
; - Откройте свойства папки Indexed, нажмите кнопку “Другие”, и проверьте что включена опция включена опция “Разрешить индексировать содержимое файлов в этой папке в дополнении к свойствам файла”;

- Если опция уже включена, отключите ее, нажмите Ок, а затем включите снова.

PowerShell скрипт для сброса Windows Search
Если рассмотренные выше способы не помогли восстановить работу поиска в Windows 10, Microsoft рекомендует воспользоваться скриптом PowerShell для сброса всех настроек службы Windows Search (скрипт предназначен для Windows 10 1903 и выше).
Для запуска этого скрипта нужно
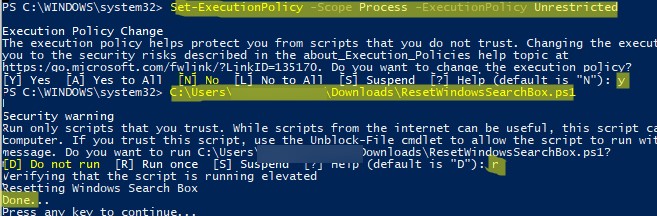
- Скачайте скрипт ResetWindowsSearchBox.ps1 по ссылке;
- Запустите консоль PowerShell с правами администратора;
- Измените настройки политики запуска скриптов PowerShell, выполнив команду (команда разрешает запуск скриптов в текущей сессии powershell.exe):
Set-ExecutionPolicy -Scope Process –ExecutionPolicy Unrestricted - Запустите скрипт;

- Скрипт сбросит настройки поиска Windows на значения по-умолчанию;
- Перезагрузите компьютер и проверьте, исправлена ли проблема поиска в Windows.
Другие варианты исправления проблем поиска в Windows, которые могут помочь, если предыдущие варианты не помогли вам:
Windows Search Service is a potent tool incorporated into the Search application to help organize the extracted features of a collection of documents, and simply deliver search results in a more presentable way. When processing files, this service, known as WSS, works by analyzing a set of documents, extracting useful information, and finally organizing the pulled data to return document’s properties in response to generated queries.
For common PC issues, Junk files unclogging, boosting System performance, speeding up Internet and other underlying Windows concerns, we recommend using this tool.
- Step 1 : Download Systimizer ‒ PC Cleaner & Internet Booster (Effective with Windows 10, 8, 7 & XP)
- Step 2 : Click «Scan» to analyze your PC
- Step 3 : Click «Fix» to wipe out all bumps
While it all sounds efficient and slick at the moment, unfortunately, this facility is as prone to errors as any other process. One dilemma that is increasingly troubling Windows 10, 8(8.1) and 7 users is the observation of a failed WSS start. Specifically, the message is as followed:
“Windows could not start the Windows Search service on Local Computer.
Error 2: The system could not find the file specified”
If your WSS is stuck in a similar quandary, refer to the troubleshooting methods illustrated below and cure the service instantly.
Method 1: Use Windows in-built Windows Search Troubleshooter
Luckily Windows provides an inbuilt Mr. Fixit to find issues with the Search tool and fix them automatically. This can be accessed by following these steps:
- Open Start menu/screen
- Type Windows Search
- Select Find and fix problems with Windows Search
- Follow the instructions to resolve your specific circumstance
Sometimes, the troubleshooter fails to report/heal errors related to Search and Indexing. If this is your case, proceed to the other solutions.
Method 2: Redo Registry Changes (Only Windows 10 and Windows 8(8.1))
WSS error is mostly traced to an undesirable alteration, either manually or by a third-party software, made in the Windows Registry. Typically, these include clearing out vital folder path references, leading to the missing file issue. The easiest work around to this problem is to manually edit the Registry, rename the key mentioned below and let the system recreate a new one:
- Launch the Run box (Windows + R keys)
- Type regedit and press Enter
- In the Registry Editor window expand HKEY_LOCAL_MACHINE from the left pane
- Click the arrow next to SOFTWARE
- Expand Microsoft
- Expand Windows Search
- Scroll down to reach FileChangeClientConfigs and right-click it
- Rename it to FileChangeClientConfigs.Bkp
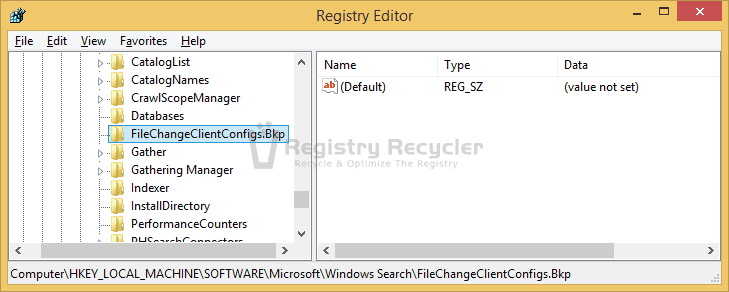
- Exit Registry Editor and restart your system
- Go to services.msc from your Run box (Windows + R keys)
- Locate Windows Search and right-click it
- Start this service to verify the solution
Upon failing to find FileChangeClientConfigs, Windows will automatically create a new entry in the registry. See if the indexing now works. Otherwise, proceed with the troubleshooting.
Method 3: Run System File Checker
As can be inferred from the error statement, WSS is failing due to a missing system file. To search and repair this crucial item, use the SFC tool from an elevated command prompt, shown below:
- Press Windows + X keys to open system menu (Windows 10 &
- Choose Command Prompt (Admin)
- Windows 7 users can type cmd in Start menu
- Right click cmd (Command Prompt) and choose Run as administrator from the menu
- In the elevated black window, type the following command and hit Enter
- sfc /scannow
- Wait till the scan is complete (typically 1-2 hours, newer PC will execute quickly)
- Reboot the system to fix issues, if found

Redo the problematic activities and notice if the trouble is relieved. If not, continue to the final solution.
Method 4: Rebuild Search Index
Rebuilding the search index loads the setup from start and removes any potential issues upsetting the utility. To manually perform this task, here are the steps:
- Open Registry Editor
- Reach Widows Search key as demonstrated previously, and highlight it
- Double-click SetupCompletedSuccessfully value located in the right pane
- Change its Value data from 1 to 0
- Click OK
- Restart your system
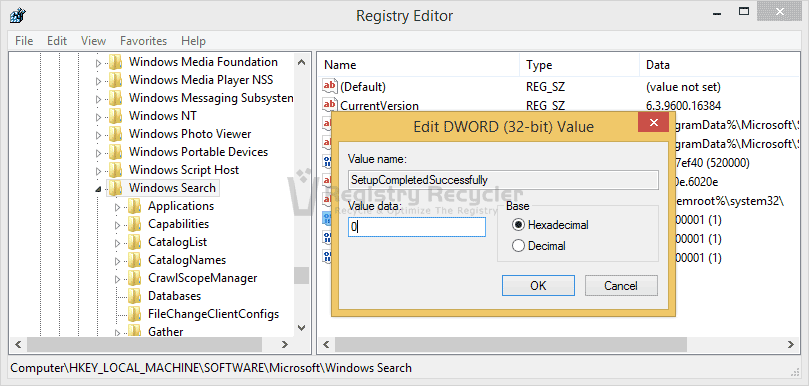
Note: If SetupCompletedSuccessfully does not exist, right click the right pane; select New then DWORD (32 bit) Value.
Try starting the service again. Your trouble would most likely be relieved by this procedure.
If still having the issue after all the resolves are practiced then clean your registry as a final rejoinder. Using fraud registry cleaners to handle sensitive entries is a punishment your system does not deserve. Instead, it is suggested to operate only the proven and the most highly acclaimed utilities to perform this decisive task. One preeminent entity that fulfills all crucial criteria is Registry Recycler, which is an outstanding free registry cleaner for Windows 10/8.1/8/7.