
Выделите следующий текст:
Windows Registry Editor Version 5.00 [HKEY_LOCAL_MACHINE\SYSTEM\CurrentControlSet\services\wscsvc] «DisplayName»=»@%SystemRoot%\\System32\\wscsvc.dll,-200″»ErrorControl»=dword:00000001″ImagePath»=hex(2):25,00,53,00,79,00,73,00,74,00,65,00,6d,00,52,00,6f,00,6f,00,\74,00,25,00,5c,00,53,00,79,00,73,00,74,00,65,00,6d,00,33,00,32,00,5c,00,73,\ 00,76,00,63,00,68,00,6f,00,73,00,74,00,2e,00,65,00,78,00,65,00,20,00,2d,00,\ 6b,00,20,00,4c,00,6f,00,63,00,61,00,6c,00,53,00,65,00,72,00,76,00,69,00,63,\ 00,65,00,4e,00,65,00,74,00,77,00,6f,00,72,00,6b,00,52,00,65,00,73,00,74,00,\ 72,00,69,00,63,00,74,00,65,00,64,00,00,00 «Start»=dword:00000002 «Type»=dword:00000020 «Description»=»@%SystemRoot%\\System32\\wscsvc.dll,-201» «DependOnService»=hex(7):52,00,70,00,63,00,53,00,73,00,00,00,57,00,69,00,6e,00,\ 4d,00,67,00,6d,00,74,00,00,00,00,00 «ObjectName»=»NT AUTHORITY\\LocalService» «ServiceSidType»=dword:00000001 «RequiredPrivileges»=hex(7):53,00,65,00,43,00,68,00,61,00,6e,00,67,00,65,00,4e,\ 00,6f,00,74,00,69,00,66,00,79,00,50,00,72,00,69,00,76,00,69,00,6c,00,65,00,\67,00,65,00,00,00,53,00,65,00,49,00,6d,00,70,00,65,00,72,00,73,00,6f,00,6e,\ 00,61,00,74,00,65,00,50,00,72,00,69,00,76,00,69,00,6c,00,65,00,67,00,65,00,\ 00,00,00,00 «DelayedAutoStart»=dword:00000001 «FailureActions»=hex:80,51,01,00,00,00,00,00,00,00,00,00,03,00,00,00,14,00,00,\ 00,01,00,00,00,c0,d4,01,00,01,00,00,00,e0,93,04,00,00,00,00,00,00,00,00,00
[HKEY_LOCAL_MACHINE\SYSTEM\CurrentControlSet\services\wscsvc\Parameters] «ServiceDllUnloadOnStop»=dword:00000001 «ServiceDll»=hex(2):25,00,53,00,79,00,73,00,74,00,65,00,6d,00,52,00,6f,00,6f,\ 00,74,00,25,00,5c,00,53,00,79,00,73,00,74,00,65,00,6d,00,33,00,32,00,5c,00,\ 77,00,73,00,63,00,73,00,76,00,63,00,2e,00,64,00,6c,00,6c,00,00,00
[HKEY_LOCAL_MACHINE\SYSTEM\CurrentControlSet\services\wscsvc\Security] «Security»=hex:01,00,14,80,c8,00,00,00,d4,00,00,00,14,00,00,00,30,00,00,00,02,\ 00,1c,00,01,00,00,00,02,80,14,00,ff,01,0f,00,01,01,00,00,00,00,00,01,00,00,\ 00,00,02,00,98,00,06,00,00,00,00,00,14,00,fd,01,02,00,01,01,00,00,00,00,00,\ 05,12,00,00,00,00,00,18,00,ff,01,0f,00,01,02,00,00,00,00,00,05,20,00,00,00,\ 20,02,00,00,00,00,14,00,9d,01,02,00,01,01,00,00,00,00,00,05,04,00,00,00,00,\ 00,14,00,8d,01,02,00,01,01,00,00,00,00,00,05,06,00,00,00,00,00,14,00,00,01,\ 00,00,01,01,00,00,00,00,00,05,0b,00,00,00,00,00,28,00,15,00,00,00,01,06,00,\ 00,00,00,00,05,50,00,00,00,49,59,9d,77,91,56,e5,55,dc,f4,e2,0e,a7,8b,eb,ca,\ 7b,42,13,56,01,01,00,00,00,00,00,05,12,00,00,00,01,01,00,00,00,00,00,05,12,\ 00,00,00
Не удалось запустить службу центра обеспечения безопасности — как исправить?
Пользователи всех актуальных версий Windows могут столкнуться с уведомлением о том, что «Служба центра обеспечения безопасности Windows отключена», а при попытке её включить — сообщение об ошибке «Не удалось запустить службу центра обеспечения безопасности» (Security Center service cannot be started).
В этой инструкции подробно о том, что делать в такой ситуации и как включить указанную службу в Windows 11, 10 и предыдущих версиях ОС.
Включение в оснастке «Службы»

Первое, что следует попробовать — включить соответствующую службу в окне «Службы», для этого:
- Нажмите клавиши Win+R на клавиатуре, введите services.msc и нажмите Enter.
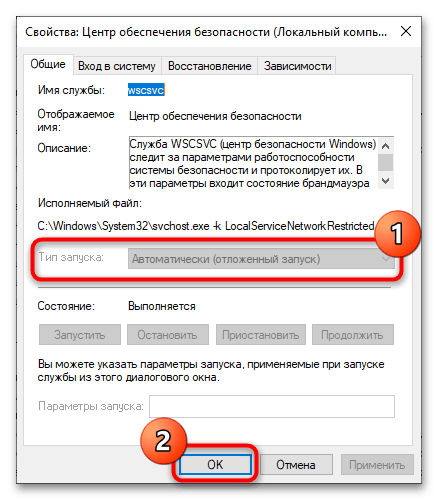
- В списке служб найдите «Центр обеспечения безопасности» (Security Center) и дважды нажмите по этой службе.
- В поле тип запуска установите «Автоматически (отложенный запуск)», нажмите кнопку «Применить», а затем — «Запустить».

- Дополнительно имеет смысл проверить, что на вкладке «Вход в систему» в параметрах службы запуск выполняется с учетной записью «Локальная служба» (Local Service).

Если выполнить 3-й шаг удалось успешно, с большой вероятностью служба центра обеспечения безопасности будет запущена.
Однако, может оказаться, что изменить тип запуска в окне «Службы» невозможно, так как поле не активно. В этом случае можно использовать следующий метод для решения проблемы.
Редактор реестра
Настроить автоматический запуск службы центра обеспечения безопасности можно в реестре. Необходимые шаги:
- Запустите редактор реестра: нажмите клавиши Win+R на клавиатуре, введите regedit и нажмите Enter
- Перейдите к разделу реестра
HKEY_LOCAL_MACHINE\SYSTEM\CurrentControlSet\services\wscsvc
- Дважды нажмите по параметру Start и установите значение 2 для него.

- Нажмите «Ок», закройте редактор реестра и перезагрузите компьютер.

Если это не сработало, вы можете создать REG-файл со следующим кодом и добавить его в реестр (путем простого запуска и подтверждения), после чего так же выполнить перезагрузку компьютера:
Windows Registry Editor Version 5.00

[HKEY_LOCAL_MACHINE\SYSTEM\CurrentControlSet\Services\wscsvc]
"DelayedAutoStart"=dword:00000001
"DependOnService"=hex(7):52,00,70,00,63,00,53,00,73,00,00,00,00,00
"Description"="@%SystemRoot%\\System32\\wscsvc.dll,-201"
"DisplayName"="@%SystemRoot%\\System32\\wscsvc.dll,-200"
"ErrorControl"=dword:00000001
"FailureActions"=hex:80,51,01,00,00,00,00,00,00,00,00,00,03,00,00,00,14,00,00,\
  00,01,00,00,00,c0,d4,01,00,01,00,00,00,e0,93,04,00,00,00,00,00,00,00,00,00
"ImagePath"=hex(2):25,00,53,00,79,00,73,00,74,00,65,00,6d,00,52,00,6f,00,6f,00,\
  74,00,25,00,5c,00,53,00,79,00,73,00,74,00,65,00,6d,00,33,00,32,00,5c,00,73,\
  00,76,00,63,00,68,00,6f,00,73,00,74,00,2e,00,65,00,78,00,65,00,20,00,2d,00,\
  6b,00,20,00,4c,00,6f,00,63,00,61,00,6c,00,53,00,65,00,72,00,76,00,69,00,63,\
  00,65,00,4e,00,65,00,74,00,77,00,6f,00,72,00,6b,00,52,00,65,00,73,00,74,00,\
  72,00,69,00,63,00,74,00,65,00,64,00,20,00,2d,00,70,00,00,00
"LaunchProtected"=dword:00000002
"ObjectName"="NT AUTHORITY\\LocalService"
"RequiredPrivileges"=hex(7):53,00,65,00,43,00,68,00,61,00,6e,00,67,00,65,00,4e,\
  00,6f,00,74,00,69,00,66,00,79,00,50,00,72,00,69,00,76,00,69,00,6c,00,65,00,\
  67,00,65,00,00,00,53,00,65,00,49,00,6d,00,70,00,65,00,72,00,73,00,6f,00,6e,\
  00,61,00,74,00,65,00,50,00,72,00,69,00,76,00,69,00,6c,00,65,00,67,00,65,00,\
  00,00,00,00
"ServiceSidType"=dword:00000001
"Start"=dword:00000002
"Type"=dword:00000020

[HKEY_LOCAL_MACHINE\SYSTEM\CurrentControlSet\Services\wscsvc\Parameters]
"ServiceDll"=hex(2):25,00,53,00,79,00,73,00,74,00,65,00,6d,00,52,00,6f,00,6f,\
  00,74,00,25,00,5c,00,53,00,79,00,73,00,74,00,65,00,6d,00,33,00,32,00,5c,00,\
  77,00,73,00,63,00,73,00,76,00,63,00,2e,00,64,00,6c,00,6c,00,00,00
"ServiceDllUnloadOnStop"=dword:00000001

[HKEY_LOCAL_MACHINE\SYSTEM\CurrentControlSet\Services\wscsvc\Security]
"Security"=hex:01,00,14,80,1c,01,00,00,28,01,00,00,14,00,00,00,30,00,00,00,02,\
  00,1c,00,01,00,00,00,02,80,14,00,ff,01,0f,00,01,01,00,00,00,00,00,01,00,00,\
  00,00,02,00,ec,00,08,00,00,00,00,00,18,00,9d,00,02,00,01,02,00,00,00,00,00,\
  05,20,00,00,00,21,02,00,00,00,00,14,00,9d,01,02,00,01,01,00,00,00,00,00,05,\
  12,00,00,00,00,00,18,00,9d,01,02,00,01,02,00,00,00,00,00,05,20,00,00,00,20,\
  02,00,00,00,00,14,00,9d,00,02,00,01,01,00,00,00,00,00,05,04,00,00,00,00,00,\
  14,00,9d,00,02,00,01,01,00,00,00,00,00,05,06,00,00,00,00,00,28,00,fd,01,02,\
  00,01,06,00,00,00,00,00,05,50,00,00,00,e5,fe,79,5f,a0,ae,0d,3b,22,fa,0a,c9,\
  01,5a,41,3a,e5,a6,4a,b7,00,00,28,00,ff,01,0f,00,01,06,00,00,00,00,00,05,50,\
  00,00,00,b5,89,fb,38,19,84,c2,cb,5c,6c,23,6d,57,00,77,6e,c0,02,64,87,00,00,\
  28,00,ff,01,0f,00,01,06,00,00,00,00,00,05,50,00,00,00,db,8c,74,0f,c2,72,73,\
  f3,2b,26,b9,44,77,1e,4f,02,76,63,b5,21,01,01,00,00,00,00,00,05,12,00,00,00,\
  01,01,00,00,00,00,00,05,12,00,00,00
Если вы столкнулись с ошибкой «Не удалось запустить службу центра обеспечения безопасности» недавно, после каких-либо действий по настройке системы, установки обновлений или аналогичных событий, могут сработать точки восстановления системы на дату, когда проблема не наблюдалась.
Если служба отключается «сама», а действия по её включению отменяются, имеет смысл проверить компьютер на наличие вирусов, например, с помощью KVRT (Kaspersky Virus Removal Tool) и различных средств удаления вредоносных программ.
Readers help support Windows Report. We may get a commission if you buy through our links.
Read our disclosure page to find out how can you help Windows Report sustain the editorial team. Read more
When you install Windows 11, Windows Security or Windows Defender becomes the default antivirus and security solution. It is one of the most excellent remedies available, and it is effective in most circumstances.
Nevertheless, one of the most frequently encountered concerns has been that the Windows 11 Windows Security is not opening or functioning as expected after an upgrade or random upgrade.
Why is my Windows Security not opening on Windows 11?
The reasons Windows Security settings are not opening or launching on Windows 11 after upgrading are close to close. Below are the popular reasons:
- Glitches with the app: One of the reasons Windows security is not loading on Windows 11 is some glitches preventing it from opening. The solution here is to reset the app.
- Faulty system files: If the system files meant to load the Windows Security apps are faulty, the app won’t open. You need to repair the system files to fix this.
How can I fix the Windows 11 Windows Security not opening issue?
1. Reset using PowerShell Command
- Right-click on the Start icon and select the Windows Terminal (Admin) option.

- Click the dropdown at the top and select the Windows PowerShell option.

- Copy and paste the command below and hit Enter:
Get-AppxPackage Microsoft.SecHealthUI -AllUsers | Reset-AppxPackage
- Restart your PC and check if the Windows Security app is now working.
- If it does not work, type the command below and hit Enter to reinstall the app:
Set-ExecutionPolicy UnrestrictedGet-AppXPackage -AllUsers | Foreach {Add-AppxPackage -DisableDevelopmentMode -Register "$($_.InstallLocation)\AppXManifest.xml"}


You need to reset the app if Windows Security is not working or Windows Defender is not opening. The command below has worked for many. You can reinstall the app using the second command if resetting does not work.
2. Repair the app
- Press the Windows key + I to open the Settings app, choose Apps in the left pane, followed by Apps & features.

- Once you are inside the Apps & features window, search for Windows Security in the search bar from the top, and click on the three-dot menu next to it, followed by Advanced options.

- Scroll down until you find the Reset section, then click on the Repair button to start the repairing process.


Allow the Repair process to finish before rebooting your computer to guarantee your changes are applied. Then, by starting Windows Security, it lets you see if its functionality has been restored.
3. Reset the app
- Press the Windows key + I, go to Apps in the left pane, followed by Apps & features.
- Once inside the Apps & features window, search for Windows Security in the search bar, and click on the three-dot menu. Now click on Advanced options.
- Scroll down until you meet the Reset section, then click on the Reset button.


4. Run SFC
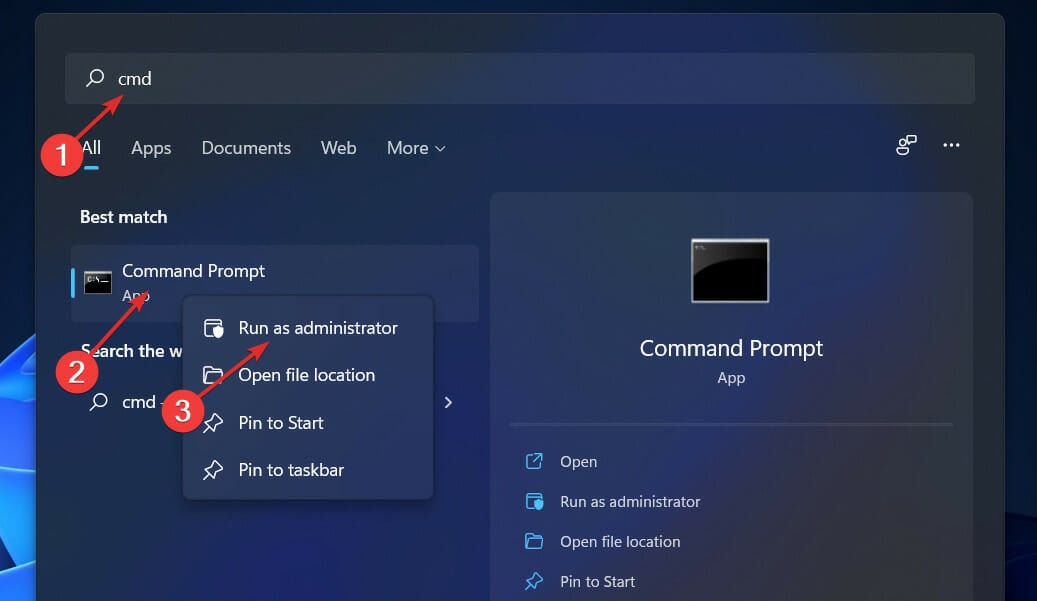
- Press the Windows + S key to open the Search bar, then type cmd, right-click on the most relevant result shown to you, and run it as an Administrator to get full privileges.

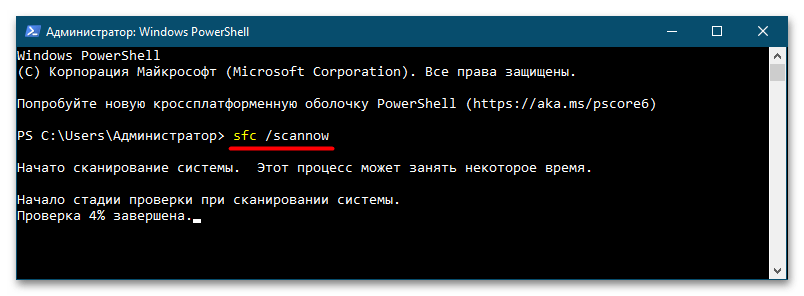
- Type in the following command and press Enter to start the process:
sfc /scannow
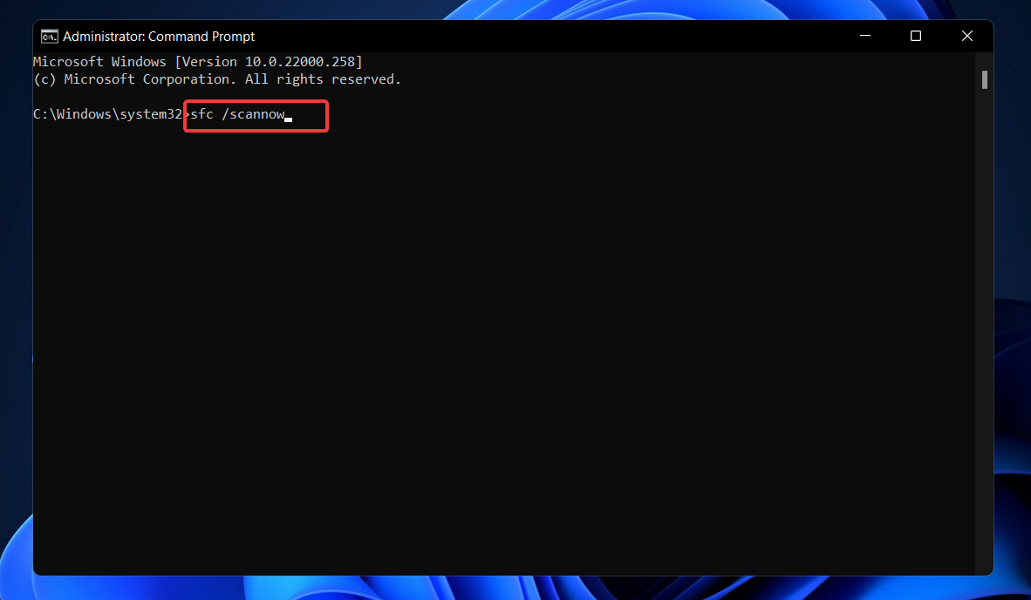
The process may take some time to finish, so you may need to restart your computer. SFC will automatically find and restore corrupted files and folders. If that does not help, you can try using specialized repair tools, which are much more advanced than Windows built-in tools.
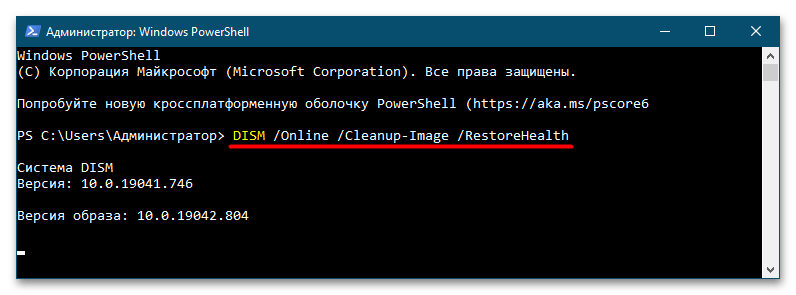
5. Run DISM
- Press the Windows + S key to open the Search bar, then type cmd, and right-click on the most relevant result to run it as an Administrator.
- Paste or type in the following commands and press Enter after each:
DISM /online /Cleanup-Image /ScanHealthDISM /Online /Cleanup-Image /RestoreHealth

Continue to be patient until the process is finished. Be advised that the process could take up to ten minutes to finish. Once you’ve completed this step, restart your computer to ensure the changes take effect.
6. Disable your antivirus
- Click the expand arrow from your taskbar and right-click on your antivirus icon. Now choose Avast shields control followed by Disable for 10 minutes to stop it from interfering.

- If you have other antivirus programs installed, you can temporarily disable the app following the same steps as above or similar ones with a few differences.

With the fixes above, you should be able to fix the Windows Security not opening on Windows 11 issue. If you want to use a third-party tool, check out our post on five of the best antiviruses for Windows 11.
Alternatively, you can look at our article on the best antiviruses with low CPU usage for Windows 11.
If you want to know how to turn on Dev Device protection on your Windows 11 computer, we have a detailed guide to help you with that.
In case you have more issues, don’t miss our guide on how to reinstall Windows Security on Windows 11 for more solutions.
Let us know in the comments section below which solution worked best for you in solving the Windows 11 Windows Defender not working issue and which antivirus software you prefer.
Loredana Harsana
Windows Software Expert
Loredana is a passionate writer with a keen interest in PC software and technology. She started off writing about mobile phones back when Samsung Galaxy S II was on top of the world and she fell in love with tech of all sorts.
Whenever she’s not at her work desk, you’ll find her enjoying refreshing tea flavors, spilling stories on paper, and listening to the radio.
Все способы:
- Способ 1: Удаление стороннего антивируса
- Способ 2: Проверка служб
- Способ 3: Локальные политики и твикеры
- Способ 4: Перерегистрация приложения
- Способ 5: Утилита «SFC»
- Вопросы и ответы: 2
Способ 1: Удаление стороннего антивируса
Если на компьютере установлен и используется сторонний антивирус, штатное средство защиты работать не будет. Чтобы задействовать встроенный «Защитник», удалите сторонние антивирусные решения, работающие в режиме реального времени. Как вариант, в стороннем антивирусе можно попробовать отключить защиту в режиме реального времени и посмотреть, станет ли открываться служба безопасности. Если да, можно будет обойтись и без деинсталляции стороннего ПО.
Способ 2: Проверка служб
Проблемы с запуском приложения «Безопасность Windows» могут быть вызваны отключением отвечающих за его работу системных служб. Убедитесь, что они запущены.
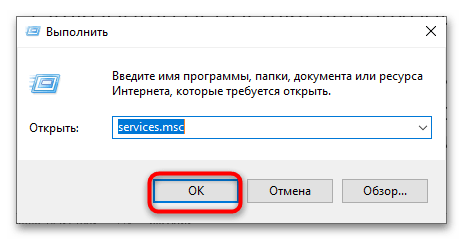
- Откройте оснастку управления службами командой
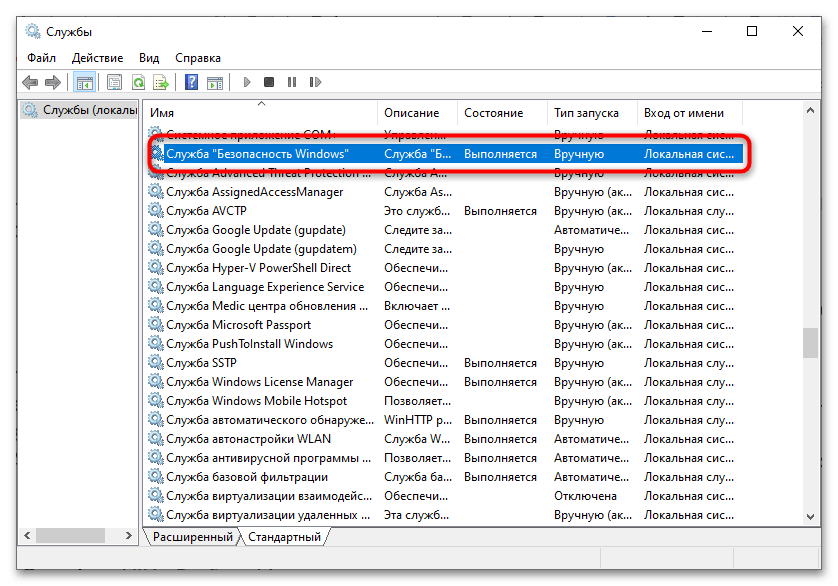
service.msc, выполненной в диалоговом окошке Win + R («Выполнить»). - Найдите службы «Центр обеспечения безопасности», «Служба антивирусной программы Microsoft Defender», «Служба “Безопасность Windows”» и посмотрите их статус. Они должны выполняться.
- Если какая-то из этих служб не запущена, откройте ее свойства двойным по ней кликом и выставьте запуска «Автоматически», если он отличается. Сохраните настройки и перезагрузите компьютер.
Способ 3: Локальные политики и твикеры
Приложение «Безопасность Windows» могло быть отключено администратором с использованием локальных групповых политик или сторонних твикеров. При наличии прав администратора исключите оба варианта. Сбросьте для начала локальные политики к исходным настройкам.
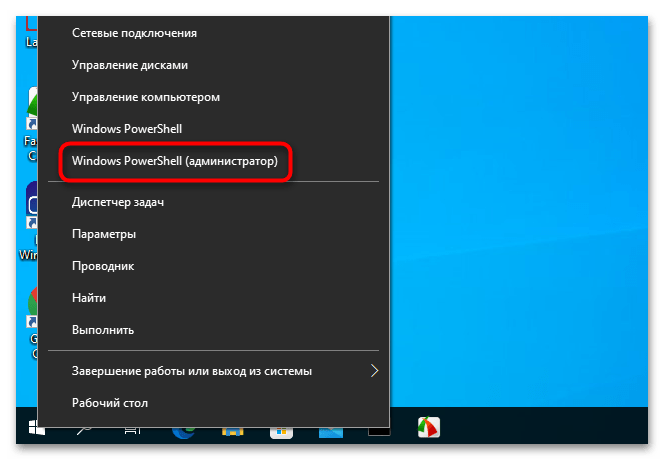
- Откройте от имени администратора «PowerShell» из контекстного меню кнопки «Пуск».
- Выполните в консоли команду сброса
secedit /configure /cfg %windir%\inf\defltbase.inf /db defltbase.sdb /verbose. Не обращайте внимания на сообщения о невозможности изменить некоторые параметры.

Если на компьютере имеется программа-твикер, запустите ее и внимательно просмотрите ее настройки. В случае обнаружения настроек, отвечающих за отключение «Защитника» и других служб безопасности, сбросьте их в дефолтное состояние (отключите).

Способ 4: Перерегистрация приложения
Если при запуске приложения «Безопасность Windows» появляется сообщение «Вам понадобится новое приложение, чтобы открыть эту ссылку Windows Defender», вероятнее всего, встроенная программа управления безопасностью была повреждена. В этом случае эффективным решением может стать сброс или повторная регистрация приложения.
- Запустите от имени администратора «PowerShell» из контекстного меню кнопки «Пуск».
- Выполните в консоли команду
Get-AppxPackage Microsoft.SecHealthUI -AllUsers | Reset-AppxPackageили& {$manifest = (Get-AppxPackage *Microsoft.Windows.SecHealthUI*).InstallLocation + '\AppxManifest.xml' ; Add-AppxPackage -DisableDevelopmentMode -Register $manifest}, если первый вариант не сработает. - Если устранить неполадку не удастся или команда вернет сообщение об ошибке, указывающей на отсутствие каталога или файлов приложения, перейдите в «Проводнике» по адресу
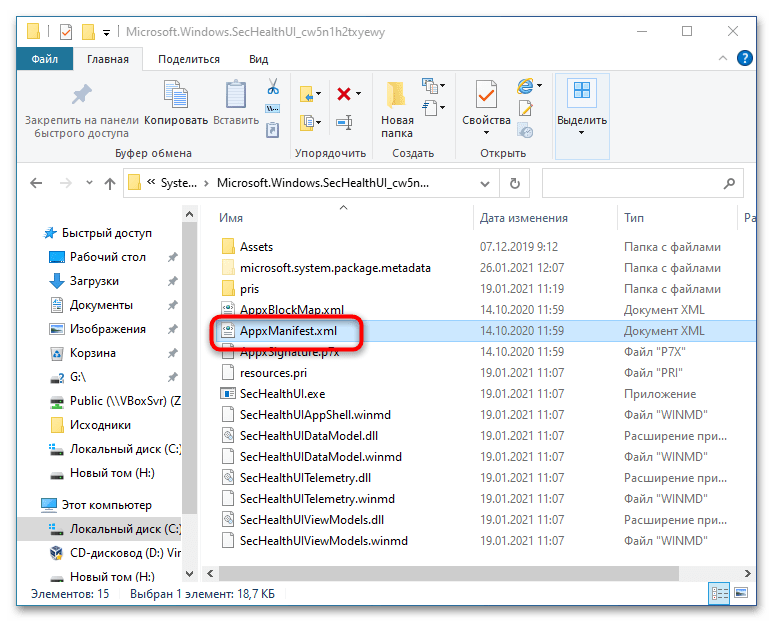
C:\Windows\SystemApps\Microsoft.Windows.SecHealthUI_cw5n1h2txyewyи посмотрите, имеется ли в папке файл манифеста «AppxManifest.xml». - Если да, выполните в «PowerShell» команду перерегистрации приложения
Add-AppxPackage -Register -DisableDevelopmentMode "path", заменив path полным путем к файлу манифеста.

Способ 5: Утилита «SFC»
Если файл манифеста или папка приложения «Безопасность Windows» отсутствует, попробуйте восстановить приложение из хранилища компонентов.
- Откройте от имени администратора «PowerShell» как было показано выше.
- Выполните в консоли команду
sfc /scannowи дождитесь завершения процедуры сканирования Windows на предмет удаленных или поврежденных системных файлов. В случае обнаружения проблем утилита автоматически восстановит оригинальные файлы из встроенного хранилища компонентов. - Если
sfc /scannowвернет ошибку повреждения хранилища, выполните командуDISM /Online /Cleanup-Image /RestoreHealth. Эта команда восстанавливает хранилище. - Повторите сканирование средствами «SFC».
При появлении неустранимых ошибок SFC или DISM читайте следующий материал.
Подробнее: Использование и восстановление проверки целостности системных файлов в Windows 10
Наконец, если служба безопасности Windows раньше работала нормально, можно откатить систему к точке восстановления, созданной на тот момент, когда проблем не наблюдалось. В крайнем случае можно выполнить сброс самой операционной системы к исходным настройкам, согласившись на потерю всех установленных приложений и сохраненных настроек.
Подробнее: Восстановление Windows 10 к исходному состоянию
Наша группа в TelegramПолезные советы и помощь