
Если при скачивании и установке Chrome появляется сообщение об ошибке, вы можете решить проблему.
Как исправить большинство ошибок, возникающих при установке
- Убедитесь, что у вас стабильное подключение к интернету.
- Если связь неустойчивая, почитайте, как исправить ошибки подключения.
- Проверьте, соответствует ли устройство системным требованиям.
- Заново скачайте установочный файл.
- Попробуйте установить Chrome с его помощью.
- Если проблему решить не удалось, используйте офлайн-установщик.
- Для компьютеров с несколькими аккаунтами пользователей.
- Для компьютеров с одним аккаунтом пользователя.
- Чтобы устранить неполадки с поисковой системой, всплывающими окнами и обновлениями Chrome, нужно удалить и повторно установить браузер.
- Подробнее о том, как удалить Google Chrome…
Как устранить неполадки или получить помощь с определенными видами ошибок
Как устранить неполадки Chrome при использовании протокола Wayland
Теперь Chrome можно использовать в ОС Linux с поддержкой протоколов Wayland и X11. При запуске Chrome на компьютере с Linux будет автоматически выбран один из этих протоколов для организации графического сервера.
Как Chrome взаимодействует с протоколом для организации графического сервера
- Chrome взаимодействует с протоколом, чтобы вы могли выполнять определенные действия. Выберите X11 вместо Wayland, если у вас возникают проблемы со следующими операциями:
- перетаскивание;
- копирование и вставка;
- ввод с помощью клавиатуры и мыши или сенсорный ввод.
- При использовании Wayland некоторые операции в Chrome выполнить невозможно. Например:
- При перетаскивании вкладки показывается ее упрощенное уменьшенное изображение.
- Невозможно разместить окно в определенном месте экрана.
Как обойти автоматический выбор протокола для организации графического сервера в Chrome
В браузере:
- Перейдите на страницу
chrome://flags. - Установите для параметра #ozone-platform-hint значение X11 или Wayland.
В командной строке:
- Откройте командную строку.
- Запустите Chrome, указав следующий параметр:
--ozone-platform=x11(для протокола X11).--ozone-platform=wayland(для протокола Wayland).
Не удается подключиться к интернету в Windows
Не удается подключиться из-за брандмауэра, антивирусного ПО или прокси-сервера
Внесите брандмауэр, антивирусное ПО или прокси-сервер в список исключений системы безопасности. Если вы используете брандмауэр Windows:
- Войдите в меню «Пуск».
- Логотип Windows в меню «Пуск» в разных версиях устройства отличается.
- Откройте приложение «Параметры».
- В окне поиска «Найти параметр» введите
Брандмауэр. - Выберите Разрешить работу с приложением через брандмауэр Изменить параметры Разрешить другое приложение.
- Нажмите Обзор.
- В верхней части окна «Обзор» введите
%ProgramFiles(x86)%\Google\GoogleUpdater. - Выберите папку с самым большим числом в названии.
- Нажмите updater.exe Добавить.
Если вы пользуетесь другим брандмауэром, узнайте, как добавить его в список исключений, на сайте компании-разработчика.
Прокси-сервер не поддерживается
Убедитесь, что вы работаете с одним из поддерживаемых прокси-серверов. К ним относятся:
- Прокси-серверы, в которых используется механизм взаимной аутентификации, в том числе протоколы Kerberos и NTLM.
- Прокси-серверы с «интегрированной аутентификацией» (если у пользователя есть нужные разрешения).
Не удается установить Chrome, потому что вы находитесь в S-режиме
- Выйдите из S-режима на компьютере.
- Чтобы узнать больше об S-режиме и установке Chrome, перейдите в Справочный центр Microsoft.
- Скачайте установочный файл для Chrome.
- При необходимости нажмите Выполнить или Сохранить.
- Если вы выбрали сохранение, чтобы начать установку, дважды нажмите на скачанный файл.
- Запустите Chrome.
- После завершения установки откроется окно Chrome. При желании сделайте Chrome браузером по умолчанию.
Ошибки 4, 7, 12, 13, 31, 35, 57, 102 и 103
При установке Chrome на компьютер вы можете столкнуться со следующими ошибками:
- Ошибка 4. На компьютере уже установлена более новая версия Chrome.
- Ошибки 7, 12, 13, 35, 57, 102, 103. Установка не удалась по неизвестным причинам.
- Ошибка 31. Не удалось переустановить Chrome.
Шаг 1. Проверьте, достаточно ли на компьютере свободного места
Если на жестком диске вашего компьютера недостаточно места, вы не сможете установить Chrome.
- Чтобы освободить пространство, удалите ненужные файлы, например:
- временные файлы;
- файлы кеша браузера;
- старые документы и программы.
- Скачайте Chrome заново со страницы google.com/chrome.
- Переустановите браузер.
Шаг 2. Отключите антивирусное ПО
Некоторые антивирусные приложения могут мешать установке Chrome на компьютер.
- Отключите антивирусное ПО.
- Скачайте Chrome заново со страницы google.com/chrome.
- Переустановите браузер.
- Включите антивирусное ПО.
Если Chrome все равно не удалось установить, обновите антивирусное ПО.
Шаг 3. Скачайте Chrome ещё раз
- Скачайте Chrome заново со страницы google.com/chrome.
- Переустановите браузер.
Если это не удалось, обратитесь к системному администратору.
Ничего не помогло? Посетите справочный форум Chrome или узнайте, как устранить неполадки при обновлении Chrome.
Информация по теме
- Как удалить Google Chrome
- Как устранить ошибки, возникающие при загрузке страницы
- Как устранить ошибки подключения к интернету
Эта информация оказалась полезной?
Как можно улучшить эту статью?
Chrome is a popular cross-platform web browser developed by Google. It’s trustworthy among millions of users due to its handy features and speed. However, you may sometimes face errors or failures when trying to install Chrome on your Windows computer. If you’re experiencing any issues with downloading or installing Chrome, do not worry. Here’s our detailed guide to fix Google Chrome not installing on Windows 11 or 10.
Google Chrome Not Installing on Windows 11/10? Here’s the Fix
Many users are complaining on social websites and forums about the Google Chrome installation failure, or Chrome cannot be installed on Windows. Here, we have added ways to fix the problem.
Method 1- Install Chrome as an Administrator
If Chrome not installing on your PC then you can try installing it as an administrator. Follow the below steps to install the browser as an administrator.
Step 1: Head over to the Chrome setup program you have downloaded.
Step 2: Right-click on the setup and tap Run as administrator.
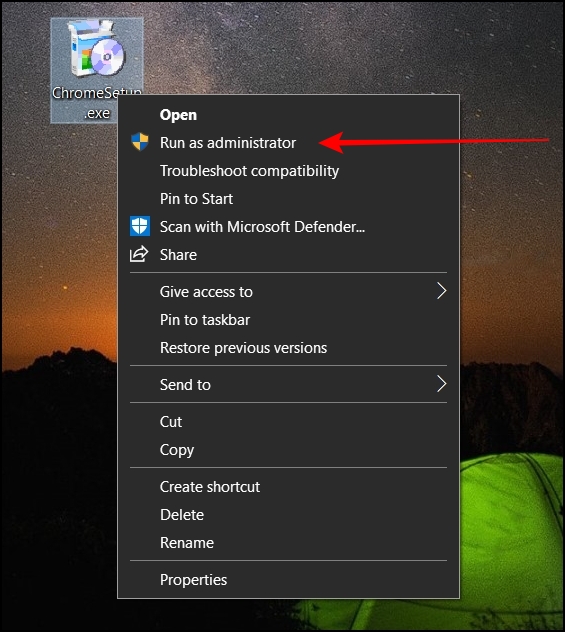
Step 3: Follow the on-screen instructions, and you should be able to install it without any issues.
Method 2- Enable Installation of Third Party Apps
If the third-party installation is not enabled on your PC, you will not be able to install the Chrome browser on your Windows PC. Follow the below steps to turn it on.
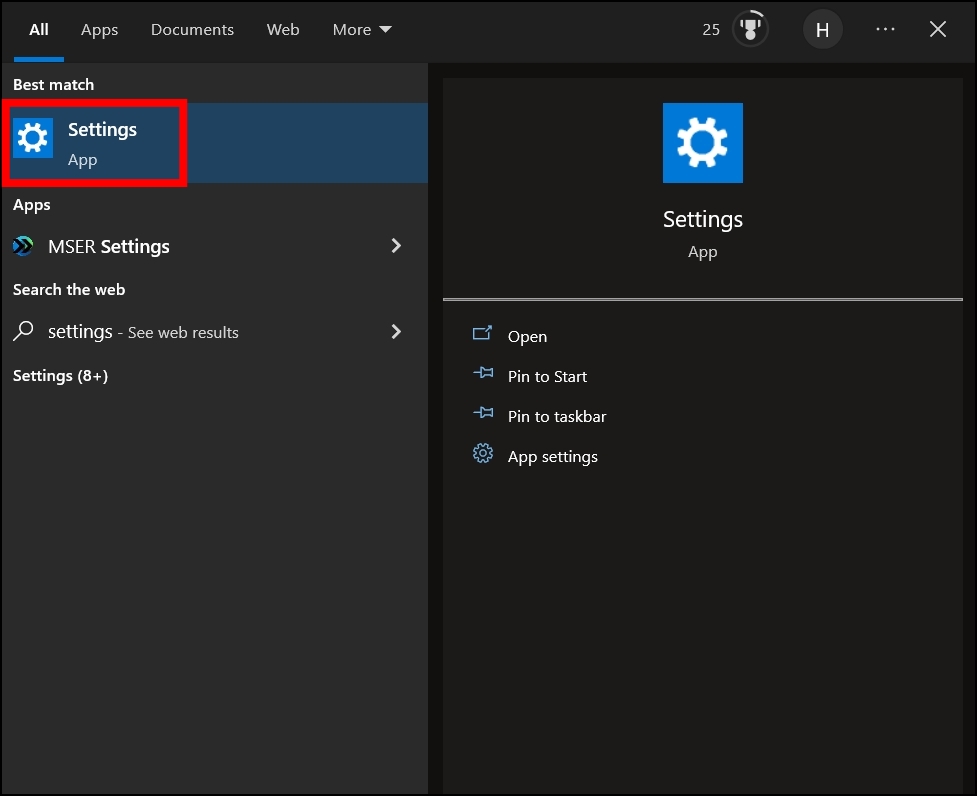
Step 1: Press the Windows+S key to open the search.
Step 2: Type settings and open the Settings app.
Step 3: Click on Apps on the settings page.
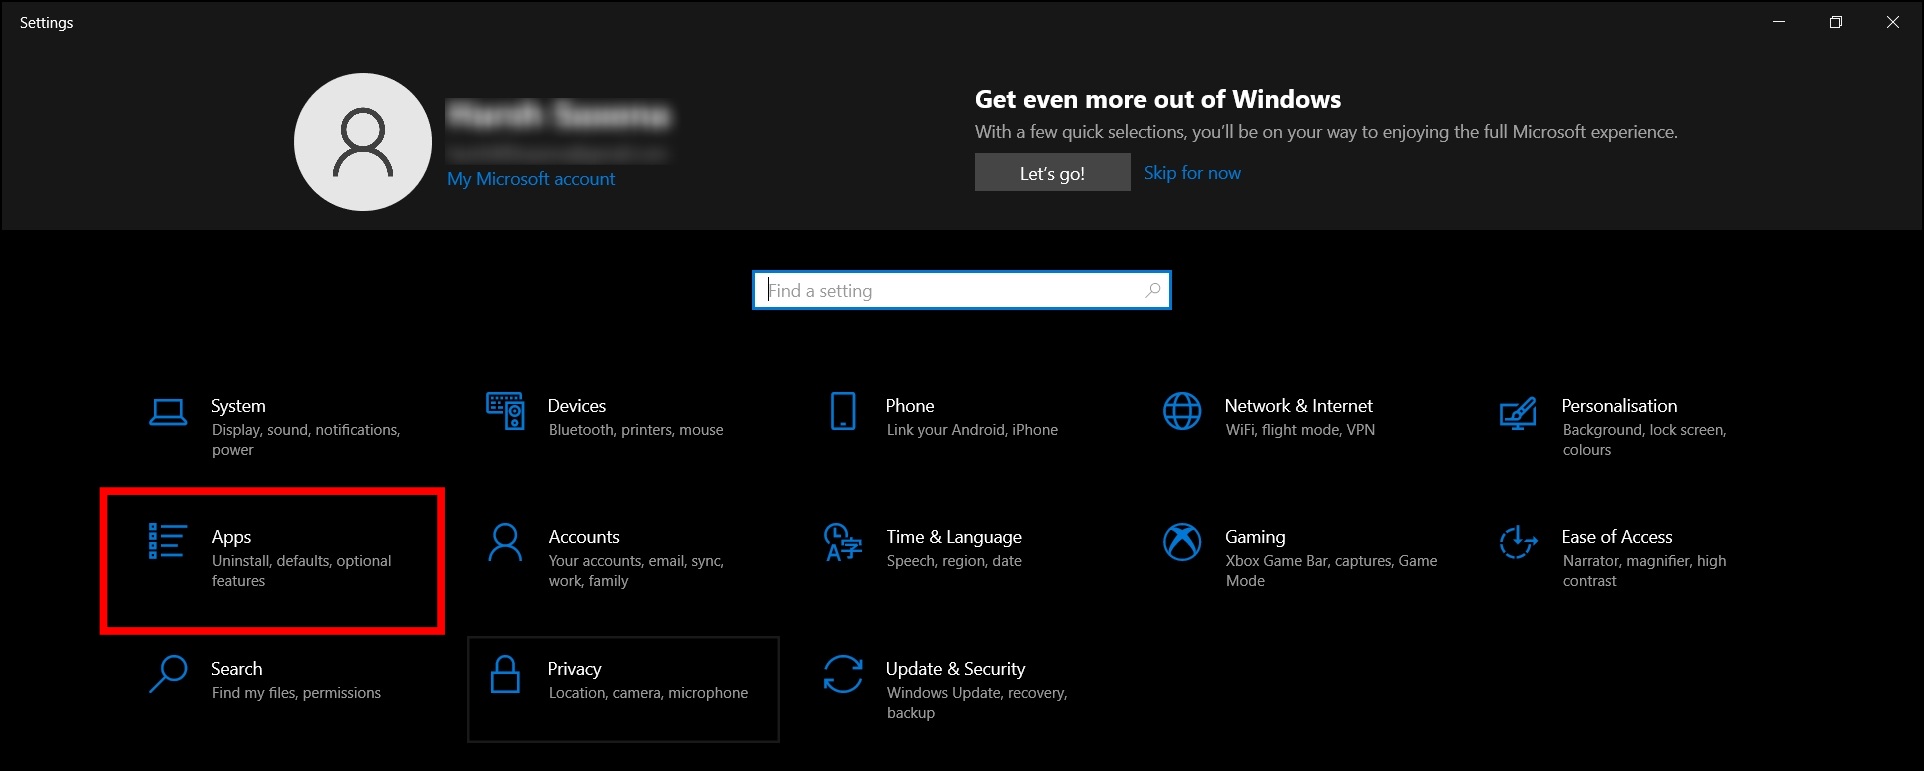
Step 4: On the next window, tap on Apps & Features.
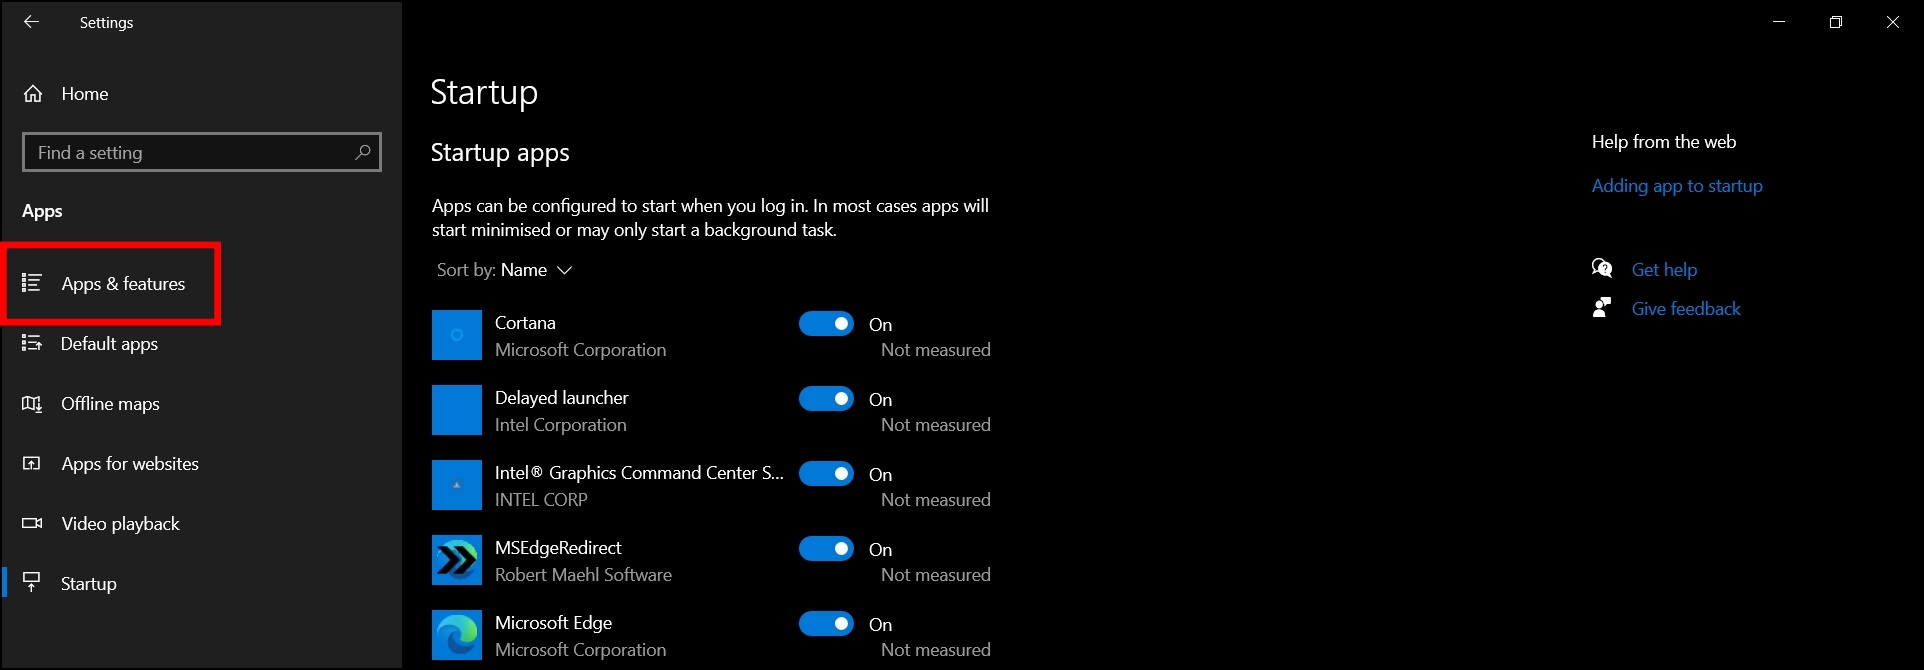
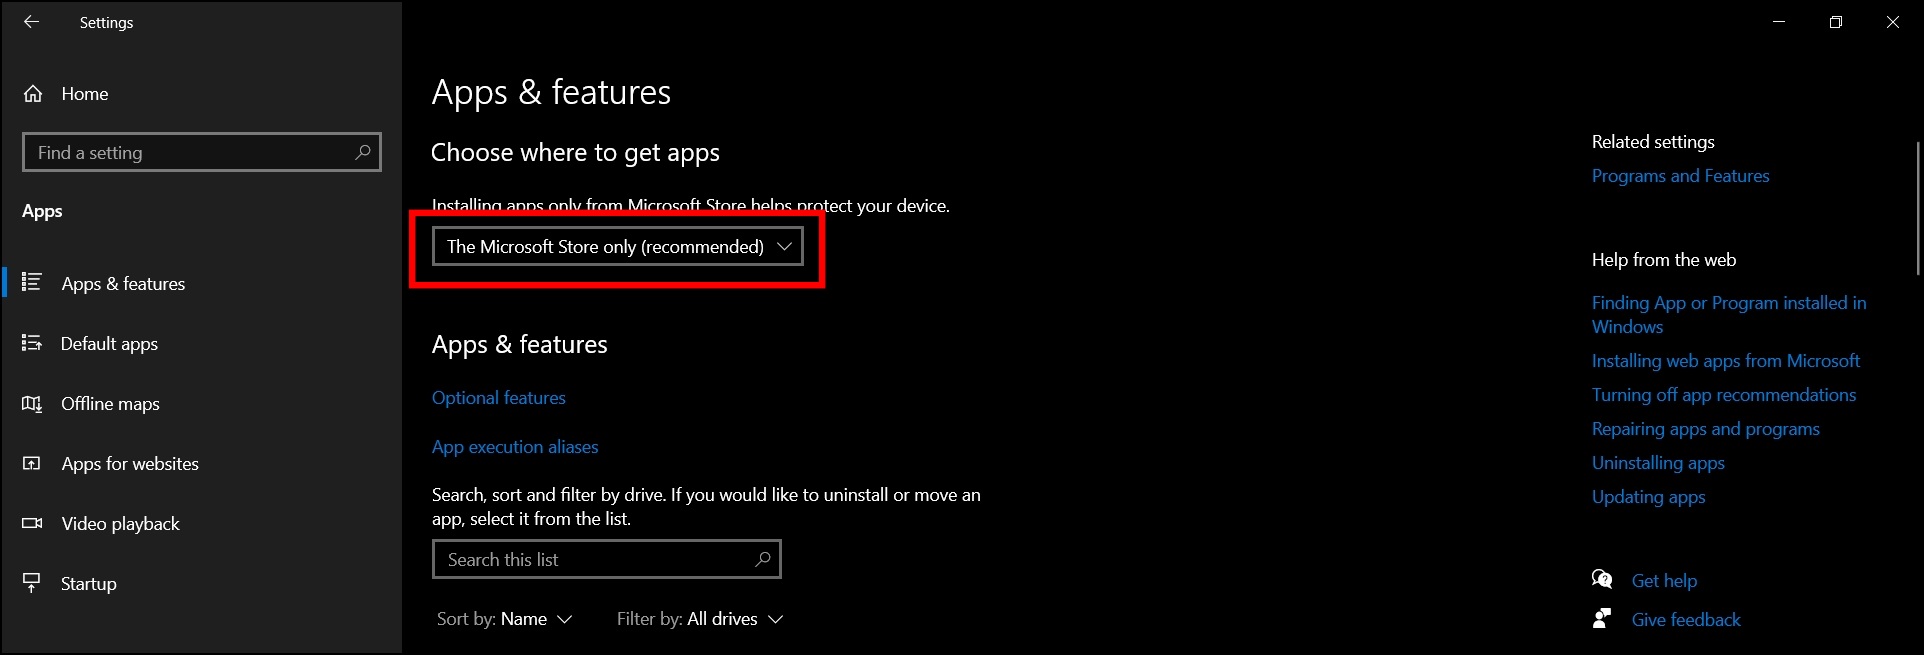
Step 5: Tap on the drop-down menu under Choose where to get apps.
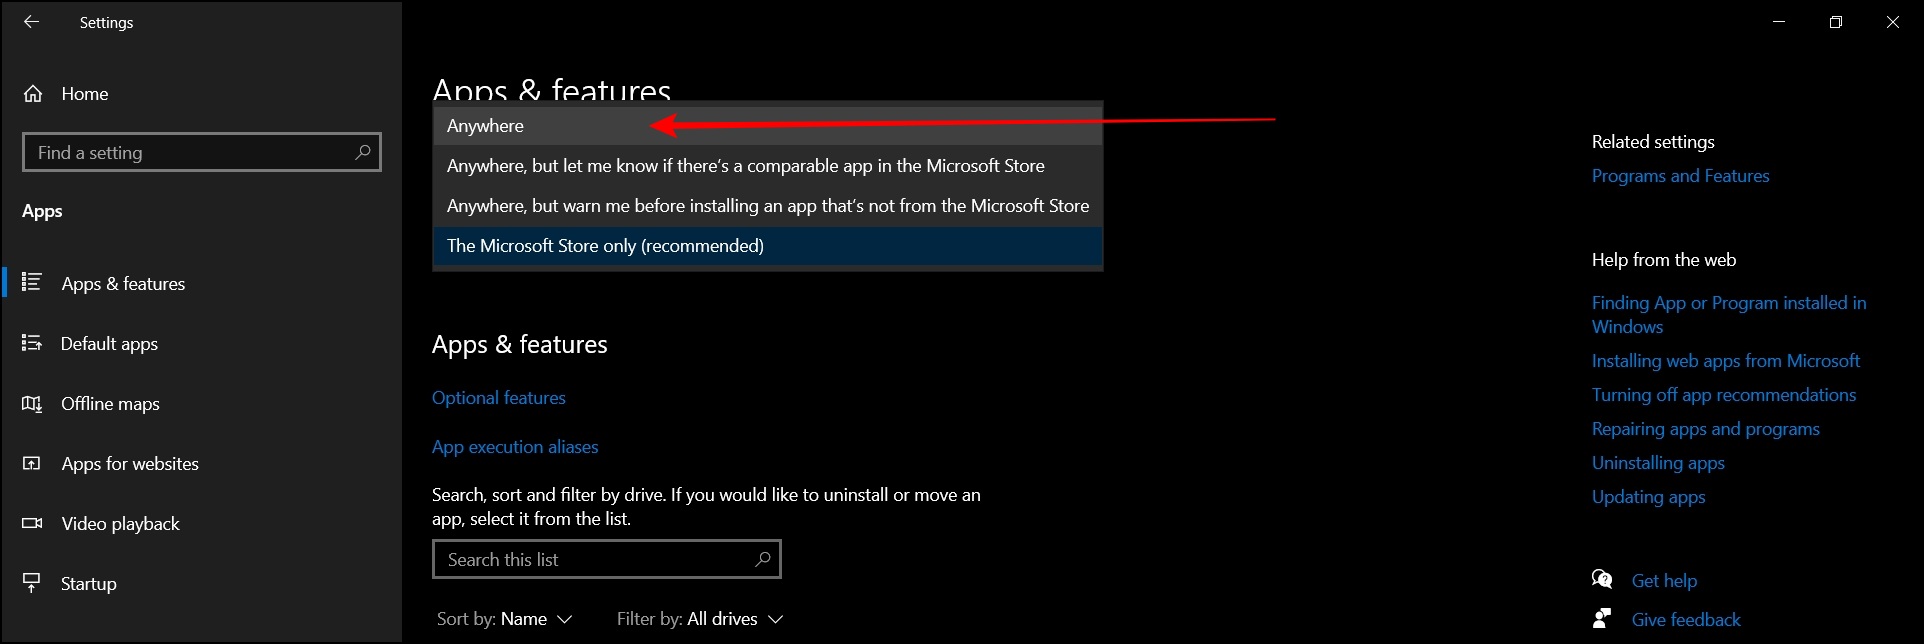
Step 6: Select Anywhere from the appeared options.
Method 3- Enable Background Intelligent Transfer Service
If Background Intelligent Transfer Service (BITS) is disabled then you might not be able to install Chrome on your Windows PC. Follow the below steps to enable BITS.
Step 1: Right-click on the Start button.
Step 2: Click on Task Manager from the appeared options.
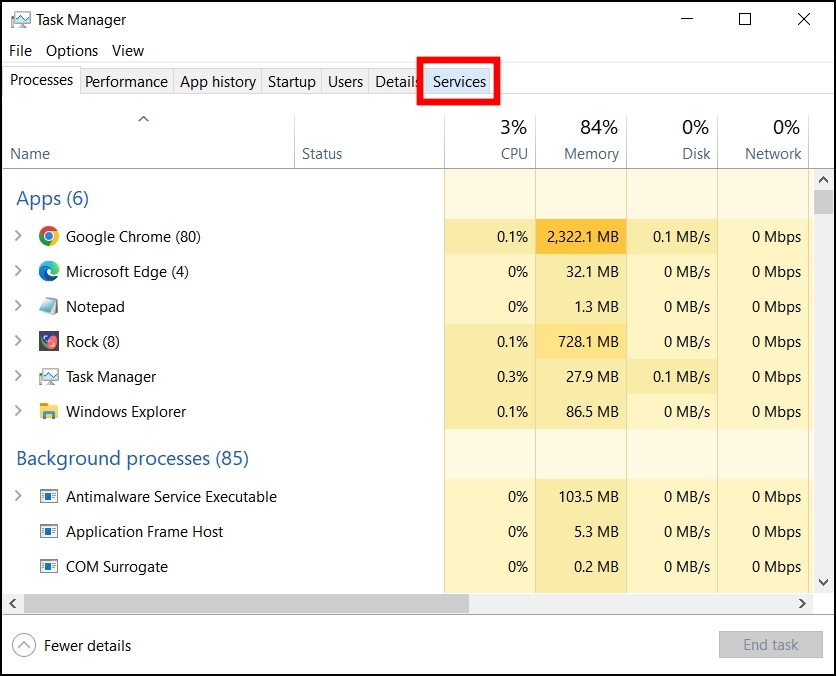
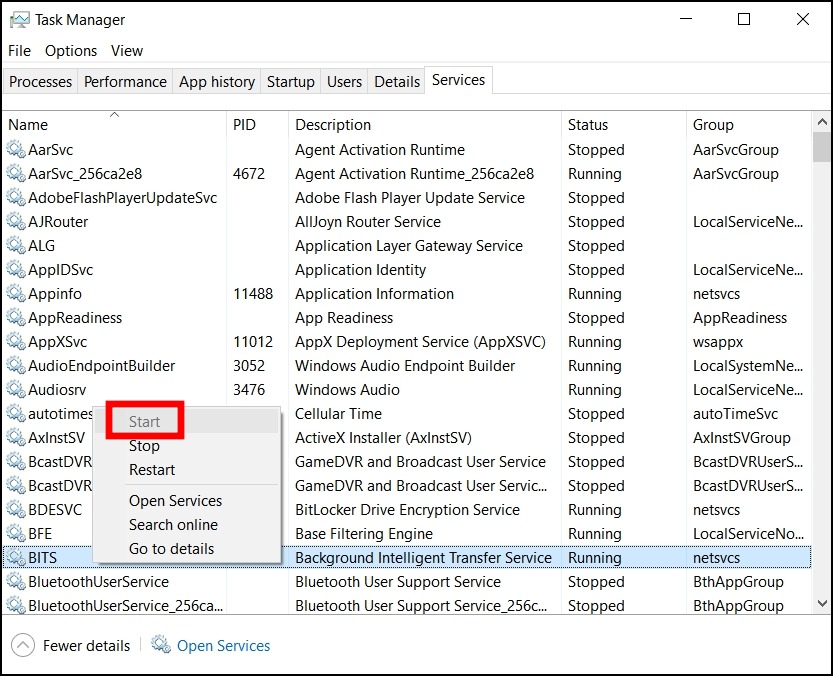
Step 3: Tap on the Services tab from the top.
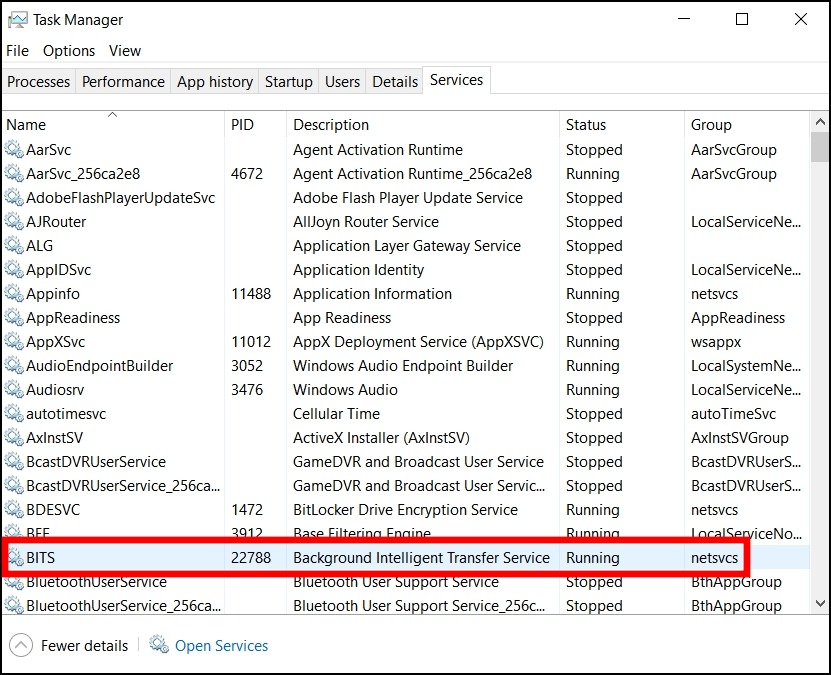
Step 4: Here, make sure the BITS service is showing running status. If not, right-click on BITS and select Start to enable it.
Method 4- Delete Chrome Client Registry Entry
If you are getting the “Can’t find installer applications on Windows” message while trying to install Google Chrome on your PC, then you need to delete the Registry key. Follow the below steps to do so.
Step 1: Press the Windows+R key to open the Run window.
Step 2: Type Regedit and hit enter, then tap Yes.

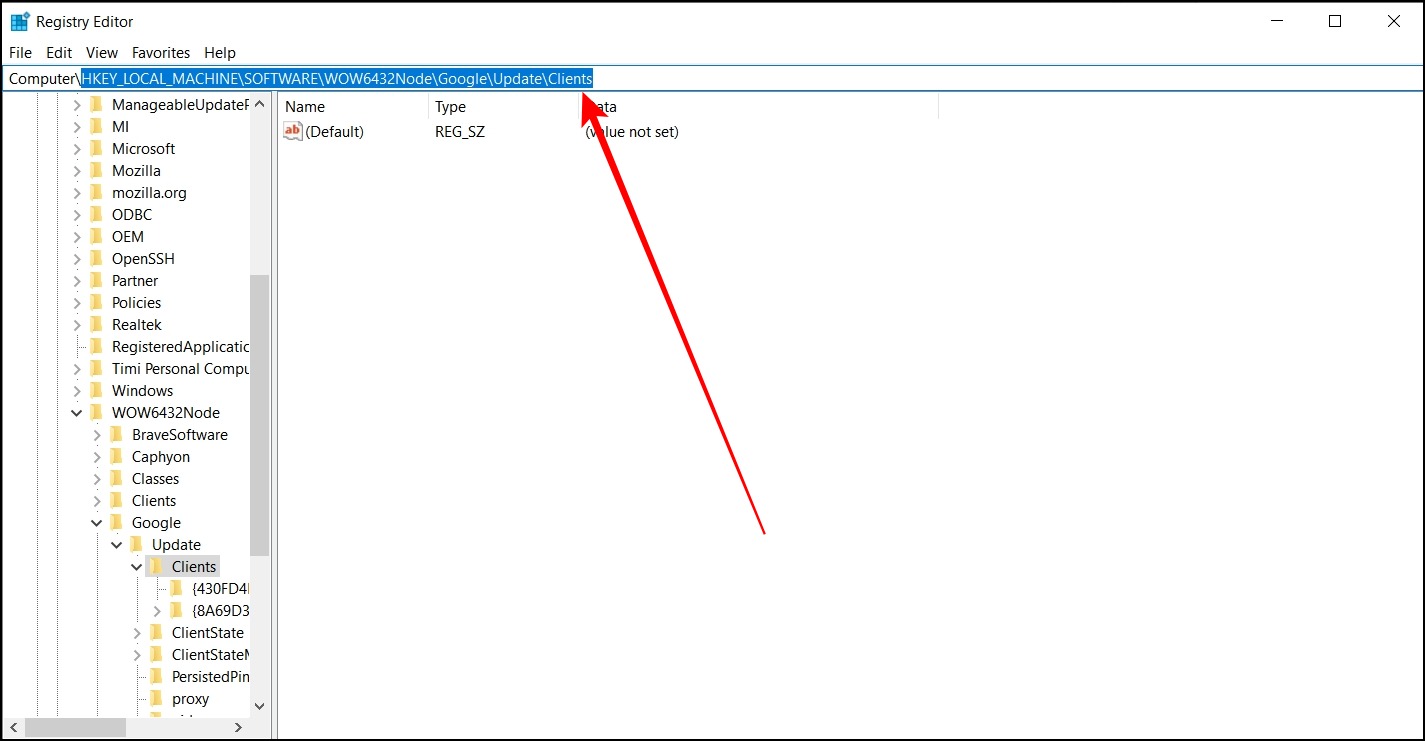
Step 3: Enter HKEY_LOCAL_MACHINE\SOFTWARE\WOW6432Node\Google\Update\Clients in the path file.
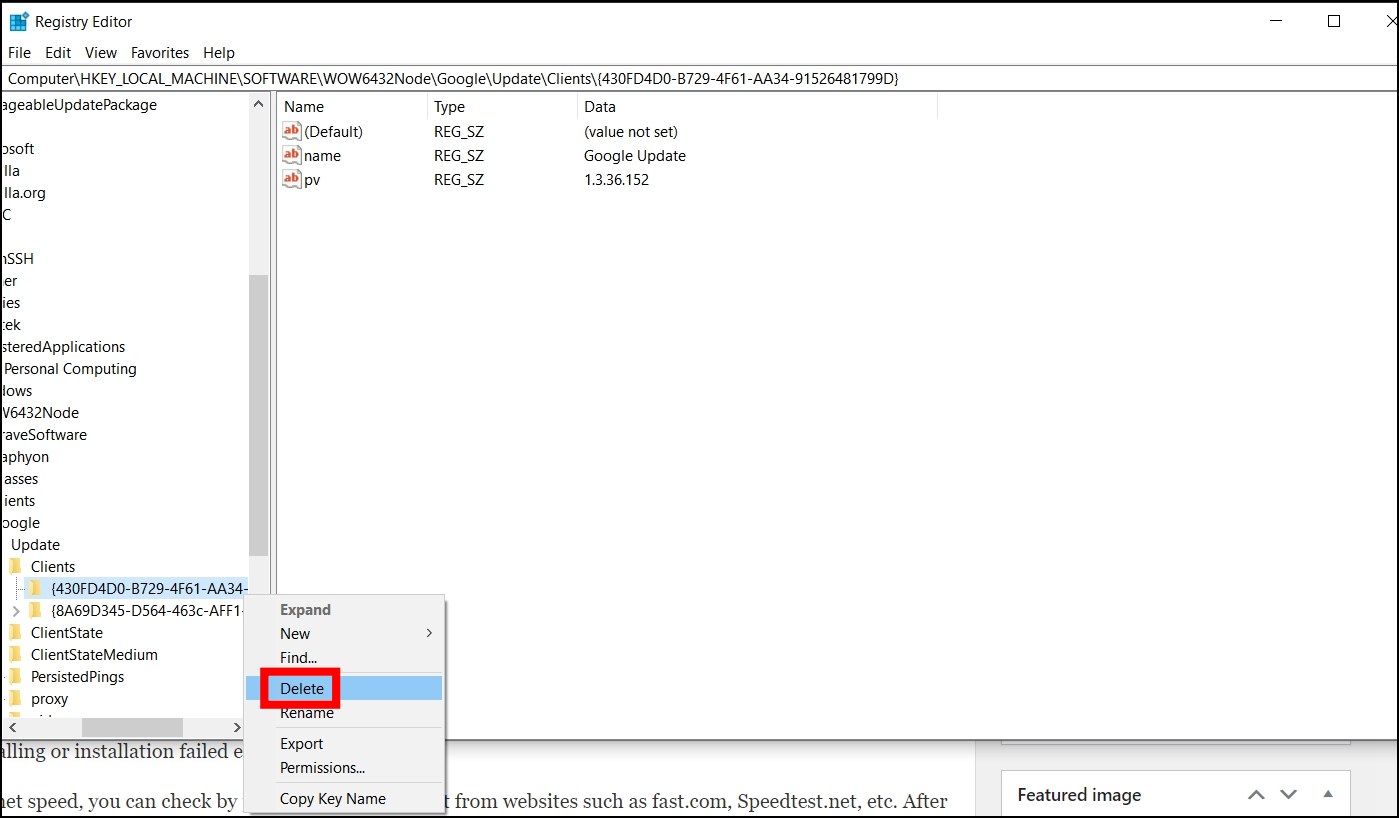
Step 4: Right-click on 4HKEY_LOCAL_MACHINE\SOFTWARE\WOW6432Node\Google\Update\Clients and select Delete.
Step 5: Close the Editor, and your issue should be fixed.
Method 5- Check Your Internet
Chrome setup requires an active internet connection to install the full browser. If your connection has issues or limited bandwidth, it may hamper the installation of the browser on your machine, causing Chrome won’t install or an installation failed error.
If you are unsure of your internet speed, you can perform a speed test from websites such as fast.com, Speedtest.net, etc. After performing the speed test, check whether your internet is active and stable. If the test doesn’t work or you receive low speed, there’s an issue with the connectivity.
Alternatively, you can download and transfer the Chrome offline setup from some other device to install it directly without the internet connectivity on your computer.
Method 6- Uninstall Previous Versions of Chrome
If you have older Chrome versions on your Windows PC, you might be unable to install the Google Chrome browser on your system. Follow the below steps to delete any older versions of Chrome then try to install it.
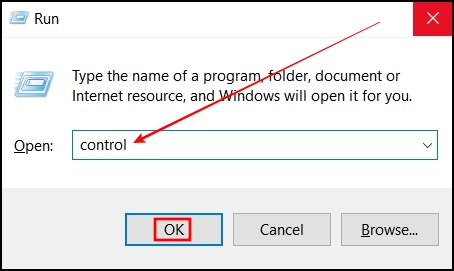
Step 1: Press the Windows+R key to open the Run window.
Step 2: Type control and hit enter to open the control panel.
Step 3: Click on Programs from the appeared options.
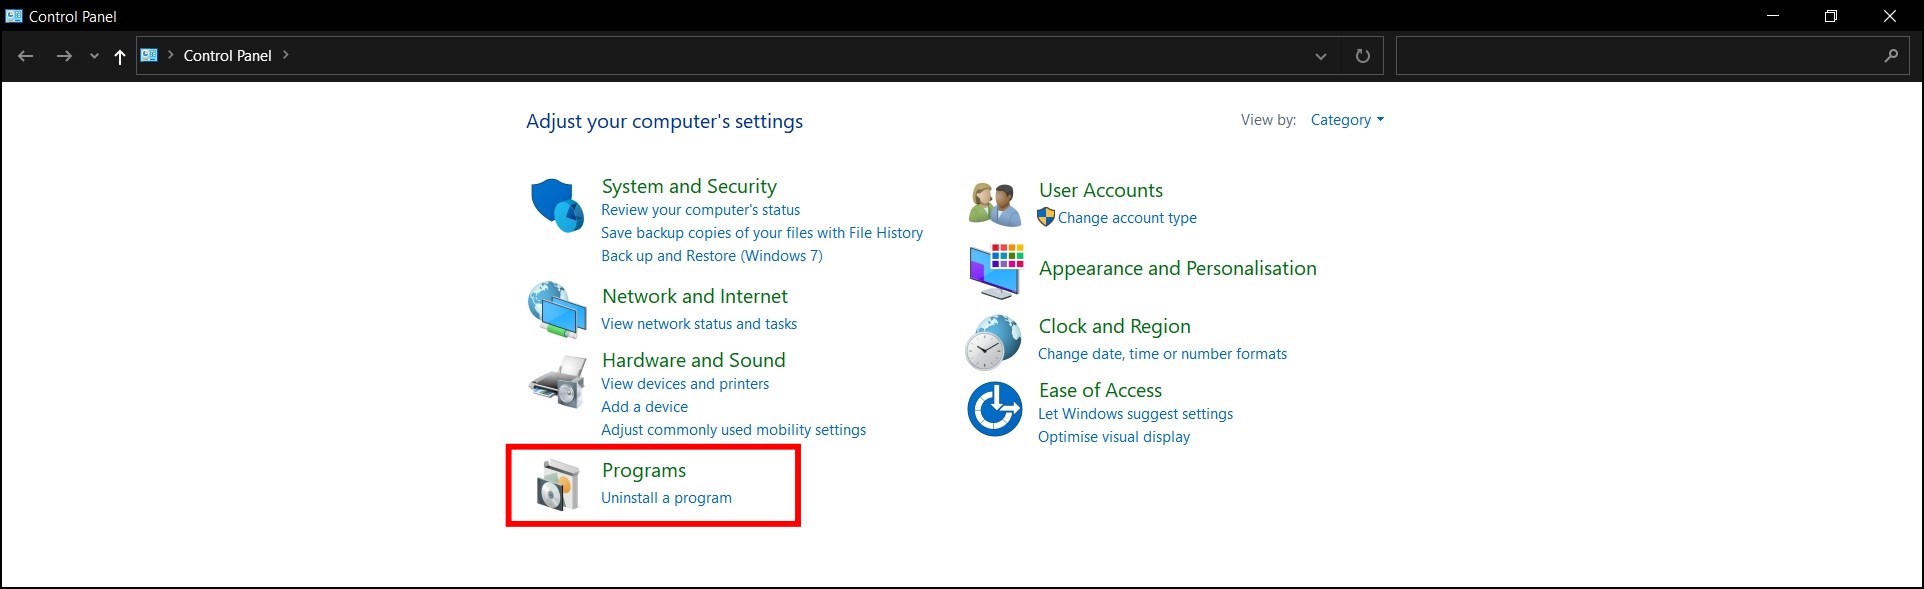
Step 4: Tap on Uninstall a program under Programs and Features.
Step 5: Select Google Chrome, then tap on Uninstall.
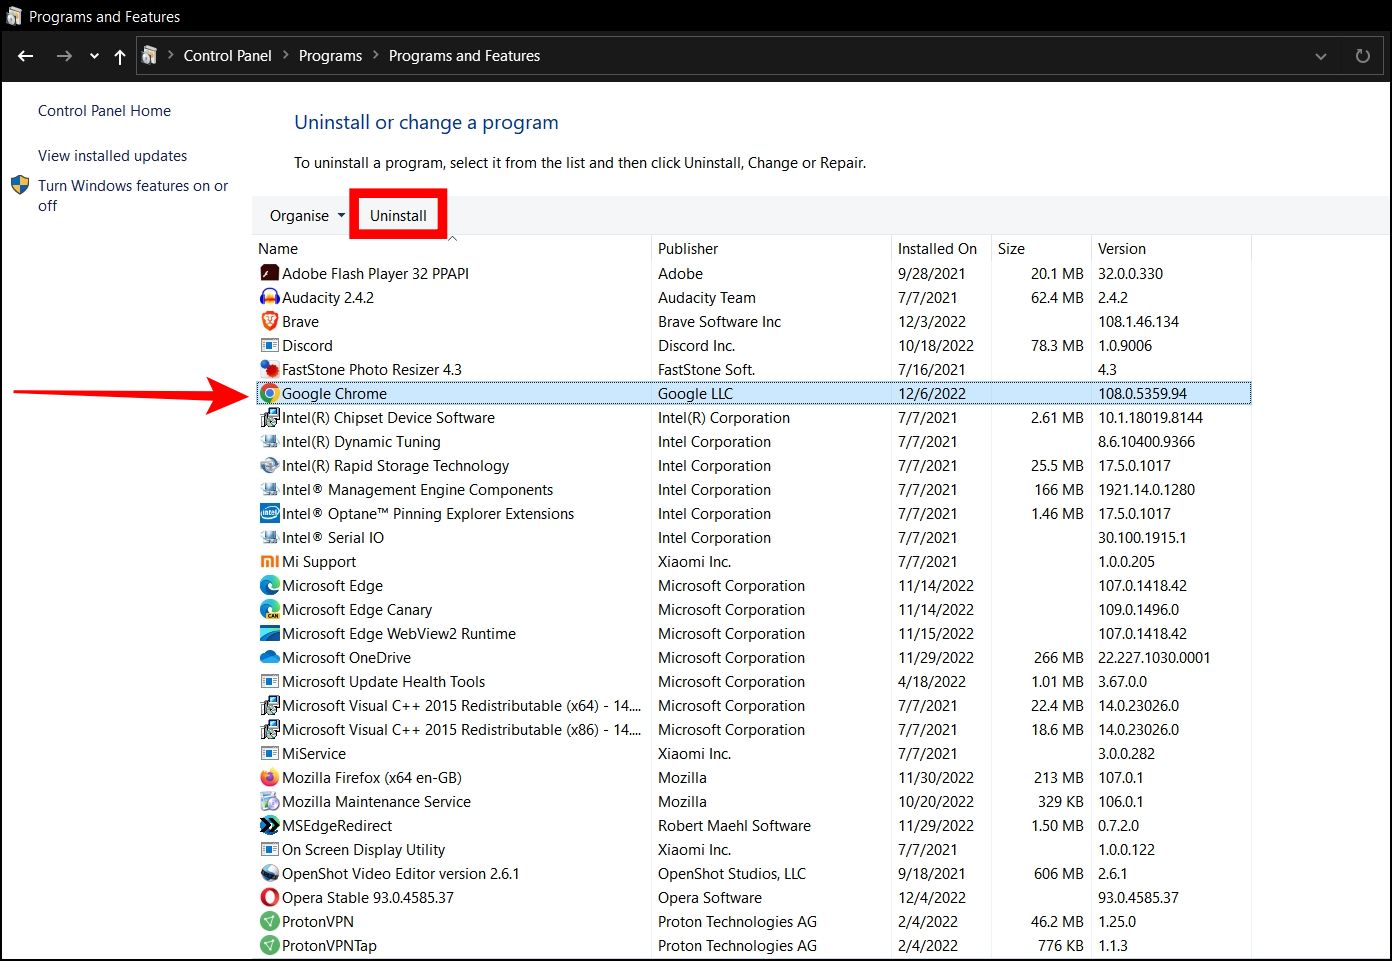
Step 6: Follow the on-screen instructions to uninstall Chrome from your system.
Method 7- Use Program Install and Uninstall Troubleshooter
You can also fix the problem by using Program Install and Uninstall troubleshooter. Follow the below steps to do so.
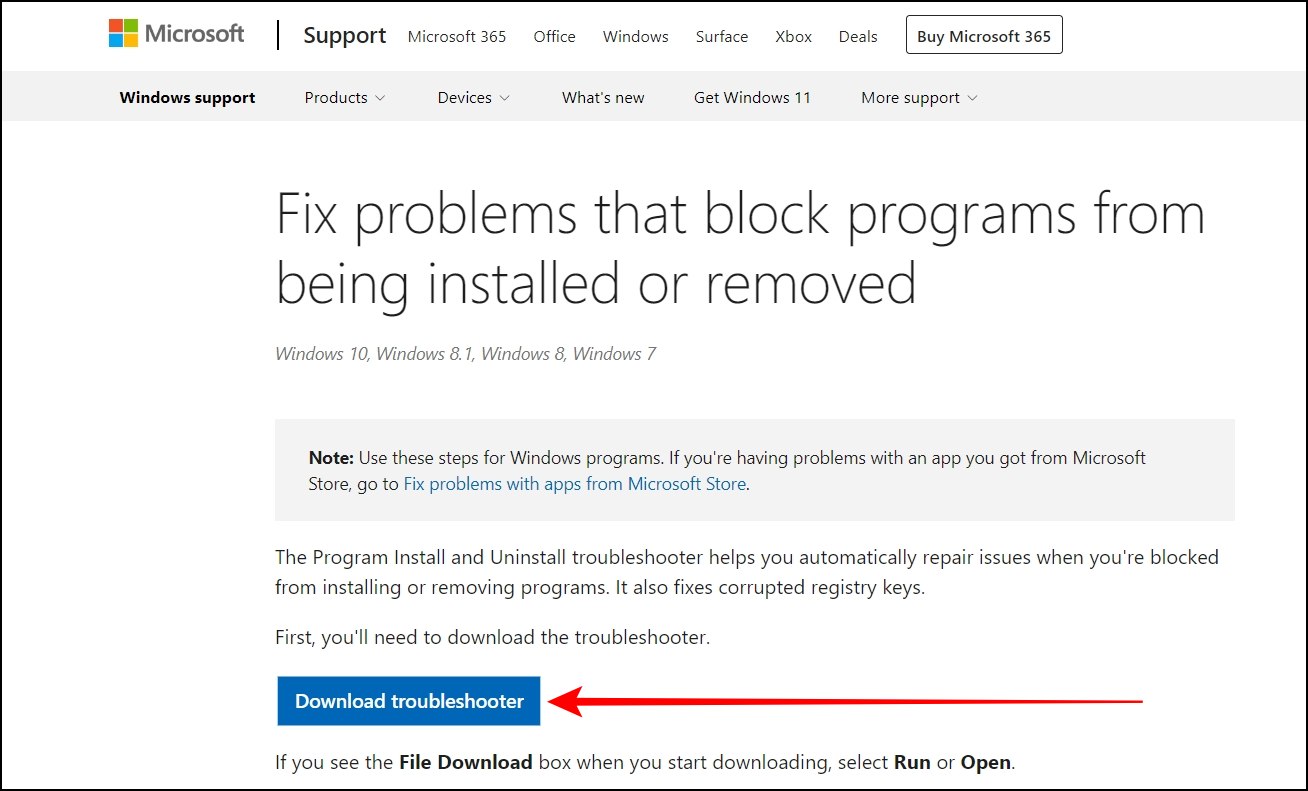
Step 1: Open Microsoft’s Troubleshooter Download page.
Step 2: Tap on the Download Troubleshooter button.
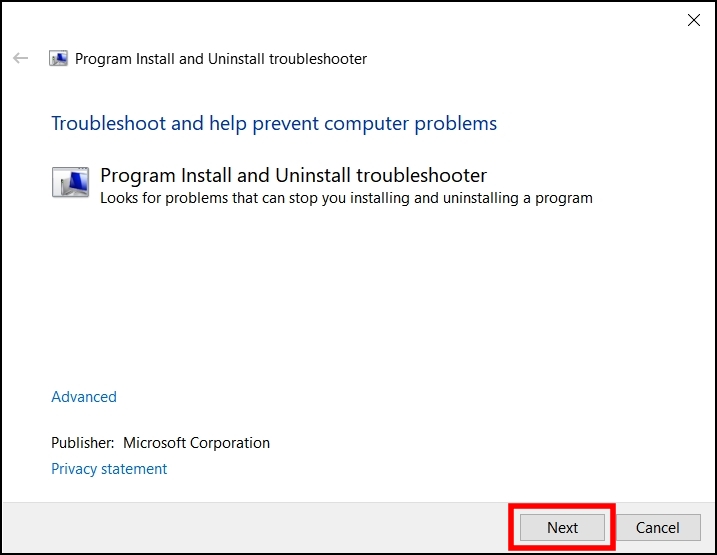
Step 3: Once downloaded, open the program to launch it and click Next.
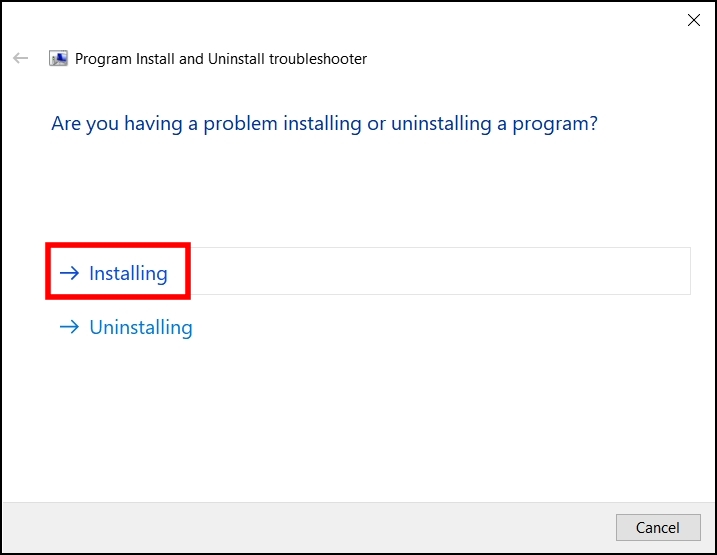
Step 4: Select Installing on the “Are you having a problem installing or uninstalling a program?” page.
Step 5: Select Google Chrome. If you cannot find it, tap Not Listed, then click Next.

Step 6: Finally, tap on Yes, try uninstall, and your issue should be fixed.
Method 8- Delete the Google Update directory
If you cannot download Google Chrome on your Windows system, you can try removing the Update directory. Follow the below steps to do so.
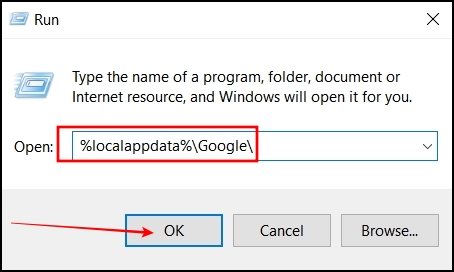
Step 1: Press the Windows+R key to open the run window.
Step 2: Type %localappdata%\Google\ and tap OK.
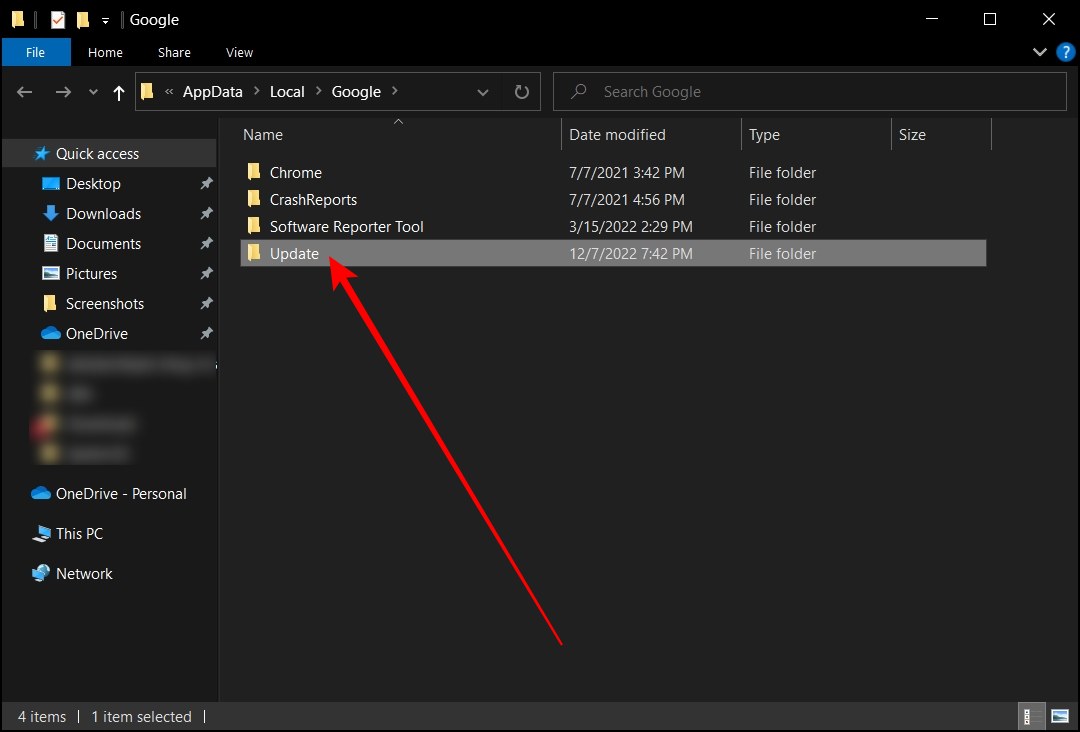
Step 3: Now, delete the Update folder.
If you do not see the Update directory, you should skip this solution.
Method 9- Turn on User Account Control
Some Reddit users have reported that turning on user account control settings helps them fix the problem. Follow the below steps to do so.
Step 1: Press the Windows+S key to open the search.
Step 2: Search for Change User Account Control Settings and tap to open it.
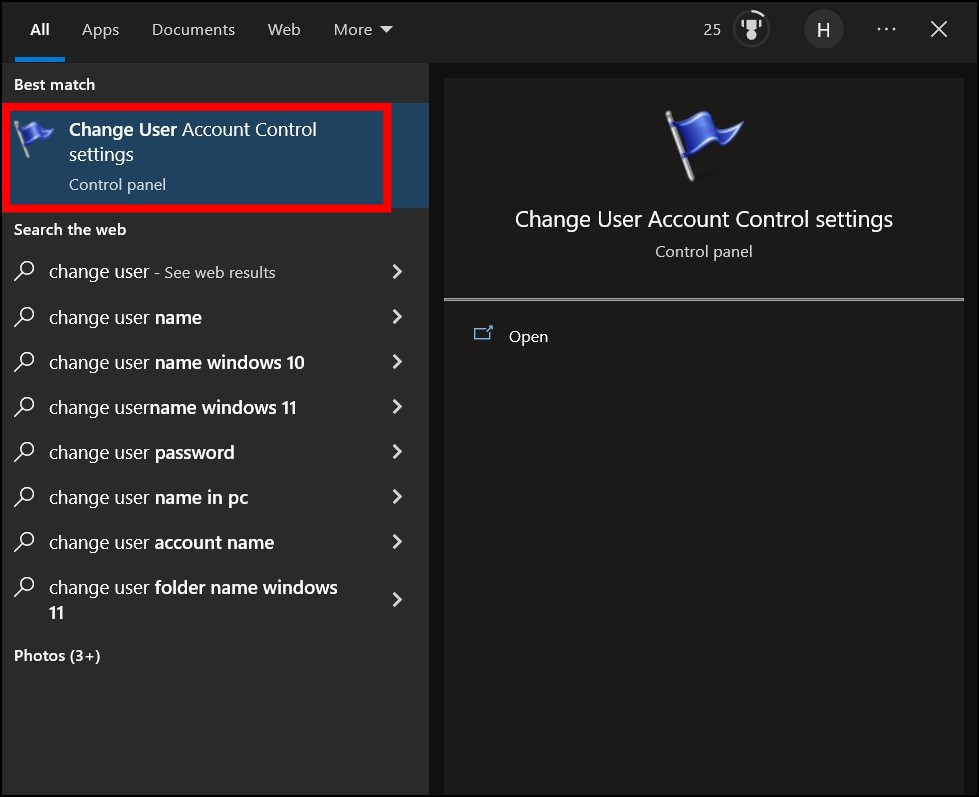
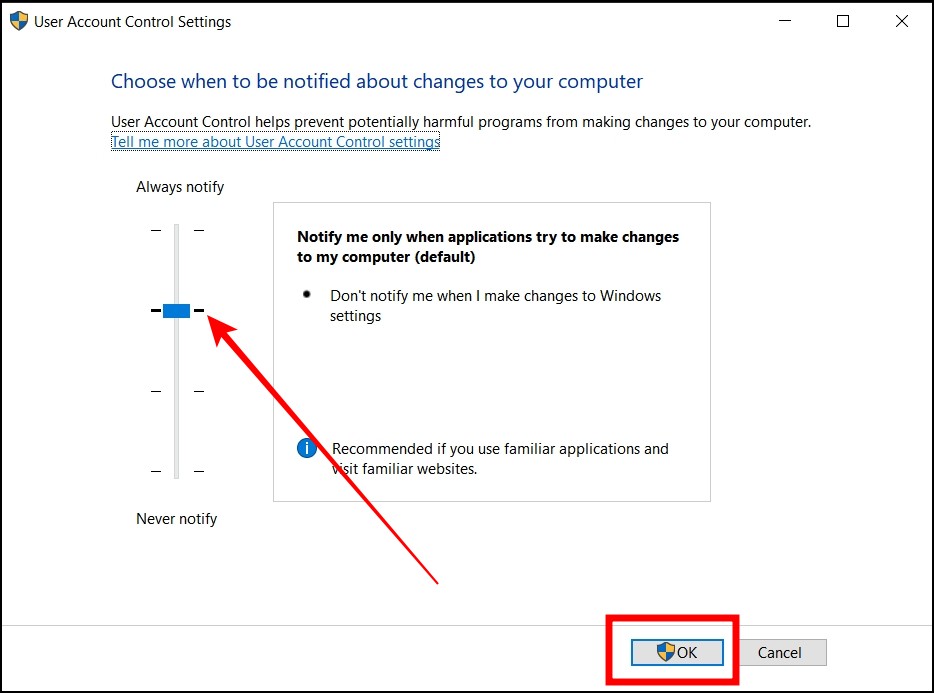
Step 3: Move the slider to the first point from the top, which is the default position, and tap OK to save it.
Method 10- Reinstall Google Chrome
If none of the methods works, you need to uninstall and re-install the Google Chrome browser on your computer. Follow the below steps to reinstall it.
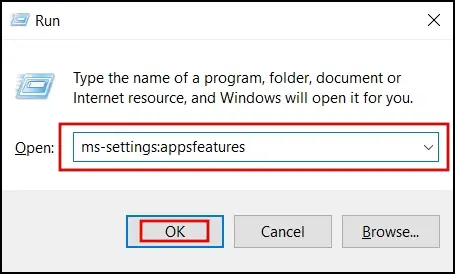
Step 1: Press the Windows+R key at once to open Run.
Step 2: Type ms-settings:appsfeatures and hit enter to open the Apps & features settings page.
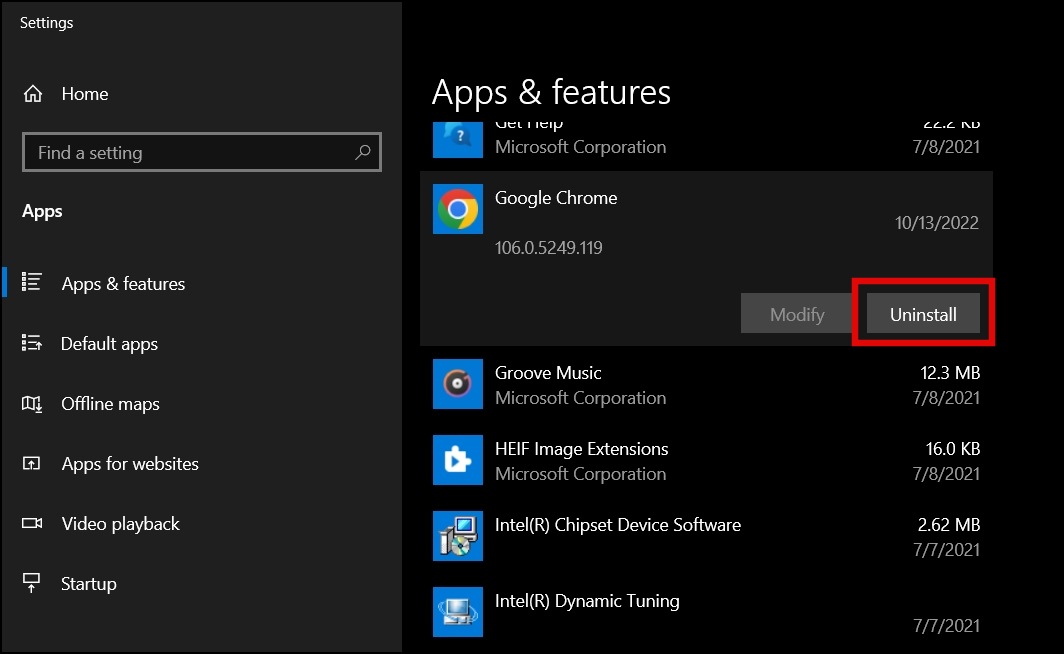
Step 3: Select the Google Chrome app from the installed app list.
Step 4: Click on Uninstall button under the menu and confirm it.
Step 5: Once uninstalled, open Chrome’s download website on another browser.
Step 6: Tap on Download Chrome and install it on your PC.
(Resolved) Chrome Won’t Install on Windows
This is how you fix Google Chrome not installing on your Windows 11/10 computer. I hope the above article helped you in fixing the problem of Google Chrome installation failure. Stay tuned to BrowserToUse for more such tips, tricks, and how-tos.
Related:
- 2 Ways to Disable and Uninstall Google Chrome on Android
- How to Downgrade and Install Old Version of Chrome (Windows, Mac, Android)
- 5 Ways to Fix Chrome Closes After Opening on Windows and Mac
Table of contents
- “Why Am I Getting Chrome Installation Errors?”
- How to Fix Chrome Installation Issues in Windows 10
- Fix 1: Install Google Chrome as an Administrator
- Fix 2: Delete the Google Update Directory
- Fix 3: Modify the Registry
- To modify the registry and fix your Chrome installation issues, follow these steps:
- Fix 4: Uninstall All Previous Versions of Google Chrome
- Fix 5: Try the Program Install and Uninstall Troubleshooter
- Fix 6: Check If the Background Intelligent Transfer Service (BITS) Is Running
- Fix 7: Temporarily Disable Your Antivirus Program
- Fix 8: Use the Offline Installer
- Run Regular Malware Scans
Have you tried to install or reinstall Google Chrome, only for the Chrome installer to display the “Installation failed. The Google Chrome installer failed to start” error message? The “Chrome installation failed” error is not new to Windows PCs. Users have long been complaining about encountering the error and not knowing how to bypass it. So, if you’re interested in knowing why Chrome installation fails, keep reading this post. We’ll show you how to fix Chrome installation errors in Windows 10, and hopefully, you’ll be able to install and use Google Chrome on your Windows PC.
Here is a list of the most common Chrome installation errors that you may encounter while trying to install Chrome:
- “Google Chrome install failed to start, not working”.
- “Google Chrome installation failed due to unspecified error”.
- “Can’t install Google Chrome”.
- “Installation failed. The Google Chrome installer failed to start”.
“Why Am I Getting Chrome Installation Errors?”
This is a question many Windows users ask. There could be a number of reasons why the Chrome installation process is failing. Here are the most common ones:
- Windows Registry files could be broken or corrupted.
- Chrome setup files could be corrupted.
- There are remnants of an old version of Chrome left behind on your PC after the uninstallation.
- Malware infection in your Windows system may have deleted some Chrome installation files, therefore interfering with the process.
- Your PC doesn’t meet the system requirements for installing that particular version of Google Chrome.
- Your internet connection is not working normally.
- Your antivirus program could be blocking the installation of Chrome.
The solutions below will show you how to fix the “Chrome installation failed in the first boot phase” problem. But before you begin, here are a few troubleshooting steps you should try first:
- Be sure to verify whether your internet connection is working properly, especially if you are using an online installer.
- Make sure that your computer meets the system requirements for installing Google Chrome.
- Reboot Windows and try the installation process again.
How to Fix Chrome Installation Issues in Windows 10
Fix 1: Install Google Chrome as an Administrator
Some users reported that installing Chrome with administrator privileges had solved the installation errors for them. To check whether this fix works, follow the steps below:
- Launch another browser, like Mozilla Firefox or Microsoft Edge, and search for “Google Chrome for Windows 10”.
- Click “Download now” and select “Download Chrome”. Follow the instructions to complete the download process and save the file to your preferred location.
- Open the download location, right-click on the file and select “Run as administrator”.
- Click “Yes” if prompted by the system. Follow the setup instructions to install Google Chrome.
This should resolve your problem. If it doesn’t, try the next solution below.
Fix 2: Delete the Google Update Directory
According to multiple posts on various forums, deleting the Google Update directory can fix Chrome installation errors. Here’s how:
- Press the Windows Key + R.
- Type %LOCALAPPDATA% into the “Run” box and press “OK” or hit “Enter”.
- Locate the “Update” directory and delete it.
- Try reinstalling Google Chrome and check if the process goes through this time.
If the “Update” directory doesn’t exist, you can skip this solution. Alternatively, locate the “Google” folder and delete it. Now try installing Chrome, and hopefully, it should work without an issue. If this doesn’t work, move to the solution below.
Fix 3: Modify the Registry
Editing the registry is a risky process that should be handled by an advanced user. If you don’t feel comfortable making changes to your registry, ask for help from an expert since the smallest mistake could severely damage your system.
To modify the registry and fix your Chrome installation issues, follow these steps:
- Press the Win + R keyboard shortcut, type regedit into the “Run” box and click “OK”.
- If prompted by the system, select “Yes”.
- Once the “Registry Editor” window opens, click on “File” and then select “Export…” to back up your registry. This will be helpful in case something goes wrong.
- Choose where you want to store the backup and assign the file a name. For instance, type “Original Registry Backup” into the “File name:” field.
- Select “All” under the “Export range” section in the bottom left corner and click “Save”.
- Once you’re done creating a backup of the Windows Registry, go back to the “Registry Editor” window and open the following location:
- HKEY_CURRENT_USER\SOFTWARE\Google\Update\ClientState
- Locate the {4DC8B4CA-1BDA-483e-B5FA-D3C12E15B62D} folder, right-click on it and select “Delete”.
- Open the path HKEY_LOCAL_MACHINE\SOFTWARE\Google\Update\Clients, look for the same folder and delete it.
- Exit the Registry Editor and try the installation process again. If the Google installer throws up the same error message, try the next solution.
Fix 4: Uninstall All Previous Versions of Google Chrome
It could be that when you uninstalled the old version of Chrome, some components were left behind and are preventing you from reinstalling Chrome. If that’s the case, then you need to delete all Chrome registry entries. To do this, follow these steps:
- Press the Win + R shortcut, type regedit into the “Run” box and hit “Enter”.
- Open the following paths and delete these keys:
- HKEY_CURRENT_USER\Software\Google
- HKEY_LOCAL_MACHINE\Software\Google
- HKEY_LOCAL_MACHINE\Software\Wow6432Node\Google
The problem should now be resolved, and you should be able to install Chrome without issues. However, if the installation fails, don’t give up. There are still other methods that could work.
Fix 5: Try the Program Install and Uninstall Troubleshooter
Microsoft rolled out the Program Install and Uninstall troubleshooter to help users who are struggling with the installation and uninstallation of programs. The tool is free to download on Microsoft’s official download website. Among other functions, the tool helps you to fix issues that are preventing you from installing or uninstalling programs and problems preventing existing programs from being completely uninstalled. To proceed, follow this guide:
- Visit Microsoft’s official download page and click the “Download” button to download “Program Install and Uninstall troubleshooter”.
- Once downloaded, launch the program and select “Next”.
- Allow Windows to scan for and detect problems, and then choose “Installing”.
- Google Chrome should be listed on the next screen. If it’s not listed, click on the “Not Listed” option.
- Otherwise, if Chrome is listed, select it and click “Next”.
- Select “Yes, try uninstall” and wait for the troubleshooter to do the hard work for you. Once the process is complete, you’ll see a notification showing all the problems that were fixed. You can also choose the “Explore additional options” link to check what other options you have.
Now you can exit the “Program Install and Uninstall troubleshooter” window and try installing Chrome again. The process should now be smooth and successful.
Fix 6: Check If the Background Intelligent Transfer Service (BITS) Is Running
BITS should be enabled for the transfer of data to be successful. The service only works if there is idle bandwidth – that is, the bandwidth that’s not being used by other applications. This service runs in the background and is tasked with supporting downloads and uploads. You need to check if the service is running, and to do so, follow these steps:
- Press the Win + R keyboard shortcut, type in msc and click “OK”.
- Locate “Background Intelligent Transfer Service” and double-click on it to open its “Properties” window.
- Set “Startup type:” to “Automatic” and click “Start” to make sure the service is running.
- Click Apply > OK.
You should now be able to install Google Chrome without any problems.
Fix 7: Temporarily Disable Your Antivirus Program
Your antivirus software could also be the reason why you’re unable to install Chrome. If you suspect this to be the case, disable the antivirus software temporarily and check if you can now install Chrome. The process of disabling your antivirus program depends on the software that you’re using. Refer to the user guide for instructions.
If disabling the antivirus doesn’t help, try uninstalling it from your PC. If this fix works, it’s wise to use a different antivirus program that won’t cause Chrome installation errors.
Fix 8: Use the Offline Installer
If you’re still running into problems while trying to install Chrome, we suggest using the offline installer. Google provides users with the option to download a standalone offline installer that may come in handy in such situations. To get the offline installer, visit the Google Chrome download page on a different computer and download it. Be sure to select the Chrome version that is supported by your system to avoid running into incompatibility issues. Next, transfer the file to an external media storage device.
Plug the external media storage device into the PC where you want to install Chrome, run the file and follow the on-screen instructions.
Run Regular Malware Scans
Every now and then, your PC may be targeted by hackers whose intentions are to steal your data and use it for criminal activities. If you’re using an ordinary antivirus program, you probably think that it’s enough to keep you safe. However, hackers are developing sophisticated malware that can circumvent your primary antivirus program without detection and infect your PC. That’s why we recommend installing a more advanced security tool like Auslogics Anti-Malware.
This malware removal tool performs a comprehensive scan of your entire Windows system to detect and remove any suspicious entities that could be hiding on your computer. The program checks the registry entries, temporary folders, browser extensions, and system memory, among other areas that could be targeted. The tool adds another layer of security to ensure that your privacy is protected. We always encourage Windows users to run regular malware scans using Auslogics Anti-Malware for continuous protection.
If malware infection is the reason why Chrome installation keeps failing on your computer, then you can trust Auslogics Anti-Malware to remove it from your PC and prevent future attacks.
That’s it! We hope you were able to fix Chrome installation issues on your Windows PC. For additional information or queries, leave your comments below and we’ll get back to you.
If you Can’t Install the Google Chrome browser on your Windows computer, the problem is most likely due to the computer being in S-Mode or installation of third-party apps being disabled on your device.
In most cases, the reason for Google Chrome not downloading or installing on a computer is provided by the operating system in the form of an error message.
For example, if you try to install Google Chrome on a computer in S-Mode, you should see it coming up with an error message reading “Can’t install Chrome because you’re in S mode”.
Similarly, if you see an error message reading “Google Chrome is already installed on your computer”, the problem is due to the presence of an incomplete or corrupted version of Google Chrome being available on your computer.
Advertisement
As mentioned above, your computer should come up with an error message providing the most likely reason for its failure to install Google Chrome and you can use that to select from the following methods to fix the problem on your computer.
1. Switch OFF S Mode
If your computer is in S-Mode, it prevents you from installing Google Chrome and other third-party apps. The only solution in this case is to Switch OFF S Mode on your computer.
Note: The switch from S Mode to Standard Windows 11 is permanent, you won’t be able to go back to S Mode again.
1. Open Settings > select the System Tab in the left-pane. In the right-pane, scroll down and click on the About option.

2. On About screen, scroll down and click on Product key and Activation tab, located under Related Settings.

3. On the next screen, expand the S Mode entry and click on Open Store button.

Windows 10: Go to Settings > Update & Security > Activation > Go to Store.

4. On the next screen, click on the Get button to switch your computer out of S Mode.
Advertisement

This will immediately switch OFF S Mode on your computer, after which you should have no problem installing Google Chrome browser on your computer.
2. Enable Installation of Third Party Apps
If your computer is not in S Mode and you are still unable to Install Google Chrome, the problem could be due to installation of apps being blocked on your device.
1. Open Settings > click on the Apps tab in the left-pane. In the right-pane, click on Apps & Features tab.

2. On Apps & Features screen, click on the Down Arrow next to “Choose where to gets Apps” entry and select Anywhere or Warn while installing Non Microsoft Apps option.

After this, you should be able to Install the Google Chrome browser on your computer.
Windows 10: Go to Settings > Apps > Apps & Feature > In the right-pane, select Anywhere or Warn while installing Non Microsoft Apps option.

3. Reinstall Google Chrome
If you are looking at an error message reading “Google Chrome is already installed on your computer”, the solution is to remove and reinstall Google Chrome on your computer.
1. Open Settings > click on the Apps tab in the left-pane. In the right-pane, click on Apps & Features tab.
2. On the next screen, type Chrome in the search bar > click on Google Chrome and select the Uninstall option.

After Uninstalling Chrome, download and Reinstall Google Chrome back on your computer.
4. Delete Chrome Client Registry Entry
If you are looking at “Can’t find installer applications on Windows” message, the solution is to delete Chrome related registry key from your computer.
1. Right-click on the Start button and click on Run.
2. In the Run Command window, type regedit and click on OK.
3. On Registry Editor screen, navigate to HKEY_LOCAL_MACHINE\SOFTWARE\WOW6432Node\Google\Update\Clients

Right-click on 430FD4D0-B729-4F61-AA34-91526481799D folder and select the Delete option.
4. Close the Registry Editor and try to Install Google Chrome on your computer.
5. Enable Background Intelligent Transfer Service
Another reason for installation of Google Chrome browser failing on a Windows computer is due to Background Intelligent Transfer Service (BITS) being disabled.
1. Right-click on the Start button and click on Task Manager.
2. On Task Manager screen, select the Services tab and make sure BITS service is running.

If BITS is not enabled, right-click on BITS and select the Start option.
Добрый день.
Сегодня купил asus ноутбук с windows 10 pro. 64-bit
Chrome — скачиваю с официального сайта. идет скачивание, затем установка, но после установки выскакивает сообщение » Установка не удалась из-за неизвестной ошибки. закройте все окна Google Chrome и повторите попытку снова.» Что это может значить? Как мне установить Chrome на новый ноутбук? Какую версию скачиваю я не в курсе, наверное же самую последнюю.
-
Вопрос задан
-
8653 просмотра
Пригласить эксперта
Может Chrome уже установлен? Посмотрите в диспетчере задач процессы.
В последней на данный момент инсайдерской сборке Windows 10 (под номером 1809) Microsoft реализовала новую функцию, препятствующую установке браузеров Chrome и Firefox. Вместо этих веб-обозревателей операционная система предлагает использовать системный браузер Microsoft Edge. Пользователю нужно вручную отказаться от программы редмондского гиганта, чтобы продолжить установку Chrome или Firefox. Инстаграм Трешбокса с важными новостями дня в формате «сторис». При запуске установочного файла браузеров конкурентов, инсайдерская версия Windows 10 отображает баннер о преимуществах Microsof…
Но есть способ обойти и этот запрет.
1 Удалите Виндовс 10 и установите его заново
2 Создайте локальную учётную запись
3 Установите антивирус
4 Скачайте Гугл Хром офф-лайн установщик
5 Отключитесь от интернет
6 Установите браузер и все необходимые вам сервисы гугл.
7 Войдите в Виндовс с помощью учётной записи Microsoft (После входа переустановка сервисов Гугл и браузера будет не возможна как и обновления)
Войдите, чтобы написать ответ
-
Показать ещё
Загружается…