

Введение
Всем привет, в этой статье мы разберёмся как замести свои следы при работе в Windows 10/11. Ведь как бы я не старался, мне не получиться перевести всех на Linux, сознаюсь, в последнее время я тоже начал пользоваться ОС Windows, не смотря на то, что я в открытую призерал и посылал компанию Microsoft. Знаю что такое неприятно слышать, но я верен в победу GNU\Linux и я всё также продолжаю помогать пользователям перейти с Windows на Linux. Тем не менее, я хочу обезопасить всех, поэтому этот гайд будет для пользователей Windows. Это будет некий список, чтобы не забыть. Эта статья будет полезна, если вы пользовались чужим компьютером.
Очистка списков недавних мест и программ
Современные проприетарные ОС следят за тобой и сохраняют твои запросы и файлы якобы для быстрого и удобного доступа — БРЕД. Давайте почистим эту информацию. Список недавно запущенных программ храниться — в главном меню, а недавних мест — в проводнике. Отключить список недавно добавленных и часто используемых приложений можно через окно «Параметры» в разделе «Персонализация» -> «Пуск». Отключаем всё, что есть.

Но это толком ничего не даст, ибо если мы включим эти параметры вновь, то наши списки вернуться. Поэтому придётся отключать это всё через групповую политику. Нажимаем сочетание клавиш Win+R и вводим «gpedit.msc», переходим в раздел «Конфигурация пользователя»->»Административные шаблоны»->»Пуск».

В нём включаем политики:
- Очистить журнал недавно открывавшихся документов при выходе
- Очистка списка недавно использовавшихся программ для новых пользовтелей
- Отключить слежение за действиями пользователя
- Не хранить сведения о недавно открывавшихся документах.
- Удалить список «Недавно добавленные» из меню «Пуск».
Очистить недавние места немного проще. Заходим в «Проводник» и переходим на вкладку «Вид»->»Параметры». В появившимся окне отключаем параметры «Показать недавно использованные файлы на панели быстрого доступа» и «Показывать часто используемые папки на панели быстрого доступа». Также очищаем журнал проводника.

Очистка списка USB-накопителей
На некоторых важных объектах (например в офисах) к компьюетру разрешено подключать только флешк, зарегестрированные в журнале. Проблема в том, что зачастую этот журнал — бумажный. То есть, ОС никак не ограничивает распознавание любой другой флешки. Но зато он это протоколирует. Если при проверке обнаружат, что пользователь подключать флешки не занесённые на туалетную бумагу в углу стола, у него будут проблемки. Поможем пользователю.
Зайдём в разделы реестра («Win+R»->»regedit«):
Bash:
[HKEY_LOCAL_MACHINE\SYSTEM\CurrentControlSet\Enum\USBTOR\
[HKEY_LOCAL_MACHINE\SYSTEM\CurrentControlSet\Enum\USB\
И вот список всех накопителей которые были подключены к ПК:


Вроде как решение очень простое — просто почистить. Но нет. Во-первых, разрешения на эти ветки реестра устроены таким образом, что мы ничего не удалим. Во-вторых, назначать права и разрешения вручную довольно долго, особенно, если накопителей много. В-третьих, права админа не помогут =). В-четвёртых, это не все разделы, вот список ещё:
Bash:
HKEY_CURRENT_USER\Software\Microsoft\Windows\CurrentVersion\Explorer\MountPoints2\CPC\Volume
HKEY_CURRENT_USER\Software\Microsoft\Windows\CurrentVersion\Explorer\MountPoints2\
HKEY_LOCAL_MACHINE\SYSTEM\ControlSet001\Control\Class\{36FC9E60-C465-11CF-8056-444553540000}
HKEY_LOCAL_MACHINE\SYSTEM\ControlSet001\Control\Class\{4D36E967-E325-11CE-BFC1-08002BE10318}
HKEY_LOCAL_MACHINE\SYSTEM\ControlSet001\Control\DeviceClasses\{53f56307-b6bf-11d0-94f2-00a0c91efb8b}
HKEY_LOCAL_MACHINE\SYSTEM\ControlSet001\Control\DeviceClasses\{56907941-3AFE-11D4-AE2C-00A0CC242D2C}
HKEY_LOCAL_MACHINE\SYSTEM\ControlSet001\Control\DeviceClasses\{a5dcbf10-6530-11d2-901f-00c04fb951ed}
HKEY_LOCAL_MACHINE\SYSTEM\ControlSet001\Enum\STORAGE\RemovableMedia
HKEY_LOCAL_MACHINE\SYSTEM\ControlSet001\Control\DeviceClasses\{3abf6f2d-71c4-462a-8a92-1e6861e6af27}
KEY_LOCAL_MACHINE\SYSTEM\ControlSet001\Control\DeviceClasses\{53f56307-b6bf-11d0-94f2-00a0c91efb8b}
KEY_LOCAL_MACHINE\SYSTEM\ControlSet001\Control\DeviceClasses\{53f5630a-b6bf-11d0-94f2-00a0c91efb8b}
HKEY_LOCAL_MACHINE\SYSTEM\MountedDevices
Эти разделы нужно не просто удалить, а грамотно почистить. Для этого будем использовать программу
Ссылка скрыта от гостей
.

Включаем параметр «Do real clean(simulation otherwise)» и нажимаем «Clean».

Программа не только делает очистку, но и выводит подробный лог. По окончанию, не останется никаких упоминаний о каких-либо подключённых накопителях.
Очистка кэша и истории браузера
Хорошо, если вы используете 1 браузер, если несколько то придётся чистить все.
| Edge | Очистить список загруженных файлов и все журналы. (Ctrl+Shift+Del) |
| Firefox | «Настройки»->»Приватность и защита»->»Удалить данные», выбираем все переключатели и удаляем. |
| Chrome | Нажимаем «Ctrl+Shift+Del», и в появившейся станице выбери очистку за всё время, отметь все чекбоксы и удаляй данные. |
| Opera | «Ctrl+Shift+Del» -> очистка за всё время -> Удалить |
Мало того, что мы стёрли следы, так ещё и место на диске почистили. А в коопе с этой статьёй, так вообще бомба!!!
Удаляем записи DNS
Узнать, какие сайты ты посещал можно не только через журнал браузера, но и через кэш DNS. Когда ты вводишь адрес сайта в браузере, то твой комп обращается к DNS. Просмотреть кэш можно командой ipconfig /displaydns.
Для его очистки используем команду ipconfig /flushdns
Удаление списка последних документов MS Office
«Для удобства пользователей» список последних документов хранят все программы офисного пакета. В новых версиях Office нужно перейти в раздел «Дополнительно» в настройках и установить число последних документов = 1.
А лучше использовать
Ссылка скрыта от гостей
. Мало того что он позволяет удалить историю в 2 кнопки:

Так ещё и полностью бесплатный для персонального использования.
Автоматизация очистки с помощью CCleaner
Скачиваем CCleaner Desktop. CCleaner хорош тем, что:
- Поддерживает последние версии Windows и браузеров
- Может очистить не только систему, но и приложения
- Программа может работать в batch-режиме
Использовать её крайне просто — выбираем элементы, которые хотим очистить и чистим.
Полное удаление файлов
Мы уже знаем, что при удалении файла, он на самом деле не удаляется, а удаляется только запись о нём. Сам файл храниться где-то в недрах диска. Поэтому для полного удаления информации нужно использовать специальные утилиты wipe-утилиты, которые затирают свободное пространство диска случайными данными. После такого восстановить файлы уже не получится. Существует много утилит для затирания. Но мы будем использовать уже знакомый CCleaner. Заходим в «Сервис»->»Стирание дисков»-> выбираем диск -> что стирать? — Только свободное место -> и способ стирания. Утилита поддерживает способы от самого простого, до
Ссылка скрыта от гостей
(Состав перезаписываемой сессии следующий: в первые 4 прохода записываются случайно выбранные символы в каждый байт каждого сектора, с 5 по 31 проход происходит запись определенной последовательности символов, в последние 4 прохода снова записываются случайно выбранные символы).
Создаём bat-скрипт для очистки всего
Создадим bat-скрипт для автоматизации некоторых процессов описаных выше.
Приступим с удаления файлов из директории «Recent». Удалять командой del.
Bash:
C:\Program Files (x86)\CCleaner.exe /delete "%appdata%\Microsoft\Windows\Recent\*" 1
C:\Program Files (x86)\CCleaner.exe /delete "%appdata%\microsoft\windows\recent\automaticdestinations\*" 1
Последний параметр 1 — означает удаление с 3 проходами. Это оптимальный режим, поскольку с одним проходом 0 — слишком просто, а все остальные — очень долгие.
USBOblivion также можно использовать из командной строки Windows.
Bash:
C:\Users\user\Desktop\USBOblivion64.exe -enable -auto -nosave -silentПервый параметр запускает реальную чистку, второй работает в автоматическом режиме, третий отключает сохранение «.reg», а четвёртый означает работу в тихом режиме, как раз для командной строки.
Далее нужно запустить CCleaner с параметром AUTO для автоматической очистки, но кэш DNS не очищается, так что чистим в ручную.
Bash:
C:\Program Files (x86)\CCleaner.exe /AUTOПолный код выглядит так:
Bash:
C:\Program Files (x86)\CCleaner.exe /delete "%appdata%\Microsoft\Windows\Recent\*" 1
C:\Program Files (x86)\CCleaner.exe /delete "%appdata%\microsoft\windows\recent\automaticdestinations\*" 1
C:\Users\user\Desktop\USBOblivion64.exe -enable -auto -nosave -silent

C:\Program Files (x86)\CCleaner.exe /AUTO
ipconfig /flushdns
Заключение
Чтож, сегодня мы стали немного осторожнее при поиске чего-либо в интернете и научились удалять файлы и затирать их. Это будет полезный опыт, если например, ваша цель сервер на ОС Windows(Да такие есть) и вам нужно уйти бесследно.
Спасибо за внимание!
Все способы:
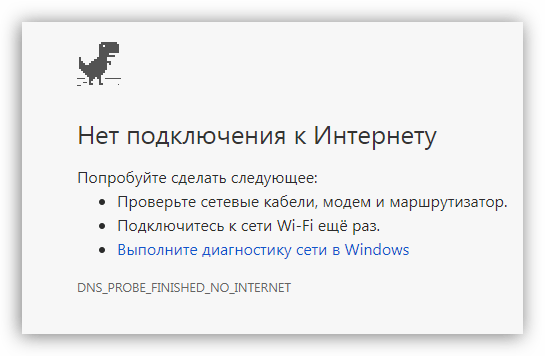
- Способ 1: Проверка доступа к интернету
- Способ 2: Настройки брандмауэра
- Способ 3: Разрешение удаленного подключения
- Способ 4: Отключение спящего режима
- Способ 5: Удаление обновления
- Способ 6: Установка пароля
- Способ 7: Изменение типа соединения
- Способ 8: Редактирование системного реестра
- Вопросы и ответы: 0
Способ 1: Проверка доступа к интернету
Если не удается подключиться к удаленному рабочему столу, в первую очередь проверьте доступ к интернету, ведь соединение происходит между устройствами по сети. Для проверки достаточно запустить браузер и попытаться посетить несколько веб-сайтов.
Если вы обнаружили, что с интернетом на компьютере есть проблемы, ознакомьтесь с нашими инструкциями с решением наиболее распространенных проблем.
Подробнее: Решение проблемы с неработающим интернетом на ПК
Способ 2: Настройки брандмауэра
Еще одна причина, из-за которой не подключается удаленный рабочий стол в Windows 10, — это настройки встроенного брандмауэра, где активна блокировка доступа к нему:
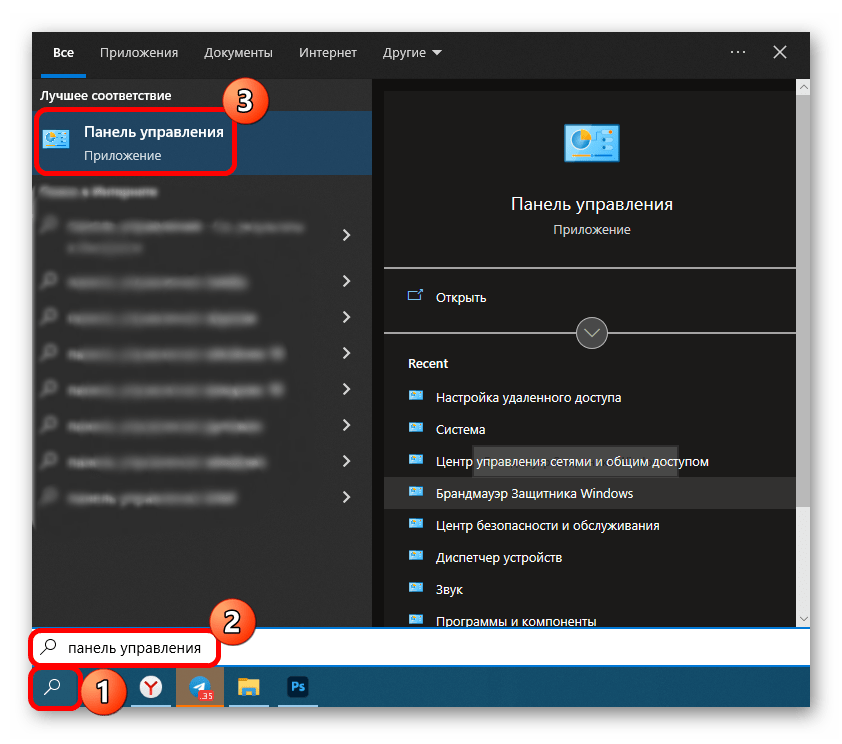
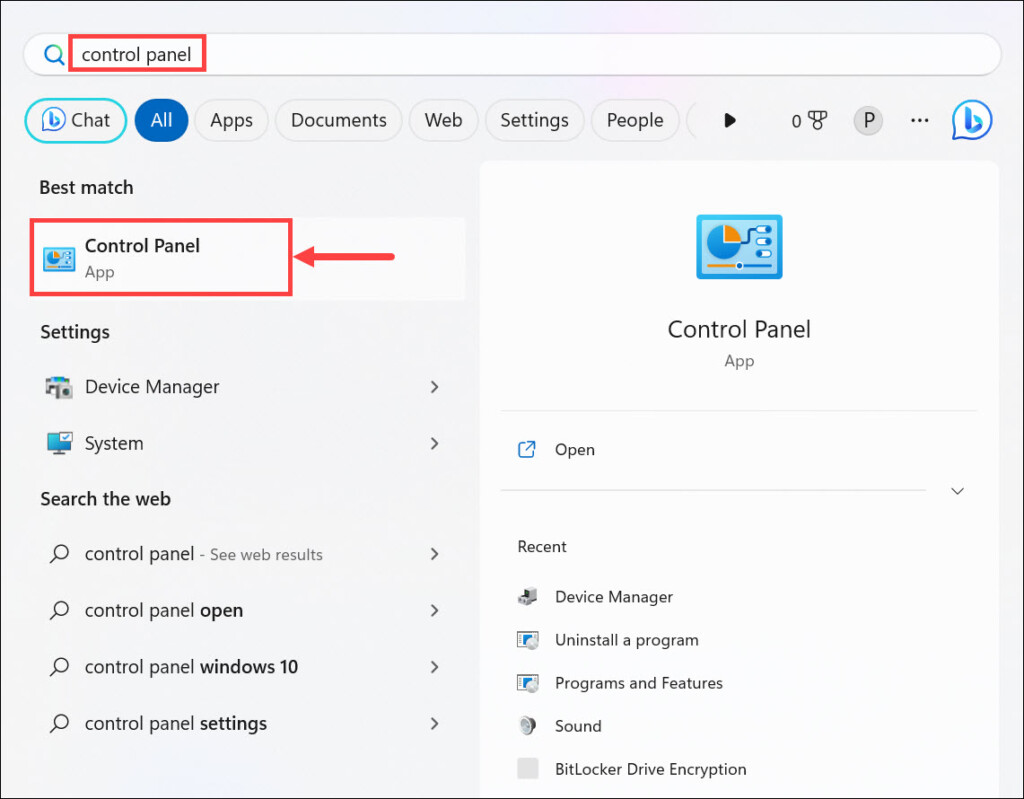
- Запустите «Панель управления», используя поиск системы.
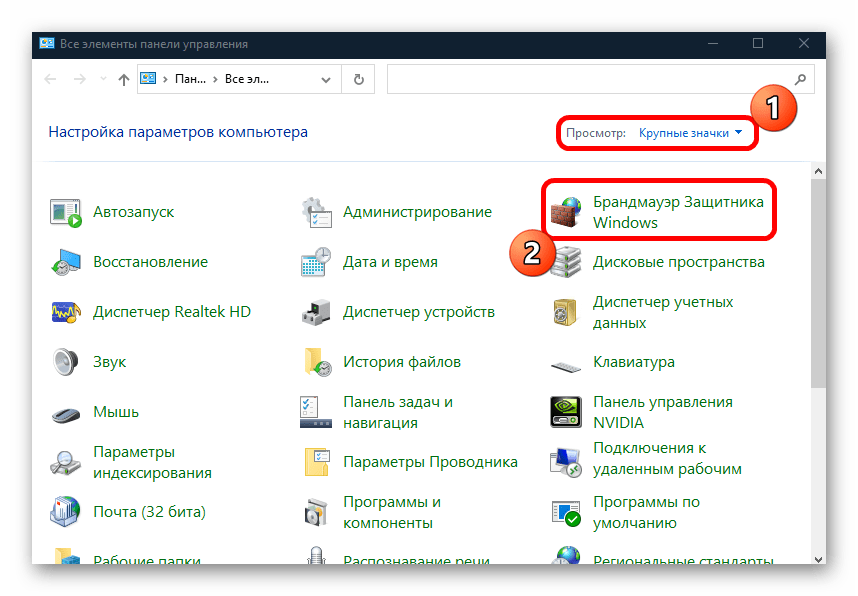
- Для удобства выберите отображение разделов в виде крупных значков, затем перейдите в «Брандмауэр Защитника Windows».
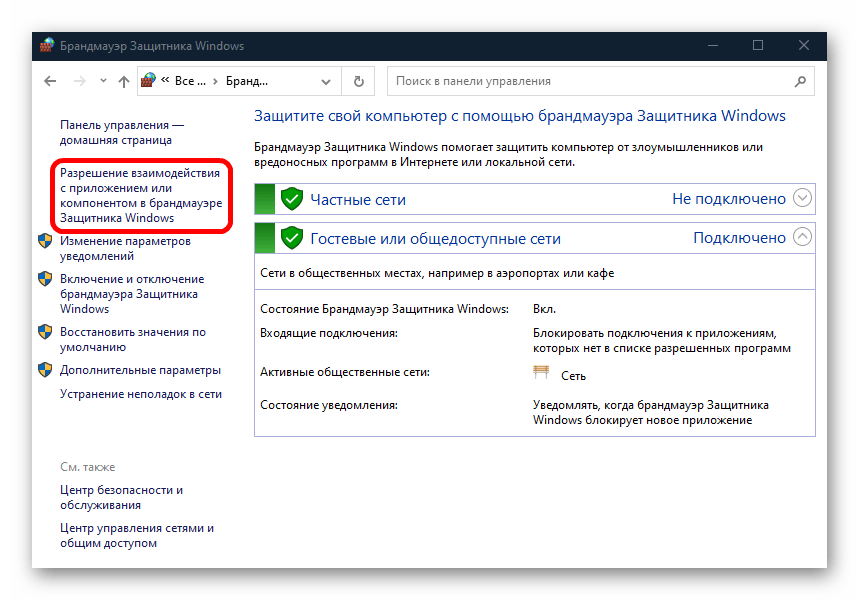
- На панели слева кликните по строке «Разрешение взаимодействия с приложением или компонентом в брандмауэре Защитника Windows».
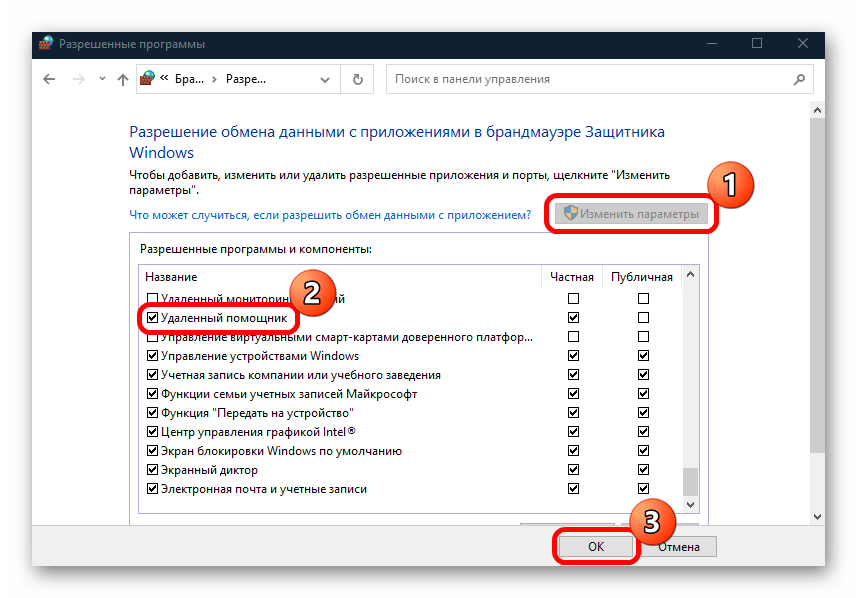
- Щелкните по кнопке «Изменить параметры», чтобы настройки стали активными. Отметьте галочкой пункт «Удаленный помощник» — он отвечает за подключение удаленных рабочих столов. Также можно выбрать тип сети, для которой будет доступна функция. Нажмите на «ОК», чтобы сохранить настройки.
После этого можете попробовать вновь подключить к рабочему столу.
Если у вас установлен сторонний антивирус, то проверьте, не блокирует ли он подключение. Алгоритм действий отличается, но обычно этот параметр можно найти в настройках программы.
Способ 3: Разрешение удаленного подключения
Если вы впервые используете функцию подключения к удаленному рабочему столу, то стоит проверить разрешение этой возможности не только в брандмауэре, но и в самой системе:
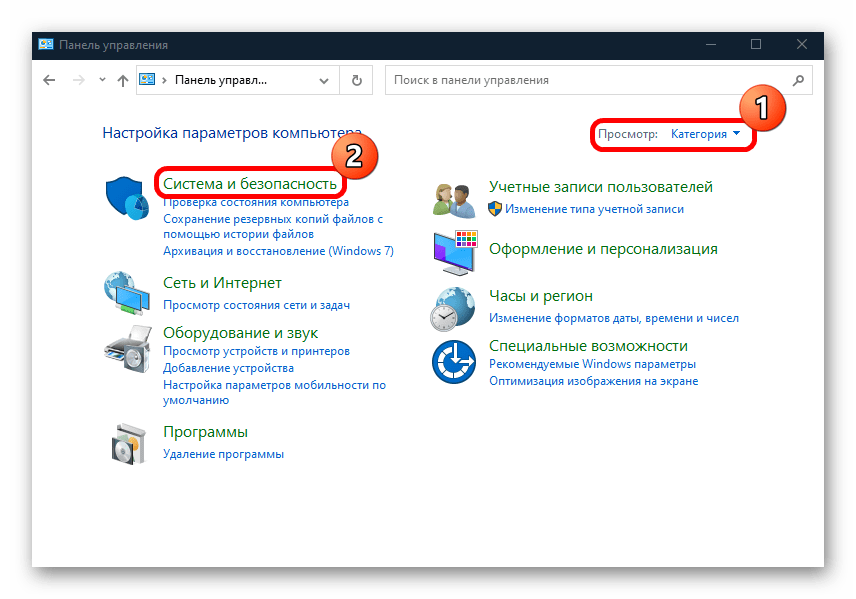
- В «Панели управления» лучше выбрать «Категория» в меню «Просмотр». Затем кликните по разделу «Система и безопасность».
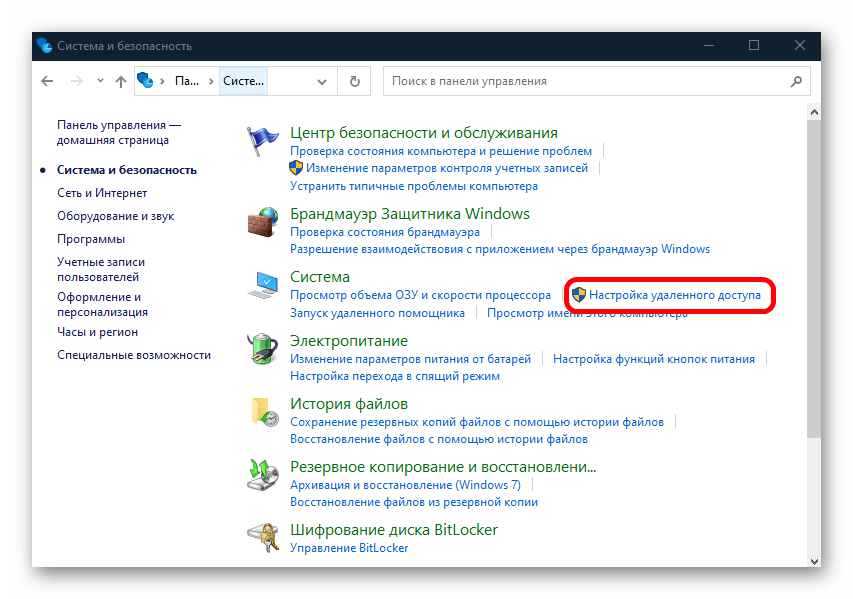
- Далее в блоке «Система» щелкните по строке «Настройка удаленного доступа».
- В новом окне перейдите на вкладку «Удаленный доступ», а в разделе «Удаленный рабочий стол» отметьте пункт «Разрешить удаленные подключения к этому компьютеру». Кликните по «ОК», чтобы настройки вступили в силу.

После этого удаленные подключения станут включены, поэтому проблема должна быть решена. Если не сработало, то переходите к следующим способам.
Способ 4: Отключение спящего режима
Как ни странно, но иногда осуществить удаленное подключение не удается из-за включенного спящего режима. Если ваш компьютер уходит в сон после определенного периода бездействия, то попробуйте отключить данную функцию через системные «Параметры» или классическую «Панель управления». Более подробную информацию можно узнать из нашего отдельного материала.
Подробнее: Отключение спящего режима в Windows 10

Способ 5: Удаление обновления
Разработчики Microsoft регулярно выпускают апдейты, которые предназначены для исправления ошибок и улучшения работы системы. Одно из таких обновлений может блокировать попытку подключения к удаленному рабочему столу, поэтому есть смысл попробовать его удалить, чтобы исправить неполадку:
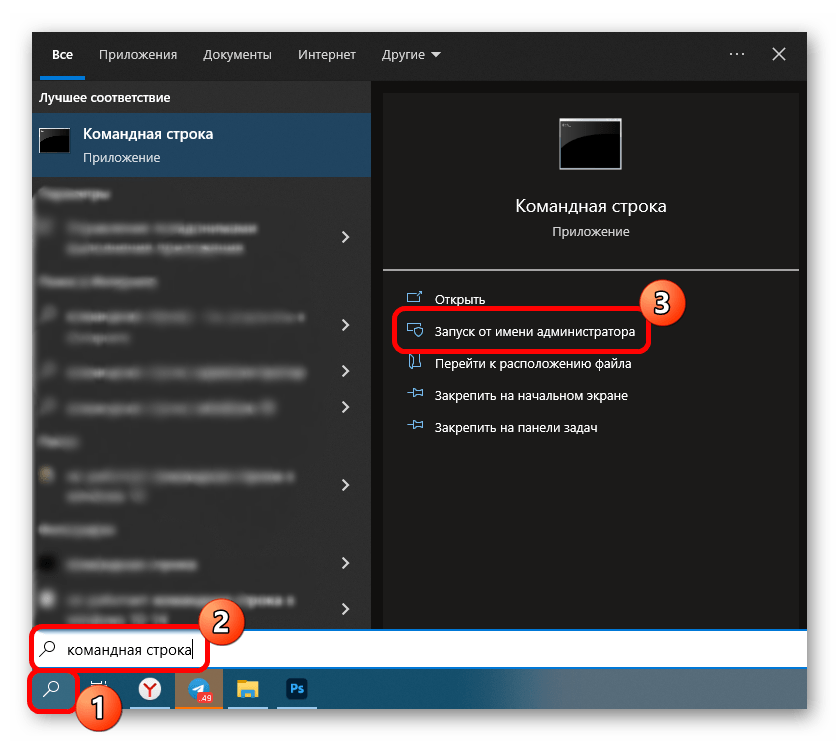
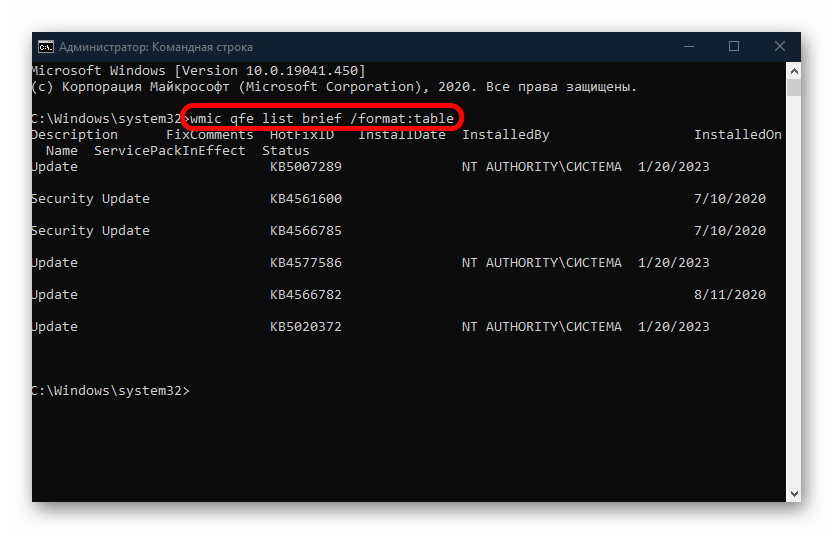
- Запустите «Командую строку» от имени администратора. Проще всего воспользоваться строкой системного поиска.
- Чтобы отобразить список всех установленных обновлений в окне консоли, выполните команду
wmic qfe list brief /format:table. - Если в перечне есть обновление безопасности «KB3074679», то вставьте
wusa /uninstall /kb:3074679и нажмите на клавишу «Enter».
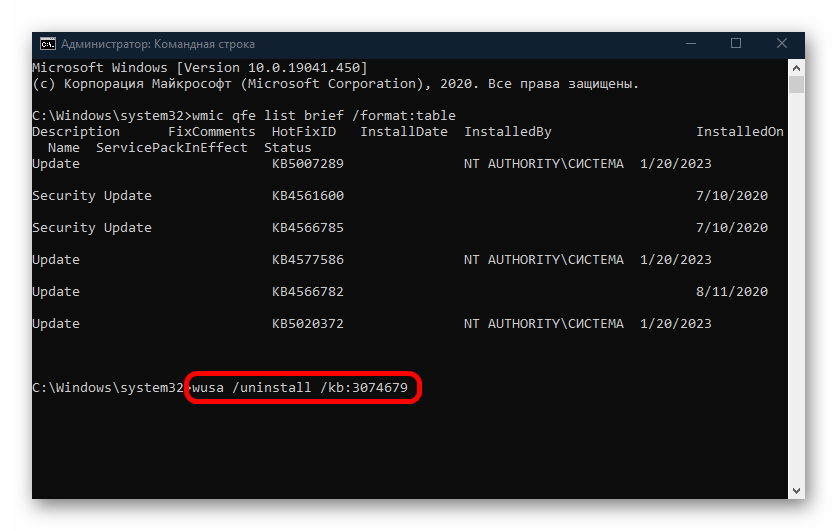
После того как проблемное обновление удалено, перезагрузите компьютер и попытайтесь снова подключиться к удаленному рабочему столу.
Способ 6: Установка пароля
Отсутствие пароля для учетной записи также является одной из причин удаленного подключения. Если профиль никак не защищен, то ни одно входящее подключение невозможно. Есть несколько способов установить пароль – об этом писал наш автор в отдельном руководстве.
Подробнее: Установка пароля на Windows 10

Способ 7: Изменение типа соединения
Если вы используете общедоступное подключение, то, скорее всего, оно препятствует удаленному подключению. Попробуйте изменить тип сети:
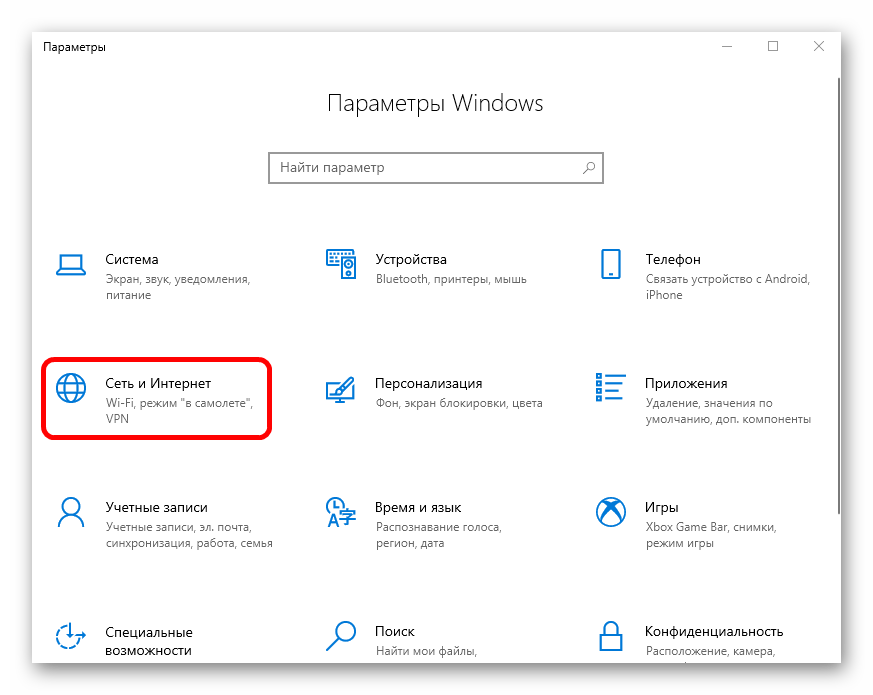
- Нажмите на «Пуск» и перейдите в системные «Параметры».
- Выберите раздел «Сеть и Интернет».
- На вкладке «Состояние» нажмите на «Свойства» активного подключения.
- В блоке «Сетевой профиль» поставьте отметку у пункта «Частные».
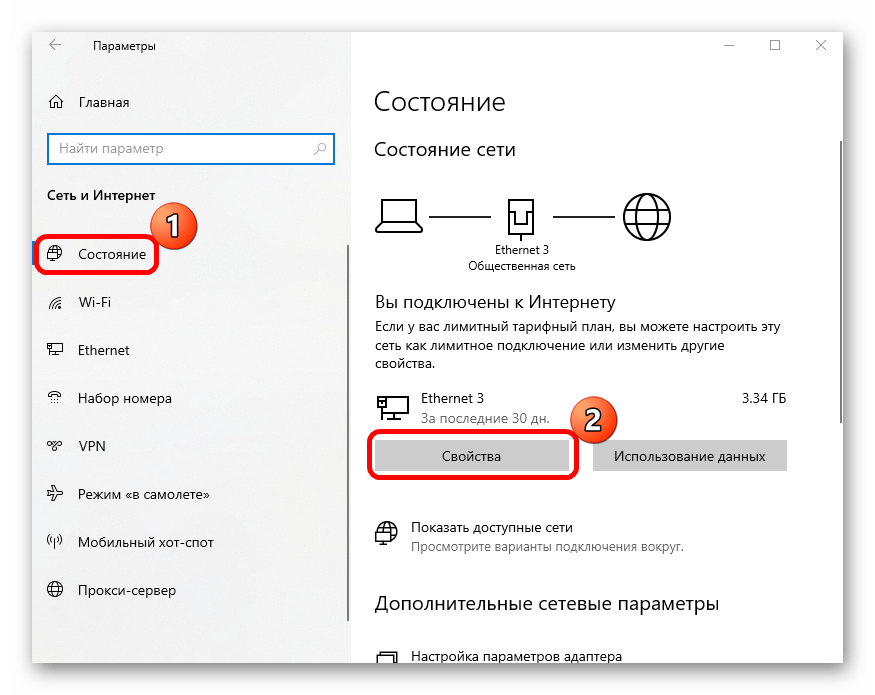

При активном общедоступном подключении срабатывает встроенная защита, поэтому при смене сетевого профиля есть вероятность, что проблема будет решена.
Способ 8: Редактирование системного реестра
В некоторых случаях может помочь редактирование системного реестра, а точнее, создание нового параметра, который заставит протокол удаленного рабочего стола использовать PRC/HTTP вместо HTTP/UDP.
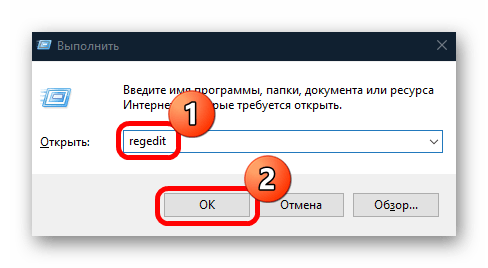
- Нажмите на клавиши «Win + R», затем введите команду
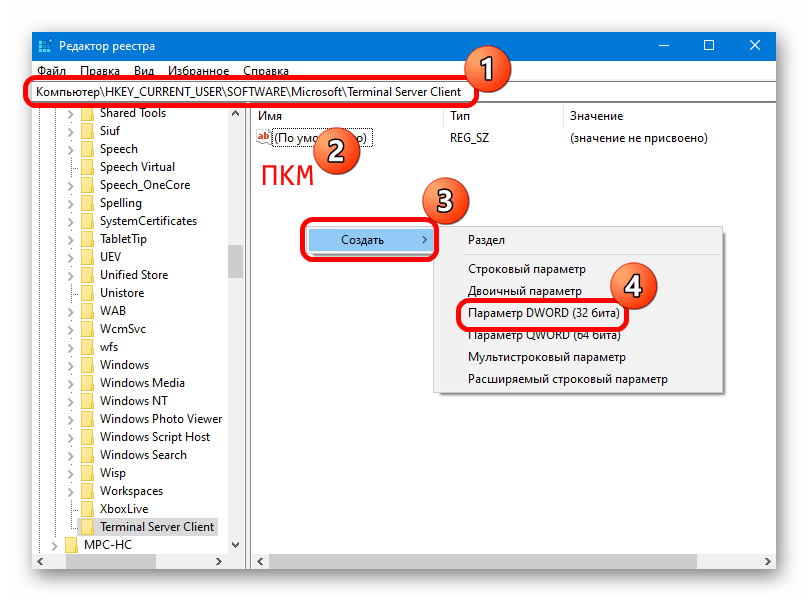
regeditи выполните ее, кликнув по кнопке «ОК». - Перейдите по пути
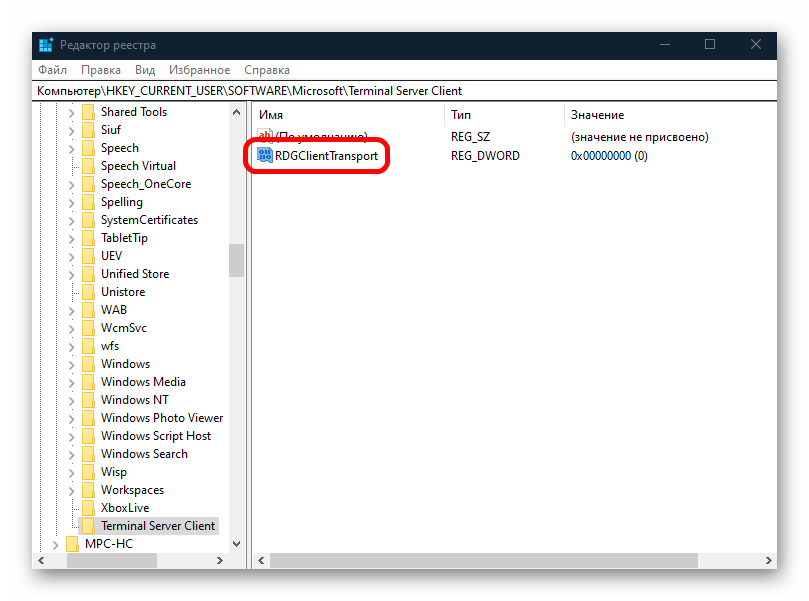
HKEY_CURRENT_USER\SOFTWARE\Microsoft\Terminal Server Client. В последнем каталоге создайте новый ключ. Для этого кликните правой кнопкой мыши по свободной области центральной части окна, затем наведите курсор на пункт «Создать» и выберите «Параметр DWORD». - Задайте имя новому параметру – «RDGClientTransport». Дважды кликните по нему ЛКМ, чтобы открыть окно с его свойствами.
- В поле «Значение» введите «1», остальное оставьте без изменений и сохраните настройки.
Как только нужные изменения будут внесены, перезагрузите систему и проверьте, сработал ли способ, попытавшись подключиться к удаленному рабочему столу.
Наша группа в TelegramПолезные советы и помощь
Время на прочтение3 мин
Количество просмотров17K
В Windows 11 версии 24H2 возникла ошибка, из-за которой сеанс RDP зависает при входе в систему. Такое поведение наблюдается даже тогда, когда уже запущена служба RDP.

Сеанс RDP (протокола удаленного рабочего стола) позволяет управлять компьютером через удалённое подключение. Обычно опцию используют предприятия для управления установкой Windows на реальном ПК или виртуальной машине.
После обновления Windows 11 24H2 некоторые системы испытывают трудности с установкой RDP. Неясно, кроется ли причина в базовом выпуске Windows 11 24H2 или в двух последних обновлениях безопасности (KB5050094 и KB5051987), которые были выпущены для этой версии. Вероятно, сбой возник из-за того, как Win11 обрабатывает сеть.
При этом служба RDP запускается, если открыть Services (встроенный менеджер служб). Сбой может произойти, даже если брандмауэр настроен правильно, и Windows проходит тесты подключения, такие как ping в cmd.
«Проблема в том, что у меня два одинаковых ПК от одного производителя и одинаковых моделей, а также одно и то же обновление W11 Pro 24H2, которое я не могу заставить работать с RDP», — отметил один из пользователей в обсуждении на Reddit. Он обнаружил, что изменение порта RDP с порта по умолчанию на другой решило проблему.
Но этот обходной путь работает не для всех. Согласно отчётам Windows Latest, есть ещё одна ошибка, из-за которой сеанс RDP зависает при входе в систему. Это происходит во время процесса входа в систему. В некоторых случаях пользователи видят экран «Пожалуйста, подождите» или замороженную верхнюю панель.
Вероятно, эта ошибка в Windows 11 24H2 связана с тем, как операционная система обрабатывает «обнаружение сети».
«У нас есть несколько пользователей с такими же проблемами, они нормально подключаются, но если сеанс прерывается, они, похоже, не могут просто переподключиться. Единственное решение — надеяться, что пользователь войдёт на ПК со вторым сеансом, и это поможет запустить его, либо же нужно войти как администратор/другой пользователь, а затем повторить попытку», — отметил один из авторов жалоб.
Чтобы исправить зависание при повторном подключении к отключённым сеансам RDP, нужно внести изменения в редактор групповой политики. Для этого потребуется перейти в «Политика локального компьютера» > «Конфигурация компьютера» > «Административные шаблоны» > «Компоненты Windows» > «Службы удалённого рабочего стола» > «Узел сеансов удалённого рабочего стола» > «Подключения».

Затем нужно открыть «Выберите обнаружение сети на сервере» и установить для этой политики значение «Включено», а также выбрать «Отключить обнаружение времени подключения и непрерывное обнаружение сети». Для применения изменений групповой политики перезагрузка не требуется, но следует выполнить команду gpupdate /force.

Также проблему можно решить через реестр Windows для автоматизации процесса на всех устройствах.
# Define registry path

$RegPath = "HKLM:\SOFTWARE\Policies\Microsoft\Windows NT\Terminal Services"

# Ensure the registry path exists

if (!(Test-Path $RegPath)) {

New-Item -Path $RegPath -Force | Out-Null

}

# Set the registry values

Set-ItemProperty -Path $RegPath -Name "fServerNetworkDetect" -Type DWord -Value 1

Set-ItemProperty -Path $RegPath -Name "fTurnOffTimeDetect" -Type DWord -Value 1

Set-ItemProperty -Path $RegPath -Name "fTurnOffNetworkDetect" -Type DWord -Value 1

# Confirm changes

Write-Host "Network detection policies applied. A reboot may be required for changes to take effect.
Для этого нужно открыть «Блокнот», сохранить указанное выше содержимое с расширением .reg и запустить скрипт.
Download Windows Speedup Tool to fix errors and make PC run faster
Remote Desktop Connection is a built-in feature of the Windows operating system that allows a user to connect to a computer remotely. Some users complain that Remote Desktop is not working in Windows 11 when they want to connect to the computer error. In this article, we will discuss what to do if you get the said error on your Windows computer.

Before moving to the troubleshooting guide, you should know that Remote Desktop is not available on Windows 11 Home Edition. If you want to use Windows’s built-in Remote Desktop tool, you must have Windows 11 Pro or Enterprise edition. In case, you are on Windows 11 Home, you need to unblock it using RDP Wrapper Library.
Generally, the Remote Desktop won’t work when there is a connection error. There can be many reasons for the said error. Maybe you have not enabled RDP service, or your firewall or Antivirus is blocking the service. Some users also reported that they encountered this error after updating their system. If you are one of them, follow the suggestions mentioned below if the Remote Desktop is not working on your computer.
- Enable Remote Desktop
- Allow RDP through Windows Defender Firewall
- Edit Registry
- Disable UDP in Group Policy
Let’s try to resolve the issue using the prescribed steps.
1] Enable Remote Desktop
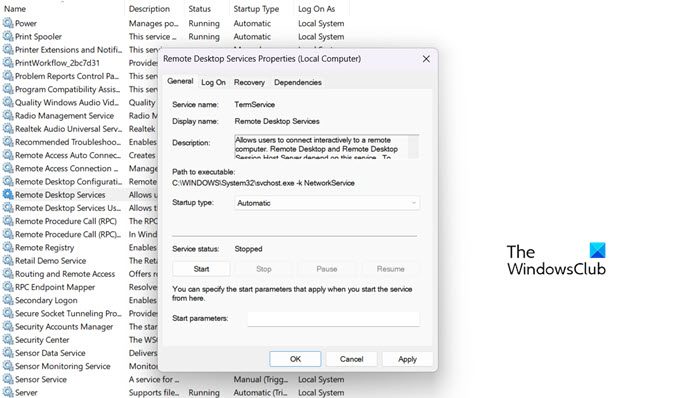
Users do not check whether Remote Desktop Service is enabled or not before connecting to the remote computer and encountering the issue in question. Therefore, we are going to enable the Remote Desktop Service to resolve the issue, and here’s how you can do the same:
- First, open Services by searching it out of the Start Menu.
- Double-click on Remote Desktop Service.
- Select Automatic from the drop-down menu.
- Click on Start.
- Now select Apply > Ok.
Hopefully, this issue will be solved after enabling the Remote Desktop Service. In case the issue persists, check if Remote Desktop is enabled in Settings or not. To do the same, open Settings, go to System > Remote Desktop, and then enable Remote Desktop.
Related: Remote Desktop can’t find the computer
2] Allow Remote Desktop through Windows Defender Firewall
Windows in-built Firewall is one of the reasons why you are facing the issue as the Remote Desktop connection is getting blocked by it. In such scenarios, you have to allow RDP through Windows Defender Firewall to resolve the issue. Follow the steps prescribed below to do the same.
- First, click the Search button and then type “Firewall & network protection” in the search bar and press enter.
- Click on Allow an app or feature through Windows Defender Firewall
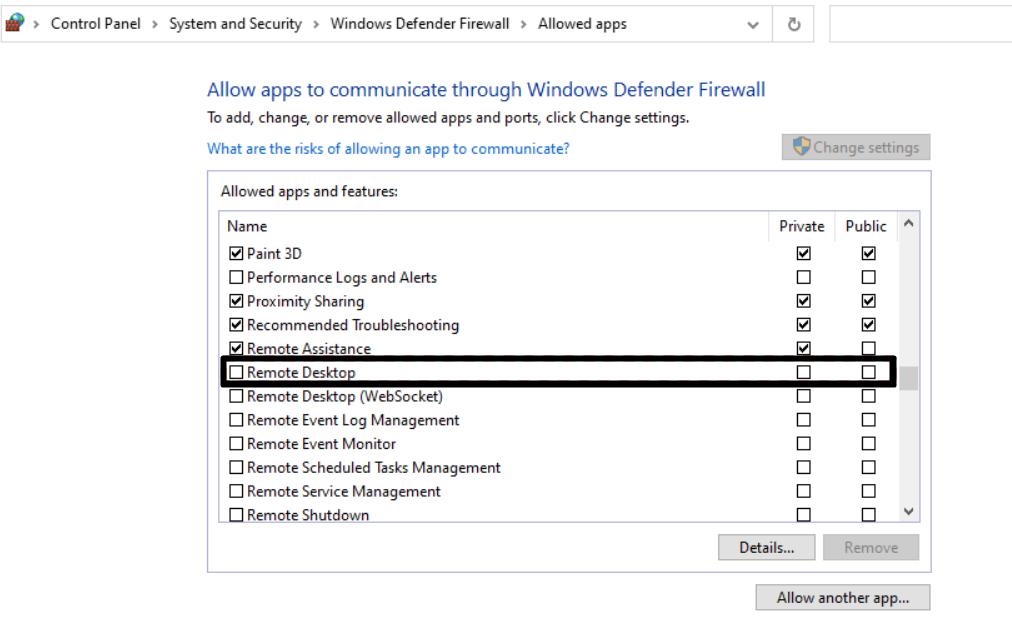
and then click on Change Setting. - Scroll down and select Remote Desktop and allow it through both Public and Private.
Hopefully, after allowing Remote Desktop through Windows Defender Firewall your issue will be resolved. In case you use a third-party antivirus, make sure to add an exception.
Related:
- Remote Desktop stuck on Please wait
- Remote desktop can’t connect to the remote computer.
3] Edit Registry
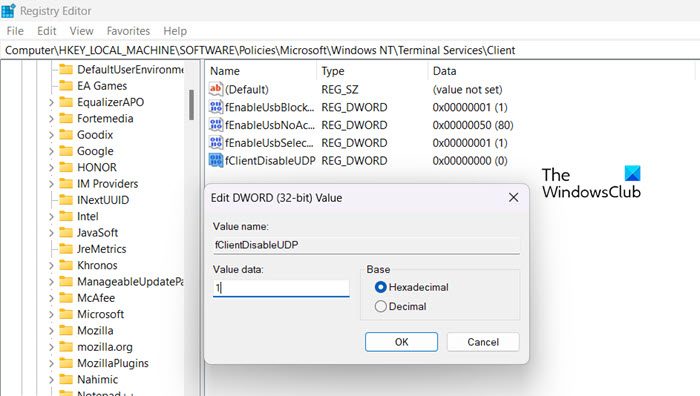
Some users say that the Remote Connection is not working after installing the 22H2 update. This could happen because there is a bug in the Remote Desktop client and it is only trying to use the UDP connection, not TCP. The solution to this issue is to disable UDP by creating a new registry value set to 1.
- Press Windows + R key to open the run dialog box, type Regedit, and press Enter. Locate this path below in the left pane:
Computer\HKEY_LOCAL_MACHINE\SOFTWARE\Policies\Microsoft\Windows NT\Terminal Services\Client
- Right-click on the Client folder and select New > DWORD(32-bit ) Value.
- Name it fClientDisableUDP.
- Now, double-click on fClientDisableUDP, set its value to 1 and click on the OK button.
Hopefully, your issue will be resolved after using methods.
Troubleshoot: Remote Desktop connection issues on Windows.
4] Disable UDP in Group Policy
In case you find the Registry Editor process a little difficult, and you have a Windows Pro version, another way to disable UDP that you can try is from the Group Policy Editor. To resolve this issue use the prescribed methods.
- Press Windows + R key to open the run dialog box.
- type gpedit.msc and press enter.
- Go to the below path:
Computer Configuration > Administration Templates > Windows Components > Remote Desktop Services > Remote Desktop Connection Client
- Double-click on Turn off UDP on Client in the right pane.
- Now click on Enable radio button and click ok
Hopefully, you are able to resolve the issue using the solutions mentioned in this post.
Read: Best free Remote Desktop software for Windows.
Yusuf is an Engineering graduate from Delhi. He has written over 1000 technical articles and has knowledge of programming languages including Java, and C++, and technologies such as Oracle 12C and MsSQL. Troubleshooting Windows is his favorite past-time.
Remote Desktop is a great feature in Windows 11 that lets us connect our PC to someone else’s PC, of course, with their permission, and access the content on it. It saves a lot of time and effort since we don’t have to be physically present at their place to access someone else’s Windows 11 PC. However, for some users, it’s currently not working properly.
If you’re also experiencing similar issues with Remote Desktop on your PC, try all the fixes we’ll share in this troubleshooting guide. So read ahead and quickly fix Remote Desktop not working on your Windows 11 PC and make the Remote Desktop quickly work.
Why Is Remote Desktop Not Working in Windows 11?
Various reasons could cause Remote Desktop not working in Windows 11. In this section, we’ll list out all the common reasons for this issue. So check all the possible reasons below:
- Remote Desktop Isn’t Enabled
- RDP Isn’t Allowed Through Defender Firewall
- Issues With the Remote Desktop Services
- Network Discovery Is Disabled
- Antimalware Software
- Conflicting Windows Update
- Missing Values in Registry Editor
- Enabled UDP
- Remote Desktop Port Forwarding
- Temporary Issues
- Outdated Windows 11
Fix Remote Desktop Not Working in Windows 11
There are several fixes to fix Remote Desktop not working in Windows 11. Here in this section, we’ll share all the potential solutions in detail. So read ahead, try all the mentioned fixes, and check what resolves this common issue on your Windows 11 PC or laptop:
1. Ensure the Remote Desktop Function Is Enabled
It may be possible that the Remote Desktop functionality isn’t enabled on your PC, which is why the Remote Desktop not working issue is appearing on it. Therefore, we suggest you ensure it’s enabled on your PC. So, follow the below steps to easily make sure the same:
1. Using Windows + I, open the Settings app on your computer and click System on the left.
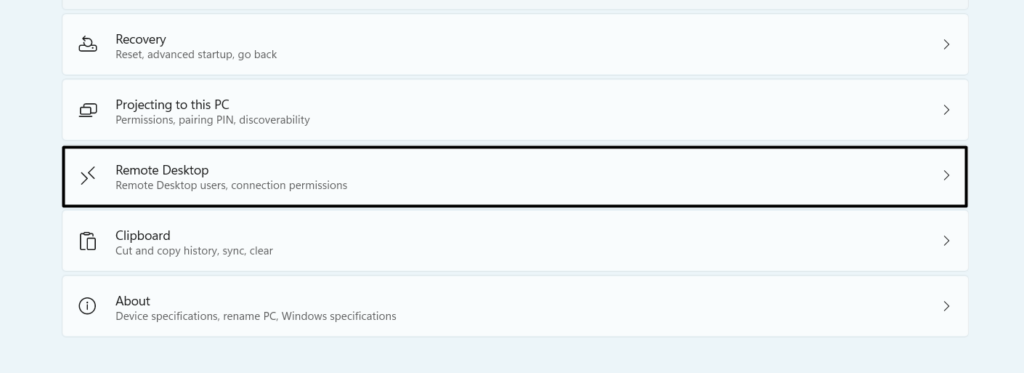
2. On the right, choose the Remote Desktop option to access the remote desktop options.
3. On the next screen, toggle on Remote Desktop to turn on the Remote Desktop option.
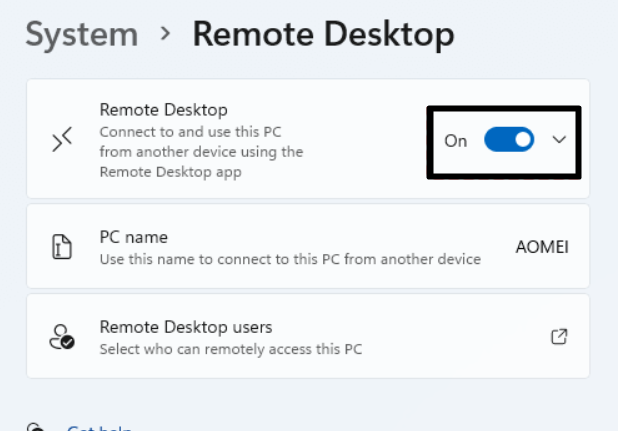
Note: To enable the Remote Desktop feature on your PC, you must have a Windows 11 Pro edition.
2. Allow RDP through Windows Defender Firewall
Your computer’s Windows Defender Firewall may be stopping the Remote Desktop function from working properly for some privacy reasons. As a result, this issue is occurring. Considering this, we suggest you allow RDP through Windows Defender Firewall in the Control Panel. You can do so by following the below prompts on your PC:
1. To permit RDP through Windows Defender Firewall, open the Windows Security app on the PC.
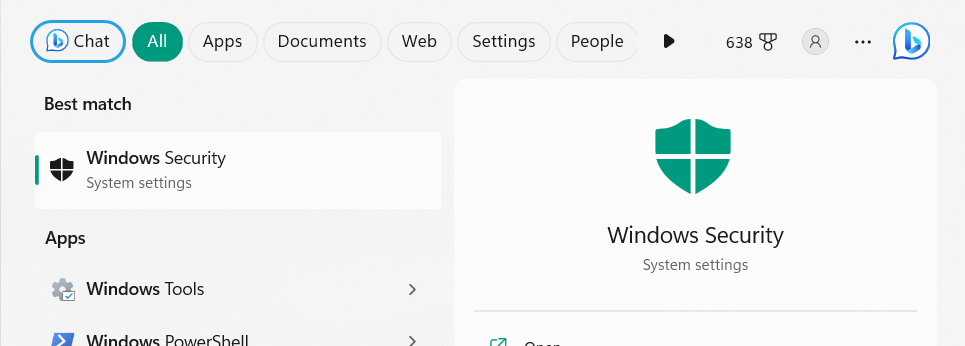
2. In the next window, choose Firewall & network protection and click Allow an app through firewall.

3. In the Control Panel window, look for Remote Desktop in the box and make sure it’s checked. If it isn’t checked, click on the Change settings button at the top and check them.
3. Check That Remote Desktop Services Are Enabled
To let the Remote Desktop function work properly on your computer, make sure that the “Remote Desktop Services” service is operating properly. So, ensure the same on your PC. You can do the same with ease by following the below-mentioned steps on your PC or laptop:
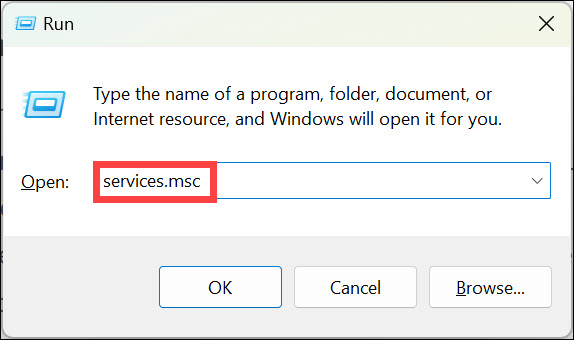
1. Open the Run program on your PC, type services.msc in its search box, and hit the Enter key.
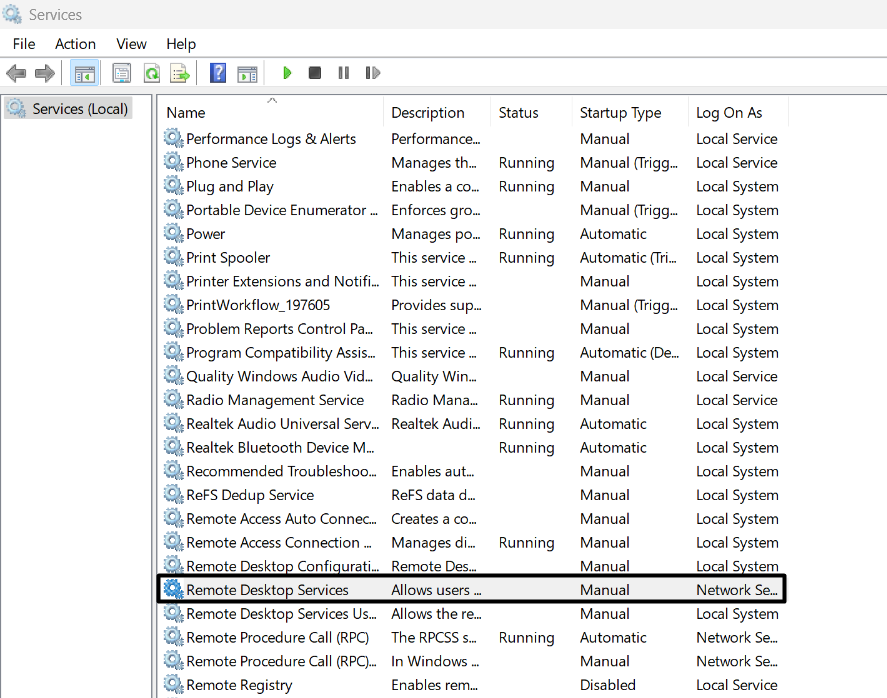
2. In the Services window, find the “Remote Desktop Services” service, and double-click it to open its properties.
3. In the next window, click Start to start the “Remote Desktop Services” service on the device. If it’s already enabled, stop it, and restart it to refresh it and fix temporary issues with it.
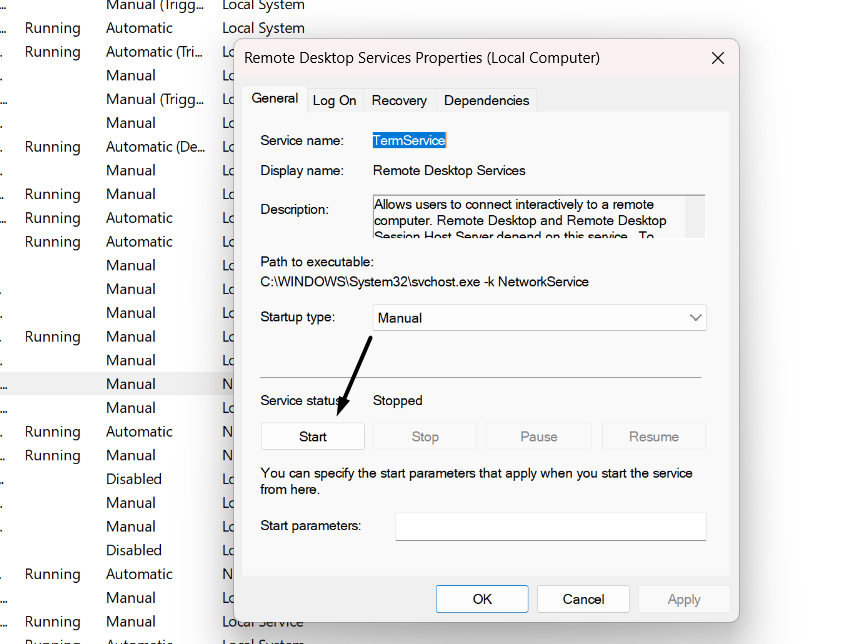
4. Click the OK button to save the change and close the window to check the issue’s status.
4. Check the Startup type in Remote Desktop Services
It could be possible that the “Remote Desktop Services” service that helps the Remote Desktop function properly isn’t automatically starting at the PC’s boot. Hence, Remote Desktop isn’t working well. Thus, we suggest you check the startup settings of the above service in the Services app. To check the same, follow the below-mentioned steps:
1. Open the Run utility on your PC, type services.msc in its search box, and hit the Enter key.

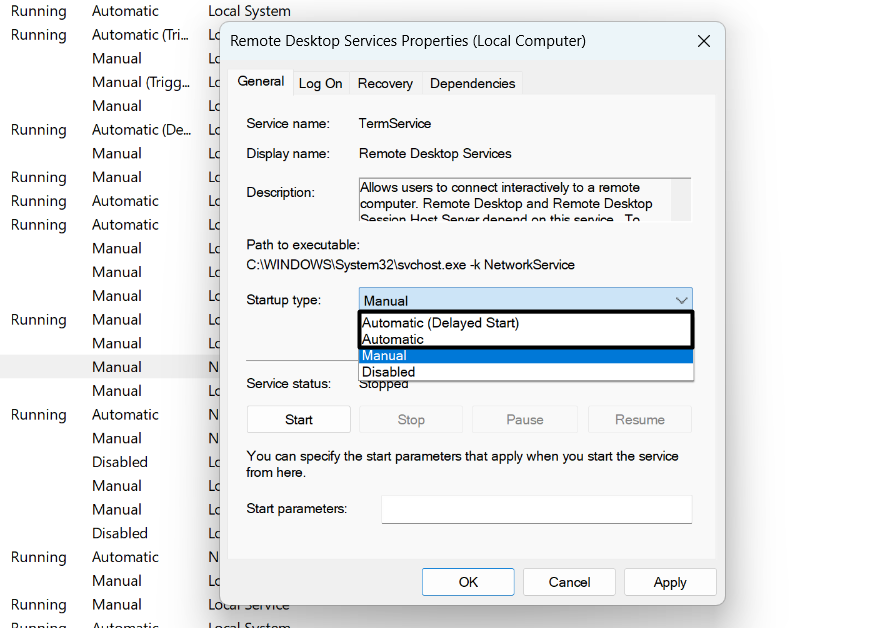
2. In the Services window, search for Remote Desktop Services and check if the Startup Type is set to Automatic. If it isn’t, right-click it, and select Properties from the menu.
3. In the next window, set Startup type: to Automatic, and click the Apply button to apply the change.
4. After making the above change, close the window, and restart your PC to get rid of this issue.
5. Enable the Network Discovery Option
To let the Remote Desktop function work on your PC, the Network Discovery option must be enabled on it. This is because this option helps the other PCs discover your PC to connect to. Follow the prompts to learn how to turn on Network Discovery in Windows 11:
1. To enable the Network Discovery option, open the Control Panel app using any way you want.
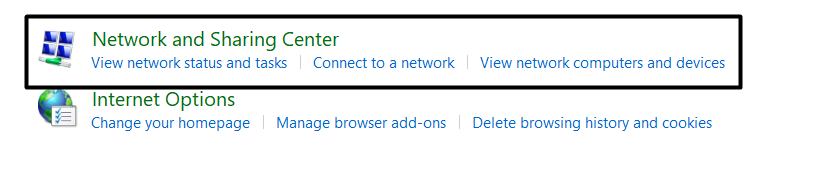
2. Choose Network and Internet, and on the next screen, select Network and Sharing Centre.
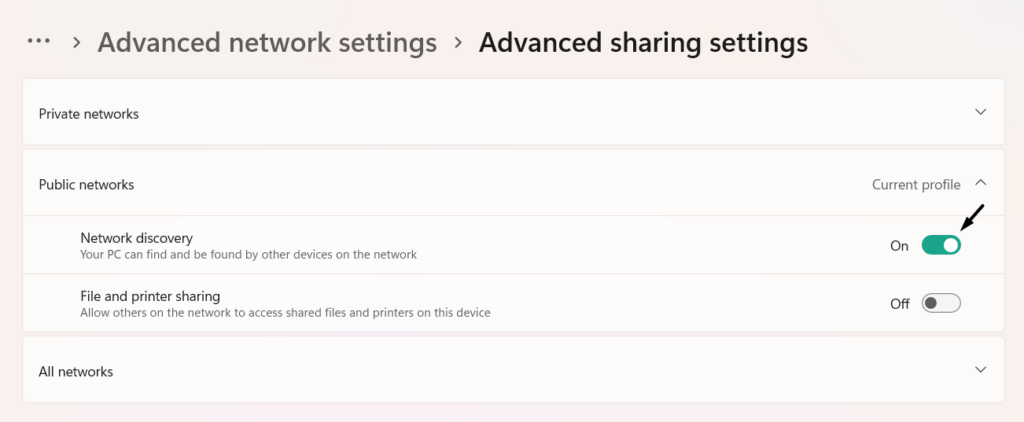
3. On the next screen, click Change advanced sharing settings on the left to move ahead.
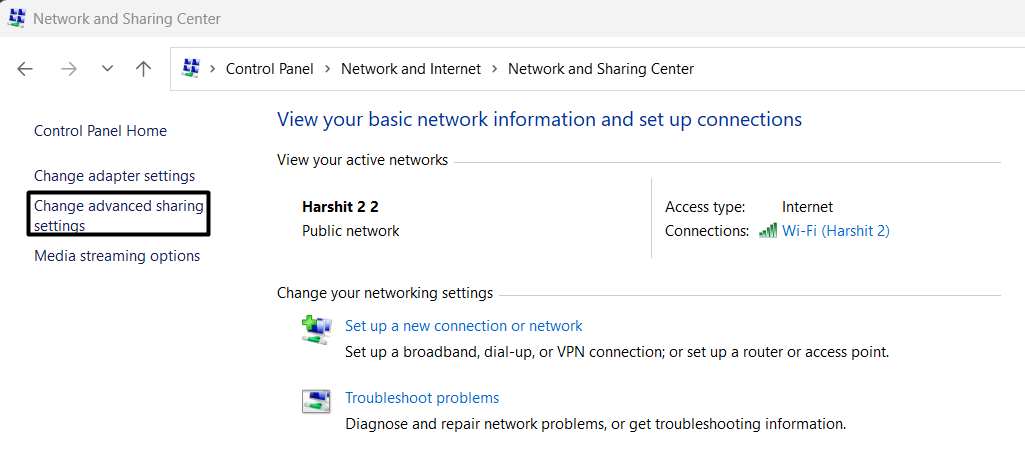
4. Next to Network discovery under Public networks, turn on the toggle and exit the window.
5. After executing the above steps, check if the Remote Desktop option is now working properly.
6. Add the Host PC’s IP Address
Some users in the online forums mentioned that they fixed the Remote Desktop not working issue on their Windows 11 PC by adding the host PC’s IP address in the Hosts file. So, do the same to fix it on your PC. We’ve mentioned the steps to do the same below:
1. Open the File Explorer app on your computer, and once opened, go to the below location:
C:/Windows/System32/Drivers/etc
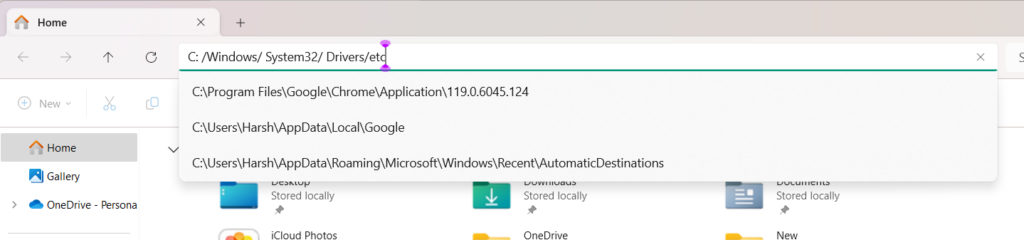
2. Find the hosts file, right-click it, and select Open with > Notepad from the context menu.
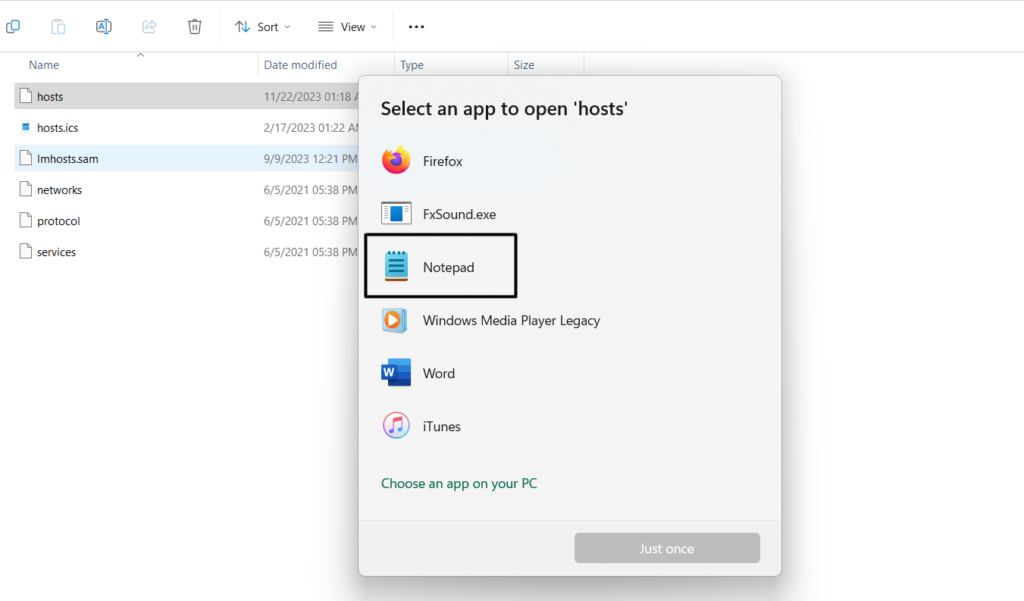
3. In the Notepad window, type the IP address of the host PC and press Windows + S to save it.
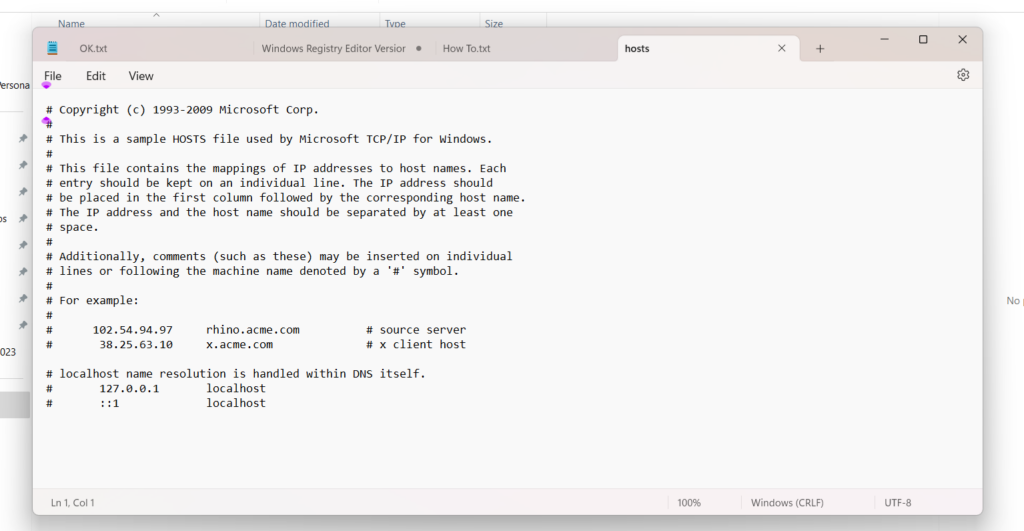
4. After entering the host’s IP address, reboot the PC, and confirm the problem’s status on it.
7. Disable Antimalware Software
A Microsoft community user recommended users disable any antimalware software on the PC, as it could be the one causing this issue. So if you also have an antimalware app on your Windows 11 PC, consider disabling or uninstalling it for a while. Once done, check whether the Remote Desktop not working issue is fixed on your Windows 11 PC or laptop.
8. Make the Following Change In the Registry Editor
During the research, we found that making changes to the Remote Desktop associated values and keys in the Registry Editor could also make this function work again. So, we suggest you follow the below steps and make the following edits in your PC’s Registry Editor:
1. Launch the Registry Editor app on your computer and go to the following path using the search:
Computer\HKEY_LOCAL_MACHINE\SOFTWARE\Policies\Microsoft\Windows NT\Terminal Services\Client
2. Look for fClientDisableUDP on the right, and then double-click it to open its properties.
Note: In our case, there’s no value like this. If that’s the same with you, create a new value on the PC.
3. Type 1 in the Value data: text field, and then choose the OK button to save the change.
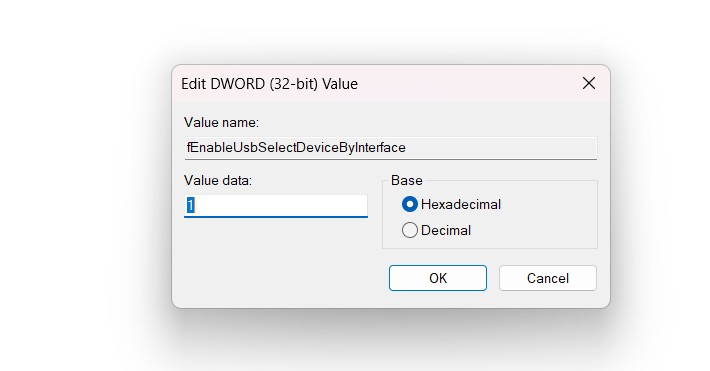
4. Close the window, and reboot the PC to check if it resolved Remote Desktop not working.
9. Turn Off the UDP Option in Group Policy
One way to fix issues with Remote Desktop in Windows 11 is to turn off UDP or User Datagram Protocol (UDP) in the Group Policy Editor. If your Windows 11 version has the Group Policy Editor, try the same. You can check the below steps to know how to do so:
1. Open the Run box, type gpedit.msc in it, and press the Enter key to open the Group Policy Editor.
2. In the Group Policy Editor, go to the below location and choose Turn Off UDP On Client on the right.
Computer Configuration > Administration Templates > Windows Components > Remote Desktop Services > Remote Desktop Connection Client
3. In the Turn Off UDP On Client window, choose Enabled and click OK to make the change.
4. After making the above-mentioned changes, close the program and confirm the issue’s status on your PC.
10. Check Remote Assistance Is Enabled in System Properties
Besides the Network Discovery option, you also need to make sure the Remote Assistance is enabled on the PC. This is because it plays an essential role in the working of Remote Desktop. Follow the below-mentioned steps to check the same on your PC:
1. Open the Control Panel app on your device and set the View: dropdown to Category.
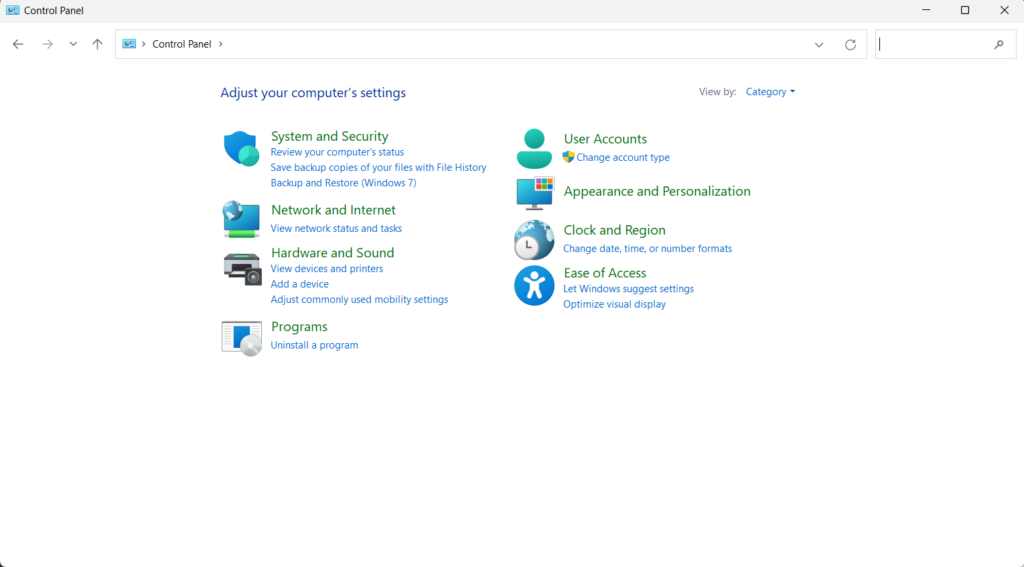
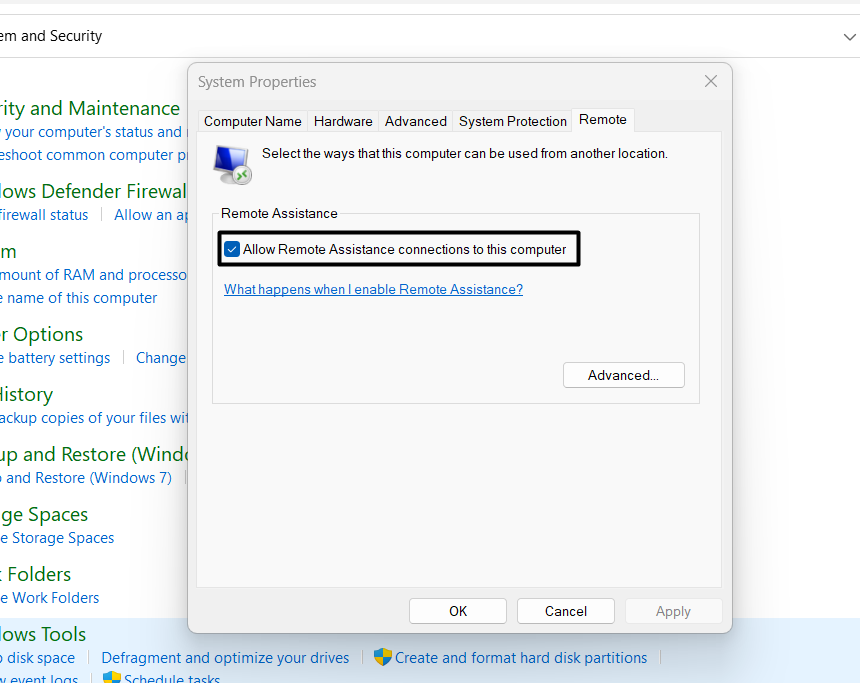
2. Choose the Allow remote access option under System and tick the below option on the screen:
Allow Remote Assistance Connections to this Computer
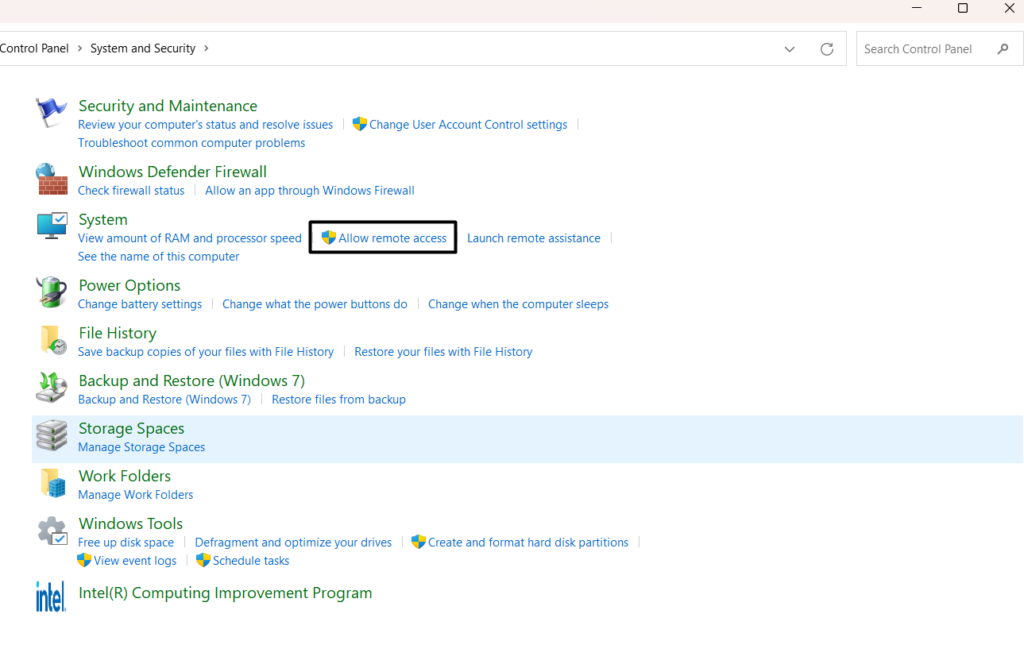
3. Lastly, choose the Apply button and then OK to apply the above change and close the window.
11. Verify Remote Desktop Port Forwarding
Some users in the online forums suggested users verify the Remote Desktop port forwarding. Considering this, you also need to forward the TCP port – 3389, which is the default Remote Desktop port to the internal IP address of your remote Windows 11 PC. So cross-check the same and check whether it’s causing the issue on your PC or laptop.
12. Uninstall the Recent Windows Update
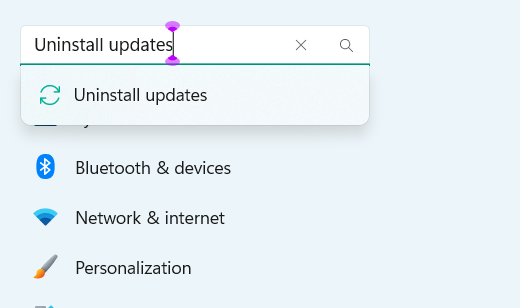
For some users, this problem started appearing after installing a Windows update. If that’s the same with you, find the conflicting update, and then uninstall it. It’s very easy to uninstall conflicting updates in Windows 11, and the below-mentioned steps explain the same:
1. Open the Windows Search Box, type Uninstall updates in it, and select it from the search results.
2. In the Uninstall updates window, locate the conflicting update, and choose Uninstall next to it.
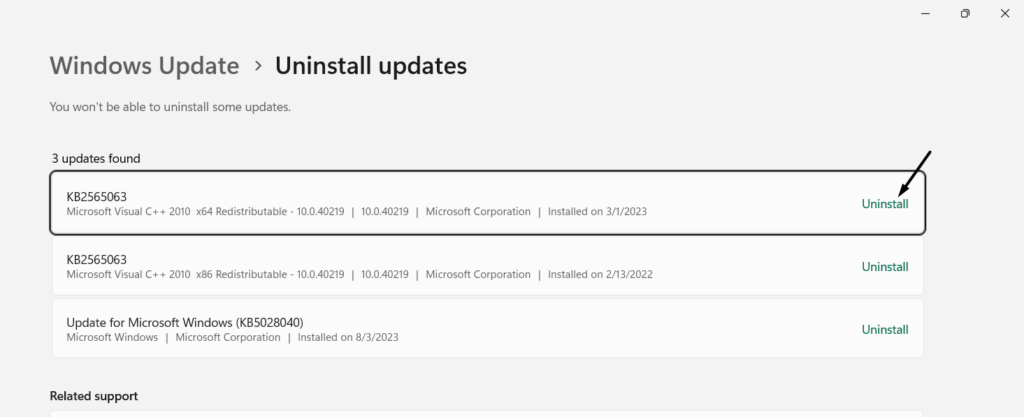
3. Again click the Uninstall button in the new prompt to remove it from your Windows 11 PC.
13. Use a Third-party Remote Desktop App
If none of the above-mentioned workarounds help you resolve the Remote Desktop not working in Windows 11, we suggest you use a third-party remote desktop app until the issues with the integrated Remote Desktop functionality get fixed on your Windows 11 PC.
FAQs
Why Remote Desktop Is Not Connecting in Windows 11?
There could be several reasons for the non-functioning of Remote Desktop in Windows 11, like outdated Windows 11 OS, conflicting updates, disabled Network Discovery, bugs, etc.
How Can I Enable Remote Desktop in Windows 11?
You can enable Remote Desktop on your Windows 11 PC from the Remote Desktop area of the Settings app.
How Do I Reinstall Remote Desktop on Windows 11?
To reinstall Remote Desktop on your computer, go to the Apps section in the Settings app, search for the functionality, and then simply uninstall it by selecting Uninstall from its menu.
Why My Remote Desktop Is Not Working?
It may be possible that your PC’s current Windows OS has some bugs, which is why Remote Desktop isn’t working. Another reason could be antimalware software installed on the PC.
How to Enable Remote Desktop in Windows 11 Using CMD?
To enable the Remote Desktop option on your Windows PC using CMD, run the listed commands in it:
reg add "HKEY_LOCAL_MACHINE\SYSTEM\CurrentControlSet\Control\Terminal Server" /v fDenyTSConnections /t REG_DWORD /d 0 /fnetsh advfirewall firewall set rule group="remote desktop" new enable=YesFinal Words
Remote Desktop is a great feature that improves experience with Windows 11. But for some users, it’s currently not working properly. According to them, they aren’t able to discover other computers on their PC to connect to them.
In case that was the same with you, we hope the fixes we shared in this Remote Desktop not working in Windows 11 in-depth fixes guide help you fix it. If yes, then do let us know which fix helped you resolve it.