
You should upgrade or use an alternative browser.
[Guide] Fix for device not working in fastboot / unable to install official driver in Windows 10 / 11
-
Thread starterVarunAgw
-
Start date
-
#1
1. Download the attachment «Generic Driver.zip» and extract it
2. Click on «Update Driver» in the dialog in the screenshot.
3. Browse my computer for drivers
4. Let me pick from the list of available drivers
5. Show all devices
6. Have Disk
7. Point it to the extracted folder and click OK.
8. You will see 3 new items in the box now Choose «Android bootloader interface» in the list and click next
9. It will show you a warning. Ignore it and press Yes
That’s all! Enjoy

Attachments
-
#2
-
#3
I am facing the same issue, after updating to windows 11 my one plus 7T driver stopped working…i tried all the possible solutions I the forums, from updating driver of Generic driver, Qualcomm drivers, and USB driver…nothing has worked…in fact I saw many members posting to update the android driver in device manager in the other devices tab which solves the issue…many have an android option but on my device there isn’t any android option..i don’t know what to do..I’m very frustrated and tensed as to what needs to be done…please if any on can help me personally it wud be really great.
Attachments
-
WhatsApp Image 2022-07-11 at 10.35.04 PM.jpeg
-
#4
Hi,
I am facing the same issue, after updating to windows 11 my one plus 7T driver stopped working…i tried all the possible solutions I the forums, from updating driver of Generic driver, Qualcomm drivers, and USB driver…nothing has worked…in fact I saw many members posting to update the android driver in device manager in the other devices tab which solves the issue…many have an android option but on my device there isn’t any android option..i don’t know what to do..I’m very frustrated and tensed as to what needs to be done…please if any on can help me personally it wud be really great.
-
#5
Attachments
-
#6
I am using Samsung Galaxy Tab A7 Lite and the ADB drivers came from Samsung and adb was working.
However, once I put the tablet in fastboot mode the USB re-enumerated and Samsung drivers didn’t cut it!
Inspecting DeviceManager gave me the USB\VID_18D1&PID_4EE0 and Google search shows this is actually a Google VID. The rest is history: Downloaded (signed!) driver from Google (specifically this) and voila — life is good!
I hope this may help others avoiding wizardry with unsigned drivers.
-
#7
I can’t get the phone to be detected while it is bootloader mode to my PC. I always updated and rooted my phone without any issue but with f.15 I can’t.
All drivers are fine because I’ve rooted f.13 like one month ago so i really don’t know what to do.
I remember once I had to install «Android Bootloader Interface» but now when I’m in bootloader mode my PC doesn’t see the phone. No «unknown android» under window devices manager, nothing.
When the phone is ON I see «ADB Interface» in devices manager, when it’s OFF nothing shows up in the list like the PC doesn’t see I’ve plugged my phone.
What am I missing?
Thx in advance
-
#8
I didn’t think I’d get to ask something like this but here I am:
I can’t get the phone to be detected while it is bootloader mode to my PC. I always updated and rooted my phone without any issue but with f.15 I can’t.
All drivers are fine because I’ve rooted f.13 like one month ago so i really don’t know what to do.
I remember once I had to install «Android Bootloader Interface» but now when I’m in bootloader mode my PC doesn’t see the phone. No «unknown android» under window devices manager, nothing.
When the phone is ON I see «ADB Interface» in devices manager, when it’s OFF nothing shows up in the list like the PC doesn’t see I’ve plugged my phone.
What am I missing?
Thx in advance
Not sure if this will help but I would run «usbview» to see what is enumerated. Since the tree is very bid these days with many hubs and USB devices already connected you might first plug-in anything known to the same USB port to see where on the tree it sits. Then plug-in the phone and look at the same spot («bark at the same tree»  )
)
If you nave a NIX system «lsusb» will do you similar service. Both are driver independent. Then (if the phone is recognized) get the VID and PID and google what got enumerated and you may end-up with the right driver.
In the case nothing is detected at this low level the only explanation I would have is that the boot doesn’t initialize the USB interface on the phone. That would be weird and nasty.
-
#9
While trying to install drivers using have disk I encounter a problem. After navigating to the android-usb.inf file I press ok and it rolls back to asking me where is the disk. I tried disabling driver enforcement but to didn’t work. It’s like windows doesn’t want to work. I am using a win 11 copy via parallels on an M1 Mac.
-
#10
-
#11
Thanks so much for this. Much appreciated.
This fixes the problem in adb where fastboot were not recognizing the device with fastboot commands.
-
#12
-
#13
-
#14
Hey
While trying to install drivers using have disk I encounter a problem. After navigating to the android-usb.inf file I press ok and it rolls back to asking me where is the disk. I tried disabling driver enforcement but to didn’t work. It’s like windows doesn’t want to work. I am using a win 11 copy via parallels on an M1 Mac.
same here
-
#15
I think I got it working by making a folder called Desktop in users. This folder is usually present but is absent because of onedrive.
Similar threads
How to Install ADB Drivers on Windows 10
Installing ADB (Android Debug Bridge) drivers on Windows 10 is quite simple if you follow the right steps. You’ll need these drivers to connect your Android device to your computer for tasks like debugging apps or transferring data. Here’s how you can do it: Download the required driver package, extract it, and use Device Manager to install it on your system. Now, let’s dive into the detailed steps.
In this guide, we will walk you through the steps required to successfully install ADB drivers on your Windows 10 computer. This will allow you to establish a connection between your Android device and your PC, enabling advanced features like app debugging and data management.
Step 1: Download the ADB Driver Package
First, go to the official Android developer’s website or another trusted source to download the ADB driver package.
Downloading the package from a trusted source ensures you get the latest and most secure version. Typically, the file will be in a zip format.
Step 2: Extract the Downloaded File
After downloading, extract the contents of the zip file to a location on your computer.
Use a tool like WinRAR or the built-in Windows extraction feature. Make sure you remember the folder where you extracted the files.
Step 3: Open Device Manager
Press «Windows + X» and select «Device Manager» from the menu that appears.
Device Manager is a utility in Windows that allows you to manage installed hardware. You’ll use it to install the ADB drivers.
Step 4: Connect Your Android Device
Connect your Android device to your computer using a USB cable.
Ensure your device is in «Developer Mode» and has «USB Debugging» enabled. You can enable these settings by going to Settings > About Phone and tapping «Build Number» seven times to unlock Developer Options.
Step 5: Locate Your Device in Device Manager
In Device Manager, find your Android device (it might be listed under «Other Devices» or «Portable Devices»).
If you can’t find it easily, look for any device with a yellow exclamation mark next to it. This indicates that the driver is not installed properly.
Step 6: Update Driver Software
Right-click on your device and select «Update Driver Software.»
This option allows you to manually install the driver you downloaded earlier.
Step 7: Choose «Browse my computer for driver software»
Select «Browse my computer for driver software» from the options that appear.
You will be prompted to navigate to the folder where you extracted the ADB driver files.
Step 8: Select the Folder and Install
Navigate to the folder where you extracted the driver files, then click «Next» to install.
Windows will now install the ADB drivers. This may take a few moments, so be patient.
Step 9: Verify the Installation
Open Command Prompt and type adb devices to verify the installation.
If everything is installed correctly, you should see your device listed.
After you complete these steps, your computer will be set up to communicate with your Android device via ADB. This enables you to debug apps, transfer files, and perform other advanced functions.
Tips for Installing ADB Drivers on Windows 10
- Always download drivers from a trusted source to avoid malware.
- Enable «Developer Options» and «USB Debugging» on your Android device before starting the installation.
- If your device isn’t recognized, try using a different USB cable or port.
- Restart both your computer and Android device if the installation fails.
- Keep your ADB drivers updated to ensure compatibility and security.
Frequently Asked Questions
What is ADB?
ADB stands for Android Debug Bridge. It’s a command-line tool that allows you to communicate with an Android device.
Why do I need to install ADB drivers?
You need ADB drivers to connect your Android device to your computer for debugging, development, or file transfer.
What should I do if my device isn’t recognized?
If your device isn’t recognized, try using a different USB cable or port, and ensure «USB Debugging» is enabled.
Can I use ADB on other operating systems?
Yes, ADB is available for macOS and Linux as well. The installation process, however, will be different.
Is it safe to install ADB drivers?
Yes, it is safe as long as you download the drivers from trusted sources like the official Android developer’s website.
Summary
- Download the ADB driver package.
- Extract the downloaded file.
- Open Device Manager.
- Connect your Android device.
- Locate your device in Device Manager.
- Update Driver Software.
- Choose «Browse my computer for driver software.»
- Select the folder and install.
- Verify the installation.
Conclusion
Installing ADB drivers on Windows 10 is a straightforward process once you know the steps. These drivers are crucial for developers and advanced users who want to interact deeply with their Android devices. By following this guide, you ensure that you can carry out tasks ranging from debugging apps to transferring data seamlessly.
Remember, always download drivers from trusted sources to avoid running into issues. If something goes wrong, don’t hesitate to revisit each step carefully or consult additional resources. Now that you’re equipped with this knowledge, you’re ready to take full control of your Android device using ADB.
If you found this guide helpful, why not explore more about the Android development tools? Happy tinkering!
Matt Jacobs has been working as an IT consultant for small businesses since receiving his Master’s degree in 2003. While he still does some consulting work, his primary focus now is on creating technology support content for SupportYourTech.com.
His work can be found on many websites and focuses on topics such as Microsoft Office, Apple devices, Android devices, Photoshop, and more.
Install Android USB Driver, ADB, and Fastboot on Windows 10/11 (2025) – Step-by-step instructions to install the Android USB driver and set up ADB/Fastboot using winget on Windows 10/11. Perfect for Android development and troubleshooting.
Credit: ph33nx
Manual Installation Guide for Android USB Driver & ADB/Fastboot (Windows 10/11)
This guide provides simple, direct steps to manually install the Google USB Driver and ADB/Fastboot binaries using winget on Windows 10/11.
1. Install the Google USB Driver Manually
-
Download the Driver
- Download the Google USB Driver and extract the ZIP to a folder (e.g.,
C:\usb_driver).
- Download the Google USB Driver and extract the ZIP to a folder (e.g.,
-
Update Driver in Device Manager
- Open Device Manager.
- Locate your Android device (often listed under «Unknown Devices»).
- Right-click the device and select Update driver.
- Choose Browse my computer for driver software.
- Click Let me pick from a list of available drivers on my computer.
- Click Have Disk… and navigate to the folder where you extracted the driver.
- Select
android_winusb.infand follow the prompts (ignore any unsigned driver warnings if necessary).
2. Install ADB and Fastboot Binaries via Winget
-
Open Command Prompt or PowerShell
- Execute the following command to install the binaries:
winget install Google.PlatformTools
- Execute the following command to install the binaries:
-
Verify Installation
- Check ADB version:
- Check Fastboot version:
You’re all set!
Keywords: Windows 10, Windows 11, Android, ADB, Fastboot, Google USB Driver, Platform Tools, winget, device driver, manual installation
Table of contents
- How to Install Android Debug Bridge for Windows 10?
- Step 1: Check if you already have the ADB driver installed on your PC
- Step 2: Get the ADB driver file
- Step 3: Activate USB debugging on your Android device
- Step 4: Open Device Manager and install the ADB driver
- Pro Tip: Update your Drivers for Better Performance
- Downloading and Installing ADB in Windows 11
- Conclusion
Those who are familiar with the Android Debug Bridge (ADB) already know the benefits it can give.
The feature allows them to side-load apps that they cannot acquire from the Google Play Store.
For instance, they can use the ADB to record their phone’s screen via their computer. Basically, the ADB is a command line tool that allows users to control their Android device on their Windows PC using a USB cable.
If you’re still wondering about this feature and how you can add it to your PC, you’ve come to the right place! In this article, we will teach you how to install Android Debug Bridge for Windows 10.
Read the article to get bonus tips to enhance your user experience!
How to Install Android Debug Bridge for Windows 10?
In general, you must go through the following steps to install the ADB on your computer:
- Check if you already have the ADB driver installed on your PC.
- Get the ADB driver file.
- Activate USB Debugging on your Android device.
- Open Device Manager and install the ADB driver.
You will see the detailed instructions below. Make sure you follow them carefully to be able to set up the ADB correctly.
Step 1: Check if you already have the ADB driver installed on your PC
The first thing you have to do is check if your computer already has the ADB driver installed. Simply perform a test via Chrome to see if your PC can recognize your Android device and communicate with it. To do that, follow the steps below:
- Use a USB cable to connect your Android device to your computer.
- Open Google Chrome.
- Inside the URL bar, type chrome://inspect, then press Enter.
If the test fails, you do not have the ADB driver installed on your PC yet. On the other hand, if you see the name of your Android device, then it means that you already have the ADB driver on your computer.
Step 2: Get the ADB driver file
Of course, before you can add the ADB driver to your PC, you have to get the installation file first.
Typically, your Android device’s manufacturer provides the ADB driver file. Download the installation file from the official website.
Step 3: Activate USB debugging on your Android device
Once you’ve downloaded the ADB driver file, you must enable the USB Debugging function on your Android device. You can only enjoy the full potential of the ADB when the USB debugging function is activated.
Here are the steps:
Note
By default, the USB Debugging option is hidden for Android 4.2 and newer versions.
- Open Settings on your Android device.
- Scroll down, then tap About Phone or About.
- Enable the Developer options by tapping the Build number seven times.
- Remember to set the toggle at the top to On.
- Enable USB Debugging.
- Plug your Android device into your computer. On your Android device, you will see a message saying, Allow USB Debugging? Select the box beside the Always allow from this computer option, then tap OK.
Step 4: Open Device Manager and install the ADB driver
You can open Device Manager to install the ADB driver. In this article, we are going to use Google Nexus 7 because the steps are quite similar for all other Android devices. Once you’re ready, just follow the instructions below:
- Plug your Android device into your computer.
- Open the Run dialog box by pressing
Windows Key + Ron your keyboard. - Type
devmgmt.msc, then hit Enter. This should bring up Device Manager. - Look for your Android device.
- Right-click it, then select Properties from the options. If the driver is not installed properly, you will see a yellow warning icon beside your Android device.
- Go to the Driver tab, then click Update Driver.
- A new window will pop up. Select the Browse my computer for driver software option.
- Search for the ADB driver file you previously downloaded by clicking Browse.
- Select the box beside Include Subfolders, then click Next. Device Manager will automatically install the ADB driver.
If you do not need this feature, you might ask, “Where can I uninstall the ADB driver?” You can do that via Device Manager. You just need to follow the first four steps, then select Uninstall Device.
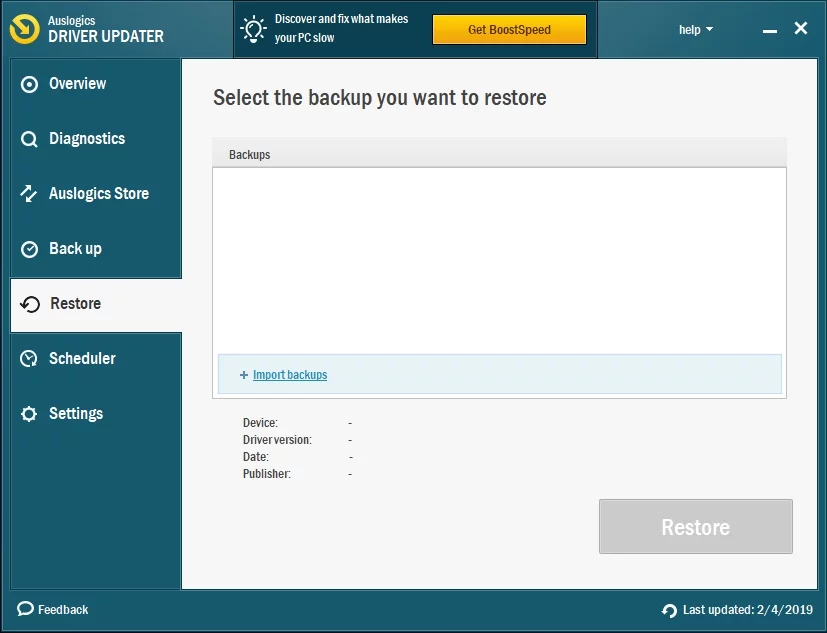
Fix this issue quickly
You can try using a safe and totally free tool developed by the Auslogics team of experts.
A few simple steps to troubleshoot the issue:
Download the tiny Auslogics TroubleShooter tool.
Run the application (no installation is needed).
The app will check for the issue mentioned in the article. When the scan is done, check that this is the issue you were looking to solve and click ‘Apply now’ to apply the recommended fix.
You can use the app to troubleshoot other malfunctions for free by simply typing in a brief description of the issue your PC is experiencing. Or you can scan your PC for performance issues using the My Scanner tab.
Pro Tip: Update your Drivers for Better Performance
We suggest updating all your drivers to ensure that you can use the ADB without any hassle.
You can manually do this, but the process can be tedious and time-consuming. Moreover, it can be risky. If you download and install the wrong driver, you might cause system instability issues on your PC.
So, if you do not have the patience and tech skills to update your drivers manually, we recommend using Auslogics Driver Updater.
Once you activate this program, it will automatically identify your system version. That said, Auslogics Driver Updater will locate the latest manufacturer-recommended drivers compatible with your system.
Downloading and Installing ADB in Windows 11
If you know what you are doing, you can easily download and install ADB in Windows 11. To do so, you have to access the Android Studio developer site to download the required file, after which you can add the driver to your machine.
Here are simple steps to follow to help download the driver on your Windows 11 machine:
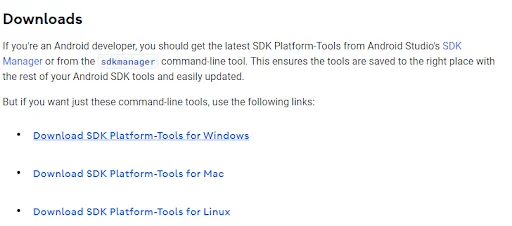
- Visit the Android Studio site on your computer.
- Next, scroll down the page to find the download options. Then click the “Download SDK Platform-Tools for Windows” option to download the Android Debug Bridge driver on your PC.
- Accept the terms and conditions.
- Next, click the Download button, then wait for the download process to finish.
- Copy the downloaded file and paste it into the C drive.
- After extracting the copied file, right-click the newly extracted folder and choose Open in Terminal.
- Launch Windows PowerShell and execute the following commands one by one:
cmd
ADB devices
- Allow for debugging when the USB debugging prompt window appears on your phone screen.
- Run the “adb devices” command again to view the list of all devices connected to your computer.
- Now, run the ADB command on your connected device.
Conclusion
Throughout this article, we’ve explained how to install ADB drivers on your Windows 10 and 11 PC. Go through the steps to download, install, connect, and control your Android devices from your computer.
Was this article helpful? Share it with your friends and colleagues, and share your thoughts in the comments below!