
Реализация DI в PHP
Jason-Webb 13.05.2025
Когда я начинал писать свой первый крупный PHP-проект, моя архитектура напоминала запутаный клубок спагетти. Классы создавали другие классы внутри себя, зависимости жостко прописывались в коде, а о. . .
Обработка изображений в реальном времени на C# с OpenCV
stackOverflow 13.05.2025
Объединение библиотеки компьютерного зрения OpenCV с современным языком программирования C# создаёт симбиоз, который открывает доступ к впечатляющему набору возможностей. Ключевое преимущество этого. . .
POCO, ACE, Loki и другие продвинутые C++ библиотеки
NullReferenced 13.05.2025
В C++ разработки существует такое обилие библиотек, что порой кажется, будто ты заблудился в дремучем лесу. И среди этого многообразия POCO (Portable Components) – как маяк для тех, кто ищет. . .
Паттерны проектирования GoF на C#
UnmanagedCoder 13.05.2025
Вы наверняка сталкивались с ситуациями, когда код разрастается до неприличных размеров, а его поддержка становится настоящим испытанием. Именно в такие моменты на помощь приходят паттерны Gang of. . .
Создаем CLI приложение на Python с Prompt Toolkit
py-thonny 13.05.2025
Современные командные интерфейсы давно перестали быть черно-белыми текстовыми программами, которые многие помнят по старым операционным системам. CLI сегодня – это мощные, интуитивные и даже. . .
Конвейеры ETL с Apache Airflow и Python
AI_Generated 13.05.2025
ETL-конвейеры – это набор процессов, отвечающих за извлечение данных из различных источников (Extract), их преобразование в нужный формат (Transform) и загрузку в целевое хранилище (Load). . . .
Выполнение асинхронных задач в Python с asyncio
py-thonny 12.05.2025
Современный мир программирования похож на оживлённый мегаполис – тысячи процессов одновременно требуют внимания, ресурсов и времени. В этих джунглях операций возникают ситуации, когда программа. . .
Работа с gRPC сервисами на C#
UnmanagedCoder 12.05.2025
gRPC (Google Remote Procedure Call) — открытый высокопроизводительный RPC-фреймворк, изначально разработанный компанией Google. Он отличается от традиционых REST-сервисов как минимум тем, что. . .
CQRS (Command Query Responsibility Segregation) на Java
Javaican 12.05.2025
CQRS — Command Query Responsibility Segregation, или разделение ответственности команд и запросов. Суть этого архитектурного паттерна проста: операции чтения данных (запросы) отделяются от операций. . .
Шаблоны и приёмы реализации DDD на C#
stackOverflow 12.05.2025
Когда я впервые погрузился в мир Domain-Driven Design, мне показалось, что это очередная модная методология, которая скоро канет в лету. Однако годы практики убедили меня в обратном. DDD — не просто. . .
If you keep getting the Unable to save display settings error when trying to connect your PC to more than one display, you’re not alone. The good news is, it’s usually not hard to fix at all…
Fixes for Unable to save display settings
All the screenshots below are from Windows 7, but the fixes also work in Windows 10.
- Change your screen resolution
- Update your graphics driver
Fix 1: Change your screen resolution
There’s a good chance your graphics hardwares have been fighting among each other on which resolution to output, hence the Unable to save display settings error. If this is the case, you should make sure your screen resolution is set to the lowest one.
So for example, if you have 3 monitors of resolutions, namely 1900 x 1200, 1600 x 900, 1280 x 800, then you should make sure you set the screen resolution to 1280 x 800 in order for a successful setup.
To do so:
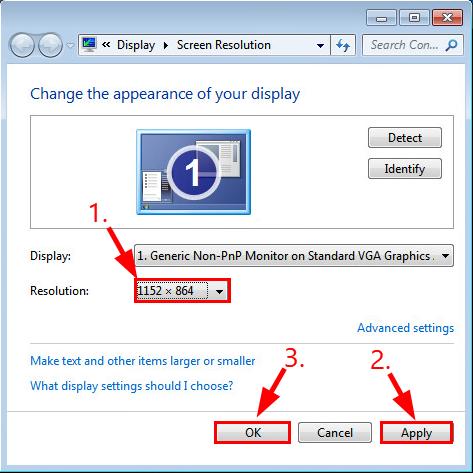
- Right-click on any empty space on your desktop and click Screen resolution.
- In the Resolution section, click the drop-down menu and select the lowest resolution of all the connected monitors. Then click Apply > OK.

- Restart your computer and check if the Unable to save display settings issue has been fixed. If no, then move on to Fix 2, below.
Fix 2: Update your graphics driver
This Unable to save display settings error may occur if you are using the wrong graphics driver or it’s out of date. So you should update your graphics driver to see if it fixes your problem. If you don’t have the time, patience or skills to update the driver manually, you can do it automatically with Driver Easy.
Driver Easy will automatically recognize your system and find the correct drivers for it. You don’t need to know exactly what system your computer is running, you don’t need to be troubled by the wrong driver you would be downloading, and you don’t need to worry about making a mistake when installing.
You can update your drivers automatically with either the FREE or the Pro version of Driver Easy. But with the Pro version it takes just 2 steps (and you get full support and a 30-day money back guarantee):
- Download and install Driver Easy.
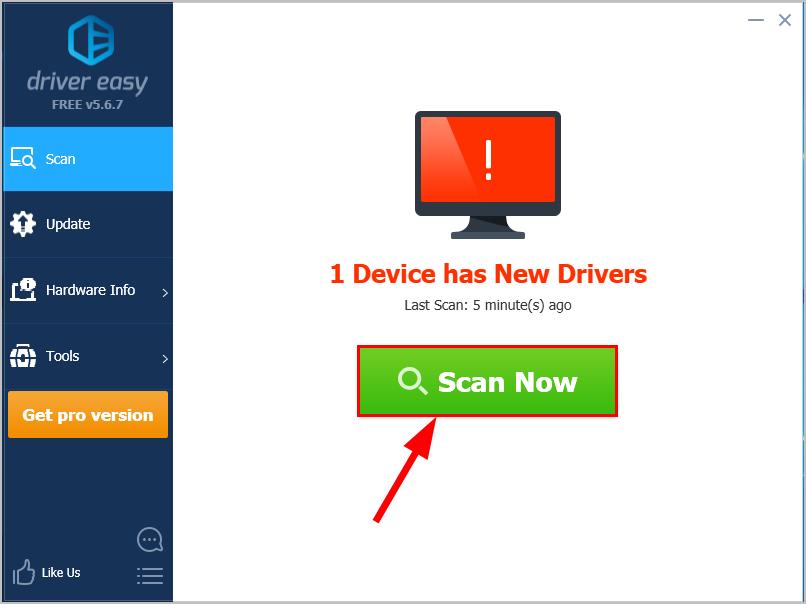
- Run Driver Easy and click the Scan Now button. Driver Easy will then scan your computer and detect any problem drivers.

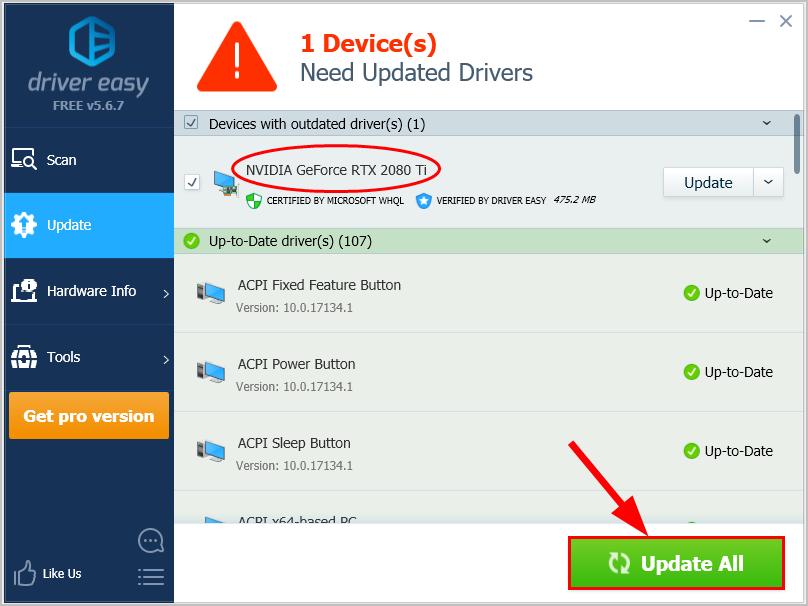
- Click Update All to automatically download and install the correct version of all the drivers that are missing or out of date on your system (this requires the Pro version – you’ll be prompted to upgrade when you click Update All).

You can also click Update to do it for free if you like, but it’s partly manual.
- Restart your computer and see if the problem is solved.
How have the fixes above helped you with your troubleshooting? Do you have any ideas or tips to share with us? Drop a comment below and let us know your thoughts.
Readers help support Windows Report. We may get a commission if you buy through our links.
Read our disclosure page to find out how can you help Windows Report sustain the editorial team. Read more
The Windows 10 resolution setting doesn’t usually reconfigure itself. Yet, some users have said that their VDUs’ resolutions change from the default setting whenever they start Windows.
After adjusting the display resolution to a higher setting, it then dropdowns to a lower resolution after the users restart Windows. It is a somewhat baffling issue that arises for some users.
The resolution change can often be due to incompatible or corrupted graphics card drivers and the Base video option.
In addition, conflicting third-party software might adjust the resolution. In this article, we’ll show how you can fix the resolution in Windows 10 when it automatically changes.
Why does Windows 10 keep changing my screen resolution?
Here are a few reasons the resolution appears suddenly changed in Windows 10:
- Safe Mode is enabled: When you boot Windows into Safe Mode, the resolution is automatically decreased. So check if you have inadvertently enabled it.
- Incompatible, corrupt, or outdated driver: When the installed drivers are outdated, incompatible, or corrupt, especially an out-of-date graphics driver, the resolution may be affected.
- Conflicting third-party apps: Several third-party apps are found to change the display settings, especially the ones meant to optimize performance.
- Buggy Windows update: If the resolution suddenly changed in Windows 10 after an update, it could be a bug to blame. Check if others on the same version of the OS, too, are reporting the problem.
Why does screen resolution change after sleep on Windows 10?
There are many reasons for this issue, but the most common one is your drivers, however, this isn’t the only issue, and many reported that their screen became pixelated after Windows update.
Many users also reported that Windows goes to sleep too fast, which will cause your resolution to change more often than you would like.
Resolution change can also appear if your second monitor isn’t detected properly, but luckily there are ways to fix this issue, and in today’s guide, we’ll show you how to do it.
How do I stop my screen resolution from changing?
1. Update your drivers
1.1 Update the drivers manually
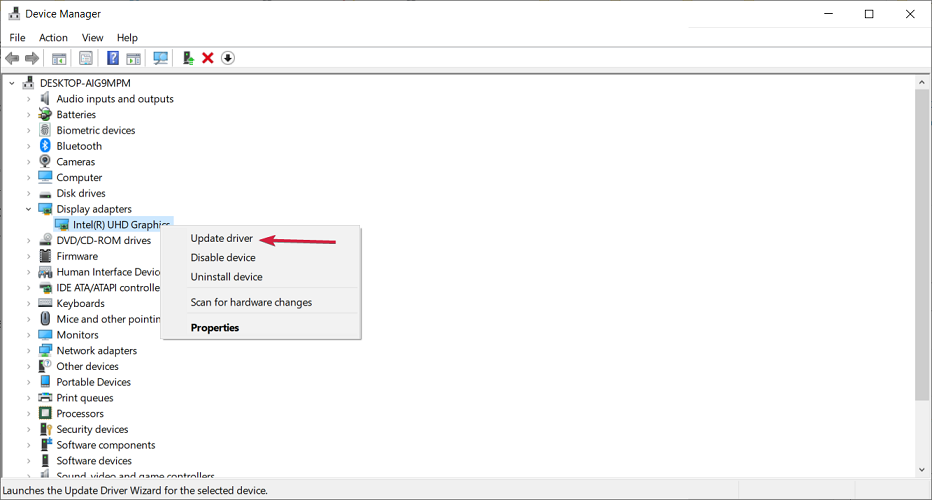
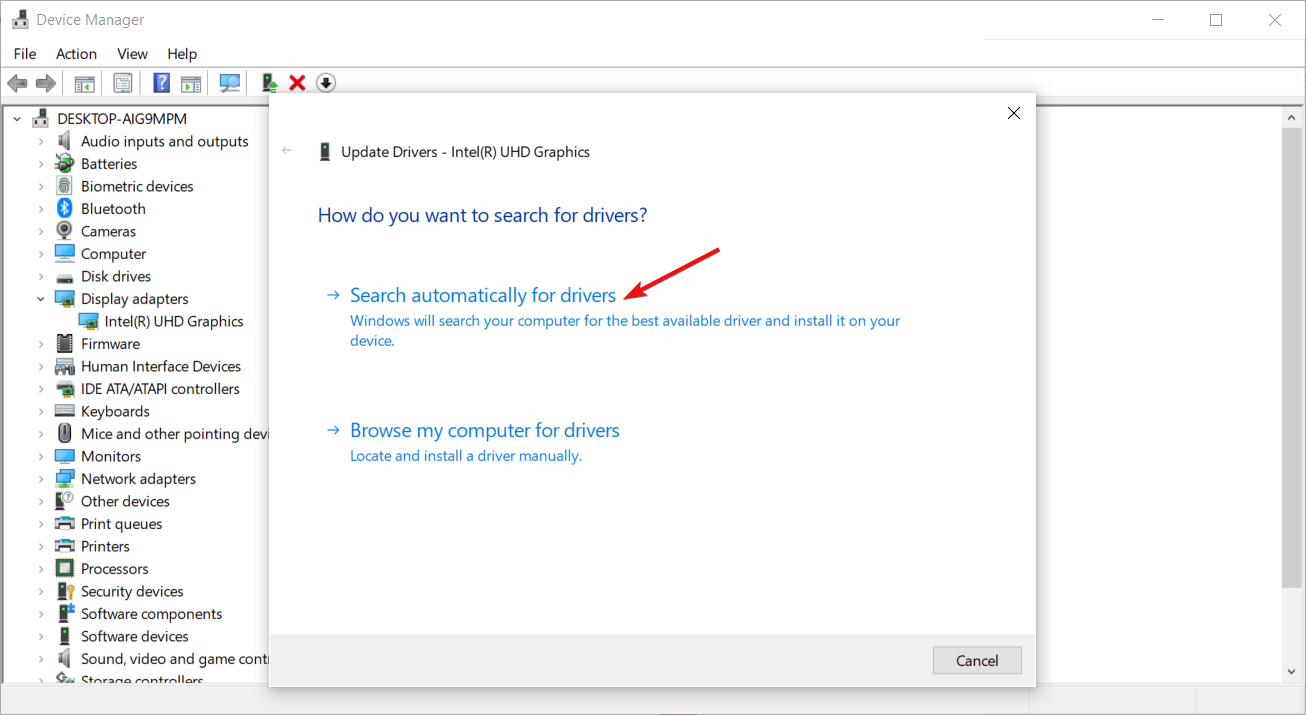
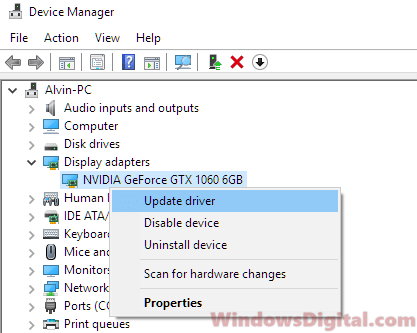
- Right-click the Start button and select Device Manager.
- Expand the Display adapters section, right-click the device, and select Update driver.

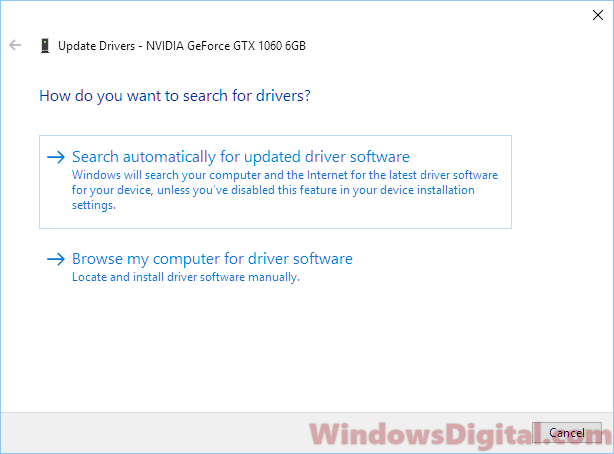
- Choose Search automatically for drivers.

- If the system finds a newer driver, it will install it.
You can also perform this step to update the Monitor driver. You will find the device under the Monitors section.
There is also the option to select Uninstall device instead of Update driver in step 2 of this solution.
That will trigger the system to automatically look for a new driver and install it after the restart.
1.2 Update the drivers automatically
You can update the card drivers using dedicated software. Here are the steps you need to follow:
- Install and Download PC HelpSoft Driver Updater and launch the tool.
- Wait for the automatic scan of your PC.

- Select the graphics card drivers from your list.
- Wait while it deals with your drivers.
- Restart your PC.
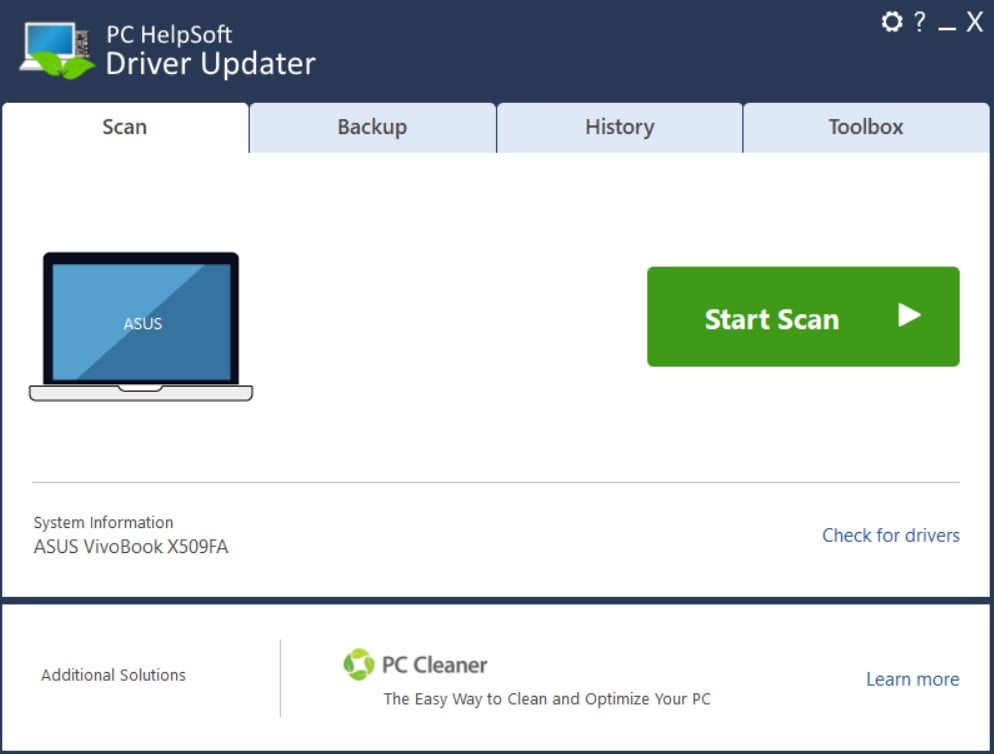
PC HelpSoft Driver Updater
Update your device graphics card drivers with this amazing tool and stop Windows 10 from changing the resolution automatically.
2. Deselect the base video option
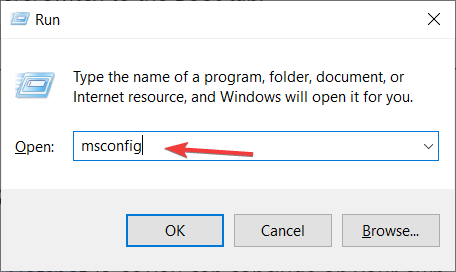
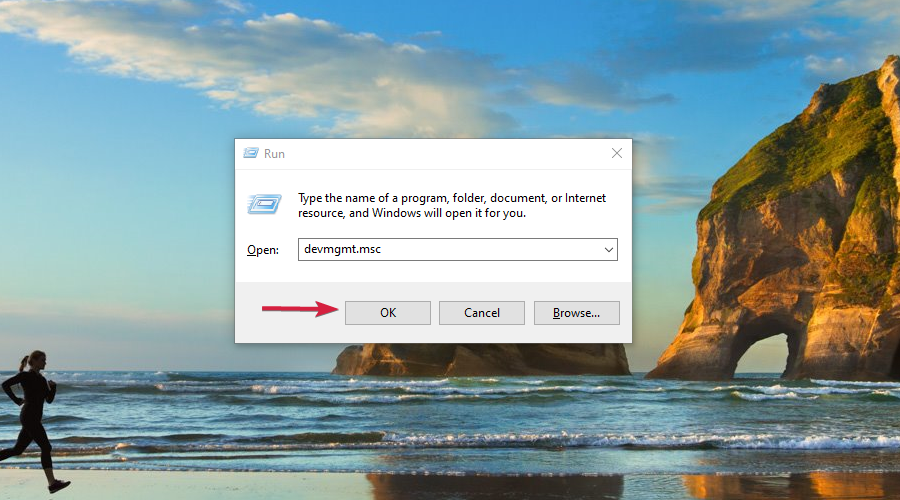
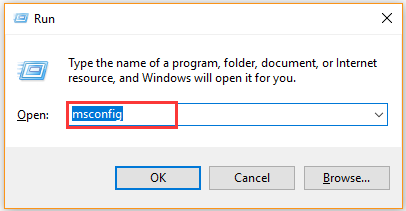
- Press the Windows+ X key and click Run on the menu to open that accessory.
- Enter msconfig in and click the OK button.

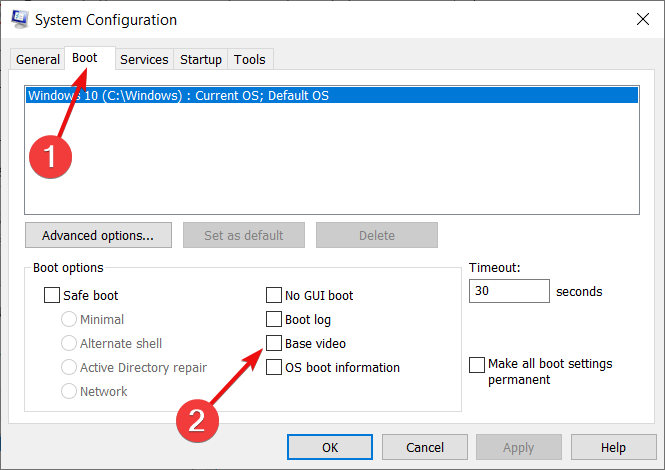
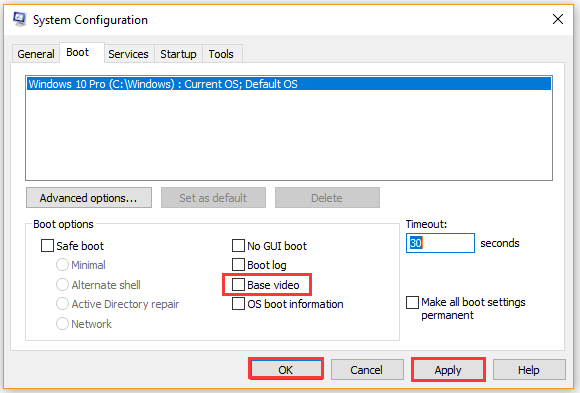
- Then click the Boot tab on the System Configuration window and deselect the Base video checkbox.

- Press the Apply button to confirm the new settings and click OK to close the window.
- Restart windows after closing System Configuration.
3. Clean boot Windows
-
1. Open Run with the Windows key + R hotkey.
-
2. In the text box, input msconfig, and click OK.
-
3. Click the Selective startup radio button on the General tab.
-
4. Deselect the Load startup items checkbox, then select the Load system services and Use original boot configuration options.
-
5. Select the Services tab and click the Hide all Microsoft services option.

-
6. Press the Disable all button.
-
7. Select the Apply option, and then press the OK button.
-
8. Lastly, select the Restart option on the System Configuration window.


Another great method that works for some users when encountering the screen resolution changing by itself problem is to perform a clean boot of your PC.
You can configure one via System Configuration in just a few steps, as seen above.
- Laptop screen keeps dimming or brightening [Windows 10/11]
- How to fix Windows 11’s screen dimming issue
- How to fix a pixelated screen after a Windows update
4. Rollback graphics card driver update
- Press the Windows key + R to launch Run, then input devmgmt.msc and click OK.

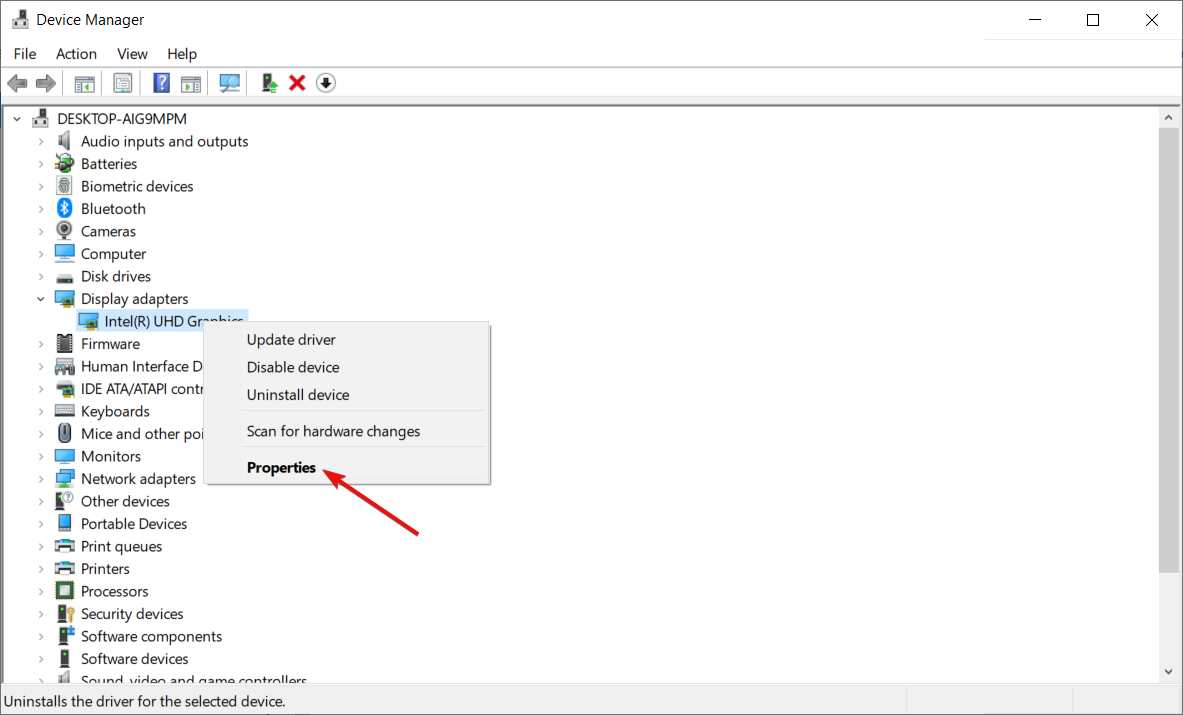
- Double-click Display adapters, right-click your video card, and select Properties.

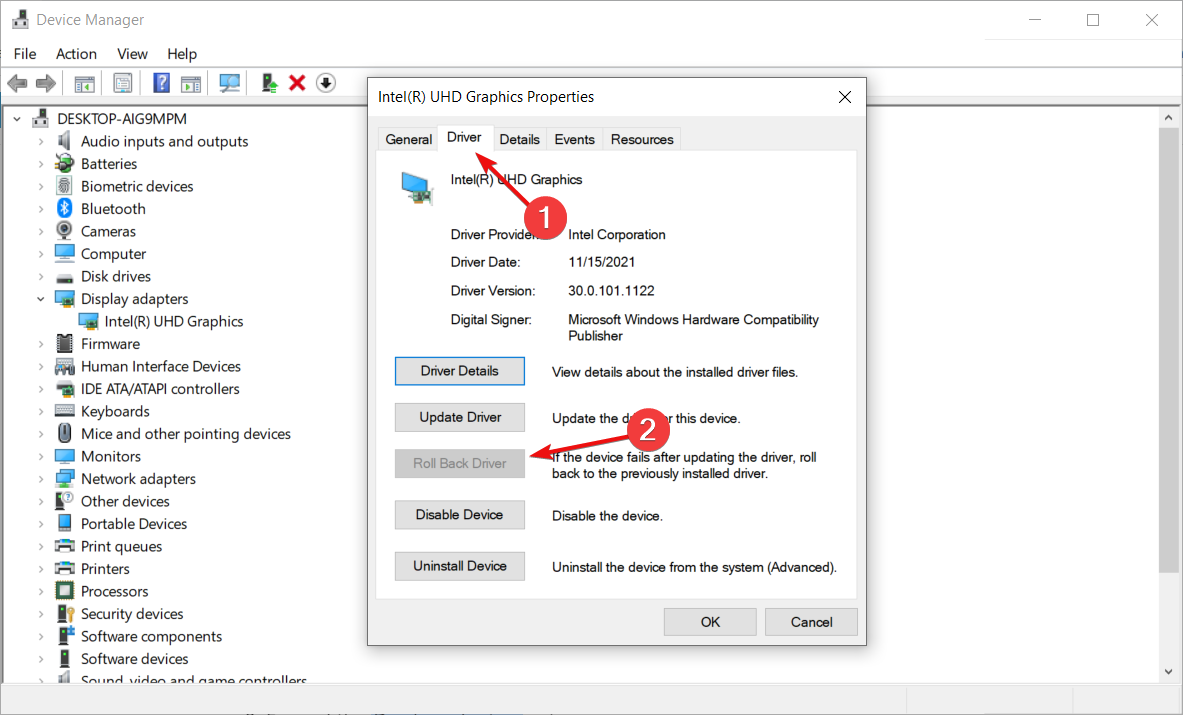
- Then press the Roll Back Driver button on the Driver tab.
This solution is especially helpful if the problem started to occur after you installed a new graphics driver.
If the Roll Back Driver option is grayed out, it means that you don’t have an older driver to go back to so move on to the next solution.
5. Restore Windows to an earlier date
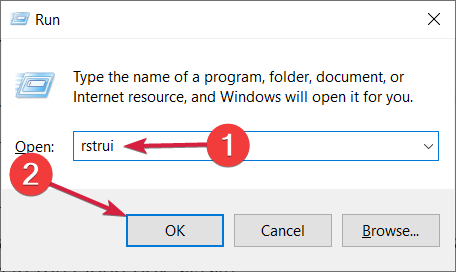
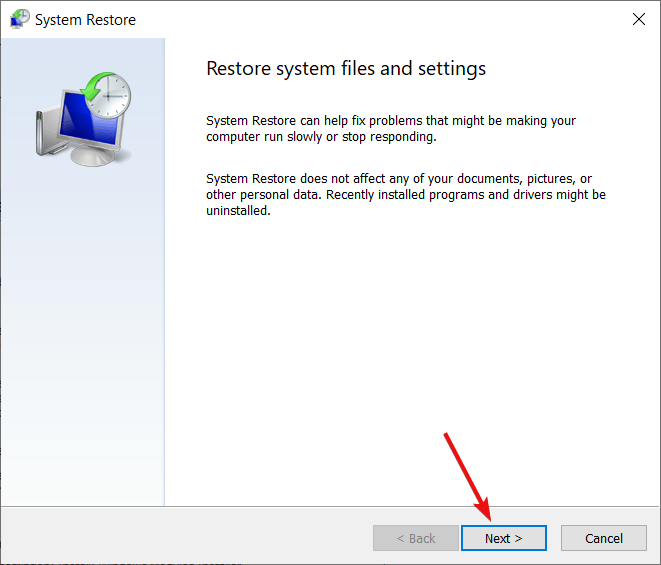
- Open Run with the Windows key + R hotkey, input rstrui, and press Enter.
- Click Next when the System Restore app opens.

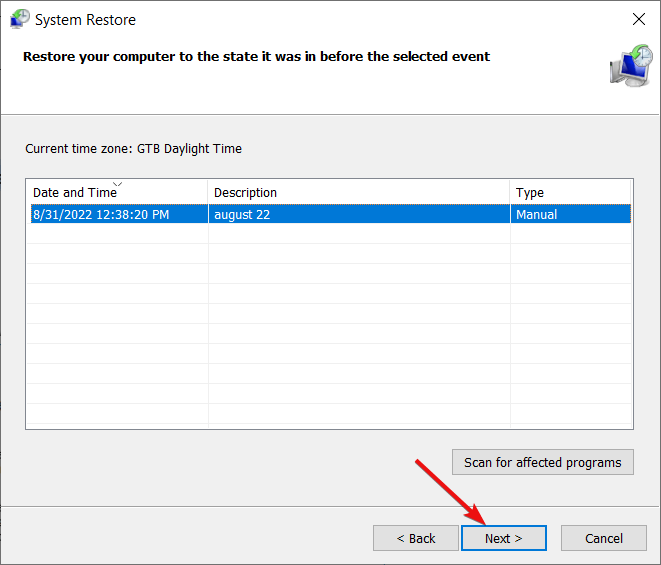
- Select a listed restore point, and press the Next button.
- Press the Finish button to confirm your selected restore point and roll back the OS.
What can I do if the resolution suddenly changes in Windows 11?
The new OS looks nicer and comes with new and improved features but is not so different from Windows 10 at its core.
That is why all the solutions we outlined above will also work like a charm on Windows 11.
The windows will have a slightly different design, with round corners, but the function will perform identically.
How do I reset my screen resolution in Windows 10?
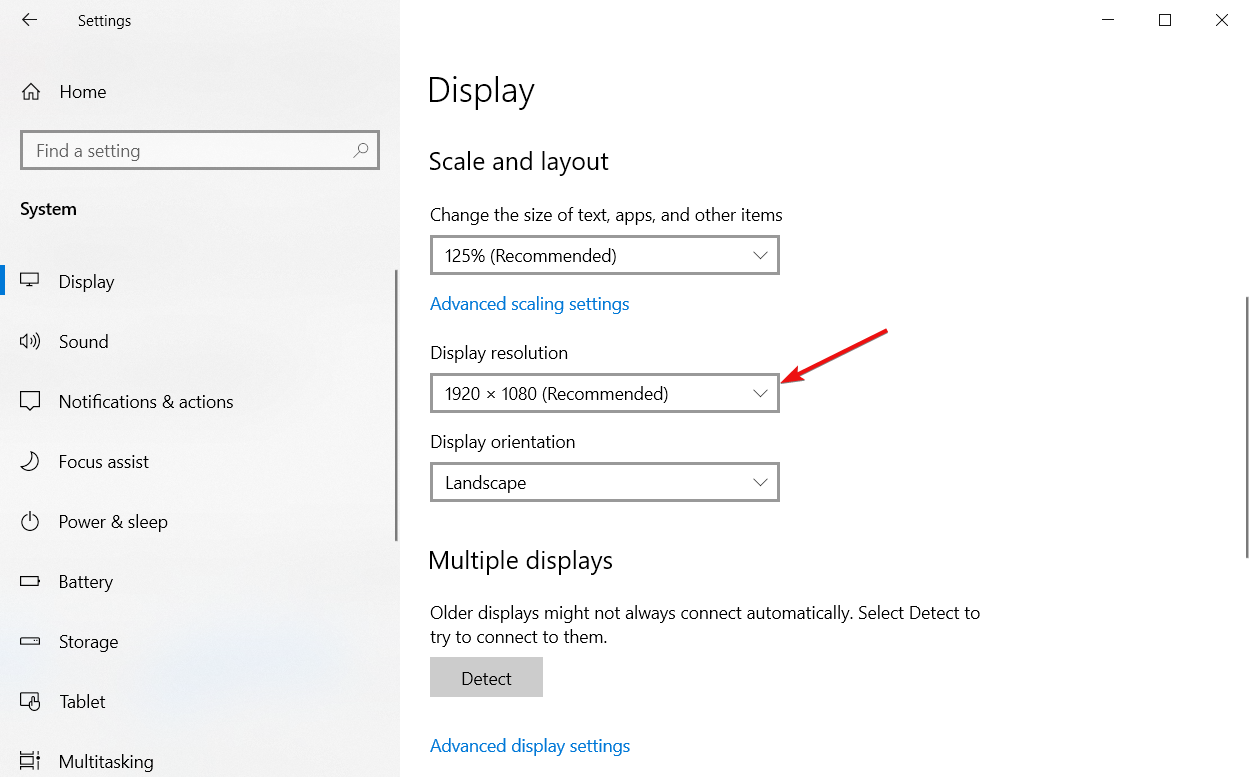
- Right-click on a free space on your desktop and select Display settings.
- Now, click on the Display resolution menu and choose a different resolution. If the resolution at this moment is different than the recommended one, we suggest switching to that one.

- Click Yes to accept the new resolution.
Those are some of the fixes users have fixed the display resolution with. In addition to those fixes, turning off the screen saver and fast startup mode might resolve the issue.
You might also be interested in reading our guide on how to set custom resolution on Windows 10.
Let us know in the comments section below if you have additional suggestions or recommendations.
Matthew Adams
Windows Hardware Expert
Matthew is a freelancer who has produced a variety of articles on various topics related to technology. His main focus is the Windows OS and all the things surrounding it.
He is passionate about the tech world, always staying up-to-date with the latest and greatest. With an analytical view, he likes problem-solving, focusing on errors and their causes.
In his free time, he likes to read and write about history and tries to always develop new skills.
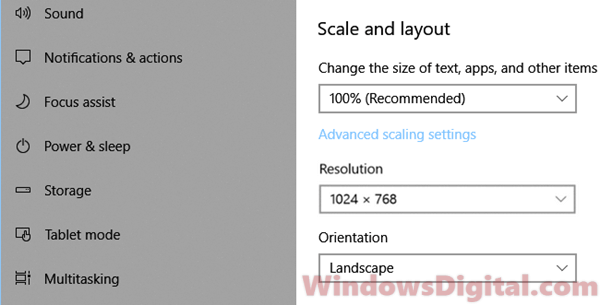
Have you tried changing your screen resolution on Windows 11 or Windows 10 only to find that the only option you can select in the display settings is “1024×768“? This strange problem can occur after a random Windows boot up, or after you tried to change to a screen resolution larger than your usual resolution, which is usually followed by a black screen. All other options will be grayed-out, and you will be left with only the 1024 option. If this has happened to you, try the following solutions.
Related issue: Screen Size Smaller or Larger Than Monitor Issue
Reasons behind the issue
There are a few situations that can lead to the Windows 11 or 10 resolution being stuck at 1024×768 only problem, including:
- A corrupted, missing, or incorrectly installed graphics driver.
- The cable you are using to connect your monitor with your GPU doesn’t support the resolutions you want.
- A defective graphic card, cable, or monitor.
How to fix screen resolution stuck at 1024×768 on Windows 11/10
Start with some basic steps first to figure out and maybe fix the issue instantly. Restart your computer first—this can sometimes clear up resolution problems. Make sure your monitor is properly hooked up to your computer and the cable is securely plugged in. Try using a different monitor or cable to see if it’s a hardware issue. If these steps don’t help, you can then proceed to the solutions below to fix the resolution being stuck at 1024×768 issue.
Update graphics driver
If both your monitor and graphic card support screen resolution larger than 1024×768, the most likely cause of the issue is a corrupted, missing, or incorrectly installed graphic drivers. Try to update or reinstall your graphic drivers and see if it fixes the issue.
You can update your GPU driver by either manually downloading from “Nvidia.com” for Nvidia graphic card or “AMD.com” for ATI video card, or by updating via “Device Manager” in Windows 10/11. Here are the steps to update via Device Manager:
Also see: How to check what graphics card you have on Windows 11/10
- Go to start menu or Cortana.
- Search for and open “Device Manager“.
- In Device Manager, expand the “Display adapters” category.
- Right-click on your primary graphic processing unit, then select “Update driver“.

- On the next window, select “Search automatically for updated driver software” to allow Windows to automatically search for the latest driver and install it for your PC.

Your GPU may appear as an unknown device with a yellow exclamation mark under the display adapters category in Device Manager if Windows couldn’t correctly detect your GPU. In that case, right-click it and select “Update driver” to allow Windows to install the driver for you.
Similar problem: Monitor Not Working After Windows Update (Fix)
If you are using a Windows 11/10 laptop from manufacturers such as Dell, HP, Lenovo, Asus, Acer, or Toshiba, and Windows is unable to locate the appropriate GPU driver, visit your laptop manufacturer’s website. From there, download the graphics driver (typically an M series) specifically tailored for your laptop model.
Uninstall and reinstall graphics driver
Another way to fix this is to uninstall your GPU driver. Right-click on it in Device Manager and select “Uninstall driver“. After your computer restarts, reinstall the driver using the method above or download it manually from your GPU maker’s website.
Usually, if Windows notices the GPU driver is missing, it will automatically update and reinstall the right driver for you when you reboot.
Try changing the resolution via other software
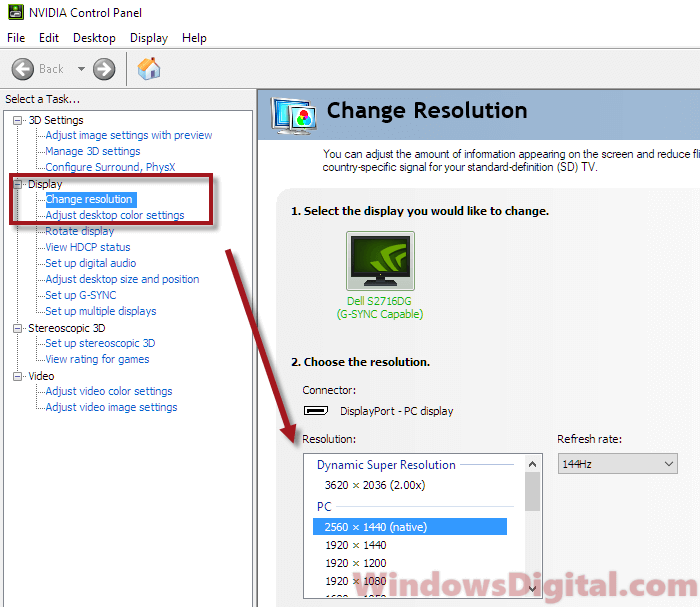
If you have an Nvidia graphics card, consider changing your Windows screen resolution using the “Nvidia Control Panel” to see if it resolves the issue. For those with ATI video cards, use the “AMD Catalyst Software” instead.
- Go to the start menu.
- Search for “Nvidia Control Panel“.
- Expand “Display” and then select “Change resolution“.
- From there, you can try to change the screen resolution for your monitor under “Resolution“.
Cable you are using doesn’t support 4k / 2k
A common reason for being stuck at the “1024×768” resolution is that the cable connecting your monitor to your GPU might not support higher resolutions like 2k or 4k.
You’ll need at least a DisplayPort 1.2 or HDMI 2.0 cable for 4K at 60Hz. Also, you have to make sure that both your monitor and GPU support the necessary port version to work correctly. Some monitors only support their maximum resolution through specific ports, so it’s important to check this.
Suggested read: Generic PnP Monitor Driver Problem in Windows 11/10
Check Monitor to GPU connection
Double-check that your monitor is correctly connected to your GPU, not to the built-in video adapter on your motherboard. It is a common mistake for people who don’t actually understand their PC, especially those with older motherboards.
But, even if you did connect your monitor to an onboard graphics card, most modern ones should support much higher resolutions than just “1024×768”.
Potential hardware defects: Graphics card, cable, or monitor
If nothing else works, a hardware problem might be to blame. It could be your GPU, monitor, or the cable between them. If you think this might be the case, try testing with parts borrowed from another computer and see if you’re still stuck with “1024×768”. Replace them as needed.
-
Home
-
Clone Disk
- [Full Fix] Screen Resolution Changes on Its Own Windows 10
By Ariel | Follow |
Last Updated
A lot of users complain that screen resolution changes on its own Windows 10. What causes screen resolution keeps changing Windows 10? How to fix it? If you are trying to figure them out, this post of MiniTool is what you need.
Why Does My Screen Resolution Keeps Changing by Itself Windows 10
According to user reports, screen resolution changes on its own Windows 10 each time they start up the computer. Why Windows 10 display resolution changes itself? The issue is often related to the incompatible or outdated graphics card driver and the Base video option. In addition, some conflicting third-party software can provoke the screen to change itself.
How to Stop Screen Resolution Changes On Its Own Windows 10
To help you fix screen resolution keeps changing Windows 10, we summarize the following 5 solutions. Let’s try them one by one until the issue is resolved.
Solution 1. Disable the Base Video Option
Base video is a standard Windows startup that only loads the standard video of Windows. If you have installed a specific video card, you can disable the Base video option in Boot. This is because the option may trigger Windows 10 display resolution changes itself.
Step 1. Press Win + R keys to open the Run dialog box, and then type msconfig in it and hit Enter.
Step 2. In the System Configuration window, navigate to the Boot tab and untick the checkbox of Base video.
Step 3. Click on Apply and OK button to execute the change.
Now, you can restart the computer and check if the screen resolution keeps changing Windows 10.
Solution 2. Update or Roll Back Your Graphics Card Driver
As mentioned above, an incompatible or outdated graphics card driver is responsible for the screen resolution changes on its own Windows 10. To fix the issue, you can try updating or rolling back the device driver. For that:
Step 1. Right-click the Start menu and select Device Manager from the elevated menu.
Step 2. Expand the Display adapters category, and then right-click the graphics card driver and select Properties.
Step 3. Navigate to the Driver tab and click on Update Driver. Then you can select Search automatically for updated driver software option to update the driver automatically. Alternatively, you can download the graphics card driver from the manufacturer’s website and install it on your computer.
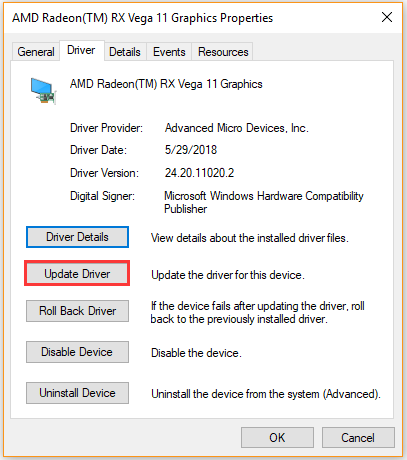
If the above steps fail to resolve the issue, you can roll back the driver by clicking on Roll Back Driver in the Properties window and follow any prompts to complete the operation.
Solution 3. Reinstall Your Graphics Card Driver
Sometimes, the Windows 10 display resolution changes itself issue can be caused by a corrupted graphics card drive. For this, you need to reinstall the device driver. Here’s a quick guide.
Step 1. Follow Step 1 to Step 3 in Solution 2 to open the Properties of the graphics card driver.
Step 2. Click on Uninstall Device button, and then tick the checkbox next to Delete the driver software for this device and click on Uninstall.
Step 3. Follow the on-screen prompts to complete the operation and restart your computer. After that, Windows will automatically install a graphics card driver.
Solution 4. Perform a Clean Boot
In addition, the screen resolution changes on its own Windows 10 due to some conflicting third-party software. To exclude this situation, we recommend you perform a clean boot to find the conflicting application, and then you can uninstall it.
Solution 5. Revert Your Windows 10 to an Earlier Date
Some uses reported that screen resolution keeps changing Windows 10 after updating. If you are also troubled by this situation, you can perform a system restore to undo these changes. By doing so, your Windows 10 will be reverted to an earlier date that you don’t have encountered the issue.
About The Author
Position: Columnist
Ariel has been working as a highly professional computer-relevant technology editor at MiniTool for many years. She has a strong passion for researching all knowledge related to the computer’s disk, partition, and Windows OS. Up till now, she has finished thousands of articles covering a broad range of topics and helped lots of users fix various problems. She focuses on the fields of disk management, OS backup, and PDF editing and provides her readers with insightful and informative content.