
Xbox is one of the most frequently used apps in daily life, while it may not download or install at times. What could you do? This guide on MiniTool Website will help you to get rid of this problem. Hope you enjoy it!
Xbox app enables you to play with other Xbox players, accumulate scoreboards, share your social life and so on. However, it is very annoying if you cannot download or install it on Windows 10/11 because you can’t play with your friends. Don’t be vexed! Every problem has a solution.
How to Fix Xbox App Not Downloading or Installing on Windows 10/11?
If Windows 10/11 Xbox app not downloading games occurs, you can try the following fixes to help you get out of trouble!
Fix 1: Reboot Your Computer
If Xbox app not working on a PC appears, the first option that comes to your mind should be to reboot your PC.
Step 1. Close all the programs and software.
Step 2. Click on Power and choose Shut down.
Step 3. After the power is off, wait for several minutes and restart the computer.
Step 4. Try to download Xbox again to check if Xbox download stuck still exists. If it is, try the next fixes.
Fix 2: Do an SFC Scan
If the Xbox app not working on PC still persists, make sure that the system file checker tool helps to find and repair the corrupted system files for you.
Step 1. Type cmd beside the magnifier icon to show Command Prompt.
Step 2. Right-click it to choose Run as administrator.
Step 3. Type sfc /scannow in the black command window and press Enter.
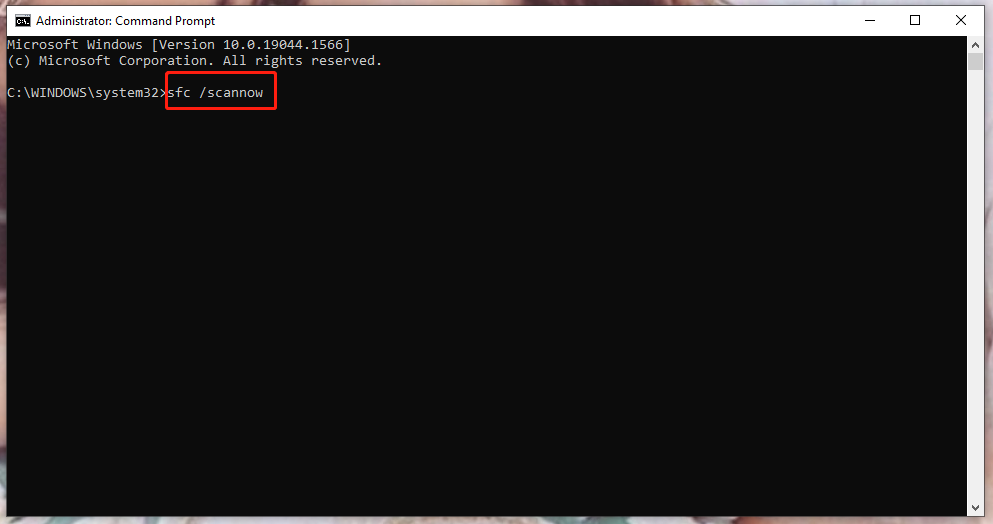
Step 4. After the process finishes, reboot your computer.
Fix 3: Run the Troubleshooter
You can also fix Xbox app not downloading or installing with the troubleshooter function.
Step 1. Open Update & Security in Settings and click Troubleshoot.
Step 2. At the bottom of this page, click Additional troubleshooters.
Step 3. Scroll down to find Windows Store Apps and tap on it.
Step 4. Click Run the troubleshooter.
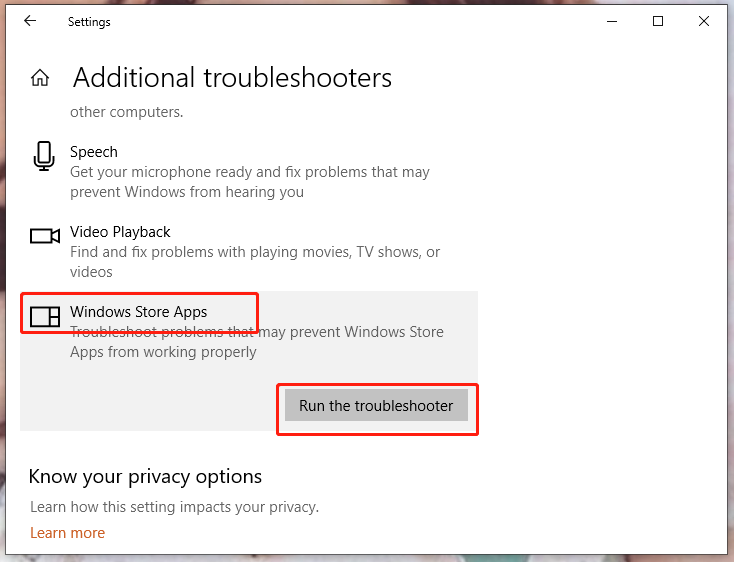
Step 5. Follow the instructions that appear.
Fix 4: Purge Microsoft Store Cache Data
Plenty of apps like Xbox rely on the normal operation of Microsoft Store. Accordingly, it is crucial to keep it running properly. You can resolve Xbox app not downloading or installing by following the steps below:
Step 1. Press Win + R at the same time to launch the Run box.
Step 2. Paste wsreset.exe in the box and hit Enter.
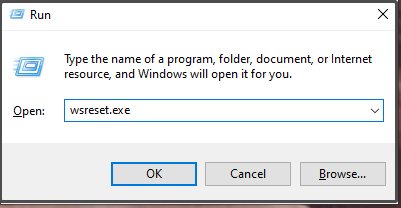
Step 3. After completing this progress successfully, reboot your computer to check if Xbox Installation and Download process still keep loading all the time.
Fix 5: Reset Xbox App Package
To fix Xbox app not downloading or installing, you can also reset Xbox Package on your computer.
Step 1. Type Powershell in the search box to run Windows PowerShell.
Step 2. Copy and paste the following command in the popping-up windows and press Enter.
Get-AppXPackage -AllUsers | Foreach {Add-AppxPackage -DisableDevelopmentMode -Register “$($_.InstallLocation)\AppXManifest.xml”}
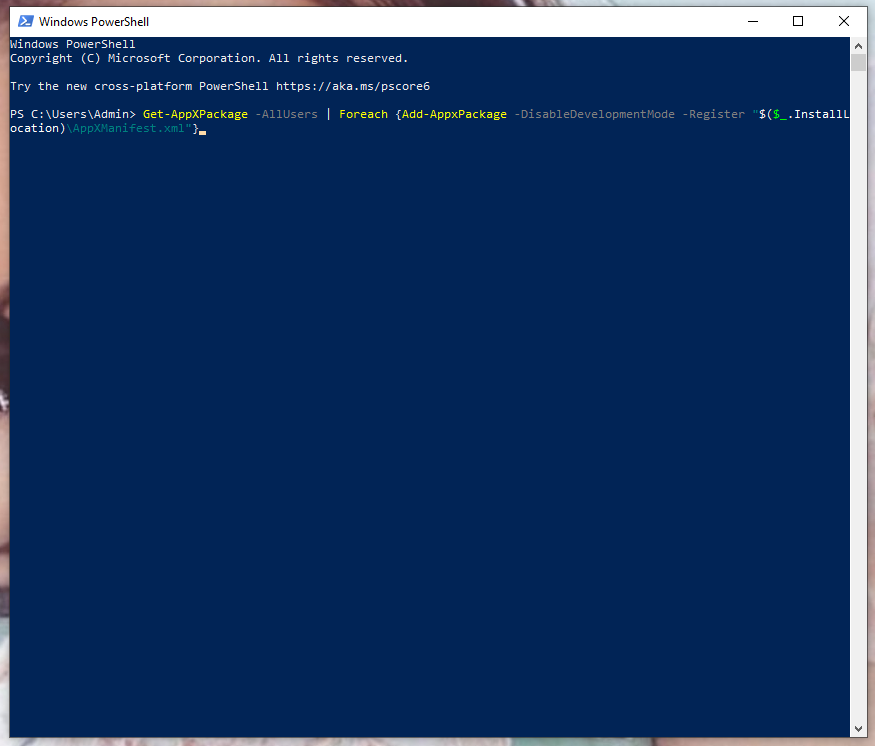
Step 3. The process will cost a few minutes, please wait patiently. Try running Xbox again to see whether Xbox app not installing games appears or not.
Fix 6: Examine Windows Updates
An outdated Windows version will influence a lot on the performance of any software thus you are supposed to update in time.
Step 1. Open Settings and choose Update & Security.
Step 2. In this interface, click Windows Update.
Step 3. Click Check for updates to see if you need to install a newer Windows.
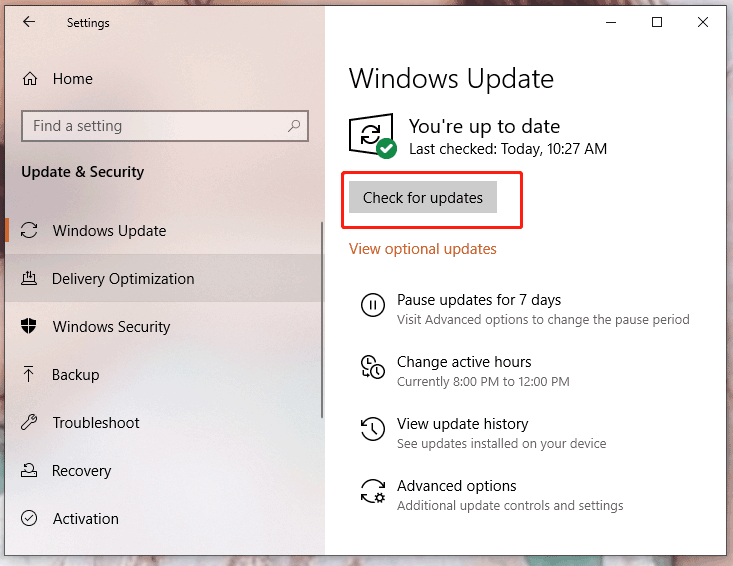
Step 4. If it finds a newer version for you, click Install now and the system will download and install it for you.
Step 5. Restart your computer to see whether Xbox app not downloading or installing is fixed or not.
Tip: There is an article that mainly introduces you to how to check, update, download and install the latest Windows version – Update Windows 11/10 to Download & Install Latest Updates
Fix 7: Use License Service Script
Step 1. Create a new notepad.
Step 2. Copy and paste the next text in it.
echo offnet stop clipsvcif “%1″==”” ( echo ==== BACKING UP LOCAL LICENSES move %windir%serviceprofileslocalserviceappdatalocalmicrosoftclipsvctokens.dat %windir%serviceprofileslocalserviceappdatalocalmicrosoftclipsvctokens.bak )if “%1″==”recover” ( echo ==== RECOVERING LICENSES FROM BACKUP copy %windir%serviceprofileslocalserviceappdatalocalmicrosoftclipsvctokens.bak %windir%serviceprofileslocalserviceappdatalocalmicrosoftclipsvctokens.dat )net start clipsvc
Step 3. Save the text file as licence.bat.
Step 4. Open Command Prompt as an administrator.
Step 5. This script will uninstall Xbox, so download it in the Microsoft Store.
Tip: We didn’t test if the script works with the full version of Windows 10 and Xbox, but it is worthy to have a shot.
Is the Xbox app not downloading or installing on your PC?
Here’s the error message, “Something unexpected happened”.
Followed by, “Reporting this problem will help us understand it better”.
And, “You can wait a bit and try again or restart your device. That may help”.
The error message happens when you try to download the Xbox App on the Microsoft Store.
In this guide, you’ll learn how to fix the Xbox app for PC not installing on the Microsoft Store on Windows 11 or 10.
To fix the Xbox app for PC not installing, you can try the 11 fixes below.
Note: After each fix, try installing the Xbox app on the Microsoft Store again.
Fix 1: Set date and time automatically
- Search for “Date & time settings” using Windows Search and open it.
- Turn on “Set time zone automatically”.
- Turn on “Set time automatically”.
Fix 2: Run WSRESET command
- Search for “WSRESET” using Windows Search and run it.
- Wait for the black screen to go away.
- Microsoft Store will open and you can try installing the Xbox app again.
Fix 3: Repair or reset Microsoft Store
- Search for “Microsoft Store” using Windows Search.
- Right-click “Microsoft Store” and select “App settings”.
- Scroll down and click on the “Repair” button.
- Click on the “Reset” button.
Fix 4: Run a PowerShell command
- Search for “PowerShell” using Windows Search.
- Right-click “Windows PowerShell” and select “Run as administrator”.
- Paste this command and press enter:
- Get-AppxPackage -AllUsers| Foreach {Add-AppxPackage -DisableDevelopmentMode -Register “$($_.InstallLocation)\AppXManifest.xml”}
Fix 5: Delete Microsoft Store’s cache
- Search for “%localappdata%” using Windows Search and open it.
- Open the “Packages” folder.
- Open the “Microsoft.WindowsStore_xxx” folder.
- Delete the “LocalCache” folder.
Fix 6: Get Microsoft Store updates
- Search for “Microsoft Store” using Windows Search and open it.
- Select “Library” on the left sidebar.
- Click on the “Get updates” button.
- Select “Update all”.
Fix 7: Start some services
- Search for “Services” using Windows Search and open it.
- Scroll down to “Windows Update” and double-click it.
- Set the startup type to “Automatic” > Start > Apply > OK.
- Select “Restart the service” on the left sidebar.
- Scroll up to “Microsoft Store Install Service” and double-click it.
- Set the startup type to “Automatic” > Start > Apply > OK.
- Select “Restart the service” on the left sidebar.
Fix 8: Update Windows
- Search for “Check for updates” using Windows Search and open it.
- Click on the “Check for updates” button.
- Update Windows and restart your computer.
Fix 9: Uninstall and reinstall Microsoft Store
- Search for “PowerShell” using Windows Search.
- Right-click “Windows PowerShell” and select “Run as administrator”.
- Paste this command and press enter:
- Get-AppxPackage -allusers *WindowsStore* | Remove-AppxPackage
- Restart your computer.
- Search for “PowerShell” using Windows Search.
- Right-click “Windows PowerShell” and select “Run as administrator”.
- Paste this command and press enter:
- Get-AppxPackage -allusers WindowsStore | Foreach {Add-AppxPackage -DisableDevelopmentMode -Register “$($_.InstallLocation)\AppXManifest.xml”}
Fix 10: Run inetcpl.cpl command
- Search for “inetcpl.cpl” using Windows Search and open it.
- Select “Advanced” and scroll down.
- Enable “Use TSL 1.0, 1.1, 1.2, and 1.3” > Apply > OK.
Fix 11: Update Windows using Media Creation Tool
- Windows 10: https://www.microsoft.com/en-in/software-download/windows10 > Create Windows 10 Installation Media > Download tool now > Run MediaCreationTool > Accept > Upgrade this PC now > Next > Install.
- Windows 11: https://www.microsoft.com/en-in/software-download/windows11 > Create Windows 11 Installation Media > Download now > Run MediaCreationTool > Accept > Next > ISO file > Next > Desktop > Save > Double-click the Windows ISO file when the installation is complete > setup > Next > Install.
Further reading
How to Fix “Your transaction cannot be completed because you have another pending transaction on your account” on Steam
How to Find Your Steam Trade URL
How to Get a Steam API Key
Буквально позавчера поставил 11 всё на чистую все диски отформатировать.
0x87e00017
0x80070490
0x800700e7
такие ошибки вылетали и было всё сделано, что советовали по гайдам к этим ошибкам, чистка кеша winstore всякие манипуляции со службами, короче всё что ищётся в гугли по этим ошибкам было испробовано, отключения ip6 тоже ни к чему не привело, разве что vpn не пробовал.
Начал копал в сторону проблем с windows update, сами обновления вроде ставятся и никаких проблем не замечено, но при диагностики выявляются проблемы.
И тоже все манипуляции по поиску к этим ошибкам ни к чему не привели.
Я в отчаянии, возвращать на 10 не хочется т.к тот же cyberpunk на ней идёт в разы хуже.
добавились ошибки
0x87e0005
0x00000001
UPD если запустить службу восстановление при неполадках что то там, вылетает странность, диск 3 указан верно где установлена винда, но буква указа не верно, винда стоит на диск С
РЕШЕНО
Оказывается проблемы была с сетевыми настройками, просто сделал reset роутера и тут всё заработало, после этого ещё раз заново поставил на чистую винду и всё так же работает.
Many Xbox PC users are facing issue that the Xbox Gaming Services not installing while trying to download a Game. Even on the newPC / laptop after installing the XBOX app it asks to download the services. In some cases the XBOX Gaming services would throw an error when attempting to install or will get stuck forever and does not download completely.
XBOX Gaming services not Installing on Windows 11 is not a new issue as the same issue is reported with Windows 10 as well. The Xbox gaming services does not install even after multiple tries. In this article we have listed fix for Xbox Gaming services not installing on Windows.

How to fix XBOX Gaming services not Installing on Window 11/10 ?.
XBOX Gaming services not Installing on Windows could be due to a software glitch or configuration issue. To fix Gaming service not working on installing on Windows you may have try some simple or complex solutions as describe below.

Fix : Repair Gaming service
On your Windows PC’s the Xbox Gaming services may have corrupted or not installed properly. To fix that you should first try to repair the Gaming service. go into Settings, Apps, and clicking Repair on Gaming Services
Fix: Update Xbox/ Gaming service from The Store directly
Sometimes installing the gaming services from the prompt does not go well in windows. To fix this try starting the update of Xbox app and gaming services from the within the Microsoft store app rather than the Xbox app prompt.
To do that open the MS store on your pc, then go library and gaming services should be there and if it’s not then open the Xbox app say yes to installing gaming services then open the store and check the update in there.
Fix : Include Game Pass
One other quick fix for XBOX Gaming services not Installing on Windows is installing it with the Game Pass. Go to the Microsoft Store and try searching a Xbox game with using the option “Install – Included with Game Pass”. This seems to work for many users who were facing the issue.
Fix : PowerShell commands
If XBOX Gaming services not Installing on Windows then this could be issue in directly download the game from the Store. You can try using Windows inbuild PowerShell to download the Game Service.
- First on your PC search for PowerShell and launch it as admin.
- Now enter following command “get-appxpackage Microsoft.GamingServices | remove-AppxPackage -allusers”
- In the same powershell window, enter “start ms-windows-store://pdp/?productid=9MWPM2CQNLHN”
- You will be taken to the Gaming Services page in the Windows store. Click install/update. Should work from there.
This will download the Xbox Game services in few minutes but please note that it may take two or three time to work.
Fix : Registry settings
If none of the above solution helped to fix the issue “XBOX Gaming services not Installing on Windows” then finally you should try to update the registry.
- Open Registry Editor (In the window search box on the taskbar, type regedit, then select Registry Editor)
- Go to HKEY_LOCAL_MACHINE -> SYSTEM -> CurrentControlSet -> Services
- Remove the GamingServices and GamingServices.Net
- Restart Computer
- Go to your Windows Store -> 3-dot-menu -> Downloads and Updates -> Check updates
- Gaming Services should install now without any issues.
- You can Double check this by rebooting and going back to Windows Store and trying to Get Updates again – you should be Up to date.
Other troubleshooting steps:
– Update everything on Window: Make sure that there are no pending updates for Window, Appstore or the App.
– Make sure your regions match both the Xbox app and Microsoft account. If there’s a mismatch it could prevent the syncing necessary.
– Uninstall and reinstall the app.
– Update windows and restart your computer
– Ensuring that the Harddrive/SSD is formated to NTFS with the allocation size default or 4K, not something else.
Conclusion: Hope this article helps to fix “XBOX Gaming services not Installing on Windows”, do let us know in comment section.
Read: Starfield can’t take ship with all piloting skill needed
Quick Fixes
- Repair or reset the Xbox app from Windows Settings > Apps > Installed apps > Xbox > Advanced options.
- Launch the ‘Gaming Services Repair Tool’ in the Xbox app from your account profile > Support.
Basic Fixes
- Check your network connection: Ensure your PC has a good internet connection to download games in the Xbox app. Test its speed online.
- Inspect your PC storage: Check your PC has adequate free storage to download new games. Head to Windows Settings > System > Storage, to review and free up occupied storage.
- Check the Xbox server status: Visit the Xbox Support page to check the live status of its servers.
- Install the game from the Microsoft Store: If you can’t download a game in the Xbox app, try searching and downloading it from the Microsoft Store app on Windows 11.
- Correct date and time on your PC: Incorrect date and time can prevent the Xbox app from contacting its servers. To fix it, open Windows Settings, select Time & Language from the sidebar, click Date & time, and turn on the ‘Set time automatically’ toggle.
- Update or reinstall the Xbox app: Open the Microsoft Store, search Xbox, and click Update (if available). Alternatively, uninstall the app from Settings > Apps > Installed apps, and install it afresh from the Microsoft Store.
Fix 1: Force Close the Xbox App and Reopen
Force closing the Xbox app refreshes it, fixing existing glitches preventing you from downloading games on Windows 11.
Step 1: Press the Ctrl + Shift + Esc shortcut to open the Task Manager app, select Processes from the left sidebar, right-click Xbox, and select End task.

Step 2: Reopen the Xbox app and retry downloading your desired game.
Fix 2: Sign Out and Log Back In
Account authentication issues are a common reason behind the Xbox app not downloading games on your PC. Sign out and log back in to restore normalcy.
Step 1: Open the Xbox app, click your account profile at the top left, and select Sign out.

Step 2: Repeat the step to select Sign in and type your account credentials to log back in. Retry downloading your game.
Fix 3: Repair or Reset the Xbox App
Besides authentication issues, the Xbox app on Windows 11 may fail to download new games if its app components are corrupt. Head to Windows Settings to repair or reset the app.
Step 1: Press the Windows key, search Xbox, and right-click it to open its App settings.

Step 2: Scroll down and click Repair. If the issue persists, select Reset to reset the app to its default configuration.

Fix 4: Disable IPv6 on Your Network Adapter
Disabling the IPv6 network protocol or switching to the Google DNS are nifty techniques to resolve game-downloading issues in the Xbox app. Head to the Control Panel app to get started.
Step 1: Press the Windows + R shortcut to open the Run dialog, type control, and press Enter to launch the Control Panel app.

Step 2: Switch View by to Category, and click Network and Internet.

Step 3: Select Network and Sharing Center.

Step 4: Click Change adapter settings in the left sidebar on the next page.

Step 5: Right-click your network connection and open Properties. Approve the UAC prompt when it appears.

Step 6: Uncheck Internet Protocol Version 6 (TCP/IPv6), and click OK to apply changes. Open the Xbox app and retry downloading a new game.

The recent Xbox app update introduced a new ‘Gaming Services Repair Tool’ to help you investigate and fix issues related to Xbox games and services. Here’s how you can access it:
Step 1: Click your account profile at the top left of the Xbox app, and select Support.

Step 2: Select the Gaming Services Repair Tool to launch it.

Step 3: Finally, click Start repairing and follow the on-screen instructions to resolve the issue.

Was this helpful?
Thanks for your feedback!
The article above may contain affiliate links which help support Guiding Tech. The content remains unbiased and authentic and will never affect our editorial integrity.