
Что делать, если не работает сочетание Win + Shift + S в Windows
Восемь возможных проблем и способы их решения.
Данная комбинация вызывает инструмент для захвата экрана «Ножницы» или «Фрагмент и набросок» либо «Набросок на фрагменте» в более ранних версиях Windows. Опция гораздо удобнее стандартных скриншотов по PrintScreen, поскольку умеет снимать не только весь экран, но и отдельные области и окна, а также позволяет записывать видео.
Иногда сочетание Win + Shift + S не срабатывает, и на то есть несколько причин. Разбираемся, как это исправить.
Перезагрузите компьютер

Проблема может быть вызвана пустяковой ошибкой или программным сбоем. Чтобы исключить эту причину, просто перезагрузите компьютер. Кликните правой кнопкой мыши по кнопке «Пуск» и выберите «Завершение работы или выход из системы» → «Перезагрузка». После этого проверьте, будут ли работать «Ножницы».
Установите обновления
Апдейты системы могут исправлять возможные ошибки, в том числе и с работой сочетания Win + Shift + S, которые периодически случаются.

Для этого откройте «Параметры», нажав Win + I на клавиатуре, переключитесь в раздел «Центр обновления Windows» и кликните «Проверить наличие обновлений». Если есть доступные, нажмите «Загрузить и установить» либо просто «Перезагрузить», если они были уже скачаны ранее автоматически.
На некоторых игровых клавиатурах, а также на всех ноутбуках есть функциональная клавиша Fn, которая позволяет использовать дополнительные комбинации. Если случайно нажать на неё в сочетании с кнопкой Win, то последняя отключится, чтобы не мешать, например, в играх.

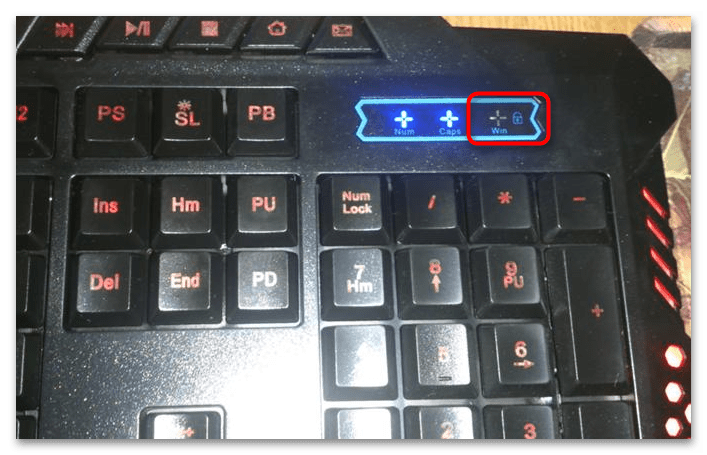
Попробуйте вызвать сочетание Fn + Win для активации кнопки. Если на клавиатуре есть индикатор Win Lock (Win🔒), он должен погаснуть. Также можно просто использовать для вызова «Ножниц» комбинацию Fn + Win + Shift + S.
Включите уведомления

Возможно, сочетание Win + Shift + S всё-таки работает, но вы просто не получаете уведомления о том, что скриншот сделан. Для проверки нажмите Win + I для вызова настроек, а затем перейдите в раздел «Система» → «Уведомления», найдите «Ножницы» и убедитесь, что оповещения работают. Если тумблер уже активен, попробуйте отключить и включить его заново.
Исправьте ошибки приложения
Неполадки могут возникать в самом приложении «Ножницы», из‑за чего вызов сочетанием Win + Shift + S не работает корректно. Исправить это можно штатными средствами Windows.

Для этого перейдите в «Параметры», нажав сочетание Win + I, откройте раздел «Приложения» → «Установленные приложения». Найдите поиском «Ножницы», кликните по троеточию и выберите «Дополнительные параметры».

Поочерёдно нажмите «Завершить», «Исправить», «Сброс», дожидаясь окончания каждой операции.
Перезапустите службу

В некоторых случаях сброс стандартными средствами не срабатывает, и необходимо перезапустить зависший процесс через «Диспетчер задач» Windows. Нажмите Ctrl + Shift + Esc для вызова диспетчера, а затем найдите процесс ScreenClippingHost.exe или «Создание фрагмента экрана» и выберите в контекстном меню «Снять задачу».
Назначьте создание скриншотов на клавишу PrintScreen
Если по какой‑то причине сочетание Win + Shift + S всё равно не хочет работать, можно переназначить инструмент на клавишу PrintScreen. Тогда по нажатию на неё сразу же будет активироваться захват экрана в приложении «Ножницы».

Нажмите Win + I для вызова настроек, перейдите в раздел «Система» → «Специальные возможности» → «Клавиатура» и включите тумблер «Используйте клавишу Print Screen для открытия захвата экрана».
Переустановите «Ножницы»
Если исправить ошибки не получилось ни одним из описанных способов, попробуйте удалить и заново установить инструмент «Ножницы» («Фрагмент и набросок») с официального сайта Microsoft.

Для этого сначала нажмите Win + I, откройте «Приложения» → «Установленные приложения», найдите там с помощью поиска «Ножницы» («Фрагмент и набросок»). Кликните по троеточию и выберите «Удалить».

После чего перейдите по этой ссылке и нажмите «Установить».
Snipping Tool is a handy screenshot-taking & editing tool for many Windows users. As one of the native Windows apps, it’s lightweight and useful in producing screenshots, but sometimes it also fails to work properly.
Users may encounter issues such as a pop-out error message, blank or black screen, images failing to be saved or the app not working after the system is upgraded. If you’re stuck in one of these Snipping Tool problems, you’ve found the right place! In this article, we will guide you through several methods that may help you out. Now, let’s move on to show you how:
Try these methods:
You might not need to try them all, just walk your way down the list until you find the one that fixes the snipping tool not working issue.
- Relaunch Snipping Tool in Task Manager
- Allow the Snipping Tool to run in the background
- Update your graphics driver
- Update your Operating System
- Repair or reset apps in Apps & features
- Run DISM tool
- Run System File Checker
Method 1: Relaunch Snipping Tool
Simply quitting the Snipping Tool and restarting it may help with the problem. You can use the built-in program Task Manager that allows you to close any non-responding or freezing application to end the Snipping Tool completely, and then have a relaunch to see if your problem can be solved.
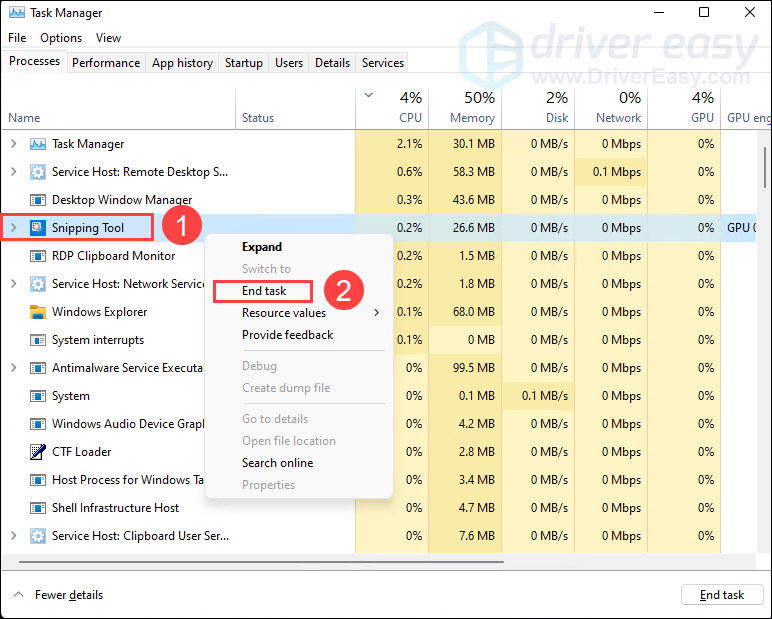
- Press Ctrl + Shift + Esc keys to open the Task Manager.
- Under the Processes tab, right-click the Snipping Tool listed on the left and select End task from the pop-up menu.

- Restart your Snipping Tool and check if it can function properly.
If this fix doesn’t work, try the next below.
Method 2: Allow the Snipping Tool to run in the background
For most of the time, Snipping Tool is an app that “stays behind the screen” and waits for being woken. If Snipping Tool lacks permission from your PC to run in the background, it won’t be able to work at any time when you are not active in the app’s window.
On Windows 10
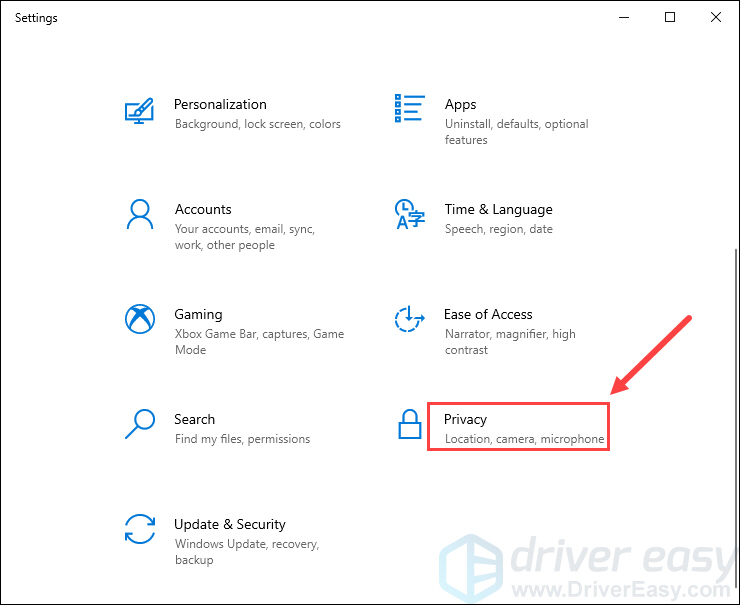
- Right-click the Windows icon on the taskbar to open the quick access menu and then select Settings.
- In Settings, click Privacy.

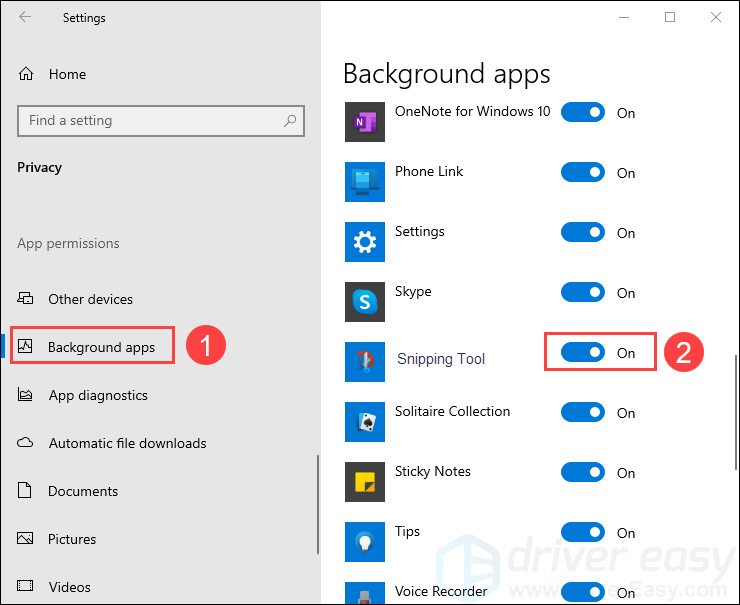
- On the left panel, scroll down to the Background apps, check if the Snipping Tool is turned on. If not, toggle the switch to On
On Windows 11
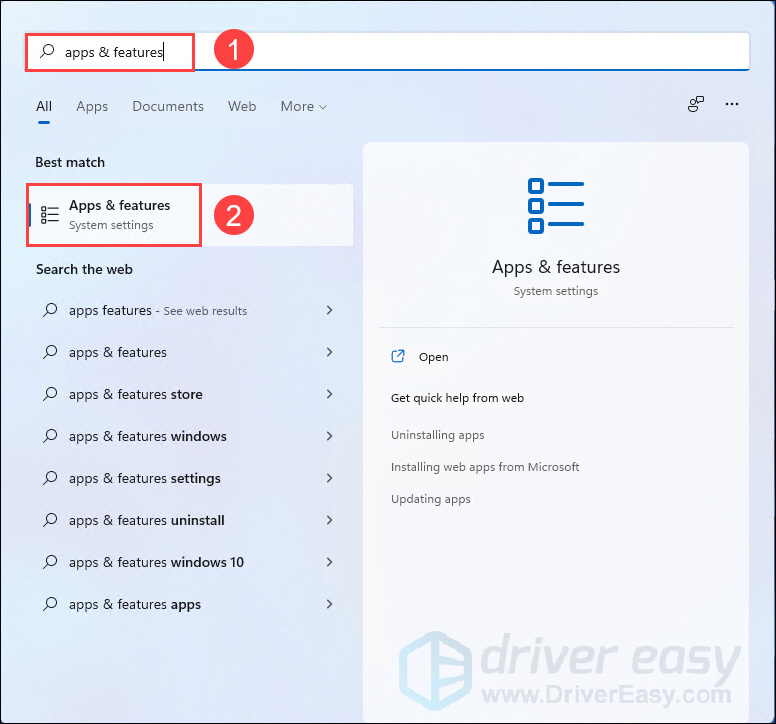
- Press the Windows key to open the Start menu, type apps & features in the search box and select it from the result.

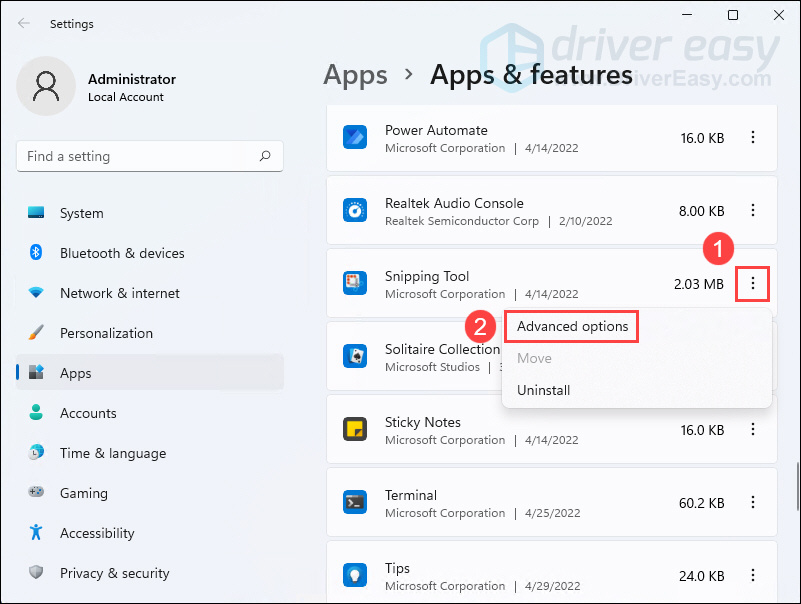
- Scroll down to the Snipping Tool in the right list and click the 3-dots icon next to it, then select Advanced options.

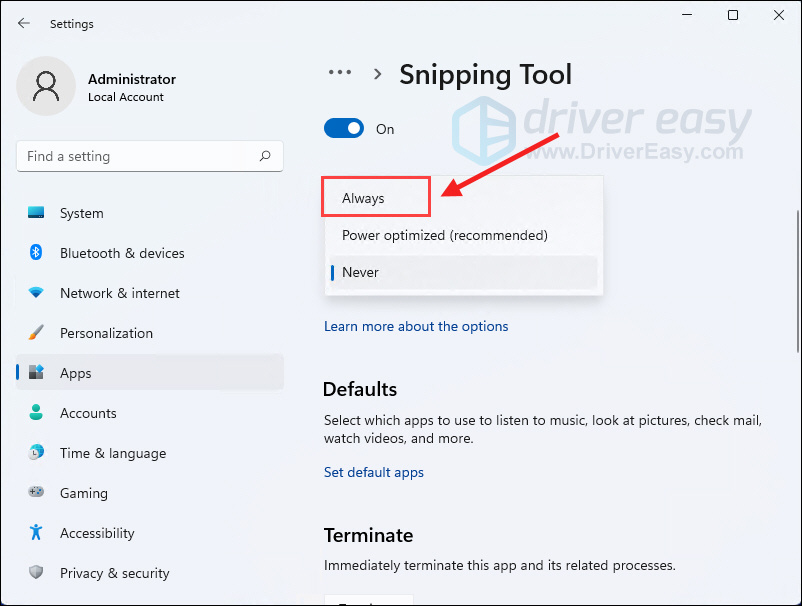
- In the Background apps permissions section, click on the box under Let this app run in the background.

- Select Always from the drop-down list.


If this fix doesn’t work, try the next below.
Method 3: Update your graphics driver
If you have an outdated graphics driver, your graphics would not be able to process images appropriately in your computer and as a result, the Snipping Tool cannot be used properly. So you should update your graphics driver to see if it fixes your problem.
You can update your graphics driver manually by visiting the manufacturer’s website (NVIDIA/AMD), finding the latest correct installer and installing step by step. But if you don’t have the time, patience or skills to update the driver manually, you can do it automatically with Driver Easy.
Driver Easy will automatically recognize your system and find the correct drivers for it. You don’t need to know exactly what system your computer is running, you don’t need to be troubled by the wrong driver you would be downloading, and you don’t need to worry about making a mistake when installing.
- Download and install Driver Easy.
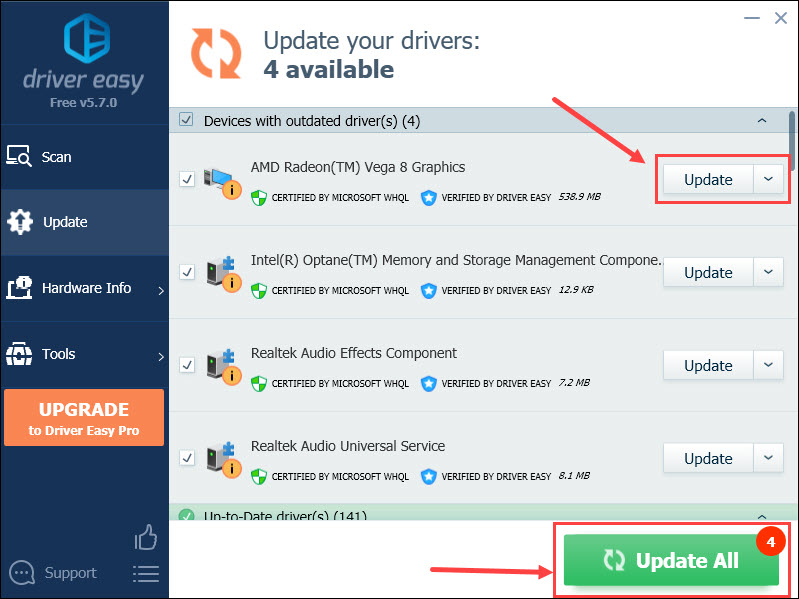
- Run Driver Easy and click the Scan Now button. Driver Easy will then scan your computer and detect any problem drivers.

- Click Update All to automatically download and install the correct version of all the drivers that are missing or out of date on your system (this requires the Pro version with full support and a 30-day money-back guarantee – you’ll be prompted to upgrade when you click Update All).
You can do it for free if you like, but it’s partly manual.

Method 4: Update your Operating System
Apart from updating the graphics driver, updating your Windows should also be a trick that is worth trying since Microsoft keeps releasing OS updates with bug fixes for its apps including Snipping Tool. Here’s how you can check for updates:
On Windows 10
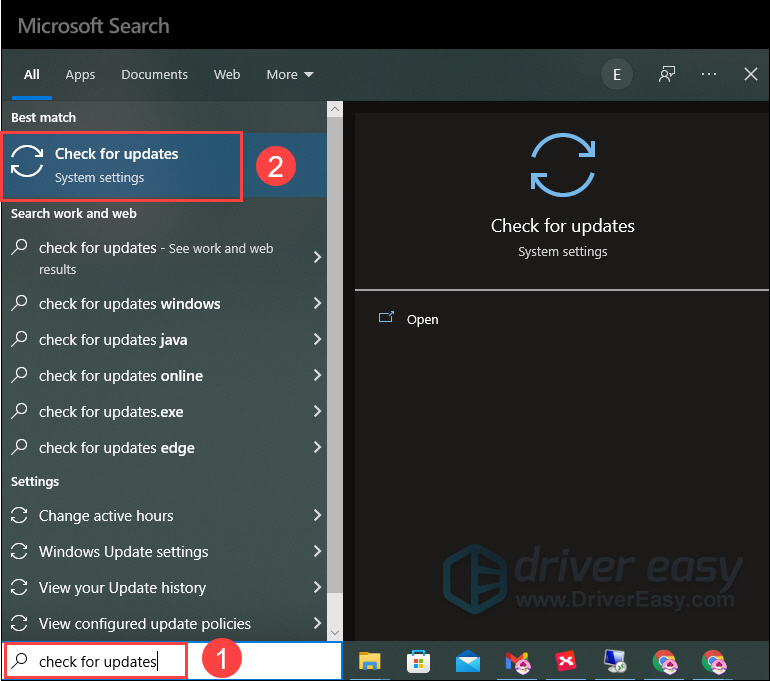
- In the search box, type check for updates and select it from the result that appears.

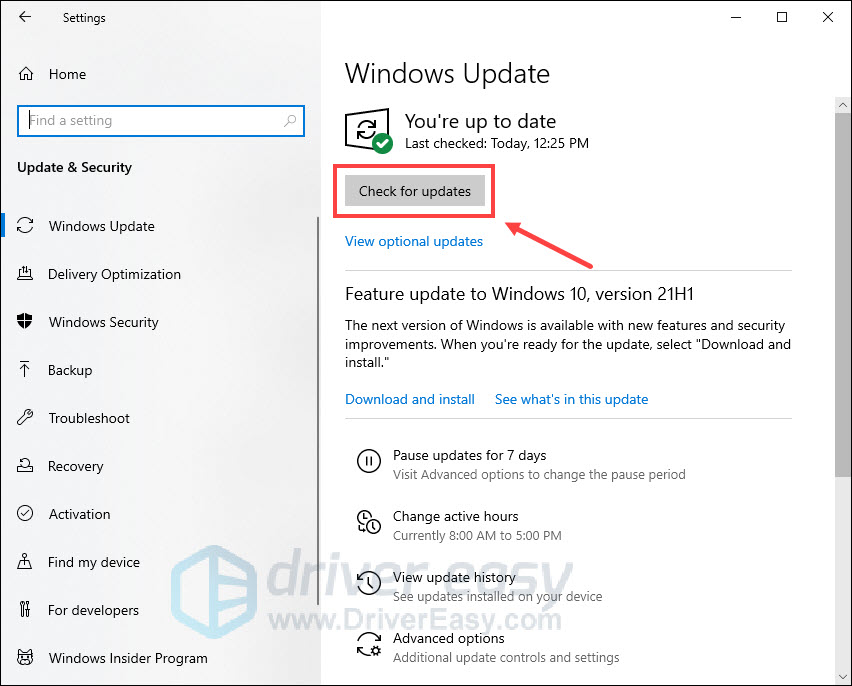
- Click Check for updates on the right section and wait for the checking.

- The checking result could be You’re up to date, which means you don’t need to do anything about it next.
If not, there will be a Download and install button. Click on it to have a Windows update.
On Windows 11
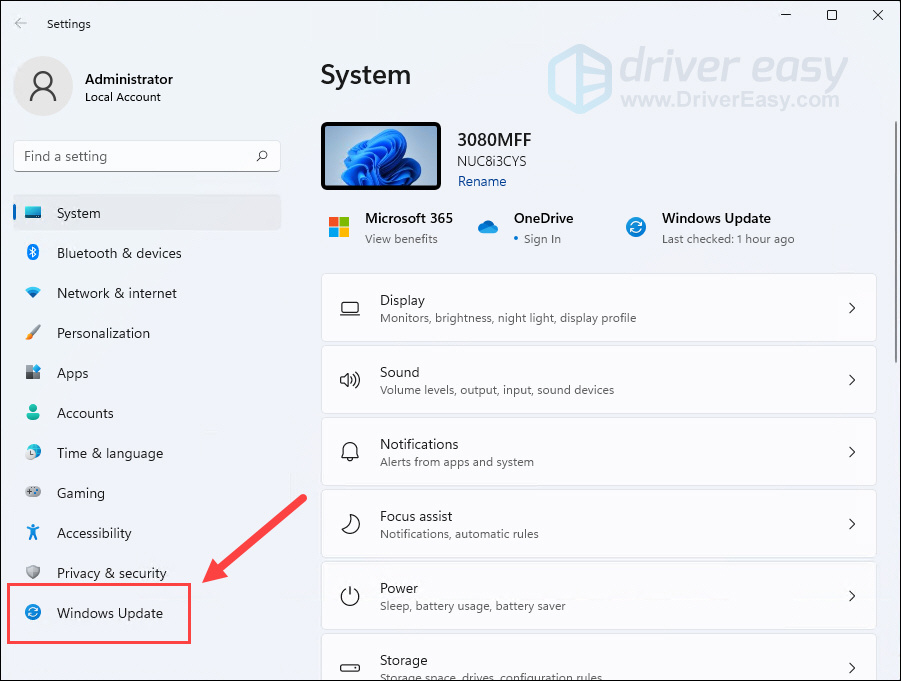
- Press the Windows + I keys to open Settings.
- Click Windows Update on the left section.

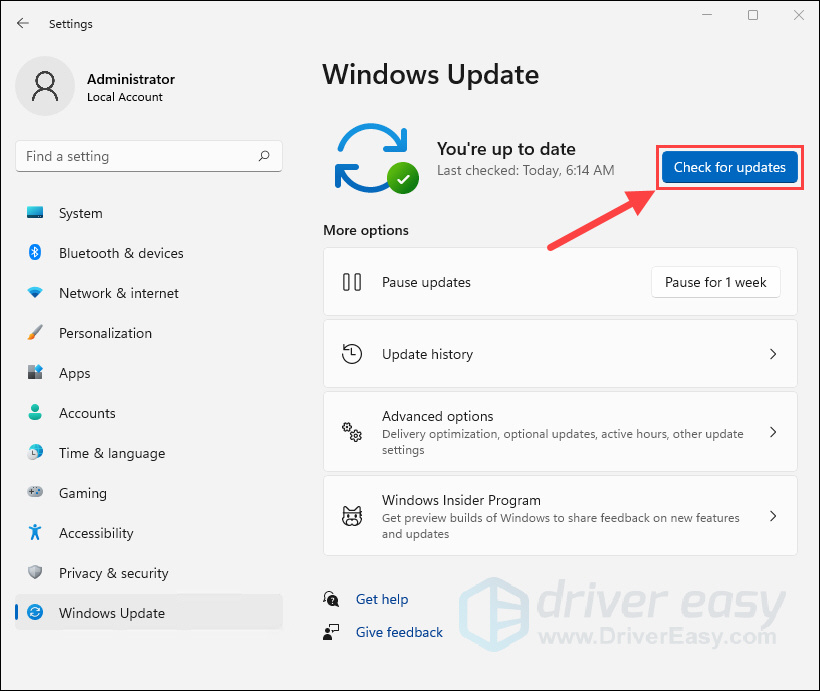
- Click Check for updates. Then Windows will start downloading the updates if they are available.

- Click Restart now when the process is finished.
Method 5: Repair or reset the Snipping Tool
When an app is not running correctly or the app’s certain features fail to work properly, you can give it a try to repair and reset it with the built-in process Apps & features. Below is how to do it when your Snipping Tool is somehow not working.
On Windows 10
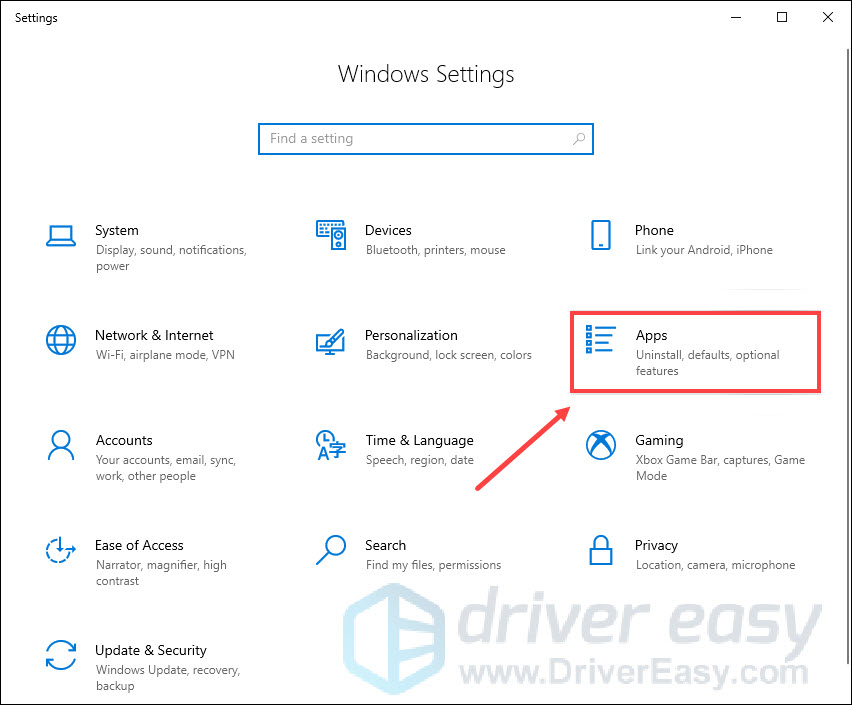
- Press Windows + I keys to open Windows Settings and then click Apps.

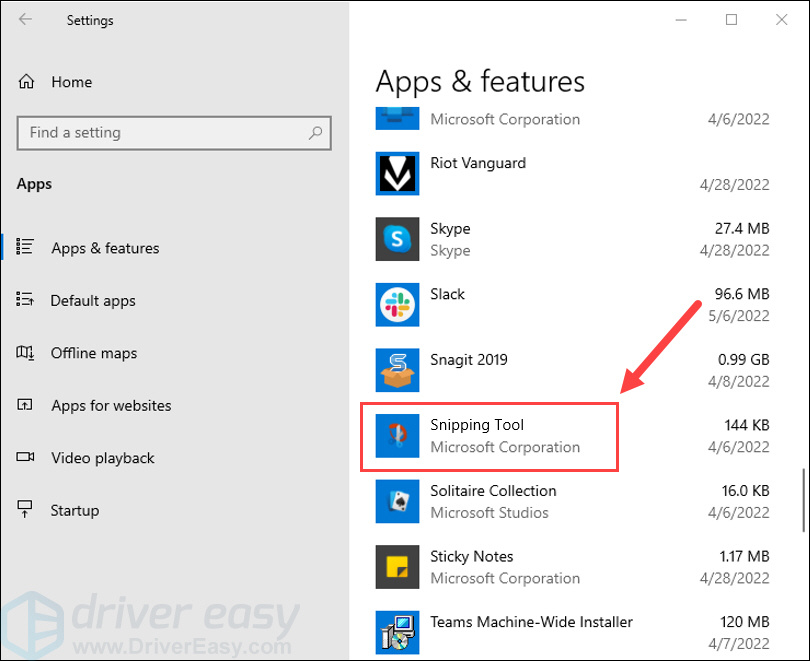
- Scroll down to the Snipping Tool in the right list and click to expand it.

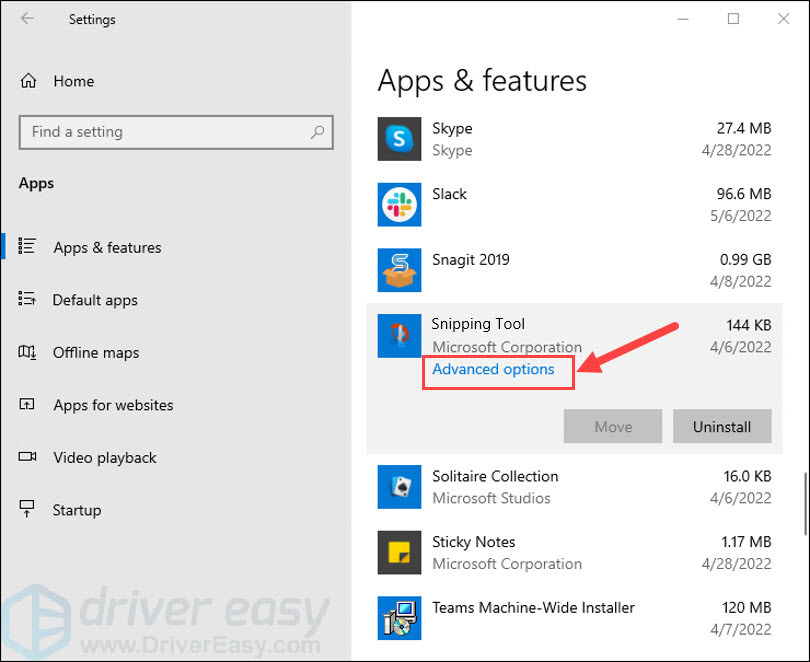
- Click Advanced options.

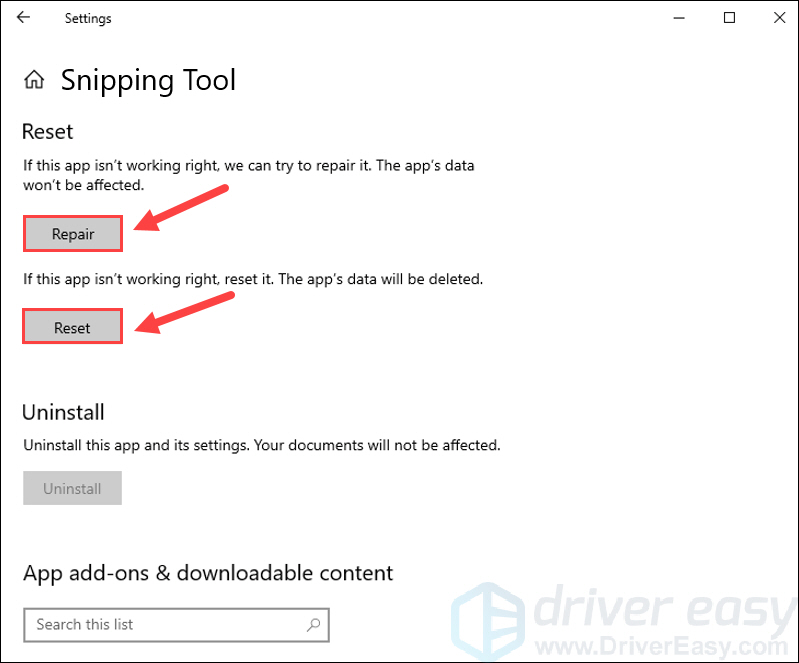
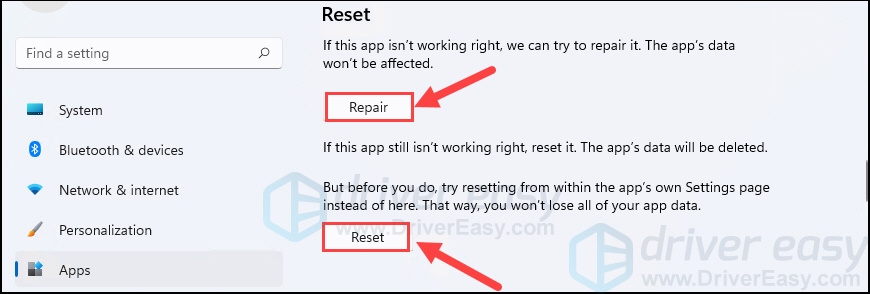
- If Repair is available, click on it.
If it isn’t available or doesn’t fix the problem, select Reset.
On Windows 11
- Press the Windows key to open the Start menu, type apps & features in the search box and select it from the result.
- Scroll down to the Snipping Tool in the right list and click the 3-dots icon next to it, then select Advanced options.
- Click Repair if it’s available.
If it isn’t available or doesn’t fix the problem, then select Reset.
Move on to the next fix below if this method doesn’t work for you.
Method 6: Run the DISM tool
The Deployment Image Servicing and Management (DISM) is a command-line tool for Windows image service. One of its many uses is to repair system images when image-related problems occur. So if your Snipping Tool is not working correctly, you can run the DISM command with the RestoreHealth option to see whether problems come from the system image.
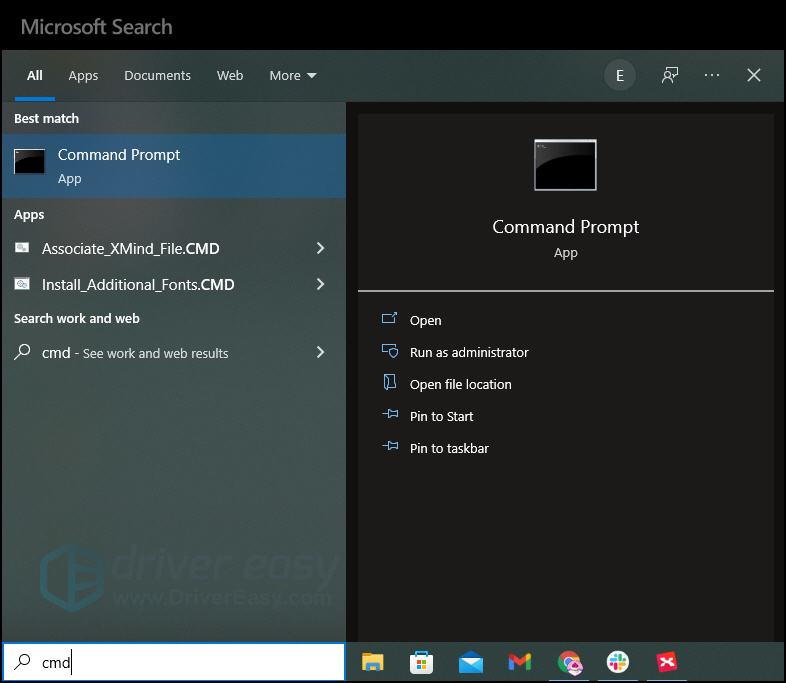
- Type cmd in the search box and select Run as administrator to open the Command Prompt.

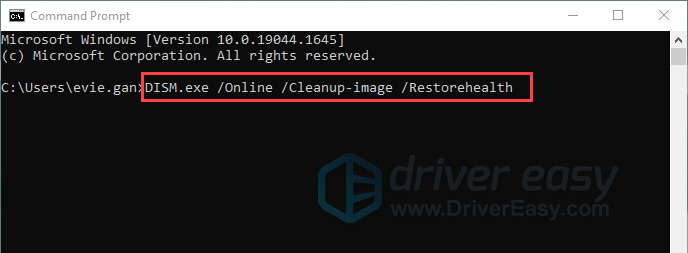
- Copy the following command to the Command Prompt and press Enter.
DISM /Online /Cleanup-Image /RestoreHealth
- Wait for the restore operation to complete.
- Restart your PC to see if the Snipping Tool is working now.
If this fix doesn’t work, try the last method below.
Method 7: Run System File Checker
When corrupted or damaged system files exist in your system, they could also cause the Snipping Tool to go wrong. In this case, maybe you should run a system scan to detect broken system files in your PC.
To do this, follow these steps:
- Press the Windows logo key and R on your keyboard to invoke the Run box.
- On your keyboard, type cmd and press Ctrl, Shift and Enter at the same time to run Command Prompt as administrator.
- You’ll be prompted for permission. Click Yes to open Command Prompt.
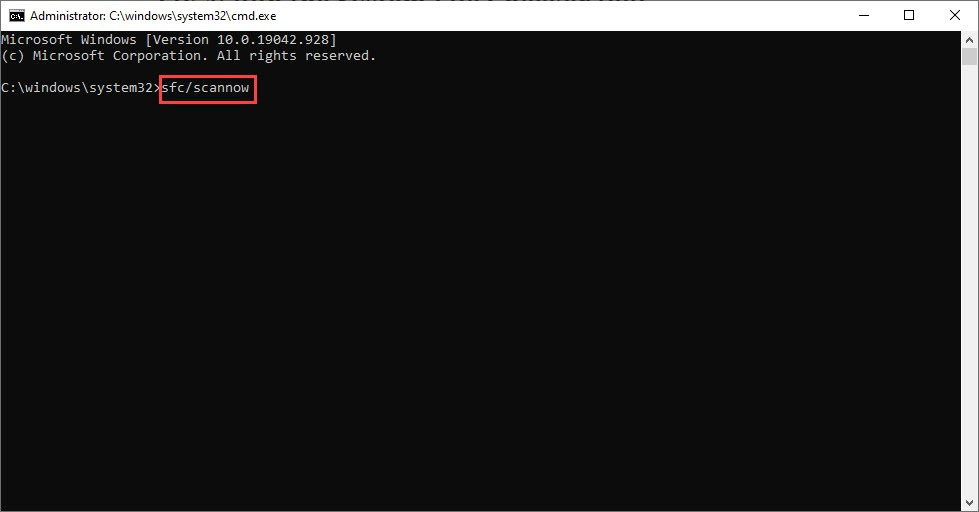
- Type sfc/scannow, then press Enter.

- The System Files Checker tool will automatically scan for corrupt or missing files and fix them, if there’s any.

Restart your PC to see if the issue persists.
That’s it – hopefully, this guide could help you solve the Snipping Tool not working problem. If you have any ideas or other fixes for this issue, please feel free to leave comments below. We would appreciate your thoughts!
10
10 people found this helpful
Все способы:
- Способ 1: Проверка назначения клавиш
- Способ 2: Отключение блокировки Win
- Проверка блокировки Win в GPO
- Способ 3: Использование Print Screen
- Способ 4: Сброс приложения
- Вопросы и ответы: 6
Проблемы с запуском нового встроенного инструмента создания скриншотов экрана нажатием Win + Shift + S в Windows 10 чаще всего возникает из-за некорректного переназначения клавиш, но неполадка может быть вызвана и другими причинами.
Способ 1: Проверка назначения клавиш
Если вы используете стороннее приложение для переназначения быстрых клавиш, зайдите в его настройки и убедитесь, что назначенная по умолчанию комбинация запуска приложения «Набросок на фрагменте экрана» не передана другой программе или ярлыку. В противном случае освободите это сочетание клавиш, чтобы Windows 10 могла его использовать по назначению.
Способ 2: Отключение блокировки Win
Некоторыми клавиатурами поддерживается сочетание клавиш, позволяющее блокировать клавишу Win. Если последняя будет заблокирована, за исключением Fn + Win все клавиатурные комбинации с Win работать не будут. При наличии на вашей клавиатуре блокиратора или индикатора Win Lock отключение Win поддерживается. Если индикатор горит, нажмите клавишу Win Lock, если таковая имеется, а если она отсутствует, попробуйте комбинации Fn + F6 и Fn + Win.
Проверка блокировки Win в GPO
Проверьте на всякий случай, не заблокирована ли клавиша Win политикой администратора. Для этого выполните следующие действия.
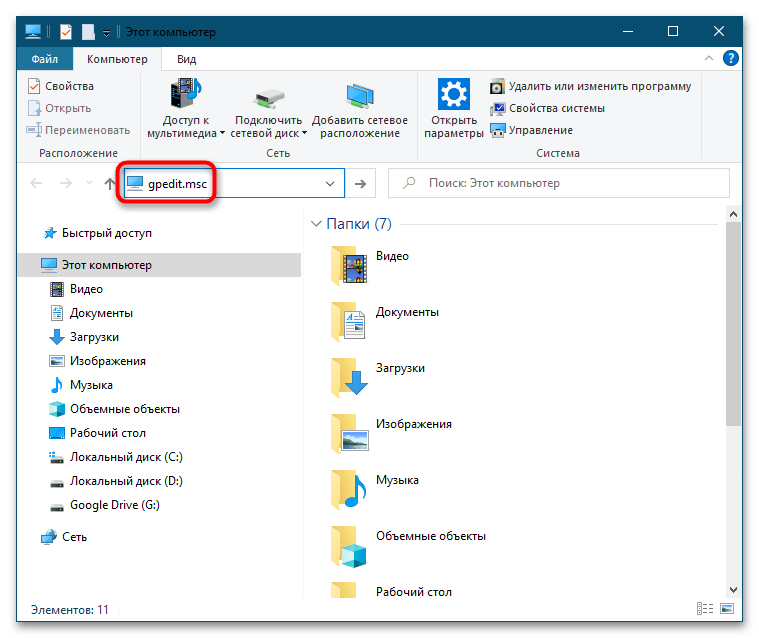
- Откройте «Редактор локальных групповых политик», для чего выполните команду
gpedit.mscв адресной строке «Проводника», если не работает комбинация вызова окошка быстрого выполнения команд Win + R. - Перейдите в раздел «Конфигурация пользователя» → «Административные шаблоны» → «Компоненты Windows» → «Проводник» и найдите справа политику «Отключить сочетания клавиш, в которых используется клавиша Windows».
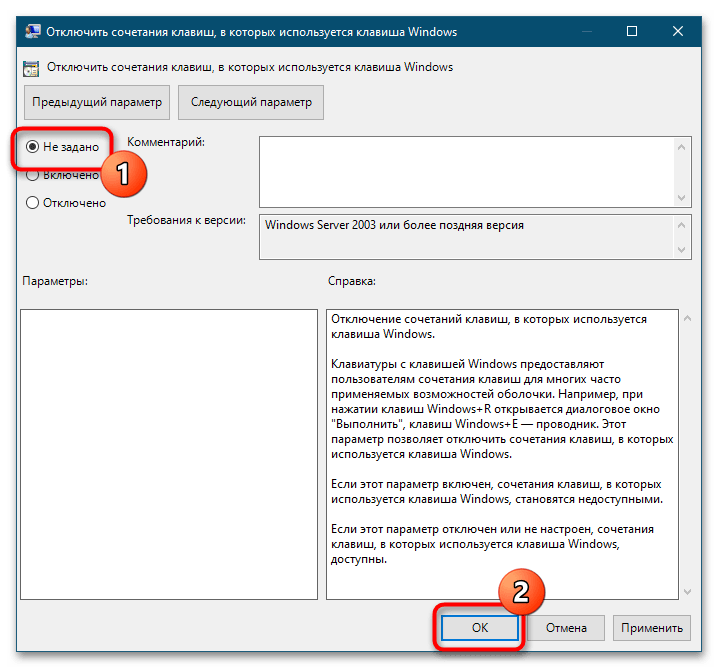
- Если она активна, отключите ее. Откройте свойства политики двойным кликом и включите радиокнопку «Не задано» или «Отключено».
- Перезагрузите компьютер или перезайдите в учетную запись Windows.

Способ 3: Использование Print Screen
Если у вас не работает комбинация Win + Shift + S, замените ее на Print Screen. К сожалению, этот способ работает не во всех сборках Windows 10, тем не менее попробовать решение все же стоит.
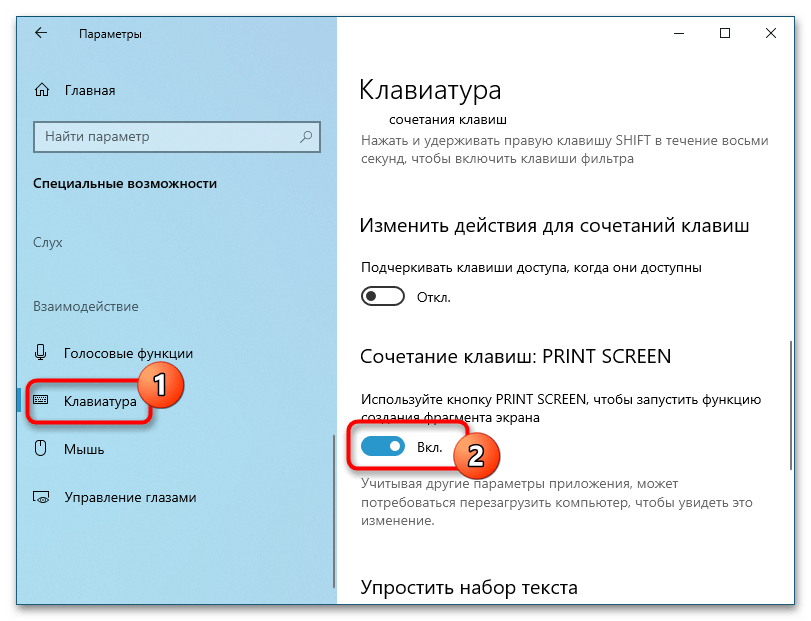
- Откройте приложение «Параметры» и перейдите в раздел «Специальные возможности» → «Клавиатура».
- Справа найдите опцию «Сочетание клавиш: PRINT SCREEN» и активируйте ее, переключив рычажок в положение «Вкл».
Способ 4: Сброс приложения
Не исключено, что проблема была вызвана повреждением самого приложения «Набросок на фрагменте экрана». Устранить ее можно путем сброса этой штатной программы.
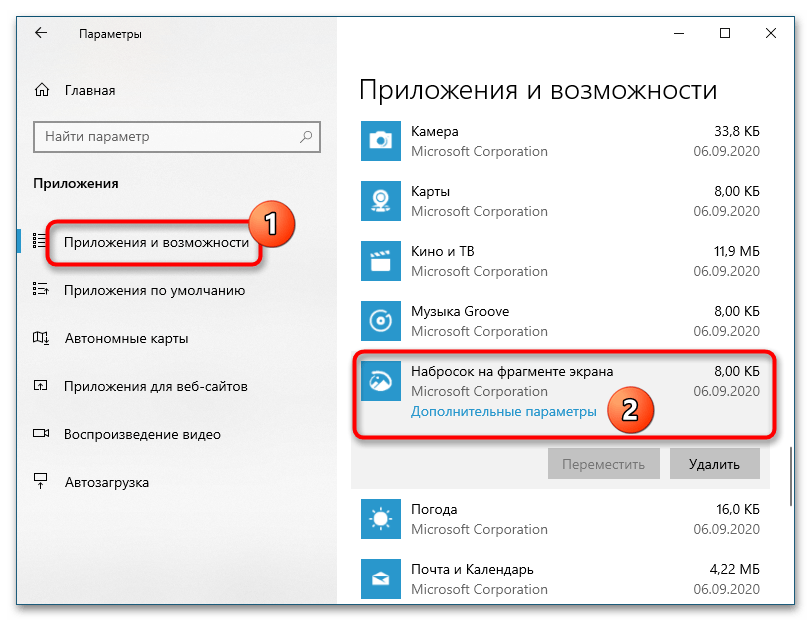
- Откройте приложение «Параметры», перейдите в раздел «Приложения» → «Приложения и возможности» и найдите справа программу «Набросок на фрагменте экрана».
- Нажмите по нему мышкой, а затем кликните ссылку «Дополнительные параметры».
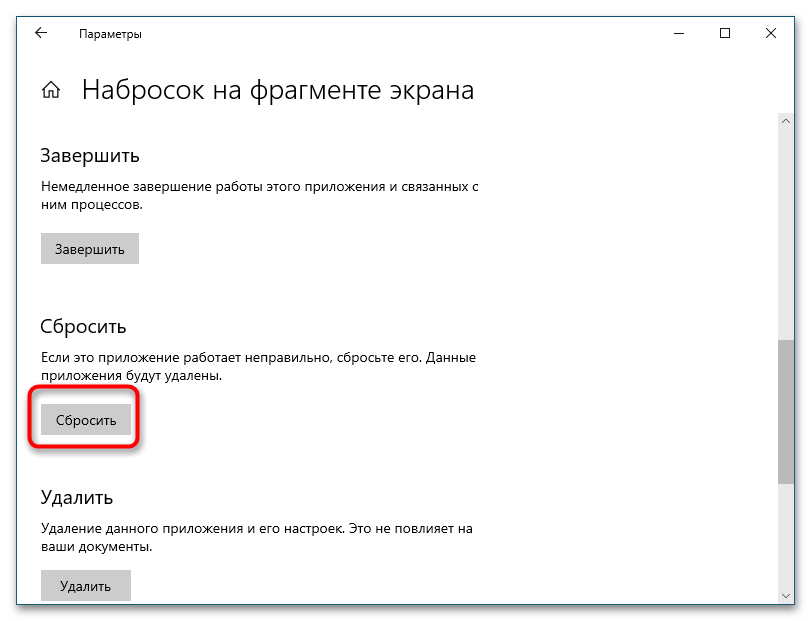
- Нажмите кнопку «Сбросить», чтобы восстановить исходные настройки приложения.
Если проблема сохранится и после сброса, удалите приложение и установите его повторно из Microsoft Store. Удалить программу можно из того же раздела, из которого выполнялся ее сброс.
Наша группа в TelegramПолезные советы и помощь
Does the Snipping Tool or Snip & Sketch fail to show up when you press Windows + Shift + S on your PC? This tutorial will show you how to fix that in Windows 11 and 10.
The Windows + Shift + S keyboard shortcut in Windows 11 can stop working for several reasons. For example, it could be a buggy or corrupt Snipping Tool installation or some conflict with another program on your computer.
Read on to learn how to get Windows 11’s Snipping Tool hotkey functioning as usual again. The fixes below also apply to the older Snip & Sketch app in Windows 10.

1. Run Store Apps Troubleshooter
Windows comes with a built-in automatic troubleshooter that helps resolve underlying issues with problematic Microsoft Store apps. Try running it if the Win-Shift-S shortcut key doesn’t invoke the Snipping Tool or if the app freezes, crashes, or fails to save screenshots.
1. Open the Start menu and select Settings. Or, press Windows + I.

2. Select System on the sidebar. If you use Windows 10, select the Update & Security category

3. Select the option labeled Troubleshoot.

4. Select Other troubleshooters or Additional troubleshooters.

5. Select Run or Run the troubleshooter next to Windows Store Apps.

2. Restart Your Computer
Did you try restarting your computer yet? Sometimes, a total system reboot is all it takes to eliminate problems preventing shortcuts and apps from working on your computer. If you haven’t already, do that before continuing with the rest of the fixes.

3. Enable Notifications
If the Windows + Shift + S shortcut appears to work, but the Snipping Tool doesn’t prompt you to save your snips, check if the app is set to display notification alerts.
1. Open the Settings app and select System > Notifications.

2. Turn on the switch next to Snipping Tool or Snip & Sketch.

Additionally, make sure that Focus Assist is not active or reconfigure it to stop blocking Snipping Tool alerts.
4. Activate Clipboard History
The Snipping Tool may also fail to work correctly if the clipboard history feature in Windows is inactive. Try turning it on and check if that makes a difference.
1. Open the Settings app and select System > Clipboard.

2. Scroll down and activate the Clipboard history switch.

5. Repair and Reset Snip & Sketch Tool
Repair the Snipping Tool if you run into issues invoking it even without the Win-Shift-S hotkey. If that doesn’t work, you must reset the app to its defaults.
1. Right-click the Start button and select Apps and Features.

2. Scroll down the Apps & Features screen and select Snipping Tool. Then, select the Advanced options link or button.

3. Select Repair to reset the app.

If the Win + Shift + S hotkey still won’t work, reset the Reset button to factory reset the Snipping Tool.
6. Re-register Snip and Sketch
If the problem persists, go through the following steps to re-register the Snipping Tool with Windows. It’s a straightforward process that involves running a specific command via an elevated Windows PowerShell console.
1. Right-click Start on the taskbar and select Windows Terminal (Admin) or Windows PowerShell (Admin).

2. Select Yes on the User Account Control pop-up.

3. Paste the following command and press Enter:
Get-AppXPackage -AllUsers | Foreach {Add-AppxPackage -DisableDevelopmentMode -Register “$($_.InstallLocation)\AppXManifest.xml”}

Alternatively, use the Command Prompt in Windows to re-register the Snipping Tool. Type cmd into the Start menu, select Run as administrator, and execute the following:
PowerShell -ExecutionPolicy Unrestricted -Command “& {$manifest = (Get-AppxPackage *Microsoft.ScreenSketch*).InstallLocation + ‘\AppxManifest.xml’ ; Add-AppxPackage -DisableDevelopmentMode -Register $manifest}”
7. Uninstall and Reinstall the Snipping Tool
Next, try reinstalling the Snipping Tool on your computer. To do that, open Settings and select Apps > Snipping Tool or Snip & Sketch. Then, select the Uninstall button and redownload the Snipping Tool via the Microsoft Store.

8. Check Local Group Policy Editor
If your computer runs the Pro edition of Windows 11 or 10, check the Local Group Policy Editor and make sure that a specific policy setting isn’t blocking the Snipping Tool from opening.
1. Press Windows + R to open the Run box. Then, type gpedit.msc and press Enter.

2. Visit the following directory and double-click the Do not allow Snipping Tool to run policy setting:
Computer Configuration > Administrative Templates > Windows Components > Tablet PC > Accessories

3. Select Not Configured or Disabled and save your changes.

9. Bind Snipping Tool to the PrtScn Key
The Windows Key + Shift + S shortcut might conflict with similar features from other apps on your PC—e.g., Screen Clipping in OneNote. Consider binding the Snipping Tool to the Print Screen key instead.
1. Open the Settings app and select Accessibility on the sidebar. If you use Windows 10, select the Ease of Access category instead.

2. Select Keyboard.

3. Turn on the switch next to Use the Print screen button to open screen snipping and restart your PC.

10. Update Windows
Installing the latest Windows updates can resolve any known system-related bugs or glitches preventing the Snipping Tool shortcut from working.
1. Open the Settings app and select Windows Update.

2. Select Check for updates and install any pending updates.

11. Run SFC or DISM Scan
Run the System File Checker and the DISM tool to repair possible instances of file corruption in Windows 11 and 10.
1. Open an elevated PowerShell or Command Prompt console and run the System File Checker:
sfc /scannow

2. Wait until the System File Checker finisher scanning and repairing corrupt system files. Then, run the DISM tool:
DISM /Online /Cleanup-Image /RestoreHealth

12. Troubleshoot in Clean Boot
Performing a clean boot allows you to isolate and remove third-party apps and services that interfere with the Snipping Tool or its shortcut.
1. Open the Run box, type msconfig, and press Enter.

2. Switch to the Services tab, check the box next to Hide all Microsoft services, and select Disable all.

3. Switch to the Startup tab and select Open Task Manager.

4. Disable each third-party startup item.

5. Restart your computer. If the Windows + Shift + S shortcut starts to work, re-activate groups of the services and startup apps you just disabled until you identify the conflicting item. Keep it turned off or remove the relevant program from your computer.
13. Use an Alternative Tool
If none of the above methods help and you have trouble opening the Snipping Tool or the Snip & Sketch apps directly, consider using alternative tools for screenshot purposes. In the meantime, continue installing operating system updates as soon as they become available. A future update could end up permanently fixing the issue.
Related Posts
- How to Fix a “This file does not have an app associated with it” Error on Windows
- How to Fix an Update Error 0x800705b4 on Windows
- How to Resolve “A JavaScript error occured in the main process” Error on Windows
- How to Fix the Network Discovery Is Turned Off Error on Windows
- How to Change Folder Icons in Windows