
Все способы:
- Способ 1: Удаление программ
- Способ 2: Отключение залипания клавиш
- Способ 3: Удаление одного из языков
- Способ 4: Обновление драйверов для тачпада (только ноутбуки)
- Способ 5: Устранение аппаратных неполадок
- Вопросы и ответы: 6
Операционной системой можно пользоваться даже без мышки, посредством горячих клавиш. Иногда, впрочем, эта функция перестаёт работать, и сегодня мы расскажем, почему это происходит и как с этим бороться.
Способ 1: Удаление программ
Наиболее часто описываемый сбой возникает из-за специфического софта, такого как средства для автоматической смены раскладки или менеджеров буфера обмена. Решением проблемы будет его деинсталляция.
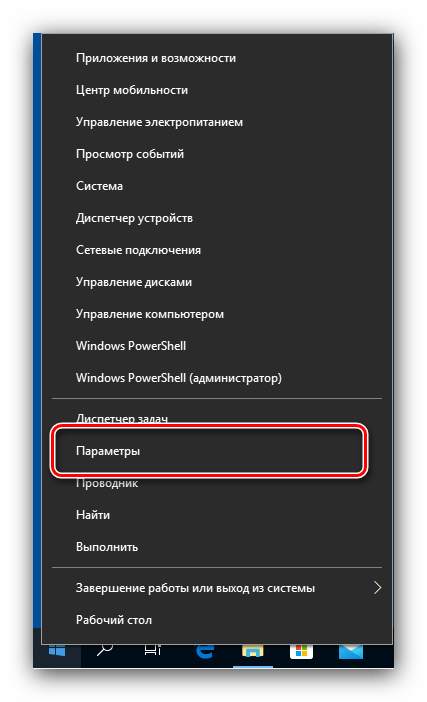
- Откройте «Параметры» любым удобным способом – например, кликните правой кнопкой мыши по кнопке «Пуск» и выберите соответствующий пункт в меню.
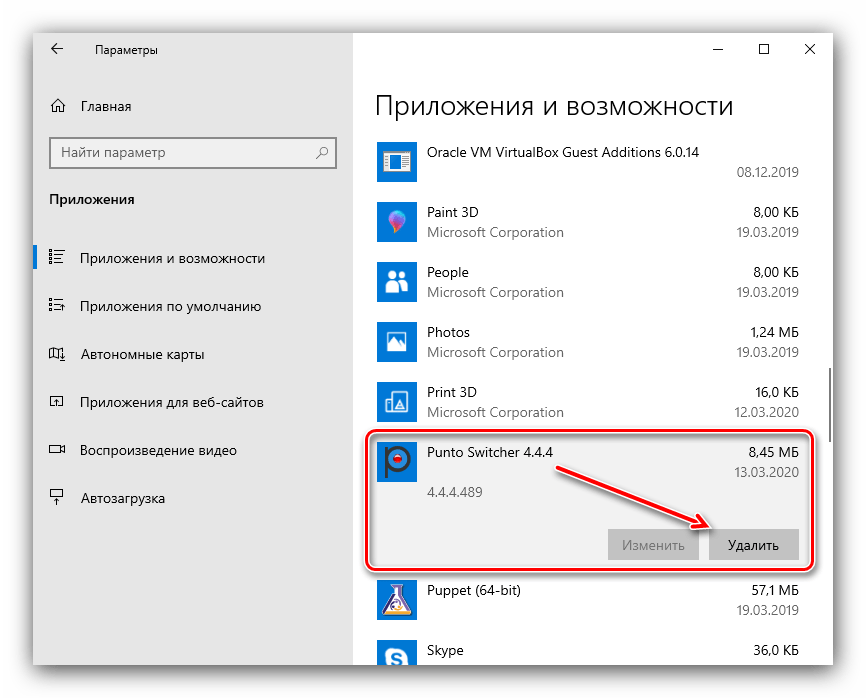
- В окне «Параметров» откройте пункт «Приложения».
- Прокрутите страницу вниз для доступа к списку инсталлированных программ. Найдите там нужное ПО и кликните по нему левой кнопкой мыши, затем воспользуйтесь кнопкой «Удалить».
- Используйте инструмент удаления программы, после чего перезапустите ПК. Проверьте работоспособность горячих клавиш Виндовс – наверняка проблема будет решена.

Способ 2: Отключение залипания клавиш
Иногда хоткеи неработоспособны из-за активной опции залипания. Отключить её можно следующим образом:
- Снова воспользуйтесь «Параметрами», но на этот раз выберите пункт «Специальные возможности».
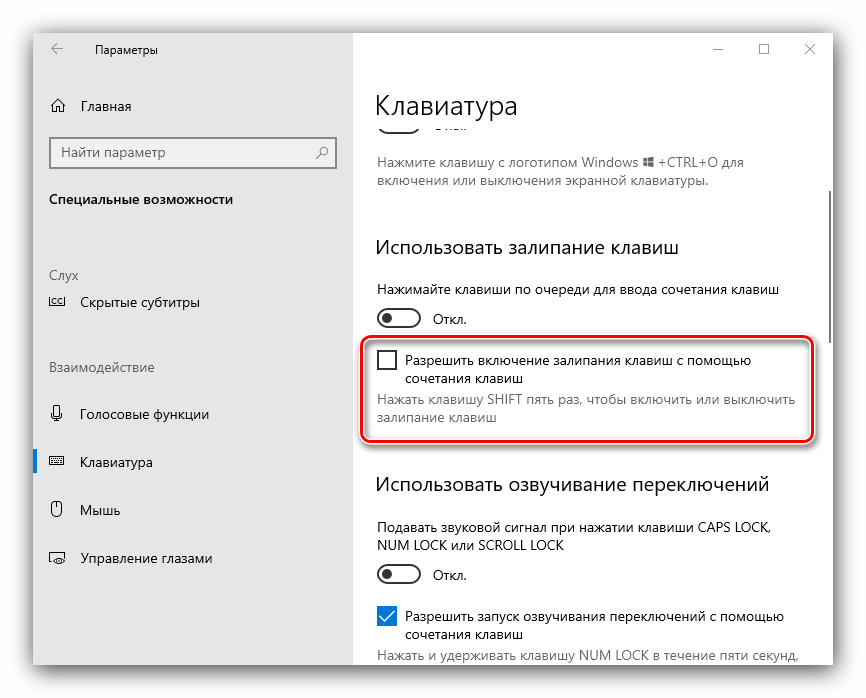
- Прокрутите боковое меню до раздела «Клавиатура» и перейдите к нему.
- Найдите блок «Использовать залипание клавиш». Если переключатель «Нажимайте клавиши по очереди…» включён, переведите его в положение «Откл».
- Также отключите пункт «Разрешить включение залипания клавиш с помощью сочетания клавиш».


Проверьте работоспособность функции хоткеев – она должна работать без проблем.
Способ 3: Удаление одного из языков
Также горячие клавиши могут не работать на некоторых из языковых пакетов. Решение проблемы заключается в определении сбойного компонента и его удалении.
- Для начала стоит выяснить, с каким языком не работает рассматриваемая возможность. Проверить это достаточно просто – по очереди переключайте раскладки и прожимайте комбинации.
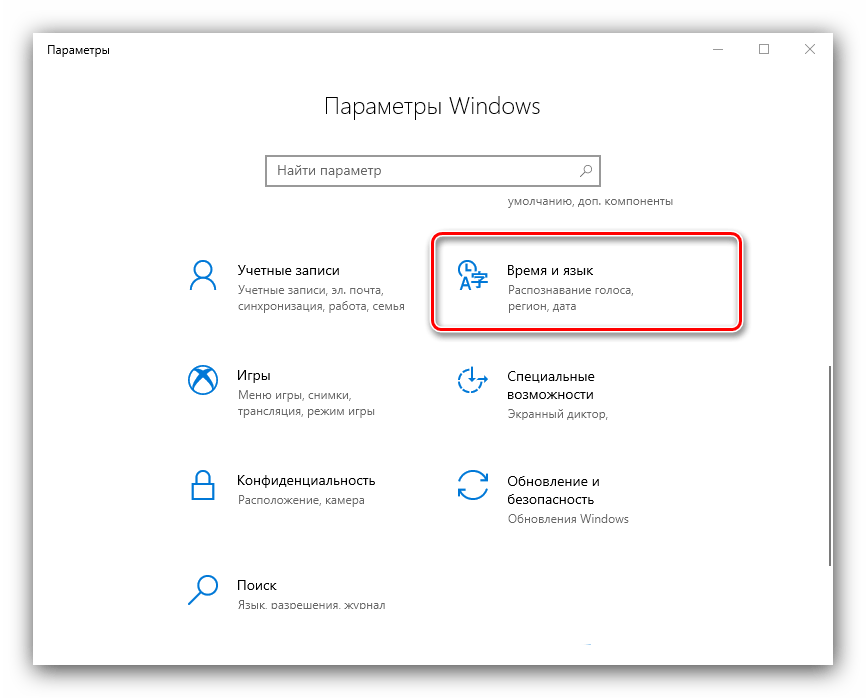
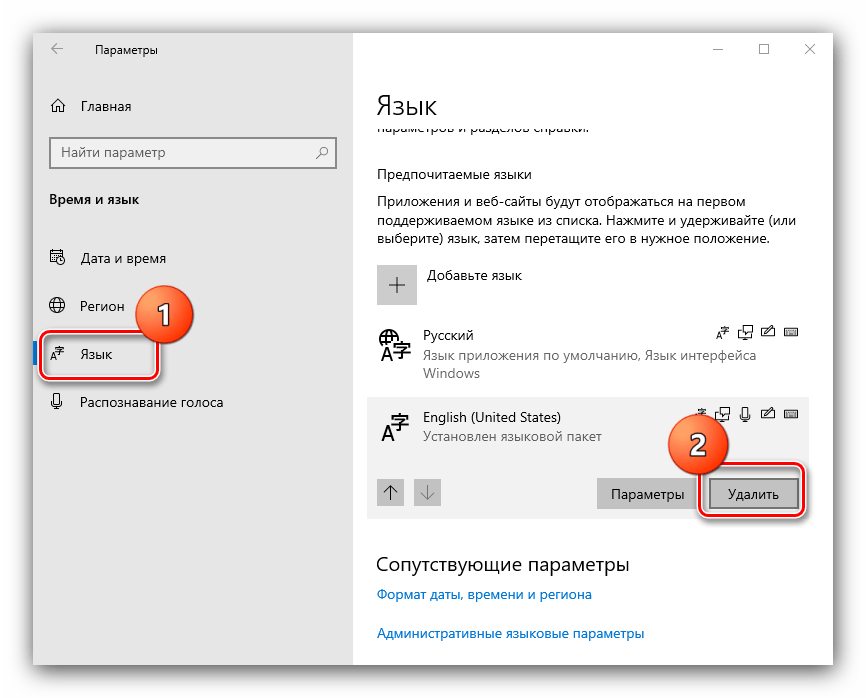
- Для удаления проблемного пакета нужно воспользоваться «Параметрами»: вызовите оснастку и перейдите к разделу «Время и язык».
- Откройте пункт «Язык», затем в правой части окна найдите список языков. Выделите его и нажмите на кнопку «Удалить».
- Подождите, пока пакет будет удалён, после чего перезагрузите машину.
- После запуска ОС проверьте, работают ли сочетания клавиш. Если да, попробуйте снова добавить удалённый языковой пакет, если он вам требуется.
Подробнее: Добавление языковых пакетов в Windows 10
Способ 4: Обновление драйверов для тачпада (только ноутбуки)
Пользователи ноутбуков могут столкнуться с рассматриваемым сбоем после обновления служебного софта для тачпада. Проделайте следующёе:
- Удалите текущую версию драйверов по инструкции далее.
Подробнее: Удаление драйверов в Windows 10
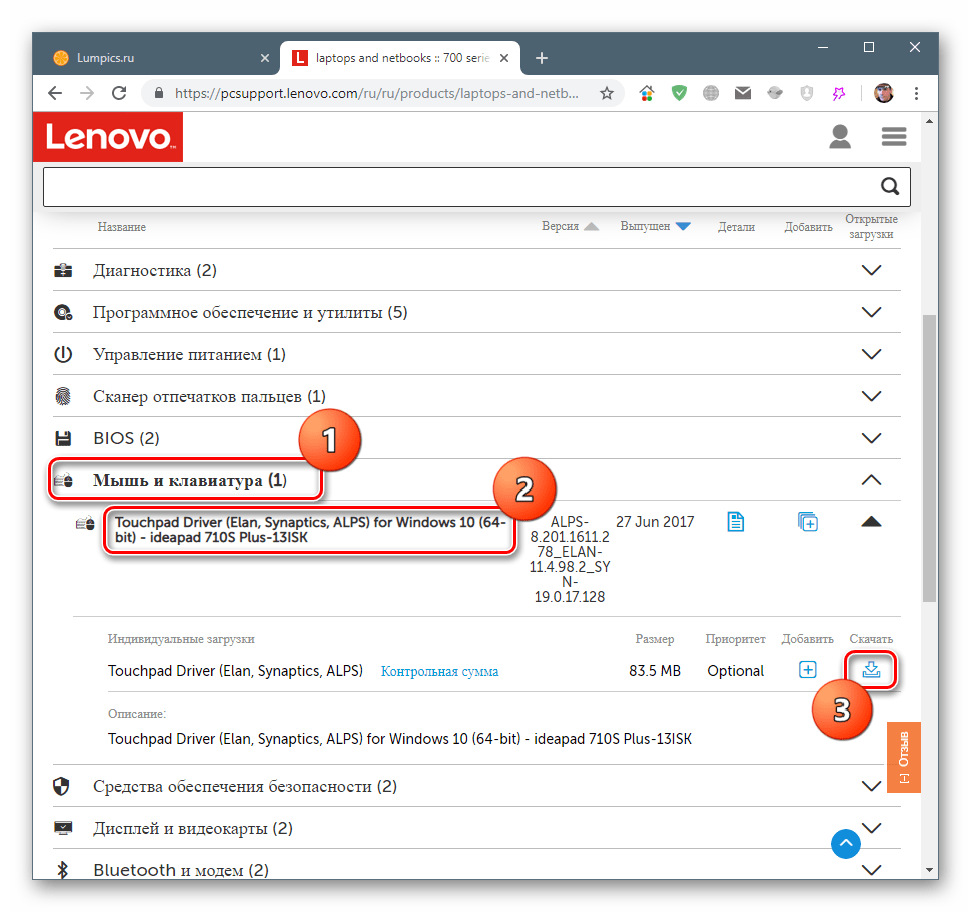
- Загрузите с сайта производителя вашего лэптопа предыдущий вариант служебного ПО для сенсорной панели и инсталлируйте его.

Подробнее: Установка драйверов для тачпада
- Проверьте, пропала ли проблема – если её причиной был конфликтующий софт, она должна быть устранена.
Способ 5: Устранение аппаратных неполадок
Если программные методы решения рассматриваемой проблемы не помогают, логично предположить, что сбой имеет аппаратную природу, на стороне клавиатуры либо самого компьютера. Для определения причины выполните следующее:
- На настольном компьютере подключите его клавиатуру к другой машине, заведомо работоспособной. Для ноутбуков же, напротив, подсоедините к нему внешнее решение. Если проблема всё так же наблюдается, её источником является клавиатура. Методом устранения в такой ситуации будет замена устройства.
- Если же на другом настольном ПК либо с другой клавиатурой на ноутбуке сбой всё ещё присутствует, его причина на стороне компьютера. В нём выйти из строя может как разъём подключения (для проводных комплектующих), так и беспроводной модуль (для Bluetooth-средств). Здесь можно порекомендовать только обращение в сервисный центр.
Таким образом, мы выяснили, почему в Windows 10 перестают работать горячие клавиши, и предложили вам несколько вариантов решения этой проблемы.
Наша группа в TelegramПолезные советы и помощь
Многие действия Windows 11 и 10 удобнее и быстрее выполнять с помощью сочетаний клавиш, многие из которых задействуют клавишу Win (Windows) — обычно находящуюся в нижнем ряду клавиатуры слева. Однако, некоторые пользователи могут столкнуться с тем, что нужная клавиша не работает.
В этой инструкции подробно о том, почему может не работать клавиша Win на клавиатуре компьютера или ноутбука и способах это исправить.
Функции включения и отключения клавиши Win на игровых клавиатурах и ноутбуках

Некоторые игровые клавиатуры и ноутбуки предлагают функцию отключения клавиши Win для исключения случайных нажатий во время игры. В зависимости от конкретной модели игрового устройства, реализовано это может быть по-разному, например:
- Для игровых устройств ASUS настройку включения и отключения клавиши Win можно найти в приложении Armoury Crate, для Corsair — в iCUE в настройках профиля клавиатуры, для других игровых компьютеров/клавиатур также можно поискать настройку в фирменном приложении.

- Некоторые игровые клавиатуры поддерживают блокировку клавиши Win сочетанием клавиш. Сами сочетания могут отличаться, например: Fn+Win, Fn+Win+L (отдельные клавиатуры Red Square), Fn+F1 (клавиатуры XPG), Fn+F8 (на некоторых клавиатурах Logitech), возможны и другие комбинации, например, Fn+f6
- Отдельные клавиатуры могут иметь переключатель игрового режима: при наличии такого, попробуйте отключить игровой режим.


Подводя итог по этой части: если у вас игровое устройство, изучите настройки фирменного ПО, функциональные клавиши и их назначение (открыв инструкцию к вашей клавиатуре) — вероятнее всего, отключение клавиши Win было выполнено с их помощью.
В дополнение к указанным пунктам можно попробовать отключить игровой режим в Параметрах Windows 11 или Windows 10 — по некоторым сообщениям, для части устройств он может также отключать и клавишу Win.
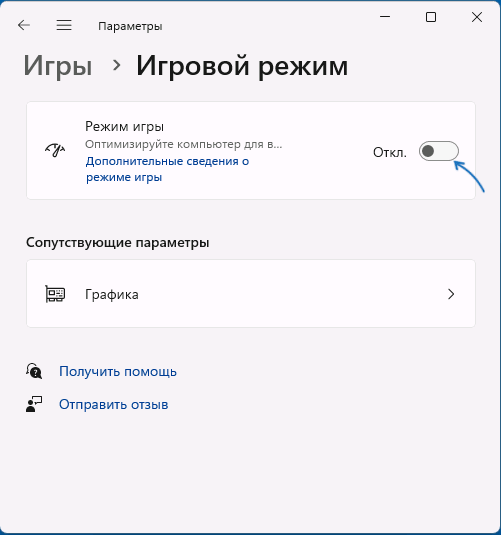
Найти настройки игрового режима можно в разделе Параметров «Игры».
Устранение неполадок клавиатуры
Если речь идёт о простой, не игровой клавиатуре, на которой перестала работать клавиша Win, вы можете попробовать следующие методы решения проблемы:
- Попробуйте удалить клавиатуру в диспетчере устройств (правый клик — удалить), а затем выбрать в меню диспетчера устройств «Действие» — «Обновить конфигурацию оборудования».
- Попробуйте подключить клавиатуру (или приёмник) к другому USB-разъему.
- Запустите средство устранения неполадок клавиатуры: нажмите правой кнопкой мыши по кнопке «Пуск», выберите пункт «Выполнить» и используйте команду
msdt.exe -id KeyboardDiagnostic
Внимание: классические инструменты устранения неполадок, возможно, прекратят работу в будущих версиях Windows.

- Попробуйте отключить фильтрацию ввода, для этого в Windows 11 и Windows 10 можно зайти в Параметры — Специальные возможности — Клавиатура и отключить опцию «Фильтрация ввода».

- Проверьте, нет ли других совместимых драйверов для вашей клавиатуры: в диспетчере устройств нажмите правой кнопкой мыши по клавиатуре, выберите «Обновить драйвер» — «Поиск драйверов на этом компьютере» — «Выбрать из списка установленных драйверов» и, при наличии другого совместимого драйвера, попробуйте выбрать его.


В заключение несколько дополнительных возможных причин не работающей клавиши Win на клавиатуре и подходов к решению проблемы:
- Если до появления проблемы вы устанавливали какие-либо твикеры или иные программы для настройки системы, некоторые из них могут содержать функции отключения или переназначения клавиш, которые, в том числе могли повлиять на работу клавиши Win: можно проверить наличие соответствующих настроек в таких программах.
- В Windows есть возможность настройки системной политики, отключающей комбинации клавиш с клавишей Win. Откройте редактор реестра и проверьте, нет ли параметра с именем NoWinKeys в разделе
HKEY_CURRENT_USER\Software\Microsoft\Windows\CurrentVersion\Policies\Explorer
и аналогичном подразделе в HKEY_LOCAL_MACHINE, при наличии — удалите его, а затем выйдите из системы и вновь зайдите, либо перезагрузите компьютер.
- Если проблема возникла недавно и предполагается, что причина — в системе, а не самой клавиатуре, можно попробовать использовать точки восстановления системы.
Учитывайте, что проблема может быть и аппаратной: неисправность клавиатуры вследствие износа или пролитых жидкостей: причем во втором случае проблемы часто проявляются не сразу, а через некоторое время после самого события.
Если вам необходима клавиша Win, при этом она не работает физически, а замена клавиатуры по какой-либо причине невозможна, вы можете использовать инструменты переназначения клавиш, такие как AutoHotkey, соответствующие настройки в Microsoft PowerToys и другие варианты.
Приветствую всех, кто зашел на мою страницу! Сегодня я хочу поделиться с вами своей историей о том, как я столкнулся и решил проблему с неработающими горячими клавишами в Windows 10. Это было непростое испытание, но благодаря нему я узнал много нового и теперь готов поделиться этими знаниями с вами.
Первые Признаки: Горячие Клавиши Отказываются Работать
Все началось довольно неожиданно. Однажды я попытался использовать привычные комбинации клавиш, такие как Ctrl+C для копирования текста, и ничего не произошло. Сначала я подумал, что это просто маленький сбой, но со временем понял, что проблема куда серьезнее.
Проверка Индивидуальных Клавиш
Первым делом я убедился, что проблема не в самих клавишах:
1. Проверил работу Ctrl, Alt и Shift в других сочетаниях и приложениях.
2. Убедился, что проблема касается всех горячих клавиш в целом.
Поиск и Устранение Неполадок: Мои Шаги
Поняв, что дело не в отдельных клавишах, я начал поиск способов решения проблемы.
Перезагрузка Системы
Как часто бывает, первый и самый простой шаг – это перезагрузка компьютера. Иногда это помогает решить множество небольших проблем.
Проверка Языковых Настроек
1. Я проверил, не были ли изменены языковые настройки клавиатуры, так как это могло повлиять на работу горячих клавиш.
Обновление Драйверов Клавиатуры
1. Через «Диспетчер устройств» я обновил драйверы клавиатуры, чтобы исключить возможные проблемы с ними.
Более Глубокие Решения: Технические Действия
Когда базовые методы не помогли, я перешел к более серьезным шагам.
Использование Встроенной Функции Устранения Неполадок Windows
1. Я запустил встроенный инструмент устранения неполадок Windows для клавиатуры через «Панель управления«.
Сброс Настроек Системы
1. Я пробовал восстановить систему до последней рабочей точки восстановления, чтобы отменить возможные изменения, повлиявшие на работу горячих клавиш.
Финальные Шаги: Решение Найдено
В итоге, проблема оказалась в конфликте между недавно установленным программным обеспечением и системными настройками горячих клавиш. После удаления этой программы и повторной настройки горячих клавиш все вернулось в норму.
Это был настоящий вызов, но я рад, что смог найти и устранить причину проблемы. Надеюсь, что мой опыт окажется полезным для всех, кто сталкивается с подобными трудностями. Помните, что для каждой проблемы найдется решение, главное – не сдаваться и методично искать источник неполадки. Удачи вам, и до новых встреч в моем блоге!
This post will guide you on what to do if your keyboard shortcuts or hotkeys are not working on your Windows 10 computer. A lot of users use hotkeys as they make things easier for them as they use their computer. However, there are instances when these hotkeys suddenly stop working. It’s actually one of the most common problems with keyboards. And so to resolve this problem, you can try out some suggestions prepared on this post.
Option 1 – Clean the keyboard keys physically
Your keyboard might not be working properly due to some dirt or other corrosion. First, you need to shut down your computer and then unplug the keyboard if you are using a desktop computer and then prepare it for cleaning. After that, use a small cotton ear cleaning tool to get between the creases and clean them. You can dip it slightly in alcohol to make it more efficient in cleaning dust and dirt. And if you can, you have the option to pull apart the keyboard completely and then wipe away all the corrosion from the inside. Once you’re done, put the keyboard back together and then plug it back into your PC. Now turn your PC on and check if the hotkeys are now working.
Option 2 – Try running the Hardware and Devices Troubleshooter
The first thing you can do to fix the problem is by running the Hardware Troubleshooter. Although it won’t make much of a difference, there’s still a possibility that it could automatically fix the problem with these function keys. To use it, refer to these steps:
- The first thing you need to do is click on Start and then on the gear-like icon to pull up the window for Settings.
- After opening Settings, look for the Update and Security option and select it.
- From there, go to the Troubleshoot option located on the left-hand side of the list.
- Next, select Hardware and Devices from the list and open the Troubleshooter and run it. Once it is doing its job, wait for it to complete the process and then restart the system.
- After the system restarts, check if the problem’s now fixed. If not, refer to the next option given below.
Option 3 – Try connecting the keyboard to a different USB port
The problem might have something to do with the USB port that’s currently in use by your keyboard. It could be that it’s not working so it makes sense to unplug it and attach it to another USB port. You can also clean the USB port on both ends to ensure that they are not affected by corrosion.
Option 4 – Uninstall previously installed keyboard software
If you have been previously using another keyboard, it might be better if you make sure that the software for the old device has been removed since there are instances when multiple software can cause problems due to similarities in actions.
Option 5 – Update the keyboard driver
You can also update the keyboard driver to fix the problem. There are cases when an outdated or corrupted driver can fix the problem. To do so, follow the steps below.
- Tap the Win + R keys to open the Run dialog box.
- Then type “devmgmt.msc” in the field and hit Enter to open the Device Manager.
- From there, look for the keyboard driver and click on it.
- Next, right-click on the keyboard driver and select the Update driver option.
- After that, click the “Search automatically for updated driver software” option to proceed.
Option 6 – Reinstall the keyboard driver
If updating the keyboard driver didn’t help, then you might want to reinstall it. How? Follow the steps below.
- Tap the Win + R keys to launch Run.
- Type in MSC into the box and tap Enter or click OK to open the Device Manager.
- After that, a list of device drivers will be displayed. Look for keyboard driver, right-click on it and then select “Uninstall device”.
- After that, unplug the device and restart your PC.
- Then plug your device back in. Assuming your device is connected to your PC, open the Device Manager again.
- Next, click on the Action button and click the Scan for hardware changes button. That should fix the problem.
Note: You could also completely uninstall the driver and go directly to the manufacturer’s website and download the latest driver for your hardware and then install it.
Option 7 – Enable Human Interface Device (HID) Service
Another thing to consider is the Human Interface Device Service. If this service is disabled, then no wonder why your hotkeys are not working. Thus, you need to enable this service. Refer to the following steps to do that:
- Tap the Win + R key to launch the Run dialog box.
- Then type “services.msc” in the field and hit Enter to open Services.
- After opening Services, scroll down until you see the Human Interface Device service.
- Double click on HID and make sure that its Startup Type is set to “Automatic” and then click OK.
- Restart your PC and check if the hotkeys are now working or not.
Option 8 – Try resetting the keyboard
You might also want to try resetting the keyboard as it can also help in fixing the problem. Setting it back to its default state will surely help.
Do You Need Help with Your Device?
Our Team of Experts May Help
Troubleshoot.Tech Experts are There for You!
GET HELP
Troubleshoot.Tech experts work with all versions of Microsoft Windows including Windows 11, with Android, Mac, and more.
Share this article:
You might also like
If you are currently facing the “A required device isn’t connected or cannot be accessed” error with codes 0xc0000185, 0xc0000225, 0xc0000001, 0xc00000f, and 0xc000000e on your Windows 10 computer, worry not for this post will help you resolve this problem. All these error codes point out the same thing – your computer needs to be repaired. Some of these error codes are related to the “winload.efi” file which means that you are using the UEFI system. This file also loads up important drivers in order to start the Windows Kernel. And if you got a remark from any of these error codes indicating that there is a hardware failure or that the driver configuration is incorrect, then you must physically check if the wires are connected properly.
This kind of error occurs mostly when your computer wasn’t able to locate the system files that are needed to boot up your computer. Thus, the only way to fix this problem is to correct the boot record. It is recommended that you utilize the “/RebuildBCD” option in order to rebuild the BCD files. To do so, follow these steps:
- You can start by booting into the installation environment for Windows 10 from an installation media.
- After that, click on Repair your computer and on the blue screen, select Troubleshoot and then select the Advanced options menu.
- From there, select Command Prompt and once you open it, enter each one of the commands given below by sequence.
- bootrec /FixMbr
- bootrec /FixBoot
- bootrec /ScanOS
- bootrec /RebuildBcd
- Once you’re done executing the commands given above, type “exit” to close the Command Prompt window and then restart your computer and see if it fixed error code 0xc000014c.
On the other hand, if rebuilding the BCD using the /RebuildBCD option didn’t help, you can try a crude way to rebuild the boot record from scratch. You can do that by following the given steps below which will export and delete/backup the BCD available in the system.
- Go to the Advanced Recovery Mode.
- From there, go to Command Prompt and execute the commands given below and make sure to enter them one after the other.
- bcdedit /export C:BCD_Backup
- c:
- cd boot
- attrib bcd -s -h –r
- ren c:bootbcd bcd.old
- bootrec /RebuildBcd
If it still didn’t help, then troubleshoot the problem further with the help of the following instructions.
Option 1 – Disable the Secure Boot in the BIOS
Disabling the Secure Boot in the BIOS settings is definitely recommended to resolve the error. To disable Secure Boot, here’s what you have to do:
- First, boot your computer into Windows 10.
- Next, go to Settings > Windows Update. From there, check if there is anything that you have to download and install if you see any available updates. Usually, OEMs send and update the list of trusted hardware, drivers, and operating systems for your computer.
- After that, go to the BIOS of your computer.
- Then go to Settings > Update & Security > Advanced Startup options. If you click on Restart Now, it will restart your computer and give you all the advanced options.
- Next, select Troubleshoot > Advanced Options. As you can see, this screen offers you further options including System restore, Startup repair, Go back to the previous version, Command Prompt, System Image Recovery, and UEFI Firmware Settings.
- Select the UEFI Firmware Settings which will take you to the BIOS.
- From there, go to the Security > Boot > Authentication tab where you should see Secure Boot. Note that every OEM has its own way of implementing the options so it varies.
- Next, set Secure Boot to Disabled and set Legacy Support to On or Enabled.
- Save the changes made and exit. Afterward, your computer will reboot.
Option 2 – Run System File Checker
You could also run a System File Checker or SFC scan. All you have to do is select Command Prompt from the Advanced Options. Once you’ve opened Command Prompt, type the “sfc /scannow” command and tap Enter to execute it.
Option 3 – Disable the Early Launch Anti-Malware Protection
- You need to restart your computer in the Start Menu first while holding down the Shift key on your keyboard.
- After that, it will restart your computer to Startup Settings.
- Now ensure that the 8th option is labeled as “Disable early launch anti-malware protection.
- Then tap the F8 key since the aforementioned option above is listed at number 8. This should launch and load Windows on your PC with the Early Anti-malware protection disabled for that session only when you try to carry out the same task and then check if the error related to the Winload.efi file is now fixed.
Option 4 – Try to run Automatic Startup Repair
In this option, you need to boot your computer into the Advanced Startup Options and from there, run the Automatic Startup Repair and then wait until the process is completed.
Option 5 – Try to reset the BIOS or the UEFI Settings
If updating the BIOS didn’t help in fixing the error, you can try to reset the BIOS instead.
- Start your computer and tap the F10 key during the booting process to enter the BIOS. If it does not work, you can try tapping the F1 or F2 key as well as the Del key.
- Once you’re already in the BIOS, tap the F9 key to get the prompt to RestoreLoad default configuration now for the BIOS.
- Next, click on Yes and then follow the next on-screen instructions that appear to set the BIOS back to its default settings.
- Once you’re done restoring the default settings of the BIOS, restart your computer and then check if it now boots properly.
Option 6 – Try to physically check the hardware
You should also check the physical status of the hardware in your computer. You can clean the dust off the hardware components like the Network Card of the computer. You might want to use a small blower or you could also use a soft cloth and run the components gently. Make sure that you don’t damage any parts with moisture or cause harm to any circuits while you carry out this task.
Read More
It seems that Microsoft is going to offer subscription and sales of individual office applications in the Windows Store. The office package will still be available as a package but for the first time, we will get single applications as standalone ones available for purchase.

This is a very interesting decision by Microsoft and I fully support it, this time users will be able to pay less and to choose only applications that they need instead of paying for the whole package and not using it.
Read More
It is a fact that Google Chrome is one of the world’s most used web browsers and it’s because this search giant is focused on following the standards of the web. Although this web browser has become quite bloated over the years, it still remains at the top of the list of browsers used most by users. If you are a user of Google Chrome for a long time now, you have most likely come across a couple of issues in the past while using this browser. In this post, we’ll help you fix one of the issues commonly encountered in Chrome which is the “No Data Received – ERR_EMPTY_RESPONSE” error.
This kind of error message in Chrome pops up when you try to log into a website. It isn’t clear what’s the cause of this error but worries not, for there are several ways you can try to fix it.
Option 1 – Try checking if your network connection is working
The No Data Received – ERR_EMPTY_RESPONSE error is not usually related to a downed network. However, anything is possible so you need to check if your internet connection is working just fine or not as it might be the reason why you’re getting this error in Chrome.
Option 2 – Try resetting the network
There are instances when a network goes into haywire because of a bad DNS. Thus, a bad DNS might be the one that’s causing this headache so it’s time for you to reset the entire network to resolve the issue. To reset the network, here’s what you have to do:
- Click the Start button and type in “command prompt” in the field.
- From the search results that appear, right-click on Command Prompt and select the “Run as administrator” option.
- After opening Command Prompt, you have to type each one of the commands listed below. Just make sure that after you type each command, you hit Enter
- ipconfig /release
- ipconfig /all
- ipconfig /flushdns
- ipconfig /renew
- netsh int ip set dns
- netsh winsock reset
After you key in the commands listed above, the DNS cache will be flushed and the Winsock, as well as the TCP/IP, will reset.
- Now restart your computer and open Google Chrome then try opening the website you were trying to open earlier.
Option 3 – Try to clear the browsing data of Google Chrome
If your browsing data in Chrome hasn’t been cleared for some time now then that might be the reason why you’re suddenly getting the ERR_EMPTY_RESPONSE error when you browse the web. To fix this error, you need to clear your web browsing data. Refer to the following steps to do so.
- Tap the Ctrl + Shift + Delete buttons to go to the Clear browsing data section in Chrome.
- Next, set the time range to “All time” and tick all the boxes and then click on the Clear data button.
- After that, restart the Chrome browser and try to open the website you were trying to open earlier.
Option 4 – Reset Google Chrome
If none of the options given above worked, you can try resetting the Chrome browser. To do that, follow these steps:
- Open Google Chrome, then tap the Alt + F keys.
- After that, click on Settings.
- Next, scroll down until you see the Advanced option, once you see it, click on it.
- After clicking the Advanced option, go to the “Restore and clean up an option and click on the “Restore settings to their original defaults” option to reset Google Chrome.
- Restart Chrome and check if you can now open the webpage or not.
Read More
Universal PnP or plug-and-play monitors use a generic PnP Windows driver.
Whenever a user plugs a USB device or monitor into a PC the system will automatically identify the device and it will install the proper driver for smooth running.
Generic PnP Monitor in Windows 10 means that Windows 10 installed a monitor driver as the PNP did not recognize the device. This generic PnP monitor driver may not work perfectly like the manufacturer’s one.
It can lead to issues like unable to set the best monitor resolution and the screen refresh rate. Therefore, it is important to fix this issue.
All of that being said let us fix your PnP display driver issue.
-
Reconnect monitor
Always try this first, just by unplugging the monitor and then plugging it back may resolve the issue, if the monitor was not detected properly the first time, there are very high chances that this method will resolve the issue.
-
Check if the Device Manager is reporting an error and update the driver
If the hardware is functioning properly then the issue might be in Windows not detecting device or driver malfunction. In any case, the Device Manager will be the one who will report this problem. In order to check to see if the driver is properly working press ⊞ WINDOWS + X to open the hidden start menu.

Once it opens, click on Device Manager to open it,
If you have a driver device error inside Windows, you should see it immediately when entering the Device Manager, it will have a yellow exclamation mark beside it. Right-click on it and choose update driver. -
Reinstall driver
If driver update failed or you already have the latest drivers, reinstalling them could fix the issue since drivers might have corrupted during installation of some update or application. Follow steps from point 3 to get to the driver in Device Manager, then right-click on it but instead of update choose to uninstall. Reboot Windows once the driver is uninstalled and Windows will install a new one automatically. If you do not want to update drivers automatically install the latest driver for your device, then reboot.
-
Check Windows update
Check to see if the latest Windows update is installed, update your Windows if needed
-
Fix driver issue with DRIVERFIX
If everything else fails, get DRIVERFIX, a premium solution for your PC issues, and fix driver errors.

Read More
What is Bandoo?
Bandoo application, specifically product version 5.0.2.4762, is a bundled program. What does this mean? Simply, Bandoo, upon installation, installs additional programs, extensions, and add-ons to a computer and computer’s browser, without the knowledge of the user. This version of Bandoo concentrates on providing features for entertainment and also functionality/tools for backing up your computer files. Once executed, the file installs the iLivid Download Manager Software.
Additional tools installed within the bundle include a Movie Toolbar and the thriving search engine ‘Ask.com.’
Technical details about Bandoo include:
Digital Signature/Publisher: Bandoo Media, Inc.
Product Version: 5.0.2.4762
Entry Point: 0x000038AF
Assessment of Bandoo Potentially Unwanted Program
Interestingly, before the installation of Bandoo product version 5.0.2.4762 was complete, Spyhunter detected that the software was a PUP. After the installation was complete, product version 5.0.2.4762 of Bandoo added add-ons and extensions to both Internet Explorer and Chrome Browsers (these were the only 2 browsers used within the assessment). These appeared in the form of a Movie toolbar, providing quick access to movie trailers, reviews, ratings, and other video functionality, and ‘Ask’ (Ask.com) search engine.
Areas of Infiltration by Bandoo
Bandoo product version 5.0.2.4762 infiltrated several areas of the computer system. After installation, folders were neatly placed as files within all programs. Within “All Programs” there were 3 newly added programs. These included:
- iLivid
- Movies Search App for Chrome
- Movies Search App for Internet Explorer
The iLiVid application seems to be the main offer while the others, namely Movies App for Internet Explorer by Ask was featured as promotions or advertisements. Additionally, just below the ‘END USER LICENSE AGREEMENT AND PRIVACY POLICY’ a request was made that the user set Ask.com as both their homepage, new tab, and default search engine. This is just another well-concocted plan to get Internet users onto the ‘Ask.com’ search engine.
Along with the 3 programs installed as a bundle, a new folder was found within the computer’s local drive. This program was termed OLBPre.
What is OLBPre?
OLBPre.exe is reputed as dangerous adware that weakens the security settings of a computer system. It’s also covertly used for dropping files on a targeted computer, often without the user’s consent or knowledge.
Manual Steps for Removal of Movie Search Apps
I found this removal pretty simple. Depending on your Operating System, there will be slight discrepancies in the manual removal steps. Using the Windows 8 (8.1) OS on your computer:
- Step 1: from your desktop, right-click on the ‘Start Button’. A menu box will then appear.
- Step 2: from the menu box, click ‘Search’.
- Step 3: enter “Programs and Features” within the Input Box.
- Step 4: locate the installed apps. You should be able to see “Movies Search App for Chrome” & “Movies Search App for Internet Explorer”.
- Step 5: right-click on the names of the Apps (the ones you want to remove) when you’ve located them.
- Note: you will have to remove the apps one after the other.
- Step 6: after right-clicking the app, click the uninstall option (probably the only option available anyway).
- Note: If a box appears asking If you wish to ‘block’ or ‘allow’, select the allow option. That’s just the Publisher’s way to annoy you out of uninstalling the app.
- Step 7: follow instructions until the app is fully removed.
- Step 8: Repeat steps for the other app.
Since Bandoo also changed your search engine, you’ll have to reset that manually for Internet Explorer and Chrome. Follow the steps below:
- Step 1: Open your Internet Explorer browser.
- Step 2: Click the tool option located in the top right-hand corner of the page.
- Step 3: Click the “Internet Options” option.
- Step 4: Under the “General” tab, you’ll be able to see approximately 3 buttons. Click the button labeled ‘Use Default”.
- Step 5: At the bottom right-hand corner of the pop-up menu, select the “Apply” button and “OK”. That should do the trick.
Removal for Chrome Extension
This removal is simple.
- Step 1: Open your Chrome browser.
- Step 2: A pop-up box will be visible.
- Step 3: Click the “Remove from Chrome” option.
After removing the extensions/add-ons, perform another scan with Spyhunter. You’ll pick up a few threats. The second scan should clear up everything.
To completely remove Bandoo from your computer, click here to download and install Spyhunter.
Read More
If you encounter the DRIVER_UNLOADED_WITHOUT_CANCELLING_PENDING_OPERATION Blue Screen error with an error code of 0x000000CE then it means that a driver failed to cancel the pending operations before unloading. Some of the driver files that might be the culprit include the intelppm.sys, intcdaud.sys, tmxpflt.sys, mrxsmb.sys and asusptpfilter.sys.
This kind of Blue Screen error occurs when the driver failed to cancel lookaside lists, worker threads, DPCs, and other items before unloading. You can usually identify which driver file is triggering the BSOD error in the BSOD error itself since its name would be printed on the blue screen and stored in memory at the location (PUNICODE_STRING) KiBugCheckDriver.
Refer to the possible solutions given below to fix the DRIVER_UNLOADED_WITHOUT_CANCELLING_PENDING_OPERATIONS error.
Option 1 – Perform a System Restore
Performing System Restore might help you in fixing the SYNTP.SYS Blue Screen error. You can do this option either by booting into Safe Mode or in System Restore. If you are already in the Advanced Startup Options, just directly select System Restore and proceed with the next steps. And if you have just booted your PC into Safe Mode, refer to the steps below.
- Tap the Win + R keys to open the Run dialog box.
- After that, type in “sysdm.cpl” in the field and tap Enter.
- Next, go to the System Protection tab then click the System Restore button. This will open a new window where you have to select your preferred System Restore point.
- After that, follow the on-screen instructions to finish the process and then restart your computer and check if the problem is fixed or not.
Option 2 – Disable the BIOS Memory options
Disabling the BIOS Memory options such as Caching and Shadowing can help you in fixing the DRIVER_UNLOADED_WITHOUT_CANCELLING_PENDING_OPERATIONS Blue Screen error. All you have to do is enter the BIOS first and then use the Arrow and Enter keys to select your choices. And if you can’t seem to find it, look for specific instructions from your OEM or you could also look out for instructions from the manufacturer of your motherboard.
Option 3 – Update or rollback your device drivers
If the first option didn’t work for you, then it’s time to either update or roll back the device drivers. It is most likely that after you updated your Windows computer that your driver also needs a refresh. On the other hand, if you have just updated your device drivers then you need to roll back the drivers to their previous versions. Whichever applies to you, refer to the steps below.
- Open the Devices Manager from the Win X Menu.
- Then locate the device drivers and right-click on them to open the Properties.
- After that, switch to the Driver tab and click on the Uninstall Device button.
- Follow the screen option to completely uninstall it.
- Finally, restart your computer. It will just reinstall the device drivers automatically.
Note: You can install a dedicated driver on your computer in case you have it or you could also look for it directly from the website of the manufacturer.
Option 4 – Try to run the CHKDSK utility
Running the CHKDSK utility might also help you resolve the DRIVER_UNLOADED_WITHOUT_CANCELLING_PENDING_OPERATIONS Blue Screen error. If your hard drive has issues with integrity, the update will really fail as the system will think that it’s not healthy and that’s where the CHKDSK utility comes in. The CHKDSK utility repairs hard drive errors that might be causing the problem.
- Open Command Prompt with admin privileges.
- After opening Command Prompt, execute the following command and hit Enter:
chkdsk /f /r
- Wait for the process to be completed and then restart your computer.
Option 5 – Run the Memory Diagnostic Tool to check for Memory leaks
- Tap the Win + R keys to open Run and type exe and hit Enter to open the Windows Memory Diagnostic Tool.
- After that, it will give two options such as:
- Restart now and check for problems (Recommended)
- Check for problems the next time I start my computer
- Once your computer has restarted, perform a basic scan or you could also go for the “Advanced” options such as “Test mix” or “Pass count”. Simply tap the F10 key to start the test.
Note: After you select the option, your PC will restart and check for memory-based issues. If it finds any issues, it will automatically fix them and if there’s no issue found, then it’s most likely not a memory-based issue so you should try the other options given below.
Option 6 – Try analyzing the Memory Dump Files
You can also try to analyze the Memory Dump files as it can help you identify the root cause of the DRIVER_UNLOADED_WITHOUT_CANCELLING_PENDING_OPERATIONS error.
Option 7 – Try checking the Registry settings
You might also want to try disabling the concerned driver file if it is mentioned in the Stop error. For example, if the stop error mentioned the “intelppm.sys” driver file then you have to disable this driver file since it is most likely the culprit. To do that, follow the steps below.
- Tap the Win + R keys to open the Run dialog box.
- Next, type “Regedit” in the field and hit Enter to open the Registry Editor.
- After that, go to the this registry path: HKEY_LOCAL_MACHINE > SYSTEM > CurrentControlSet > Services > Processor
- From there, double click on Start and change its value to “4”.
- Now go to this path: HKEY_LOCAL_MACHINE > SYSTEM > CurrentControlSet > Services > Intelppm.
- Set its value to “4” and then restart your computer to apply the changes made.
Option 8 – Run the Blue Screen Troubleshooter
The Blue Screen troubleshooter is a built-in tool in Windows 10 that helps users in fixing BSOD errors like DRIVER_UNLOADED_WITHOUT_CANCELLING_PENDING_OPERATIONS. It can be found on the Settings Troubleshooters page. To use it, refer to these steps:
- Tap the Win + I keys to open the Settings panel.
- Then go to Update & Security > Troubleshoot.
- From there, look for the option called “Blue Screen” on your right-hand side and then click the “Run the troubleshooter” button to run the Blue Screen Troubleshooter and then follow the next on-screen options. Note that you might have to boot your PC into Safe Mode.
Read More
Error code 0x803f7000 -What is it?
Error code 0x803f7000 refers to an issue in Windows 10 with downloading apps through Windows Store. When you choose the app or game to download, it heads to Downloads in the Store app. Then it says it is acquiring a license but then fails. When you click the “See details” link, you see the error code 0x803F7000. It could mean that the date and time or region settings in your Windows 10 are incorrect or there are some problems with the Windows Store Cache.
Symptoms
- This error appears when you are running Windows 10 and trying to download an app through the Microsoft store. The error code may appear with this message: “Something went wrong. The error code is 0x803f7000, in case you need it”
- You might also see this message along with the error code: «It looks like you’ve reached your device limit for installing apps and games from the Store on your Windows 10 device. If you want to install apps and games from the Store on another Windows 10 device, remove a device from the device list.»
Solution
Error Causes
There may be several reasons for this error:
- This problem may arise if the date and time in Windows 10 are incorrect.
- If the region has been set incorrectly.
- Problems with Windows store cache.
- Windows store server overloaded.
- The Windows version you are using is pirated.
Further Information and Manual Repair
Method 1:
Correcting date and time:
- Open up Control Panel > Clock, Language, and Region.
- Then click on Date & Time.
- Now click on Change date & time to correct your time.
Method 2:
Correcting region:
- Navigate to Control Panel > Clock, Language, and Region.
- Then click on Region.
- Then click on the Location tab.
- Now set your actual region from Home location section.
- Click Apply & OK.
Method 3:
Resetting Windows Store:
- Press Windows Flag Key + X from your keyboard. Then select Command Prompt (Admin). It will launch Command prompt as administrator.
- Then type wsreset and hit Enter.
- Wait for a few seconds. It will automatically open Windows Store.
- Then try to download any apps.
Method 4:
- Open Command prompt in local machine and type in the Windows Store reset tool exe
- Activate Windows by going to Settings>Updates and Security
- Run the Modern UI/metro app troubleshooter from Microsoft
- Keep trying it several times.
- Try changing locale and time zone to the United States as shown below
- Go to control panel, Language settings
- Select location to the United States
- This will reset the language to US English. After this try downloading the apps again.
- Try restarting the Windows Updater service or restart the machine once.
You must make sure that you have a good internet connection. You need that for the updates and downloads complete without disruption.
Method 5:
Make sure the app isn’t blocked by the Windows firewall:
To make your PC more secure, some apps are blocked by Windows Firewall by default. For proper functioning, you might need to enable an app to receive info through the firewall. For more info, see the «Allow an app to receive info through the firewall,» and follow the procedure from start to finish.
Method 6:
Check with your system admin:
If your PC is part of a network in an organization, like a business, school, or government agency, your system administrator might have turned off the use of certain apps using the Group Policy. Contact your system admin if you believe that Group Policy is preventing you from using an app.
Method 7:
Make sure your apps are up-to-date:
To make the apps working properly, you must keep your apps up-to-date. This could be done by turning on automatic updates in the Windows Store.
Method 8:
Contact the app publisher
To view the publisher’s app support info, follow these steps:
- On the Start screen, tap or click Store to open the Windows Store.
- Search or browse for the app, and then tap or click it.
- Scroll to the Details section of the app’s description page, and then tap or click the support link for the app under Learn more. The link will open an email message for you to contact support or will take you to a support website.
If you do not possess the technical expertise required to accomplish this yourself or do not feel comfortable doing so, download and install a powerful automated tool to get the job done.
Read More
The Disk Management tool in Windows 10 is a built-in tool that contains a user interface used to manage disk partitions to administrators of the computer. There are lots of instances when you have to change the size of the hard disk partition or reduce the size and so on. This is where the Disk Management tool comes in. It’s useful as the command line interface can be quite confusing and risky for some users. However, there are cases when this tool stops working. A proof of this the reports submitted recently by some Windows 10 users. Based on the reports, the Disk Management does not load or respond. If you are having the same problem, read on as this post will give you some suggestions on what you can do to resolve the problem.
Option 1 – Try restarting the Disk Management Service
- Tap the Win + R key combination to open the Run dialog box.
- Then type “services.msc” in the field and hit Enter or click OK to open the Windows Services Manager.
- Next, scroll down in the service list until you see the Virtual Disk Service. Double click on it to open and then select Automatic.
- Click on Apply and OK to save the changes made.
- If it hasn’t started yet, you can just click on the Start button to start the Service. The Virtual Disk service provides management services for disk, volumes, file systems as well as storage arrays.
- Now save all the changes you’ve made and restart your computer. Then check if you can now use the Disk Management tool without any problem.
Option 2 – Try using the System File Checker scan
System File Checker or SFC is a built-in command utility that helps in restoring corrupted files as well as missing files. It replaces bad and corrupted system files with good system files that might be causing some issues with the Disk Management tool. To run the SFC command, follow the steps given below.
- Boot your PC into Safe Mode.
- Tap Win + R to launch Run.
- Type in cmd in the field and tap Enter.
- After opening Command Prompt, type in sfc /scannow
The command will start a system scan which will take a few whiles before it finishes. Once it’s done, you could get the following results:
- Windows Resource Protection did not find any integrity violations.
- Windows Resource Protection found corrupt files and successfully repaired them.
- Windows Resource Protection found corrupt files but was unable to fix some of them.
Option 3 – Try using the DISM tool
Aside from the System File Checker, the DISM tool can also help you resolve the issue with the Disk Management tool. It helps in restoring the health of your computer.
- Open the Command Prompt as admin.
- Then type in this command: Dism /Online /Cleanup-Image /RestoreHealth
- Do not close the window if the process takes a while as it will probably take a few minutes to finish.
Option 4 – Try using Diskpart and Fsutil
If both the System File Checker and DISM tool didn’t work, you can use command-line tools like diskpart and fsutil. These command-line tools are powerful but you need to be careful especially if you’re not that familiar with using them. However, it’s recommended that you have somebody who knows if you’re really inexperienced with this kind of stuff.
Read More
The world today is still sadly under pandemic and by the looks of it, COVID-19 is here to stay, well at least for some time in the near future. Razer seems to think so as well since their upcoming gear is not really what you would expect.
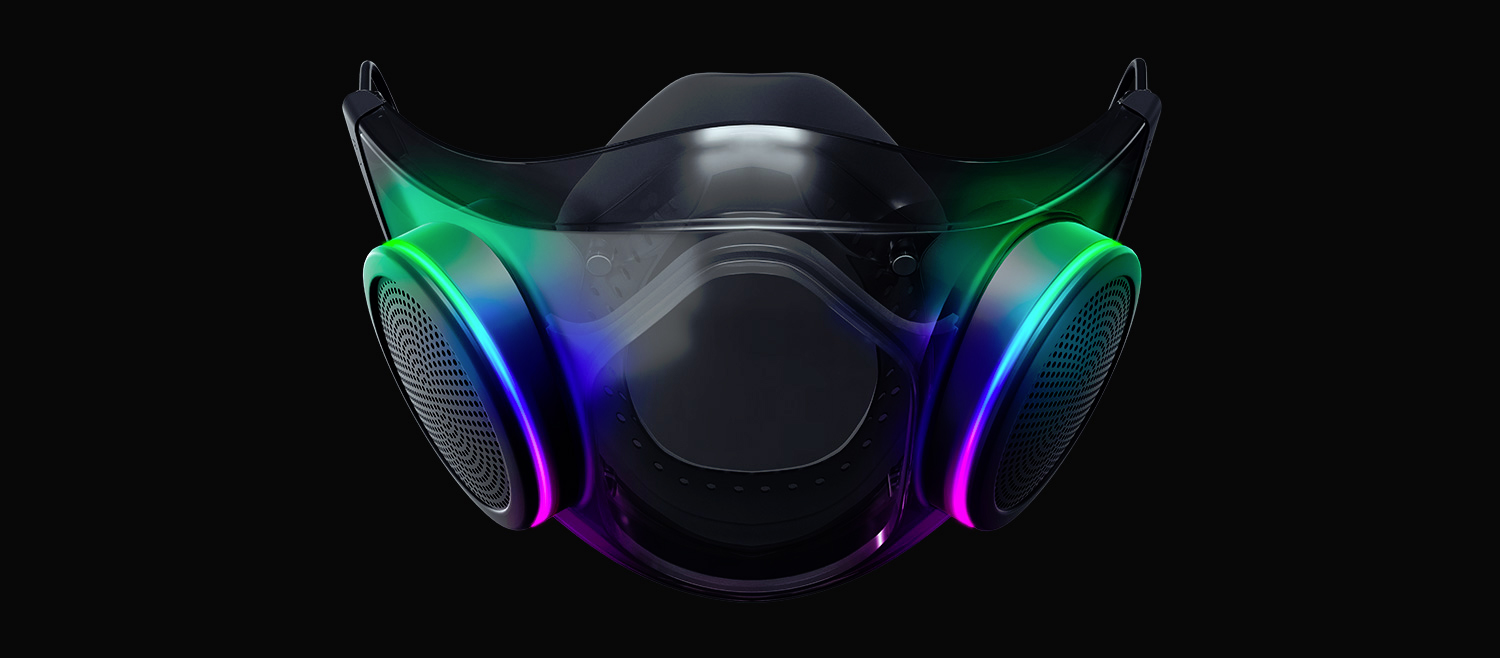
Enter Hazel, a new and upcoming Razer smart mask.
Protection
Hazel mask has a high bacterial surgical N95 filter with fluid resistance that will protect you against large droplets and splashes. A detachable active ventilator regulates airflow and is capable of filtering around 95% of airborne particles. Mask comes with a special charging case that has an auto sterilization UV light that will kill bacteria and viruses inside the case interior while it charges.
When the mask is recharging it will change color from red to green visually showing the level of the current charge. Mask of course has easy to replace filters inside ventilators and Razer is standing by that fully charged mask will last enough for full-day use.
An active ventilation system brings cool air while releasing breathing heat at the same time drastically reducing CO2 inside the mask that could produce dizziness and headache.
Silicon guard is on its edge gluing to around your face in order to prevent exterior air sneaking inside the mask and positioning it firmly so it does not rest on your lips in order for easier and clearer communication.
Hazel personalization and technical features
Hazel has a clear and transparent design making it better for social interaction since other people will be able to see your lips and smiles thus making it more natural. A low light mode that turns on automatically when it is dark outside is also aimed for easier communication.
Speaking of communication, the mask comes with voice Amp technology that has a built-in mic and amplifier thus making your voice lines clear so you are not muffled when wearing the mask itself. Your friends and other people will be able to hear you like you are not wearing a mask at all.
Thicker air loops apply less pressure on ears and can be adjusted for a more secure fit, while the mask itself can be custom-made to fit your face shape.
And of course Hazel comes with 16.8 million colors and a suite of effects with Razer Chroma RBG
Read More
Ntdll.dll Error — What is it?
Ntdll.dll is a type of DLL (Dynamic Link Library) error. DLL errors are some of the most common but complicated errors to troubleshoot and resolve by PC users. The Ntdll.dll error message is displayed in the following formats:
- «STOP: 0xC0000221 unknown hard error C:WinntSystem32Ntdll.dll
- «NTDLL.DLL Error!»
- «STOP: C0000221 unknown hard error SystemRootSystem32ntdll.dll»
- «[PROGRAM NAME] caused a fault in module NTDLL.DLL at [ANY ADDRESS]»
- «AppName: [PROGRAM NAME] ModName: ntdll.dll»
- «Crash caused in ntdll.dll!»
- «Unhandled exception at [ANY ADDRESS] (NTDLL.DLL)»
You may come across the ‘Ntdll.dll error’ pop-up either when you try to run a program or after using it or while the program is running. It may also appear when Windows starts or shutdowns or even during Windows installation.
Solution
Error Causes
The Ntdll.dll error code can be triggered due to numerous reasons such as:
- DLL file corruption due to hard drive bad entries
- Missing DLL files
- Corrupt hardware drivers
- Viruses
- DLL file misconfiguration
It is recommended to resolve this error code immediately on your PC to avoid inconvenience and serious PC damages like program lockouts, system failure, freeze, and crash
Further Information and Manual Repair
All the causes for ‘Ntdll.dll’ are linked with the registry.
The registry is the main database of your system. It saves all the activities and files on your PC including the important data file and unnecessary files such as the junk files, temporary internet files, and obsolete files, files of the programs installed, bad entries, invalid registry keys, and cookies.
These files take up also hard drive space thereby causing dll file damage, disk fragmentation, and data overload. Ntdll.dll error may also occur to due viral infection and malware attack.
There are 2 ways to resolve the Ntdll.dll error. One is to install 2 separate tools, the registry cleaner, and antivirus, and run them separately to scan for errors. This option is time-consuming and running an antivirus can also slow down the speed of your computer.
Therefore we recommend that you opt for the second alternative that is to download Restoro.
Why Restoro.
- This is an advanced, innovative, and multi-functional PC repair tool embedded with several powerful PC repair utilities like a registry cleaner, an antivirus, and a system optimizer. This is a one-stop solution for all your PC errors.
- It is user-friendly, safe, efficient, and compatible with all Windows versions. The registry cleaning feature scans for all registry issues.
- It wipes out all the unnecessary files from the hard drive, repairs the damaged dll files, and restores the registry, thereby resolving the Ntdll.dll error code right away.
- The privacy error utility functions like an antivirus. It detects and removes all the malicious software like viruses, malware, Trojans, and spyware. Simultaneously, the system optimizer feature boosts the PC speed.
Click here to download Restoro and resolve the Ntdll.dll error on your PC today!
Read More
Copyright © 2023, ErrorTools. All Rights Reserved
Trademark: Microsoft Windows logos are registered trademarks of Microsoft. Disclaimer: ErrorTools.com is not affiliated with Microsoft, nor claims direct affiliation.
The information on this page is provided for information purposes only.
Unable to use keyboard shortcuts on your Windows PC? There may be problems with your keyboard hardware, drivers, shortcut change, or some Windows setting. Whatever the reason that is causing the keyboard shortcuts issue on your Windows PC, we will show every possible way to fix keyboard shortcuts not working on your Windows PC.
1. Check if Keyboard Hardware is Working
Let’s begin with minor and common issues. The first thing you should do is a hardware check. Try to plug the keyboard into another USB port if any of the keys are not working.
If you are facing an issue with only some specific keys, try using another keyboard with your PC to verify. If other keyboards are working properly, then the issue is with your keyboard itself. Similarly, you can also try using your keyboard with other PCs. If shortcuts are working fine on the other PC, then the issue may be with your PC’s software. This will help you understand if the problem is with your keyboard or with the software.
If the issue is with the hardware, make sure to clean the keyboard. There can be specks of dirt or debris accumulated under the keyboard keys. If cleaning isn’t helping you, then you have to replace the keyboard. You can also check out these tips to use your PC with a broken keyboard.
2. Restart the PC
If the issue is with the software, before tweaking the Windows settings, try restarting your PC first. Often, a simple restart can iron out many issues like keyboard shortcuts not working on Windows PC by clearing the bugs present in the memory on your computer. To restart, click on the Windows icon in the bottom bar > Power icon and then select the Restart option.

3. Troubleshoot the Keyboard
Windows comes preinstalled with troubleshooting tools that can find and fix common errors. Running the keyboard troubleshooter may fix keyboard shortcuts not working on Windows.
1. On Windows 11, Open the Settings app > System > Troubleshoot > Other troubleshooters. Whereas on Windows 10, open the Settings app > Update and security > Additional troubleshooters.

2. Here, click on the Run button beside the Keyboard option to run the Keyboard Troubleshooter.

3. This process can run up to 5 minutes.
4. Update/Reinstall Keyboard Drivers
For the most part, troubleshooting the keyboard should fix the problems. But if it does not, try updating the keyboard drivers. Drivers are a piece of software that connects hardware to the OS. Updating keyboard drivers to the latest version will ensure there are no bugs in the connection.
1. Right-click on the Windows icon and then select the Device Manager option.

2. In the Device Manager window, select the Keyboards option to open the drop-down.

3. Here you should find all the attached keyboards. Right-click on the keyboard where shortcuts are not working and then select the Update driver option.

4. In the pop-up window, select Search automatically for drivers.

5. If there is an available driver update, your PC will automatically install it.

If updating the driver isn’t solving the issue, you can try reinstalling the driver.
1. To do that, just right-click on the keyboard and then select Uninstall driver option.

2. In the pop-up, click on Uninstall button to confirm.

3. Finally, restart your PC for Windows to install the available driver again.
5. Update to the Latest Windows Version
Windows updates also include driver updates. So updating Windows to the latest version will also update the keyboard drivers and can also fix many other bugs.
1. To update to the latest version of Windows 11, open the Settings app > Windows update. On Windows 10, open the Settings app > Updates and security > Windows updates.
2. Then click on Check for updates. If there are any updates available, click on Download & install all option.

Are keyboard shortcuts now working on your Windows 10/11 computer? If not, maybe you have a keyboard with a gaming mode?
6. Disable Special Keyboard Modes
Some keyboards come with special modes such as gaming. These modes disable some keyboard shortcuts to prevent you from pressing the wrong buttons accidentally while gaming. If you own a gaming keyboard, for instance, try disabling them in order to use your Keyboard shortcuts properly.
7. Turn Off Sticky Keys
Sticky keys are a Windows feature that changes the behavior of Windows shortcuts. For example, instead of pressing Windows Key + I to open Settings, you need to press the Windows key and then press the I key (one at a time instead of together) to open Settings. This can be helpful for people who have issues using keyboard shortcuts on Windows. Anyhow, if this setting is turned on, it will disable the default Windows shortcuts behavior.
1. To disable it on Windows 11, open the Settings app > Accessibility > Keyboard. On Windows 10, open the Settings app > Ease of Access and then select Keyboard.
2. In the Keyboard settings, make sure the toggle beside the Sticky Keys is turned off.

8. Reset Keyboard Settings
If none of the above options worked, try resetting the Keyboard Settings. On Windows, there is no special option that can reset the keyboard settings. But if you change the language and then change it back to your preferred language, it will reset all keyboard settings including your layout, themes, text correction, autosuggestion, etc.
1. Open the Settings app > Time and language > Language and region. Under the Preferred Languages section, you will see a list of installed language packs.

2. Click on the meatballs menu beside the language name and then select the Remove option.

3. You cannot remove the primary language directly. To remove it, click on Add a language button and add any language.

4. Now drag that added language to the top making it a primary language.
5. Now click on the meatballs menu beside your preferred language and then select Remove to remove it. This will remove all the keyboard settings.

6. Once done, click on Add a language button and add your preferred languages back.
7. Drag your preferred language to the top making it primary again. Now you can remove the added language by clicking on the Meatballs icon beside it and then selecting the Remove option.
9. Disable NoWinKeys from Registry Editor
Registry Editor is a graphical tool that helps users to configure system files and settings. On Registry Editor, there is an option to toggle off Windows keyboard shortcuts. If other shortcuts are working fine, but you have an issue with only shortcuts that include the Windows key, then Registry Editor might be the culprit. Making any changes in the registry editor can damage your device beyond repair. So make sure to take a backup before making any changes.
1. Click on the Windows icon and search for the Registry Editor app and open it. In the pop-up, click on Yes to make changes in the Registry Editor.
2. Now paste this path into the address bar above.
HKEY_CURRENT_USER\Software\Microsoft \Windows\CurrentVersion\Policies\ExplorerNote: If you are not able to find the Explorer option, then you can consider NoWinKeys is set to default. This means that the shortcuts issue is not with the Registry Editor.

3. Now in the right pane, right-click on the NoWinKeys option and select Modify.

4. Make sure the value is set to 0 and click on OK.

10. Turn on Shortcuts from Group Policy Editor
Group policy is a graphical tool similar to the Registry editor. Unlike on the Registry editor where you can disable the Windows key shortcuts, with Group Policy, you can disable all shortcuts. However,
1. Open Command Prompt and enter gpedit.msc and press Enter.
Note: Group Policy Editor is not available on the Windows Home edition. If you do not have Group Policy Editor, you can skip this step considering all the settings in Group Policy are set to default.
2. Now on the Group Policy Editor, navigate to User Configuration > Administrative Templates > Windows Components > File Explorer.
3. Now in the right pane, double-click on Turn off Windows keys hotkeys.
4. In the pop-up window, select the Disabled option and then click on OK and then Apply.
11. Run DISM
Deployment Image Servicing and Management (DISM) tool fixes any defects in the Windows image. Running it on your PC can change a few settings like Registry Editor settings to their default settings.
1. Open the Command Prompt in administrator mode.

2. Then in the Command Prompt, enter the following command and press Enter.
Dism /Online /Cleanup-Image /ScanHealth 
3. The process may take 2 – 5 minutes. Once the above command scans the Windows image health, enter the following command and then press Enter.
Dism /Online /Cleanup-Image /RestoreHealth

4. Within a few minutes, the tool will fix any defects in the Windows image.
12. Run System File Checker
Similar to DISM, System File Check (SFC) tool can scan for any corrupted system files and replace them with their original state.
1. Open the Command Prompt as an administrator.
2. Then type the following command and press Enter.
sfc /scannow
3. Once the tool does its work, check if the problem is solved.

13. Restart Human Interface Device Service
Human Interface Device (HID) Services are just services that control human interface devices such as keyboards, mice, game controllers, etc.
1. Click on the Windows icon, search for the Services app, and open it.
2. In the Services app, scroll down and right-click on the Human Interface Device Services option.

3. In the pop-up menu, click on the Start option. If the service is already in the start, click on Restart.

4. Now double-click on the Human Interface Device Services option. In the pop-up window, click on the drop-down beside the Startup type and change it from Manual to Automatic, To save, click on OK and then Apply.

14. Check Third-Party Apps
On Windows, third-party apps can change system features such as keyboard shortcuts. You might have installed an app that disabled or remapped the Windows keyboard shortcuts. There are also apps like Power Toys, that can even remap keyboard keys on your Windows PC.
Check for apps that you might have installed on your PC. You can disable any setting in those apps that are causing the issue or you can clean and uninstall those apps.
Fix Keyboard Shortcuts on Windows
We have covered troubleshooting the keyboard to enabling shortcuts from Group Policy Editor. If any of the above-mentioned ways failed to fix keyboard shortcuts not working on Windows error, try resetting the device in order to get back to the default state. If you have any backup of your Windows PC when it is working fine, then you can also system restore to that working version.
Ravi Teja KNTS
Tech writer with over 4 years of experience at TechWiser, where he has authored more than 700 articles on AI, Google apps, Chrome OS, Discord, and Android. His journey started with a passion for discussing technology and helping others in online forums, which naturally grew into a career in tech journalism. Ravi’s writing focuses on simplifying technology, making it accessible and jargon-free for readers. When he’s not breaking down the latest tech, he’s often immersed in a classic film – a true cinephile at heart.