
,
In this article, you’ll learn what might be preventing Windows Defender from starting, and then we’ll show you step-by-step how to fix the problem: Windows Defender Security not working.
Windows Defender (aka ‘Windows Security’), the built-in antivirus software in Windows 10/11, is crucial for protecting your computer from malware and other online threats. However, there are several factors that can prevent Windows Defender to not start, leaving your system vulnerable.
What can cause Windows security not working problem?
- Conflicting third-party antivirus software: Installing another antivirus program may affect the operation of Windows Defender. In some cases, even if you have uninstalled third-party antivirus programs, the remaining registry entries may still cause Windows Defender to not start.
- Corrupted system files: Damaged or missing system files can disrupt Windows Defender’s functionality.
- Registry or Group Policy modifications: Incorrect registry or group policy changes made by the user or by a malicious program can disable Windows Defender.
How to FIX: Windows Defender Security won’t open on Windows 11/10.
If the Windows Security (aka «Windows Defender») does not start in Windows 10/11, follow these steps in order to fix the problem.
- Uninstall Third-Party Antivirus.
- Scan for Malware and Viruses.
- Perform a Clean Boot.
- Start or Restart the Security Center service.
- Repair Windows System Files.
- Reset Windows Defender from PowerShell.
- Enable Windows Defender in Registry.
- Enable Windows Defender in Group Policy.
- Repair Windows 10/11.
Method 1. Uninstall Third-Party Antivirus.
One of the main reasons that Windows Defender Security cannot start is an installed third-party antivirus program. So, if you have installed a third-party security program, uninstall it, restart your PC and check if the problem remain. *
* Note: Even if you haven’t installed a security software yourself, your computer may have it pre-installed. To see if this is happening:
1. Type «control panel» in the search and then open the Control Panel app and go to Programs > Uninstall a program.
2. Next, look for any installed third-party antivirus and if there is one, select it and click Uninstall.
3. When uninstall is completed, restart your PC and check if the problem remain. *
* Important: Restart your computer even if you haven’t uninstalled any programs. Sometimes Windows Defender-related services may be stuck and not working, but restarting the computer can force them to work properly.

Method 2. Scan for Malware/Viruses.
Before proceeding further, ensure that your computer is clean from viruses and malware. To accomplish this task you can use this Malware Scan and Removal Guide to check and remove viruses or/and malicious programs that may be running on your computer.
After scanning and cleaning your computer for malware, check if the problem persists. If not, you’re done here, otherwise continue to the next step.
Method 3. Perform a Clean Boot.
Sometimes, other applications running in the background can conflict with Windows Defender and prevent it from running. To find out if this is causing the Windows Defender startup problem, start your computer with all third-party services disabled by doing a clean boot using these steps:
Step 1. Disable Startup programs.
1. Press CTRL + SHIFT + ESC to open Task Manager.
2. In the Startup tab, disable (one by-one) all the third-party programs running at Windows Startup. Then reboot your PC.

3. After rebooting, check if the problem remains and if so, proceed to Step-2. If not, reopen the Task Manager and enable one by one the disabled programs and reboot until you find the culprit.
Step 2. Disable Third-Party Services.
1. Press the Windows + R keys to open the ‘Run’ command box.
2. Type msconfig and press Enter to open the System Configuration utility.

3. At Services tab, check the Hide all Microsoft services checkbox.

4. Then press the Disable all button, to disable all non Windows services that start with Windows. When done, click OK and restart your PC.

5. Check if Windows Defender works now. If yes, open ‘msconfig’ again and enable one by one the disabled services and reboot until you find the culprit. If the problem persists, select the the ‘General’ tab, choose Normal Startup, reboot your PC and continue to next method.

Method 4. Start or Restart the ‘Security Center’ service.
To ensure Windows Defender works well, «Security Center» Service should be running.
1. Press the Windows + R keys to open the ‘Run’ command box.
2. Type services.msc and press Enter to open the Services control panel.

3. Find the Security Center service and check if it running. According the result do the following:
- If «Security Center» service is not running, right-click on it and click Start to start the service.*
- If «Security Center» service is running, right-click on it and click Restart.*
* Note: If the «Start» & «Restart» options are inactive (greyed out), skip to next method.

Method 5. Repair Windows System Files.
Repairing Windows system files is a common but important step in solving Windows 10/11 problems like the one mentioned here.
1. Open Command Prompt as Administrator. To do that, type «cmd» or «command prompt» in the search and then click Run as administrator in Command Prompt result.

2. At the command prompt window, copy-paste the following command & press Enter:
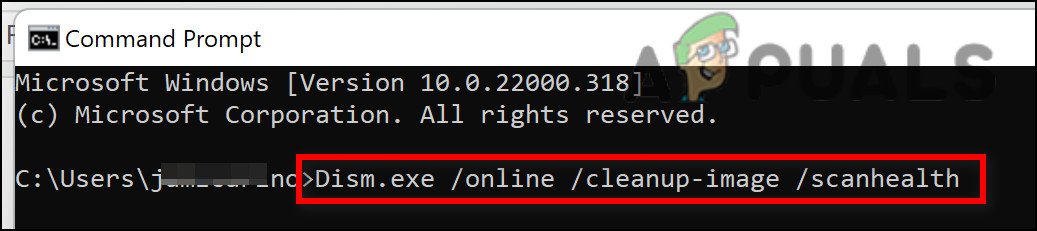
- Dism.exe /Online /Cleanup-Image /Restorehealth

3. Be patient until DISM repairs component store. When the DISM operation is completed, copy-paste the command below and press Enter:
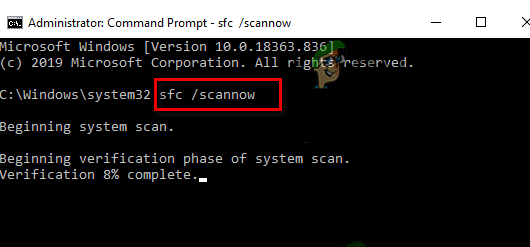
- SFC /SCANNOW

4. When SFC scan is completed, restart your computer and check if the problem is fixed.
Method 6. Fix Windows Defender Not Starting using PowerShell.
1. In Windows Search, type PowerShell and select Run as Administrator to open PowerShell as an Administrator.

2. In PowerShell window, copy and paste the following command and then press Enter.*
- Get-AppxPackage Microsoft.SecHealthUI -AllUsers | Reset-AppxPackage

* Note: If after giving the above command, you receive the error «package not found» or something similar, give this command instead:
- Get-AppXPackage -AllUsers | Foreach {Add-AppxPackage -DisableDevelopmentMode -Register “$($_.InstallLocation)\AppXManifest.xml”}

3. After command execution, close PowerShell, reboot your PC and try again to open Windows Defender.
Method 7. FIX Windows Defender Not Working in Registry.
1. Press the Windows + R keys to open the Run dialog box.
2. Type «regedit» and press Enter to open the Registry Editor.

2. In Registry, navigate to this location:
- HKEY_LOCAL_MACHINE\SOFTWARE\Policies\Microsoft\Windows Defender
3. At the right pane double-click to open the DisableAntiSpyware REG_DWORD value.*
* Note: If the «DisableAntiSpyware» value doesn’t exist, skip to next step or do the following:
- Right-click on empty space, and choose New > DWORD (32-bit) Value.
- Rename the «New Value #1» to «DisableAntiSpyware« and press Enter.
- Continue to next step.

3. Set the Value data to 0 to enable Windows Defender and then press OK.

4. Close the Registry Editor and reboot your PC.
Method 8. Enable Windows Defender in Group Policy.
Sometimes, Windows Defender is disabled because of a group policy that disables it, either set by the user or by malware. *
* Note: This method applies only to Windows 10/11 Professional Editions.
1. Press Windows + R keys to open the Run dialog.
2. Type gpedit.msc and press OK.

2. In the Local Group Policy Editor, navigate to:
- Computer Configuration > Administrative Templates > Windows Components > Microsoft Defender Antivirus.
3a. Double-click to open the Turn off Windows Defender Antivirus policy in the right pane.

4. In the window that appears, choose Not Configured or Disabled and then click Apply and OK.

5. Close the Group Policy Editor and restart your PC.
Method 9. Repair Windows with an In-place Upgrade.
If, after following the methods above, you’re still having problems, your last option is to repair Windows with an in-place upgrade. To do this, use the instructions in one of these tutorials, depending on your version of Windows.
- How to Repair Windows 10 with an In-Place Upgrade.
- How to Repair Windows 11 with an In-Place Upgrade.
That’s it! Which method worked for you?
Let me know if this guide has helped you by leaving your comment about your experience. Please like and share this guide to help others.
If this article was useful for you, please consider supporting us by making a donation. Even $1 can a make a huge difference for us in our effort to continue to help others while keeping this site free:
- Author
- Recent Posts
Konstantinos is the founder and administrator of Wintips.org. Since 1995 he works and provides IT support as a computer and network expert to individuals and large companies. He is specialized in solving problems related to Windows or other Microsoft products (Windows Server, Office, Microsoft 365, etc.).
В Windows 10 и Windows 11 есть встроенный (и довольно неплохой) антивирус Microsoft Defender Antivirus (Защитник Windows), управляемый через панель Безопасность Windows. В некоторых случаях Windows Defender или панель управления Безопасность в Windows перестают открываться, вместо диалогового интерфейса показывается пустое белое окно, приложение не запускается при вызове через панель Settings или командой быстрого доступа
ms-settings:windowsdefender
. В этой статье мы рассмотрим, как исправить типовые ошибки, когда не удается открыть окно службы безопасности Windows Defender.
В первую очередь проверьте, не уставлен ли в Windows сторонний антивирус. Windows Defender в панели безопасности Windows автоматически отключается при использовании не-Microsoft антивируса. Решите какой антивирус вы хотите использовать в дальнейшем, если нужно оставить защитник Windows, удалите сторонний антивирус.
Если при запуске Windows Security (Windows Defender) через меню Параметры (Settings -> Update & Security -> Windows Security), появляется окно с предложением выбрать программы для открытия ссылки “
You’ll need a new app to open this Windowsdefender link
”, проверьте что UWP приложение Microsoft.SecHealthU установлено. Именно UWP приложение Windows Security (Windows Defender) отвечает за отображение окна Безопасность Windows.
Если нужно сбросьте его настройки. Подробно это описывалось в статье Вам понадобится новое приложение, чтобы открыть эту ссылку WindowsDefender.
Get-AppxPackage Microsoft.SecHealthUI -AllUsers | Reset-AppxPackage
Убедились, что в Windows запущены все службы Microsoft Defender. В Windows должны быть запущены следующие службы:
- Microsoft Defender Antivirus Service (
WinDefend
) - Windows Security Service (
SecurityHealthService
) - Security Center (
wscsvc
)
Можно проверить список запущенных служб Защитника Windows через панель управления services.msc или с помощью PowerShell:
get-service WinDefend, SecurityHealthService, wscsvc | select name,status,starttype
Если службы отключены, измените тип запуска на Automatic и перезагрузите компьютер.
Службы Windows Defender Firewall (mpssvc), Microsoft Defender Antivirus Network Inspection Service (WdNisSvc) и Windows Defender Advanced Threat Protection Service (Sense) не являются обязательными для работы панели управления Security.
В панели управления безопасностью Windows может висеть надпись “Cлужба работы с угрозами остановлена, перезапустите ее”. Чтобы исправить такую ошибку Defender, следуйте этой инструкции.
В Windows 10 и 11 Microsoft Defender автоматически выключается, если на устройстве установлен сторонний антивирус. Если стороннего антивируса, нет, а Microsoft Defender отключен, значит кто-то очень сильно постарался, чтобы его отключить.
Начиная с Windows 10 2004 (в том числе в Windows 11) вы не можете просто отключить Microsoft Defender с помощью:
- ключей реестра DisableAntiVirus=1 и DisableAntiSpyware = 1 (HKEY_LOCAL_MACHINE\SOFTWARE\Policies\Microsoft\Windows Defender);
- или параметра GPO Turn off Microsoft Defender Antivirus в Computer Configuration -> Administrative Templates -> Windows Components -> Microsoft Defender Antivirus.
Для отключения Защитника Windows сначала придется отключить функцию защиты Microsoft Defender Tamper Protection в настройках Microsoft Defender.
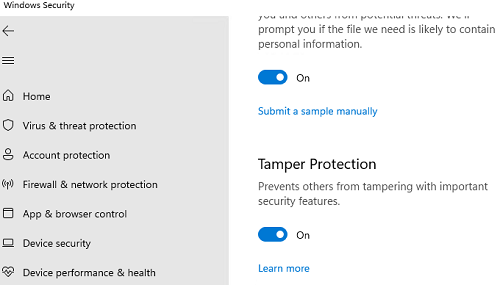
Можно проверить, отключена ли защита антивируса Defender с помощью PowerShell:
Get-MpComputerStatus | select IsTamperProtected
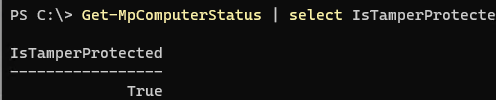
В данном примере
IsTamperProtected=True
, это значит, что защита Windows блокирует отключение Microsoft Defender.
В более ранних версиях Windows 10, проверьте значение указанного выше параметра локальной групповой политики с помощью редактора gpedit.msc (параметр должен быть установлен в Не задано или Отключено) или с помощью PowerShell:
Get-ItemProperty -Path 'HKLM:\SOFTWARE\Policies\Microsoft\Windows Defender' -Name DisableAntiSpyware
Get-ItemProperty -Path 'HKLM:\SOFTWARE\Policies\Microsoft\Windows Defender' -Name DisableAntiVirus
Если команда вернет значение параметров =1, значит Microsot Defender отключен. Чтобы включить Защитник Windows, удалите параметр или измените значение на 0.
Проверьте и установите последние обновления Windows Settings -> Update & Security -> Windows Update -> Check for updates или с помощью PowerShell.
Если ничего не помогло, проверьте и исправьте целостность образа Windows командами:
sfc /scannow
и
DISM /Online /Cleanup-Image /RestoreHealth
Инструкции из этой статье должны восстановить работу службы Безопасность Windows.
Windows 11 Windows Defender not working is a common problem. If you cannot use it to protect your PC against viruses and malware attacks, some troubles may come to you. What should you do to fix Windows 11 Security not working to get real-time protection? Refer to this post and MiniTool will show you some possible methods.
Windows Security, usually known as Windows Defender, is an excellent antivirus program that comes with Windows 11 by default. As one of the best antivirus apps, it can run properly in most situations to protect your PC from threats like viruses, spyware, malware attacks, and more.
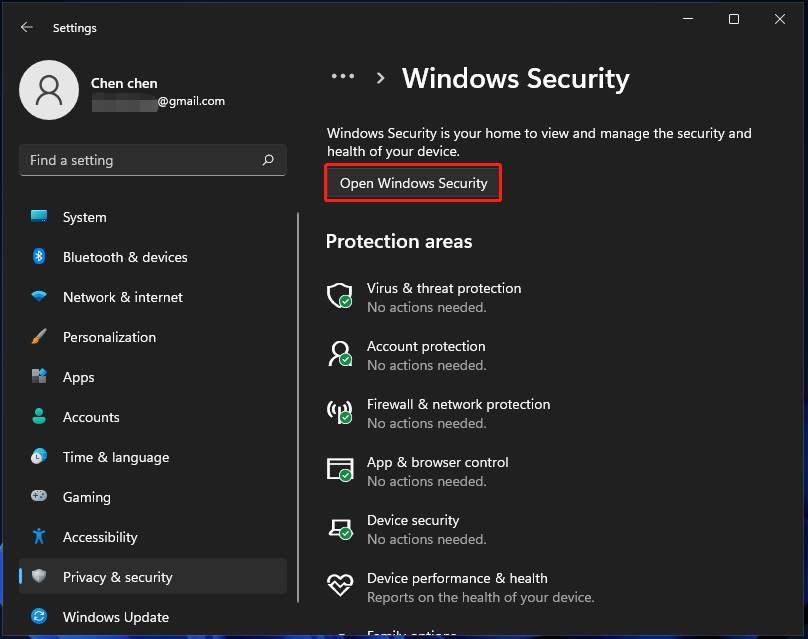
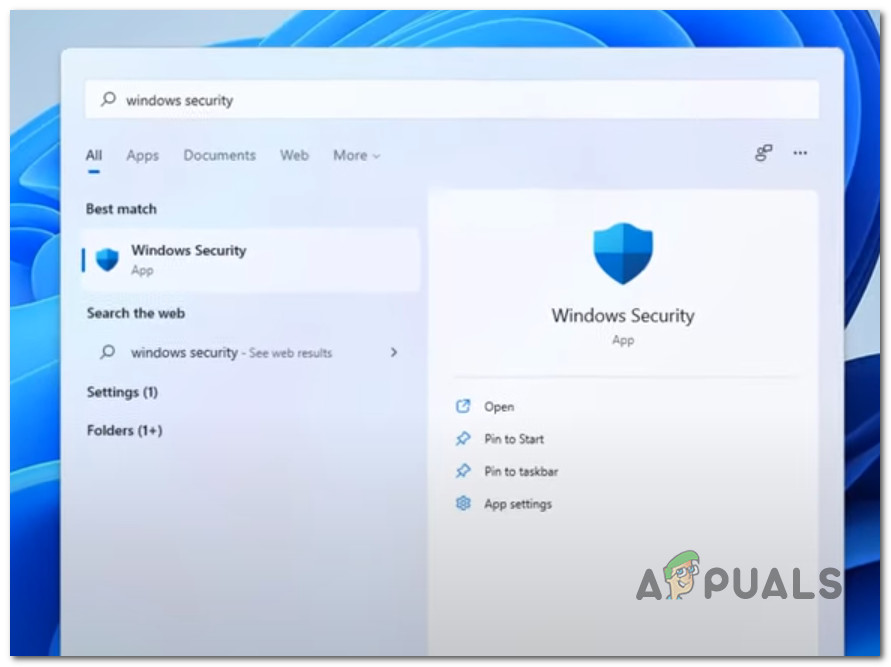
To use it, you won’t need to download Windows Security in Windows 11 but you are required to enable it in Settings. Just press Win + I to open Windows 11 Settings, go to Privacy & security > Windows Security > Open Windows Security. (Related article: How to Enable or Disable Microsoft Defender in Windows 11)
However, due to some reason, you may find Windows Defender is not working or starting/turning on in Windows 11 or Windows Defender Windows 11 missing. Sometimes you get a message saying “unexpected error”; sometimes you get a pop-up saying “you’ll need a new app to open this windowsdefender link”. Or sometimes you get other errors. No matter which situation you have, you cannot use Windows Defender for PC protection as normal.
Fixing Windows Security not working in Windows 11 is an urgent thing since viruses and malware may affect your computer. Fortunately, it is not a difficult task to solve this issue if you follow the methods below.
Fixes for Windows 11 Windows Defender Not Working
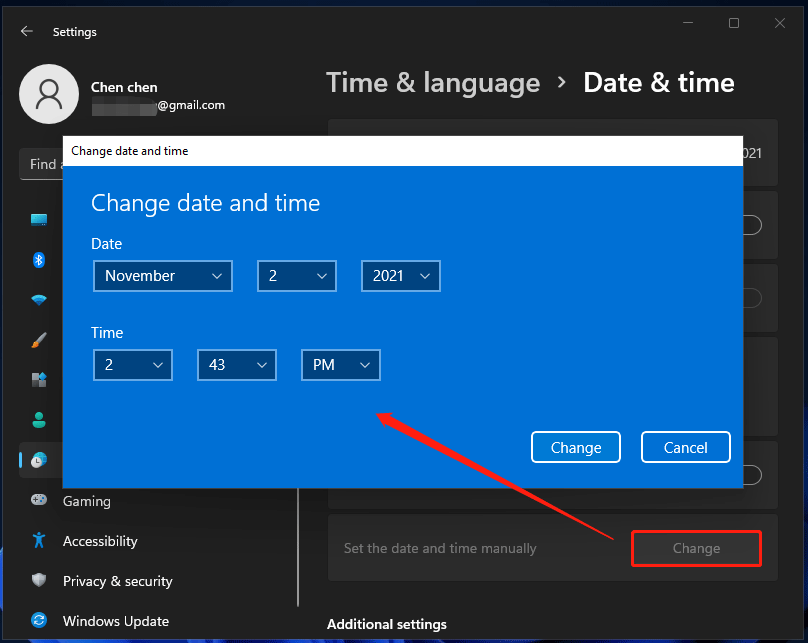
Set Date and Time Correctly
A common reason why Windows Defender won’t start/work is an incorrect time and date since most system features depend on time and date. So, make sure your date and time are set correctly.
Step 1: Click the Start icon from the Taskbar in Windows 11 and choose Settings to open this app.
Step 2: Move to the Time & language tab on the left side and click Date & time in the right pane.
Step 3: Click the Change button to set the correct time and date.
Tip: In addition, you can set date and time in other methods, and here is a related article – [3 Ways] How to Change Date and Time & Sleep Time on Windows 11.
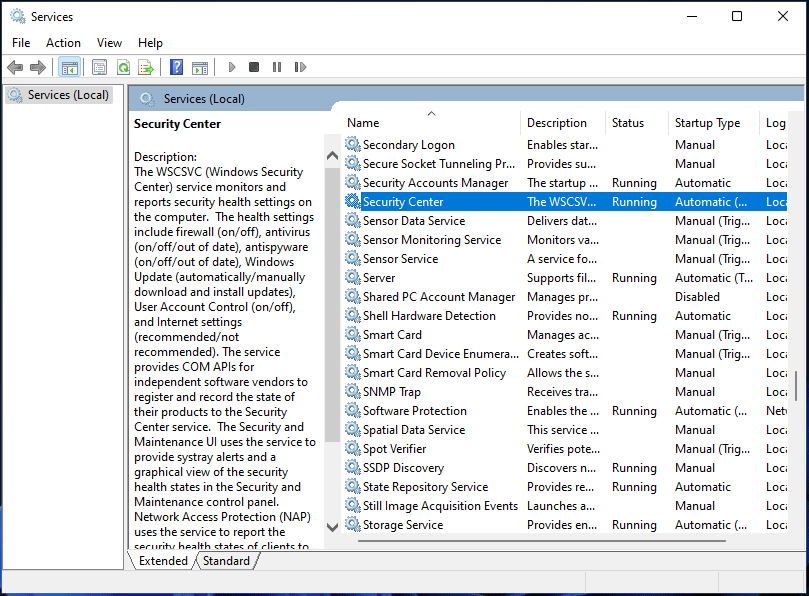
Restart Security Center Service
Windows Defender service not running may be another reason why Windows Security is not working or operating in Windows 11. To fix Windows 11 Windows Defender not working, make sure the service is running properly.
Step 1: To get the Run dialog, press Win + R.
Step 2: Type services.msc into the textbox and click OK to open Services.
Step 3: Go to find the Security Center service from the right pane, right-click it and choose Restart.
Besides, you should also check these services – Windows Defender Advanced Threat Protection, Windows Defender Firewall, Windows Defender Antivirus Network Inspection Service, and Windows Defender Antivirus Service and make sure they are running.
Step 4: Double-click each service to open the Properties window and set the Startup type to Automatic.
After that, go to check if Windows Defender can work. If it is still not working as normal, try other methods below.
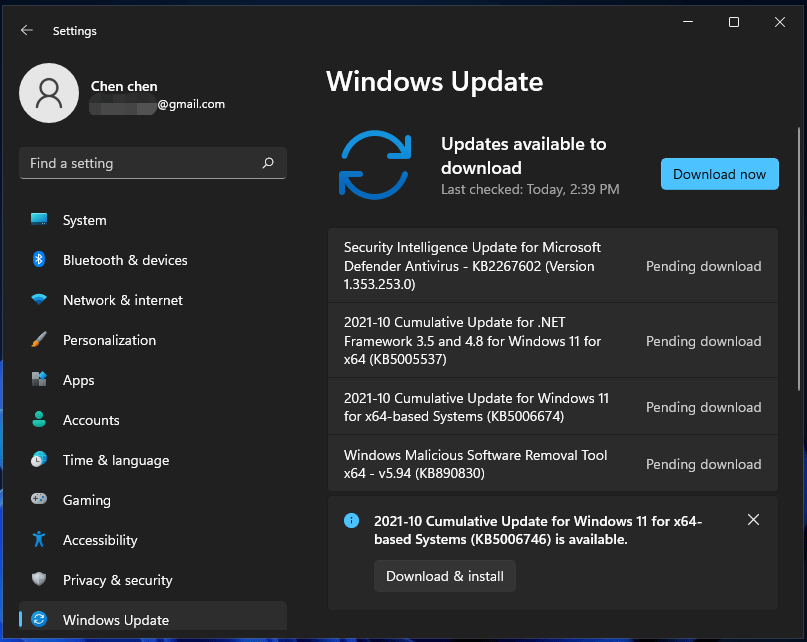
Update Windows 11 to the Latest Version
Sometimes Windows Defender Windows 11 missing or Windows 11 Security not working appears due to the bugs in the certain Windows versions. To fix it, you can update it to the latest version to see if the issue is resolved.
Step 1: Click Start > Settings to get Windows 11 Settings interface.
Step 2: Go to Windows Update in the left sidebar and click Check for updates.
Step 3: If the system checks for some available updates, download and install them on your Windows 11 PC. Then, you may be able to run Windows Defender for PC protection against viruses and threats.
Disable or Uninstall Third-Party Security Software
If you also install a third-party antivirus program, it may interface with Windows Defender. If you want to run this app to keep your PC safe without having any conflicts, you had better disable or uninstall the third-party antivirus software from your Windows 11 PC.
After uninstalling the antivirus, reboot your PC and try to run Windows Defender to see if it can work properly.
Tip: A simple uninstallation sometimes cannot completely remove programs and some entries are saved in registry. You can follow this post – How to Remove Remnants of Uninstalled Software? Try These Ways to remove them.
Run an SFC Scan
Performing an SFC scan is a fast and straightforward solution to fix the issue of Windows Security not working Windows 11. System File Checker (SFC) can be used to check and fix system file corruption. This means if Windows Defender stops working due to faulty files, the scan can fix this issue.
Step 1: Type cmd to the search box and right-click on Command Prompt to choose Run as administrator.
Step 2: In the CMD window, type in sfc /scannow and press Enter to execute this scanning task.
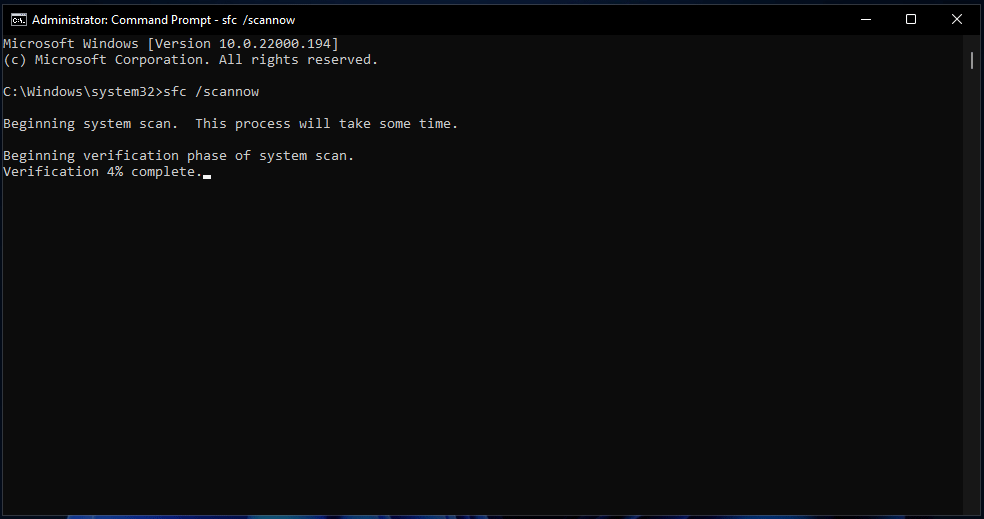
After the verification is 100% complete, restart your PC and see if Windows Defender can work well.
Perform a Clean Boot
The running third-party services and programs may interrupt Windows, leading to Windows 11 Windows Defender not working. To get rid of the trouble, you can try to perform a clean boot.
Step 1: Open the Run window by pressing Win + R, type msconfig, and click OK.
Step 2: Under the Services tab, tick the checkbox of Hide all Microsoft Services.
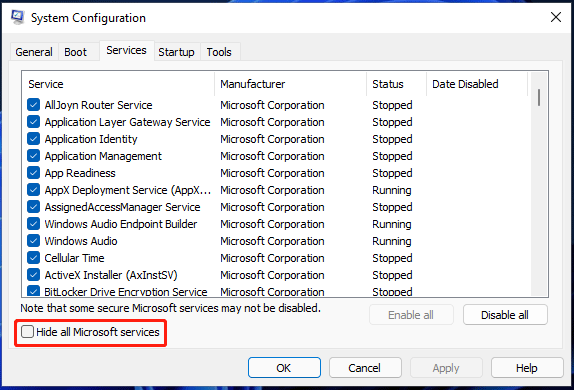
Step 3: After that, click Disable all to disable all the services except Microsoft services.
Step 4: Go to the Startup tab and click Open Task Manager.
Step 5: Choose programs individually and click Disable to disable them to fix Windows Security not working in Windows 11.
Make Changes in Your Registry
If Windows Defender won’t start or work after trying many solutions, you can try to change Registry settings. Before you do, you had better back up your registry keys in Windows 11 to avoid system corruption due to mistaken operations.
Step 1: Type regedit to the search box and click Registry Editor.
Step 2: Go to this path: Computer\HKEY_LOCAL_MACHINE\SOFTWARE\Policies\Microsoft\Windows Defender.
Step 3: Locate DisableAntiSpyware in the right pane. If it is not here, right-click Windows Defender and choose New > DWORD (32-bit) Value to create it.
Step 4: Double-click this key and set its value data to 0.

Repair or Reset Windows Security Windows 11
If Windows Security is not working in Windows 11, another solution you can try is to repair or reset this app by following the steps below.
Step 1: Launch the Windows Settings app by pressing Win + I.
Step 2: Click App > App & features.
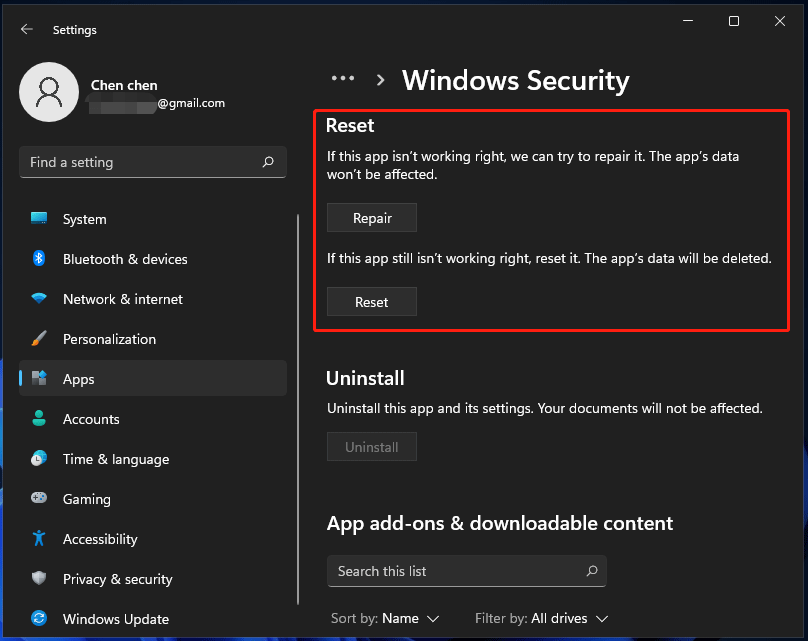
Step 3: Scroll down to find Windows Security, click the three-dot menu and choose Advanced options.
Step 4: In the new window, go to the Reset section, click Repair to repair it. If this cannot work, click Reset to reset this app.
Reset This PC
If all of these methods cannot fix Windows 11 Windows Defender not working, the last solution you can try is to reset your PC to its factory settings. To do this task, go to Settings > System > Recovery > Recovery options > Reset this PC. Then, choose an option based on your need and finish the resetting operation by following the instructions on the screen.
To know more information about PC resetting or reinstallation, refer to this post – How to Reinstall Windows 11? Try 3 Simple Ways Here Now!
“Is Windows Defender not working in Windows 11 or Windows 11 Security not working? Try these solutions to fix it. Or, you can share them with your friends on Twitter.”Click to tweet
Suggestion: Back up Your PC
After trying the methods above, you should run Windows Security properly to protect your PC from malicious programs, viruses, and some other threats. In practice, only running antivirus is not enough to keep your PC safe. From this post – Is Windows Defender Enough? More Solutions to Protect PC, you know the reasons.
To prevent your PC’s data loss due to malware and virus attacks, you can choose to make a full backup for them. Besides, you had better create a system image to avoid system breakdown due to virus infection.
Well then, how can you back up your computer in Windows 11? A professional PC backup software should be your good assistant. Here, we strongly recommend using MiniTool ShadowMaker.
This backup software is compatible with Windows 11/10/8/7 and can be used to back up your files, folders, disks, partitions, and Windows systems. In addition, you can use it to clone a hard drive to another disk for disk upgrade or the entire disk backup. Besides, data sync is also supported. Importantly, you can use it to only create backups for the changed or newly added data without taking much disk space.
Now, get MiniTool ShadowMaker by clicking the following download button and install it on your Windows 11 PC for backup.
MiniTool ShadowMaker TrialClick to Download100%Clean & Safe
Step 1: Double-click the icon of this software to launch it.
Step 2: Click Backup and you can see this software backs up the system by default. To create a system image, you can directly go to choose a destination path to continue. If you need to back up files, click Source to go to choose files you need.
Step 3: After selecting backup source and destination, click Back up Now to execute the backup task immediately.

Tip: In addition to using MiniTool ShadowMaker to back up your PC in Windows 11, you can try other ways. Just refer to this post – How to Back up Windows 11 (Focuses on Files & System) to know more.
Other Tips to Keep PC Safe
In addition to backing up your files or system, there are some other measures you can take to keep your PC safe:
- Don’t Visit Suspect Websites
- Turn on SmartScreen Filter
- Keep Your Windows Up-to-Date
- Use a Firewall App
- Pay Attention to Your Downloaded Files
- To know more, refer to this post – How to Protect Your Computer from Viruses? (12 Methods).
Wrapping Things up
Is Windows 11 Windows Defender not working or Windows 11 Security not working? After reading this post, you should know how to get rid of this issue. Just try these solutions above to fix your issue. Besides, you had better take some measures to make sure the security of your PC.
If you have any issues or suggestions, you can leave a comment in the following section or send an email to [email protected].
If a simple restart doesn’t help, you can reset Windows Security in seconds
Updated on September 10, 2022
Windows Defender not opening or working correctly could mean you can’t edit any of its settings in Windows Security, or malware can run amok on your system because you don’t have the proper security in place. Below are several reasons why Windows Defender doesn’t open and how to get it working again.
Why Windows Defender Won’t Open in Windows 11
Here are some examples of situations where Microsoft’s anti-malware app won’t open or work properly:
- There’s a temporary memory-related issue where the app won’t scan for malware.
- Windows Security opens normally, but then promptly closes a few seconds later.
- Another software program is «fighting» with Windows Defender, and it’s throwing error messages.
- You see an error that says, «You’ll need a new app to open this windowsdefender link.»
- You recently installed or uninstalled another virus protection program, and now Windows Defender won’t open.
Windows Defender is called Microsoft Defender in Windows 11, and it’s managed through Windows Security. These names are used interchangeably in this article, but we’re referring to the same tool.
How to Fix Windows 11 Defender Not Working
There are several things you can try, but follow this list in the order it’s presented to address the easier solutions first:
-
Restart your computer. This is a very common first step when troubleshooting basically anything in Windows, and it might just be all you have to do to get Windows Defender working again.
-
Turn off Windows Defender, and then turn it back on. Or, if it was off to begin with, that article shows you how to turn it on.
Microsoft Defender won’t catch active malware unless you have Real-time protection turned on.
This step is useful if, in your situation, «Windows Defender not working» simply means that it isn’t checking for malware. If you can’t open Windows Security in Settings, then move on to the next step.
-
Repair or reset Windows Security. A repair will have Windows attempt to fix whatever is going on, and a reset will erase all the app’s settings and start over as if Windows Defender was just installed.
Follow that link for two methods—one uses Settings, like in the image below, and the other uses a PowerShell command that’s helpful if you can’t open Windows Security at all.
-
Update Windows. This is how Microsoft delivers bug fixes, so an update you’ve yet to install could address the Windows Security issue.
If that doesn’t work, you can try an offline Microsoft Defender update. Choose the latest version from that list, likely called Update for Microsoft Defender Antivirus antimalware platform.
To avoid getting an update you don’t need, you can check your current version from Settings > Privacy & security > Windows Security > Open Windows Security > Settings > About.
-
This step is for when your problem is so specific the only issue you’re running into is you can’t seem to clear out the Protection history screen in Windows Security, or you’re told a threat was found, but there’s nothing to clear out.
To address this, open the following folder. One easy way to do this is to paste this path into the Run dialog box (WIN+R):
C:\ProgramData\Microsoft\Windows Defender\Scans\History\Service\Select everything in the Service folder (Ctrl+A), and then press Delete to clear it out.
-
Temporarily disable any other antivirus programs you have installed. How this works is different for every app, but doing so should give you some time to see if Windows Defender’s troubles were due to a compatibility issue with the other anti-malware tool.
If you find the other program is to blame, or you suspect it might be but disabling it didn’t help, use a program uninstaller tool to completely delete the software.
If you still can’t start Windows Defender, there are a couple of registry keys you can delete to re-enable it. This might happen after uninstalling another antivirus program.
Open this key, and delete these two registry values from there:
DisableSpyware and DisableAntivirus.HKEY_LOCAL_MACHINE\SOFTWARE\Policies\Microsoft\Windows Defender\Your computer might not have these registry values, since they most likely exist only if security settings have been implemented via group policy (e.g., an IT department). If so, just move on to the next step.
-
Run the SFC /scannow command to repair system files. This will invoke the System File Checker tool to see if there are any problems with protected Windows files, and then replace them if so.
-
Use Reset This PC to reinstall Windows 11. Although this will reinstall Windows and reset all your programs back to their factory default state, that’s exactly what you want in this situation.
This is a sure fix for whatever problem is affecting Windows Defender, just make sure you wait until you’ve tried all the above before completing this drastic step.
Choose carefully to keep or wipe your data when resetting your PC.
FAQ
-
Go to Settings > Privacy & Security > Windows Security > Virus & threat protection > Manage Settings. Under Exclusions, select Add or remove exclusions.
-
No, not technically. Windows Firewall is a feature of the Windows Defender software. There is no separate Windows Firewall program.
-
To turn off SmartScreen in Microsoft Edge, go to the three-dot menu > Settings > Privacy, search, and services. Under Services, turn off Microsoft Defender SmartScreen.
Thanks for letting us know!
Get the Latest Tech News Delivered Every Day
Subscribe
Some Windows 11 users are reporting that they can’t access the Windows Security app anymore. Most users are experiencing this issue when attempting to change Windows Defender settings. When clicking or (double-clicking) on the Windows Security app, nothing happens. In most cases. this problem was reported to occur after a pending Windows Update was installed.
After we investigated this issue, we realized that there are actually several different underlying instances that will ultimately cause this error code. Here’s a short list of scenarios that might prevent Windows Security from opening up:
- Corrupted Windows Store certification – As it turns out, one common scenario that will cause this problem is when a critical dependency (Windows Store certification) is actually plagued by corruption. If this particular case is applicable, you should be able to get the issue fixed by reinstalling Microsoft.SecHealthUI component.
- Corrupted Windows Security component – If you recently upgraded to Windows 11 from an older Windows version, there’s a chance you’re dealing with a partially corrupted component brought about by the upgrade process. To resolve this issue, you need to reinstall the Windows Security component.
- Interfering 3rd party AV suite – Several 3rd party antivirus suites including Kasperky are known to effectively block Windows users from accessing the native AV component (Windows Security) while the 3rd party AV is enabled. To resolve this problem, you can fix the issue by disabling or uninstalling the 3rd party component.
- System file corruption – As it turns out, there is a scenario where you can no longer access the Windows Security component due to system file corruption that affects Windows security directly or an associated dependency. To fix this issue, you can start by doing an SFC and DISM scan. If this fails, you should also consider going for a clean install or repair install.
- Badly cached data – Depending on your particular scenario, you could also face an issue brought about by cached data that is being stored by Windows Security. In this case, the first thing you should do is reset the Windows Security app from the App section.
- Windows Security is Disabled – If you previously made some changes to the default behavior of Windows Security, there’s a chance Windows Security is actually disabled by a Registry key and this is the reason why you can’t access it. In this case, you can fix the problem by accessing Registry Editor and modifying the DisableAntiSpyware.
Now that we went over every potential scenario that might cause this behavior on Windows 11, let’s go over every known fix that other affected users have successfully used to restore the normal functionality of Windows Security.
1. Reset the Windows Store certification
It turns out that one typical situation that will result in this issue is when a crucial dependence (Windows Store certification) is genuinely afflicted by corruption. Reinstalling the Microsoft.SecHealthUI component should resolve the problem if this specific scenario applies.
To do this, you will need to open PowerShell with administrator access and run a command that will effectively reset the Windows Store certification. This method has been confirmed to work by a lot of affected users.
Here’s what you need to do:
- Press Windows key + R to open up a Run dialog box.
- Next, type ‘powershell’ inside the text box, then press Ctrl + Shift + Enter to open up an elevated Powershell window with admin access.

Access the Powershell window - At the User Account Control (UAC), click Yes to grant admin access.
- Once you’re inside the elevated Powershell window, paste the following command and press Enter to reset the Windows Store certification:
Get-AppxPackage Microsoft.SecHealthUI -AllUsers | Reset-AppxPackage
- After the command is run successfully, reboot your PC and see if the problem is fixed once the next startup is complete.

If the problem is still not resolved, move down to the next potential fix below.
2. Disable or Uninstall 3rd party antivirus
While the 3rd party AV is enabled, it is well known that a number of 3rd party antivirus suites, like Kasperky, effectively prevent Windows users from accessing the native AV component (Windows Security). You can address this issue by turning off or removing the third-party component.
It turns out that a conflict between a third-party security suite and a Kernel process used by the Windows 11 install agent may be the cause of this Windows Security issue. Numerous user complaints attribute this problem to Kaspersky, but other security suites can be responsible for the same symptoms.
If that’s the case and you’re using a third-party security suite, you should turn off your antivirus real-time protection and see if the problem goes away.
However, you’ll need to uninstall the security program and get rid of any leftover files if you want to be absolutely certain that your third-party AV suite—especially if it contains a firewall component—had nothing to do with this problem.
Do the simple stuff first: turn off real-time protection. Although the specifics of this procedure vary amongst the various third-party AV suites, you can usually access it through a taskbar menu.
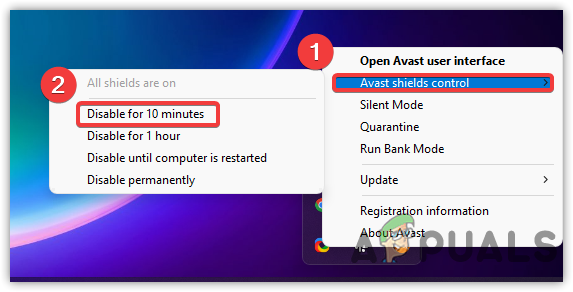
For a period, try disabling real-time protection, then check to see if Windows Security is now accessible.
If you’re still having trouble, consider completely uninstalling the security program and getting rid of any leftover files that might still be causing this issue.
If you choose to take this path, follow these instructions to thoroughly remove a third-party security suite and all leftover files.
If this approach wasn’t appropriate for your situation, scroll down to the next possible solution below.
3. Reset the Windows Security app
You might also run into a problem because Windows Security is storing cached data, depending on your specific situation. Resetting the Windows Security app from the App area should be your first course of action in this situation.
If you suspect that this scenario is applicable, you can fix the issue by accessing the Apps & Features tab from the Settings menu of Windows 11 and triggering a complete reset on Windows Security.
This method has been confirmed to work by a lot of Windows 11 users that were not previously unable to access Windows Security.
Follow the instructions below to reset the Windows Security app from the Apps & Features menu:
- Press Windows key + R to open up a Run dialog box.
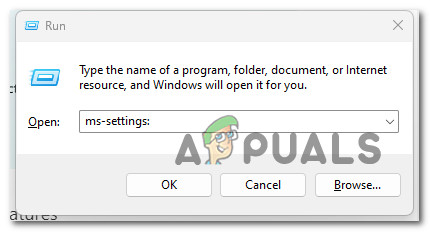
- Inside the Run dialog box, type ‘ms-settings:’ inside the text box, then press Ctrl + Shift + Enter to open up the Settings menu of your Windows computer.
Access the Settings menu of Windows 11 - At the User Account Control (UAC), click Yes to grant admin access.
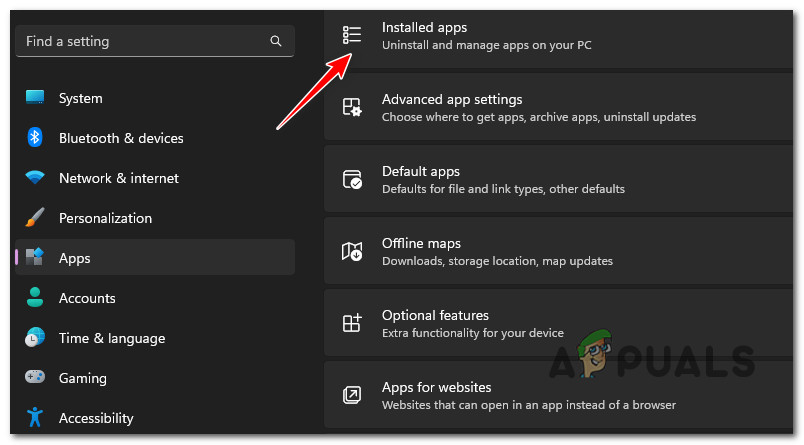
- Once you’re inside the Settings menu, click on the Apps icon from the menu on the left.
- Next, move to the right section and click on Installed apps.

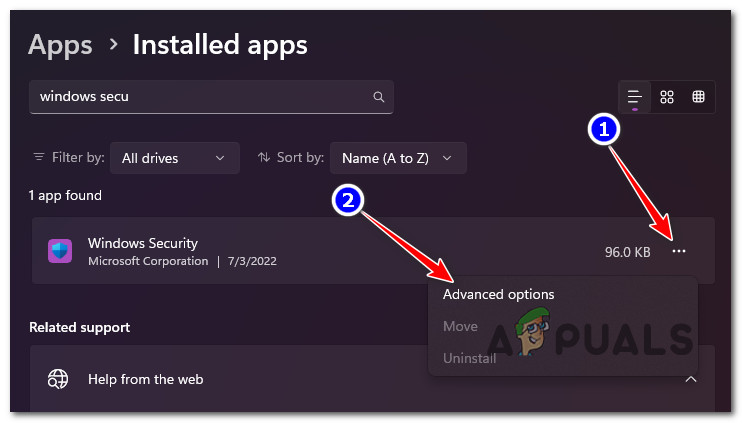
Access the Installed Apps - Once you’re inside the Installed Apps menu, scroll down through the list and locate Windows Security.
Note: You can use the search functionality at the top to make your job easier. - Once you locate Windows Security, click on the action icon (three-dot), then click on Advanced options.

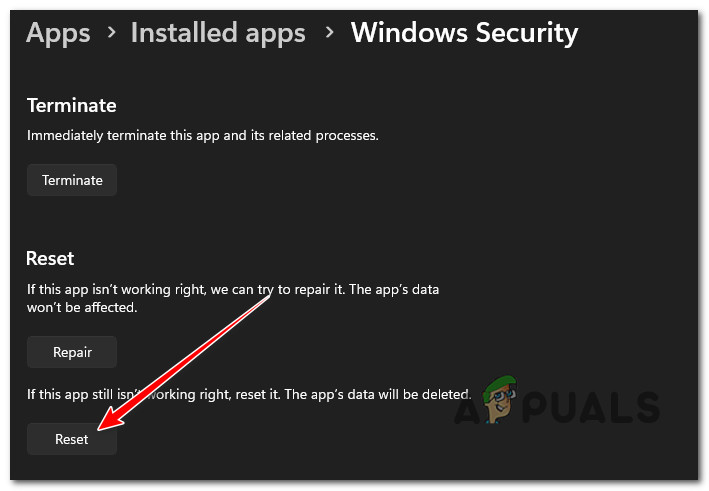
Access the Advanced Options menu of Windows Security - Inside the Advanced Options of Windows Security, scroll down to the Reset tab, then click on the Reset button.

Resetting Windows Security - At the confirmation prompt, confirm and wait until the operation is complete.
- Reboot your computer and see if Windows Security is not accessible.
If the same kind of problem is still occurring, move down to the next method below.
4. Enable Windows Security via Registry Editor
It’s possible that Windows Security is truly disabled by a Registry key and that’s why you can’t access it if you previously modified the default behavior of Windows Security. In this situation, you can resolve the issue by opening Registry Editor and making changes to the DisableAntiSpyware value.
The system frequently suffers when changes are made to the registry file. The system’s user or third-party program may have mistakenly introduced these alterations.
The registry file is the most crucial file and should be backed up before beginning since if something goes wrong, the system could crash.
Follow the steps below to open the Registry Editor and determine whether the DisableAntiSpyware value is enabled or not if this scenario appears to be applicable to you:
- Start by pressing Windows key + R to open up a Run dialog box.
- Next, type ‘regedit’ inside the text box, then press Ctrl + Shift + Enter to open the Registry Editor with admin access.
Open up the Registry Editor - At the User Account Control (UAC), click Yes to grant admin access.
- Once you’re inside the Registry Editor, use the menu on the left to navigate to the following location:
HKEY_LOCAL_MACHINE\SOFTWARE\Policies\Microsoft\Windows Defender
Note: You can either navigate to this location manually or you can paste the location directly into the nav bar at the top and press Enter to get there instantly.
- After you’re inside the correct location, double-click on the DisableAntiSpyware registry value and change its Base to Hexadecimal and the Value data to 0 before clicking on Ok.
- Now that you’ve made sure that Windows Security is not disabled at a registry level, restart your PC and see if the problem is now fixed.
If this method was not applicable, move down to the next method below.
5. Reinstall Windows Security
If you recently updated from a previous version of Windows to Windows 11, there’s a potential that the upgrading procedure may have partially corrupted a component. You must reinstall the Windows Security component in order to fix this problem.
The issue is not brand-new, and Windows 10 users who upgraded from a feature update have also reported it. The answer is rather straightforward.
Run a series of instructions to effectively replace your present Windows Store component with newer ones free of corruption once Windows Terminal is launched and in PowerShell mode.
To successfully reinstall the Windows Security component from an elevated Powershell component, follow these steps:
- Press Windows key + R to open up a Run dialog box.
- Next, type ‘powershell’ inside the text box, then press Ctrl + Shift + Enter to open up an elevated Powershell window with admin access.
Access the Powershell window - At the User Account Control (UAC), click Yes to grant admin access.
- Once you’re inside the elevated Powershell window, paste the following commands and press Enter to effectively reinstall the Windows Store component:
Set-ExecutionPolicy Unrestricted Get-AppXPackage -AllUsers | Foreach {Add-AppxPackage -DisableDevelopmentMode -Register "$($_.InstallLocation)\AppXManifest.xml"} - Once this component has been effectively reset, restart your PC and see if the Windows Security component starts working once the next startup is complete.
If the same kind of issue is still occurring, move down to the next methods below.
6. Run SFC and DISM scans
If you’ve come to this point without finding a solution, it’s likely that you have some sort of system file corruption that has broken the Windows Security component.
The next step should be to launch SFC (System File Checker) and DISM (Deployment Image Servicing and Management), two built-in programs that can address the most common causes of system file corruption.
Resolving the corruption issue is more likely if SFC and DISM are performed shortly after one another, despite the fact that they are quite identical.
It should be noted that while SFC collects healthy system files from a local location, DISM retrieves files from Windows Update in order to replace faulty counterparts.
Running an SFC scan from an elevated CMD prompt can be used to check for system file corruption.
Even if the tool appears to have frozen, it is advisable not to interrupt this process midway (or prematurely quit the CMD window). You’ll eventually get the success notification after the operation is finished.
Once the DISM scan is complete, restart your computer. Once the subsequent startup has been completed, run a DISM scan.
Before starting this process, make sure your Internet connection is strong.
Restart your computer after properly executing the DISM command to see if the problem has been fixed.
Continue to the final suggested solution below if the issue is still not resolved.
7. Repair install or clean install
If none of the aforementioned approaches have worked for you, your only remaining choice is to entirely replace all of the afflicted system file dependencies with healthy replacements.
At this point, your only choices are to perform a clean install or a repair install (in-place upgrade).
If you have the option, we advise you to go for a repair installation (in-place upgrade) if you find yourself in a difficulty:
- Repair install – Only the system files will be changed during a repair install (in-place upgrade) (while keeping your personal files, user preferences apps & games).
- Clean install – If only certain kernel processes are impacted, a clean install can be the best choice, but it has the disadvantage of wiping any personal data stored on the OS disk. However, you should be aware that if you take this action, all of your personal data will be lost.