
Drag and drop is a simple yet useful feature that makes it easy to move items around on your screen. With it, you can quickly relocate your files and folders without having to switch between windows or use keyboard shortcuts.
While that’s convenient, there can be times when the drag and drop feature stops working on your Windows 11 computer. If you are facing the same problem, here are some solutions that will help.
1. Start With Some Generic Fixes
It’s a good idea to try some generic Windows fixes before spending time on any advanced solutions.
- Restart Windows Explorer: An unresponsive Windows Explorer process can cause features like drag and drop to stop working in Windows 11. Most of the time, you can fix such problems by simply restarting the Windows Explorer process.
- Install Windows Updates: Running an outdated Windows build can also lead to such issues. Hence, it’s a good idea to install pending Windows updates if you haven’t already.
- Run the SFC Scan: If some of the system files on your PC are corrupted or missing, Windows 11 may not respond to the drag and drop gesture. Try running the SFC (or System File Checker) scan to repair any damaged system files and see if that helps.
- Scan for Malware: A malware infection is another possible cause of this issue. To rule this out, try scanning your PC for malware with PowerShell or an antivirus program.
- Try Clean Boot: It’s possible that a rouge third-party app or program on your PC is causing the drag and drop feature to malfunction. If that’s the case, booting your PC in a clean boot state will help you verify that.
2. Use the Esc Key
At times, Windows may freeze on the last drag and drop operation and stop responding to new actions. If it’s just a one-off glitch, simply resetting the drag and drop gesture should do the trick.
Left-click and hold the file or folder you want to drag and click the Esc key. Then, release the left click on your mouse, and check if you can drag and drop items after that.
3. Restart the Problematic App
If the drag and drop feature is not working only in a specific app, such as Chrome or Outlook, there may be an issue with that app. You can try restarting the problematic app or program to fix the problem.
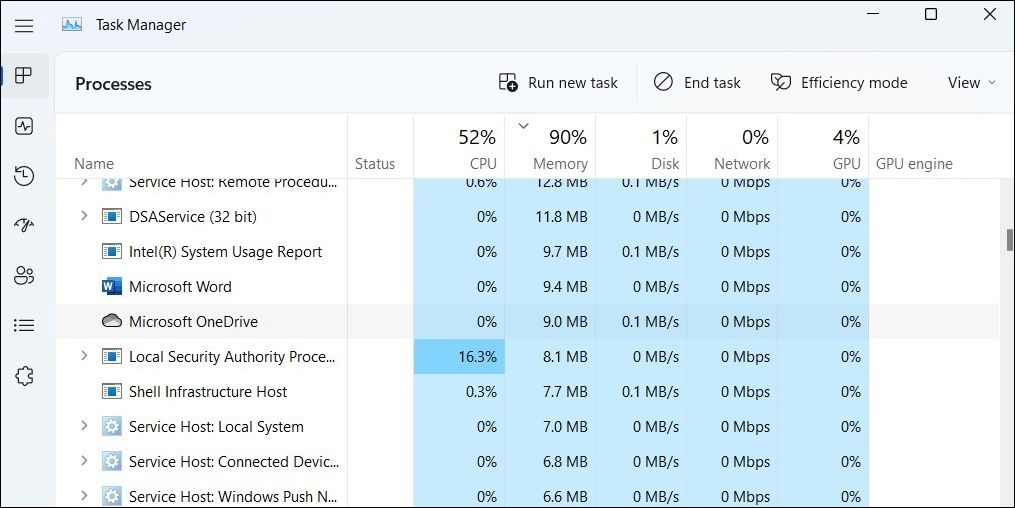
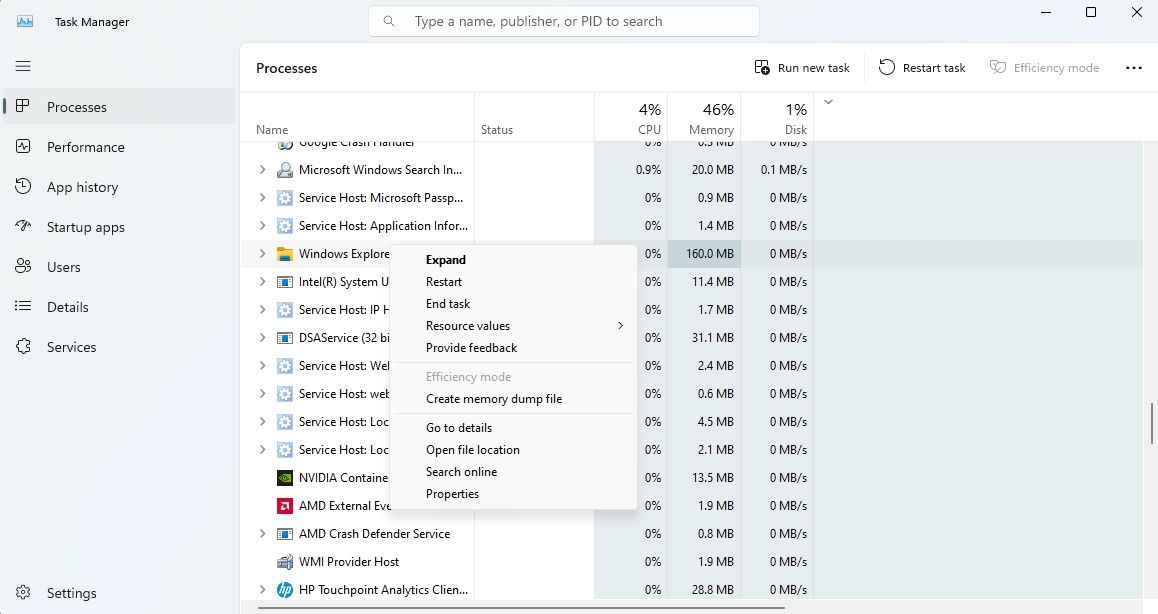
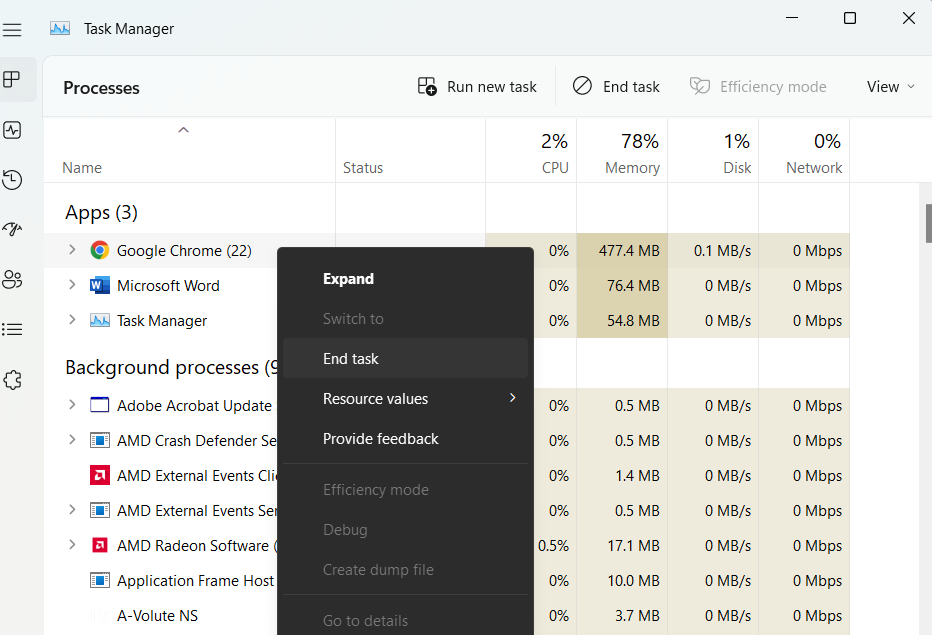
Press Ctrl + Shift + Esc to open the Task Manager. In the Processes tab, locate and select the faulty app or program, and click the End task option at the top.
Reopen your app and check if the issue still occurs.
4. Run the Hardware and Devices Troubleshooter
Running the Hardware and devices troubleshooter is an effective way to fix issues with your peripherals. This tool can scan all the hardware devices connected to the system, including your mouse or touchpad, and resolve any issues with them.
Since this troubleshooter is not accessible through the Settings app, you will need to use the Run command to start it. Here are the steps you can follow:
- Press Win + R to open the Run dialog box.
- Type msdt.exe -id DeviceDiagnostic in the Open field and press Enter.
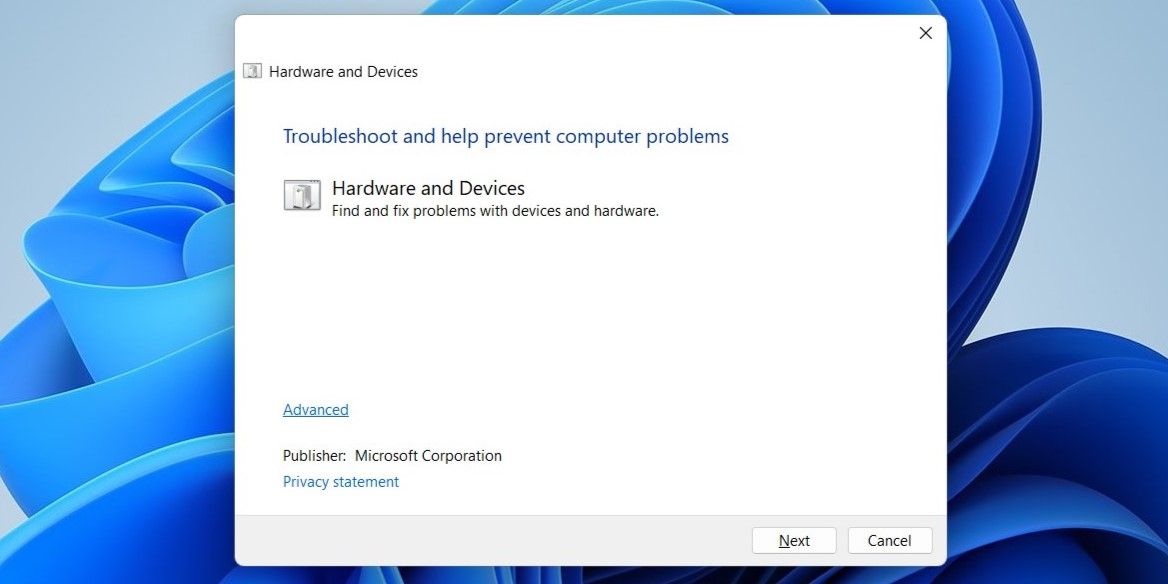
- In the Hardware and Devices window, click Advanced and tick the Apply repairs automatically checkbox.
-
Click Next to run the troubleshooter.

5. Update or Reinstall Mouse Drivers
Outdated or damaged mouse or touchpad drivers can also cause drag and drop to stop working in Windows 11. If that’s the case, updating the relevant drivers should help solve the problem.
Here are the steps to do the same:
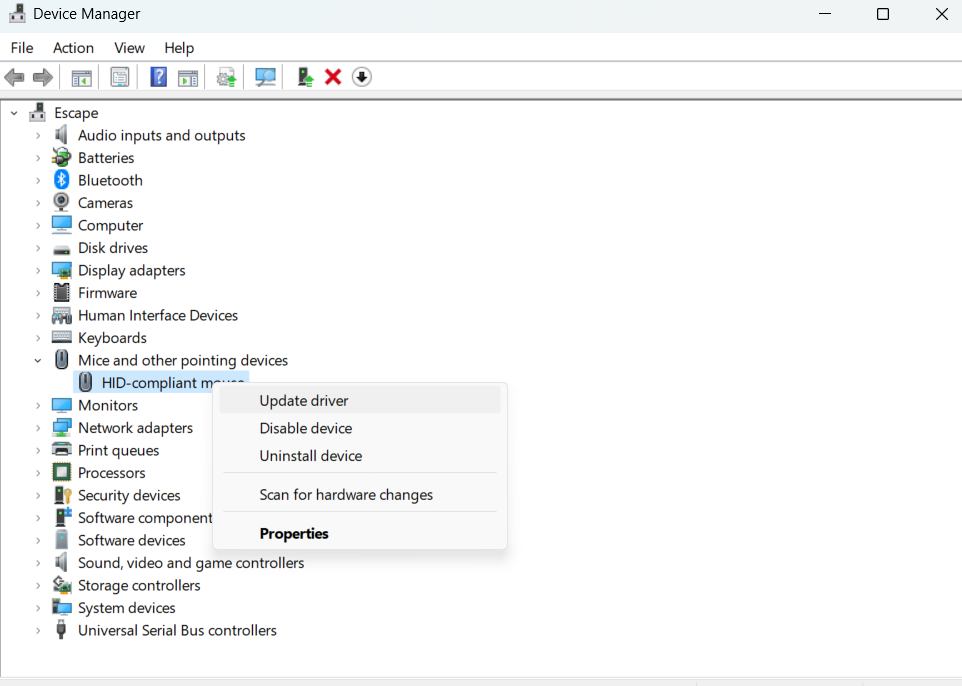
- Right-click on the Start icon or use the Win + X keyboard shortcut to open the Power User menu.
- Select Device Manager from the list.
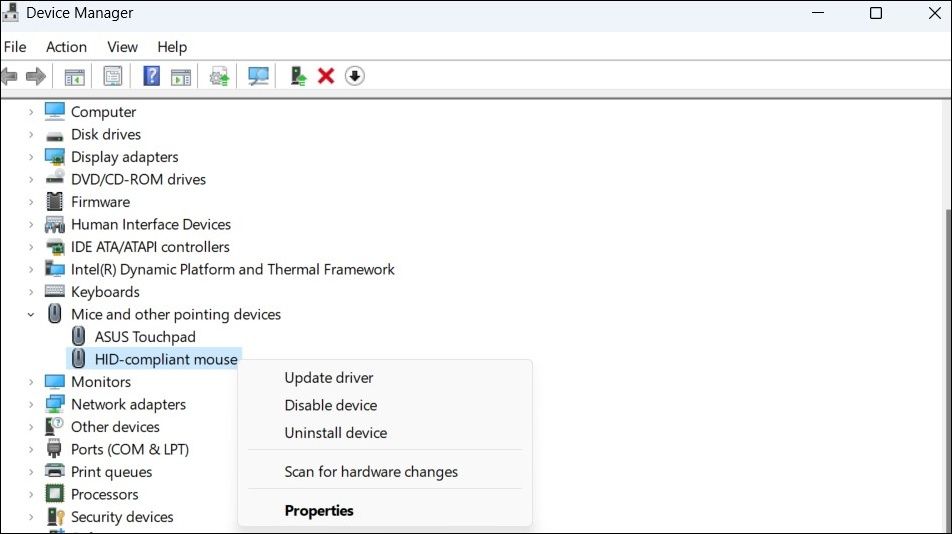
- Double-click on Mice and other pointing devices to expand it.
-
Right-click on your mouse or touchpad device and select Update driver.

Follow the on-screen prompts to finish updating the driver.
If the issue remains even after this, you can try uninstalling the mouse driver from your PC. If you need help with that, check our guide on how to uninstall drivers in Windows 11. After removing the driver, restart your PC, and Windows will automatically reinstall the missing driver during the boot process.
6. Check Your Mouse for Issues
Issues with your mouse can also make it seem like the drag and drop feature is not working on Windows 11. Try disconnecting your mouse and reconnecting it to see if that works. If you’re using a wireless mouse, swap the old batteries or charge it.
For more help, refer to our guide on fixing the left-click mouse button not working issue on Windows and follow the tips mentioned there.
7. Edit Registry Files
Incorrect registry entries can also cause such anomalies. You need to review the registry values related to the drag and drop feature and ensure they are configured correctly.
Once you’ve done that, use these steps to fix the drag and drop registry files:
- Press Win + R to open the Run dialog box.
- Type regedit in the box and press Enter.
- Select Yes when the User Account Control (UAC) prompt appears.
-
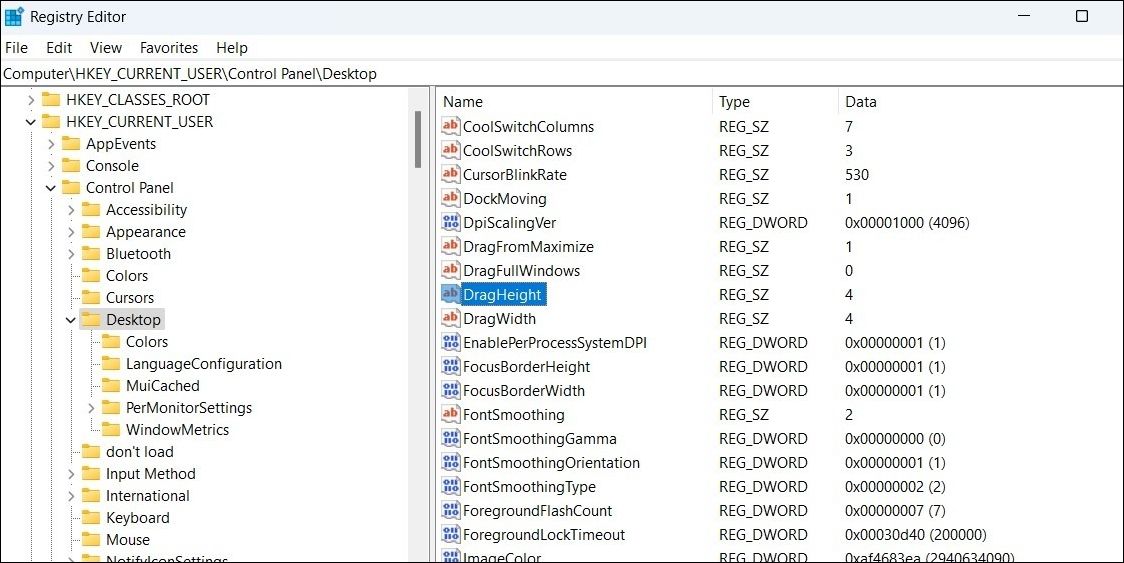
Paste the following path in the address bar at the top and press Enter to quickly navigate to the Desktop key.
HKEY_CURRENT_USER\Control Panel\Desktop - In the right pane, double-click the DragHeight entry and change its value data to 4. Then, click OK.
-
Similarly, set the value of the DragWidth entry value to 4.

Restart your PC after making the above changes and see if the drag and drop feature works after that.
Effortlessly Move Your Files With Drag and Drop Functionality on Windows
Drag and drop is one of those Windows 11 features that once you start using it, you can’t go back. Hence, it can be inconvenient when the feature stops working on your PC. We hope that going through the above tips has helped you fix the problem and put you at ease.
While the default drag and drop action can help you move items quickly, you can also modify it to copy or create shortcuts for files and folders on Windows.
FAQ
Q: How Do You Drag Maximized Windows in Windows 11?
You drag maximized Windows in Windows 11 by pressing and holding down the Windows key and pressing an arrow key (right, left, up, or down arrow key). This changes your current window’s position on your screen.
Q: How Do You Change Drag and Drop From Copy to Move in Windows 11?
You can change drag-and-drops’s action from copy to move by holding down the Shift key while dragging and dropping your files. This makes Windows move your files instead of copying them to a folder.
Q: How Do You Drag and Drop From One Computer to Another?
You can drag and drop files from one computer to another by opening your target computer’s shared folder on your main computer and dragging your files and folders onto that folder window. This copies your computer’s files to your chosen computer.
Quick Links
-
Why Is Drag and Drop Not Working on Your Windows PC?
-
Reset the explorer.exe Process
-
Use the Left Click and Escape Key Hack
-
Change Drag and Drop Sensitivity
Summary
- Drag and drop may stop working on Windows 11 due to corrupt or outdated mouse drivers, incorrect drag and drop sensitivity settings, or interference from third-party applications.
- To fix the drag and drop functionality, start by restarting File Explorer.
- If restarting File Explorer doesn’t work, you can try other troubleshooting steps, such as resetting the explorer.exe process, changing the drag and drop sensitivity, updating Windows, or performing a clean boot.
There are many ways to move a file on Windows, but one of the most common is by dragging and dropping it. However, a temporary glitch or corrupt mouse driver can sometimes prevent the drag and drop feature from working properly. There are a few quick fixes that you can try to troubleshoot this issue.
Why Is Drag and Drop Not Working on Your Windows PC?
Drag and drop is a useful feature that lets you quickly move files and folders around your computer. However, it can sometimes stop working, which can be a major inconvenience.
There are various reasons why drag and drop might not be working, but some of the most common ones are listed below.
- A corrupt or outdated mouse driver is often the main reason for the issue.
- Drag and drop functionality will not work if Windows is still in the middle of your last drag and drop action.
- Third-party applications can sometimes interfere with basic Windows functionality, such as drag and drop, and prevent it from working properly.
Now that you know all the major culprits causing the issue, let’s check out the solution to help you troubleshoot the problem.
1. Restart Windows Explorer
A temporary glitch or bug can sometimes prevent your computer from working properly. This can cause problems with opening files, renaming folders, or even using basic Windows features like drag and drop.
The best way to fix this is to restart File Explorer. To do this, press the Ctrl+Shift+Esc key together to open «Task Manager», right-click the «Windows Explorer» and choose «End task.»
Test the drag and drop feature again. If it’s still not working, try the next solution.
2. Reset the explorer.exe Process
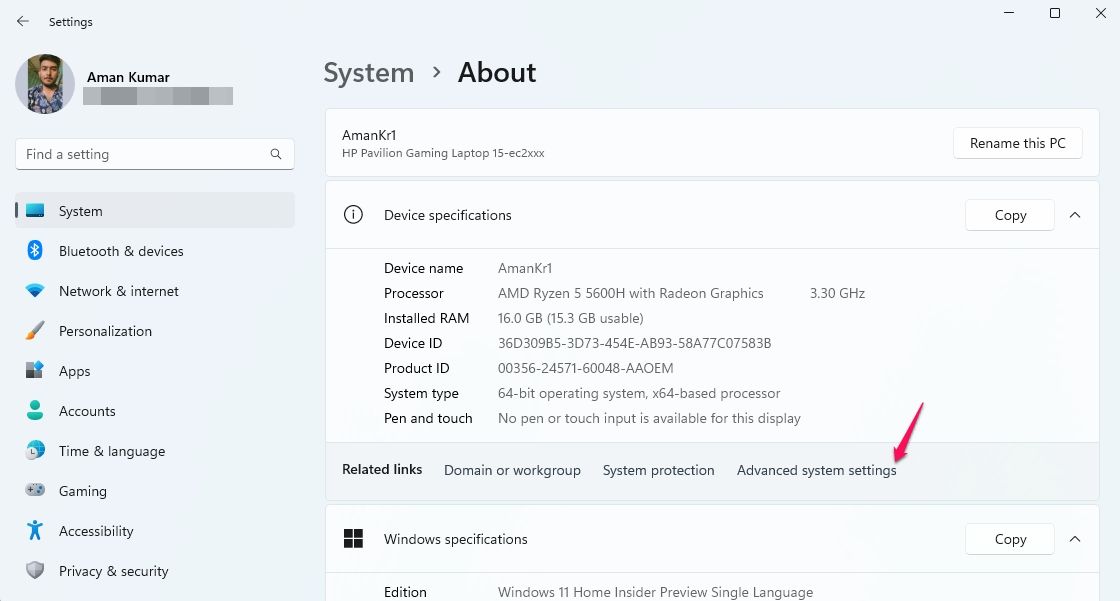
If restarting Windows Explorer didn’t work, try resetting the explorer.exe process. To do this, open «Settings» by pressing Windows+i hotkey and navigate to System > About > Advanced system settings.
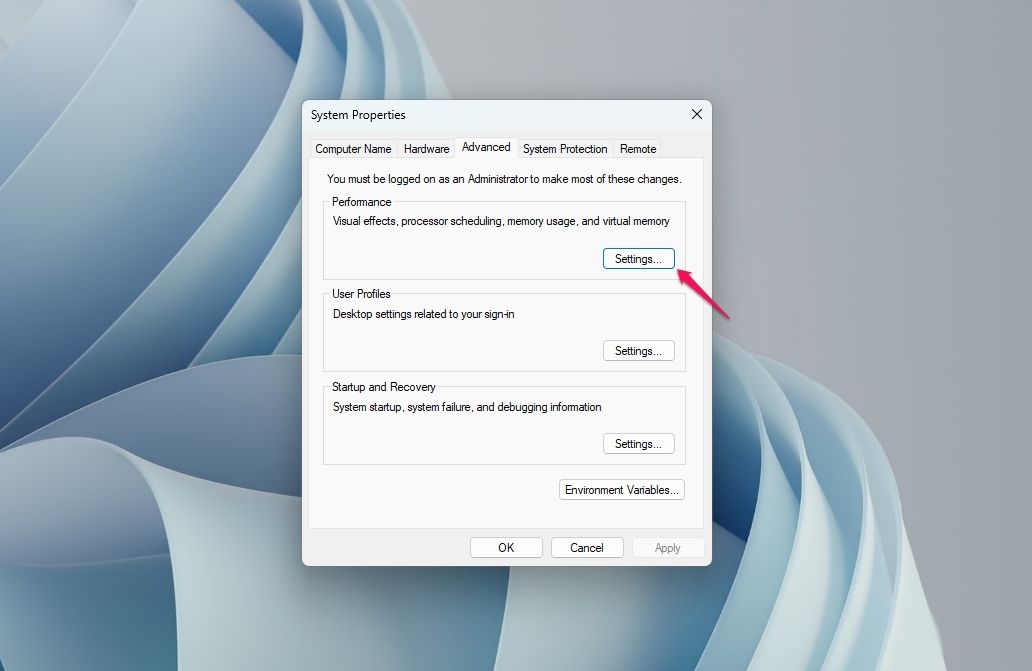
In the System Properties window, click «Settings» under the «Performance» section.
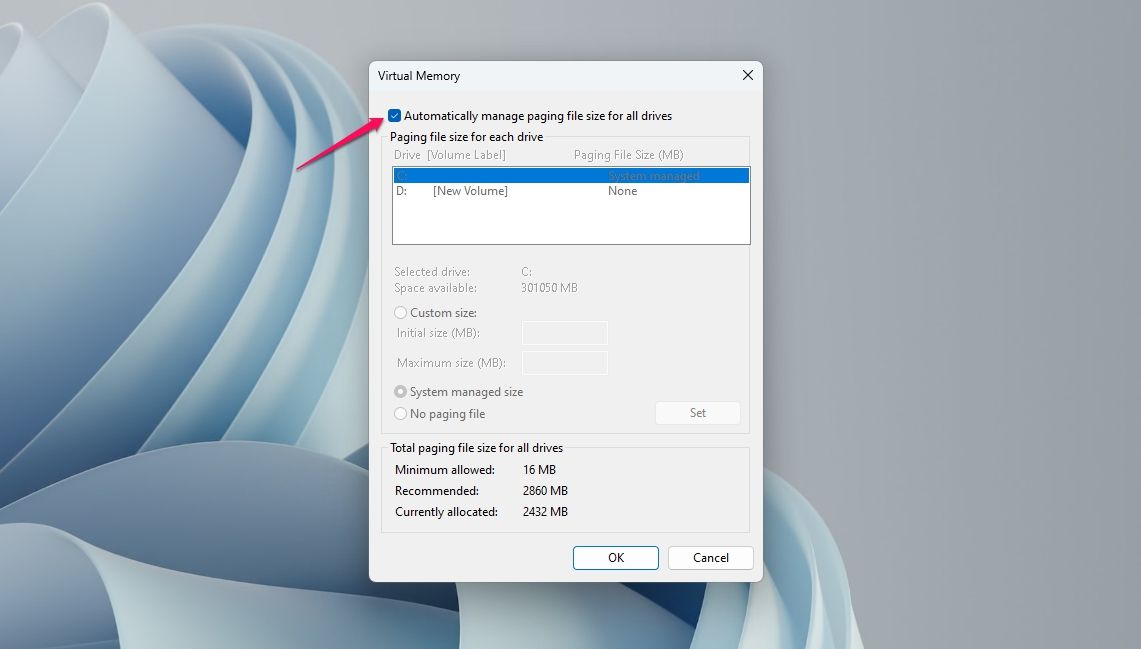
Switch to the «Advanced» tab and select «Programs» for the «Adjust for best performance of» option. Then, click «Change» under the «Virtual memory» section.
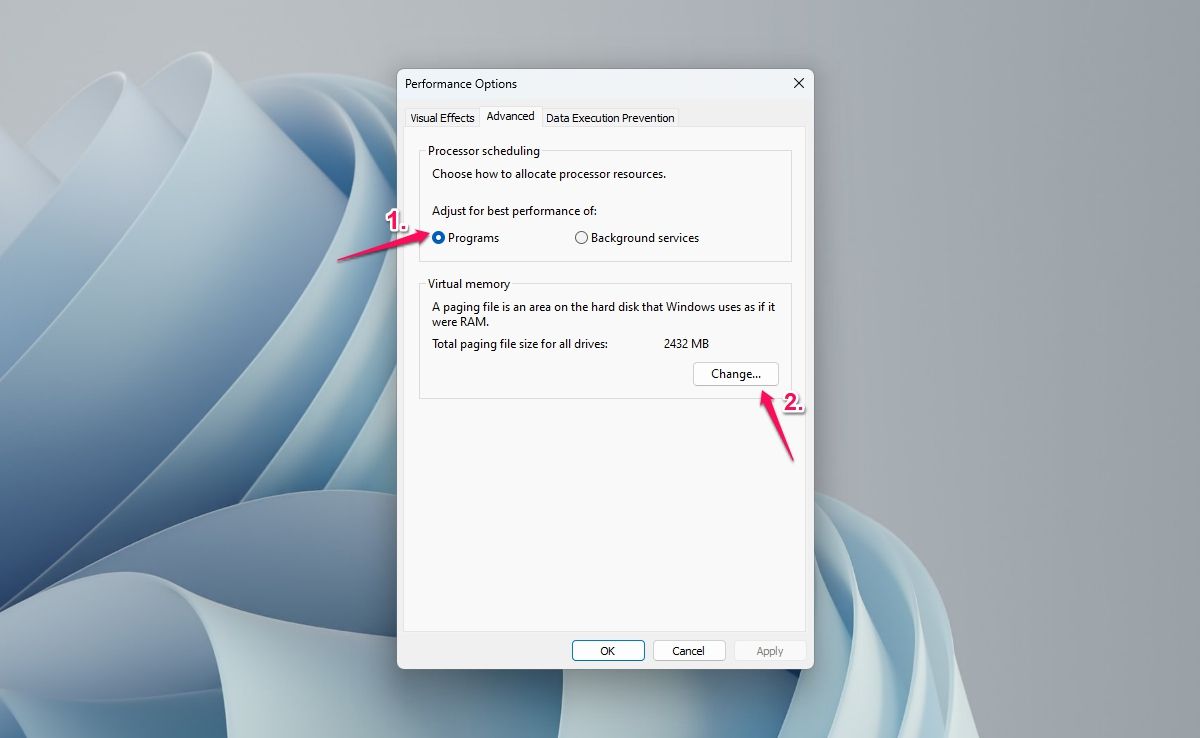
Make sure the «Automatically manage paging file size for all drivers» option is checked. Then, click OK > Apply > OK.
Now, press Alt+F4 key together to open the «Shut Down Windows» prompt, select «Restart» from the drop-down menu, and click OK. Windows will reset the explorer.exe process upon restart, which should resolve the issue.
3. Use the Left Click and Escape Key Hack
If Windows fails to release the data from the last drag and drop operation, the drag and drop feature might stop working. To fix this, open «File Explorer» by pressing Windows+E key together. Then, left-click on a file or folder and press the «Escape» key on your keyboard.
Next, restart your computer and check if the problem is resolved.
4. Change Drag and Drop Sensitivity
On Windows, the drag and drop sensitivity is set to 4 by default. This means that if you move a file or folder by 4 pixels and release it, it will be dragged and dropped.
However, if a third-party application has increased the sensitivity to a higher value, you may have difficulty using the drag and drop feature. To resolve this issue, you must reset the drag and drop sensitivity.
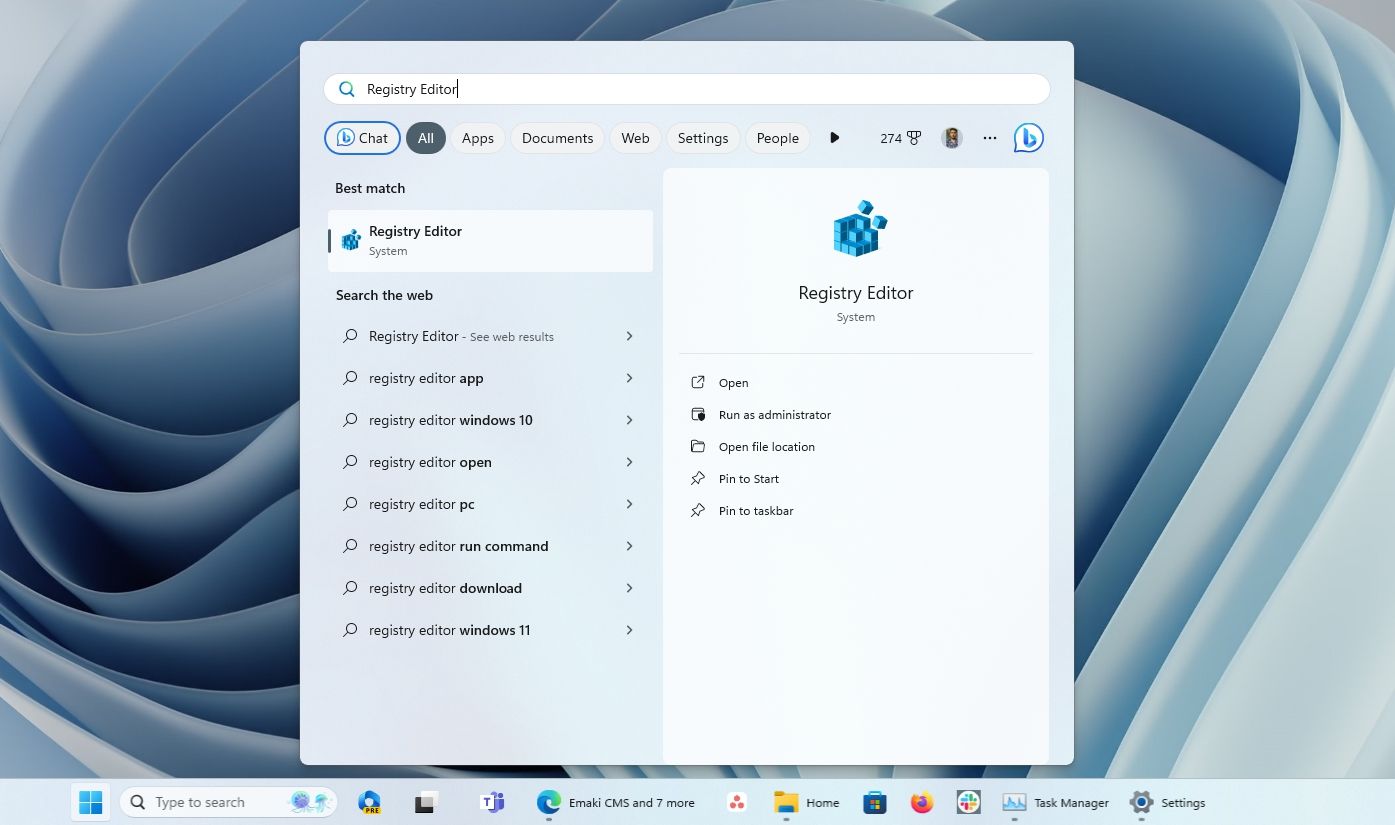
To reset the drag and drop sensitivity, press the Windows key to open the «Start» menu, type «Registry Editor» in the search bar, and press Enter.
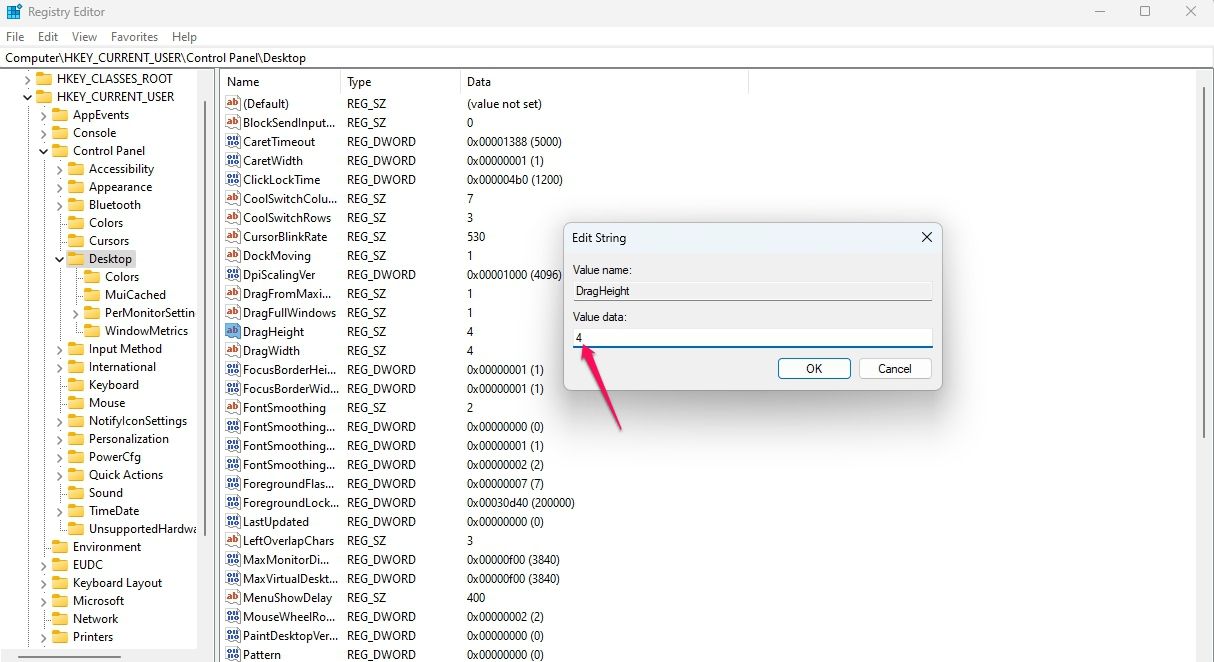
In the Registry Editor, navigate to the following location:
HKEY_CURRENT_USER\Control Panel\Desktop

Double-click the «DragHeight» string value in the right pane, type «4» in the «Value data» field, and click OK. Then, double-click the «DragWidth» string value, type «4» in the «Value data» field, and click OK.
Close the Registry Editor and check if you can drag and drop files or folders.
5. Run SFC and DISM Scans
It’s very common for Windows files to become corrupt. This can cause various problems, including the one you’re experiencing. Fortunately, you can quickly detect and eliminate all the corrupt files using your PC’s built-in System File Checker (SFC) tool.
This tool runs on its own, which means it automatically detects corrupt files on your computer and replaces them with their working counterparts. You can use this tool from a Command Prompt window, as follows.
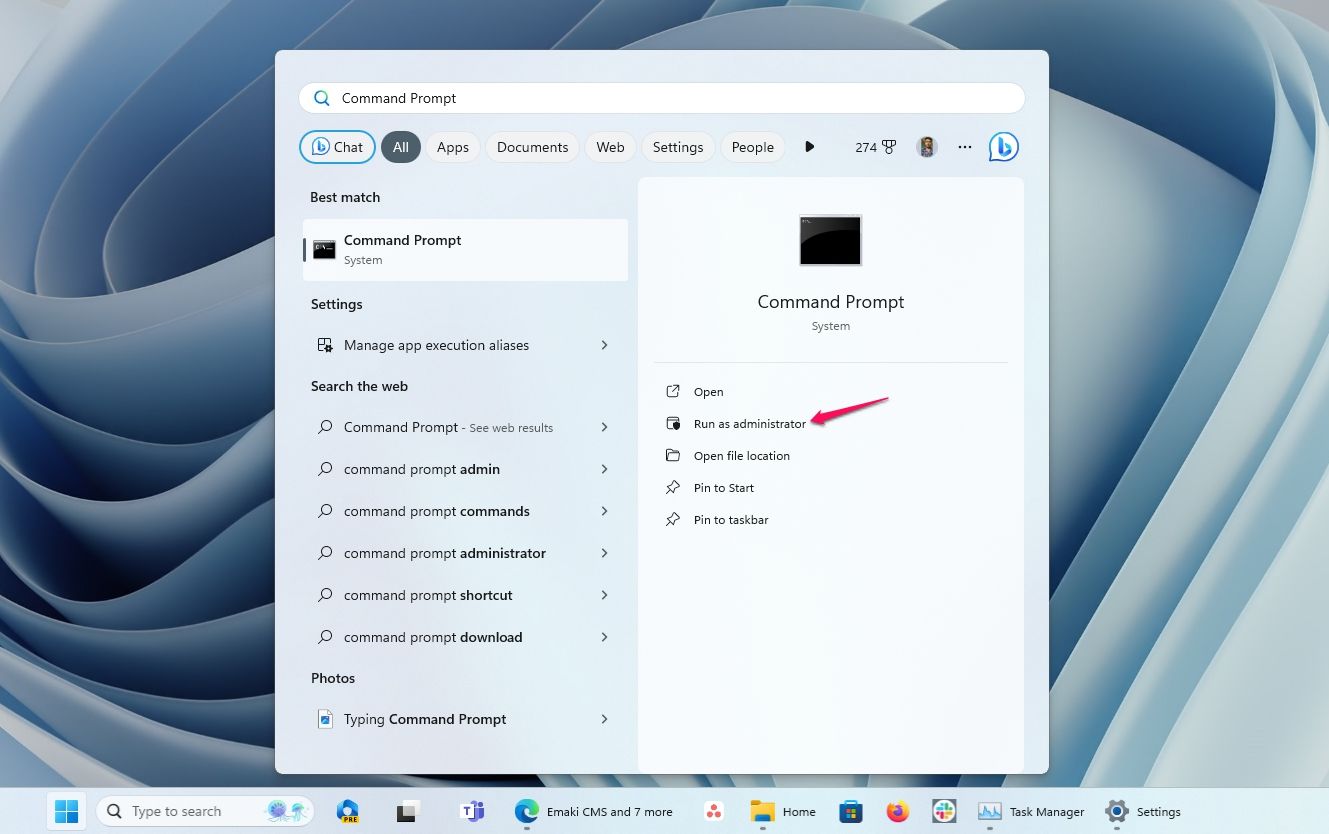
Open the «Start» menu, type «Command Prompt» in the search bar and choose «Run as administrator». If UAC crops up, click «Yes».
In the elevated Command Prompt window, type the following command and press Enter.
sfc /scannow
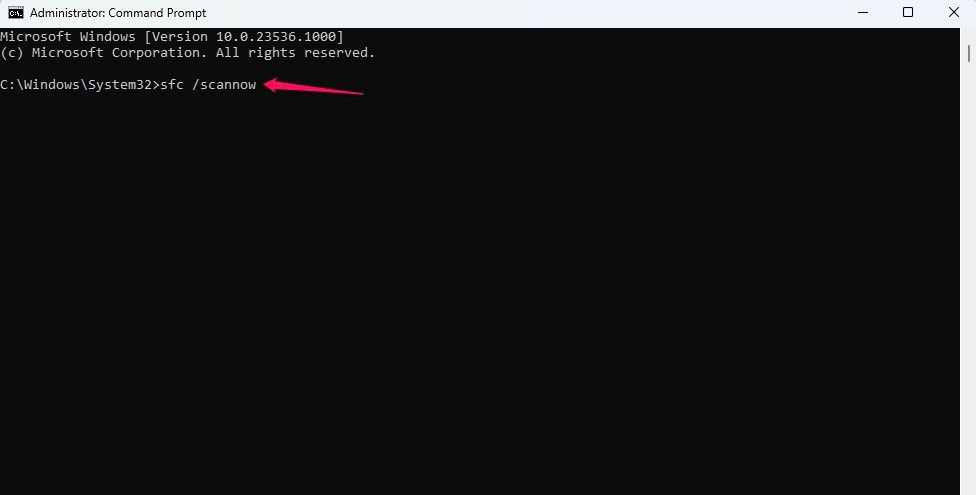
The scan might take a while to complete if it detects any issue in your system. However, if the SFC scan does not find any corrupt files or fails to repair them, you can try running a DISM scan.
To run a DISM scan, open Command Prompt window as administrator and type the following commands, one at a time, pressing Enter after each command:
DISM /Online /Cleanup-Image /CheckHealth
DISM /Online /Cleanup-Image /ScanHealth
DISM /Online /Cleanup-Image /RestoreHealth
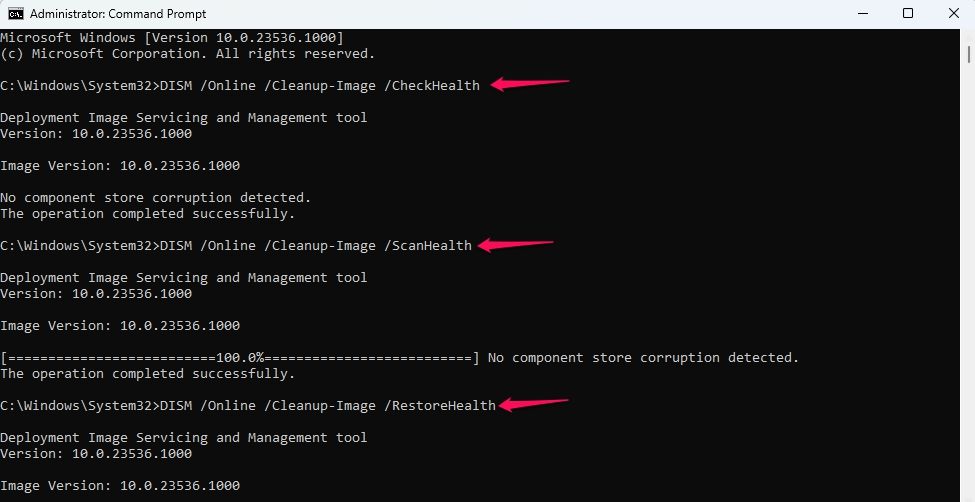
Once the DISM scan is complete, restart your computer and check if the issue is resolved. If the issue persists, there may be a bug in the version of Windows you are using.
6. Update Window 11
If your Windows version is outdated, you may experience problems with different apps and even basic functionalities like drag and drop. In this case, updating your Windows version is likely to resolve the issue.
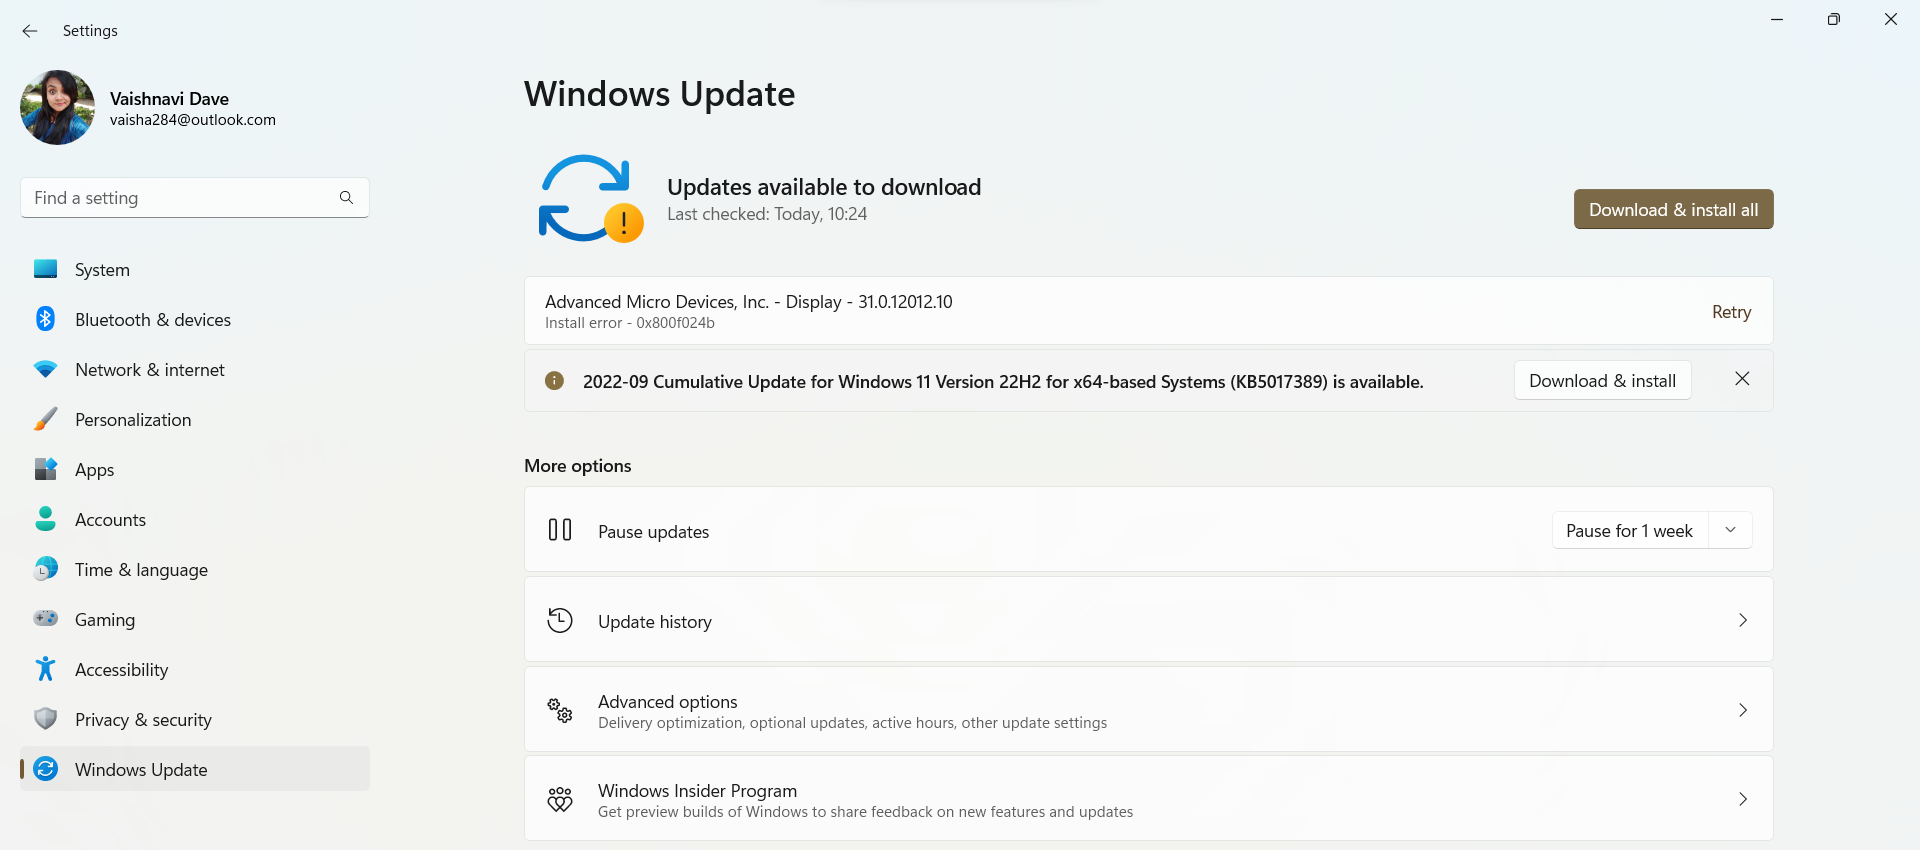
To update Windows 11, go to Settings > Windows Update. On the right pane, click «Check for updates.»
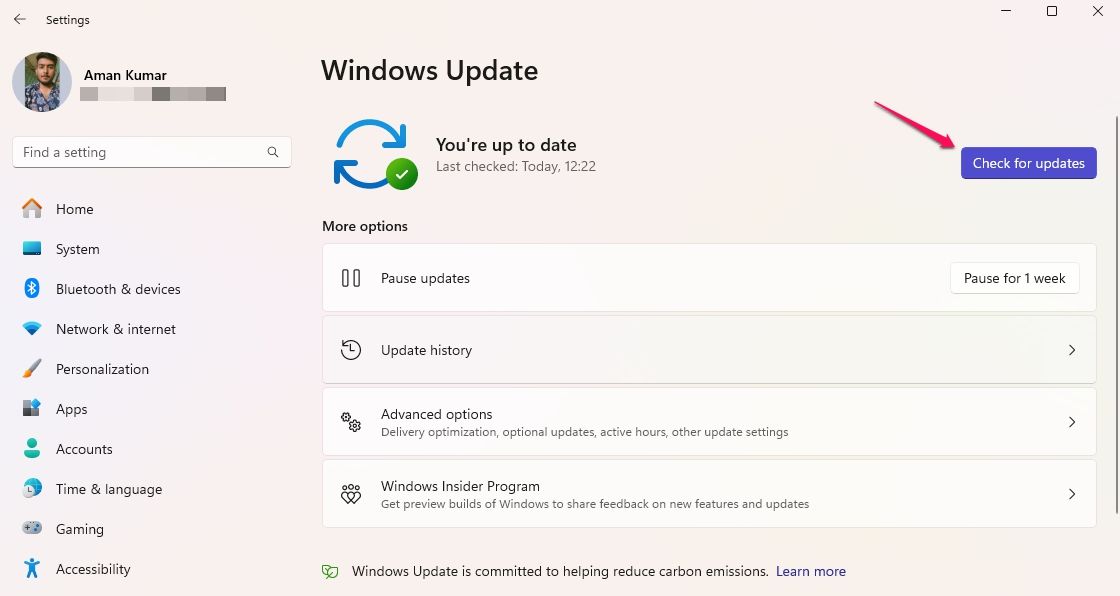
Windows will now search Microsoft’s servers for any available updates. If it finds any, it will automatically install them without much user input. This method will also look for any available driver updates for installed hardware, including your mouse. So, if the problem is caused by an outdated mouse driver, it is likely to be fixed after updating it.
7. Perform a Clean Boot
Is drag and drop still not working on your Windows PC? If so, a third-party application is likely causing the problem. In this case, you’ll need to perform a clean boot.
To do that, open the «Start» menu, type «System Configuration» in the search bar, and press Enter.

In the System Configuration window, click the «Services» tab and check the «Hide all Microsoft services» box. Then, click «Disable all.»
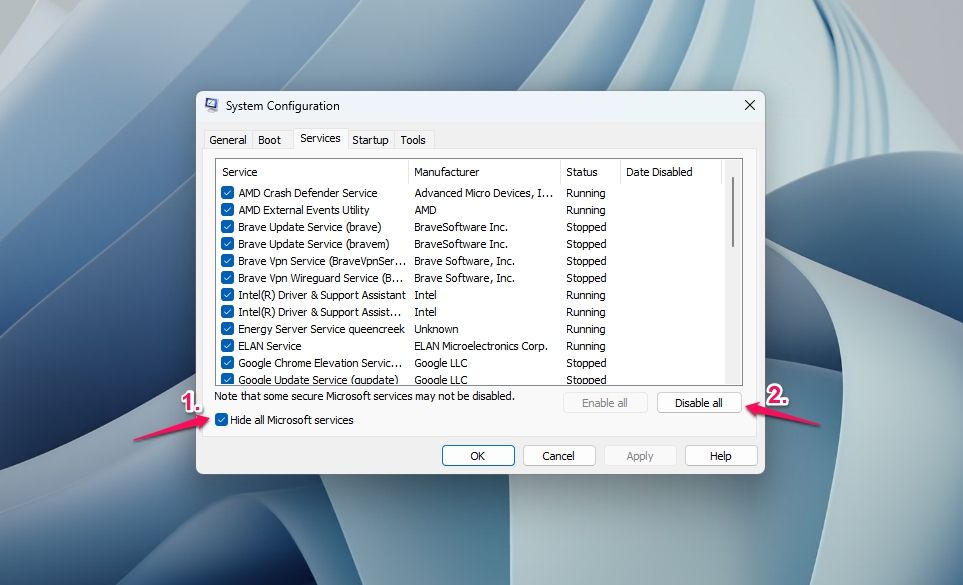
Switch to the «Startup» tab, and click «Open Task Manager.» In the Task Manager window, right-click each startup app and select «Disable.» Then, restart your computer.
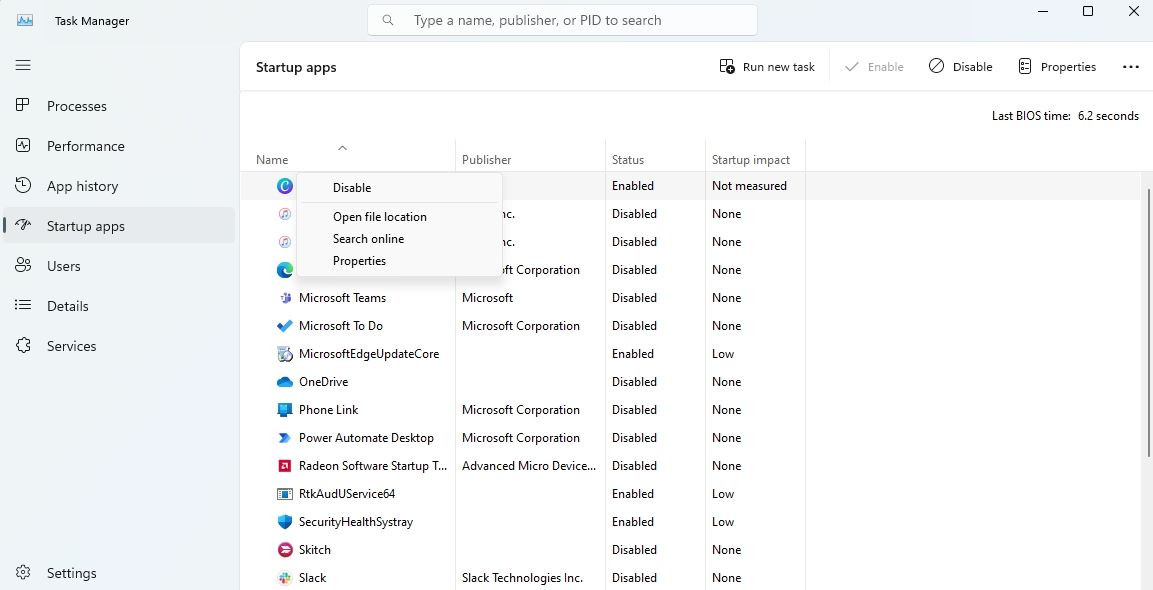
After your computer restarts, check to see if drag and drop is working. If it is, then one of the services or startup apps that you disabled was causing the problem.
To identify the culprit, start enabling each service or app one at a time until the issue reappears. Once you find the service or app causing the problem, you can uninstall it or update its driver.
That’s how you fix the drag and drop feature when it’s not working. Now, you can move files and folders around your computer without any issue.
The drag and drop feature is one of the most convenient features available on multiple versions of Windows.
So, you are trying to use the drag and drop feature, but it is not working.
Previously, you could drag files onto an app present on the Taskbar. This was great as it saved a lot of time.
Sadly on Windows 11, many users are not able to use the drag and drop feature and I know this can be very annoying.
I have written the best ways you can use drag and drop on Windows 11 in this post. I am a Windows power user and the fixes given in this post have been tested.
You can easily go through the very simple instructions given in this post, so please continue reading.
The drag and drop feature does not work on Windows 11 because it has been removed. You need to now open the app window to drag and drop a file into it. There are some rumors that Microsoft is thinking of bringing back the drag and drop feature back to Windows 11.
So, what can you do if you can drag files onto an app icon on the desktop or Taskbar?
You can press the Alt and Tab keys at the same time on your keyboard to display the multiple windows that are open or running and then drag the file or files on the desired window.
You can also use the Split-screen feature to keep the app’s windows open on one side.
After that, you can just drag your desired file onto the app window. You can also edit some registry files, although that is not recommended.
If you want, you can use third-party apps or files to force Windows 11 to have the drag and drop feature.
All of the procedures are given below in this post, so keep your cool and go through them.
Follow our guide to fix blue screen on Windows 11.
How to drag and drop files on Windows 11
It is unfortunate that we cannot just drag and drop like before, but there is no reason to lose hope as you can still drag and drop files in other different ways.
The different procedures on how to drag and drop on Windows 11 are given below, so keep calm and please go through them.
Here are the steps to drag and drop files to the taskbar on Windows 11:
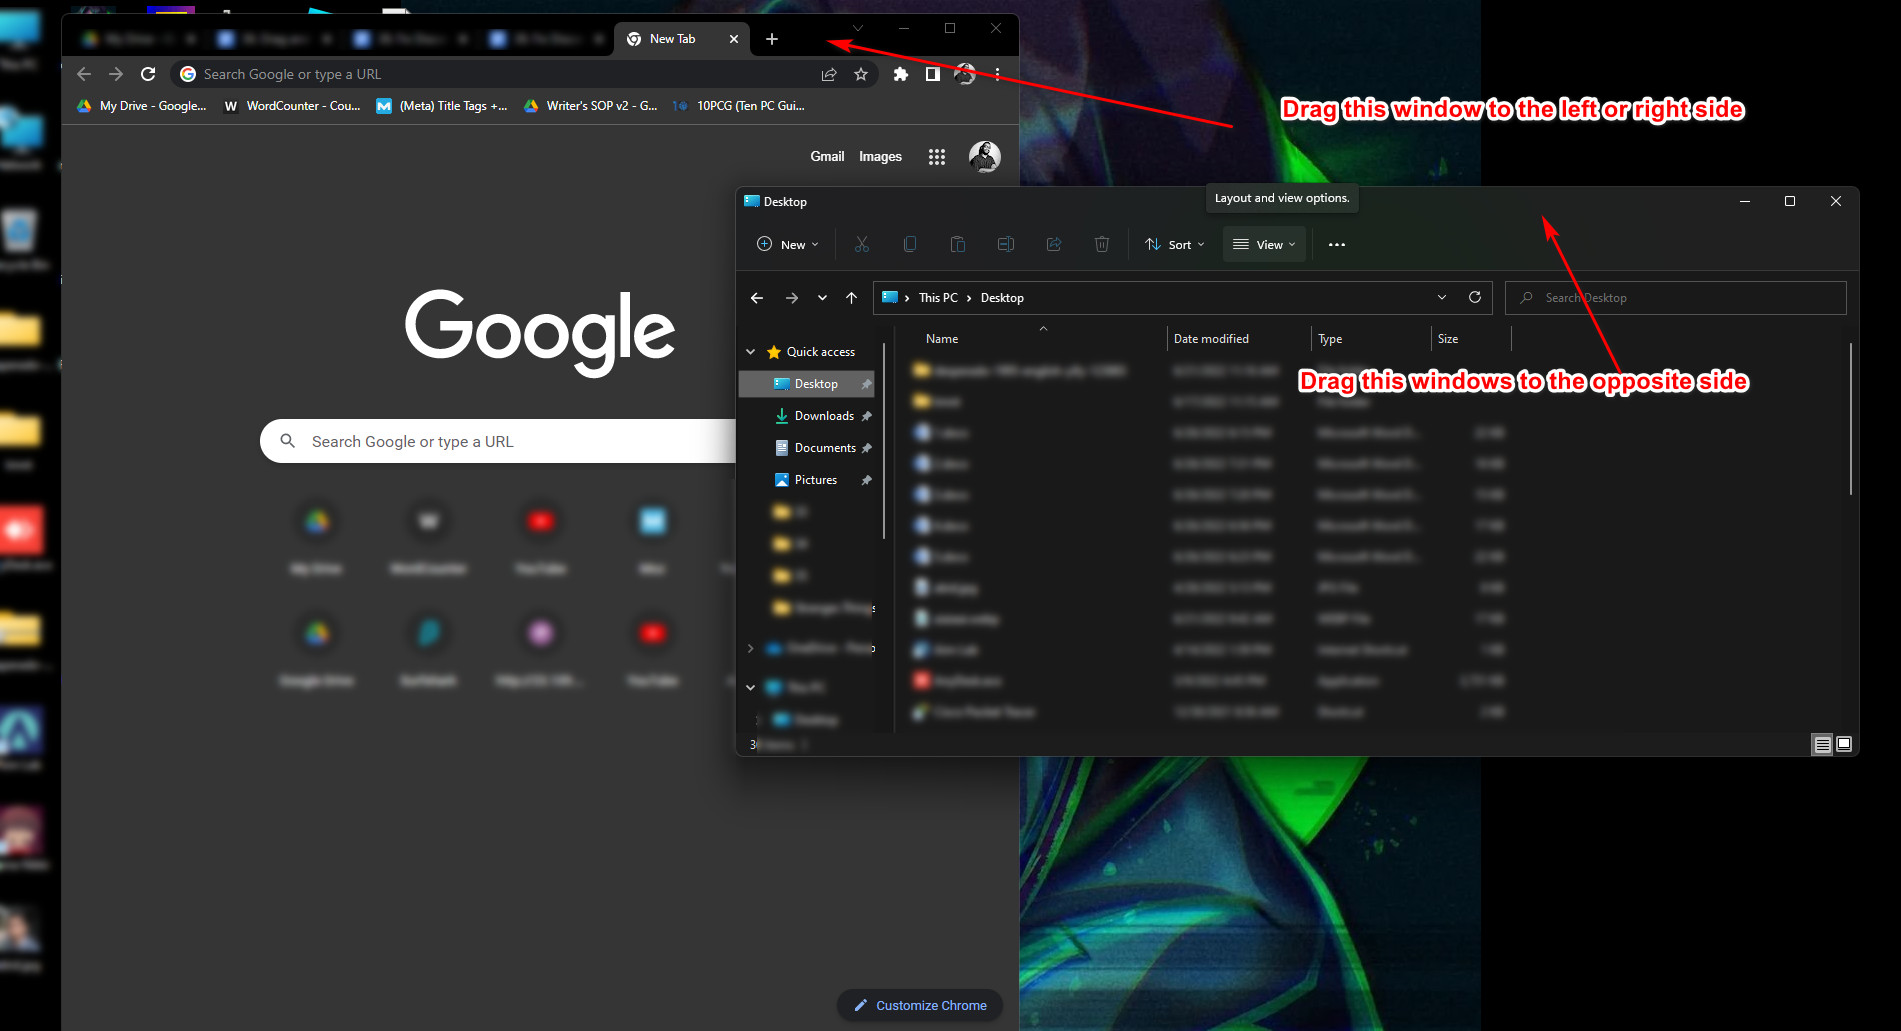
1. Use the Windows Split Screen Feature
IF you need to transfer files from one folder to another, there is a very easy way to do that. You can use the split-screen feature and you will be transferring files between folders in no time.
All you need to do is drag one of the windows to the extreme left or right side of your display and that window will take half of the screen.
You will do the same for the other window as well, just using the other side of the screen.
So, the end result is that you will have two windows, each taking half of the screen. From there, you just need to drag and drop the files from one window to another.
If you are still confused as to how you can do this, please follow the straightforward steps given below.
Here are the steps to open windows side by side on Windows to use drag and drop:
- Open the app or folders you want to drag the files to.
- Drag one of the windows to the right or left side of the screen.
- Select what you want on the other side of the screen.

- Drag and drop the files.
If you were not able to follow the instructions given in this procedure, please remain calm and go through the other fantastic ways to use drag and drop on Windows 11.
2. Use Alt+Tab shortcut
The Alt-Tab keyboard shortcut is a quick and easy way to switch between apps or folders on the fly.
It is relatively easier compared to the other procedures given in this post.
All you have to do is hold the Alt button and press the Tab button to switch between apps or windows.
It might sound confusing, so please follow the straightforward steps given below.
Here are the steps to use the Alt+Tab shortcut to use drag and drop on Windows 11:
- Open the files or apps you want to transfer files to. If you want to drag and drop files between two folders, open those two folders.
- Drag the file and hold the Alt button and tap the Tab button to switch between windows.
- Select your window and release the Tab button and drop the file or files in the window of your choice.


If you are still confused as to how you can drag and drop on Windows 11, please do not be down and go through the other amazing methods given in this post.
Follow our guide to fix Windows can’t access network drive on Windows 11.
3. Copy and paste files
Yes, just as the name suggests, you will simply copy and paste files in this procedure. If you are using Windows for a long time, you most probably know how you can copay and paste files.
The basic way is to right-click on the file or files you want to copy, click on Show more options and then click on Copy.
After that, you need to go to the folder where you want to transfer the file to.
Right-click on the empty space in the folder, select Show more options, and then click on Paste. The file will be copied and you have transferred the file successfully.
If you did not understand the instructions given above, please go through the simple steps given below.
Here are the steps to copy and paste files on Windows 11:
- Right-click on the file you want to transfer and then click on Show more options.
- Click on Copy.
- Go to the folder or Window you want to paste the file to and right-click on the empty space.
- Click on Show more options and then click on Paste. The file will be copied or transferred.
Please do not lose hope if this procedure did not help you. Kindly go through the other amazing procedures given in this post.
Read more on does Oculus Air link work with Windows 11.
4. Change Registry files
I do not recommend using this procedure. Why? Editing registry files means you are hampering vital files of your Windows 11 operating system.
Note that after using this procedure your taskbar will not work properly.
If you are very desperate, you can use this procedure or else go through the previously mentioned procedures given in this post.
Please follow the steps given below and you will be editing registry files easily.
Here are the steps to edit registry files using drag and drop on Windows 11:
If this procedure did not help you to use drag and drop on Windows 11, please follow the last method given in this post.
5. Use third-party tools
In this process, you are going to use a script made by a man from Github. It is safe to use this procedure as it does not change registry files like the last method.
Nothing vital is being hampered within this process and you can also deactivate the tool whenever you want to.
Please follow the straightforward steps given below and you will be all set. Remember that this is a third-party app.
Here are the steps to use a third-party tool to use drag ad drop on Windows 11:
- Lunch browser and go to github website then Windows11DragAndDropToTaskbarFix.
- Scroll down and click on the Download Binary (Windows11DragAndDroptoTaskbarFix.exe)
- Click on Windows11DragAndDropToTaskbarFix.exe and the file will be downloaded.
- Navigate to and click on the three-dot icon and select Keep.
- Click on Show more and then click on Keep anyway.
- Run the downloaded file.
- Check whether drag and drop is working or not.
If you want to turn this tool off, please continue reading this post.
How to turn off the third-party tool for drag and drop
If you want to turn off the tool that you used in the last procedure given in this post, please go through the very simple steps given below and you will be turning off the tool in no time.
Here are the steps to turn off the third-party tool for drag and drop on Windows 11:
- Go to the search button and click on it.
- Search for Command Prompt.
- Right-click on Command Prompt and select Run as administrator.
- Type in or Paste taskkill /f /im Windows11DragAndDroptoTaskbarFix.exe in the terminal.
- Press the Enter key on your keyboard.
- Close the Command Prompt. You have turned off the tool.
If you were able to follow the steps given above properly, I am sure you were able to turn off the third-party tool.
Also, check out our separate post on what are the disadvantages of not activating Windows 10.
Conclusion
I am also sad that we cannot drag and drop as we used to in the previous version of Windows. I guess it is a sacrifice for the sake of evolution.
There are rumors that Microsoft is planning to bring back the drag and drop feature to Windows 11.
I sincerely hope you were able to use the drag and drop feature on Windows 11 and that you have gained some knowledge reading this post.
Windows gives you the drag and drop function that lets you move files and other items throughout the OS. However, users may face that this feature is not working in their Windows 11 device. Although they can resort to using the traditional Ctrl + X & Ctrl + V, there are many ways you can fix Windows 11 drag and drop not working issue in your device. This article is a detailed guide on the same.
Page Contents
Fix 1: Restart the Application
If the drag and drop is not working in a particular app. You can simply restart that application to fix it. Close it by clicking on the red X on the top right corner and open it again after a few seconds to check if the function is working again or not.
You can also try closing the app from the task manager. To do it,
- Right click on the start button and choose Task Manager in the menu.
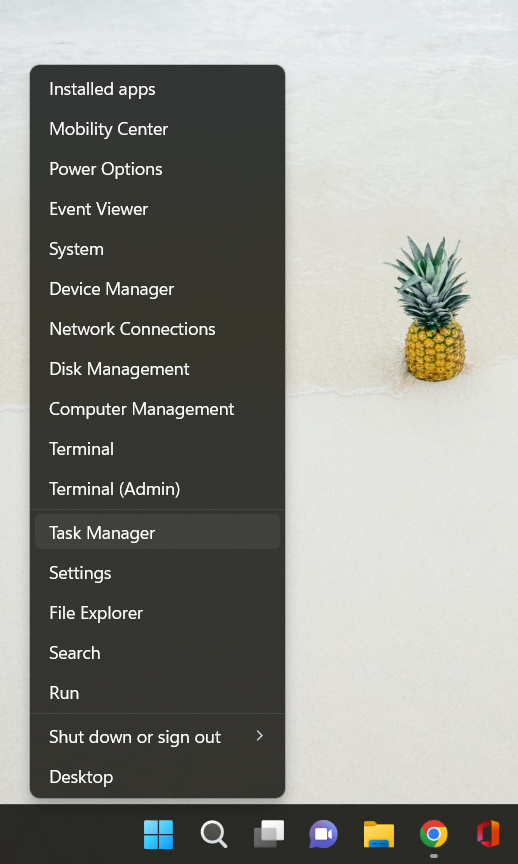
- In the processes tab, right click on the problematic application and click on End task.
Once closed, restart that app.
Fix 2: Forget the Last Drag and Drop
One of the reasons this feature may not be working is that the Windows may be hung up on the last drag and drop you performed. To fix it, you can just forget the last one easily.
Go to the File explorer and click on any file or folder. Now, press the left mouse button and then Esc while holding the mouse button. Try dragging and dropping again. You may find that the issue at hand is resolved.
Fix 3: Update Windows 11
Updates often come with bug fixes, security, system patches and many other essential things to run your devise smoothly. One reason for the drag and drop feature not functioning could be a pending updates. Here’s how you update your Windows manually.
- Open the Settings app and go to Windows update section from the left pane.
- Here, click on check for updates and then download and install all the updates that are available and pending.
Once done, you may need to Restart your computer. Then check if the issue is solved.
Fix 4: Restart the File Explorer
The problem could be in the File Explorer. You can try Restarting it to fix the problem.
As shown in the first fix, right click on the Start button and go to Task Manager. Here, right click on File Explorer under the Processes tab and select End task. When you do it, your desktop will vanish for a second there, but do not worry.
Click on Run new task, type explorer.exe and select OK.
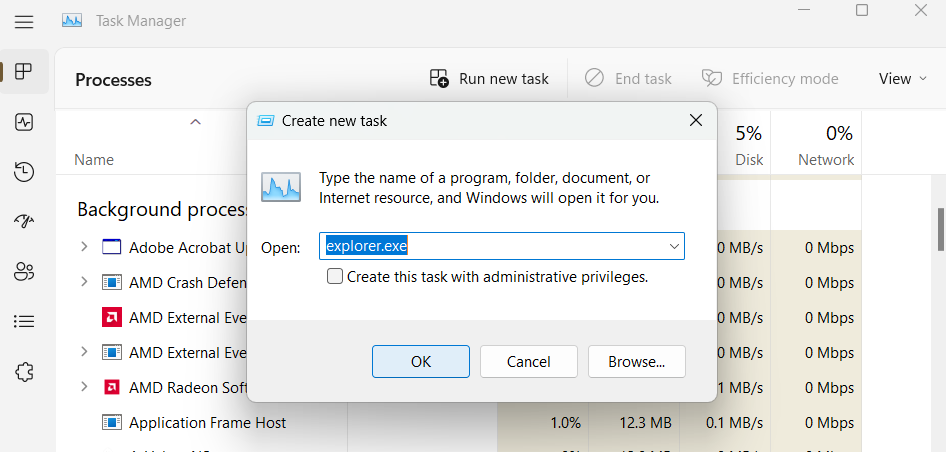
Now check if the drag and drop is functioning or not.
Fix 5: Check your mouse for issues
The problem could be with your mouse. In case of a wireless mouse, you can ensure its connection through Bluetooth or other wireless tech it uses. You can swap the old batteries with a new set. If the mouse is self-charging, plug it in overnight so it fully charges.
If you are using a wired mouse, unplug and plug it again in the USB port to ensure it is recognized. You can also try plugging it into a different working port or to another PC to ensure that the problem is not with the cord.
You should also check your mouse for any physical damage. Replace the mouse if it is not working properly.
Fix 6: Verify Mouse Drivers
Another way to fix it is to check whether the mouse drivers are up to date. You can check it using the Device Manager.
- Press Win + R and type devmgmt.msc to search for it by clicking OK.
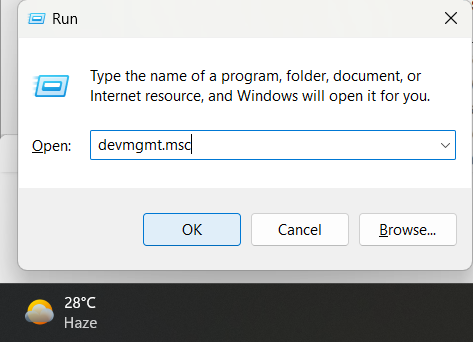
Or you can search for Device Manager in the Start Menu and open it from there.
- Expand the Mice and other pointing devices
- Right click on your mouse and select Update driver.
Now simply follow the on-screen instructions. It may so happen that your mouse has its proprietary software. If so, open it in the PC and see if you can update the mouse from there.
Fix 7: Using SFC and DISM Scan
The problem could be because of corrupted system files. Running the SFC & DISM scans on the system will check your PC for corrupted installation files and fix it. To do it,
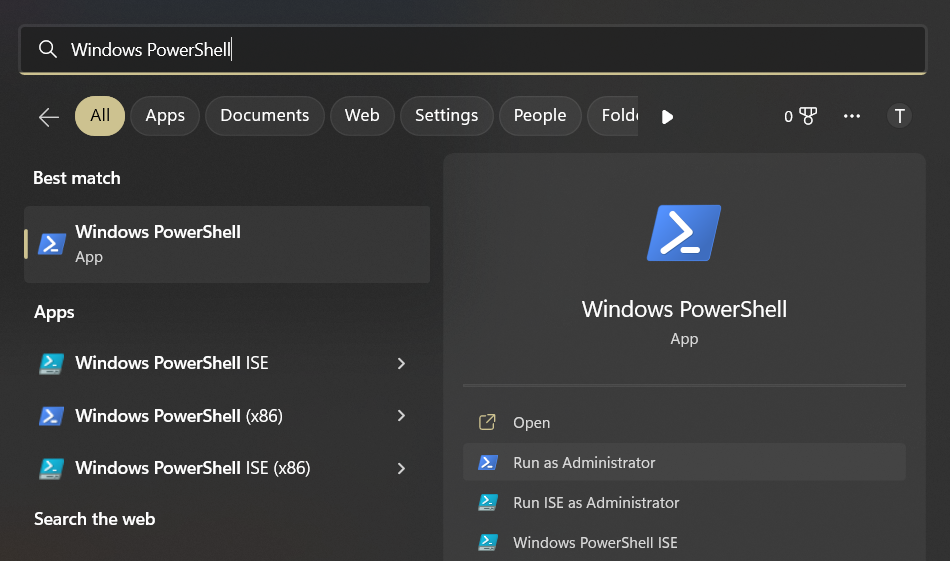
- Search for Windows Powershell in the Start Menu and Run it as Administrator.
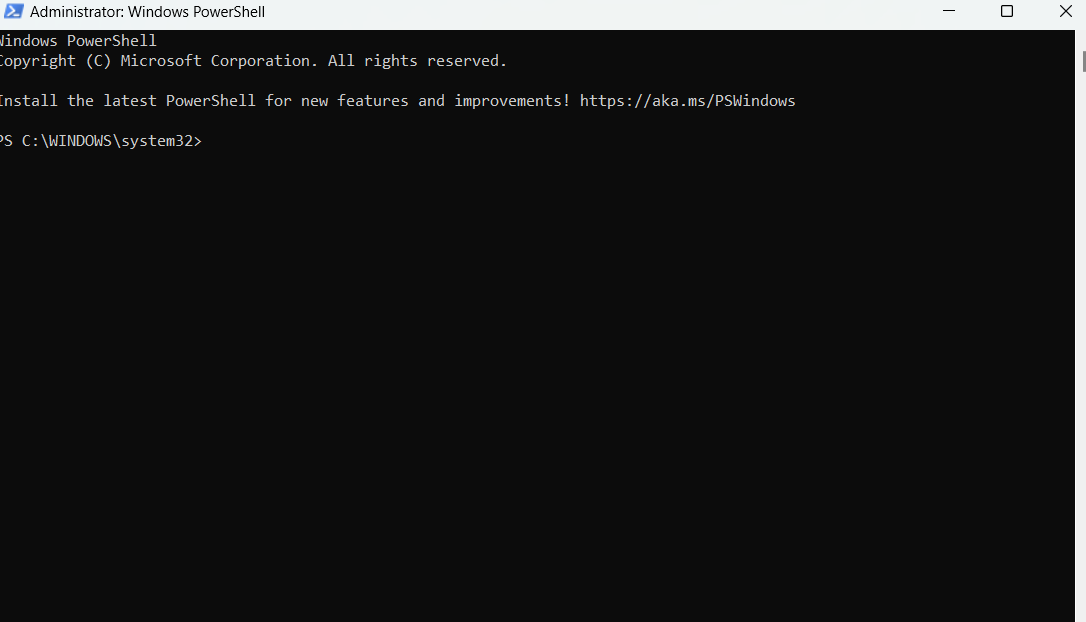
- In the black Window that opens up, type the following command and press Enter.
sfc / scannow
- Once it is completed, type the following command to run the DISM scan.
DISM /Online /Cleanup-Image /RestoreHealth
Once done, Restart your PC and the issue should be resolved.