
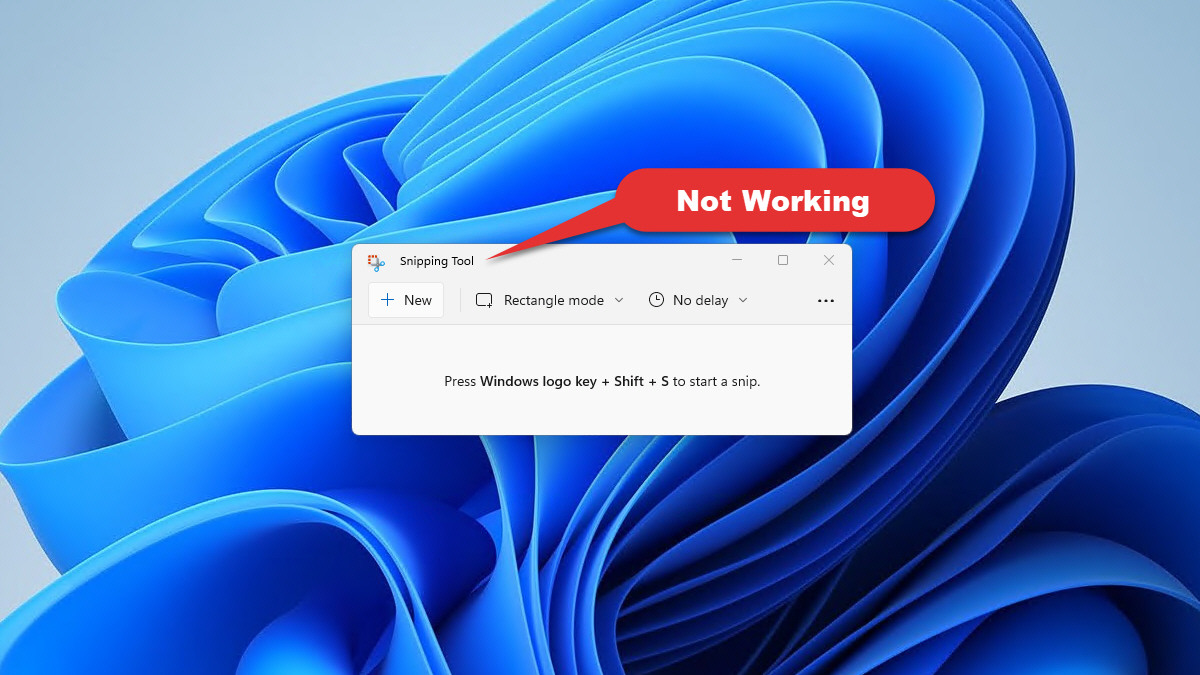
Snipping Tool is a handy screenshot-taking & editing tool for many Windows users. As one of the native Windows apps, it’s lightweight and useful in producing screenshots, but sometimes it also fails to work properly.
Users may encounter issues such as a pop-out error message, blank or black screen, images failing to be saved or the app not working after the system is upgraded. If you’re stuck in one of these Snipping Tool problems, you’ve found the right place! In this article, we will guide you through several methods that may help you out. Now, let’s move on to show you how:
Try these methods:
You might not need to try them all, just walk your way down the list until you find the one that fixes the snipping tool not working issue.
- Relaunch Snipping Tool in Task Manager
- Allow the Snipping Tool to run in the background
- Update your graphics driver
- Update your Operating System
- Repair or reset apps in Apps & features
- Run DISM tool
- Run System File Checker
Method 1: Relaunch Snipping Tool
Simply quitting the Snipping Tool and restarting it may help with the problem. You can use the built-in program Task Manager that allows you to close any non-responding or freezing application to end the Snipping Tool completely, and then have a relaunch to see if your problem can be solved.
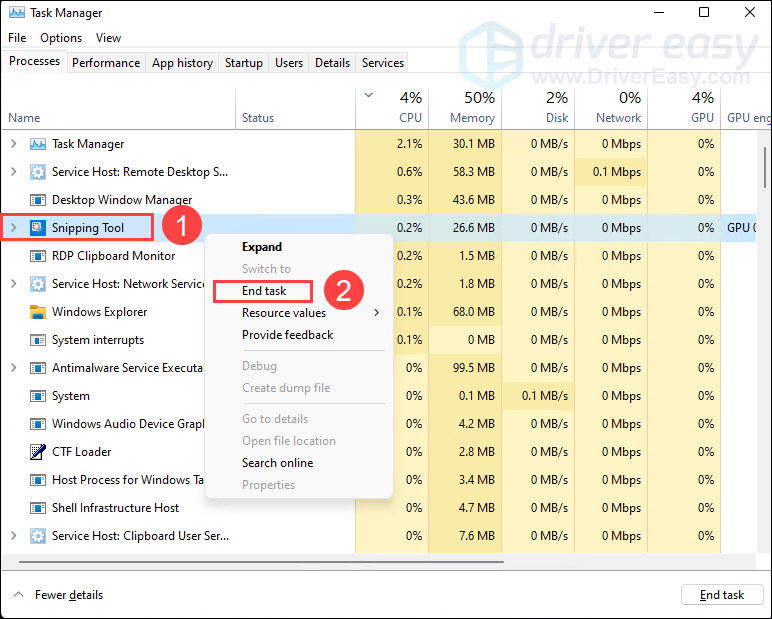
- Press Ctrl + Shift + Esc keys to open the Task Manager.
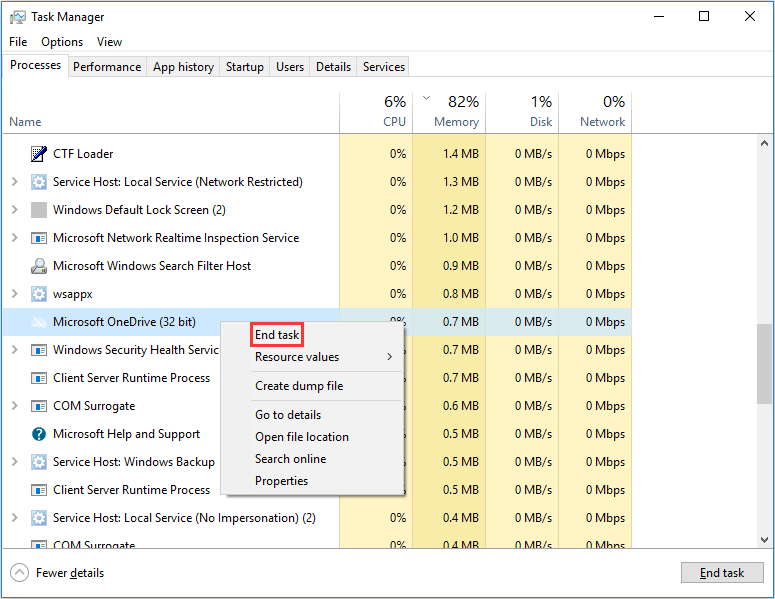
- Under the Processes tab, right-click the Snipping Tool listed on the left and select End task from the pop-up menu.

- Restart your Snipping Tool and check if it can function properly.
If this fix doesn’t work, try the next below.
Method 2: Allow the Snipping Tool to run in the background
For most of the time, Snipping Tool is an app that “stays behind the screen” and waits for being woken. If Snipping Tool lacks permission from your PC to run in the background, it won’t be able to work at any time when you are not active in the app’s window.
On Windows 10
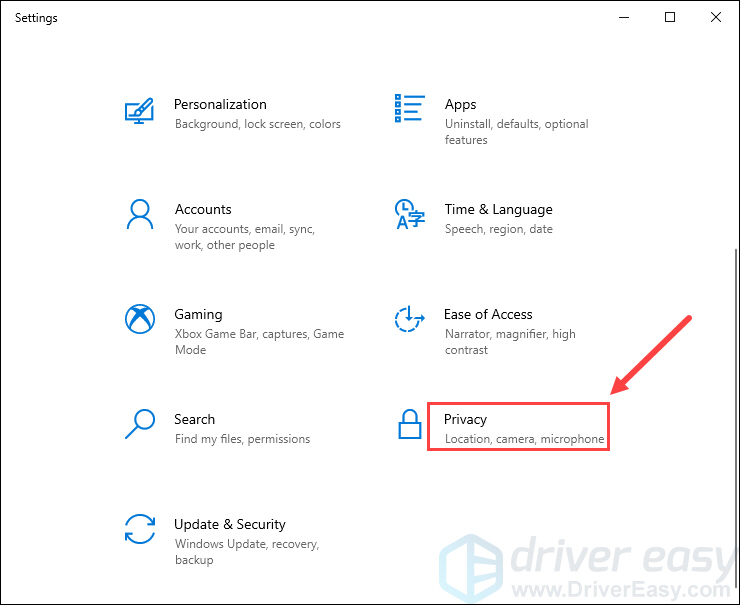
- Right-click the Windows icon on the taskbar to open the quick access menu and then select Settings.
- In Settings, click Privacy.

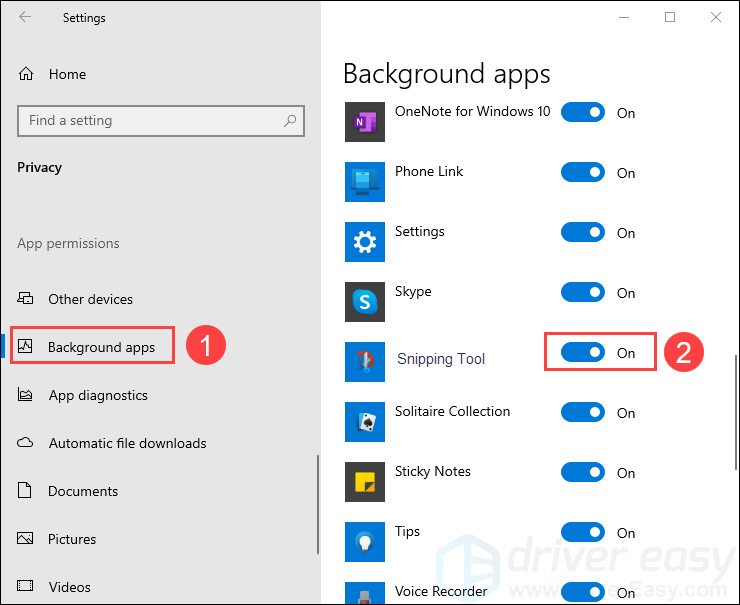
- On the left panel, scroll down to the Background apps, check if the Snipping Tool is turned on. If not, toggle the switch to On
On Windows 11
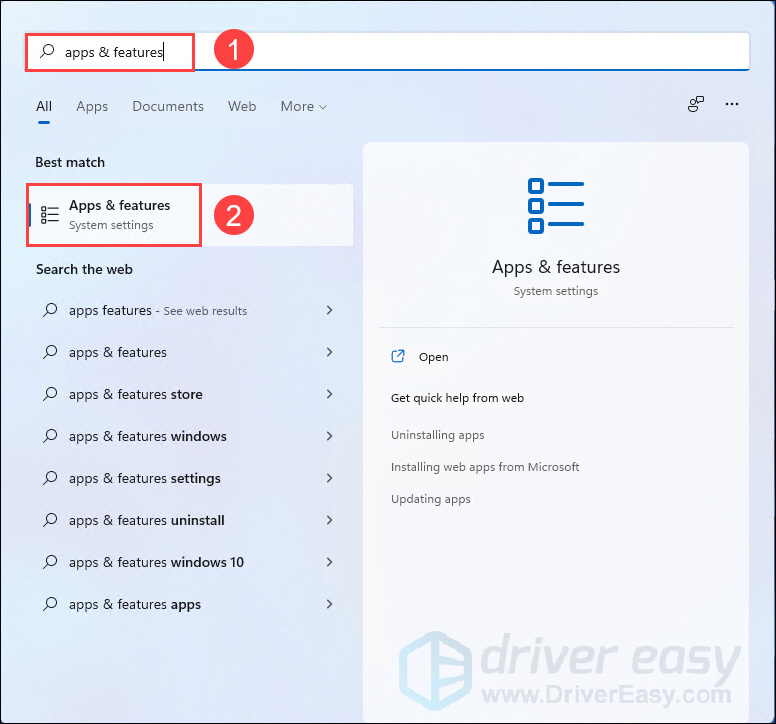
- Press the Windows key to open the Start menu, type apps & features in the search box and select it from the result.

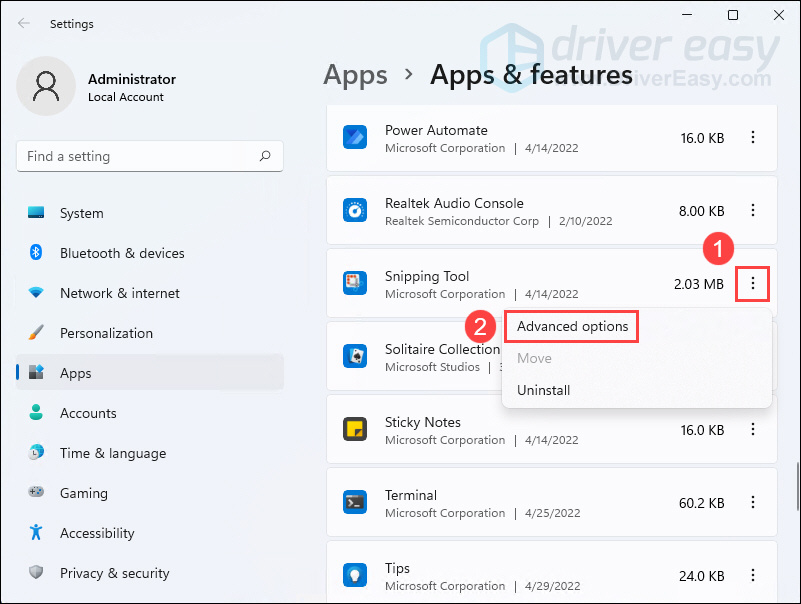
- Scroll down to the Snipping Tool in the right list and click the 3-dots icon next to it, then select Advanced options.

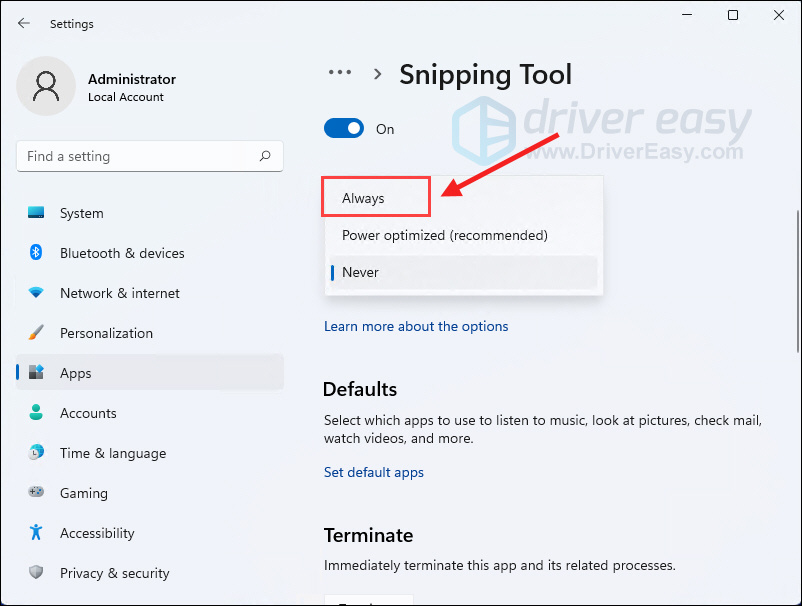
- In the Background apps permissions section, click on the box under Let this app run in the background.

- Select Always from the drop-down list.


If this fix doesn’t work, try the next below.
Method 3: Update your graphics driver
If you have an outdated graphics driver, your graphics would not be able to process images appropriately in your computer and as a result, the Snipping Tool cannot be used properly. So you should update your graphics driver to see if it fixes your problem.
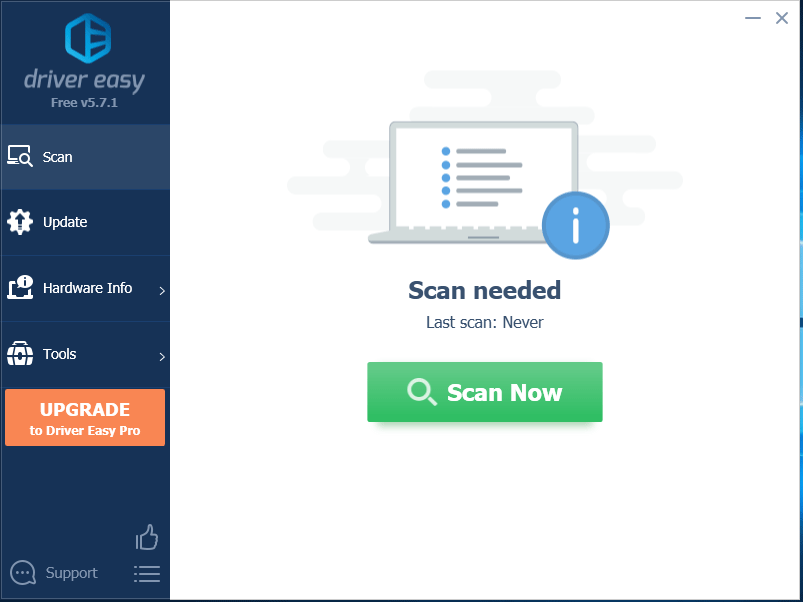
You can update your graphics driver manually by visiting the manufacturer’s website (NVIDIA/AMD), finding the latest correct installer and installing step by step. But if you don’t have the time, patience or skills to update the driver manually, you can do it automatically with Driver Easy.
Driver Easy will automatically recognize your system and find the correct drivers for it. You don’t need to know exactly what system your computer is running, you don’t need to be troubled by the wrong driver you would be downloading, and you don’t need to worry about making a mistake when installing.
- Download and install Driver Easy.
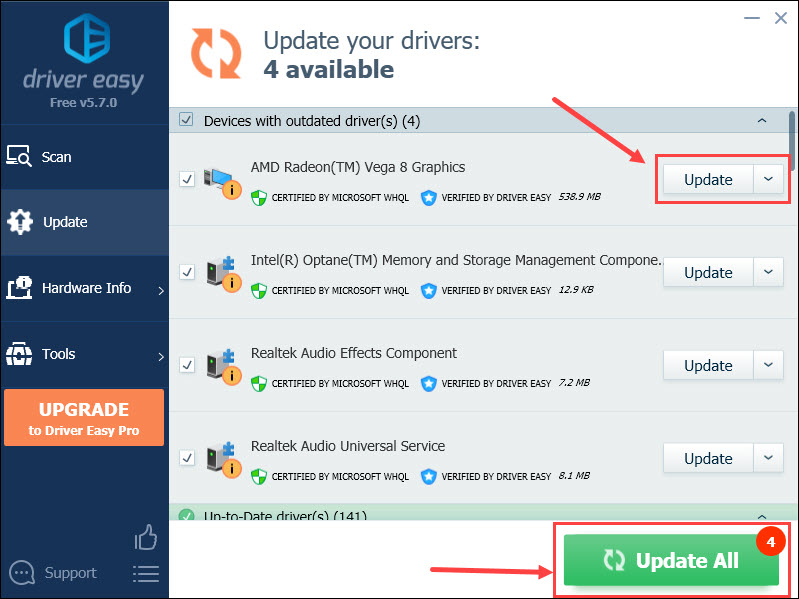
- Run Driver Easy and click the Scan Now button. Driver Easy will then scan your computer and detect any problem drivers.

- Click Update All to automatically download and install the correct version of all the drivers that are missing or out of date on your system (this requires the Pro version with full support and a 30-day money-back guarantee – you’ll be prompted to upgrade when you click Update All).
You can do it for free if you like, but it’s partly manual.

Method 4: Update your Operating System
Apart from updating the graphics driver, updating your Windows should also be a trick that is worth trying since Microsoft keeps releasing OS updates with bug fixes for its apps including Snipping Tool. Here’s how you can check for updates:
On Windows 10
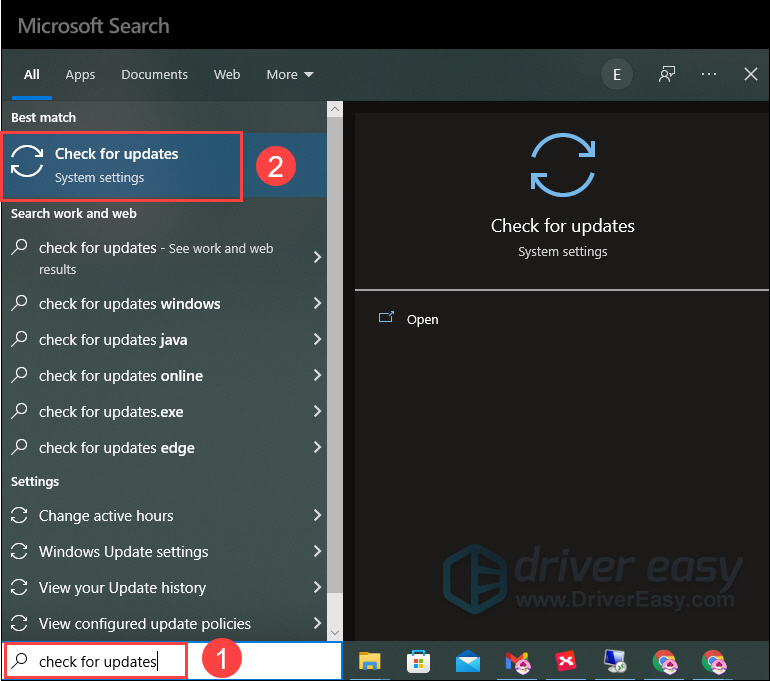
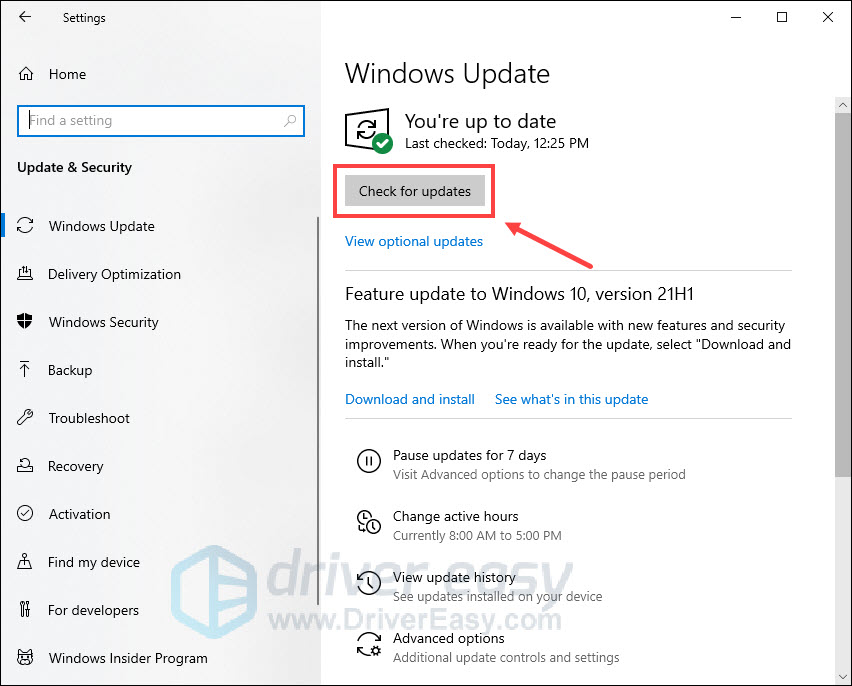
- In the search box, type check for updates and select it from the result that appears.

- Click Check for updates on the right section and wait for the checking.

- The checking result could be You’re up to date, which means you don’t need to do anything about it next.
If not, there will be a Download and install button. Click on it to have a Windows update.
On Windows 11
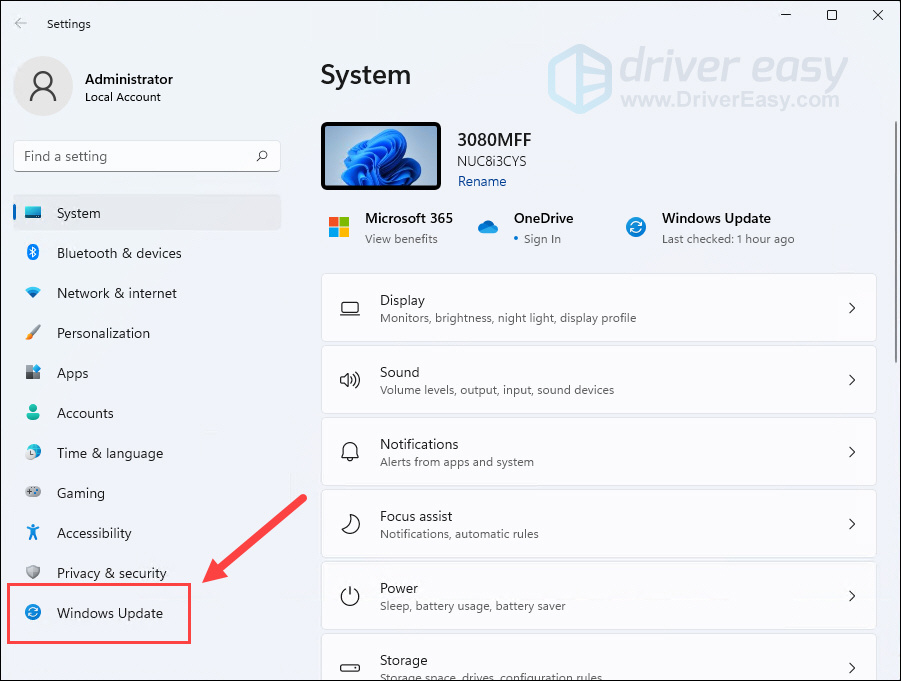
- Press the Windows + I keys to open Settings.
- Click Windows Update on the left section.

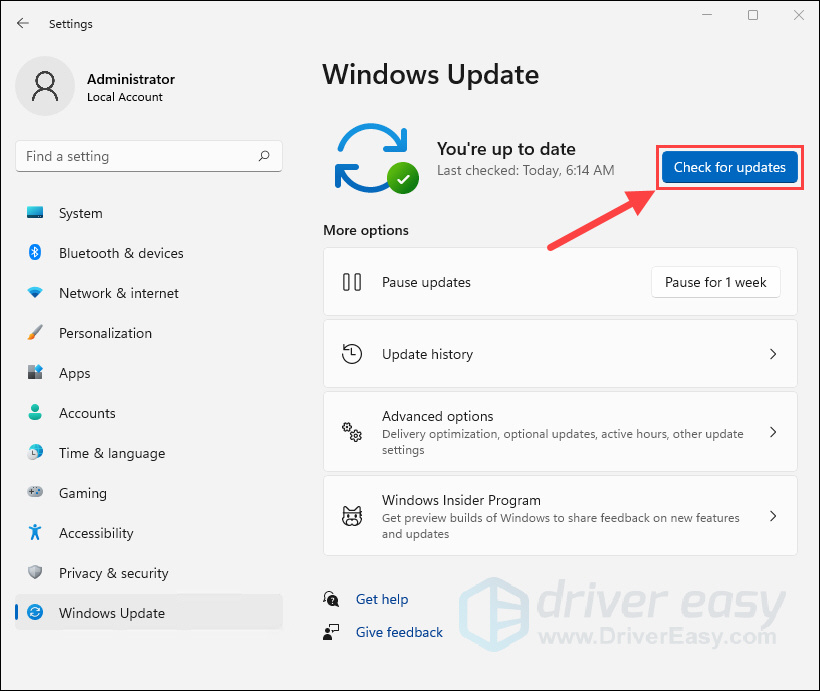
- Click Check for updates. Then Windows will start downloading the updates if they are available.

- Click Restart now when the process is finished.
Method 5: Repair or reset the Snipping Tool
When an app is not running correctly or the app’s certain features fail to work properly, you can give it a try to repair and reset it with the built-in process Apps & features. Below is how to do it when your Snipping Tool is somehow not working.
On Windows 10
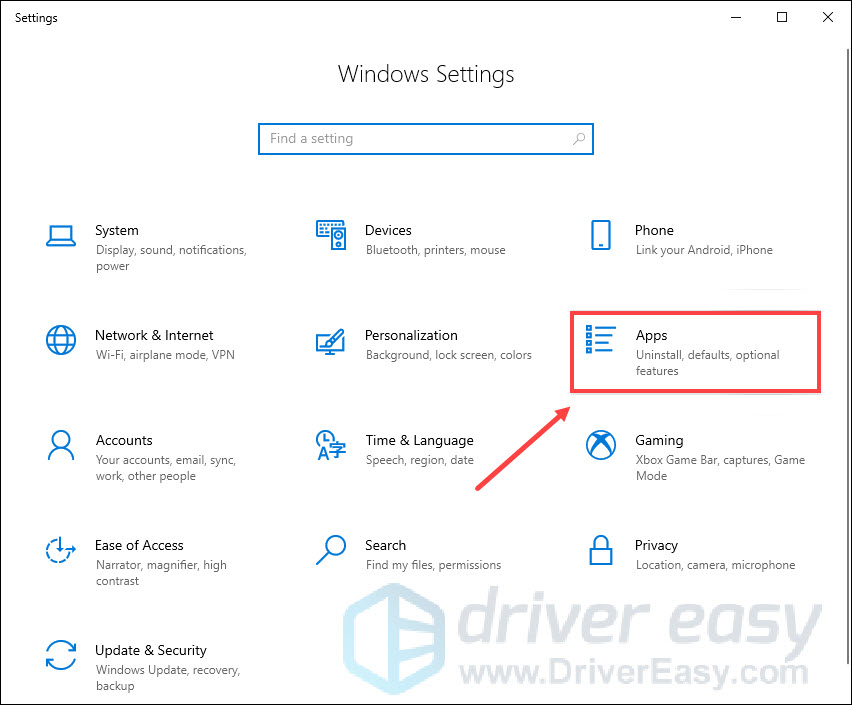
- Press Windows + I keys to open Windows Settings and then click Apps.

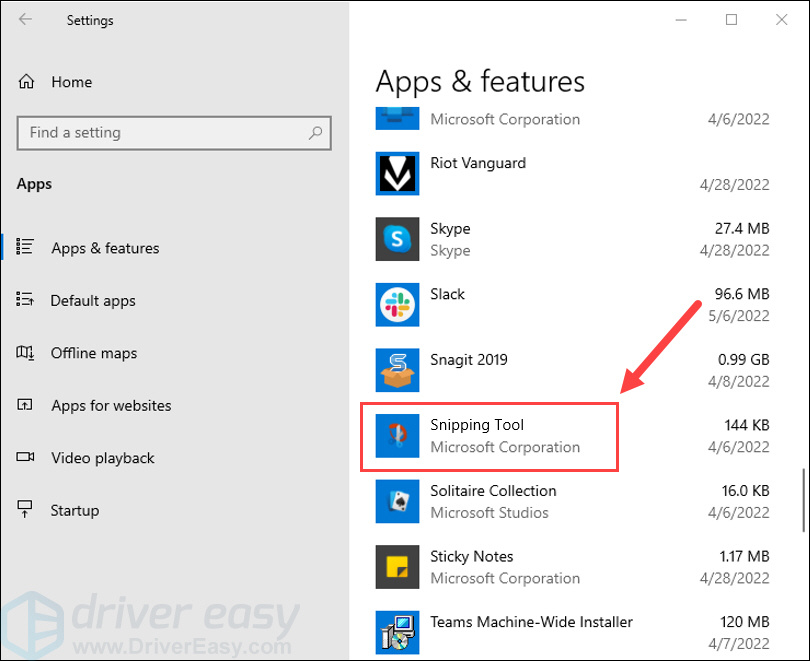
- Scroll down to the Snipping Tool in the right list and click to expand it.

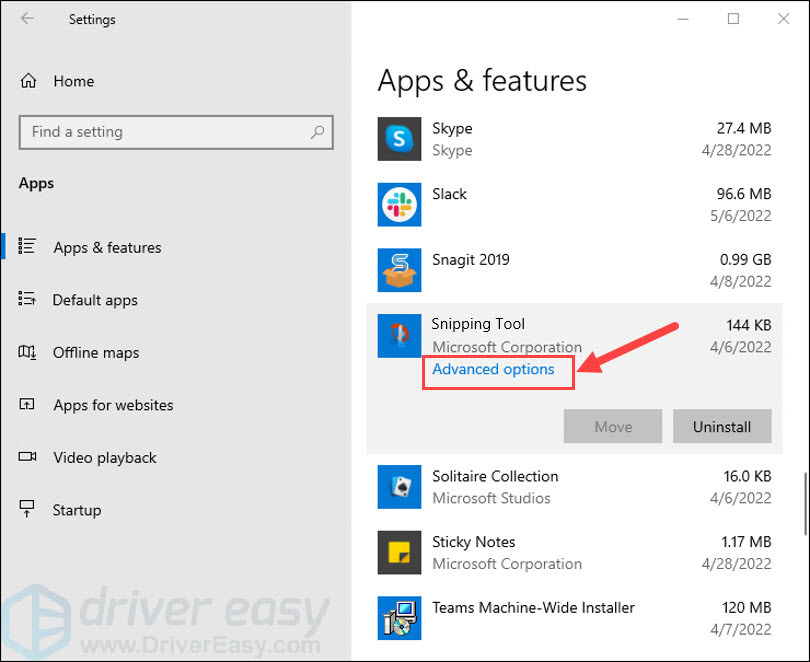
- Click Advanced options.

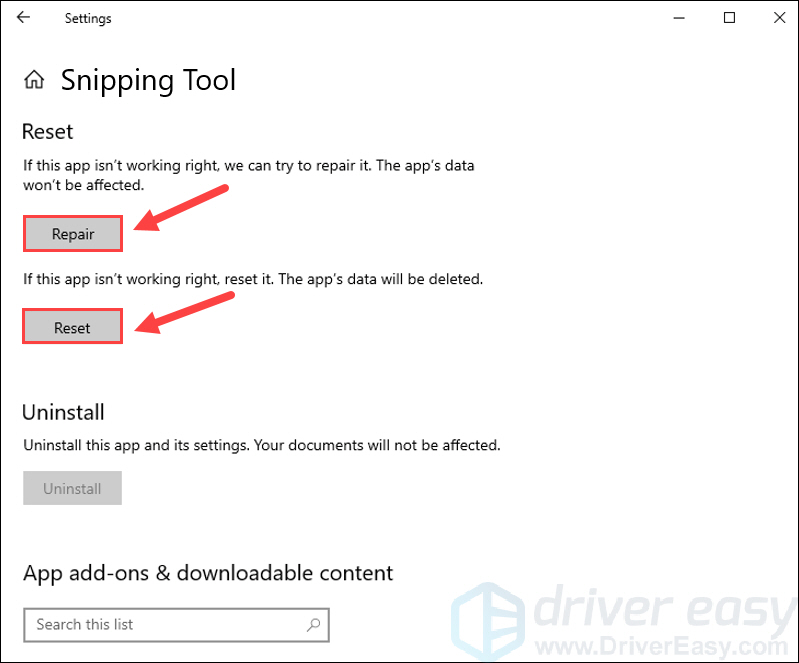
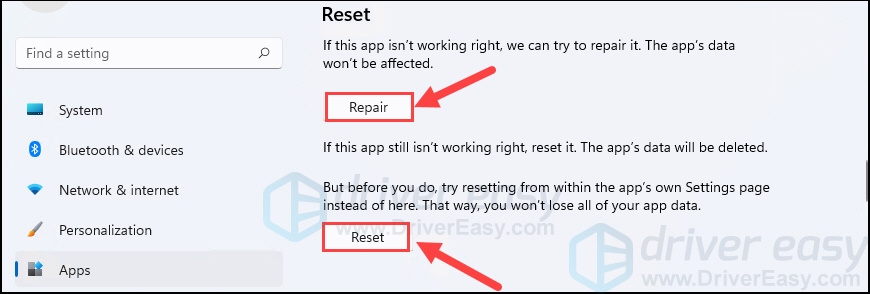
- If Repair is available, click on it.
If it isn’t available or doesn’t fix the problem, select Reset.
On Windows 11
- Press the Windows key to open the Start menu, type apps & features in the search box and select it from the result.
- Scroll down to the Snipping Tool in the right list and click the 3-dots icon next to it, then select Advanced options.
- Click Repair if it’s available.
If it isn’t available or doesn’t fix the problem, then select Reset.
Move on to the next fix below if this method doesn’t work for you.
Method 6: Run the DISM tool
The Deployment Image Servicing and Management (DISM) is a command-line tool for Windows image service. One of its many uses is to repair system images when image-related problems occur. So if your Snipping Tool is not working correctly, you can run the DISM command with the RestoreHealth option to see whether problems come from the system image.
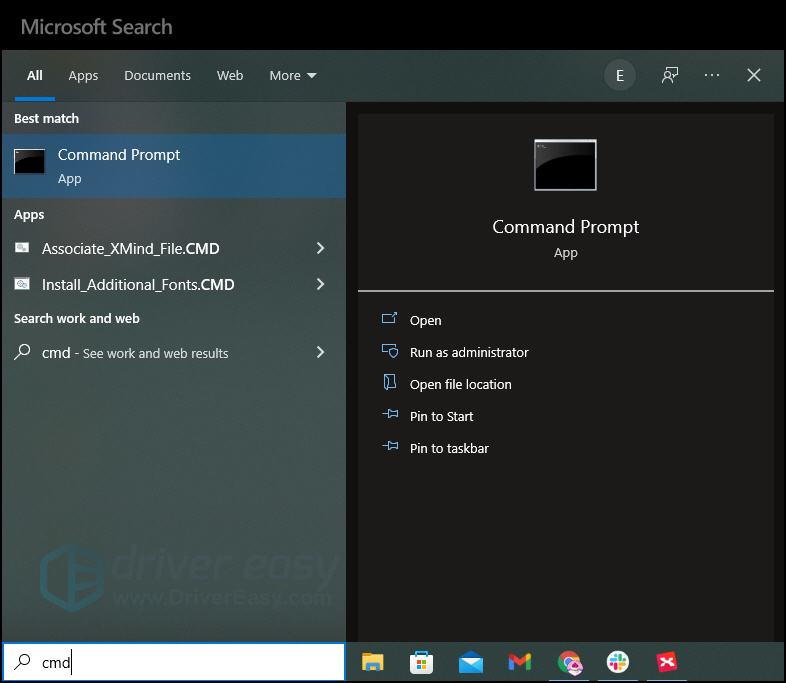
- Type cmd in the search box and select Run as administrator to open the Command Prompt.

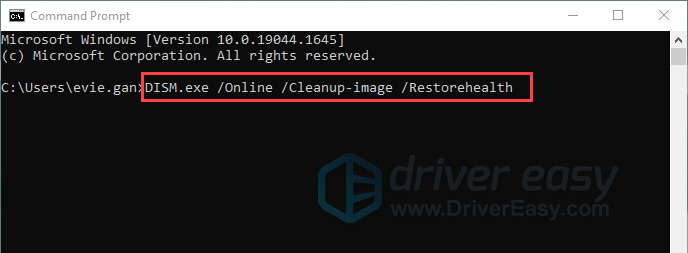
- Copy the following command to the Command Prompt and press Enter.
DISM /Online /Cleanup-Image /RestoreHealth
- Wait for the restore operation to complete.
- Restart your PC to see if the Snipping Tool is working now.
If this fix doesn’t work, try the last method below.
Method 7: Run System File Checker
When corrupted or damaged system files exist in your system, they could also cause the Snipping Tool to go wrong. In this case, maybe you should run a system scan to detect broken system files in your PC.
To do this, follow these steps:
- Press the Windows logo key and R on your keyboard to invoke the Run box.
- On your keyboard, type cmd and press Ctrl, Shift and Enter at the same time to run Command Prompt as administrator.
- You’ll be prompted for permission. Click Yes to open Command Prompt.
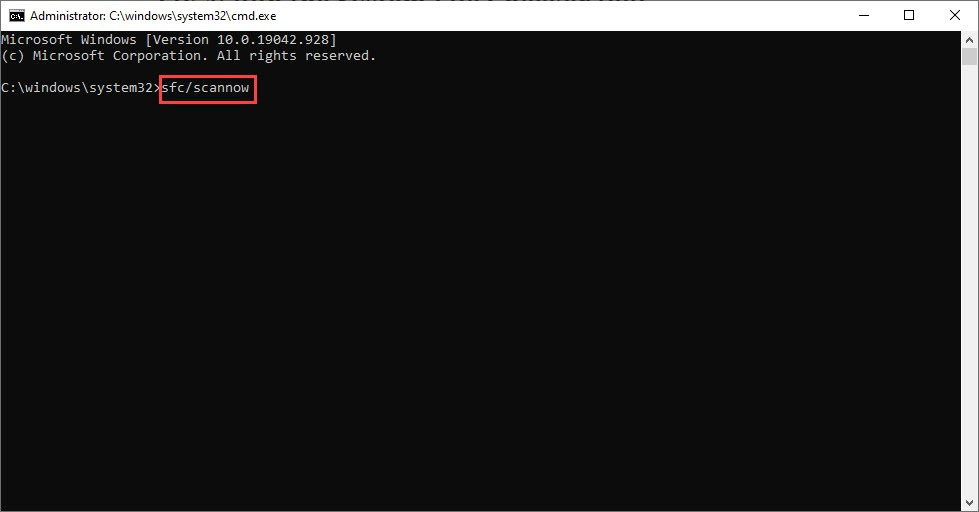
- Type sfc/scannow, then press Enter.

- The System Files Checker tool will automatically scan for corrupt or missing files and fix them, if there’s any.

Restart your PC to see if the issue persists.
That’s it – hopefully, this guide could help you solve the Snipping Tool not working problem. If you have any ideas or other fixes for this issue, please feel free to leave comments below. We would appreciate your thoughts!
10
10 people found this helpful
Readers help support Windows Report. We may get a commission if you buy through our links.
Read our disclosure page to find out how can you help Windows Report sustain the editorial team. Read more
Since Windows 8, users have been used to taking screenshots with the built-in feature on their PC. Unfortunately, some users are complaining that the screenshot feature is not working on Windows 10.
This can be pretty frustrating, especially if you don’t have a third-party tool for taking screenshots. Knowing the gravity of the issue, we have prepared this detailed guide to help you solve the problem quickly.
Why can’t I take a screenshot on Windows 10?
Below are some of the reasons you can’t take a screenshot on Windows 10:
- Outdated drivers: One of the major causes of this issue is an outdated keyboard driver. You should be able to fix it quickly by updating your drivers.
- Wrong key combinations: In some cases, the problem might appear because you used the wrong key combinations to take the screenshot. Knowing the key that works for PC is the only way out of this.
- Faulty hardware: Sometimes, the screenshot not working on Windows 10 issue can be down to problematic hardware. To know this for sure and fix potential issues, you should run the hardware and devices troubleshooter.
How to fix print screen not working on Windows 10?
1. Edit Registry
- Press the Windows key + R, type regedit, and click OK.
- Navigate to the path below in the left pane:
HKEY_CURRENT_USER/SOFTWARE/Microsoft/Windows/CurrentVersion/Explorer - Now in the right pane, you need to find ScreenshotIndex. If you can’t find it, right-click the space there and choose New > DWORD (32-bit) Value.

- Type ScreenshotIndex as the name of the new DWORD and double-click it.
- Now, set its Value data to 695 and click OK.
- Next, navigate to the path below in the left pane:
HKEY_CURRENT_USER/SOFTWARE/Microsoft/Windows/CurrentVersion/Explorer/User Shell Folders - Double-click the {B7BEDE81-DF94-4682-A7D8-57A52620B86F} entry on the right pane.
- Set its Value data to %USERPROFILE%PicturesScreenshots and click OK.
- Finally, close the Registry Editor and restart your PC.


2. Check if you’re using the correct key combination
If you’re using a Windows 10 laptop’s keyboard, the key combination for taking a screenshot is different. In most PCs, you must press the Fn key beside the usual Ctrl +PrtScr.
So, you have to note that. However, you will not need to use the Fn key on some PCs.
3. Update keyboard drivers
- Press the Windows key + X and select Device Manager.
- Double-click the Keyboards option to expand it and right-click the device there.
- Now, choose the Update driver option.

- Finally, choose the Search automatically for drivers option.


We often point to outdated drivers if something’s wrong with your keyboard. Nevertheless, keeping all your drivers up to date is always a good idea.
So, if the screenshot feature is still not working on Windows 10 after tweaking the registry, go and update your keyboard drivers.
If you don’t want the hassle of searching for drivers on your own, you can use a tool in Outbyte Driver Updater that will do this for you automatically. This tool is very easy to use, lightweight, and reported to update and repair any driver without any issues successfully
- Fix: PRIMARY_TRANSPORT_CONNECT_FAILED Error
- ERROR_IO_PRIVILEGE_FAILED: How to Fix
- How to Allow Screenshots in Chrome Incognito Mode
- How to Fix MFReadWrite.dll is Missing on Windows N
4. Run the Hardware and Device troubleshooter
- Press the Windows key, type cmd, and select Run as administrator under Command Prompt.

- Type the command below and hit Enter:
msdt.exe -id DeviceDiagnostic
- Finally, wait for the command to finish running.


If none of the previous solutions resolved the issue, we would use Windows 10’s built-in troubleshooting tool. This tool can be used to address various kinds of issues, including hardware problems.
5. Use a dedicated tool

While there are a series of third-party screenshot tools you can use, we recommend using Icecream Screen Recorder. This is because it is a straightforward, simple, yet highly professional tool with enough features to accomplish what you want but not confuse you.
If you plan to capture an image to highlight particular areas or a specific section, this tool will be quite an innovative program. Also, it is the ideal solution if you use multiple browsers during your daily Internet sessions.
Feel free to check out more features on their official website. A fully-functional trial version is available, so you can try it out now.
⇒ Get Icecream Screen Recorder
The screenshot not working on Windows 10 issue can be pretty annoying. Fortunately, it is one that can be fixed, as we have shown in this guide.
If you are looking for ways to fix tinted screenshots on Windows 10, check our detailed guide for the steps you need to follow.
Feel free to let us know the solution that helped you fix this issue in the comments below.
Ivan Jenic
Windows Hardware Expert
Passionate about all elements related to Windows and combined with his innate curiosity, Ivan has delved deep into understanding this operating system, with a specialization in drivers and driver troubleshooting.
When he’s not tackling diverse driver-related problems, Ivan enjoys watching good movies and spending time hiking with his family and friends.
Клавиша Print Screen (PrtSc) в Windows 10 и Windows 11 используется для создания скриншотов экрана или активного окна. При нажатии PrtSc или Alt+PrtSc снимок копируется в буфер обмена и может быть вставлен в любое приложение (например, Paint или Word) с помощью Ctrl+V. Сочетание Win+PrtSc автоматически сохраняет скриншот в папку %UserProfile%\Pictures\Screenshots. Однако пользователи иногда сталкиваются с проблемой, когда Print Screen не работает, и скриншоты не создаются.
Проблема может быть вызвана отключением клавиши в реестре, конфликтами с функциональными клавишами на ноутбуках, настройками пути сохранения или программными ограничениями. В этой статье расскажем про все способы устранения неполадок с Print Screen и альтернативные методы создания скриншотов в Windows.
Приобрести оригинальные ключи активации Windows всегда можно у нас в каталоге от 1099 ₽
Проверка альтернативных сочетаний клавиш
Если Print Screen не работает, попробуйте другие комбинации клавиш для создания скриншотов:
1. Ctrl+PrtSc — копирует скриншот всего экрана в буфер обмена.
2. Alt+PrtSc — копирует скриншот активного окна в буфер обмена.
3. Win+PrtSc — сохраняет скриншот экрана в %UserProfile%\Pictures\Screenshots.
4. Win+Ctrl+PrtSc — аналогично Win+PrtSc, сохраняет скриншот в папку.
5. Win+Shift+S — открывает инструмент Фрагмент и набросок (Snip & Sketch) в Windows 10 (версия 1809 и выше) или Ножницы (Snipping Tool) в более ранних версиях, позволяя выбрать область для скриншота.
Примечание для ноутбуков: На некоторых ноутбуках клавиша PrtSc работает только в сочетании с функциональной клавишей Fn. Попробуйте комбинации, такие как Fn+PrtSc, Fn+Alt+PrtSc или Win+Fn+PrtSc.
Способ 1: Проверка настроек сохранения скриншотов
Если при использовании Win+PrtSc скриншоты не сохраняются в папке %UserProfile%\Pictures\Screenshots, проверьте настройки реестра.
1. Откройте редактор реестра, выполнив команду
regedit.exe
2. Перейдите в раздел
HKEY_CURRENT_USER\Software\Microsoft\Windows\CurrentVersion\Explorer

3. Найдите параметр ScreenShotIndex (тип REG_DWORD).

– Убедитесь, что его значение равно 1.
– Если параметр отсутствует, создайте его:
– Щелкните правой кнопкой мыши по разделу Explorer, выберите Создать -> Параметр DWORD (32 бита) (New -> DWORD (32-bit) Value).

– Назовите параметр ScreenShotIndex и установите значение 1.
4. Перейдите в раздел
HKEY_CURRENT_USER\Software\Microsoft\Windows\CurrentVersion\Explorer\User Shell Folders

5. Найдите параметр с именем {B7BEDE81-DF94-4682-A7D8-57A52620B86F} (тип REG_EXPAND_SZ)
– Убедитесь, что его значение равно %USERPROFILE%\Pictures\Screenshots
– Если значение отличается, дважды щелкните по параметру и исправьте путь.

6. Закройте редактор реестра и перезагрузите компьютер.
Проверьте, сохраняются ли скриншоты после нажатия Win+PrtSc. Откройте папку Изображения -> Снимки экрана (Pictures -> Screenshots), чтобы убедиться, что файлы появляются.
Способ 2: Проверка блокировки клавиши Print Screen в реестре
Клавиша Print Screen может быть заблокирована настройками реестра, что часто происходит в корпоративных средах или из-за стороннего программного обеспечения.
1. Откройте редактор реестра, выполнив команду
regedit.exe
2. Перейдите в раздел
HKEY_LOCAL_MACHINE\SYSTEM\CurrentControlSet\Control\Keyboard Layout
3. Найдите параметр Scancode Map (тип REG_BINARY).
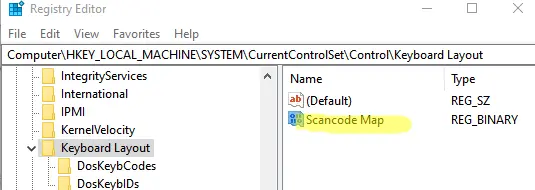
4. Если параметр существует и содержит значение, например:
00,00,00,00,00,00,00,00,04,00,00,00,00,00,2a,e0,00,00,37,e0,00,00,54,00,00,00,00,00
это указывает на блокировку клавиши PrtSc.
5. Удалите параметр Scancode Map:
– Щелкните по нему правой кнопкой мыши и выберите Удалить (Delete).
6. Закройте редактор реестра и перезагрузите компьютер.
После удаления параметра проверьте работу Print Screen с помощью комбинаций PrtSc, Alt+PrtSc или Win+PrtSc.
Способ 3: Проверка конфликтов с другими приложениями
Некоторые приложения, такие как OneDrive, Dropbox или сторонние утилиты для скриншотов, могут перехватывать клавишу Print Screen, вызывая ее неработоспособность.
1. Проверьте настройки сторонних приложений:
– В OneDrive:
– Щелкните по значку OneDrive в трее, выберите Настройки -> Резервное копирование (Settings -> Backup).

– Убедитесь, что опция Автоматически сохранять снимки экрана (Automatically save screenshots) отключена.

– В других приложениях для скриншотов (например, Snagit, Greenshot) проверьте горячие клавиши в их настройках.
2. Отключите фоновые приложения:
– Откройте диспетчер задач (Ctrl+Shift+Esc) или команда:
taskmgr.exe

– На вкладке Автозагрузка (Startup) отключите ненужные приложения, которые могут перехватывать клавиши.

3. Перезагрузите компьютер и проверьте работу Print Screen.
Способ 4: Использование альтернативных инструментов для скриншотов
Если восстановить работу Print Screen не удалось, используйте встроенные или сторонние инструменты для создания скриншотов.
Встроенные инструменты Windows
1. Фрагмент и набросок (Snip & Sketch) или Ножницы (Snipping Tool):
– Нажмите Win+Shift+S или выполните команду
snippingtool.exe

– Выберите область экрана для захвата.
– Скриншот сохраняется в буфер обмена или открывается для редактирования.

2. Игровая панель Xbox (Xbox Game Bar):
– Нажмите Win+G.
– Нажмите кнопку Сделать снимок экрана (Capture screenshot).
– Скриншоты сохраняются в %UserProfile%\Videos\Captures.

Сторонние утилиты
– Greenshot: Бесплатная программа с настраиваемыми горячими клавишами и функциями редактирования.
– Snagit: Профессиональный инструмент для захвата и аннотации скриншотов.
– Lightshot: Легкая утилита для быстрого создания и загрузки скриншотов.
Дополнительные рекомендации
– Проверьте физическое состояние клавиши PrtSc и клавиатуры: подключите другую клавиатуру, чтобы исключить аппаратные неисправности.
– Убедитесь, что драйверы клавиатуры обновлены:
1. Откройте диспетчер устройств (devmgmt.msc).

2. Найдите раздел Клавиатуры (Keyboards), щелкните правой кнопкой по устройству и выберите Обновить драйвер (Update driver).
– Проверьте наличие обновлений Windows, так как они могут исправлять ошибки ввода:
1. Перейдите в Параметры -> Обновление и безопасность -> Центр обновления Windows (Settings -> Update & Security -> Windows Update).
2. Установите все доступные обновления.

– Если вы работаете в корпоративной среде, обратитесь к администратору, так как Print Screen может быть заблокирован групповыми политиками (GPO):
1. Выполните, для просмотра примененных политик.
gpresult /r
– Для диагностики используйте журнал событий:
1. Откройте Просмотр событий (Event Viewer), выполнив
eventvwr.msc
2. Проверьте Журналы Windows -> Система (Windows Logs -> System) на наличие ошибок, связанных с клавиатурой или буфером обмена.
Эти шаги помогут восстановить работу клавиши Print Screen или предоставят альтернативные способы создания скриншотов в Windows 10 и Windows 11.
Have you encountered Print Screen not working issue? If so, you should read this post, in which MiniTool shows you how to fix this problem with 6 solutions. Keep reading to get them.
Hello, I’m a gamer and sometimes have need to take screenshots of what I’m doing for reference, forum posts, etc…You can imagine my surprise when I hit the “Prt Sc” key on my Windows 10 PC only to have nothing on the clipboard when I tried pasting into Windows Paint…What might be the cause of this and how can I fix it? —answers.microsoft.com
Where is the Print Screen key? What does Print Screen button look like? In general, the Print Screen key is located at the upper right corner of the keyboard and it is usually marked as “Print Screen”, “PrtSc”, “PrtScn”, “PrtScrn”, “Prt Scr”, or something like that.
The Print Screen button is used to capture your desktop screen. In Windows 10/11, if you just press the Print Screen (PrtSc) key, a screen shot will be saved to the Windows clipboard.
However, many people may encounter the Print Screen button not working issue on Windows 10/11. If the PrintScreen button doesn’t work, you can follow the solutions below to solve it.
Solution 1. Stop Background Programs
Many background programs such as OneDrive, Snippet tool or Dropbox etc. can take over the Print Screen key and prevent you from taking screenshots on your computer. For example, OneDrive may automatically save screenshots you capture to its server.
You can change the settings of these apps to solve the Print Screen button not working issue. But for convenience, I recommend you close these programs one by one through the following steps:
Step 1: Press “Ctrl + Shift + Esc” key together to open Task Manager.
Step 2: Right-click on programs and select End Task to close them.
Solution 2. Make Sure the Print Screen Shortcut Is Enabled
Only when the Print Screen shortcut is enabled in Windows, you can use the Print Screen key to capture the screen.
- Press Windows + U keys to open Ease of Access.
- Click Keyboard.
- Find the Print Screen shortcut section and turn it ON.
Solution 3. Use Hotkey Combination
If pressing single PrtSc key doesn’t work, you can try the following keyboard shortcut buttons:
- Alt key + PrintScreen: This hotkeys button will capture the currently selected window and allow you to save this image by using the paint or any other editing application.
- WinKey + PrintScreen: This hotkeys button will capture the screenshot and save this image to the Screenshots folder with the name Screesnshot (NUMBER). You can find this folder in Pictures on PC. Please note that you should use “Fn + WinKey + PrintScreen” for laptops.
Solution 4. Check If There Is an F Mode or F Lock Key on the Keyboard
If there is an F Mode key or F Lock key on your keyboard, the Print Screen not working Windows 10/11 may be caused by them, because such keys can disable the PrintScreen key. If so, you should enable the Print Screen key by pressing F Mode key or F Lock key again.
Solution 5. Update Keyboard Driver
An old or incorrect keyboard driver may also cause Print Screen not working Windows 10/11. Thus, you can try updating the keyboard driver to solve this problem. Please refer to the following steps:
Step 1: Press “Windows + X” keys and then choose Device Manager from the shortcut menu to open it.
Step 2: Expand Keyboards directory and then right-click on Standard PS/2 Keyboard. Then, select Update driver.
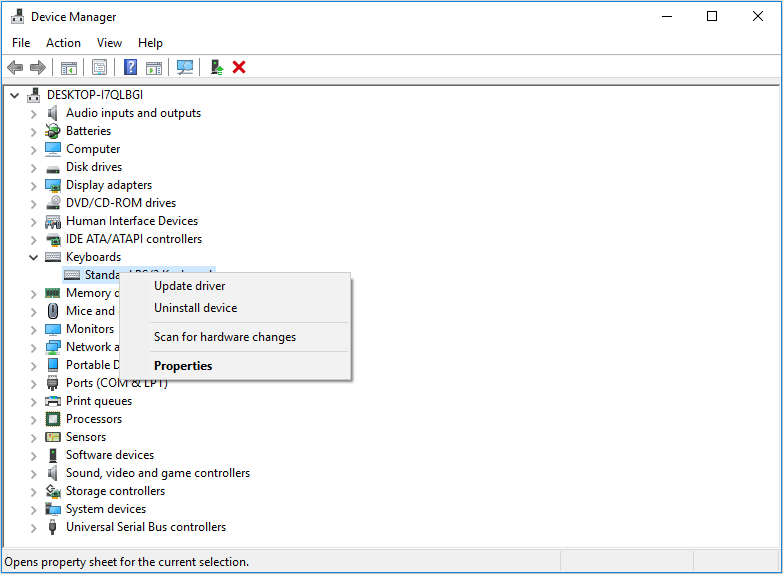
Step 3: Select Search automatically for updated driver software and wait for Windows to automatically install the latest driver.
Then, reboot your PC and see if you’re able to fix the issue. If not, you should then perform the following steps to update keyboard driver again:
Step 1: Head over to your manufacturer’s website and download the required drivers accordingly. Then, you should extract the driver file if it is a compressed file.
Step 2: Similarly, open Device Manager, expand Keyboards, right-click on Standard PS/2 Keyboard and choose Update driver.
Step 3: Select Browse my computer for driver software. Then, click on Let me pick from a list of available drivers on my computer. Finally, select the new driver from the list and click Next.
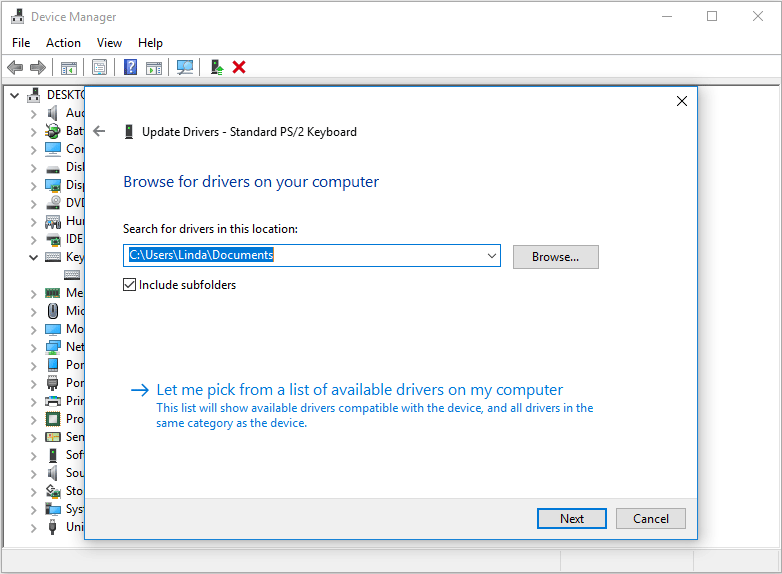
Then, reboot your PC to save changes and see if you have fixed Print Screen not working Windows 10/11 issue.
If you don’t know how to update a driver still, you can try using Driver Easy. The Driver Easy free version only allows you to detect devices with outdated drivers and download available latest drivers for those devices. To install those drivers, you should do that manually, but this is a tough job.
Therefore, I recommend you use Driver Easy Pro, with which you can update outdated drivers with just one click. Here is the guide:
Step 1: Install Driver Easy and launch it. Click the Scan Now button.
Step 2: After the scanning process is completed, click the Update All button to download and install the latest drivers for all devices with outdated drivers.

Of course, Driver Easy Pro also has other features, such as driver backup, driver update history, etc. I recommend you have a try!

If all the above methods can’t solve the Print Screen button not working Windows 10/11 issue, you can use a third-party app: Snipping Tool. This in-built tool in Windows can take a screenshot of the portion of the currently active window or the whole screen. Please refer to the following steps to use it:
Step 1: Press “Windows + S” keys, type “snipping tool” and click the best-matched app to launch it.
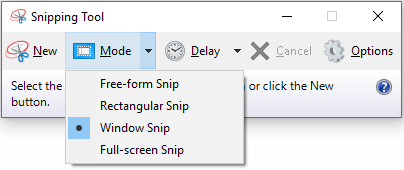
Step 2: Click Mode and choose a proper snipping mode from the pop-up menu.
Все способы:
- Способ 1: Проверка клавиатуры
- Способ 2: Устранение программных проблем
- Как сделать скриншот без PrintScreen
- Программа для снятия скриншотов
- Инструментарий системы
- Вопросы и ответы: 5
Время от времени пользователям Виндовс 10 требуется сделать скриншот «Рабочего стола» или того, что происходит на экране компьютера. Самый простой метод решения этой задачи – нажатие PrintScreen и последующая вставка скриншота в любой графический редактор (Adobe Photoshop, CorelDRAW или обычный встроенный Paint). Порой эта функция перестаёт работать – нажатие на клавишу не приносит результата. Сегодня мы рассмотрим варианты решения этой проблемы.
Способ 1: Проверка клавиатуры
Первым делом следует проверить, работоспособна ли клавиатура вообще. Методика следующая:
- На некоторых клавиатурах настольных компьютеров может присутствовать кнопка блокировки функциональных клавиш под названием F Lock. Обычно она встречается на устройствах от Microsoft старых моделей.

Нажатие F Lock блокирует в том числе и PrintScreen. Если вы являетесь владельцем девайса с такой возможностью, убедитесь, что Ф Лок не нажата.
- Если проблема наблюдается на ноутбуке, нажатие PrintScreen может быть завязано на комбинацию с Fn, которая присутствует в большинстве подобных устройств.
- Наиболее неприятной причиной дефекта является выход из строя самой клавиши – увы, но даже самая надёжная периферия подвержена поломкам. Обычно имеет смысл ремонтировать только дорогие механические клавиатуры, а офисные мембранные проще будет заменить или воспользоваться одним из альтернативных способов получения снимков, о чем мы расскажем в последней части статьи.


Способ 2: Устранение программных проблем
Порой причина, по которой PrintScreen не работает, кроется в самой операционной системе либо одном из установленных приложений.
- Проверьте, не установлен ли софт, который перехватывает системную функцию снятия скриншотов. К таковым относятся клиенты облачных хранилищ (Яндекс.Диск, Google Диск, OneDrive, Dropbox и подобные им), сторонние утилиты для получения снимков либо некоторые менеджеры буфера обмена (вроде Clipdiary). Попробуйте отключить эти программы и проверить, вернулась ли работоспособность PrintScreen. Также в большинстве из них присутствует настройка, которая отключает перехват функции.
- Рассматриваемая клавиша может быть отключена программно – например, если используются средства для переназначения, и на ПринтСкрин «повешена» какая-то другая функция. С работой в популярных приложениях для этой цели вы можете познакомиться в статье по ссылке далее.

Подробнее: Способы переназначения клавиш на Windows 10
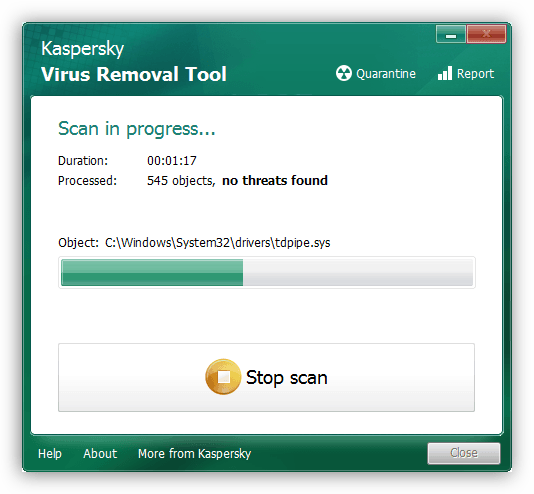
- Также на работоспособность некоторых системных функций, в частности, работоспособности рассматриваемой функции, могут влиять вредоносные программы, так что не лишним будет проверить ОС на предмет заражения.

Урок: Борьба с компьютерными вирусами

Описанных шагов достаточно для восстановления работы PrintScreen в случае программного источника сбоя.
Как сделать скриншот без PrintScreen
Нажатие ПринтСкрин и вставка изображения в графический редактор – далеко не единственный вариант получения скриншотов в Виндовс 10. Рассмотрим возможные альтернативы.
Программа для снятия скриншотов
Выше мы уже упоминали, что приложения, перехватывающие сделанный снимок, могут быть причиной рассматриваемой проблемы. Этот же софт может быть и решением в случае неисправности нужной клавиши. В качестве примера рассмотрим Lightshot.
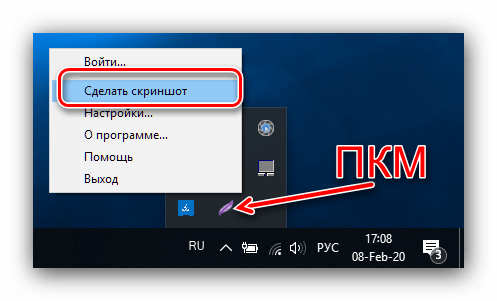
- Инсталлируйте программу на компьютер. Далее откройте системный трей, найдите в нём значок Lightshot, кликните по нему правой кнопкой мыши и выберите пункт «Сделать скриншот».
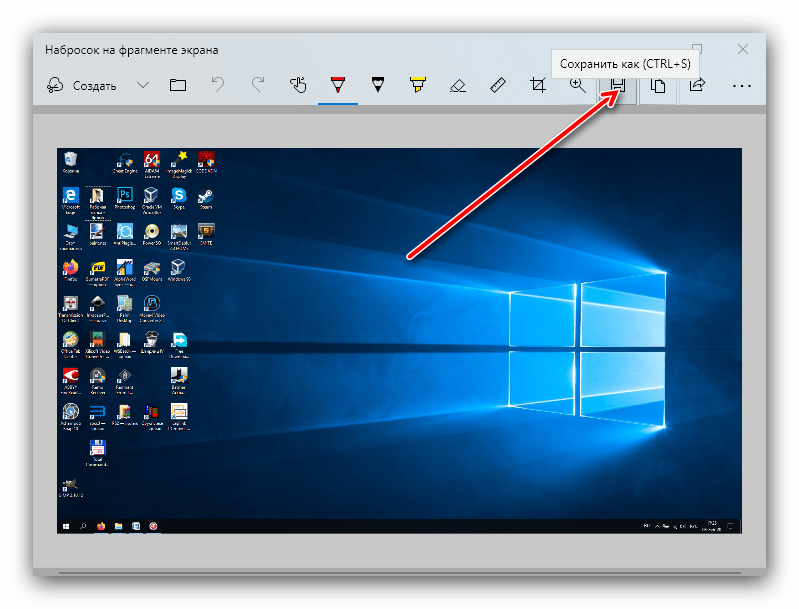
- Выделите требуемую область – поддерживается также весь экран, но выбрать его нужно самостоятельно. Затем обратите внимание на правый нижний угол, в нём появится панель инструментов. Кликните левой кнопкой мыши по значку дискеты или воспользуйтесь сочетанием Ctrl+S.
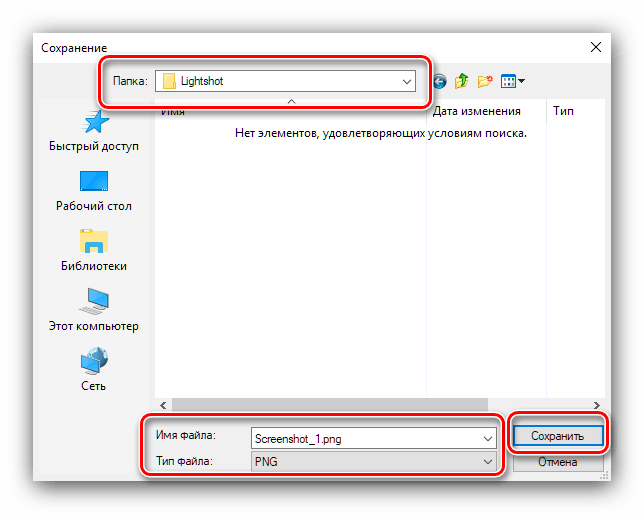
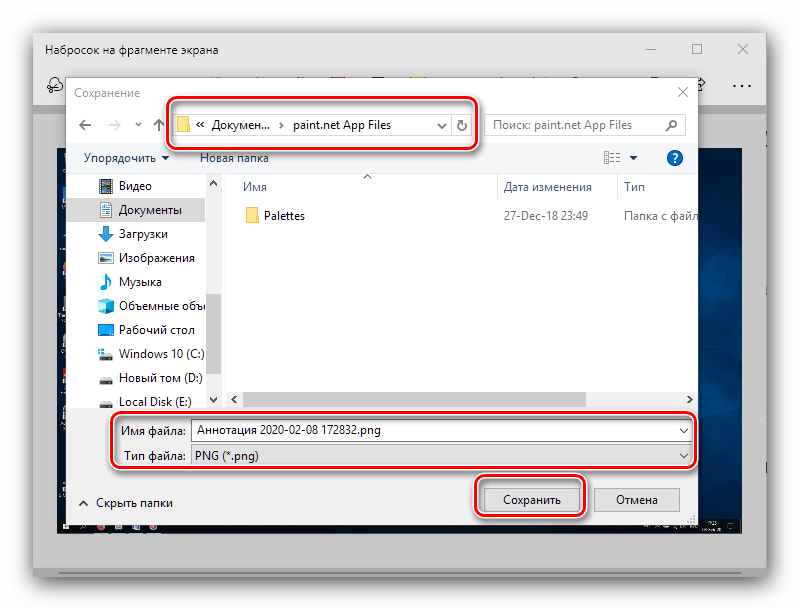
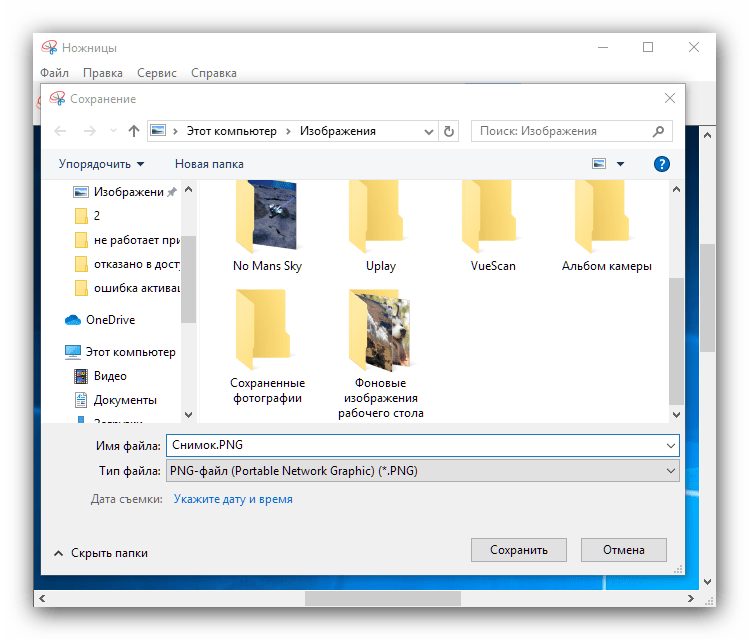
- Откроется диалоговое окно «Проводника», задайте в нём местоположение снимка, его имя и формат, после чего нажмите «Сохранить».
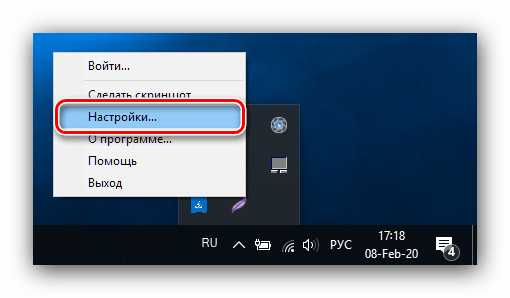
- Лайтшот также поддерживает задание горячих клавиш для снимка. Для этого вызовите меню приложения и выберите «Настройки».

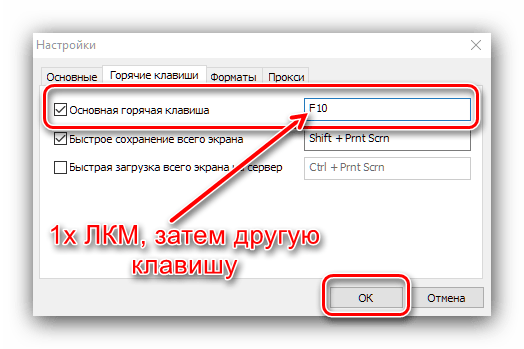
Перейдите на вкладку «Горячие клавиши». Убедитесь, что опция «Основная горячая клавиша» активна, затем один раз кликните ЛКМ по строке с именем хоткея (по умолчанию это та же PrintScreen), после чего нажмите на клавиатуре альтернативу – например, F10. Для сохранения изменений нажмите «ОК».
Инструментарий системы
В «десятке» присутствует несколько альтернатив привычному ПринтСкрин, так что можно обойтись и без установки стороннего софта.
Системный скриншотер
В Виндовс 10 версии 1703 и новее присутствует встроенное средство получения скриншотов как всего экрана, так и его области. В редакции 1809 это средство получило обновление и называется теперь «Фрагмент и набросок». Использовать его можно следующим образом:
- Нажмите сочетание клавиш Win+Shift+S – экран компьютера затемнится, а курсор примет вид крестика. Для получения изображения всего рабочего пространства наведите курсор на панель инструментов вверху и кликните по кнопке «Вырезка во весь экран».
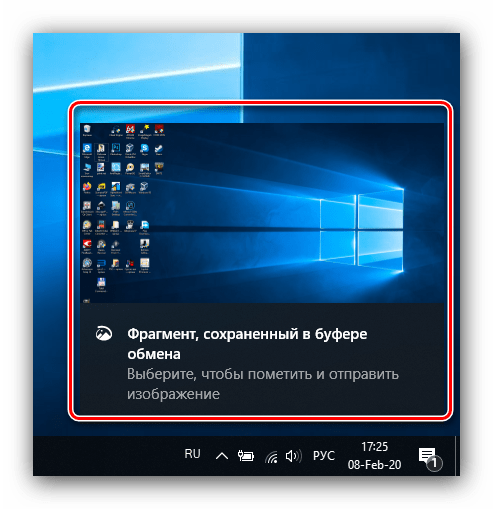
- Появится уведомление о том, что скриншот помещён в буфер обмена. Щёлкните по этому уведомлению.
- Откроется средство редактирования. Внесите в нём требуемые изменения (например, обрежьте кадр или закрасьте персональные данные), после чего воспользуйтесь кнопкой «Сохранить как», отмеченной на изображении далее.

Появится стандартный для Виндовс диалог сохранения файлов.

«Ножницы»
Пользователи, которые перешли на Windows 10 с седьмой версии ОС от Microsoft, будут рады узнать, что знакомый им инструмент «Ножницы» остался в этой редакции.
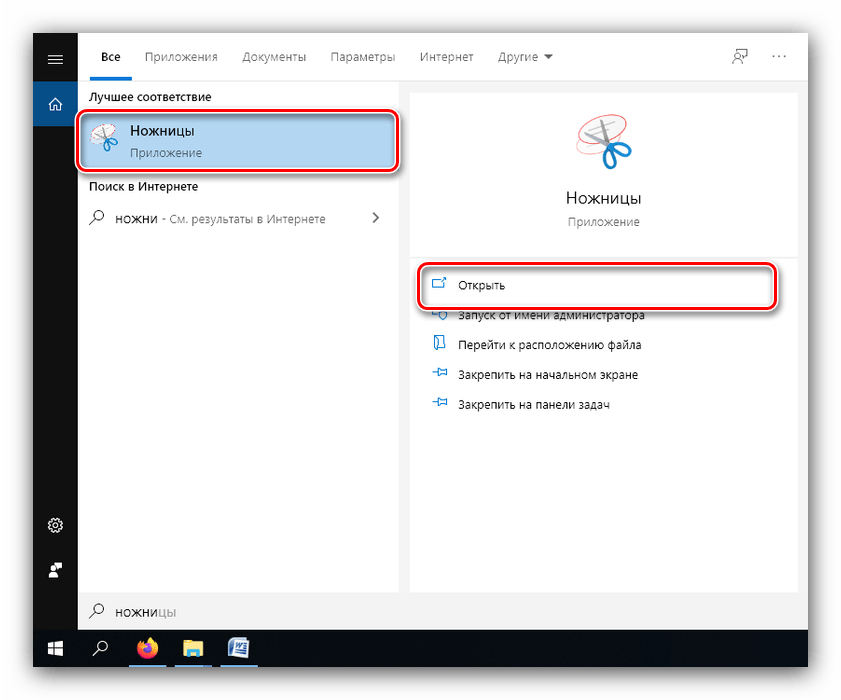
- Откройте «Поиск» и начните набирать в поле слово ножницы. Будет обнаружена соответствующая программа, кликните по ней для начала работы.
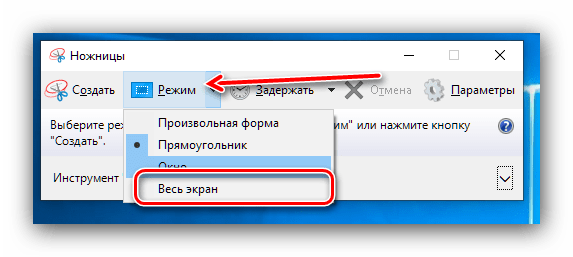
- Открываются «Ножницы» в виде небольшого плавающего окна. Нажмите на пункт «Режим» и выберите предпочитаемый вариант – например, для нашей цели это «Весь экран».
- После получения картинки можете изменить её во встроенном редакторе. Для сохранения изображения воспользуйтесь пунктами «Файл» – «Сохранить как».

Выберите опции сохранения и кликните по соответствующей кнопке.

«Игровой режим»
В свежих версиях Виндовс 10 предусмотрен специальный игровой режим, в котором можно сделать запись экрана или единичный снимок.
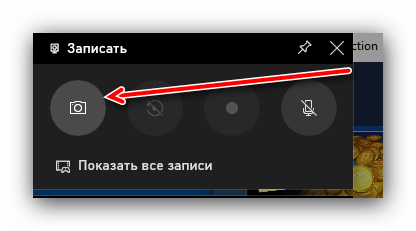
- Откройте игру или прикладную программу, скриншот которой хотите получить, и разверните на весь экран. Далее воспользуйтесь комбинацией Win+G – должен появиться интерфейс как на изображении ниже.

Воспользуйтесь кнопкой «Снимок экрана».
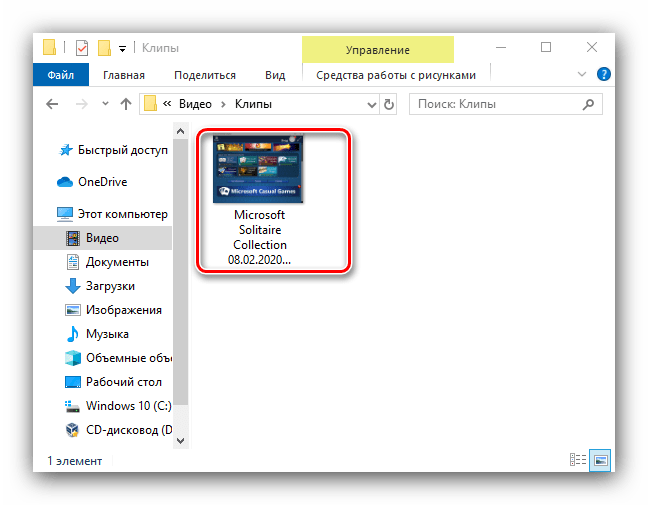
- Скриншот будет сделан автоматически и сохранён по адресу
Видео/Клипы. - Если «Игровой режим» не открывается, это может означать следующее:
- приложение/игра не поддерживаются этой возможностью;
- на целевом компьютере отсутствует приложение «Xbox», частью которого является «Игровой режим»;
- видеокарта не позволяет этой функции работать.
В первом случае ничего не остаётся, кроме как использовать альтернативы. Во втором стоит произвести сброс системы к заводским настройкам. Для устранения третьей причины рекомендуется переустановить драйвера GPU.
Мы рассмотрели причины, по которым может не работать клавиша PrintScreen и что нужно делать для устранения сбоя, а также подсказали альтернативные методы создания скриншота в Windows 10.
Наша группа в TelegramПолезные советы и помощь