
Мне надо поставить JDK 11 для одного проекта под Android.
У меня сейчас стоит только JDK 8
Скачал из архива на сайте Oracle инсталлер jdk-11.0.7_windows-x64_bin.exe
Сначала запускается, показывает запрос на админские права для запуска, после этого окошко пропадает и ничего не происходит.
В списке процессов ничего нет. Перезагрузка не помогла.
Что это может быть и как исправить?
P.S. Руководствовался этими инструкциями:
https://docs.oracle.com/en/java/javase/11/install/…
https://www.codejava.net/java-se/download-and-inst…
Дальше шага «Install» не идёт
-
Вопрос задан
-
325 просмотров
Проблему решил, но с другой стороны.
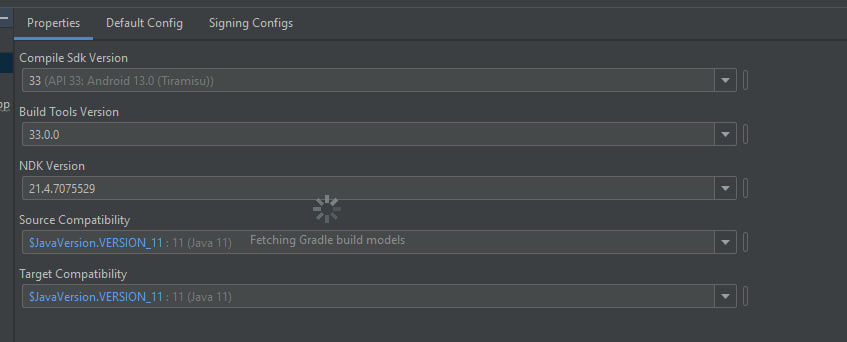
Надо было в настройках версию джавы поменять
Пригласить эксперта
Войдите, чтобы написать ответ
-
Показать ещё
Загружается…
Минуточку внимания
If you’re encountering Java Error Code 1603 on Windows 11, you’ve likely seen the frustrating message that reads: “Java installation did not complete. Error Code: 1603.”

This is a common installation issue that affects both casual users and developers trying to install or update the Java Runtime Environment (JRE) or Java Development Kit (JDK). Although it appears to be a critical failure, this error is almost always solvable with the right combination of system checks and configuration adjustments.
Understanding the root cause of this error is key to eliminating it for good. Whether you’re installing Java for Minecraft, enterprise applications, or development work, fixing this problem is essential for smooth performance.
Why is “Error Code 1603” Showing During Java Installation?
The Message Behind the Code: Java Install Did Not Complete
This error typically appears when the Java installer encounters a blockage during the setup process. It may result from permission issues, pre-existing Java files, blocked system paths, or conflicting system variables. The message signals a fatal installation failure, which means the installer has tried multiple fallback options and ultimately failed to complete its task.
Error code 1603 is not unique to Java. It’s a Windows Installer error that various software packages encounter when something critical prevents the installer from continuing. However, Java installations are particularly prone to this due to their reliance on system environment variables and registry keys, which are frequently modified or left behind by previous installations.
What Causes Java Error Code 1603 in Windows 11?
Conflicting Java Installations and Registry Entries
One of the most common causes is the existence of an older or broken Java installation. These can leave behind corrupted registry entries or files in the Program Files\Java directory. Even if Java appears to be uninstalled from the Control Panel, leftover configuration files and symbolic links may persist, misleading the installer into thinking that Java is already present or partially installed. These remnants trigger an incomplete setup state that immediately throws the 1603 error code when a new installer attempts to overwrite or repair existing files.
Incorrect or Misconfigured JAVA_HOME Variables
Another root cause lies in the system environment variables. If the JAVA_HOME path points to a non-existent directory or an invalid Java version, the new installer might fail to complete due to conflicts in file path access. These errors are particularly common when multiple Java versions have been installed and removed improperly.
Antivirus Interference During Setup
Real-time protection software such as Avira, Avast, or even Windows Defender can prevent the Java installer from writing critical files to system folders. In many cases, users are unaware that their antivirus has blocked Java components because no explicit alert is shown during the installation process.
Broken Symbolic Links in the Java System Path
Symbolic links located in C:\ProgramData\Oracle\Java\javapath are designed to point to Java executables. However, when these links become outdated or broken, they act like roadblocks. The Java installer will attempt to update them, fail, and then exit the process with error code 1603.
Issues With BIOS Virtualization Settings
A lesser-known but significant issue involves CPU virtualization settings. When virtualization features such as Intel VT-x or AMD-V are enabled in BIOS, they sometimes conflict with installer actions, especially on machines that use sandboxed or virtual environments. This has been observed in development environments where Docker, Hyper-V, or VMware is also installed.
Corrupted Installer Files and Installation Source
Sometimes the error has nothing to do with the system but everything to do with the installer itself. If the Java installer file is corrupted, incomplete, or downloaded from an unreliable source, it might malfunction mid-installation and throw the error.

Using Revo Uninstaller to Remove Existing Java Versions Completely
To begin resolving the issue, the first step is to clean up any remnants of previous Java installations. The standard Windows uninstaller often leaves files behind that can interfere with future setups. Using third-party tools like Revo Uninstaller allows you to perform a deeper scan for leftover files, registry entries, and symbolic links. After performing an advanced uninstall and rebooting the system, many users find that the installer completes successfully.
Correcting or Removing the JAVA_HOME System Variable
The JAVA_HOME variable is critical during Java installation, especially when the installer attempts to register paths system-wide. If JAVA_HOME is defined but points to a non-existent directory or deleted installation, it will prevent the setup from proceeding. Navigating to your system’s environment variables and either correcting this path or removing it entirely allows the new installer to set up Java correctly.
Manually Changing the Java Installation Path
Changing the installation directory to a non-default path like C:\Java\JDK\ often bypasses permission-related issues or conflicting folder structures in Program Files. Java sometimes fails to overwrite existing folders, especially if certain files are marked as read-only or owned by system-level processes. By switching to a new folder, the installer avoids these conflicts.
Running the Installer in Safe Mode
Safe Mode provides a minimal environment where third-party software and background services are disabled. This environment is ideal for troubleshooting installation problems. Booting into Safe Mode with Networking ensures you have internet access, if needed, and limits the interference of services that might conflict with Java setup. Running the offline installer in this mode has resolved the 1603 error for many users.
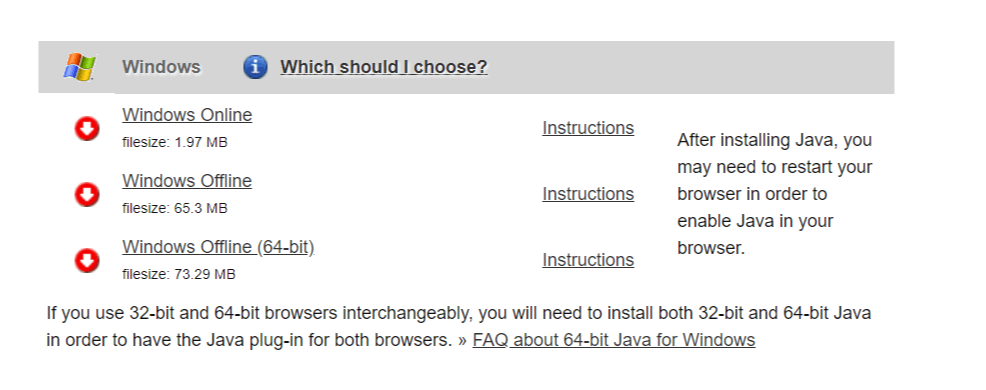
Downloading and Using the Java Offline Installer
The online Java installer relies on web scripts and network connectivity, which can be interrupted or blocked by firewall settings. Using the offline version ensures that all components are present during installation and not downloaded dynamically. Oracle’s official website provides the Java SE offline installer for both 32-bit and 64-bit systems.
Disabling Virtualization in BIOS Temporarily
Though not an obvious fix, disabling virtualization technology from your BIOS settings can help prevent conflicts during installation. Users who run virtual machines or sandboxed applications on Windows 11 may find that Java setup fails unless virtualization is turned off. Once Java is installed, you can re-enable the feature without affecting functionality.
Running the System File Checker Utility
Corrupted system files are another hidden cause of Java installation failures. The System File Checker tool, accessible through Command Prompt, scans and repairs damaged system files. Running sfc /scannow helps restore Windows Installer dependencies, especially if the msiserver service has become unresponsive.
Cleaning the Symbolic Links in the Java Path Directory
Navigating to the path C:\ProgramData\Oracle\Java\javapath and deleting all symbolic links prevents the installer from encountering redirect loops or path conflicts. These links are often remnants of older Java versions and can become corrupted during incomplete uninstall processes.
Manually Removing Java SE Runtime Environment Files
Even if Java is removed through Programs and Features, hidden folders often remain. These include installation directories in C:\Program Files\Java\, Java-related application data under %AppData%, and configuration files stored in C:\ProgramData\Oracle. Deleting these manually ensures a clean environment for the next installation attempt.
Temporarily Disabling Antivirus Protection
Some antivirus engines falsely flag Java’s runtime components as suspicious. Disabling real-time protection temporarily during installation ensures that the installer can execute all required scripts and write to system locations. Avira in particular has been known to block Java silently, causing installation to fail mid-process.
Installing an Older Version of Java First
Occasionally, the latest Java build contains changes incompatible with certain system setups. Installing an older version—such as Java 8 Update 281—and then updating manually has proven effective. This approach also allows users to validate that their system supports Java before committing to the latest build.
Resetting TEMP and TMP System Variables
Some setups have custom TEMP and TMP directories that are inaccessible or invalid. Java uses these directories during installation to extract temporary files. Resetting them to %LOCALAPPDATA%\Temp restores default behavior and helps avoid permission or access errors.
Using the Java Uninstall Tool Provided by Oracle
Oracle offers a dedicated uninstall tool that scans for and removes all Java-related files, settings, and registry entries. It’s especially useful if previous installations were interrupted or partially removed, which can cause 1603 errors during fresh installations.
Run the Official Java Uninstall Tool
- Download the Java Uninstall Tool
- Follow on-screen instructions to remove any broken installs.
Deleting the JRE Folder Manually
If C:\Program Files\Java\jre-1.8\ exists, deleting it manually before reinstalling Java prevents version conflicts. This is often necessary when previous installations were forcefully terminated or corrupted.
Verifying Windows Installer (msiserver) Service Is Running
The Windows Installer service, or msiserver, is essential for all MSI-based installations. If this service is disabled or stuck, Java will fail to install properly. Checking and starting the service through services.msc resolves such issues.
Re-downloading the Installer for a Clean Installation
Finally, downloading the installer again ensures that you are working with an uncompromised file. Java installations frequently fail when the downloaded file is corrupted or only partially downloaded. Always get your installer from the official Oracle site or a verified mirror.
Why is Error Code 1603 Java Install Did Not Complete?
When installing Java on Windows 11, you may encounter the 1603 fatal error during installation message. This typically reads:
“Java install did not complete. Error Code: 1603.”
This error appears during the setup process and signals that the installation was aborted by the system due to an underlying issue—often a conflict, missing path, or permission error.
Visit Our Post Page: Blog Page
Readers help support Windows Report. We may get a commission if you buy through our links.
Read our disclosure page to find out how can you help Windows Report sustain the editorial team. Read more
The modern internet browser does not require the users to install Java on Windows. However, millions of users still the run older version of Windows and require Java to perform some tasks. That said while updating Java, you may encounter unable to launch the java update installer, the operation was canceled by the user error.
Another similar error reads Java(TM) Update Unable to launch the Java(TM) Update installer: The requested operation requires elevation.
This error can occur due to issues with administrator rights. In this article, we show you how to fix unable to launch the Java update installer error in Windows.How to fix Java Update Installer errors
Manually download and install Java
1. Uninstall old installer

- Press Windows Key + R to open Run.
- Type control and click OK to open Control Panel.
- Go to Programs > Programs and Features.
- From the list of apps, select Java.
- Click on Uninstall (top toolbar).
- Click Yes if asked to confirm the action.
Use a dedicated app
If you are unable to uninstall the Java client using the Control Panel, use CCleaner.
- Download CCleaner and install the app.
- Open the app and head to the Tools menu.

- On the Uninstall tab, select Java from the list.
- Click on the Uninstall button (at the top).
- Wait for the process to complete.


- Fix: An Error Occurred While Loading a Higher Quality Version of This Video
- iTunesMobileDevice.dll is Missing From Your Computer [Solved]
- SYNSOACC.DLL Could Not Be Located: How to Fix in Cubase
- Fix: Omen Gaming Hub Undervolting Not Working
- How to Fix Errors Related to the LibGLESv2.dll File
2. Install Java manually
- Download the latest version of Java from the official website.
- Right-click on the installer.
- Select Run as administrator.
- If prompted by the User Account Control, click Yes to continue.
- Wait for the installation to complete.
The error occurs if the previous installation has some leftover files creating issues with the new installation or if the installer requires administrator rights to run. By following the steps in this article you can fix this issue in no time.
Tashreef Shareef
Tashreef Shareef is a software developer turned tech writer. He discovered his interest in technology after reading a tech magazine accidentally. Now he writes about everything tech from Windows to iOS and streaming services to IoT at WindowsReport.
Can’t install Java on Windows 11? Troubleshooting and Solutions
In an era where programming languages drive innovation, Java remains one of the most widely used languages in software development. It allows developers to create applications that can run on various platforms without rewriting the entire codebase. However, installing Java can sometimes present challenges, particularly on newer operating systems like Windows 11. If you’ve encountered issues while trying to install Java on your Windows 11 machine, don’t worry; this guide will walk you through common problems and solutions to ensure you get Java up and running smoothly.
Understanding Java and Its Importance
Java is an object-oriented programming language designed for versatility, allowing developers to write once and run anywhere (WORA). It’s widely employed in web applications, mobile applications (especially Android), server-side applications, and enterprise-level solutions. The Java Development Kit (JDK) and Java Runtime Environment (JRE) are essential for developers who wish to write and execute Java applications.
Windows 11: An Overview
Windows 11 is Microsoft’s latest operating system, marked by a refreshed UI, enhanced performance, and support for running Android apps. While Windows 11 offers many improvements over its predecessors, some users have reported specific issues while installing software, including Java. Understanding how Windows 11 manages installs and what may interfere with Java’s installation is critical for troubleshooting.
Common Problems Encountered During Java Installation
1. Compatibility Issues
One of the most significant concerns with installing Java on Windows 11 is compatibility. While Java is designed to work on various platforms, not every version is optimized for newer operating systems. Users may encounter problems if they’re attempting to install an outdated version of Java that’s not fully compatible with Windows 11.
2. Corrupted Installation Files
Occasionally, the installation files may become corrupted. This corruption can occur during the download process due to unstable internet connections or interruptions. A corrupted installer can lead to various errors during installation.
3. Insufficient Permissions
Another common issue involves user permissions. Windows 11 includes robust security features that may prevent software installations if the user does not have administrator rights. If your user account does not possess the necessary permissions, the installation may fail.
4. Unchecked Windows Updates
Windows updates are crucial for ensuring the stability and security of your system. If your operating system is not up to date, it could trigger compatibility issues with new software installations.
5. Conflicting Software
Existing software can also interfere with Java installation. Programs that handle Java files, like other JDK installations or specific IDEs (Integrated Development Environments), may create conflicts.
6. Antivirus/Firewall Interference
Many users have experienced problems where their antivirus software or firewall settings block the Java installation process. Some security features may mistakenly identify Java installation files as threats.
Step-by-Step Guide to Troubleshoot and Install Java on Windows 11
To help you overcome these common problems, we’ve compiled a step-by-step guide to successfully install Java on your Windows 11 system.
Step 1: Confirm System Requirements
Before attempting to install Java, confirm that your computer meets the system requirements. You’ll need:
- A compatible version of Windows (Windows 11).
- Suitable free disk space for installation (roughly 1.5GB for the JDK).
- An internet connection to download files.
Step 2: Check for Existing Java Installations
Before you install Java, check if you have an existing installation. To do this:
- Press
Windows + Rto open the Run dialog. - Type
cmdto open the Command Prompt. - Enter
java -versionand press Enter.
If Java is installed, you should see the version number. If it isn’t or if the version seems outdated, it’s time to uninstall it.
To uninstall Java:
- Go to
Settings. - Click on
Apps. - Navigate to
Installed apps. - Look for Java in the list, select it, and click
Uninstall.
Step 3: Download the Latest Version of Java
Visit the official Oracle website or AdoptOpenJDK to download the latest JDK. It’s advisable to download the recommended version for Windows.
Step 4: Disable Antivirus Temporarily
Before installation, temporarily disable your antivirus software to ensure it does not interfere.
To disable Windows Defender temporarily:
- Go to
Settings. - Select
Privacy & Security. - Click on
Windows Security. - Open
Virus & threat protection. - Under
Virus & threat protection settings, turn offReal-time protection.
Be sure to enable it again after Java installation is complete.
Step 5: Run the Installer as Administrator
When you’re ready to install Java, always run the installer as an administrator.
- Right-click on the downloaded installer file.
- Select
Run as administrator. - If prompted by User Account Control (UAC), click
Yes.
Step 6: Follow the Installation Instructions
The installer will guide you through the process. Make sure to:
- Accept the license agreement.
- Choose the installation path (using the default path is recommended).
- Wait for the installation to complete.
Step 7: Set JAVA_HOME and Update the PATH Variable
After installation, configuring environment variables is essential for Java to run correctly.
-
Right-click on
This PCand selectProperties. -
Click on
Advanced system settings. -
In the System Properties window, click on
Environment Variables. -
Under System variables, click
New, and add the following:- Variable name:
JAVA_HOME - Variable value: The path to your JDK (e.g.,
C:Program FilesJavajdk-17).
- Variable name:
-
Find the
Pathvariable in the System variables section and select it, then clickEdit. -
Click
Newand add the path to the JDKbindirectory (e.g.,C:Program FilesJavajdk-17bin). -
Click
OKto close all dialogs.
Step 8: Verify Java Installation
To confirm that Java has been installed correctly:
- Open the Command Prompt.
- Type
java -versionandjavac -version, then press Enter. You should see the version numbers for both commands.
Additional Troubleshooting Tips
If you’re still having difficulty installing Java on Windows 11 after following the steps above, consider these additional troubleshooting options:
1. Update Windows 11
Ensure your Windows operating system is fully updated. Regular updates often include bug fixes that can resolve various installation issues.
2. Check Storage Space
Make sure you have enough free disk space for the installation. If necessary, clear out unnecessary files to make room.
3. Use a Different User Account
Try installing Java from a different user account with administrative rights to determine if user profile issues are causing the problem.
4. Clear the Windows Installer Cache
Corrupted installer cache files may prevent installations. To clear these:
- Open the Run dialog (
Windows + R). - Type
msconfigand press Enter. - Go to the Services tab, check «Hide all Microsoft services,» and then click «Disable all.»
- Restart your computer and attempt the installation again.
5. Review Installation Logs
If the installation fails, check the installation logs for errors. These logs typically detail what went wrong during the install process. You can find these logs in the %temp% directory.
Java Alternatives and Other Considerations
If you’ve exhausted all avenues and still cannot install Java, consider using alternatives to Java, depending on your project needs:
- OpenJDK: This is an open-source implementation of the Java Platform, Standard Edition.
- Java via Docker: If you’re comfortable using containers, consider running a Java environment through Docker images.
- Cloud-based IDEs: Platforms like Replit, Glitch, or Gitpod allow you to write and run Java code in a browser without the need for local installation.
Conclusion
Encountering issues while trying to install Java on Windows 11 may seem frustrating, but with the right troubleshooting steps, you can quickly resolve them. Always ensure that you’re using the latest version of Java suitable for your operating system and that you have the necessary permissions to execute the installation. By following this comprehensive guide, you should be able to overcome the hurdles and set up your Java environment effectively.
With Java installed and configured, you’ll be all set to dive into the world of programming, utilizing this powerful language for a plethora of applications, from web development to mobile app creation. Happy coding!
Как перейти от Waterfall к Agile
EggHead 06.05.2025
Каскадная модель разработки Waterfall — классический пример того, как благие намерения превращаются в организационный кошмар. Изначально созданная для упорядочивания хаоса и внесения предсказуемости. . .
Оптимизация SQL запросов — Продвинутые техники
Codd 06.05.2025
Интересно наблюдать эволюцию подходов к оптимизации. Двадцать лет назад всё сводилось к нескольким простым правилам: «Избегайте SELECT *», «Используйте индексы», «Не джойните слишком много таблиц». . . .
Создание микросервисов с gRPC и Protobuf в C++
bytestream 06.05.2025
Монолитные приложения, которые ещё недавно считались стандартом индустрии, уступают место микросервисной архитектуре — подходу, при котором система разбивается на небольшие автономные сервисы, каждый. . .
Многопоточность и параллелизм в Python: потоки, процессы и гринлеты
py-thonny 06.05.2025
Параллелизм и конкурентность — две стороны многопоточной медали, которые постоянно путают даже бывалые разработчики.
Конкурентность (concurrency) — это когда ваша программа умеет жонглировать. . .
Распределенное обучение с TensorFlow и Python
AI_Generated 05.05.2025
В машинном обучении размер имеет значение. С ростом сложности моделей и объема данных одиночный процессор или даже мощная видеокарта уже не справляются с задачей обучения за разумное время. Когда. . .
CRUD API на C# и GraphQL
stackOverflow 05.05.2025
В бэкенд-разработке постоянно возникают новые технологии, призванные решить актуальные проблемы и упростить жизнь программистам. Одной из таких технологий стал GraphQL — язык запросов для API,. . .
Распознавание голоса и речи на C#
UnmanagedCoder 05.05.2025
Интеграция голосового управления в приложения на C# стала намного доступнее благодаря развитию специализированных библиотек и API. При этом многие разработчики до сих пор считают голосовое управление. . .
Реализация своих итераторов в C++
NullReferenced 05.05.2025
Итераторы в C++ — это абстракция, которая связывает весь экосистему Стандартной Библиотеки Шаблонов (STL) в единое целое, позволяя алгоритмам работать с разнородными структурами данных без знания их. . .
Разработка собственного фреймворка для тестирования в C#
UnmanagedCoder 04.05.2025
C# довольно богат готовыми решениями – NUnit, xUnit, MSTest уже давно стали своеобразными динозаврами индустрии. Однако, как и любой динозавр, они не всегда могут протиснуться в узкие коридоры. . .
Распределенная трассировка в Java с помощью OpenTelemetry
Javaican 04.05.2025
Микросервисная архитектура стала краеугольным камнем современной разработки, но вместе с ней пришла и головная боль, знакомая многим — отслеживание прохождения запросов через лабиринт взаимосвязанных. . .