
Are you trying to download battle.net app for windows 10/8/7 computer? And It’s stuck at “downloading new files” and want to fix this issue then you are at the right place. Here I am going to share a step by step guide to fix ‘battle.net won’t install on Windows 10/8/7’.
Blizzard Battle.net is one of the most popular internet based video games cum social network platforms, developed by Blizzard Entertainment. Blizzard has a collection of some most popular computer games which includes Warcraft III: Reforged, World of Warcraft: Shadowlands, and Call of Duty: Warzone.
Battle.net works like an Agent which helps you to initialize and install patched blizzard games on your computer. Unfortunately the agent sometimes failed to initialize the application. Sometimes the agent also does not download the data from the server or install any game files.
So here in this guide, I am going to show you a step by step guide to fix battle.net wont install issue on Windows 10/8/7.
But before we continue, read our review on the top graphics cards for your gaming needs.
Method 1: Run Battle.net launcher as Administrator
Running the Battle.net installer as an administrator can often solve installation issues. To do this, follow these steps:
- First of all, you have to navigate to C:\Program Files\Battle.net.
- Now you have to right-click on the Battle.net Launcher.exe and the click on Properties.
- Now a pop-up window will appear. There you will find a menu at the top of the screen of the pop-up box. Now look for the Compatibility tab and then click on it.
- Then click on the ”Run this program as an administrator” box.
- And then confirm changes.
- That’s it.
If running the installer as an administrator doesn’t work, move on to the next method.
Method 2: Update Your Computer and Router
Most of the time the Agent gets failed to download the data from the server due to unsupported system modules. And a quick update to the Operating system can easily solve your problem regarding installation issues. Follow the below solution.
- Navigate to the Start Menu.
- And then go to the Settings.
- You need to click on “Update & Security”.
- You have to click on Windows update located at the left side panel.
- Now you can see the “Check for updates” option at the right side of the panel. Just click on it. That’s it. You can see the below screenshot

Method 3: Clear the Battle.net Cache Folder
Clearing the Battle.net cache folder can also help resolve installation issues. Here are the steps to follow:
- Close the Battle.net application if it is running.
- Press the Windows key + R to open the Run dialog box.
- Type in “%ProgramData%” and hit Enter.
- Find the “Battle.net” folder and rename it to “Battle.net.old”.
- Restart the Battle.net installer and try the installation again.
Method 4: Turn off the Antivirus
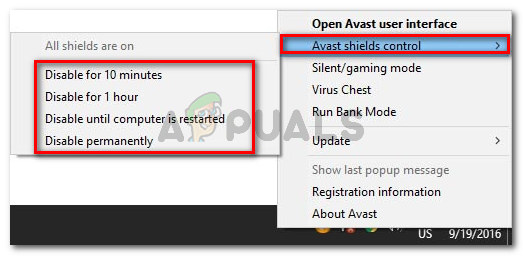
Sometimes Quick Heal or McAfee antivirus block the Battle.net launcher as It detects a virus in a Blizzard folder. The process of patching or updating games can look suspicious to antivirus. Follow the below guide:
- Navigate to Start > Settings.
- And then navigate to Update & Security > Windows Security.
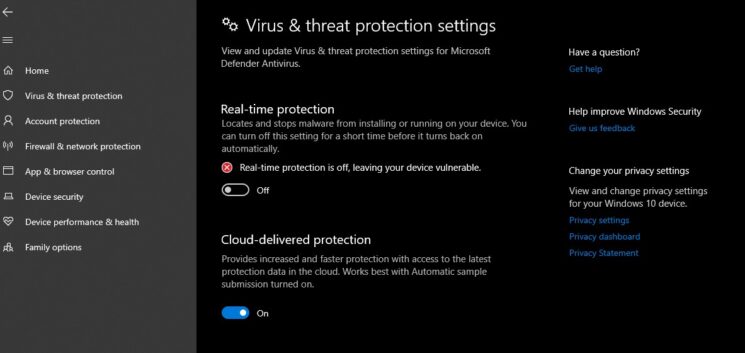
- And then go to Virus & threat protection > Manage settings.
- Now you have to switch Real-time protection to Off.
Once the installation is complete, don’t forget to re-enable your antivirus software.
Method 5: Reinstall DirectX and Visual C++ Redistributables
The Battle.net installation process requires DirectX and Visual C++ Redistributables to be installed on your system. Reinstalling them can help resolve installation issues. Here are the steps to follow:
- Open the Battle.net installer folder and find the DirectX and Visual C++ Redistributables folders.
- Run the DirectX and Visual C++ Redistributables installers.
- Restart your PC and try the Battle.net installation again.
FAQs
1. Do I need to have DirectX and Visual C++ Redistributables installed on my system to install Battle.net?
Yes, the Battle.net installation process requires DirectX and Visual C++ Redistributables to be installed on your system. If they are missing or corrupted, it can cause installation issues.
2. Can a weak internet connection cause Battle.net installation issues?
Yes, a weak or unstable internet connection can cause issues with the Battle.net installation process. Make sure your internet connection is stable and has enough bandwidth before trying the installation again.
3. Why should I keep my system and software up to date?
Keeping your system and software up to date ensures that you have the latest security patches and bug fixes, which can help prevent potential issues in the future. It can also improve the overall performance of your system and software.
Final Words
Blizzard Battle.net is the best games launcher which allows you to play a wide range of video games online. Battle.net allows you to install patched games very easily in just a couple of minutes. However, sometime, the agent of the battle net launcher does not get connected to the server which causes the installation error.
The best solution to solve this problem is to update the operating system. If the installation is blocked by an antivirus program then you might have to disable the antivirus for sometime so that the agent can download the data from the server.
Thanks. I hope that the step by step guide has helped you to sort out your problem. If you are still facing the problem regarding installation of battle.net launcher on your Windows 10/8/7 then you can add a comment in the comment box below. I will try my best to solve your issues.
Blizzard is a global brand, so whenever there’s an issue with their launcher (Battle.net), it ends affecting millions of gamers worldwide. One issue that’s gaining a lot of traction lately is an instance where the initial installation of Battle.Net gets stuck at the “Updating Battle.net” section.
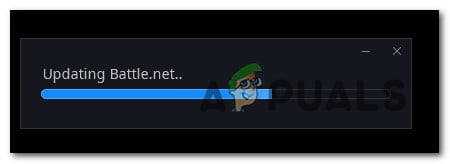
The installer freezes like this and every attempt at redoing the installation ends with the same result. This problem is much more frequent on Windows 10 and Windows 11, but it’s also reported on Windows 7.
We’ve investigated this issue and we discovered several different underlying causes that are most likely responsible for this problem:
- Conflicting process or startup service – According to some affected users, you can expect to deal with this issue in situations where a non-Microsoft service or process is running in the background and conflicting with the Battle.net installer. If this scenario is applicable, you should be able to avoid the error by doing the installation from a clean boot state.
- The conflict is caused by remnant files – If you get this problem while attempting to update your current Battle.net app or you’re trying to re-install the launcher after having it installed in the past, chances are some remnant files are blocking the installation. In this case, you should delete the Battle.net and Blizzard Entertainment folder (from the %ProgramData% folder).
- Conflicting meta-information – As it turns out, a corrupted WMI (Windows Management Instrumentation) repository can also cause installation problems with Battle.net, especially if you had the client installed in the past. To fix this issue, you’ll need to reset the WMI component from an elevated CMD prompt.
- Overprotective AV suite – If you’re trying to install an older build of Battle.net, the installation might be flagged as a false positive by certain AV suites because of an expired publisher certificate. If this occurs, you should be able to allow the installation to happen regardless by temporarily disabling the Antivirus suite and/or the firewall component.
- Network inconsistency – If you’re experiencing other issues aside from the fact that you’re unable to install Blizzard’s launcher, the problem can also result from a network inconsistency. In this case, a quick power cycle procedure performed on your router should resolve the majority of issues.
- Corrupted administrator account – According to some affected users, this problem can be related to an inconsistency resulting from a corrupted administrator account. Several affected users have confirmed that they were able to fix the problem by creating a new Administrator account for their Windows installation and doing the installation from the new account.
- Interference caused by Proxy or VPN client – If you’re using a Proxy or VPN client to block servers from detecting your location, you might want to disable these (at least while you carry out the installation of Battle.net). Battle.net (and Blizzard products in general) don’t play well with these types of products.
- TCP or IP log contains inconsistent data – Every network connection will auto-generate a log in regards to the incoming and outgoing connections. Blizzard’s install agent will check this log and might decide to terminate the connection with your computer under certain conditions. To fix this problem, you’ll need to delete the Reselog.txt file.
- Corrupted DNS Cache – According to some affected users, this problem can also appear in a situation where the data exchange protocols are being inhibited by a corrupted DNS cache. In this case, flushing the DNS cache should fix the issue.
- Inconsistent Default DNS Range – If the default DNS range assigned by your ISP is inhibiting the Battle.net installer, you make the switch to a more stable range like the one provided by Google.
- Incompatible Network Adapter – A less frequent cause that will spawn this error but one that’s certainly possible is a partially incompatible network adapter. This problem is typically encountered on Windows 11 after a recent upgrade from an older version.
Now that we went over every potential cause that might prevent it from installing the game launcher client from Blizzard (Battle.Net0), let’s get to the actual fixing part.
1. Re-do the installation in Clean Boot Mode
Antivirus suites are not the only 3rd party programs that might ultimately be responsible for your PC’s inability to install Battle.Net.
Certain system optimizing tools and even optical burning software are all potential types of programs that might cause this issue.
But since there are a lot of potential culprits that might be responsible for this problem, the best course of action would be to go for a clean boot procedure.
A clean boot operation will force your Windows to boot up without any type of 3rd party interference (only required startup services and processes will be permitted to run).
If the problem no longer occurs while you run your PC in a clean boot state, it’s clear that a 3rd party item caused the installation problem with Blizzard’s launcher.
On the other hand, if achieving a clean boot state doesn’t fix the issue, move down to the next potential fix below.
2. Delete the Battle.Net and Blizzard Entertainment folder
If you previously had the Battle.net launcher installed and you get this error while attempting to install it again, chances are the new installation is being blocked by some remnant files.
In case this scenario is applicable, chances are the problem is being caused by a temporary file that is located in one of the various cache folders that Battle.Net uses.
Other users that we’re also dealing with this issue have managed to get the issue fixed by accessing the %LOCALAPPDATA% folder and deleting the Battle.net and Blizzard Entertainment folder.
If you’re looking for specific instructions on how to do this, here’s what you need to do:
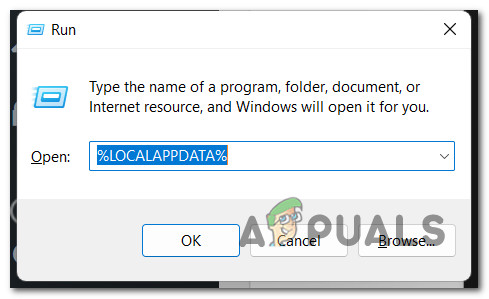
- Press Windows key + R to open up a Run dialog box. Next, type ‘%LOCALAPPDATA%’ inside the text box and press Enter to open the hidden Local App data folder.

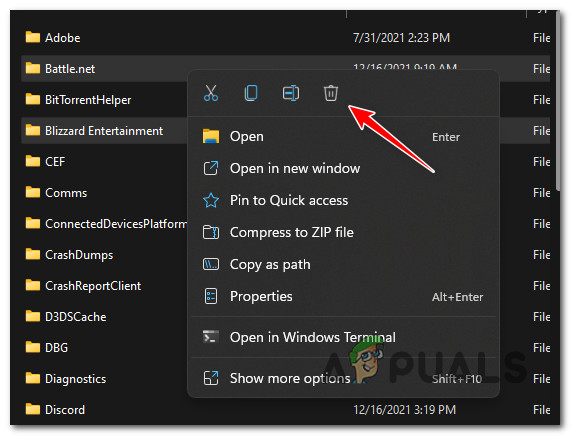
Blizzard not installing - Next, delete the Battle.net, Blizzard, and/or Blizzard Entertainment folders.

Delete the Battle.net and Blizzard Entertainment folders - After the cache folders have been deleted, open another Run box (Windows key + R) and repeat the step above with %APPDATA%, %TEMP%, and %PROGRAMDATA%.
Note: Just like you did at step 2, delete any Battle.net, Blizzard, and/or Blizzard Entertainment folders that you end up finding inside %APPDATA%, %TEMP%, and %PROGRAMDATA%.
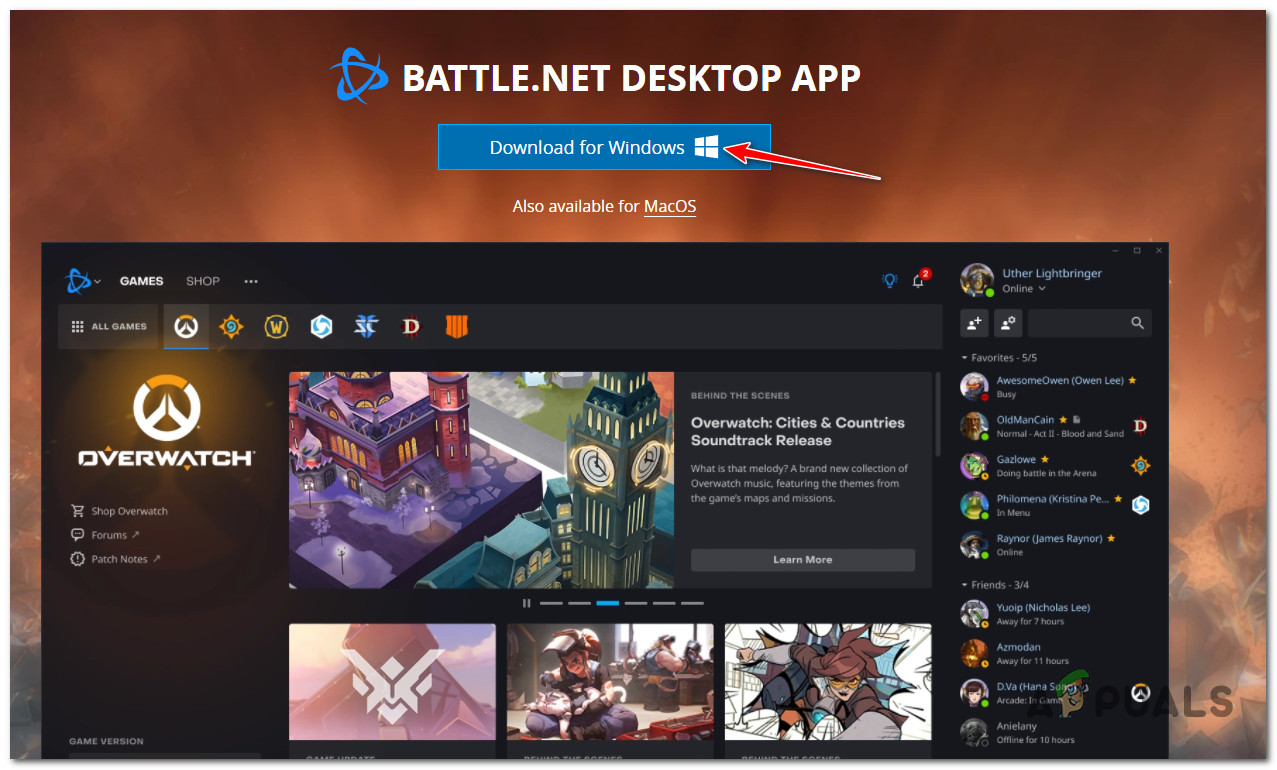
- Finally, reboot your PC and install the latest version of Battle.net from the official website after the next startup is complete.

Download the latest version of Battle.net - Follow through with the installation and see if the operation is complete.
If you’re still unable to install Battle.net, move down to the next potential fix below.
3. Reset the WMI Repository
If the first two methods have proven to be ineffective in your case, the next thing you should investigate is a potential interference caused by a repository belonging to the WMI (Windows Management Instrumentation) component.
This operation can be deployed from an elevated Command Prompt window and will successfully clear the cache data belonging to this component.
Follow the instructions below to reset the WMI Repository on your Windows PC:
Note: The steps below will work on every recent Windows version including Windows 7, Windows 8.1, Windows 10, and Windows 11.
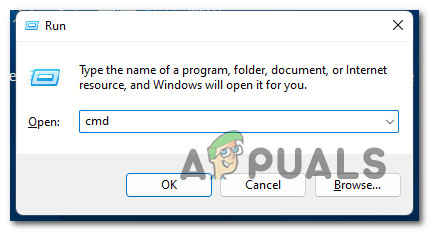
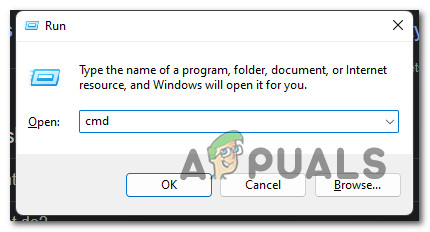
- Press Windows key + R to open up a Run dialog box. Next, type ‘cmd’ inside the text box and press Ctrl + Shift + Enter to open up an elevated Command Prompt with admin access.

Open up an elevated CMD prompt - Once you’re inside the elevated CMD prompt, type the following command and press Enter:
net stop winmgmt
- At the confirmation prompt, type Y and press Enter once again to initiate the process of resetting the WMI Repository.
- Once the first command is processed successfully, type the second command and press Enter once again:
winmgmt /resetrepository
- Once the second command is processed successfully, reboot your PC before retrying the installation of Blizzard’s launcher.
If the same problem is still occurring, move down to the next method below.
4. Disable Antivirus during installation
Under certain circumstances, you can also expect to see this error if the Blizzard install agent is unable to obtain admin access because your AV suite ends up blocking the data transfer.
If you’re using a 3rd party suite and you’re certain that the application you’re trying to open or install doesn’t pose a security threat, you should be able to resolve the issue by disabling the real-time protection prior to double-clicking on the Battle.net installer and retrying the installation.
Important: The steps of doing so will be different depending on the 3rd party suite you’re using, but most antivirus programs will allow you to disable the real-time protection from the taskbar menu.
Once you manage to disable the real-time protection, reboot your PC and re-do the installation once again.
If the problem is still ongoing, you should also try uninstalling the security suite if you’re using a 3rd party solution.
Try uninstalling the security program and remove any remnant files that might still enforce the same security rules.
In case the same problem is still occurring, move down to the next potential fix below.
5. Power Cycle Router
As it’s been confirmed by several Battle.net users, this problem can also be caused by a scenario in which inconsistent DNS and IP data are preventing the installation from taking place.
Most affected users that have dealt with this problem have reported that the issue was fixed and they were finally able to install Batlle.net after they rebooted their router or after they performed a router reset.
To keep things easy, start simple with a simple reboot. This operation will refresh the IP and DNS that are being used by the PC without overriding any custom settings that you previously established.
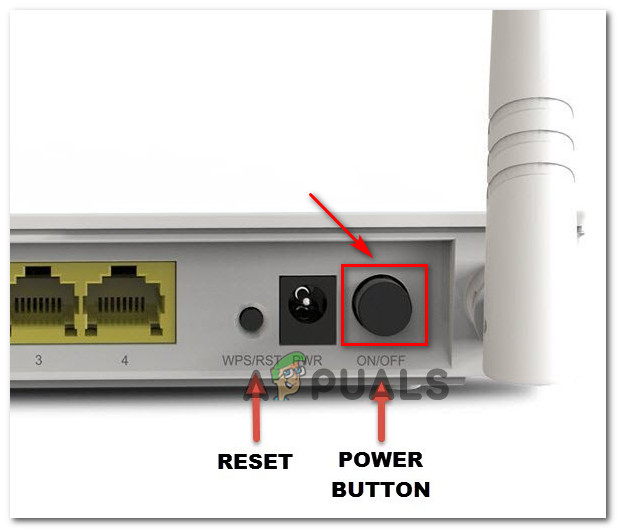
To perform a simple router reset, simply turn your router off, disconnect it from the power outlet and wait for at least 30 seconds in order to ensure that the power capacitors are completely drained.
Next, plug your router back in, wait for Internet access to be re-established and see if you are now able to install the game launcher from Blizzard.
If that doesn’t work, the next step is a router reset.
You can do this by pressing and holding the dedicated button on the back for at least 10 seconds or until you see the front LEDs flashing at the same time.
IMPORTANT: This operation might reset some custom settings that you previously established including custom router login credentials or forwarded ports.
In case you tried restarting and resetting your router but you’re still unable to install Battle.net, move down to the next potential fix below.
6. Create a new Administrator account
According to some users that we’re unable to install Battle.net on their Windows 10 or Windows 11 computer, this issue can also be related to a corrupted administrator account that you’re using when starting the installation.
As it turns out, you should be able to avoid this problem completely by creating a new administrator account and signing in to it prior to re-trying the installation.
Note: This issue is way more common on computers where the admin account was migrated from an older Windows version.
When it comes to creating a new account, you have two options:
- Create the account from the GUI menu of Windows (only works for Windows 10 and Windows 11)
- Create the account from an elevated CMD prompt (works on every Windows version)
Depending on your preferred way of getting things done under Windows, follow one of the sub-guides below to create a new administrator account and retry the installation of Battle.net from the newly created account.
Create a new admin account via the Settings app
If you’re on Windows 10 or Windows 11, you will be able to create a new admin account directly from the Settings app (by going to the Family & Other users tab).
Follow the instructions below:
- Start by opening up a Run dialog box (by pressing Windows key + R).
- Next, type ‘ms-settings:otherusers’ inside the text box and hit Enter to open up the Family & other people tab of the Settings app.
Open up the Services screen - Once you’re inside the Family & other users tab, scroll down to the Other users tab and click on Add someone else to this PC.
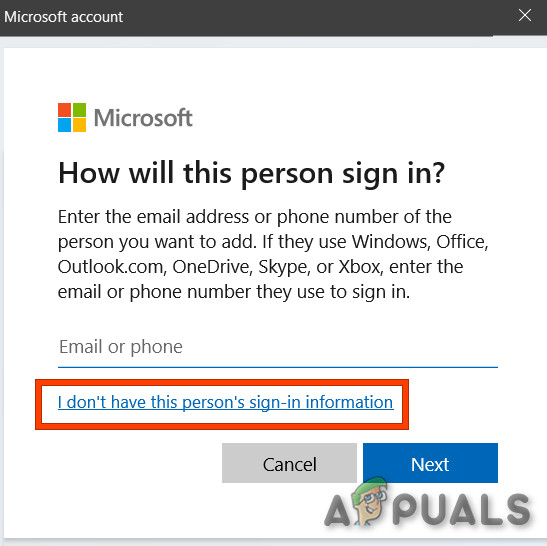
- Next, proceed to add the email and phone that you want to associate with the Microsoft account.

Don’t have this person sign in account Note: If you want to create a local account, click on I don’t have this person’s sign-in information.
- As soon as you do this, you will be prompted to add a username and password for the new administrator account that you want to create and click on Next.
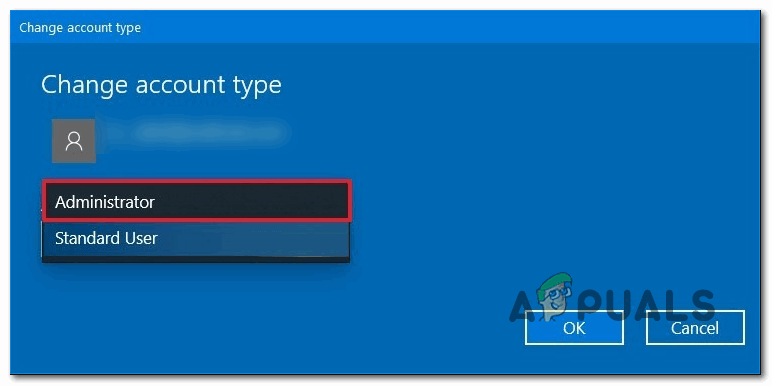
Note: You might also need to set up a couple of security questions for recovery purposes. - Once the new account is created, return to the Family & other people window, locate the newly created account and click on Change Account type.
- Inside the Change account type window, use the drop-down menu to select Administrator, then click Ok to save the changes and make the newly created account administrator.

Changing account type - Reboot your PC and sign in with the newly created admin account during the next sign-up screen.
- Once your PC boots back up, attempt to install the Blizzard software once again and see if the problem is now fixed.
Create a new admin account from an elevated CMD prompt
If you’re using an older Windows version, you won’t be able to create an administrator account from the Settings menu. In this case, the easiest way to get it done is from an elevated Command Prompt.
Here’s how to do this:
- Start by pressing Windows key + R to open up a Run dialog box.
- Type ‘cmd’ inside the text box and press Ctrl + Shift + Enter to open up an elevated Command prompt.
Open up a CMD window Note: When you get to the UAC (User Account Control), click Yes to grant admin access.
- Once you’re inside the elevated Command Prompt window, type the following commands and press Enter after each one to create a new Windows account and assign it admin rights:
net user /add ReplaceME
new localgroup administrators ReplaceME /add
Note: *ReplaceMe* is just a placeholder that you need to replace with the name of the new Windows account that you want to create. - After the two commands are processed, close the elevated CMD and reboot your PC and sign into the new admin account before attempting to install Battle.net once again.
If the same issue is still ongoing even after you successfully created a new administrator account, move down to the next potential fix below.
7. Disable Proxy or VPN Client
Another cause that might end up blocking communications between your Windows end-user version and the Battle.net download servers is a proxy or VPN client. In the majority of cases, this problem was either created by a VPN client or a Proxy server that was configured natively on Windows.
In this case, you should be able to fix the issue by uninstalling your VPN client or by disabling the Proxy server (depending on the scenario that is applicable).
We created two separate guides to accommodate both scenarios, so feel free to follow whichever one applies to you.
Disable a Proxy server
If you have previously set up a Proxy server natively, you can easily disable it by accessing the Proxy tab of the Settings menu.
Here’s how to do it:
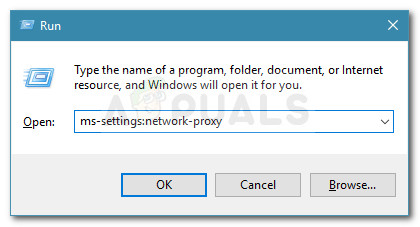
- Open up a Run dialog box by pressing Windows key + R.
- Next, from the next menu, type ”ms-settings:network-proxy’ and press Enter to open up the Proxy tab of the Settings app.

Accessing the Proxy menu - Inside the Proxy tab of the Settings menu, move down to the Manual Proxy Setup section. Next, go to the right-hand section of the screen and uncheck the box associated with Use a proxy server.
Disable the Proxy server - Once the Proxy server is disabled, restart your computer and see if the problem is resolved at the next computer startup by attempting to reinstall the blizzard app.
Disable a VPN server
Disabling a VPN service on a Windows computer depends if you configured it natively or with a standalone application.
If you’re using a standalone application, all you need to do is access the VPN interface and terminate the connection.
On the other hand, if you’ve set up your VPN using the built-in feature, follow the instructions below to disable it:
- Start by pressing Windows key + R to open up a Run dialog box.
- Next, type ‘ms-settings:network-vpn’ and press Enter to open up open up the VPN tab of the Settings app.
Accessing the VPN client interface - Once you’re inside the VPN connection tab, move over to the right-hand side section and click on your VPN, then click Remove from the context menu to prevent it from interfering with the install agent from Blizzard.

Disabling the VPN suite

Once the VPN suite is disabled, attempt to do the Blizzard installation once again and see if the problem is now fixed.
If the problem is still not resolved, move down to the next potential fix below.
8. Reset the TCP/IP Log
As it turns out, this particular issue can also be rooted in a TCPIP or DHCP parameter that is forcing the Wi-Fi adapter to terminate the connection abruptly.
This problem is much more likely if you recently switch Internet providers. If you’re facing this particular issue, you can resolve it swiftly by using an elevated Command Prompt to deploy a ‘netsh int IP reset‘ command.
Note: This CMD command will automatically reset the contents of the following registry keys which will reset the TCPIP and DHCP:
SYSTEM\CurrentControlSet\Services\Tcpip\Parameters\
SYSTEM\CurrentControlSet\Services\DHCP\Parameters\
According to other users that have successfully used this method, the Wi-Fi connection finally became stable after the CMD command was processed and the connection was reset.
Follow the steps below to reset the TCPIP and DHCP parameters on Windows 11 via an elevated Command Prompt:
- Start by pressing Windows key + R to open up a Run dialog box.
- Next, type ‘cmd’ inside the text box and press Ctrl + Shift + Enter to open up an elevated Command Prompt.
Access an elevated CMD prompt - At the User Account Control (UAC) prompt, click Yes to grant admin access.
- Inside the elevated Command Prompt, type the following command and press Enter to effectively reset the TCPIP and DHCP parameters associated with your current network connection:
netsh int ip reset c:\resetlog.txt
Note: The command above assumes that your Windows partition is on the C:\ drive. If your setup is different, change the partition letter accordingly.
- After the command is processed successfully, reboot your PC and see if you are able to complete the installation of the Blizzard software.

If the same problem persists, try the next method below.
9. Perform a DNS Flush
Another probable cause that might prompt your PC to terminate the data exchange with Battle.net install agent is an inconsistency facilitated by the DNS (Domain Name System) that is currently in use.
If there’s a problem with how your network adapter reacts to the in-use DNS, you might notice these ‘download restrictions’ because the communications between the active network adapter and the ISP are terminated.
In this case, you should be able to fix this problem by flushing your current DNS from an elevated CMD prompt – this operation will end up clearing the currently stored DNS information.
Follow the instructions below to perform a DNS flush from an elevated Command Prompt window:
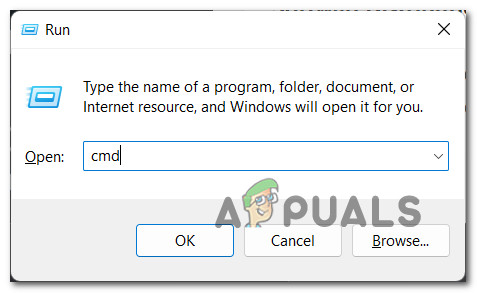
- Press Windows key + R to open up a Run dialog box.
- Next, type ‘cmd’ inside the text box and press Ctrl + Shift + Enter to open up an elevated Command Prompt.

Open up an elevated Command Prompt - At the User Account Control prompt, click Yes to grant admin access.
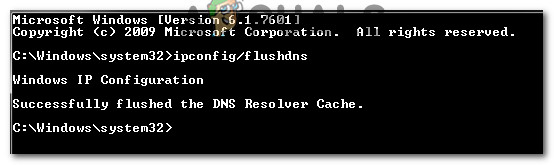
- Inside the elevated CMD prompt, type the following command and press Enter to flush your DNS cache:
ipconfig/flushdns
Note: This step will help you remove any cached information about your current DNS, forcing your router to receive and process new DNS information.
- After you see the confirmation message, close the elevated CMD prompt and restart your PC.
- During the next startup, the connection to the router should start fresh without leveraging any previously cached DNS data.

Flushing the DNS - Utilize your PC normally to see if you’re still experiencing these installation issues when launching the Blizzard install agent.
If the problem is still not fixed, move down to the next potential fix below.
10. Switch the DNS to Google’s Range
If none of the fixes above have worked for you, the next thing you should troubleshoot is the DNS that is currently being used by your network connection.
Tier 3 ISPs might cause this problem after inhibiting your ability to exchange information rapidly as it’s required by certain game launchers (including Battle.net) due to the assignment of a bad DNS range.
In this case, one way to get around the issue is to transition from the default DNS servers to the equivalents provided by Google.
In case you’re looking for specific instructions on how to do this, follow the instructions below:
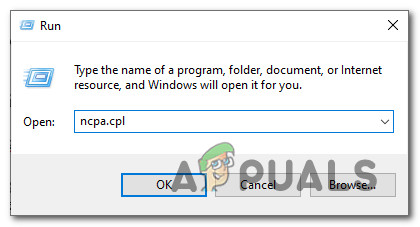
- Open up a Run dialog box by pressing Windows key + R. Next, type ‘ncpa.cpl’ and press Enter to open up the Network Connections window.
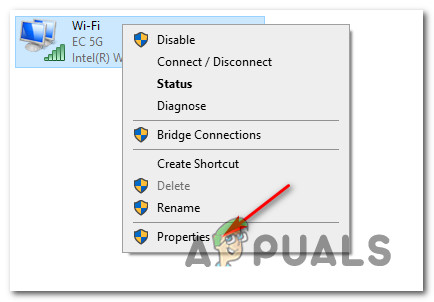
Opening the Network Connections window - Inside the Network Connections window, right-click on the connection that is currently active and click on Properties from the context menu.

Accessing the Properties screen Note: If you are using a wired connection, right-click on Ethernet (Local Area Connection). If you are using a wireless connection, right-click on Wi-Fi (Wireless Network Connection).
- At the UAC (User Account Control), click Yes to grant admin access.
- Once you’re finally inside the Ethernet and Wi-Fi Properties menu, go ahead and click on the Networking tab, then find the section that says This connection uses the following items.
- When you get to the previously mentioned section, click on the box associated with Internet Protocol Version 4 (TCP / IPV4), then click on the Properties button.
Accessing the IPv4 Settings - Once you’re inside the Settings screen of Internet Protocol Version 4, click on General, then check the box associated with Use the Following DNS server address.
- Next, replace the values for Preferred DNS server and Alternate DNS server with the following:
8.8.8.8
8.8.4.4
Note: If you prefer to stay away from the DNS range supplied by Google, use the following values instead: Preferred DNS server: 1.1.1.1
Alternate DNS server: 1.0.0.1 - Save the changes, then restart your computer and see if the issue is now fixed.
If you’re still unable to install Blizzard software even after making the switch to a different DNS, move down to the next potential fix below.
11. Perform a network Reset from Windows Settings
A network inconsistency caused by inconsistent TCP or IP data that’s affecting the stability of your Internet connection and might affect Blizzard’s install agent. If this scenario is applicable and the problem is caused by temporary network data, you should be able to fix the problem by performing a Winsock reset.
Here’s what you need to do to perform a Winsock Reset on your computer:
- Open up a Run dialog box by pressing Windows key + R. Next, type ‘cmd’ inside the text box and press Ctrl + Shift + Enter to open up an elevated Command Prompt.
Open up a CMD prompt
- When prompted by the UAC (User Account Control), click Yes to grant admin access.
- Inside the elevated CMD prompt, run the following commands individually in whatever order and press Enter after each one to effectively reset your TCP and IP temp data:
ipconfig /flushdns
nbtstat -R
nbtstat -RR
netsh int reset all
netsh int ip reset
netsh winsock reset
- Once every command is processed successfully, reboot your PC and see if you are able to complete the installation of Battle.net.
If you’re still unable to install the game launcher from Blizzard, move down to the final potential fix below.
12. Reset Network adapter driver
If you’ve come this far without a viable fix, you should think about uninstalling your current network adapter driver. Especially if you’re experiencing similar issues with other applications outside of Blizzard’s ecosystem.
This fix will be effective in those situations where you’ve recently upgraded to Windows 11 and the old network adapter driver ended up being migrated instead of installing a fully compatible driver for Windows 11.
In this case, you’ll need to use Device Manager to completely uninstall the active network adapter driver and restart your PC. By doing this, you will force Windows 11 to detect that it’s missing a key driver and install a generic equivalent (one that’s fully compatible) the next time you boot up your computer.
For step by step instructions on how to do this, follow the instructions below:
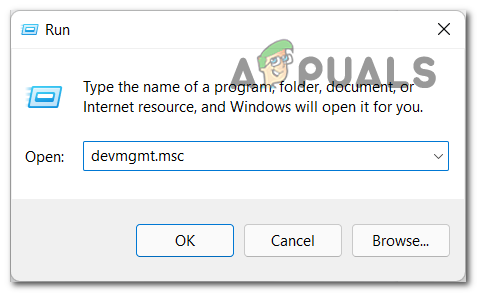
- Press Windows key + R to open up a Run dialog box.
- Next, type ‘devmgmt.msc’ inside the text box and press Ctrl + Shift + Enter to open up Device Manager.
Open up Device Manager - When you’re prompted by the User Account Control, click Yes to grant admin access.
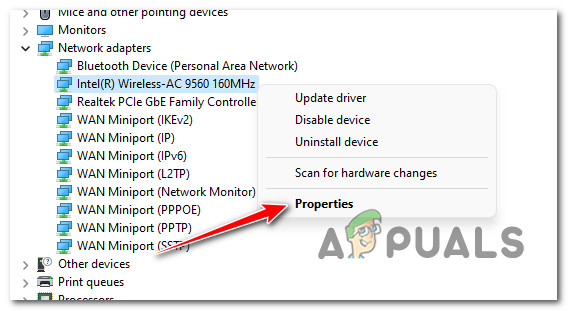
- Inside Device Manager, scroll down through the list of devices and expand the Network Adapters drop-down menu.
- From the next drop-down menu, right-click on the Wireless adapter and choose Properties from the context menu.

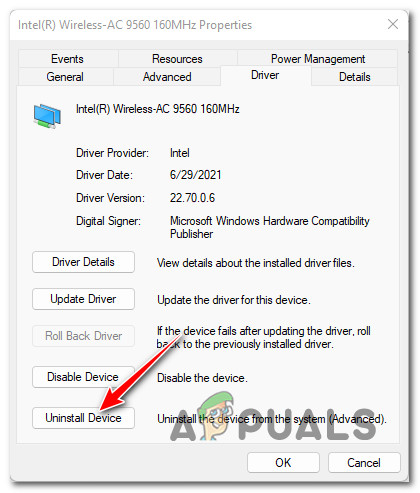
Accessing the Properties screen of the network adapters - Once you’re inside the Properties screen of your Network adapter, click on the Driver tab from the menu at the top.
- From the Driver tab, click the Uninstall Device button at the bottom of the screen, then click on Uninstall once again to begin the process of removing the active network adapter driver.

Uninstall the device Note: Confirm the operation by clicking Uninstall, but first make sure to check the box associated with the Attempt to remove the driver for this device.
- During the next system startup, your OS will detect that the network adapter driver is missing and will install a compatible equivalent to restore your Wi-Fi connectivity.
-
Support home -
-
My tickets -
-
Get help
-
-
-
My tickets
-
Get help
Updated: 3 years ago
Article ID: 30377
Common Problems
- Chrome says network error when trying to download Battle.net
- Tried to download Battle.net and it just says it couldn’t be downloaded
If you are having trouble downloading the Battle.net installer, try to clear the cache and cookies in your browser, or try a different browser.
Please log in to submit feedback.
Did you find this article helpful?
Great! Help us improve. Please rate the following from a scale of 1 to 5 stars:
Thanks for your feedback!
Click to watch this video in a web browser.
Errors in game launcher are annoying but inevitable. Waiting on Another Installation or Update is one such error that occurs while opening Blizzard game using Battle.net desktop app. It indicates the availability of pending installations or updates but the progress remains static. This error can occur in all games in Blizzard. If you are also dealing with the same error, you are at the right place. We bring to you a perfect guide that will help you fix waiting on another installation or update error along with another installation in progress Windows 10 error.

Table of Contents
You can face this another installation in progress in Windows 10 due to the following reasons.
- Due to announcement of downtime or scheduled maintenance by Blizzard officially.
- Presence of bugs in Battle.net Update Agent process.
- Enabled peer-to-peer model network in the game.
- Interference of third-party applications.
- Incorrect Client Settings
- Outdated graphic drivers.
- Firewall and VPN issues.
After understanding the reasons why waiting on another installation or update occurs, let start with methods to fix it. We will start with some basic checks and then move towards complex methods.
How to Check For Downtime
The first thing to do is to check if Blizzard has made any downtime or maintenance announcement in your region. You may get this error during this time. To check for it simply go to Blizzard Twitter page.

If there is a tweet mentioning any downtime or maintenance, note its time and open game launcher after it is scheduled to be over. Check if you are still facing the issue.
Method 1: Run Battle.net With Administrative Rights
Using administrative rights to run Battle.net will give you full access to run the app without any security related interruptions. It could fix the error. Follow the steps below to do the same.
1. Right-click Battle.net app and select Run as administrator.

See if the issue is fixed. If it resolves the issue, you can run Battle.net as administrator every time you open it by following the below steps.
2. Right-click Battle.net app and select Properties. It will open Properties window.

3. Switch to Compatibility tab and check the box marked Run this program as an administrator as highlighted.

4. Click Apply and OK to save changes.
Now every time you open Battle.net, it will run as administrator.
Method 2: Update Graphic Drivers
Graphic drivers are a significant component of online games. To avoid any kind of technical glitches it is essential to update graphic drivers as they are behind the smooth functioning of graphics hardware. It may resolve the issue in hand. Follow our guide on 4 ways to update graphic drivers in Windows 10.
Also Read: Fix error 1500 Another Installation is in Progress
Method 3: Update Windows
If the issue persists, we recommended you update your Windows PC, if it is not up to date. Windows updates can often fix bugs and issues related to compatibility. This another installation in progress Windows 10 error can be due to incompatibility between Blizzard and Windows. You can update Window PC by following these steps
1. Press the Windows + I keys simultaneously to launch Settings.
2. Click on the Update & Security tile, as shown.

3. In the Windows Update tab, click on Check for updates button.

4A. If a new update is available, then click Install Now and follow the instructions to update.

4B. Otherwise, if the Windows is up-to-date, then it will show You’re up to date message.

Method 4: Run Malware Scan
Sometimes Blizzard servers can be infected by virus or malware threats. If launcher gets affected especially while downloading or installation process it could cause another installation in progress Windows 10 error. You can check for viruses by scanning your computer for malicious warning and removing any threats affecting Battle.net client app. To run a virus scan follow our guide on How do I run a Virus Scan on my Computer. If you have found any malware in your PC check out How to Remove Malware from your PC in Windows 10 and remove them.
Method 5: Disable Antivirus Temporarily (If Applicable)
Antivirus programs can affect online games by identifying them as malicious and could even block Battle.net resulting in updates or installation process error messages. To fix this, you can disable a third-party antivirus program temporarily by following our guide to Disable Antivirus Temporarily on Windows 10. After that check if updates or install processes are running in the application. If they are, wait for them to finish and enable Antivirus again and launch Battle.net app to check if you can play games without any issues.
Note: If this doesn’t resolve the issue. Enable Antivirus again.
Method 6: Disable Firewall Temporarily (Not Recommended)
The Windows Firewall protects your system from virus or malware attack. Sometimes it can restrict Blizzard software from running. You can temporarily disable Windows 10 Firewall and check if the error is resolve by using our guide to Disable Windows 10 Firewall
Method 7: Disable VPN or Proxy
A VPN or virtual private network is a technology that protects your online identity by encrypting your Network information. Certain apps like Battle.net may not work properly when connected with VPN. In that case, you can disable your VPN by following our guide to Disable VPN and Proxy on Windows 10. Once VPN or Proxy is turned off, open game launcher and see if you can complete game update and play it. If issue is resolved, you can enable it again.
Also Read: How to Fix Error Code 0x80004005
Method 8: Stop Battle.net Update Agent Process
Battle.net Update Agent is launcher process designed check if any updates are available among client games and install it automatically. Stopping this process may fix the error and you can do it by following these steps.
1. Press the Ctrl + Shift + Esc keys together to open Task Manager.
2. On Task Manager window, click on More details.

3. Go to Processes Tab. Scroll down to Background Processes section.
4. Locate and right-click on Battle.net Update Agent (32 bit) and select End task to stop the process.

Method 9: Modify Boot Settings
Few background applications can interrupt the Battle.net app causing another installation in progress Windows 10 error. To close such problematic background apps, boot your system into selective startup which will boot PC with only selective applications running. To do so, follow the steps given below.
1. Press Windows + R keys simultaneously to open the Run dialog box.

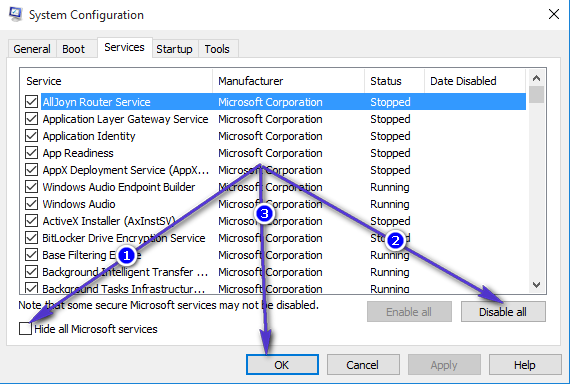
2. Type msconfig on Run Dialog Box and click OK. It will open System Configuration window.

3. Switch to Boot tab and uncheck the box marked Safe boot.

4. After that switch to General tab. Select Selective startup option and uncheck the box marked Load startup items.
Note: Make sure that Load system services is checked.

5. Click Apply and OK to save changes.
Also Read: Fix DISM Error 87 in Windows 10
Method 10: Delete Battle.net Folder
Sometimes removing certain contents of Battle.net folder could reset and repair settings of Battle.net client. It might fix the error and you can do it by following these steps
Note: Before using this method, make sure to end all processes related to Battle.net using Task Manager.
1. Press Windows + E keys to open File Explorer.

2. Select View from menu bar and check the box marked Hidden items as shown.

3. Navigate to the C:\ProgramData path in File Explorer.

4. Right-click on Battle.net folder and select Delete to remove it.

5. Once the folder is deleted, restart the Battle.net app
Method 11: Set Default DNS
If you have altered DNS or domain name system settings, then it might be what is causing the error in Battle.net. You can revert to default DNS settings and run Battle.net to check this. To do so, follow the steps given below.
1. Press Windows + R keys together to open the Run dialog box.

2. Type ncpa.cpl on Run Dialog Box and hit Enter. It will open Network Connections.

3. Double-click on active Network Adapter as highlighted on Network Connections.

4. On Wi-Fi Status or Network Adapter popup, click on Properties.

5. Locate and check the box marked Internet Protocol Version 4 (TCP/IPv4). After that, click Properties as shown to open properties window.

6. In General tab, select Obtain an IP address automatically and Obtain DNS server address automatically option. Click OK to confirm changes.

After that, open Battle.net app and check if the error is resolved.
Note: If you are still facing the problem, try disabling Hamachi Adapter in Network Connection if you use it. It may fix Battle.net waiting on another installation or update problem.
Also Read: How to Fix Error 0x80300024
Method 12: Disable Peer-to-Peer
A peer-to-peer networking option can act as a barrier for game launcher due to various security concerns and cause the error. Try disabling peer-to-peer option within the game as it might resolve the issue. To do so, follow the steps given below.
1. Launch Battle.net game launcher.

2. Click Blizzard icon on the top left corner of the display screen as shown.
3. Select Settings option.

4. Select Downloads option on the left pane.

5. Uncheck the box marked Enable peer-to-peer option under Network Bandwidth section and click Done to save changes.
Relaunch the app and check whether you have fixed Battle.net waiting on another installation or update issue or not.
Also Read: Fix Command Prompt Appears then Disappears on Windows 10
Method 13: Uninstall Battle.net
If none of the above-mentioned methods work for you then this is the last option. Uninstall Battle.net application from your PC and install it again. Outdated Battle.net app could cause the error and thus manually installing the latest version of the app might fix this Battle.net waiting on another installation or update issue. Here is how to do it to fix Battle.net another installation in progress in Windows 10.
1. Press the Windows key and type control panel, then click on Open.

2. Set View by > Category and select Programs setting.

3. Click on Uninstall a program under Programs and Features section.

4. Right-click on Battle.net program and click Uninstall/change.

5. Click Yes, Uninstall option to confirm uninstallation process.

6. After uninstalling app, Go to official Battle.net webpage to download its latest version.
7. Click on Download for Windows. It will download file named Battle.net-setup.exe.

8. Run Battle.net-setup.exe. Select preferred language and click Continue.

9. Click Change if you want to alter Install location. Click Continue.

10. Wait for the installation process to complete.

11. Once installed, fill out Battle.net credentials to log in.

Recommended:
- How to fix WDF_VIOLATION Error in Windows 10
- Fix Trusted Platform Module 80090016 Error in Windows 10
- Fix Windows 10 File System Error 2147219196
- Fix GTA 4 Seculauncher Failed to Start Application 2000
We hope that this guide was helpful and you were able to fix another installation in progress in Windows 10. Let us know which method worked for you the best. If you have any queries or suggestions then feel free to drop them in the comments section.
Ambrose322
Пользователь
Регистрация:
29.10.2015
Сообщения: 1008
Рейтинг: 1071
Регистрация:
29.10.2015
Сообщения: 1008
Рейтинг: 1071
Привет,не идет установка Баттл.нета: Начинается установка и останавливается на 0%.Папку с Баттл.Нет удалял.Сидел 30 минут ждал , а она даже не сдвинулась.
Нужна помощь!
kremennik
Куратор других игр и разного
Регистрация:
10.11.2011
Сообщения: 46137
Рейтинг: 27995
Регистрация:
10.11.2011
Сообщения: 46137
Рейтинг: 27995
В программдате удалял тоже папку баттлнет?
Savio
Пользователь
Регистрация:
24.05.2014
Сообщения: 22
Рейтинг: 16
Регистрация:
24.05.2014
Сообщения: 22
Рейтинг: 16
TICxxxTAC
Пользователь
Регистрация:
26.07.2013
Сообщения: 447
Рейтинг: 412
Регистрация:
26.07.2013
Сообщения: 447
Рейтинг: 412
Kyoto~
Пользователь
Регистрация:
25.11.2015
Сообщения: 1078
Рейтинг: 1258
Регистрация:
25.11.2015
Сообщения: 1078
Рейтинг: 1258
Попробуй отключить фаервол и антивирус. Запусти от имени администратора. Почисти комп с помощью ccleaner malwarebytes anti-malware и hitman pro.
Ambrose322
Пользователь
Регистрация:
29.10.2015
Сообщения: 1008
Рейтинг: 1071
Регистрация:
29.10.2015
Сообщения: 1008
Рейтинг: 1071
kremennik сказал(а):↑
В программдате удалял тоже папку баттлнет?
Нажмите, чтобы раскрыть…
Да,Удалял.
kremennik
Куратор других игр и разного
Регистрация:
10.11.2011
Сообщения: 46137
Рейтинг: 27995
Регистрация:
10.11.2011
Сообщения: 46137
Рейтинг: 27995
Ambrose322 сказал(а):↑
Да,Удалял.
Нажмите, чтобы раскрыть…
У меня была как-то аналогичная проблема, я рылся на сайте поддержки близзов, и вроде мне помогла отдельная скачка агента батлнет оттуда
Ambrose322
Пользователь
Регистрация:
29.10.2015
Сообщения: 1008
Рейтинг: 1071
Регистрация:
29.10.2015
Сообщения: 1008
Рейтинг: 1071
Flashgod
Пользователь
Регистрация:
08.10.2013
Сообщения: 2087
Рейтинг: 665
Регистрация:
08.10.2013
Сообщения: 2087
Рейтинг: 665
Тоже самое на днях было.
Просто удалил все связанное с батл.нет и скачал заново с офф.сайта,но получилось только с 3 раза….
Ambrose322
Пользователь
Регистрация:
29.10.2015
Сообщения: 1008
Рейтинг: 1071
Регистрация:
29.10.2015
Сообщения: 1008
Рейтинг: 1071
kremennik сказал(а):↑
У меня была как-то аналогичная проблема, я рылся на сайте поддержки близзов, и вроде мне помогла отдельная скачка агента батлнет оттуда
Нажмите, чтобы раскрыть…
https://eu.battle.net/support/ru/article/6989 не он?
kremennik
Куратор других игр и разного
Регистрация:
10.11.2011
Сообщения: 46137
Рейтинг: 27995
Регистрация:
10.11.2011
Сообщения: 46137
Рейтинг: 27995
Ambrose322 сказал(а):↑
Нажмите, чтобы раскрыть…
Вроде оно
Ambrose322
Пользователь
Регистрация:
29.10.2015
Сообщения: 1008
Рейтинг: 1071
Регистрация:
29.10.2015
Сообщения: 1008
Рейтинг: 1071
Flashgod сказал(а):↑
Тоже самое на днях было.
Просто удалил все связанное с батл.нет и скачал заново с офф.сайта,но получилось только с 3 раза….Нажмите, чтобы раскрыть…
Делал уже раз 5 , устал что-то


Ambrose322
Пользователь
Регистрация:
29.10.2015
Сообщения: 1008
Рейтинг: 1071
Регистрация:
29.10.2015
Сообщения: 1008
Рейтинг: 1071
kremennik сказал(а):↑
Вроде оно
Нажмите, чтобы раскрыть…
Ну смотри, делаю всё,что написано в инструкции,но у меня в папке Баттл.Нета Есть только Файл Launcher и все.
kremennik
Куратор других игр и разного
Регистрация:
10.11.2011
Сообщения: 46137
Рейтинг: 27995
Регистрация:
10.11.2011
Сообщения: 46137
Рейтинг: 27995
Ambrose322 сказал(а):↑
Ну смотри, делаю всё,что написано в инструкции,но у меня в папке Баттл.Нета Есть только Файл Launcher и все.
Нажмите, чтобы раскрыть…
Что
Вроде бы надо установить агент вот так, а потом уже устанавливать батлнетАгент контролирует процессы обновления и установки батлнета
Король Лич
Пользователь
Регистрация:
04.02.2016
Сообщения: 1260
Рейтинг: 544
Регистрация:
04.02.2016
Сообщения: 1260
Рейтинг: 544
Боженька не разрешает запросить в тех-поддержке близзард помощь? там же ответ в онлайн чате 1-2 мин
simonov-89
Пользователь
Регистрация:
04.06.2014
Сообщения: 4427
Рейтинг: 3037
Регистрация:
04.06.2014
Сообщения: 4427
Рейтинг: 3037
Ambrose322 сказал(а):↑
Привет,не идет установка Баттл.нета: Начинается установка и останавливается на 0%.Папку с Баттл.Нет удалял.Сидел 30 минут ждал , а она даже не сдвинулась.
Нужна помощь!Нажмите, чтобы раскрыть…
Это знак свыше, не играй) У меня никогда с ним проблем не было, странно.
Ambrose322
Пользователь
Регистрация:
29.10.2015
Сообщения: 1008
Рейтинг: 1071
Регистрация:
29.10.2015
Сообщения: 1008
Рейтинг: 1071
В
kremennik сказал(а):↑
Что
Вроде бы надо установить агент вот так, а потом уже устанавливать батлнетАгент контролирует процессы обновления и установки батлнета
Нажмите, чтобы раскрыть…
Видимо нашел решение проблемы,папка Баттл Нет была скрыта,по-этому и не устанавливалась. Тему можно клоз
Llynarisa
Пользователь
Регистрация:
19.04.2016
Сообщения: 5
Рейтинг: 0
Регистрация:
19.04.2016
Сообщения: 5
Рейтинг: 0
Удали антивирус, отключи брандмауэр, фаервол и почисти реестр. Была похожая проблема. Могу сказать точно только одно: если у вас стоит Касперский, то проблема однозначно в нем, так как он расценивает этот сайт как вредоносный(не знаю почём у) и любые запросы с него блокируются. Попробуйте поставить Avira http://softcatalog.info/ru/programmy/avira-free-antivirus , только после установки батлы.
Тема закрыта
-
Заголовок
Раздел
Ответов Просмотров
Последнее сообщение
-
Сообщений: 15
13 May 2025 в 18:25Сообщений:15
Просмотров:28
-
Сообщений: 7
13 May 2025 в 18:15Сообщений:7
Просмотров:17
-
Сообщений: 10
13 May 2025 в 17:20Сообщений:10
Просмотров:26
-
Сообщений: 23
13 May 2025 в 17:19Сообщений:23
Просмотров:45
-
Сообщений: 34
13 May 2025 в 16:53Сообщений:34
Просмотров:69